
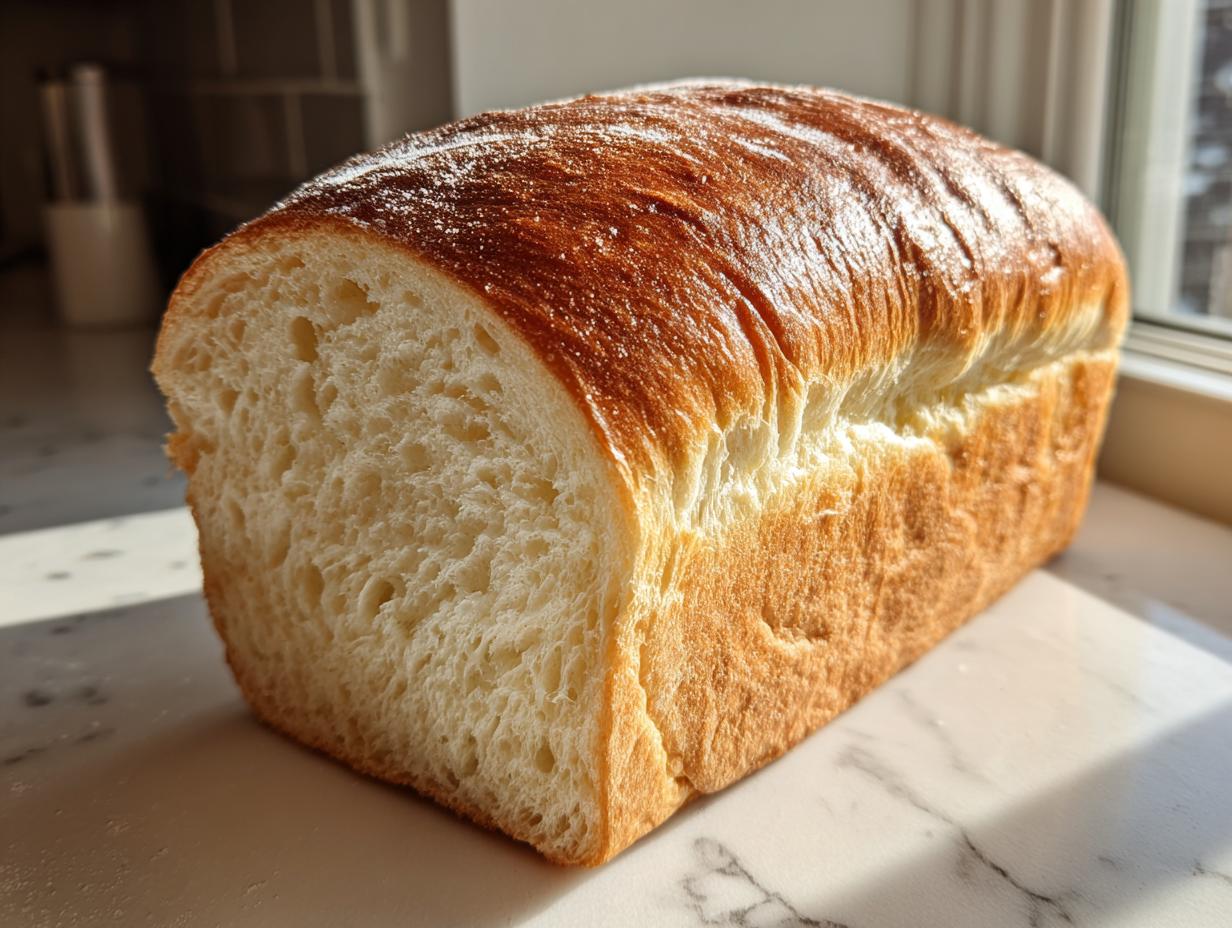
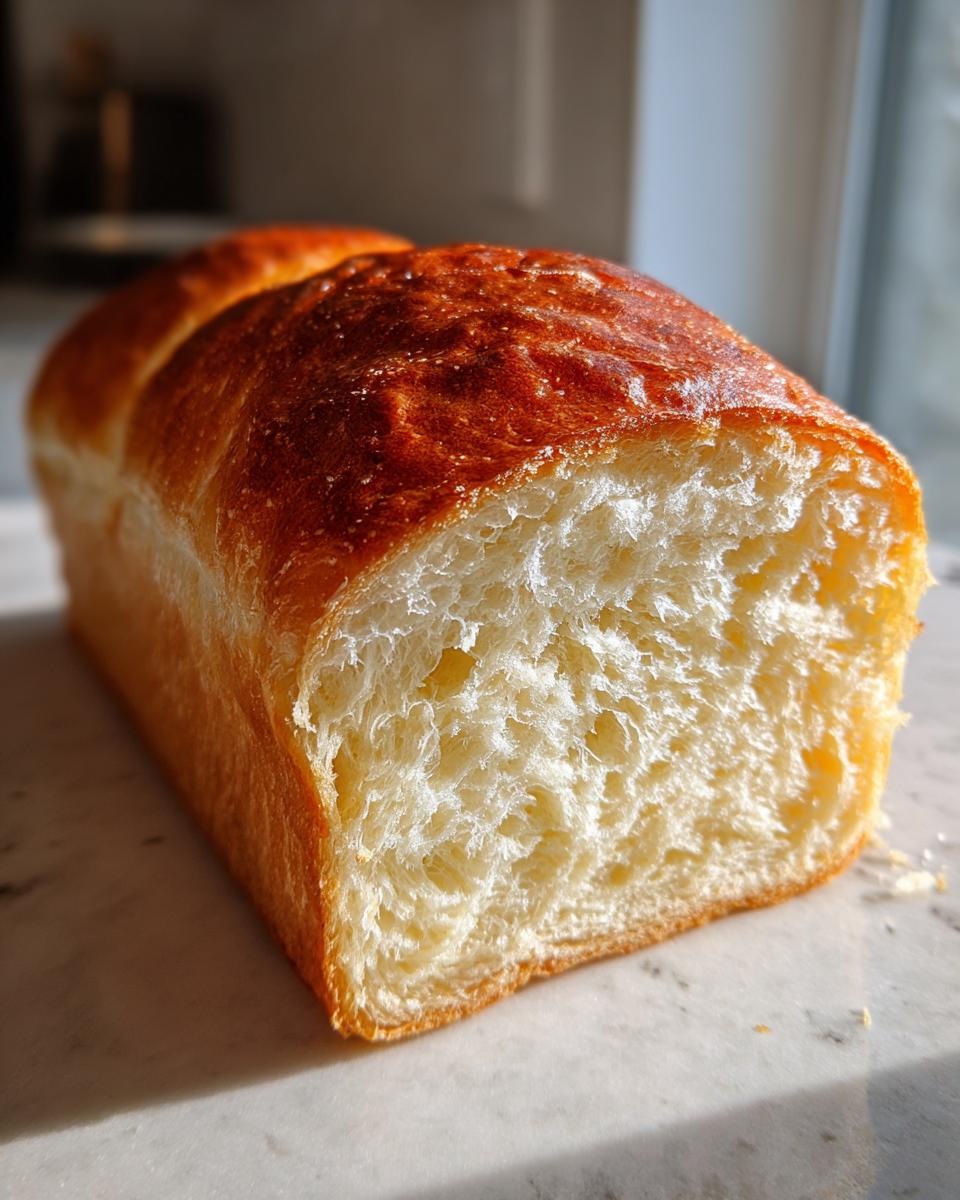
Isn’t achieving that melt-in-your-mouth softness the ultimate goal when you bake bread at home? I know it is for us here at Cookery Command. We live by the philosophy that beautiful traditional recipes work best when paired with rock-solid technique, and nowhere is that more true than with this incredible **condensed milk bread**.
Forget dense, dry loaves; this recipe is your shortcut to that delightful **Bakery Style Soft Bread** texture you usually only find at specialty shops. The secret weapon is simple—sweetened condensed milk—and it transforms humble flour into an incredibly tender, slightly sweet treat. Like all our favorite guides, such as our rundown on the ideal soft honey whole wheat bread, we blend that classic comforting flavor with reliable science. It’s straightforward enough for any beginner baker ready to tackle yeast!
- Why This Sweetened Condensed Milk Bread Recipe Delivers Fluffy Results
- Simple Ingredients for Your Condensed Milk Bread
- Step-by-Step Instructions for Soft Fluffy Bread Recipe
- Baking the Perfect Condensed Milk Bread Loaf
- Tips for the Best Condensed Milk Bread Texture
- Serving Suggestions for Your Sweet Milk Bread
- Storage and Reheating Instructions for Fluffy Loaf Bread
- Frequently Asked Questions About Making Condensed Milk Bread
- Share Your Perfect Condensed Milk Bread Creations
Why This Sweetened Condensed Milk Bread Recipe Delivers Fluffy Results
When I first started testing recipes for that truly *soft* bread texture, I kept running into doughs that were either too challenging or tasted flat. That’s when incorporating sweetened condensed milk became a game-changer. Emily Harrison spent weeks tweaking the liquid ratio because she wanted this loaf to be absolutely **Rich and Tender Bread**, not just sweet bread. The condensed milk does double duty: it adds richness thanks to the milk solids and fat, and the high sugar content helps tenderize the gluten structure, resulting in that unbelievable fluffiness. It makes the crumb almost cake-like, similar to the wonderful moisture we lock into our banana zucchini bread.
It’s science meeting comfort, folks! This method skips complicated milk-scalding techniques, delivering wonderfully **Tender Sweet Bread** with minimal fuss. Trust me, once you see how soft this dough is, you won’t go back.
Key Attributes of Our Condensed Milk Bread
- Extreme, cloud-like softness that stays fresh longer.
- A beautifully mild, inherent sweetness that’s perfect for morning toast.
- The dough handles easily, making it ideal even if you’re new to yeast baking.
- It results in a rich crumb structure that smells amazing while baking.
Simple Ingredients for Your Condensed Milk Bread
We pride ourselves on transparency here. To make this fantastic **Sweetened Condensed Milk Bread Recipe**, you don’t need a whole pantry full of specialty flours or hard-to-find extracts. In fact, this list of **Simple Bread Ingredients** is why I call this my go-to weeknight bake! It’s just as easy as whipping up our no-fail fudge.
Everything comes together quickly before the rise even begins. Look for these key components:
- 1 cup warm milk (please check that temperature—it needs to be between 105–115°F!)
- 1/4 cup granulated sugar
- 2 1/4 teaspoons active dry yeast
- 1/2 cup sweetened condensed milk (and yes, it absolutely must be the sweetened kind!)
- 1 large egg, and this needs to be at room temperature, or it can shock your yeast.
- 1/4 cup unsalted butter, melted
- 3 1/2 cups all-purpose flour, plus more for dusting
- 1 teaspoon salt
When you see melted butter and that beautiful, thick condensed milk coming together, you know you’re on the right track for that **Tender Sweet Bread** texture.
Ingredient Notes and Substitutions
Let’s talk technique for a minute. When measuring your flour, please don’t just scoop it straight out of the bag! That packs it in, and you’ll end up with dense bread, the exact opposite of what we want here. I want you to spoon the flour into your measuring cup and then level it off with a knife. It makes a huge difference in the final texture of your **condensed milk bread**.
Also, a quick note: if you decide to make the **Condensed Milk Rolls** option instead of the loaf, you’ll just divide that sweet dough into 12 equal portions instead of shaping it into a log. Easy switch!
Finally, about that condensed milk: we are using the thick, sugary can of goodness, not the evaporated milk that comes in the can with the same colorful label. They are *not* the same, and using evaporated milk will mean you’re missing the crucial sweetness and richness this **Milk Bread Recipe** relies on.
Step-by-Step Instructions for Soft Fluffy Bread Recipe
Okay, deep breath! I know baking bread sounds intimidating, but I promise you, this is the absolute best entry point for **Beginner Bread Baking**. The process here is all about patience during the waiting times, not wrestling with the dough. We follow the recipe precisely, and you are going to get that wonderful, soft rise every single time. Remember, achieving that perfect **Fluffy Loaf Bread** texture hinges on those two crucial proofing stages we cover below.
These steps are laid out to guide you through every stage, from waking up the yeast to getting that perfect golden dome.
Activating the Yeast and Mixing the Dough
First things first, we need to make sure our yeast is happy and ready to work! Grab your warm milk—and I mean *warm*, around 105 to 115°F, not hot—and stir in that granulated sugar. Sprinkle the dry yeast right over the top. We wait about 5 to 10 minutes here. If you look over the bowl and see a lovely foam crown forming on top, fantastic! That means your yeast is alive and ready to lift this beautiful **condensed milk bread** dough.
Once you have that foamy yeast, whisk in the sweetened condensed milk, the egg (make sure it’s room temperature, seriously!), and the melted butter until everything looks nicely blended. In a separate bowl, just whisk your flour and salt together—that’s your dry mix.
Kneading and First Rise for Tender Sweet Bread
Now we bring them together. Slowly add those dry ingredients into the wet mixture. Don’t worry if it looks shaggy or a little messy at first; that’s normal! Turn the whole lot out onto a lightly floured counter. This is where you start kneading. You need to work it for a good 8 to 10 minutes. It will feel sticky at first, but keep kneading, adding that last half cup of flour only if the dough is truly sticking to your hands. By the end, it should be smooth and elastic.
Once kneaded, lightly oil a bowl, pop your dough in, turn it over to coat it, cover it up, and find a nice warm spot. This first rise is so important for developing the structure. We let it go for about an hour to an hour and a half, or until it has doubled nicely in size.
Shaping and Second Proofing
Gently punch that air out when it’s doubled—don’t be aggressive! We want to keep some of that newly created structure. Shape the dough into a tight log. You want to roll it carefully until it’s smooth, and then tuck it, seam-side down, right into your greased 9×5 loaf pan.
Cover it loosely and let it have its second, slower rise. This proofing stage is what makes the loaf tall and tender. Let it sit for 45 to 60 minutes. You’ve nailed it when the dough has crowned about an inch over the top of the pan rim. If you’re making the wonderful homemade rolls instead of the loaf, this is the point where you would separate the dough balls and give them their final proof in the baking dish!
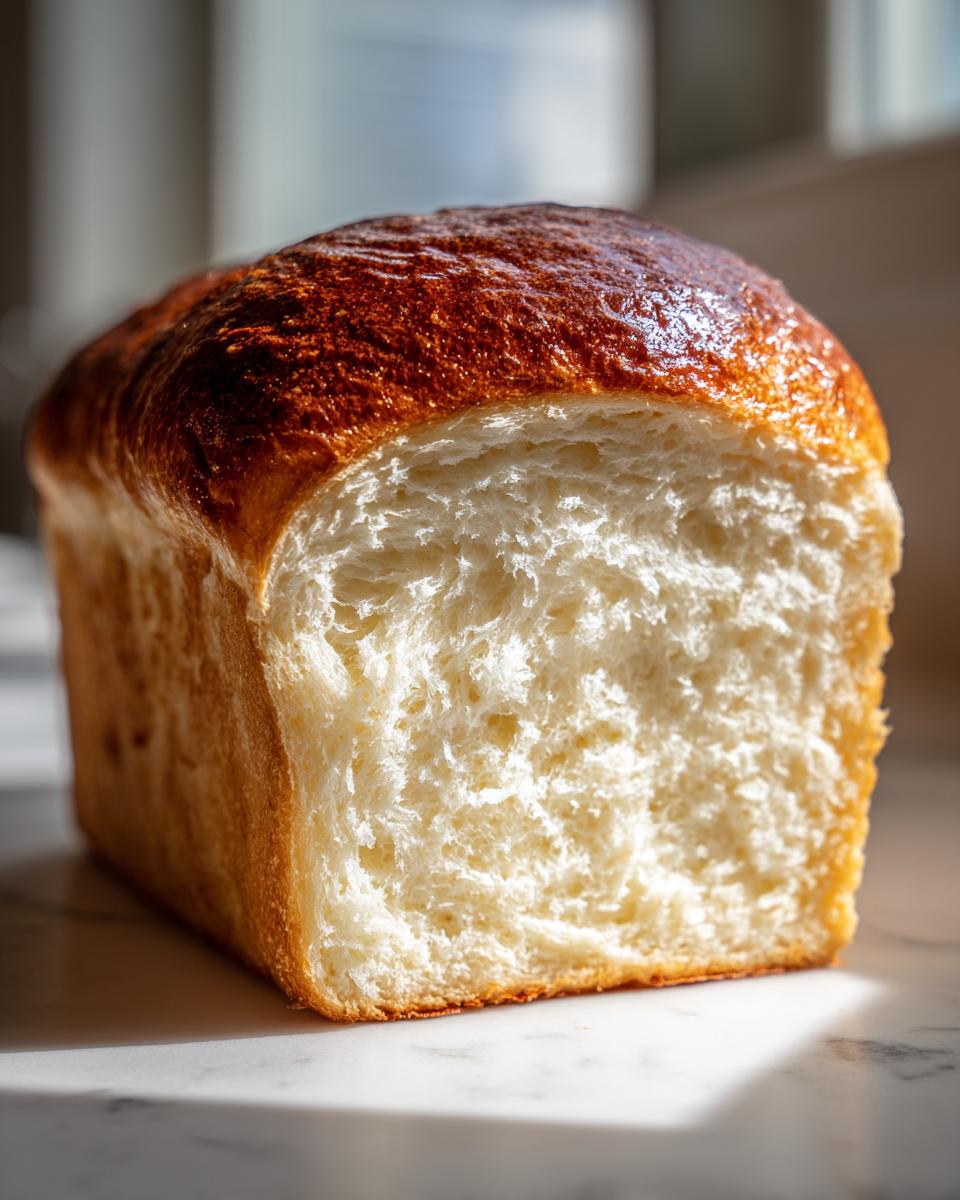
Baking the Perfect Condensed Milk Bread Loaf
We’re almost there, my friend! This final stage is where all that patience during kneading and rising pays off. Getting the timing right for the oven is super important for achieving the best color and texture. During the last 15 minutes of that second rise—when the dough is nicely puffed and domed—go ahead and get your oven preheated to 350°F (175°C). You want it fully warmed up and ready to welcome your beautiful **condensed milk bread**!
Slide that loaf pan right onto the center rack. We’re baking it for about 30 to 35 minutes. Keep an eye on the top—you’re looking for a gorgeous, deep golden brown color. That’s classic **Perfect Sandwich Bread Sweet** territory right there!
Now, here’s where we bring in a little test kitchen know-how to guarantee success: never just trust the clock! While the toothpick test works fine for cakes, for rich yeast breads like this, I rely on temperature. Stick a reliable instant-read thermometer right into the center of the loaf (try to avoid touching the pan itself). When it hits 200°F (93°C), it is perfectly baked through. Not 195°F, not 205°F—exactly 200°F means the gluten structure is set, but we haven’t dried out any of that rich crumb we worked so hard to develop. Remember the beautiful moistness in our apple dapple cake? We want that level of tender moisture here too!
As soon as it comes out of the oven, don’t let it sit in that hot pan! Turn it out immediately onto a wire cooling rack. That step stops the bottom from steaming and getting soggy. We cool it completely before slicing—I know it’s hard, but cutting it hot releases steam and can make the texture gummy. Resist the urge for just a little while!
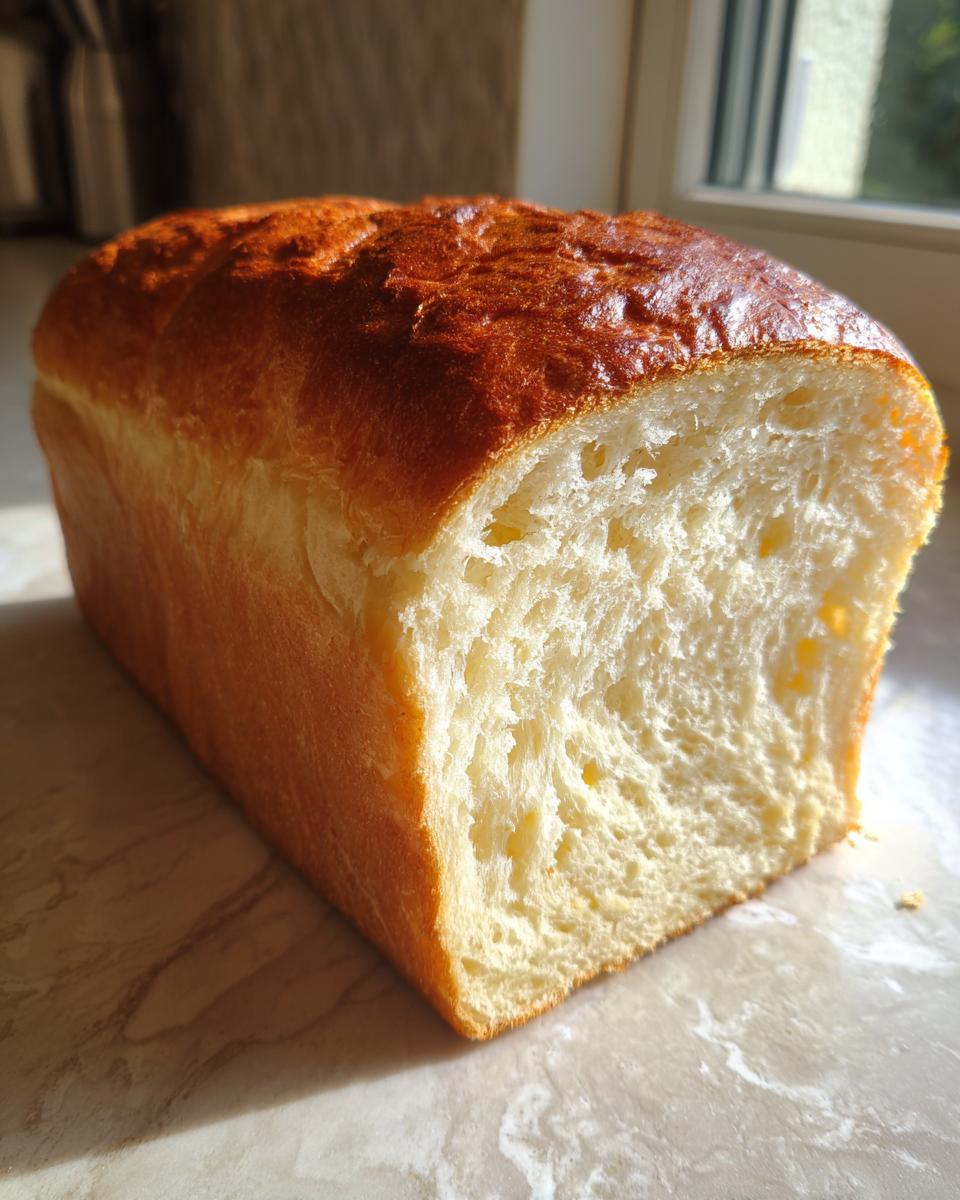
Tips for the Best Condensed Milk Bread Texture
You’ve come this far, and I want to make sure every single **condensed milk bread** you bake is softer than the last! Achieving bakery-level tenderness is about technique refinement, and that’s where our focus on reliable kitchen science really shines through. We aren’t just following steps; we are optimizing the result. Here are the pro-tips that take this loaf from just ‘good’ to absolutely unbelievable.
First, let’s talk temperature consistency, which is critical for fluffy bread. Make sure that milk is warmed correctly, but perhaps even more crucial is ensuring your egg is at room temperature. If you drop a cold egg into your yeast mixture, it can actually slow down or even shock the yeast, which means less lift and a denser loaf overall. Always plan ahead so your egg and milk are ready to play nice!
Next, this little trick comes straight from my notes on the best chocolate chip cookies—it’s about finishing strong. Immediately after you pull the loaf out of the oven (while it’s still sizzling hot!), brush the top crust generously with a tablespoon or two of melted, unsalted butter. This immediately locks in moisture where the crust is thinnest and keeps the surface incredibly tender, preventing it from hardening up as it cools. You won’t believe the difference this makes!
And remember that flexibility? If you decided to make the rolls instead of the loaf after that first rise, that’s perfectly fine! Those sweetened condensed milk rolls bake up slightly faster because of the increased surface area, but they maintain that same rich, tender crumb we are aiming for in the loaf. It’s all about respecting the dough! Knowing these little secrets is what moves you from someone who bakes bread to someone who commands the kitchen.
Serving Suggestions for Your Sweet Milk Bread
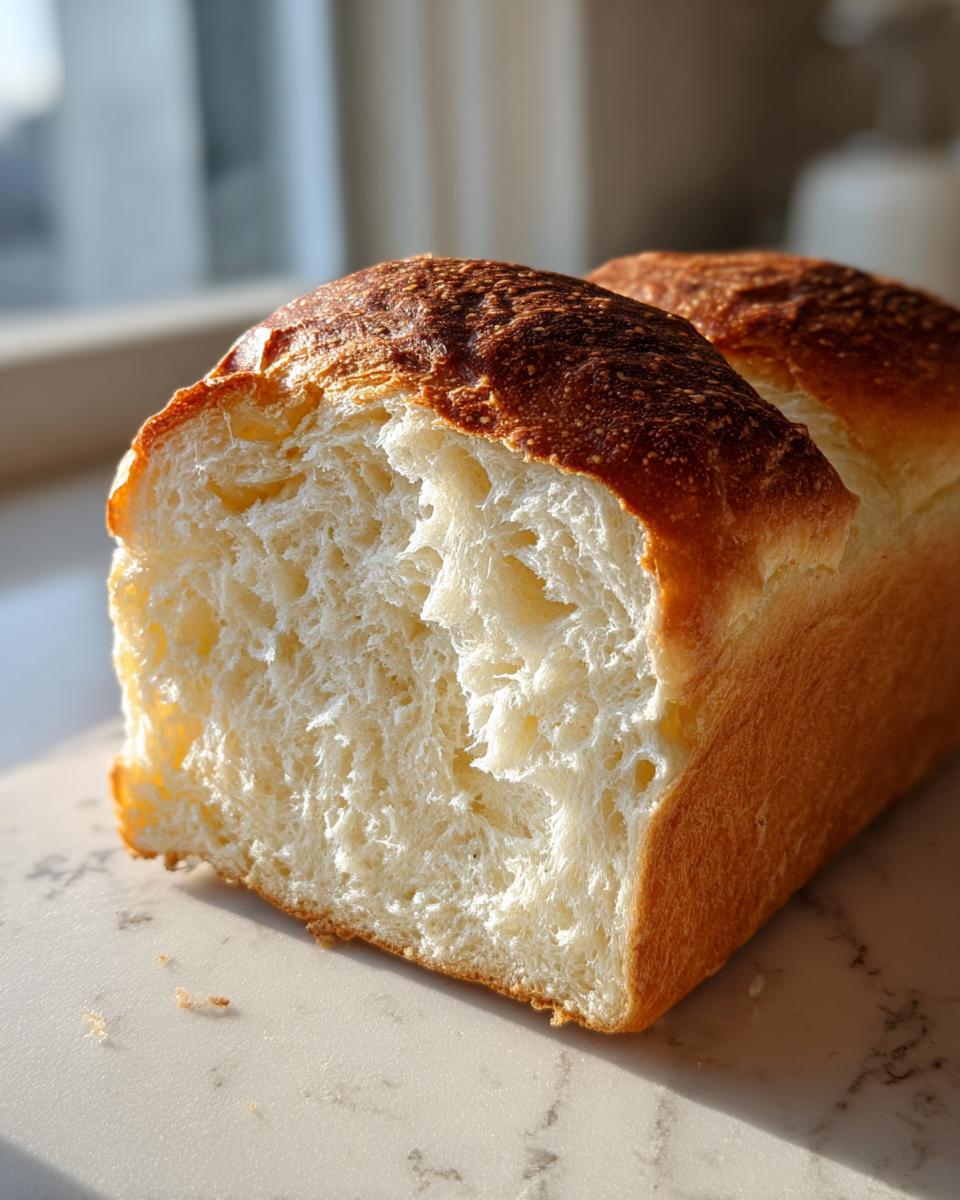
So, you’ve managed to resist slicing into that perfect loaf of **condensed milk bread** until it’s completely cool—bravo! That patience is already paying off because this bread is incredibly versatile. Sure, it’s heavenly toasted with a little butter, but honestly, that’s just the warm-up act for this wonderfully soft loaf.
Since this is such a rich and slightly sweet loaf, it shines brilliantly in breakfast applications. Think beyond plain toast! This **Sweet Breakfast Bread** makes the best French toast you’ve ever had. Because the bread is already enriched with milk solids and sugar from the condensed milk, it soaks up the custard mixture deeply without falling apart. We use a similar technique when making our cinnamon sugar French toast muffins, and this bread is even better!
But wait, don’t relegate it just to the morning table. This bread is substantial enough to pair beautifully with savory meals too. Serve slices of it alongside a big bowl of chili or a creamy soup. The slight sweetness cuts through the richness of the soup perfectly, offering a delightful contrast that feels very traditional yet special.
If you’ve made the **Condensed Milk Rolls**, I absolutely insist you try them warm with dinner rolls. They disappear fast! For dessert applications, try using thick slices lightly grilled and served with fresh berries and cream. It’s simple, but that bakery-style softness elevates whatever topping you choose. If you’re looking for an alternative way to serve that tenderness, check out these amazing soft and fluffy rolls—they’re another great way to use this base dough!
Storage and Reheating Instructions for Fluffy Loaf Bread
Listen, keeping this beautiful **condensed milk bread** soft is almost as important as baking it perfectly! The best place for the whole loaf is an airtight container on the counter for up to four days. I know some people refrigerate bread, but trust me, that makes it go stale faster. If you have extras, you can slice up the rest and store the slices in a heavy-duty freezer bag for up to three months.
When you’re ready to enjoy a slice, especially if it’s been sitting out for a day or two, don’t just stick it in the toaster! Pop that slice on a microwave-safe plate and zap it for just 10 to 15 seconds. That quick burst of steam wakes up the crumb beautifully, making it feel almost freshly baked again. It works like magic for restoring that characteristic softness you love from our moist date nut bread!
Frequently Asked Questions About Making Condensed Milk Bread
I know when you tackle a new yeast recipe, especially one promising this level of incredible softness, you end up with a few questions simmering in your head. That’s totally fair! We’ve tested this **condensed milk bread** until it was nearly foolproof, but everyone hits a snag sometimes. Use this FAQ to troubleshoot or just get that extra confidence boost before you start mixing!
We want this to be the easiest way for you to achieve a **Tender Sweet Bread** right out of your oven. If you’re looking for advice on our easy cheese pull-apart bread, check that post, but right now, let’s focus on that sweet, fluffy loaf!
Can I substitute regular milk for the warm milk in this condensed milk bread recipe?
You absolutely can use regular milk—whole milk works best for that extra richness, but 2% is fine too! The real non-negotiable here isn’t the type of milk, it’s the temperature. Remember that crucial step? The yeast needs that warmth, so whether it’s cow’s milk or a plant-based substitute, it *must* register between 105°F and 115°F when you pour it in. Too cool, the yeast sleeps; too hot, the yeast dies, and then you don’t get that gorgeous rise for your **Soft Fluffy Bread Recipe**.
How does this compare to traditional Japanese Milk Bread?
That’s a great comparison! Japanese Milk Bread, or Shokupan, is famous for its incredible texture, often achieved using the tangzhong or yudane method—basically pre-cooking a portion of the flour and liquid into a paste. Our **condensed milk bread** skips that extra step! We achieve amazing softness through the richness provided by the sweetened condensed milk itself, which acts as a powerful tenderizer. So, while both yield fantastic, soft results, ours is generally a bit simpler and results in a profile that’s slightly sweeter and richer upfront.
My dough didn’t double in size. What went wrong with my Easy Homemade Bread?
Oh, that’s the worst feeling, isn’t it? When your dough stalls, it’s almost always one of three things. First, check your yeast freshness; if it’s old, it won’t bubble up when activated. Second, double-check that water temperature—I cannot stress how important that 105-115°F range is! Third, if your kitchen is downright chilly, yeast works very slowly. Try letting the covered bowl rise inside your oven with just the light turned on—that gentle warmth usually does the trick to get your **Easy Homemade Bread** rising beautifully.
Share Your Perfect Condensed Milk Bread Creations
Now that you’ve mastered the technique, I genuinely want to see what you’ve created! Baking is so much more fun when we can share the results, and knowing I helped you achieve the softest **condensed milk bread** possible makes my day. We’re building a community of confident home bakers here at Cookery Command, and your feedback is vital for that!
Did this recipe live up to the hype and give you that pillow-soft texture you were looking for? Please, head down to the comments section below and give this recipe a star rating. Tell me how it went! Did you slice it thick for the best-ever French toast, or did you turn it into those incredible rolls?
Don’t keep that beautiful, tender loaf hidden away on your counter! Snap a picture and share it over on social media. Tag us so we can share in your success. Seeing your beautiful loaves—be they a classic **Fluffy Loaf Bread** or the roll variation—is honestly the best part of my job. If you’ve made great things with this recipe, maybe you’ll feel inspired to try our homemade tomato sauce next!
If you’re looking for more incredibly popular recipes, check out what folks are saving on Pinterest, like this great version of sweetened condensed milk bread that others are loving. Happy baking, and happy sharing!
PrintEasy Soft and Fluffy Sweetened Condensed Milk Bread
Make bakery-style soft and fluffy condensed milk bread at home. This easy recipe uses sweetened condensed milk for a tender crumb and rich, slightly sweet flavor, perfect for breakfast or snacks.
- Prep Time: 25 min
- Cook Time: 35 min
- Total Time: 3 hr 15 min
- Yield: 1 loaf (about 12 slices) 1x
- Category: Baking
- Method: Yeast Baking
- Cuisine: American
- Diet: Vegetarian
Ingredients
- 1 cup warm milk (about 105-115°F)
- 1/4 cup granulated sugar
- 2 1/4 teaspoons active dry yeast
- 1/2 cup sweetened condensed milk
- 1 large egg, room temperature
- 1/4 cup unsalted butter, melted
- 3 1/2 cups all-purpose flour, plus more for dusting
- 1 teaspoon salt
Instructions
- Combine the warm milk and sugar in a large bowl. Sprinkle the yeast over the top and let it sit for 5 to 10 minutes until foamy. This proves the yeast is active.
- Whisk the sweetened condensed milk and egg into the yeast mixture until combined. Stir in the melted butter.
- In a separate bowl, whisk together 3 cups of the flour and the salt. Gradually add the dry ingredients to the wet ingredients, mixing until a shaggy dough forms.
- Turn the dough out onto a lightly floured surface. Knead for 8 to 10 minutes, adding the remaining 1/2 cup of flour as needed, until the dough is smooth and elastic. It should be soft but not sticky.
- Place the dough in a lightly oiled bowl, turning to coat. Cover the bowl with plastic wrap or a clean kitchen towel. Let the dough rise in a warm place for 1 to 1.5 hours, or until doubled in size.
- Gently punch down the risen dough. Shape it into a tight log and place it seam-side down into a greased 9×5 inch loaf pan.
- Cover the pan loosely and let the dough rise again in a warm spot for 45 to 60 minutes, or until the dough has crowned about 1 inch over the rim of the pan.
- Preheat your oven to 350°F (175°C) during the last 15 minutes of the second rise.
- Bake for 30 to 35 minutes, or until the top is golden brown and the internal temperature reaches 200°F (93°C).
- Remove the bread from the pan immediately after baking and cool completely on a wire rack before slicing.
Notes
- For extra soft rolls instead of a loaf, divide the dough into 12 equal pieces after the first rise, shape into balls, and place them close together in a 9×13 inch baking dish before the second proof.
- Brushing the top of the loaf with melted butter immediately after it comes out of the oven adds shine and keeps the crust tender.
- This rich and tender bread is excellent toasted for breakfast sandwiches.
Nutrition
- Serving Size: 1 slice
- Calories: 185
- Sugar: 8
- Sodium: 180
- Fat: 4
- Saturated Fat: 2
- Unsaturated Fat: 2
- Trans Fat: 0
- Carbohydrates: 30
- Fiber: 1
- Protein: 5
- Cholesterol: 25