
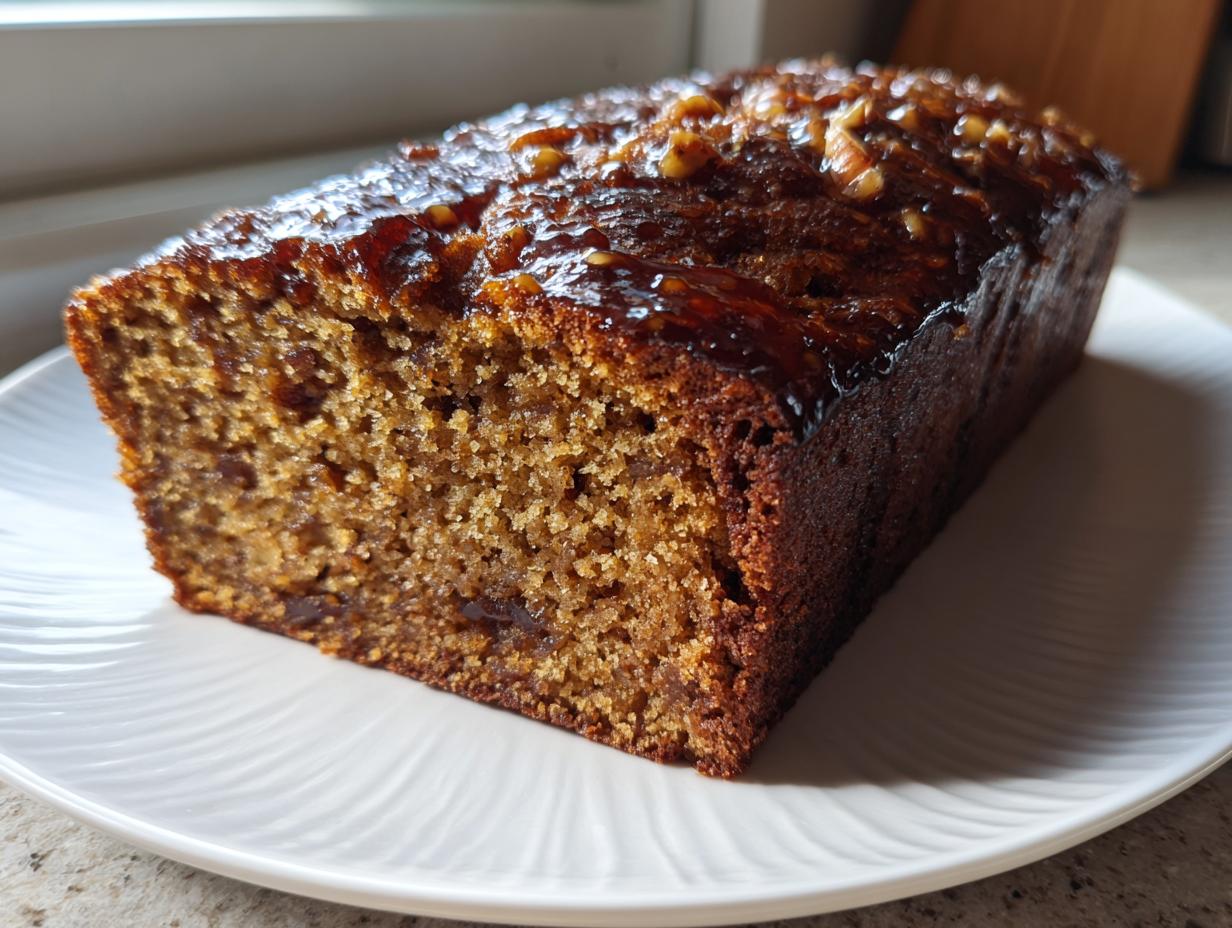
There’s just nothing that says ‘home’ quite like the smell of a sweet quick bread baking away on a quiet afternoon. Seriously, if you’re looking for true comfort food baked from scratch, you’ve landed in the right spot. We aren’t playing around here; I’m sharing what I truly believe is The Best Old-Fashioned Moist Date Nut Bread Recipe you will ever make. Forget those dry, crumbly loaves you’ve had before—this one guarantees an incredibly tender crumb, and it all comes down to one simple, sneaky soaking method. As the founder of Cookery Command, my promise is always to give you reliable, classic American recipes, and this date nut bread absolutely lives up to that standard. You’re going to love how easy this is, too!
- Why This Moist Date Nut Bread Recipe Guarantees Success
- Gather Your Ingredients for Classic Date Nut Bread
- Step-by-Step Instructions for Perfect Date Nut Bread
- Tips for Making the Best Date Nut Bread Every Time
- Serving Suggestions for Your Homemade Bread Baking Creation
- Storage and Reheating Instructions for Date Nut Bread
- Frequently Asked Questions About This Easy Date Nut Bread Recipe
- Understanding the Nutrition of Your Classic Date Loaf
- Share Your Date Nut Bread Baking Experience
Why This Moist Date Nut Bread Recipe Guarantees Success
Most people search for the perfect Moist Date Nut Bread because they’ve been burned by dry loaves before. Not here! We are conquering dryness head-on with a technique that takes zero extra effort but gives you maximum results. This is what makes it a truly Old Fashioned Quick Bread; it uses methods that our grandmothers knew ensured moisture retention. I promise this recipe delivers that unbelievable, melt-in-your-mouth Tender Crumb Bread you’ve been hunting for.
The Secret to an Old Fashioned Quick Bread Texture
It all starts right at the beginning, even before we touch the flour. We’re taking our chopped dates and drowning them in boiling water mixed with a teaspoon of baking soda. Seriously, don’t skip that bit! The hot water plumps those dates up immediately, and the baking soda helps them break down slightly during baking, which traps moisture right inside the crumb. It’s a little bit of chemistry that keeps this Classic Date Loaf unbelievably soft for days. If you want to see more tips on how to keep your loaves soft, you can check out some great advice over at this great roundup.
Gather Your Ingredients for Classic Date Nut Bread
Okay, time to gather our troops! The goal here is to make this Easy Date Nut Bread Recipe feel completely doable, so don’t panic—you likely have most of this stuff in your pantry already. We aren’t dealing with anything fussy here, just simple components that make up this wonderful Sweet Date Loaf. I’ve kept the ingredient list super straightforward. Just make sure you have your dates chopped, and your butter softened up before you start mixing!
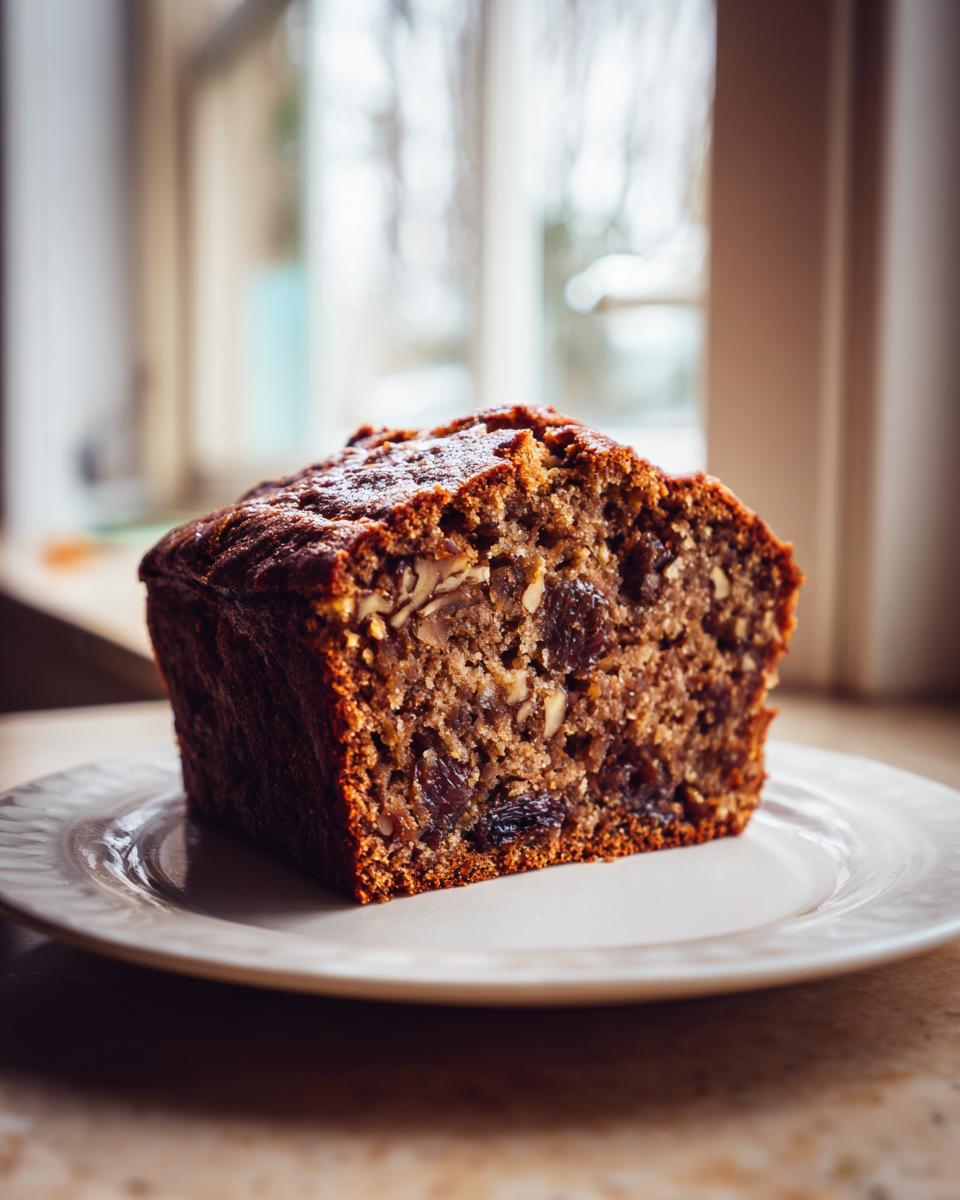
Ingredient Notes and Substitutions for Your Date and Walnut Bread
We really want that perfect mix of soft fruit and crunchy nut in this recipe, but substitutions are welcome if you need them! If walnuts aren’t your favorite, please use pecans instead; they provide a slightly richer flavor that works just as beautifully in this Comfort Food Bread. And hey, if you run out of dates or just want a fun twist, you can swap out about half the dates for dried cranberries or use chopped dried apricots. They offer a little tang that brightens up the whole loaf. Just stick to the liquid measurements in the date soak, no matter what fruit combo you pick!
Step-by-Step Instructions for Perfect Date Nut Bread
Alright, let’s get this date nut bread in the oven! Since this is technically a quick bread, we move quickly through the steps, but we need to respect the timeline, especially for that crucial date soak. Before anything else, make sure you’ve preheated your oven to 350°F (175°C) and properly greased and floured your 9×5 inch loaf pan. Nobody wants to wrestle a hot loaf out of a stuck pan, trust me!
Preparing the Dates: The Moisture Foundation of Your Date Nut Bread
This is where the magic begins, so dedicate a full 15 minutes to this step. Take your chopped dates—and make sure they are packed in there nicely—and put them into a bowl that can handle heat. Now, pour that full cup of boiling water right over them and stir in the baking soda. You’ll see it start to fizz a little bit, which is what we want! Set this aside and let it hang out for 15 minutes. This hydrates every single piece of date, which is absolutely non-negotiable if you want that guaranteed moist date nut bread texture we talked about. When it’s done soaking, the dates should look mushy and swollen. If you want to read about another excellent approach to getting a super-moist loaf, check out the tricks shared right here!
Mixing Wet and Dry Components for this Sweet Date Loaf
While your dates are getting their bath, move on to the standard creaming process. In a big bowl, beat that softened butter and light brown sugar together until it looks pale and fluffy—you’re trying to get air in there. Then, one by one, beat in your eggs, scraping down the sides, followed by the vanilla. Keep it smooth!
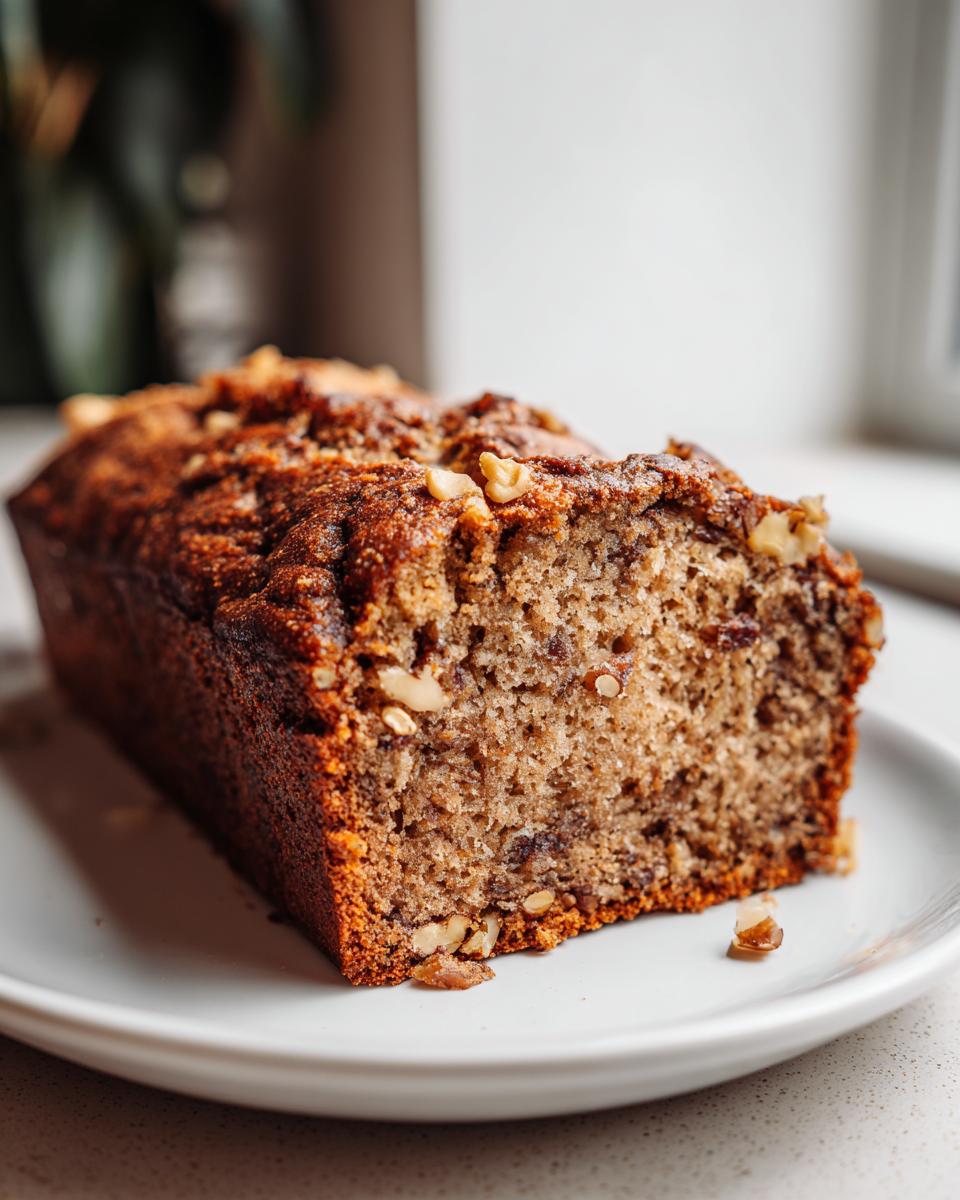
In a separate bowl, just whisk your flour, baking powder, and salt together. Now, this is super important for keeping that crumb tender: add the dry ingredients to the wet ingredients in three parts, mixing just until combined after each addition. Do not overmix! If you overwork your flour, you build gluten, and that turns our lovely loaf into a tough brick. We want soft and easy, remember? After the flour is just combined, gently fold in your nuts and then dump in the entire date mixture, liquid and all. Yes, the whole thing! This batter is supposed to be quite thin—don’t panic when you see it! This thin batter is key to a Tender Crumb Bread.

Baking and Cooling the Classic Date Loaf
Pour that thin batter right into your prepared pan. Pop it into that waiting 350°F oven and get ready to bake for about 55 to 65 minutes. Since every oven is a little different, you must test for doneness. A thin wooden skewer inserted right into the very center is your best friend here. If it comes out clean, or with just a couple of moist crumbs clinging to it, you’re golden. If it comes out soggy with wet batter, give it another five minutes and check again.
Resist the urge to yank it out immediately! Let your Classic Date Loaf cool right there in the pan for 10 minutes. This short rest allows the loaf to firm up just enough so it won’t break when you try to remove it. After those 10 minutes, carefully turn it out onto a wire rack to finish cooling completely. Honestly, for the softest result, wait until tomorrow before slicing into it! If you’re looking for more inspiration on Homemade Bread Baking techniques, feel free to check out my guide on making whole wheat bread; the principles are very similar!
Tips for Making the Best Date Nut Bread Every Time
We’ve got the recipe down, but sometimes the difference between a good loaf and the absolutely *best* loaf comes down to those little pro details. Since keeping your date nut bread perfectly moist is my number one mission, I want to share some insider knowledge I’ve picked up over years of baking this same Comfort Food Bread.
First things first: I cannot stress this enough—if you can possibly wait, let this bread chill out overnight. I know, it’s torture when it smells that good coming out of the oven, but the starches and moisture truly settle in and marry up overnight. Seriously, this Classic Date Loaf tastes exponentially better the next morning when you slice into it. Wrap it tight in plastic wrap, then slide that into a sealed bag or foil before storing it on the counter. That’s my secret for keeping this Homemade Bread Baking creation tender.
If you happen to have super dark brown sugar, use it! It has a higher molasses content and adds a slight depth of flavor that complements the dates beautifully. If you want another flavor profile to play with, try adding half a teaspoon of ground cinnamon to your dry ingredients—it just gives it a lovely, warm hug of flavor. For more foolproof tips on achieving that perfect texture in quick breads, I share some great techniques in my guide on moist chocolate banana bread, because the hydration rules are often the same!
And speaking of moisture, remember how thin the batter was? That thinness is your friend! It means you didn’t overmix, and it ensures the dates and liquid are evenly distributed. If you want to see another take on guaranteeing the softest possible texture for this type of loaf, this resource has some excellent supporting advice.
Serving Suggestions for Your Homemade Bread Baking Creation
Now that you have this gorgeous, aromatic Comfort Food Bread cooling on the rack, the fun part starts: eating it! This date nut bread isn’t just for holidays, though it’s certainly festive enough for them; it’s truly an everyday kind of treat that deserves to be enjoyed frequently.
For the absolute best experience, you need to slice it when it’s just slightly warm—not piping hot, but definitely not fridge-cold. My favorite way, hands down, is what I call the ‘Pat Nixon’ slice (she knew a thing or two about good bread!). Just slice it about half an inch thick, and slather that warm piece with a generous smear of softened sweet cream butter. That melting butter soaking into the slightly spiced crumb? Perfection.
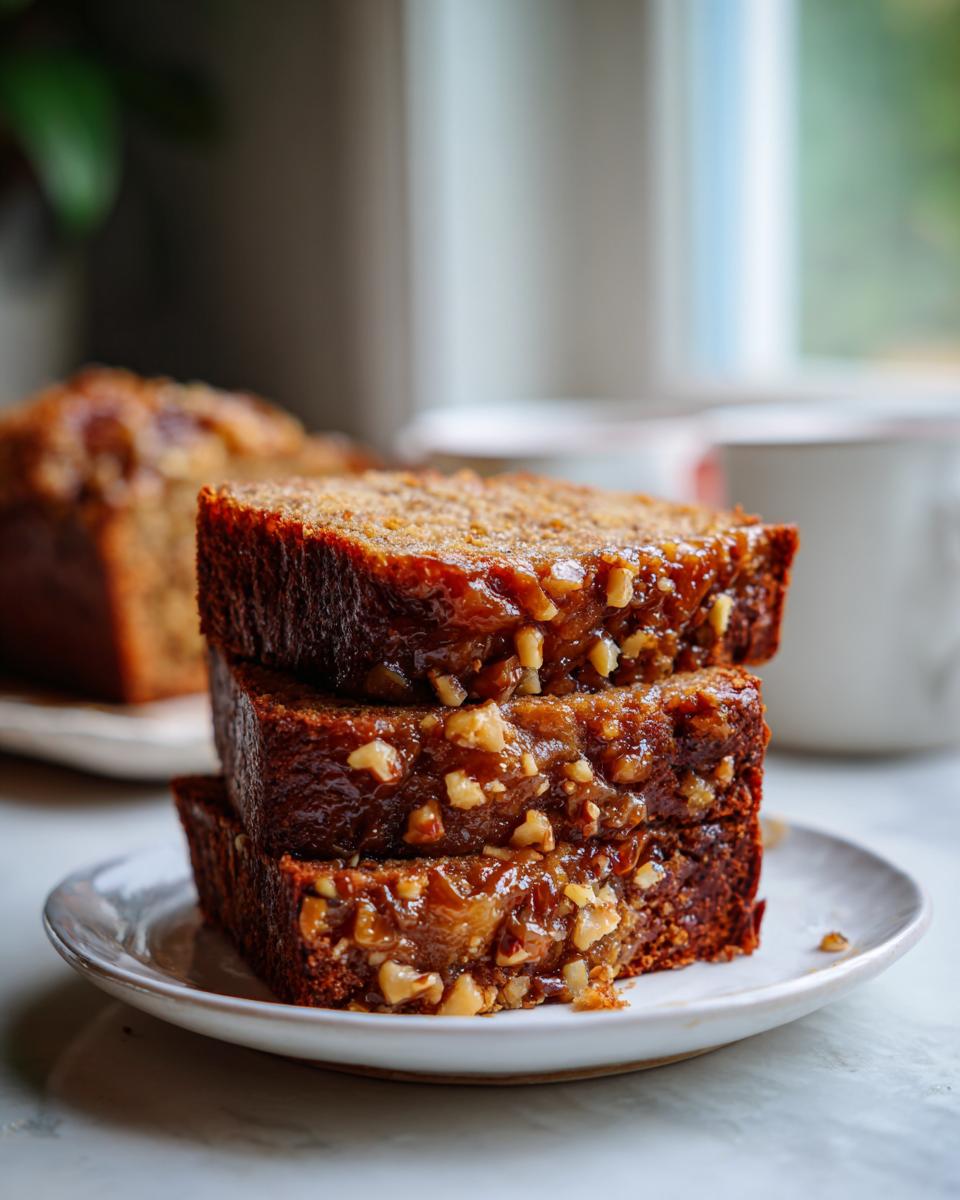
If you want something a little tangier for your mid-morning snack, cream cheese is fabulous here, especially if you mix in just a tiny bit of orange zest into the cream cheese first. Talk about a wake-up call! This bread is also the perfect accompaniment to a strong cup of coffee or a nice cup of tea in the afternoon. If you’re looking to make a full brunch spread, you could pair a slice of this loaf with something warm and spiced, like the apple cinnamon oatmeal I shared last fall—it really doubles down on that cozy feeling.
It’s also fantastic crumbled slightly on top of a bowl of vanilla ice cream if you’re feeling decadent. See? This breakfast quick bread works for almost any time of day!
Storage and Reheating Instructions for Date Nut Bread
If you’ve managed to save any of this glorious, moist date nut bread past the first day—and honestly, sometimes I haven’t!—you need to know the absolute best way to keep it perfect. Remember how much work we put into that initial date soak to guarantee that tender crumb bread? We can’t let it dry out now! Longevity is key with homemade baking.
For simple countertop storage, you want air to be kept out, period. Once the loaf is completely cool—and I mean cool to the touch, not warm at all—wrap it super tightly. I mean really tightly. First, use plastic wrap, pressing it right up against all the surfaces of the bread, and then wrap that bundle again in aluminum foil or tuck it into a zip-top bag. Stored this way, your classic date loaf should stay wonderfully soft on the counter for about three to four days. Because it’s a quick bread, it doesn’t need refrigeration unless your kitchen is extremely hot and humid.
Now, if you’re making this loaf for a holiday gift drop-off or know you won’t get to it all week, let’s talk about freezing. Freezing is amazing for preserving that perfect texture! You’ll want to slice the bread first. Yes, slice it—trust me on this one. Wrap the entire loaf *or* individual slices tightly in plastic wrap, then wrap again in foil. Label it with the date. This sweet loaf freezes beautifully for up to three months! When you’re ready to eat a slice, just pull it out and let it thaw completely on the counter for an hour or so. No need to warm it up, though slicing it first makes life so much easier!
Speaking of making things easier, if you’re looking for other fantastic make-ahead recipes that save you time later, you might want to look at my recipe for easy slow-cooker apple butter. It’s the perfect pairing for this bread when it’s slightly warmed up!
If you *do* decide you want it warm later, just take a slice or two that are fully thawed and microwave them briefly (maybe 15 seconds) on a small plate. It brings back that ‘just-out-of-the-oven’ smell immediately. Enjoy that delicious, foolproof homemade bread baking!
Frequently Asked Questions About This Easy Date Nut Bread Recipe
I get so many questions about this recipe because everyone wants that perfect, foolproof loaf! Dealing with quick bread can sometimes be tricky, but once you understand the core principles—like why we soak the dates—you’ll feel like a pro. Here are some of the most common things folks ask me about achieving the Best Date Nut Bread.
Can I make this date nut bread without nuts?
Oh, absolutely you can! If you have an allergy, or maybe you just aren’t a big walnut fan, feel free to leave them out. Just remember, the nuts do offer a little bit of structure and crunch, so leaving them out will make your final bake even softer and more cake-like. You might find that this makes the loaf lean more toward a pure Sweet Date Loaf.
If you want to make up for that lost texture, I highly recommend substituting the volume of nuts with an extra half-cup of chopped dates if you have them, or a cup of unsweetened shredded coconut. Coconut brings a nice chewiness that makes up for the lost crunch, and the flavor combination is still amazing. It just becomes a slightly different kind of Homemade Bread Baking experience!
How do I prevent my date nut bread from sinking in the middle?
This is the number one fear when baking a large, dense loaf like this Classic Date Loaf, and usually, there are two sneaky culprits. First, and most common: over-mixing! If you combine the flour too vigorously or for too long once it’s added to the wet ingredients, you develop too much gluten, which weighs the whole thing down. Remember what I said? Mix *just* until the flour streaks disappear, and then stop. That thin batter is supposed to look a little sloppy!
The second reason is often temperature related. Make sure your oven is actually up to temperature before you put the bread in. You need that initial hot blast to set the edges quickly so the middle can rise properly. If you’re unsure about your oven’s actual temperature, using a separate oven thermometer is a lifesaver—it’s how we troubleshoot in the test kitchen all the time! If you’ve ever struggled with dips or crumbles in other quick breads, I have some troubleshooting advice for creamy dips that sometimes applies to quick bread structure, too!
Also, don’t peek too early! Opening the oven door before the 45-minute mark lets out heat and can cause the center to collapse. For more foolproof baking advice to ensure your quick bread stays high and proud, take a peek at this great guide on keeping your bread moist.
Understanding the Nutrition of Your Classic Date Loaf
I know so many of us are mindful of what we eat, even when we’re enjoying a sweet, nostalgic treat like this Classic Date Loaf. Baking something incredible like this date nut bread at home is wonderful because you control every single ingredient that goes in there—from the type of sugar to the quality of the butter.
Now, I want to be really transparent with you all: keeping track of exact caloric counts for homemade baking can be trickier than you think! Since we’re using specific brands of flour, different sizes of eggs, and maybe even slightly different amounts of nuts depending on how generously you measure them, the exact nutritional data can shift quite a bit from batch to batch. So, treat any nutritional breakdown you find for Homemade Bread Baking recipes as a solid guideline, but not an absolute guarantee.
Because of that variation, I choose not to publish precise, specific numbers here. What I can confidently tell you is that this Easy Date Nut Bread Recipe relies heavily on natural sweetness from the dates and includes heart-healthy fats from nuts and butter. It’s truly a beautiful, satisfying slice of Comfort Food Bread that fits perfectly into an occasional indulgence. Enjoy it guilt-free, knowing you made it with love!
Share Your Date Nut Bread Baking Experience
Whew! Now that you’ve mastered the technique for this gloriously moist date nut bread, I really, truly want to hear all about it. Baking should always be a shared experience, right? It’s not just about following the steps; it’s about the joy of sharing what you’ve created with someone you love.
If this recipe delivered that perfect, soft slice of nostalgic baking you were hoping for, please do me a huge favor and leave a five-star rating right down below! It helps other bakers find this reliable, classic recipe and keeps us committed to bringing you the very best breakfast quick breads.
And seriously, pull out your phone and snap a picture! I adore seeing your finished loaves—whether you served yours warm with butter, took it to a holiday gathering, or just tucked away a loaf for breakfast tomorrow. Tag us on social media—it always makes my day when I see your gorgeous results. If you want to send me a specific note or a photo that won’t fit in the comments, you can always reach out directly through the contact page.
I’m also really curious to know—did you try any fun variations? Maybe you added a hint of cinnamon, or perhaps you tried making this loaf using that classic style that Pat Nixon made famous? I love hearing how you adapt these simple loaf cake staples for your own family table! Head over to this article if you want to dive into some of those historic versions. Can’t wait to see your beautiful, tender loaves!
PrintThe Best Old-Fashioned Moist Date Nut Bread Recipe

Bake this classic, easy date nut bread for an irresistibly tender crumb. This old-fashioned quick bread recipe uses a simple soaking method to guarantee moisture, making it perfect for breakfast or holiday gifting.
- Prep Time: 20 min
- Cook Time: 60 min
- Total Time: 80 min
- Yield: 1 loaf (about 10 servings) 1x
- Category: Breakfast
- Method: Baking
- Cuisine: American
- Diet: Vegetarian
Ingredients
- 1 cup boiling water
- 1 cup packed pitted dates, chopped
- 1 teaspoon baking soda
- 1/2 cup (1 stick) unsalted butter, softened
- 1 cup packed light brown sugar
- 2 large eggs
- 1 teaspoon vanilla extract
- 1 3/4 cups all-purpose flour
- 1 teaspoon baking powder
- 1/2 teaspoon salt
- 1 cup chopped walnuts or pecans
Instructions
- Preheat your oven to 350°F (175°C). Grease and flour a standard 9×5 inch loaf pan.
- Place the chopped dates in a heatproof bowl. Pour 1 cup of boiling water over the dates and stir in the baking soda. Let this mixture sit for 15 minutes to soften the dates.
- In a large bowl, cream together the softened butter and brown sugar until light and fluffy. Beat in the eggs one at a time, then mix in the vanilla extract.
- In a separate medium bowl, whisk together the flour, baking powder, and salt.
- Add the dry ingredients to the wet ingredients in three additions, mixing just until combined after each addition. Do not overmix.
- Gently fold in the chopped nuts and the entire date mixture (including the soaking liquid). The batter will be thin.
- Pour the batter into the prepared loaf pan.
- Bake for 55 to 65 minutes, or until a wooden skewer inserted into the center comes out clean.
- Let the bread cool in the pan for 10 minutes before turning it out onto a wire rack to cool completely.
Notes
- For an extra moist date loaf, wrap the cooled bread tightly in plastic wrap and foil before storing. It tastes even better the next day.
- Serve this comfort food bread warm with softened butter or cream cheese.
- If you prefer a stronger spice flavor, add 1/2 teaspoon of ground cinnamon to the dry ingredients.
Nutrition
- Serving Size: 1 slice
- Calories: 285
- Sugar: 28g
- Sodium: 180mg
- Fat: 13g
- Saturated Fat: 5g
- Unsaturated Fat: 8g
- Trans Fat: 0.2g
- Carbohydrates: 41g
- Fiber: 2g
- Protein: 5g
- Cholesterol: 55mg