
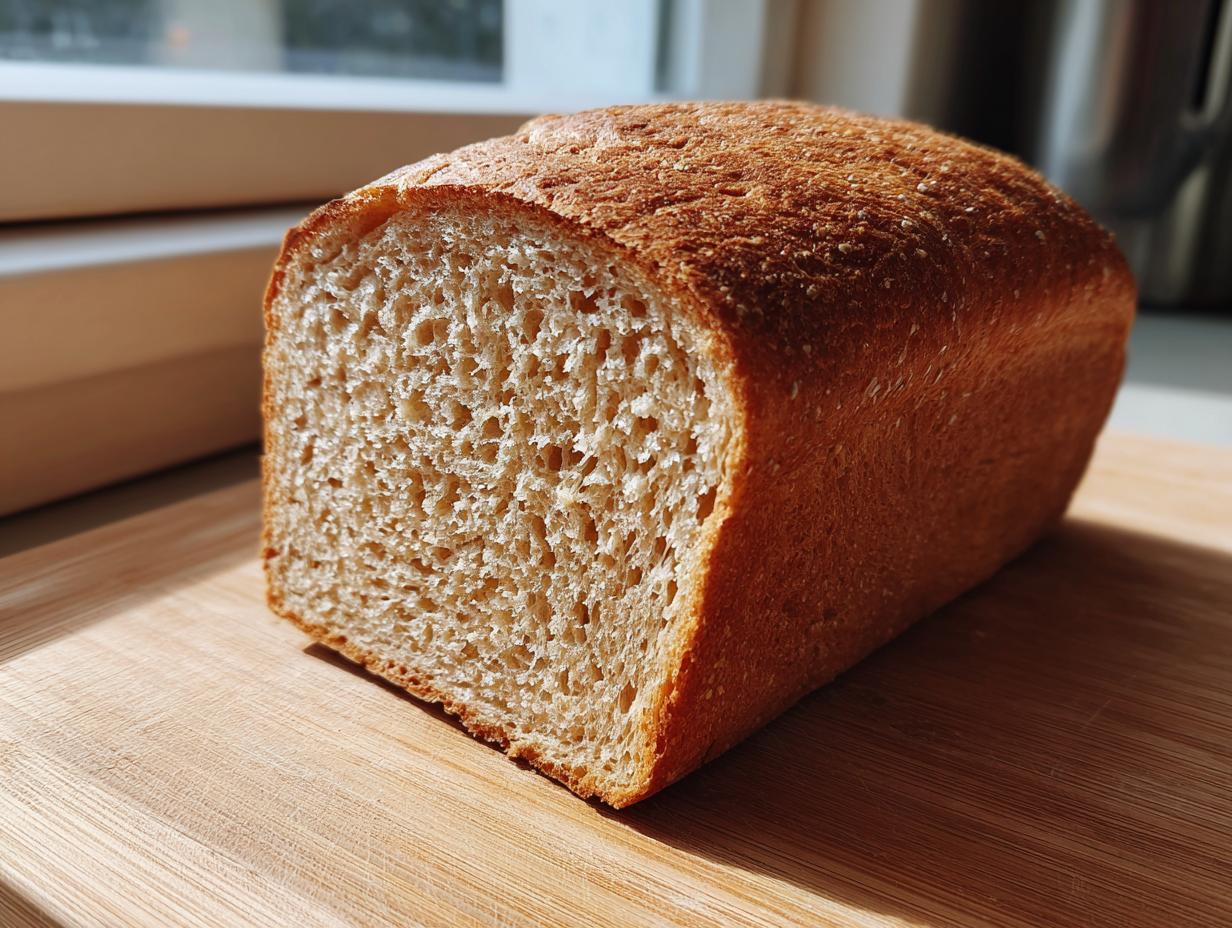
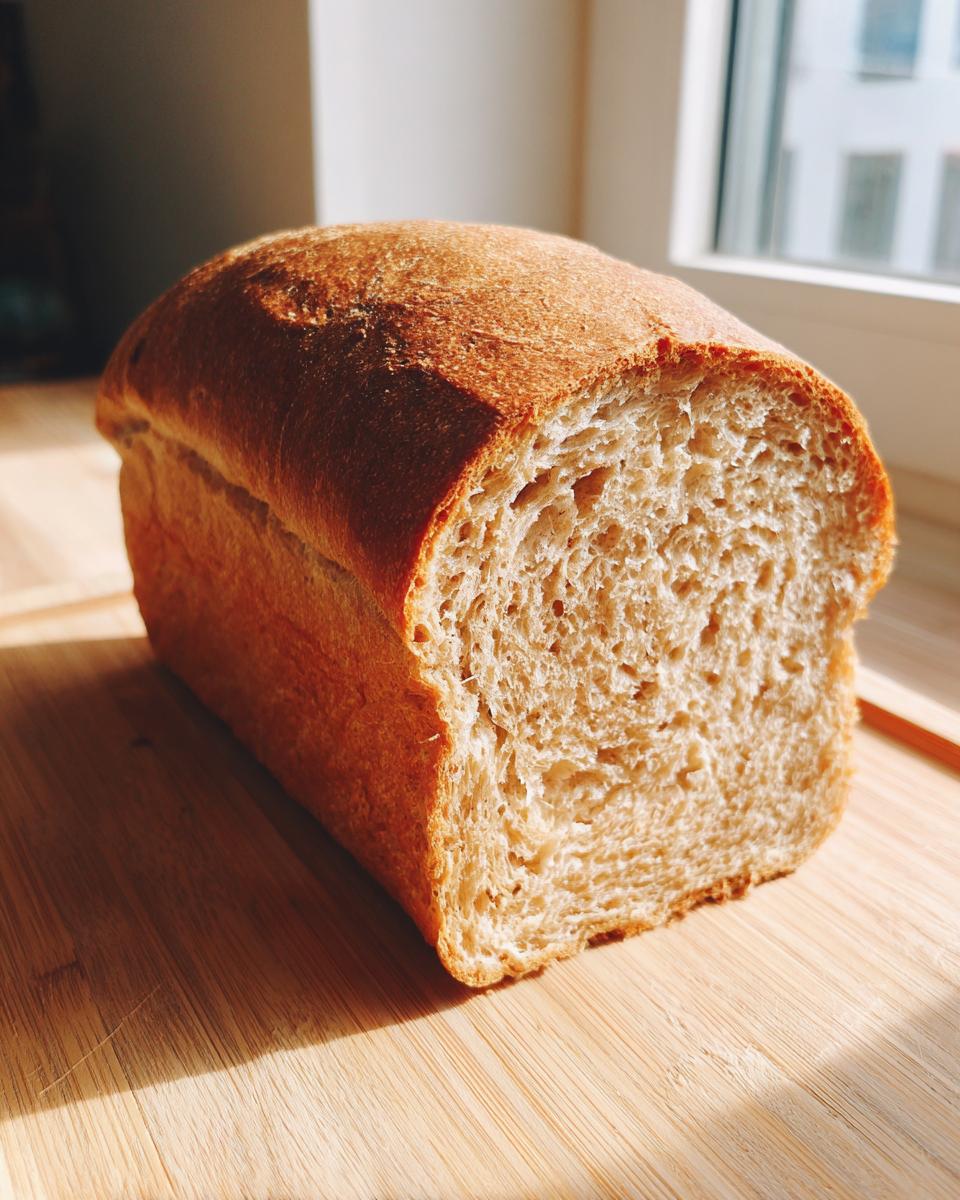
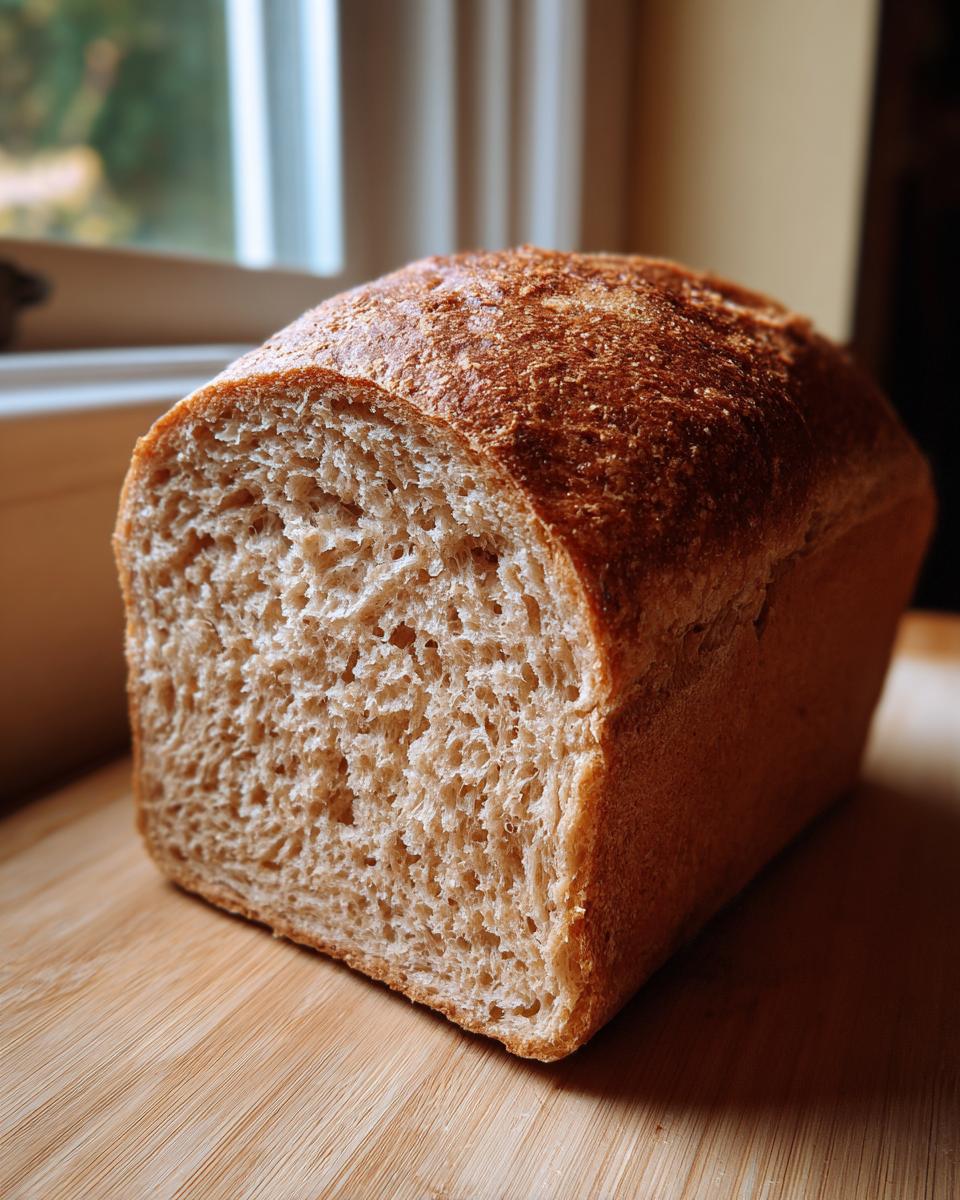
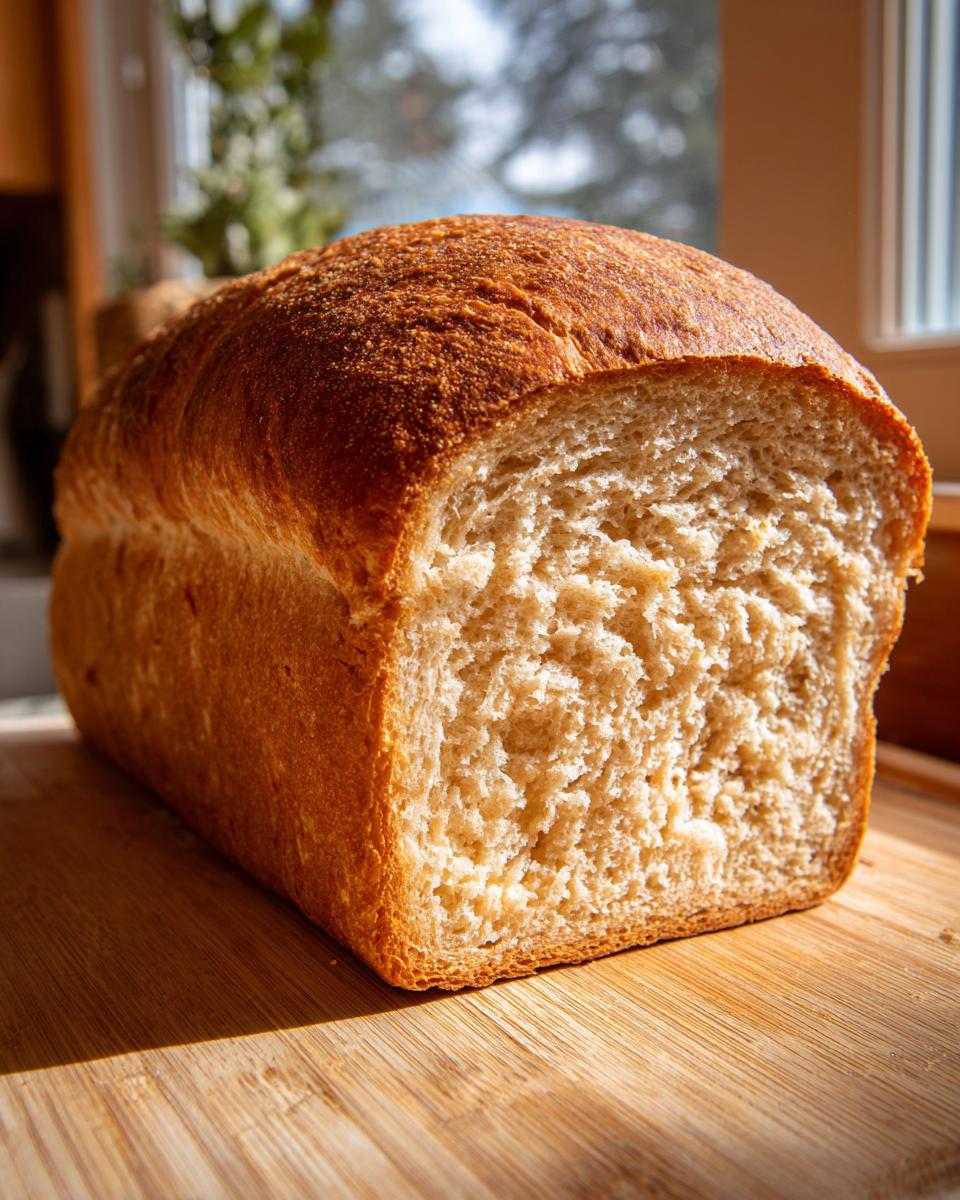
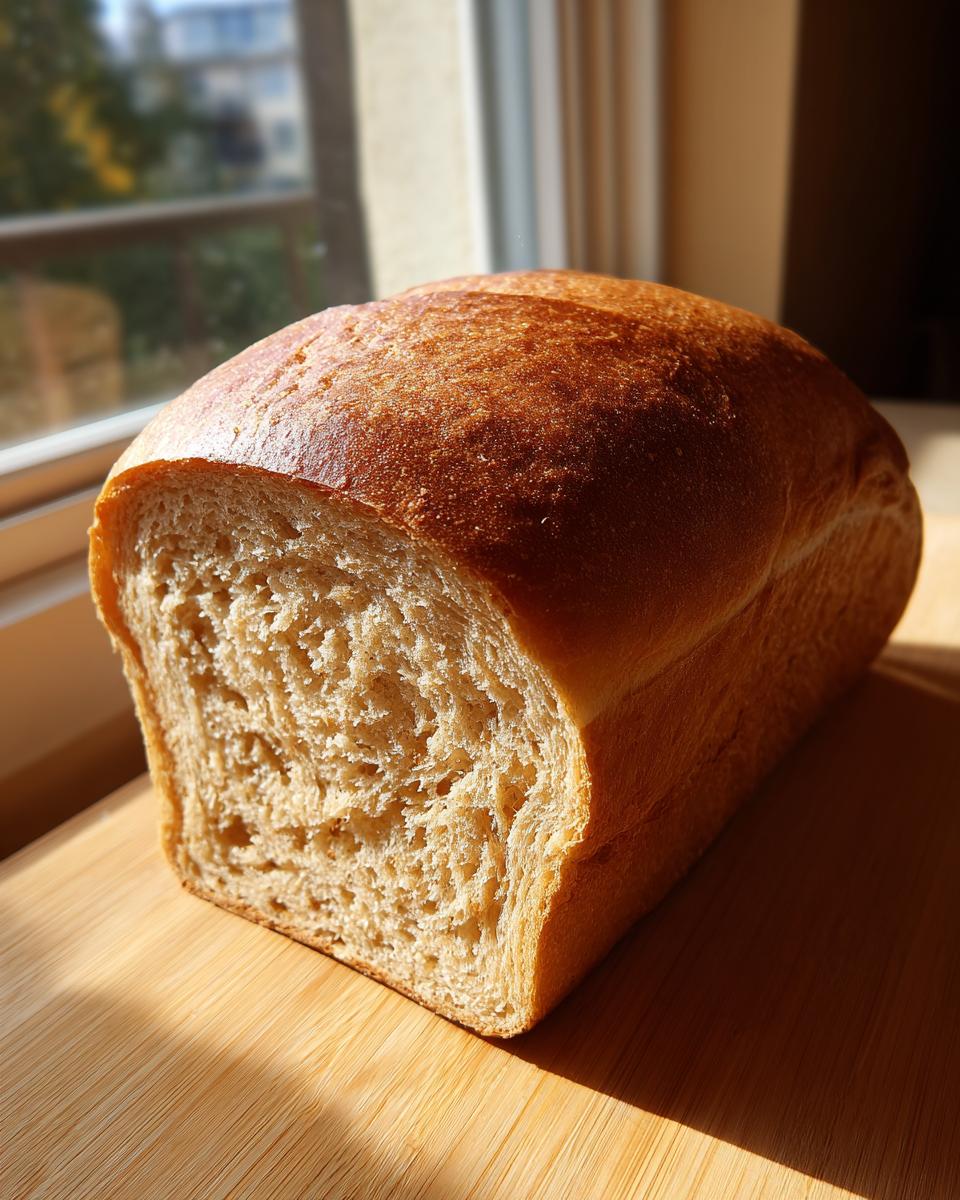
There is something fundamentally satisfying about pulling a golden loaf of truly *homemade* bread out of your own oven, isn’t there? But when we talk about bread, we usually mean white bread. I get it; whole wheat can get tough fast! That’s why I worked tirelessly in my family’s kitchen to perfect this recipe for **whole wheat bread**. This isn’t that crumbly, dense stuff you feel guilty buying—this is reliably soft, tender, and wholesome, even when using mostly whole grains.
I promise you, as someone who truly honors both tradition and technique, this recipe is my gold standard. I tested dozens of batches to nail the exact balance of honey and fat needed for that beautiful, fluffy texture. We’re going to put you in command of baking the absolute best sandwich loaf you’ve ever had. If you’re looking for a companion recipe that leans toward the rustic side, you might also look at my method for homemade crusty artisan bread, but today is all about softness!
- Why This Easy Soft Honey Whole Wheat Bread Recipe Works
- Ingredients for Your Homemade Whole Wheat Bread
- Step-by-Step Instructions for Perfect Whole Wheat Bread
- Tips for Baking the Best Whole Wheat Bread Every Time
- Storing and Reheating Your Fresh Baked Whole Grain Loaf
- Frequently Asked Questions About Making Whole Wheat Bread
- Nutritional Snapshot of This Wholesome Bread Baking
- Share Your Soft Honey Whole Wheat Bread Creations
Why This Easy Soft Honey Whole Wheat Bread Recipe Works
If you’ve ever sworn off **soft whole wheat bread** because it turned out heavy or dry, I want you to stick with me. That heavy brick feeling happens when the bran in the whole wheat flour cuts the gluten strands too much. We fix that! The secret to achieving truly **healthy homemade bread** that stays tender lies in a combination of three things: enough fat from the melted butter, the moisture boost from that lovely honey, and, yes, sometimes we need just a touch of all-purpose flour to give the dough the structure it needs.
I built this recipe specifically to avoid that dense disappointment so many people face when baking with whole grains.
The Secret to a Fluffy Whole Wheat Loaf
We get that desirable **fluffy whole wheat loaf** texture by treating the dough right. Full kneading allows the gluten to develop properly, setting the structure for that rise. Then, giving it enough time in those two proofing stages, untouched and warm, is what really inflates those soft air pockets. Trust the process; patience here guarantees fluff!
Ingredients for Your Homemade Whole Wheat Bread
Okay, let’s gather our troops! Getting the ingredients right is half the battle when you’re aiming for a stellar **whole wheat bread**. Don’t start mixing until everything is measured out—I like to use nice little bowls for everything, that way I’m ready to go when the yeast is foamy. Remember, this recipe is designed to be wonderfully wholesome, but the small additions are what make it truly soft for sandwiches!
If you’ve been looking for a great way to use up that honey, this is it. Speaking of honey, if you enjoyed this recipe, you might want to try my honey bran muffins next time you’re baking something sweet for breakfast!
Here is what you’ll need for one gorgeous loaf:
- 1 cup warm water (and I mean warm! Aim for 105-115°F, that’s lukewarm to the touch, not hot!)
- 2 1/4 teaspoons active dry yeast
- 1/3 cup honey
- 1/4 cup unsalted butter, melted
- 1 1/2 teaspoons salt
- 3 1/2 cups whole wheat flour
- 1/2 cup all-purpose flour (This part is optional, but using it helps keep the loaf lighter, so I usually toss it in!)
- 1 large egg
Step-by-Step Instructions for Perfect Whole Wheat Bread
This is where the magic happens, and I promise you, it’s so much easier than you think! We are taking this recipe right from my beginner’s zone—it’s my go-to for a consistently perfect **whole wheat bread** every single time. Just follow the timing cues closely, and you’ll have a loaf ready before you know it. Ready to start transforming simple ingredients into something incredible? For those who want to dive into more foundational baking, check out my guide on a general whole wheat beginner recipe!
Activating the Yeast and Mixing the Dough
First things first: the yeast! You need that warm water to be just right—think comfy bath water, not hot tub temperature. If it’s too hot, you’ll kill the yeast dead, and we can’t have that! Mix the warm water and yeast and give it five quiet minutes until it gets foamy and happy. That means your yeast is alive and kicking. Once it’s foamy, stir in your honey, the melted butter (let it cool just a tick first so you don’t shock the yeast!), and the salt. Then, toss in the **whole wheat bread** flour and that egg. Mix everything with a sturdy spoon until it looks like a shaggy mess—that’s exactly what you want right now.
Kneading and First Rise for Soft Whole Wheat Bread
Time to get your hands in there! Turn that shaggy dough out onto a surface you’ve dusted lightly with flour. Now, we knead. You should work at this for about five to seven minutes until the dough stops fighting you and starts feeling smooth and springy. If it’s just too sticky to handle even after kneading, that’s when you decide whether or not to incorporate that optional half-cup of all-purpose flour. Once it’s manageable, place it in an oiled bowl, turn it over once so it’s coated, and cover it up. Let it rest in a warm spot for an hour to an hour and a half. It needs to double in size—don’t rush this first rise!
Shaping, Second Rise, and Baking the Loaf
Once doubled, gently—and I mean gently—punch the air out of the dough. We need to deflate it slightly. Shape it into a nice tight log and tuck it into your greased 9×5 inch loaf pan. Cover it loosely again and let it have its second nap for about 30 to 45 minutes. This time, you are looking for it to rise about an inch over the top rim of the pan—that’s the baker’s sign it’s perfectly proofed. While it’s doing its final rise, get that oven preheating to 375°F (190°C). When it’s time to bake, it should take 30 to 35 minutes. The outside will be golden brown, but the real test for this **whole wheat bread** is the inside temperature; you want to see 190°F on your instant-read thermometer. Pull it out right away and let it cool completely so your final slice isn’t gummy!
Tips for Baking the Best Whole Wheat Bread Every Time
Baking delicious, **wholesome bread baking** doesn’t have to be a struggle, but whole wheat does ask for a little extra respect regarding ingredients. Learning exactly **how to bake whole wheat bread** that stays soft is the key to never going back to the store-bought stuff. If you follow these little tips, success is practically guaranteed in your loaf pan!
Ingredient Notes and Flavor Variations for Whole Wheat Bread
So, if you’re out of water or just want a richer flavor, go ahead and use milk instead! It adds a lovely tenderness to the crumb, trust me. And if you want a shiny, slightly crisp top—the kind you see on bakery loaves, but still soft underneath—brush the dough with an egg wash (just one egg beaten with a splash of water) right before it goes into the oven. This is optional, but it sure looks professional!
Remember that optional half-cup of all-purpose flour? That’s your texture insurance. Whole wheat flour always absorbs more liquid, and adding that small amount of white flour lightens the overall structure, helping us achieve that dreamy **whole wheat sandwich loaf** texture we are aiming for. It keeps the loaf feeling less weighty while still delivering all that nutty, whole-grain goodness. If you’re looking for something sweet after you master this bread, my easy maple fudge recipe is a perfect follow-up project!
Storing and Reheating Your Fresh Baked Whole Grain Loaf
Even the best **whole wheat bread** benefits from a good storage plan! Honestly, if you can, this bread is best eaten on the day it bakes, but lucky for us, it keeps really well. Just keep the cooled loaf tightly wrapped on the counter for about three days. That simple wrapping keeps it soft and ready for toast or a quick sandwich.
If you know you won’t get through the entire loaf right away, don’t worry about it going stale! The chilling tip from my notes is a lifesaver: slice up any remaining bread, pop those slices into a freezer bag, and store them in the freezer. You can pull out an individual slice whenever you need it for toast, and it thaws out perfectly in the toaster slot. It’s the easiest way to enjoy that **fresh baked whole grain** flavor all week long! For great meal ideas to sandwich between slices, check out my easy crockpot pulled chicken recipe.
Frequently Asked Questions About Making Whole Wheat Bread
I know you might have a few lingering questions when you’re tackling your first **whole wheat bread** loaf, especially concerning texture! It’s totally normal. That’s why I pulled together the questions I get most often from readers. We want you baking with confidence, whether this is your first time using yeast or you’re a seasoned pro looking for the absolute **best whole wheat bread** formula that works every time.
We want this to be your reliable **whole wheat beginner recipe**, so let’s clear up any confusion!
What if I don’t want to knead the dough? Can I make this an easy no knead whole wheat bread recipe?
That’s a fantastic question, especially since I know some folks prefer the hands-off approach of a **no knead whole wheat bread**. For this particular recipe, I really suggest you stick to the short knead time. Because we are working with whole wheat flour, which can be heavy, kneading helps develop the gluten structure needed to trap those gases and achieve that soft crumb. If you skip it, you risk a much denser result. If you absolutely must go no-knead, you’ll need a much longer initial rise—like 12 to 18 hours in the fridge—and you’ll likely get something closer to a **rustic whole wheat bread** texture rather than this tender sandwich loaf. For the softest results, knead it lightly!
Why is my homemade whole wheat bread coming out so dense?
This is the texture concern everyone has when starting **wholesome bread baking**! The main culprits are usually under-proofing (not letting the dough rise long enough) or using the wrong liquid temperature when activating the yeast. If your yeast dies, you get no rise, and that means a rock. If you don’t let it double both times it needs to, it won’t have the lift it needs to stay light. Secondly, make sure you aren’t adding too much extra flour during kneading! A slightly sticky dough that you handle gently will always bake up softer than one you’ve stiffened up too much.
Can I just use 100% whole wheat flour instead of adding all-purpose flour?
You absolutely can substitute it if you want a 100% whole grain experience! But be warned: the bread will be slightly heavier and taste more robustly nutty. I included that optional half-cup of all-purpose flour because it acts like a helper, allowing the gluten strands to stretch without breaking under the weight of the whole grain. If you go 100%, you might need a splash more water, too, since whole wheat loves to suck up moisture. If you make a big batch, this bread goes perfectly with my recipe for easy black bean soup!
How long is the best way to store this whole wheat sandwich loaf?
To keep this **whole wheat sandwich loaf** as soft as possible, keep it at room temperature in an airtight container or tightly wrapped in plastic wrap or beeswax wrap for about three days. Freezing works wonderfully if you won’t eat it quickly—just make sure it’s totally cool first, slice it, and freeze; it’s perfect for quick toast!
Nutritional Snapshot of This Wholesome Bread Baking
I know that for many of you, choosing to bake **whole wheat bread** at home is all about knowing exactly what’s going into your food. That’s why I always make sure to include the nutritional estimates so you feel completely in command of what you’re serving your family. It’s wonderful knowing you’re getting those three grams of fiber in every slice!
Here is a general breakdown based on the primary ingredients for this specific **wholesome bread baking** recipe. Please remember, baking is an art, and slight variations in ingredients or exact amounts (like whether you added that optional white flour) can shift these numbers a little bit. This is just a helpful guide for you!
- Serving Size: 1 slice
- Calories: 145
- Fat: 3g (and only 1.5g is saturated!)
- Carbohydrates: 27g
- Fiber: 3g (That’s the good stuff!)
- Protein: 5g
- Sugar: 5g (Mostly natural sugars from the honey)
- Cholesterol: 15mg
Enjoying this delicious, homemade loaf knowing its contents is part of the joy of the process. It truly is the kind of simple, reliable recipe I always wanted when I was first learning how to bake!
Share Your Soft Honey Whole Wheat Bread Creations
Now that you’ve been fully equipped to take command of your kitchen and bake this wonderfully soft **whole wheat bread**, I absolutely want to hear all about it! There is nothing that makes me happier than seeing photos of readers’ loaves coming out golden brown and perfect.
Did you get that fluffy texture we talked about? Did your family notice the difference between this honey loaf and the stuff from the store? Please be sure to leave a rating for the recipe right here on the page. Stars help other home cooks gain confidence in trying something new, and your comments about your experience baking this specific bread truly make my day.
If you snapped a picture of your finished **whole wheat sandwich loaf**, tag me on social media! I live for seeing that soft crumb. And hey, after you finish devouring the first loaf (it happens quickly, I know!), maybe try something new for breakfast. My recipe for fluffy oatmeal pancakes is another great way to bring that homemade, wholesome feeling to your table!
Happy Baking to command headquarters!
PrintEasy Soft Honey Whole Wheat Sandwich Bread

Bake a soft, wholesome whole wheat bread loaf at home. This easy recipe uses honey for natural sweetness, resulting in a tender crumb perfect for sandwiches and toast.
- Prep Time: 20 min
- Cook Time: 35 min
- Total Time: 2 hours 5 minutes
- Yield: 1 loaf (about 14 slices) 1x
- Category: Baking
- Method: Kneading and Baking
- Cuisine: American
- Diet: Vegetarian
Ingredients
- 1 cup warm water (105-115°F)
- 2 1/4 teaspoons active dry yeast
- 1/3 cup honey
- 1/4 cup unsalted butter, melted
- 1 1/2 teaspoons salt
- 3 1/2 cups whole wheat flour
- 1/2 cup all-purpose flour (optional, for a slightly lighter texture)
- 1 large egg
Instructions
- Combine the warm water and yeast in a large bowl. Let it sit for 5 minutes until foamy.
- Stir the honey, melted butter, and salt into the yeast mixture.
- Add the whole wheat flour and the egg. Mix with a wooden spoon until a shaggy dough forms.
- Turn the dough out onto a lightly floured surface. Knead for 5 to 7 minutes until the dough is smooth and elastic. Add the all-purpose flour if the dough remains too sticky.
- Place the dough in a lightly oiled bowl, turning to coat. Cover the bowl with plastic wrap or a clean towel. Let the dough rise in a warm place for 1 to 1.5 hours, or until doubled in size.
- Gently punch down the risen dough. Shape it into a loaf and place it into a greased 9×5 inch loaf pan.
- Cover the pan loosely and let the dough rise again for 30 to 45 minutes, or until it crests about 1 inch above the rim of the pan.
- Preheat your oven to 375°F (190°C) during the last 15 minutes of the second rise.
- Bake for 30 to 35 minutes, or until the crust is golden brown and the internal temperature reaches 190°F (88°C).
- Remove the loaf from the pan immediately and cool completely on a wire rack before slicing for the best texture.
Notes
- For a richer flavor, substitute milk for the water in the initial step.
- If you prefer a crustier exterior, brush the top of the loaf with an egg wash (1 egg beaten with 1 teaspoon water) before the second rise.
- This bread freezes well once fully cooled; slice before freezing for easy toast portions later.
Nutrition
- Serving Size: 1 slice
- Calories: 145
- Sugar: 5g
- Sodium: 210mg
- Fat: 3g
- Saturated Fat: 1.5g
- Unsaturated Fat: 1.5g
- Trans Fat: 0g
- Carbohydrates: 27g
- Fiber: 3g
- Protein: 5g
- Cholesterol: 15mg