
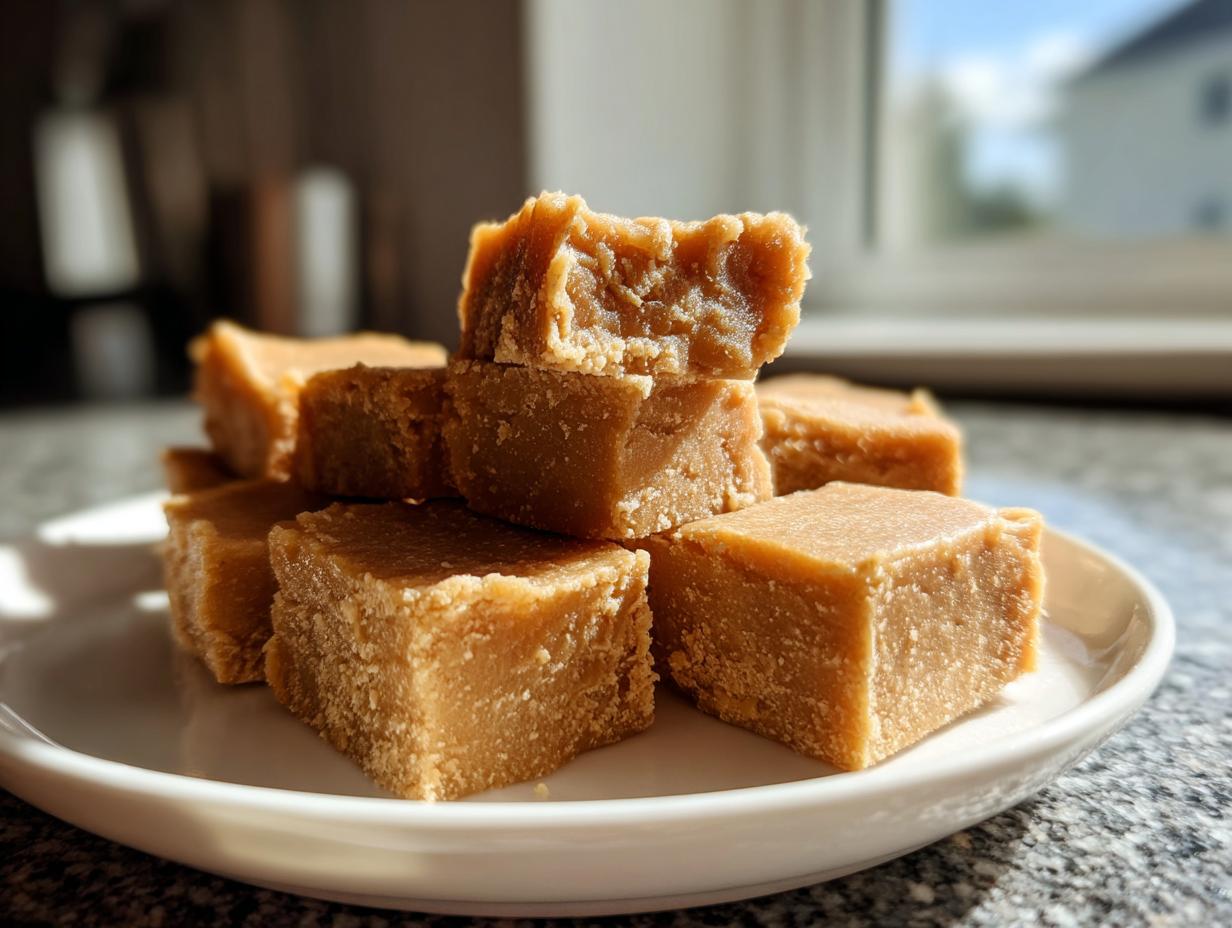
There’s just something magical about the smell of real maple syrup filling the kitchen on a cool evening. For me, those cozy, homemade sweets connect right back to my childhood when making candy was a special event, usually reserved for the colder months. Forget complicated processes; I’ve finally nailed down the secret to making incredibly **maple fudge**—the kind that is genuinely silky-smooth and just melts in your mouth the second it hits your tongue. This isn’t store-bought stuff, friends. This is the real deal, made simply, and it’s waiting for you to command your own kitchen. You can find out more about our cooking philosophy here at Cookery Command.
- Why This Is the Best Maple Fudge Recipe You Will Make
- Gathering Ingredients for Decadent Maple Treat
- Step-by-Step Instructions for Homemade Maple Fudge
- Tips for Success Making Traditional Fudge
- Serving Suggestions for Your Decadent Maple Treat
- Storage and Keeping Your Maple Fudge Fresh
- Frequently Asked Questions About Maple Fudge Recipe
- Estimated Nutritional Data for Maple Fudge
- Share Your Homemade Maple Fudge Creations
Why This Is the Best Maple Fudge Recipe You Will Make
I promise you, this **maple fudge recipe** is going to ruin all others for you. Why? Because it delivers that luxurious, melt-in-your-mouth texture we all dream about in a homemade candy without requiring hours of fuss. We use real, pure maple syrup, so the flavor is deep and authentic—none of that artificial stuff. If you’re looking for reliable **creamy fudge recipe** results, you’ve come to the right place. I’ve tested this until it was perfect, making it a staple whenever I need quick dessert recipes for the holidays. You can see all my favorite decadent recipes over on the Dessert Hub.

Achieving Silky-Smooth Texture in Your Maple Fudge
Getting that perfect, velvety mouthfeel is all down to physics, not luck. For a truly **smooth candy recipe**, you absolutely must nail the temperature—we’re aiming for that soft-ball stage, 234°F! Don’t even think about guessing. Once it cools down to the right spot, you beat it until it loses that sugary gloss. Seeing it turn matte and thick is your cue; that’s when the silky-smooth magic happens.
Quick Homemade Sweets Perfect for Gifting
This is seriously fast candy! With only about 15 minutes of cook time and 15 minutes of prep, this qualifies as one of the best **quick homemade sweets** you’ll ever find. That speed makes it perfect for last-minute **fudge recipes for holidays** or when you need a simple, comforting treat during **winter candy making** season. People will think you spent all day wrestling with sugar!
Gathering Ingredients for Decadent Maple Treat
Okay, so making amazing **homemade maple fudge** starts right here, with these core ingredients. There’s no room for cutting corners, especially when it comes to the maple flavor! We need actual, gorgeous, real maple syrup, not that pancake topping stuff—your fudge will taste dramatically better, trust me. I’ve laid everything out below so you can check your pantry. This short list really proves how this can be an **easy maple candy** to pull off.
Ingredient List for Classic Maple Fudge Recipe
- 2 cups granulated sugar
- 2 cups granulated sugar
- 1 cup heavy cream
- 1 cup real maple syrup
- 1 tablespoon butter
- 1 teaspoon vanilla extract
- 1 cup chopped walnuts (optional)
Step-by-Step Instructions for Homemade Maple Fudge
Now for the hands-on part! Making this **real maple syrup fudge** involves a little bit of concentration, but trust me, it’s worth your focus. The success of this **creamy fudge recipe** hinges on hitting precise temperatures, so pull out that candy thermometer before you even think about turning on the burner. While the setting part feels like a **no bake maple dessert**, the cooking stage is where the magic starts to happen! We’re going to walk through this together, just like making one of my favorite energy bites, which you can check out here.
Preparing the Pan and Cooking the Maple Fudge Base
First things first, get your 8×8 inch pan ready. Line it with parchment paper, making sure you leave plenty of overhang on the sides—this is how you get the fudge out cleanly later! Give that paper a light grease. Now, over to the stove: combine both cups of sugar, that heavy cream, and your real maple syrup right in a heavy-bottomed saucepan. Stir this gently over medium heat until that sugar is completely dissolved. The absolute key here is: once it starts to boil, stop stirring. Seriously, walk away! You need to let it cook undisturbed until your thermometer screams 234 degrees Fahrenheit. That’s the soft-ball stage, and it takes about 10 to 15 minutes.
Cooling and Beating the Smooth Candy Recipe Mixture
Once you hit 234°F, take the pan off the heat right away! Stir in that tablespoon of butter until it vanishes completely. Now, you have to be patient here. You must let this mixture cool down undisturbed until it hits 110 degrees Fahrenheit. Don’t try to rush this waiting period; it’s essential for that smooth result. Once it’s cool enough, stir in the vanilla and your optional walnuts. Then, grab your electric mixer—or get ready for a workout! Beat the mixture on medium speed for about 5 to 10 minutes. You’re looking for a visual change: it needs to lose that shiny gloss and start looking thick and dull, almost exactly like peanut butter. That’s your cue that you’re moments away from perfection for this **smooth candy recipe**!
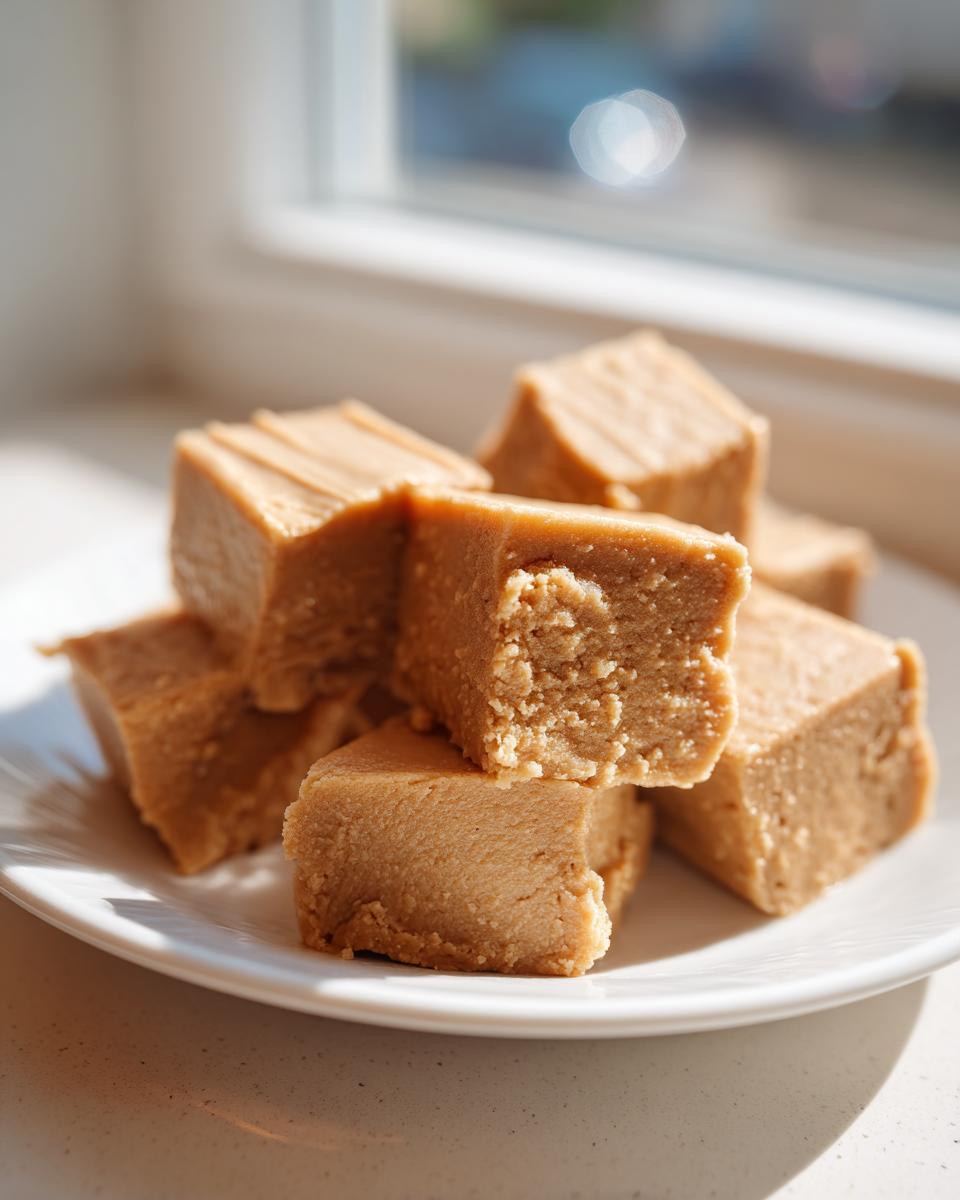
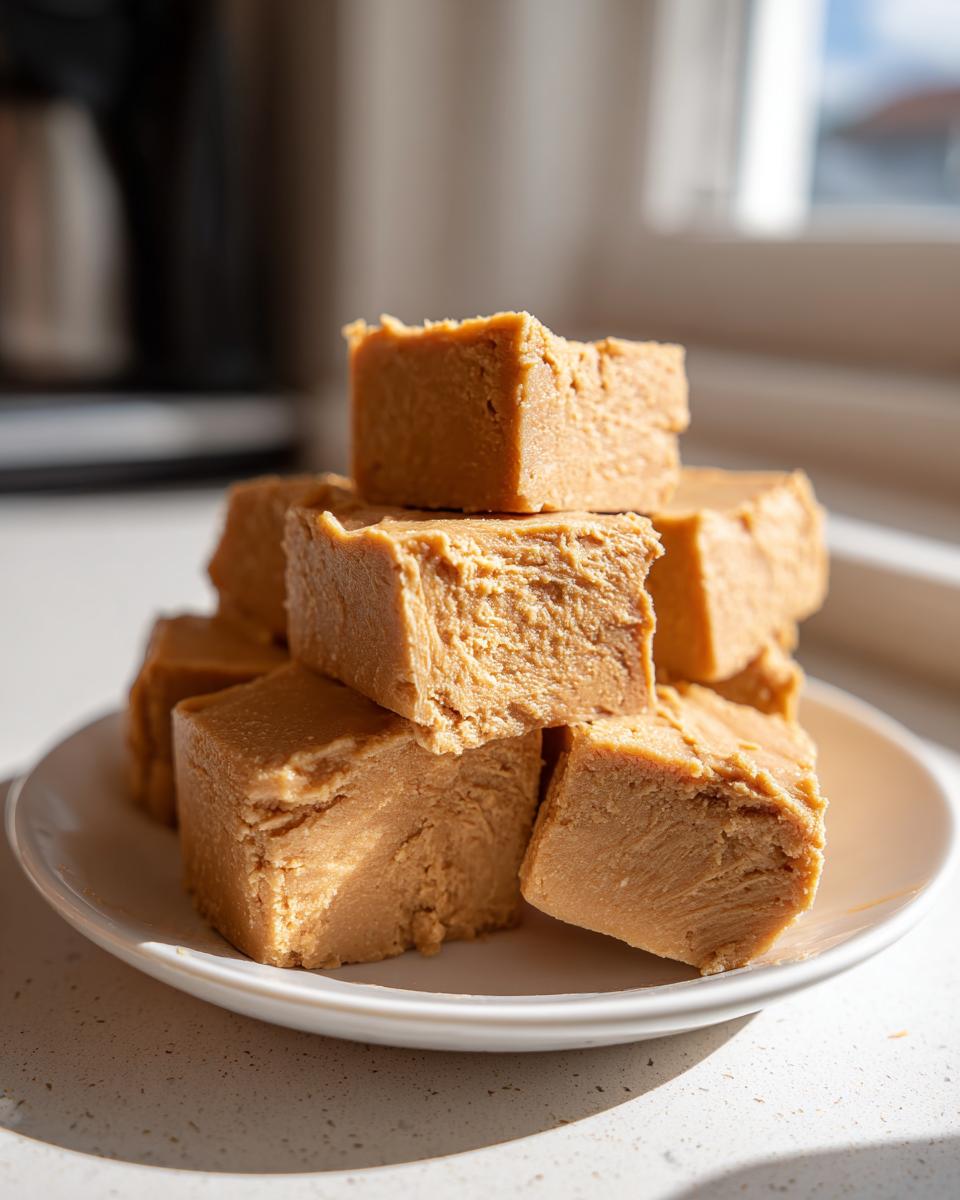
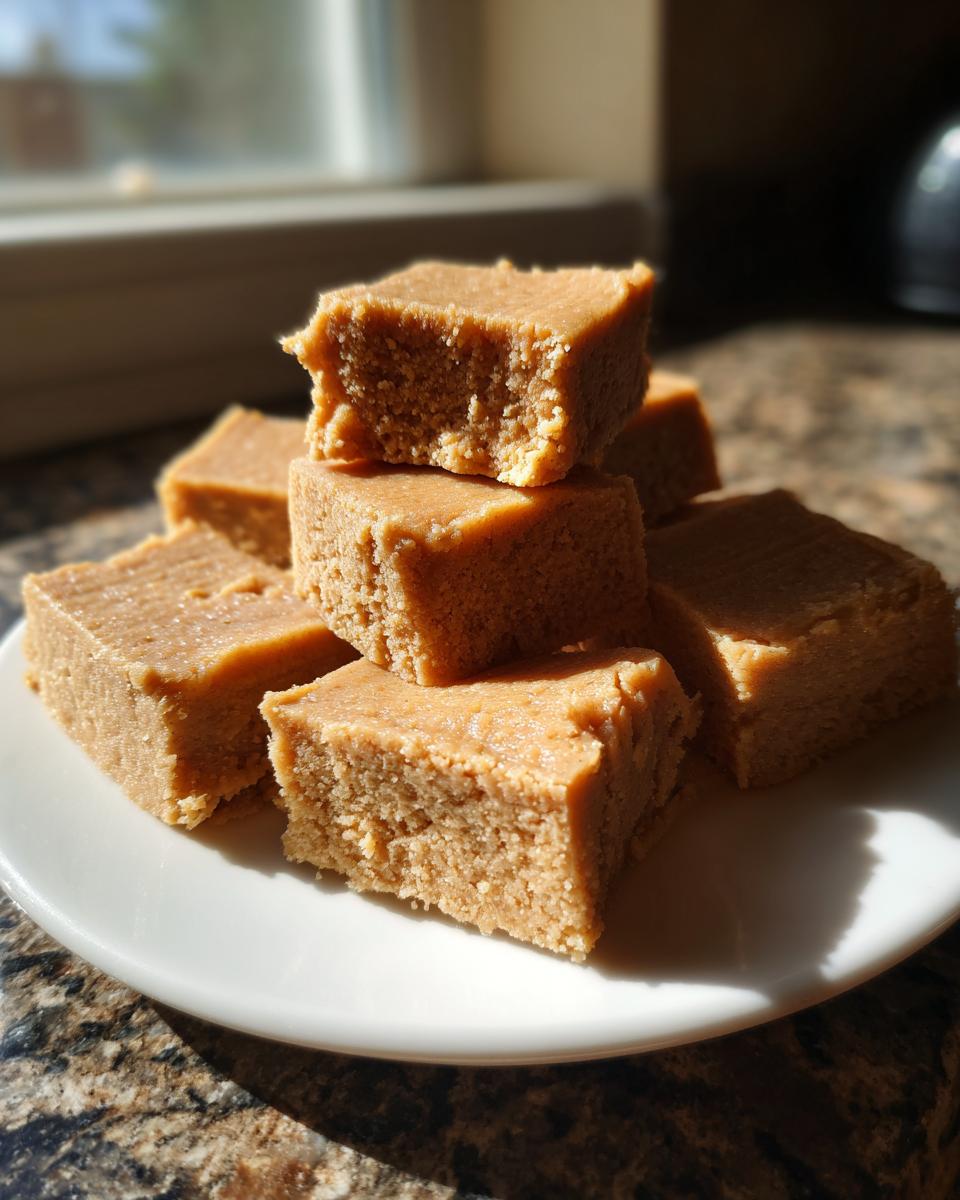
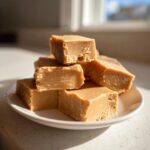
Setting and Cutting Your Maple Walnut Fudge
Quickly dump that thick **maple fudge** into your prepared pan. And I mean quickly! Don’t stand there scraping the bowl; leave the last little bit behind. Let it set up completely at room temperature for a few hours. If you’re impatient like me sometimes, you can pop it in the fridge briefly, but letting it set normally gives the best sliceable texture. Once it’s totally firm, use those parchment handles to lift the entire slab out. Now you can slice your beautiful **maple walnut fudge** into perfect squares. You can read more great tips on achieving perfect fudge over at Global Bites Recipes.
Tips for Success Making Traditional Fudge
Making **traditional fudge** relies on a few non-negotiable steps, and frankly, ignoring them leads to sugary messes rather than that perfect, creamy block. I know candy making can seem intimidating, but honestly, it’s just chemistry we’re managing in our Dutch ovens. If you follow these simple pointers, you’re going to have the most delicious **maple fudge** on the block. You can find some inspiration for other simple side dishes here, but stick with me for this one!
Ingredient Notes and Maple Fudge Variations
I cannot stress this enough: the candy thermometer is your best friend here. That 234°F reading isn’t just a suggestion; it dictates whether you end up with smooth candy or a grainy mess. Make sure your thermometer is calibrated correctly! Also, don’t be afraid to try a little variation once you’ve mastered this base recipe. For instance, I noted that you can stir in a cup of white chocolate chips right after you take the pan off the heat. It adds a lovely sweetness and changes the texture just slightly, making it an excellent, decadent twist on the core **maple fudge** recipe. For another pure take, check out this recipe from Eviltwin Kitchen: Pure Maple Fudge.
Serving Suggestions for Your Decadent Maple Treat
Once you’ve sliced up this gorgeous **maple fudge**, you might wonder what to do with ALL of it—because it’s so good, right? Seriously, this decadent maple treat is perfect for so many occasions. Naturally, it’s a slam dunk for any holiday spread. Think cellophane bags tied with twine; it makes the absolute best homemade gifts! But don’t wait for Christmas. This rich candy shines as a cozy dessert after a chilly evening walk, or even as part of your casual **fall dessert recipes** spread over Thanksgiving weekend. If you enjoy rich holiday baking, you should definitely hop over and try my recipe for Christmas Gooey Butter Cookies! For gifting ideas using walnuts, check out the gorgeous recipe on My Golden Recipes: Maple Walnut Fudge Recipe.
Storage and Keeping Your Maple Fudge Fresh
Okay, you’ve made the perfect batch of **maple fudge**, congratulations! Now we need to keep it at peak creaminess—we don’t want it to dry out or get sticky, right? For the absolute best experience, I find storing it at room temperature works wonders. Just keep it in an airtight container. You mentioned chilling it to set faster earlier, and you can store it in the fridge too, but here’s my trick: if your **homemade maple fudge** has been chilling, let it sit out and come close to room temperature before you slice it. Chilled fudge cuts into cleaner squares that way, but the flavor and texture really pop when it’s slightly warmer.
Frequently Asked Questions About Maple Fudge Recipe
You know I love hearing from you all about how you tackled this recipe! Candy making can bring up a lot of specific questions, especially when you are trying to achieve that perfect, **creamy fudge recipe** texture. Don’t worry if you’ve got a few lingering doubts about temperatures or substitutions. I’ve gathered the most common ones right here to help you make the absolute **best maple fudge** possible. If I haven’t covered your specific worry, feel free to drop by the contact page here, and we can chat about your **homemade maple fudge**!
Can I make this maple fudge recipe without a candy thermometer?
Look, I wish I could tell you, “Sure, go for it!” but for this specific **smooth candy recipe**, the thermometer is your insurance policy against grainy fudge. Relying only on timing is risky when you’re aiming for that velvety texture. If you absolutely cannot use one, you have to be *hyper-vigilant* at the soft-ball stage (boiling without stirring for about 10-15 minutes). If you drop a tiny bit in ice water and it forms a soft, pliable ball that flattens when you press it, you’ve hit that sweet spot. But honestly, for guaranteed success in **winter candy making**, please use a thermometer!
Is this considered a no bake maple dessert?
That’s a fantastic point considering how many truly **no bake maple dessert** options are out there now! This recipe is a bit of a hybrid. We have to cook the sugar mixture on the stove to reach that specific soft-ball temperature—so the *cooking* is definitely stovetop. However, the entire rest of the process, from cooling to setting in the pan, requires absolutely no further heat. So, while the initial stage is hot, the crucial setting time is completely **no bake**!
For some great tips on quick, no-oven treats, you can check out this article on maple fudge magic: Maple Fudge Magic.
Estimated Nutritional Data for Maple Fudge
Here is the nutritional breakdown for our classic **maple fudge**. Please remember, since we’re dealing with sugar and real maple syrup, these numbers represent an estimate based on standard measurements and using the full recipe yield. This is a truly decadent maple treat! We made about 36 squares from this recipe, so keep that in mind when counting calories for your favorite easy appetizers and snacks.
- Calories: 180
- Sugar: 30g
- Fat: 6g
- Carbohydrates: 32g
- Protein: 1g
Share Your Homemade Maple Fudge Creations
Well, that’s my tried-and-true method for creating the very **best maple fudge**—silky, rich, and totally addictive! Now it’s your turn to step into the kitchen and take command. Please try out this **maple fudge recipe** and come back to let me know how you liked it. Did you add the walnuts? Did you manage to get that perfect matte finish on your **homemade maple fudge**? I always love hearing your successes and seeing pictures of your **quick homemade sweets**! If you need to reach out directly, you can use the contact form here, or explore more ideas over at Chop Notch: Maple Fudge. Happy baking, everyone!
Warmly,
Emily Harrison
Silky Smooth Maple Fudge Recipe
Create a creamy, melt-in-your-mouth maple fudge using real maple syrup. This easy, no-bake recipe delivers rich flavor perfect for holiday treats or homemade gifts.
- Prep Time: 15 min
- Cook Time: 15 min
- Total Time: 30 min
- Yield: About 36 pieces 1x
- Category: Dessert
- Method: Stovetop Cooking
- Cuisine: American
- Diet: Vegetarian
Ingredients
- 2 cups granulated sugar
- 2 cups granulated sugar
- 1 cup heavy cream
- 1 cup real maple syrup
- 1 tablespoon butter
- 1 teaspoon vanilla extract
- 1 cup chopped walnuts (optional)
Instructions
- Prepare an 8×8 inch pan by lining it with parchment paper, leaving an overhang on the sides for easy removal. Lightly grease the paper.
- Combine the sugar, heavy cream, and maple syrup in a heavy-bottomed saucepan.
- Stir the mixture over medium heat until the sugar dissolves completely. Stop stirring once it boils.
- Cook the mixture without stirring until it reaches 234 degrees Fahrenheit on a candy thermometer (soft-ball stage). This usually takes about 10 to 15 minutes.
- Remove the pan from the heat immediately. Stir in the butter until it melts completely.
- Let the mixture cool undisturbed until it reaches 110 degrees Fahrenheit. Do not rush this cooling step.
- Once cooled, add the vanilla extract and, if using, the chopped walnuts.
- Begin beating the mixture vigorously by hand or with an electric mixer on medium speed. Continue beating until the fudge loses its glossy shine and becomes thick and slightly dull, resembling thick peanut butter. This process takes about 5 to 10 minutes.
- Quickly pour the fudge into the prepared pan. Do not scrape the sides of the bowl.
- Let the fudge set completely at room temperature for several hours, or chill briefly to speed up setting.
- Once firm, lift the fudge out using the parchment overhang and cut it into squares.
Notes
- For the best texture, use a reliable candy thermometer. Temperature is key to smooth fudge.
- If you prefer a faster setting time, you can chill the fudge in the refrigerator, but allow it to come close to room temperature before cutting for cleaner slices.
- This recipe makes a traditional, rich maple fudge. For a white chocolate variation, substitute 1 cup of white chocolate chips for some of the sugar/cream mixture, adding them after removing the pan from the heat.
Nutrition
- Serving Size: 1 square
- Calories: 180
- Sugar: 30
- Sodium: 15
- Fat: 6
- Saturated Fat: 4
- Unsaturated Fat: 2
- Trans Fat: 0
- Carbohydrates: 32
- Fiber: 0
- Protein: 1
- Cholesterol: 15