
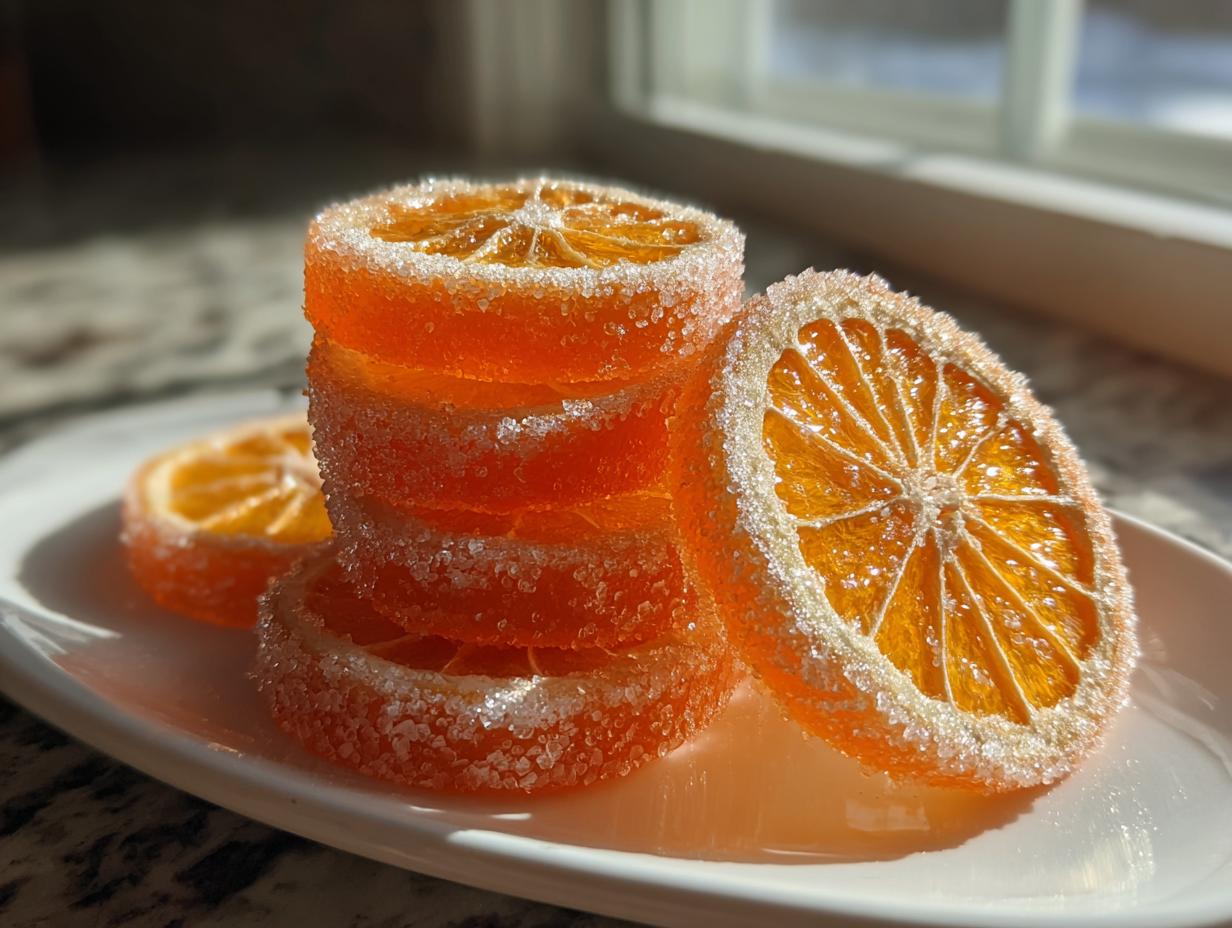
There’s just something magical about transforming a simple piece of fruit into a jewel-toned, glossy homemade candy. If you’ve ever been intimidated by making your own preserves or treats, I promise you, these treats are different. We’re talking about perfect candied orange slices that have that ideal balance: wonderfully chewy and bursting with bright, tangy flavor. At Cookery Command, my focus, tracing back to the kinds of recipes my grandmother taught me, is on foolproof technique. That’s why we rely on a straightforward simmering method that guarantees that professional, translucent look without any fuss. You get reliable results every single time, making them perfect for snacking or dressing up your baked goods. Take a look at these easy appetizers and snacks while you gather your ingredients!
- Why This Recipe for Candied Orange Slices Delivers Glossy, Chewy Results
- Gathering Supplies for Your Candied Orange Slices Recipe
- Step-by-Step Guide: How to Make Candied Oranges
- Drying Your Candied Orange Slices for the Perfect Chew
- Tips for Success When Making Candied Orange Slices
- Variations: Making Chocolate Dipped Candied Oranges
- Serving Suggestions for Your Bright Orange Snacks
- Storage and Keeping Your Candied Orange Slices Fresh
- Frequently Asked Questions About Candied Orange Slices
Why This Recipe for Candied Orange Slices Delivers Glossy, Chewy Results
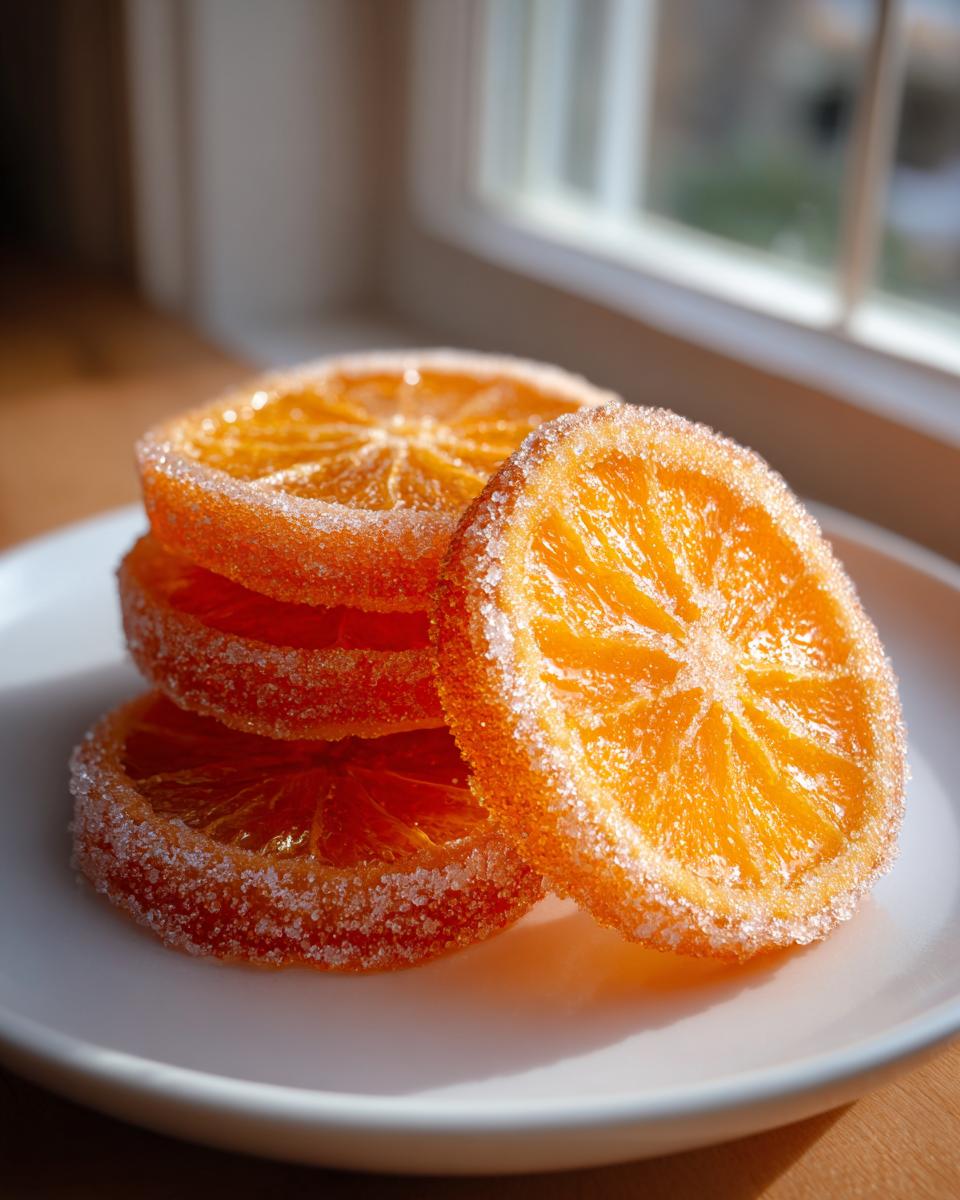
When I first started experimenting with citrus candy, I kept getting either tough, bitter peels or slices that turned out soggy. My goal here is the perfect interplay of texture and taste, and that comes down to the process. This recipe relies on a two-step simmering technique. The initial boil is crucial because it strips away some of that harsh, white pithy flavor. Then, the long, slow simmer in the sugar solution infuses the fruit completely, giving you that beautiful, translucent candied fruit everyone loves.
It’s the patience during that second simmer that locks in the sweet, tangy flavor and ensures the final product is truly chewy, not brittle or dry. That’s the secret to making these treats feel gourmet!
Essential Ingredients for Perfect Candied Orange Slices
Precision matters when you are working with sugar and fruit ratios, so please stick to these measurements for the first rounds! You will need 3 large navel oranges, 4 cups of water (divided for two uses), 4 cups of granulated sugar (which must be divided for the simmering stages), and 1 final cup of water needed for the syrup.
Gathering Supplies for Your Candied Orange Slices Recipe
Before we get that beautiful citrus scent filling the kitchen, let’s make sure you have the right tools ready to go. Cooking becomes so much smoother when everything is within arm’s reach!
You’ll want a nice, large saucepan—big enough so those orange slices can spread out a bit in the syrup without getting too crowded. After the simmer, grab yourself a sturdy wire rack set over a baking sheet. That setup is vital for letting the slices drain properly and for drying them evenly. Trust me, having that equipment ready makes the process feel relaxed instead of frantic!
Step-by-Step Guide: How to Make Candied Oranges
Alright, let’s roll up our sleeves and get into the actual execution of making those glorious candied orange slices! This isn’t hard, but it does require you to follow the order of operations. If you’ve got your ingredients ready, we’re going to start with a technique that guarantees we keep the best parts flavor-wise while ditching the bitterness. This turns simple oranges into a fantastic citrus dessert topper, perfect for cakes!
Preparing the Oranges and Initial Blanching
First things first: wash those beautiful oranges really well. We’re keeping the peel on, so it needs to be clean! Next, you need to slice them crosswise. Aim for about 1/8-inch thickness. If they are too thick, they will take forever to cook; too thin, and they might fall apart. Once sliced, chop off those awkward ends. Now, put all those slices into your big saucepan and cover them completely with 4 cups of water. Bring that right up to a boil, then immediately turn it down to simmer for about 15 minutes. Seriously, drain all that water out once they’ve cooked down. This first boil, or blanching, is what removes the sharp, bitter notes from the pith. Don’t skip it!
Simmering for Translucency in the Simple Syrup
Now for the transformation! Return the boiled slices to the clean saucepan. Add the remaining 4 cups of sugar, along with 2 cups of fresh water—this is where we build our concentrated simple syrup fruit recipe. Stir it gently just until that sugar dissolves completely once you bring it back up to a gentle boil over medium heat. Once dissolved, drop that heat way down to low. Let them simmer, uncovered, for at least 45 minutes, but often closer to an hour. You need to stir occasionally, just enough to make sure nothing sticks to the bottom, but honestly, the less you stir, the better they hold their shape. You’re looking for them to become soft, tender, and beautifully translucent. That means the sugar has thoroughly penetrated the peel!
Drying Your Candied Orange Slices for the Perfect Chew
We’ve done the hard part—the simmering! But honestly, the drying stage is just as important if we want those truly spectacular candied orange slices that are chewy instead of sticky. Getting the moisture level right is the key to achieving that fantastic texture and making sure they don’t clump together in the jar. This is the secret to mastering how to dry candied fruit successfully, whether you prefer a natural method or a quicker oven fix.
Once they come out of that gorgeous, thick syrup, remove them carefully using tongs. Lay them out, sugar-side down, on a wire rack set over a baking sheet. Don’t put them touching; they need their own space to breathe! If you can wait, letting them air dry at room temperature for a good 12 to 24 hours is my preferred method for the absolute chewiest result. Just trust the process!
If you’re in a rush—say, you need these beauties for a party tomorrow—you can cheat a little bit. Pop that baking sheet into an oven set as low as it will go, usually around 175°F (or 80°C). Keep them in there for about one to two hours, turning them gently halfway through. You’ll know they’re done when they feel tacky to the touch but aren’t actively wet anymore. That slight tackiness is what allows them to hold onto that final sugar coating perfectly.
The Final Sugar Coating for Homemade Orange Candy
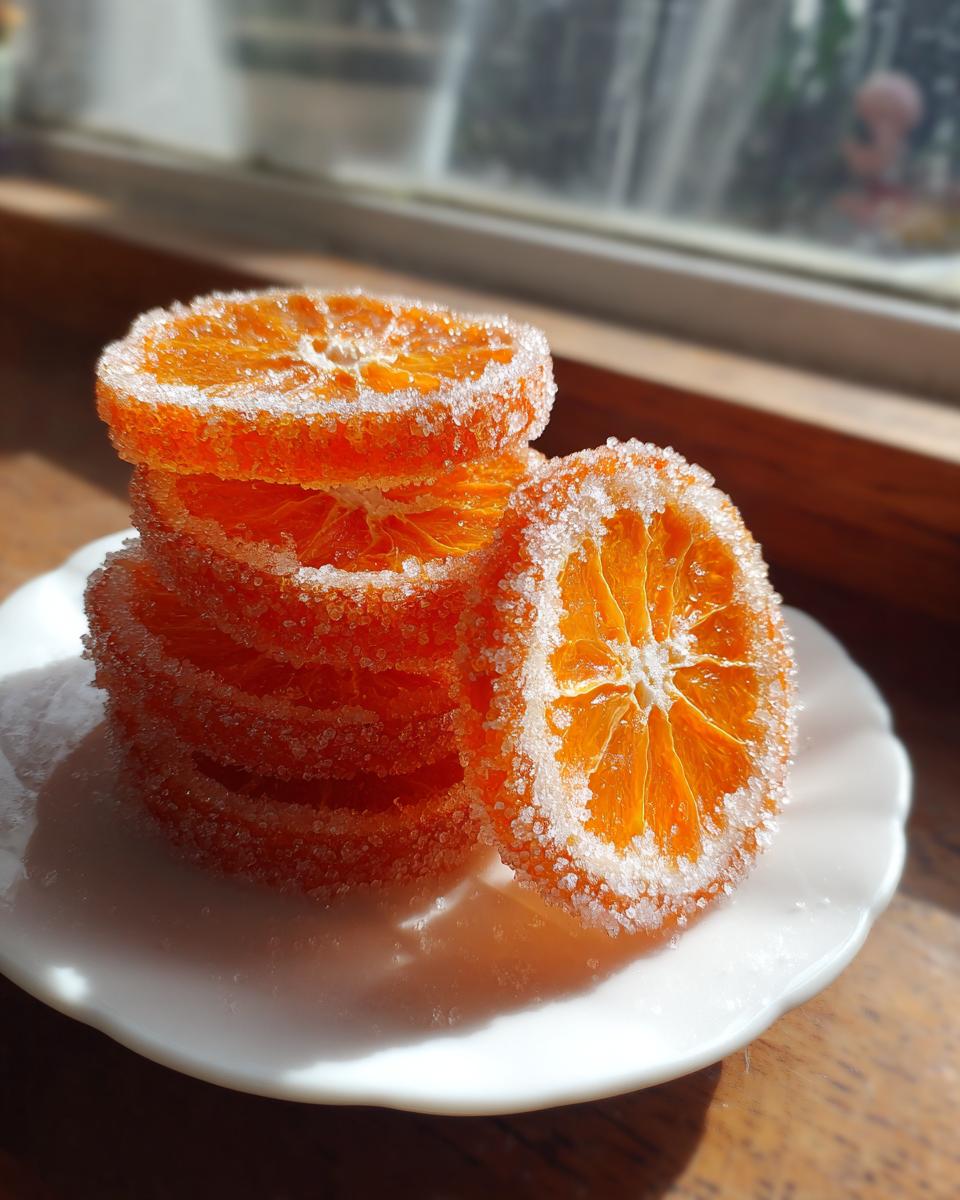
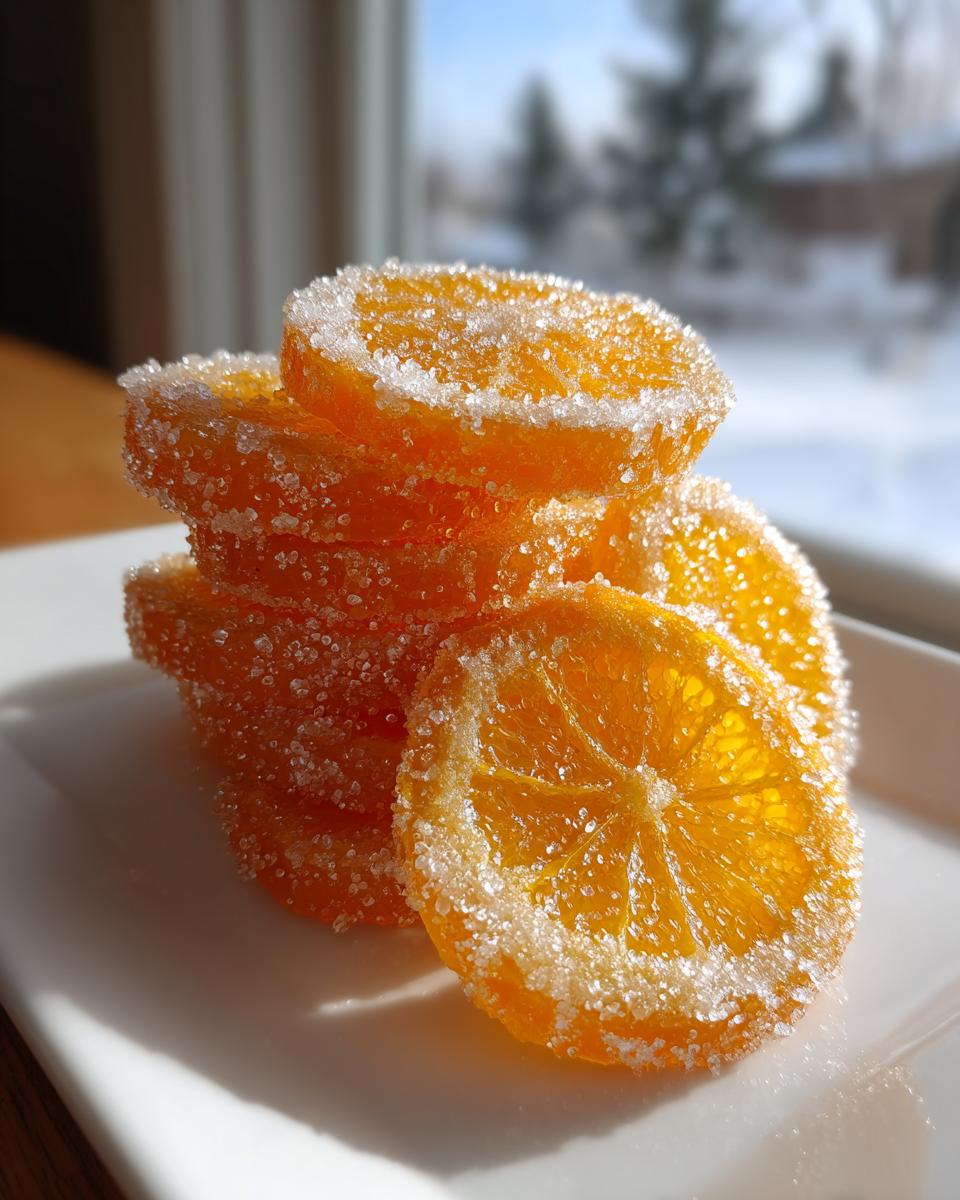
Right after they’ve dried enough to handle without making a huge mess, it’s time to make them look like true homemade orange candy! Pour about one cup of extra granulated sugar into a shallow dish—a pie plate works great for this. Take each semi-dry orange slice and give it a gentle roll around in that sugar. You don’t want a thick crust, just a light, even dusting that catches the light. This final coating is what gives them that beautiful, finished sparkle and helps keep them separate after they cool completely. Seriously, the way they shine after this step makes all that simmering worthwhile!
Once they are sugared up, place them back on the clean wire rack for a few final hours to let that sugar set up completely before you even think about storing them. Otherwise, you’ll just end up with sticky orange sludge, and nobody wants that!
Tips for Success When Making Candied Orange Slices
I picked up a few tricks over the years that really elevate these simple pieces of fruit into what I consider a tangy homemade candy centerpiece. The main thing to remember is moisture control during drying. If you want that classic, slightly tough but incredibly chewy bite, you need to dry them longer at room temperature. If you take them out too soon, they will clump together in storage and feel more like sweet orange preserves than candy.
And please, please don’t throw away that beautiful, citrus-infused syrup left over in the pan! That is liquid gold. You can use it as a fantastic simple syrup for cocktails—a gin fizz gets an amazing bright twist with it. Or, you can use it to moisten a plain butter cake. You can find some great ways to use leftover drips over at my guide on easy honey butter skillet corn side, though you’ll be using it for sweet things here!
Variations: Making Chocolate Dipped Candied Oranges
Okay, once you have your batch of perfect, glossy candied orange slices cooled and completely dried—and I mean completely dry, or the chocolate will slide right off—it’s time to take these babies up a notch. This variation is stunning, especially around the holidays, and it’s probably my favorite way to make them. We are talking about decadent chocolate dipped candied oranges!
This step should only happen once the slices are totally cool. If they are even slightly warm or damp, the chocolate won’t set right, and you’ll end up with a melted, messy disaster. Don’t rush this part; patience is what makes this elegant!
To get this done, you’ll need maybe six ounces of either dark or milk chocolate, whatever makes your heart sing. You need to melt it down slowly. I prefer using a double boiler, but you can use low power in the microwave, stirring every twenty seconds, being super careful not to scorch it. Once it’s smooth and glossy, grab a slice and just dip about half of it right into the melted chocolate. Don’t go too deep, or you lose that beautiful citrus showing through!
My pro tip? As soon as you pull that dipped slice out, set it onto a piece of parchment paper, and immediately sprinkle just a whisper of flaky sea salt right over the wet chocolate. That little pop of salt against the sweet orange and dark chocolate is just *chef’s kiss*. If you’re looking for other amazing flavor pairings, check out my guide for an easy no-bake eclair cake recipe; sometimes a salty-sweet contrast is exactly what a dessert needs.
Let these chocolate-coated beauties sit undisturbed at room temperature until the chocolate is firm and set. Nobody wants sticky fingers later! For even more pairing inspiration, I always look at other amazing creations, like the gorgeous ones found at chocolate dipped candied orange slices online. They really prove how gourmet these simple fruit slices can become!
Serving Suggestions for Your Bright Orange Snacks
Now that you’ve put in the time to make these bright, flavorful treats, how should you use them? Honestly, they’re amazing just eaten right off the rack as a quick, sweet homemade snack! But that’s just the beginning.
These slices make such an easy way to achieve a gourmet orange garnish. Imagine crowning a dark chocolate cheesecake or even just a simple vanilla pound cake with a few of these vibrant rounds. They also look incredible arranged on a charcuterie board next to creamy cheeses—I pair them especially well with goat cheese, which you can see more about in my guide to goat cheese and honey bites.
And don’t forget the cocktails! They are the ultimate citrus dessert toppers and garnish for festive drinks. A slice tucked into the rim of a Negroni or a sparkling cider instantly elevates the whole experience.
Storage and Keeping Your Candied Orange Slices Fresh
This is the final hurdle, and it’s an easy one, but crucial if you want to keep that chewy texture we worked so hard for. Once your slices are bone-dry and the optional sugar coating is completely set—and I mean completely, give them a few extra hours just to be safe—it’s time to tuck them away.
You absolutely must use an airtight container for storage. If air creeps in, two things happen: they either dry out too much and become brittle after a week, or, if there’s any residual moisture, they start getting sticky really fast. I prefer glass jars because I can see how they are doing!
Keep them in a cool, dry pantry or cupboard. Avoid putting them anywhere warm or humid, like near the stove or on a sunny windowsill, because heat encourages stickiness. If you followed the drying process correctly, your homemade orange candy should stay absolutely perfect for at least two to three weeks. Honestly, they taste best in the first week, but knowing you have a lovely stash of beautiful, bright orange snacks ready to go whenever you need them is such a treat!
Frequently Asked Questions About Candied Orange Slices
I always get a flood of questions when this candied fruit recipe goes out, usually from folks excited to try this tangy homemade candy but needing just a little reassurance. Here are the biggest questions I get in my inbox! If you have any others after you finish baking, feel free to reach out through the contact page!
Can I make candied orange slices without drying them completely?
You certainly can try, but I really, really advise against it if you are aiming for that perfect, chewy texture. If you skip the drying phase, or rush it, you end up with slices that are essentially sweet orange preserves floating in a thin, sticky film. They’ll weep moisture in storage and everything they touch will get sticky—your parchment paper, the jar, your fingers! A proper dry results in a slice that’s chewy on the outside but still tender inside. That chew is the magic here!
What is the best way to use leftover sugar syrup?
Oh my goodness, that leftover syrup is pure magic! Please don’t waste it. Since it’s been infused with fresh orange oils and flavor, it tastes absolutely incredible. The best thing I use it for is making a killer simple syrup for cocktails—try it in a gin fizz or a whiskey sour. It jazzes everything up! You can also drizzle it lightly over plain yogurt or use it to soak a plain cake or loaf pan when you bake, which keeps the cake super moist and flavorful.
Why are my orange slices popping out bitter after simmering?
If you taste bitterness, nine times out of ten, it means you skipped or skimped on that initial blanching step—the first 15-minute boil in plain water! That first boil is essential for leaching out the harsh, bitter compounds located mostly in the white pith. If you skip it, the sugar syrup locks that bitterness right in, and no amount of simmering later on can fix it. Make sure those slices are in rolling, plain water for the full 15 minutes before you introduce any sugar.
How long do candied orange slices last once they are finished?
If you have stored them correctly—and I mean airtight in a cool, dry place—they hold up beautifully. Because they are heavily preserved in sugar, they have a great shelf life. You should easily expect them to last for at least two to three weeks without losing that perfect chewy texture. If you followed the drying process correctly, your candied orange slices just right, they stay fantastic for much longer!
Can I use different citrus fruits, like lemons or grapefruit, for this recipe?
Yes! This is a fantastic concept, but heads up: different fruits require different timing. Lemons have much thicker pith sometimes, so they might need an extra 10 minutes in that initial blanching water. Grapefruit is generally less acidic, so you might find you need slightly less sugar in the final syrup mixture, or you might want to extend the drying time just a bit since they release more water. Experiment, but always treat the thicker-skinned fruits with a little extra boiling at the start!
PrintClassic Candied Orange Slices Recipe

Make glossy, chewy candied orange slices using a simple simmering method. These sweet and tangy citrus treats are perfect for snacking, garnishing desserts, or making elegant edible gifts.
- Prep Time: 20 min
- Cook Time: 75 min
- Total Time: 95 min
- Yield: About 24 slices 1x
- Category: Dessert
- Method: Simmering
- Cuisine: American
- Diet: Vegetarian
Ingredients
- 3 large navel oranges
- 4 cups water, divided
- 4 cups granulated sugar, divided
- 1 cup water (for final simmer)
Instructions
- Wash the oranges well. Slice each orange crosswise into 1/8-inch thick rounds. Discard the ends.
- Place the orange slices in a large saucepan. Cover with 4 cups of water. Bring to a boil over high heat, then reduce heat and simmer for 15 minutes. Drain the water completely.
- Return the orange slices to the saucepan. Add 4 cups of granulated sugar and 2 cups of fresh water. Bring the mixture to a boil over medium heat, stirring gently until the sugar dissolves.
- Reduce the heat to low and simmer the oranges, uncovered, for 45 to 60 minutes. Stir occasionally to prevent sticking. The slices should become translucent and tender.
- Carefully remove the slices from the syrup using tongs and place them in a single layer on a wire rack set over a baking sheet. Let them drain for 15 minutes. Reserve the remaining syrup.
- Prepare a drying environment. You can either let them air dry at room temperature for 12 to 24 hours until tacky but not wet, or place the baking sheet in a very low oven (175°F or 80°C) for 1 to 2 hours, turning them halfway through, until they are dry to the touch.
- For a final coating, place 1 cup of granulated sugar in a shallow dish. Roll each dried slice in the sugar until lightly coated.
- Place the sugar-coated slices back on the wire rack to dry completely for several hours before storing.
Notes
- For chocolate dipped candied orange slices, melt 6 ounces of dark or milk chocolate. Dip half of each cooled, dried slice into the melted chocolate. Place on parchment paper and sprinkle with flaky sea salt, if desired. Let the chocolate set completely before serving or storing.
- Save the leftover sugar syrup. You can use it as a simple syrup for cocktails or to sweeten iced tea.
- If you want a chewier texture, dry them longer at room temperature. For a more translucent look, ensure they simmer until fully tender in the syrup.
Nutrition
- Serving Size: 1 slice
- Calories: 110
- Sugar: 28g
- Sodium: 2mg
- Fat: 0.2g
- Saturated Fat: 0g
- Unsaturated Fat: 0.1g
- Trans Fat: 0g
- Carbohydrates: 29g
- Fiber: 1g
- Protein: 0.5g
- Cholesterol: 0mg