
It’s a fact: the smell of truly fresh, crusty loaf rising out of your own oven beats anything you buy at the store. Seriously, that aroma is pure comfort! Back in my test kitchen days, I saw people making complicated yeast routines, but I knew there had to be a better way. My goal at Cookery Command has always been to give you bakery-quality results without the fuss. That’s why this recipe for the perfect homemade bread is my absolute favorite. We’re talking about the simplest no-knead method imaginable. You just mix a few things, walk away for a day, and come back to the most incredible artisan loaf. It proves you don’t need fancy skills to master this kind of baking essentials bread.
- Why This No Knead Dutch Oven Bread Recipe Works So Well
- Essential Baking Essentials for Your Homemade Bread Recipe
- Ingredients for This Easy Bread for Beginners
- How to Prepare Your No Knead Bread: Step-by-Step Instructions
- Tips for Success When You Bake From Scratch Bread
- Variations to Customize Your Artisan Loaf Recipe
- Storage and Reheating Instructions for Leftover Bread
- Frequently Asked Questions About Making This Bread
- Estimated Nutritional Information for This Artisan Bread
- Share Your Homemade Bread Creations
Why This No Knead Dutch Oven Bread Recipe Works So Well
I get it—baking artisan bread seems intimidating, right? But this simple technique flips that idea upside down. The magic here rests on two pillars that mimic a professional bakery setup, but right in your home oven. First, we let time do all the heavy lifting through that long, slow fermentation. Those 18 hours aren’t idle time; they are developing deep, beautiful flavors you just can’t rush. Trust me, I’ve seen this firsthand in the test kitchen! I even saw how much praise the folks over at The Flourishing Abode gave their version of this no-knead recipe.
The second hero is the Dutch oven. When you preheat that heavy pot until it’s screaming hot, it transfers intense, even heat to the dough immediately. That’s one part of the equation. The real genius, though, is the lid. When the lid is on, it traps all the moisture evaporating off the dough, creating a steamy microclimate. This steam keeps the crust soft initially, allowing the loaf to fully expand before it sets.
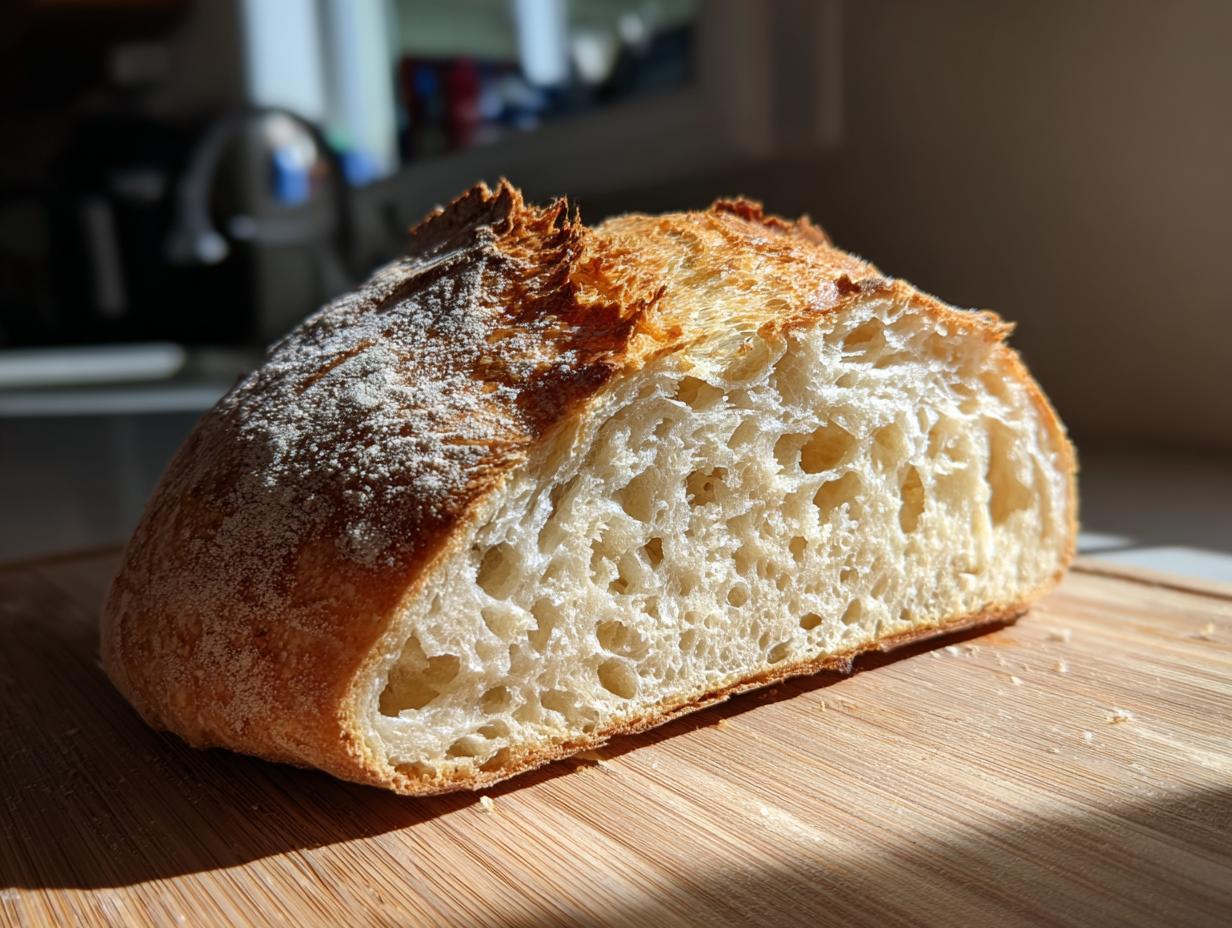
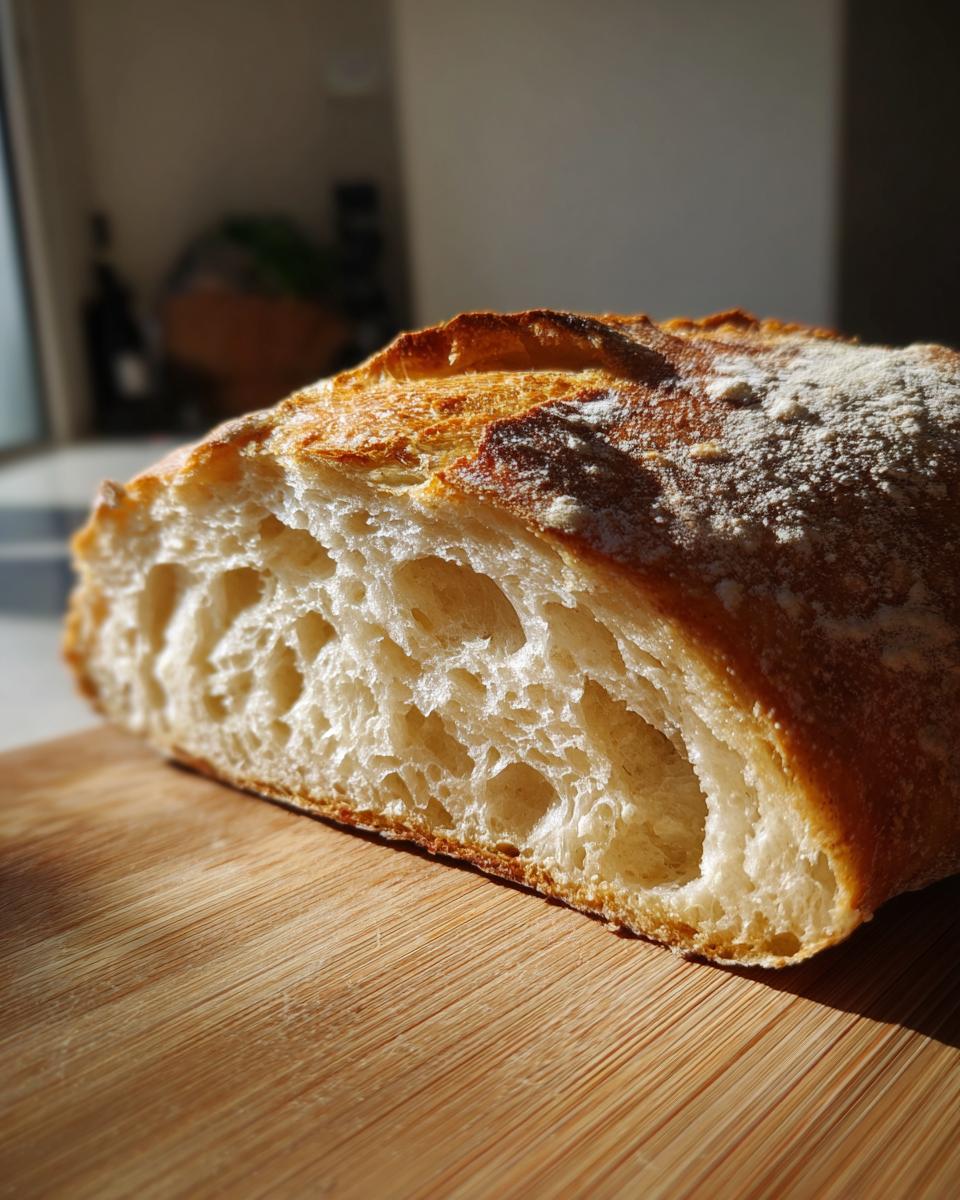
Achieving the Perfect Crusty Artisan Bread Texture
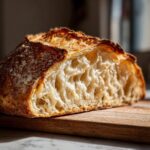
That trapped steam is the secret weapon for achieving that famous crusty artisan bread texture. If you bake bread without steam, the outside crusts over too fast, stifling the oven spring. By baking covered for the first bit, we let the loaf get HUGE and airy inside. When you pull that lid off, the dry, blast-furnace heat hits the surface, drying it out instantly into that satisfyingly crackly, golden shell. It truly is the best way to get bakery-quality bread at home without any complicated equipment.
Essential Baking Essentials for Your Homemade Bread Recipe
You might look at this recipe and think, “Do I really need special gear?” The answer is, you need a few key players to make this no knead bread truly shine. Since we aren’t engaging in any kneading action, the equipment handles the heavy lifting, especially when it comes to heat and containment. Don’t worry; most of this stuff you probably already have sitting in a cabinet somewhere!
Key Equipment for Dutch Oven Bread Recipe Success
First on the list is the star: your Dutch oven. I recommend one that is about 5 to 6 quarts. That size gives the dough enough room to expand beautifully without touching the sides too much once it starts baking. You also absolutely must have good parchment paper. This isn’t optional; it becomes your giant, non-stick sling to move that sticky dough into the screaming hot pot. Finally, grab the largest mixing bowl you own. Since the dough is extremely wet and we want to handle it as little as possible during that first mix, you need plenty of space to just stir things together.
Ingredients for This Easy Bread for Beginners
Okay, let’s talk about what goes into this bread. I broke this down because the exact measurements and temperature are surprisingly important for the no-knead magic to happen correctly. You’ll be amazed how few things you need! Don’t let the long waiting time scare you off; the actual hands-on time for gathering these ingredients is maybe five minutes, tops. We are keeping this lean and focused, just like a true rustic loaf should be.
- 3 cups bread flour (Don’t skimp here!)
- 1 1/2 teaspoons salt
- 1/4 teaspoon instant yeast (Just a tiny amount makes a huge difference over time)
- 1 1/2 cups cool water
- Optional: 1 teaspoon Italian herbs for flavor
Ingredient Notes and Substitution Guidance
I always insist on using bread flour here. It has a higher protein content than all-purpose flour, and that structure is what helps your artisan loaf get those beautiful, dramatic air pockets when it bakes uncovered. If you use AP, it’ll still be good, but you lose some of that classic chewy resistance.
Also, please pay attention to the water! It must be cool, not warm. Warm water will wake up that tiny bit of yeast too fast, ruining the intended 18-hour cool fermentation process.
If you absolutely can’t find instant yeast, you can use active dry, but you need to sprinkle it over the water first and let it sit for five minutes to proof before mixing everything else in. That’s the only real swap I allow in this base recipe!
How to Prepare Your No Knead Bread: Step-by-Step Instructions
Alright, this is where the waiting game begins, but trust me, once you see the sticky, shaggy mess that turns into perfection, you won’t mind setting your calendar reminder! We’re keeping the actual work short. First, whisk your dry ingredients—flour, salt, and that tiny bit of instant yeast—in a big bowl. Then pour in the cool water and just mix it until you can’t see any dry flour spots anymore. It should look sloppy! If you’re adding herbs, this is when you stir them in quick. Now, cover that bowl TIGHTLY. I mean press that plastic wrap right down to the surface.
The goal is to let this mixture rest at room temperature for a long haul, 12 to 18 hours. Yes, really! This long rest is just as important as the baking for developing that complex flavor in your basic yeast bread. I always think about all the fantastic, easy homemade bread results people get just by letting time do the work. You can check out what the folks at RecipeTin Eats say about their similar approach to no-knead baking! Once you’re ready to bake the next day, you’ll need to get the oven ready for the show. About 30 minutes before you think the dough is done resting, start heating up that Dutch oven in the oven set to 450°F. You need it scorching hot!
The Long Fermentation: Developing Flavor in Your Basic Yeast Bread
That 12 to 18 hour rest might feel like forever, but this is the soul of the no knead bread method. Think of it as slow-fermentation magic. That tiny amount of yeast, combined with the room temperature rest, works slowly to digest the flour. This process builds incredible flavor compounds found in true artisan loaves, which is why this is the ultimate basic yeast bread recipe. Just make sure you keep that bowl covered properly; you don’t want a dried-out crust forming on top of your wet dough. Keep it sealed up tight!
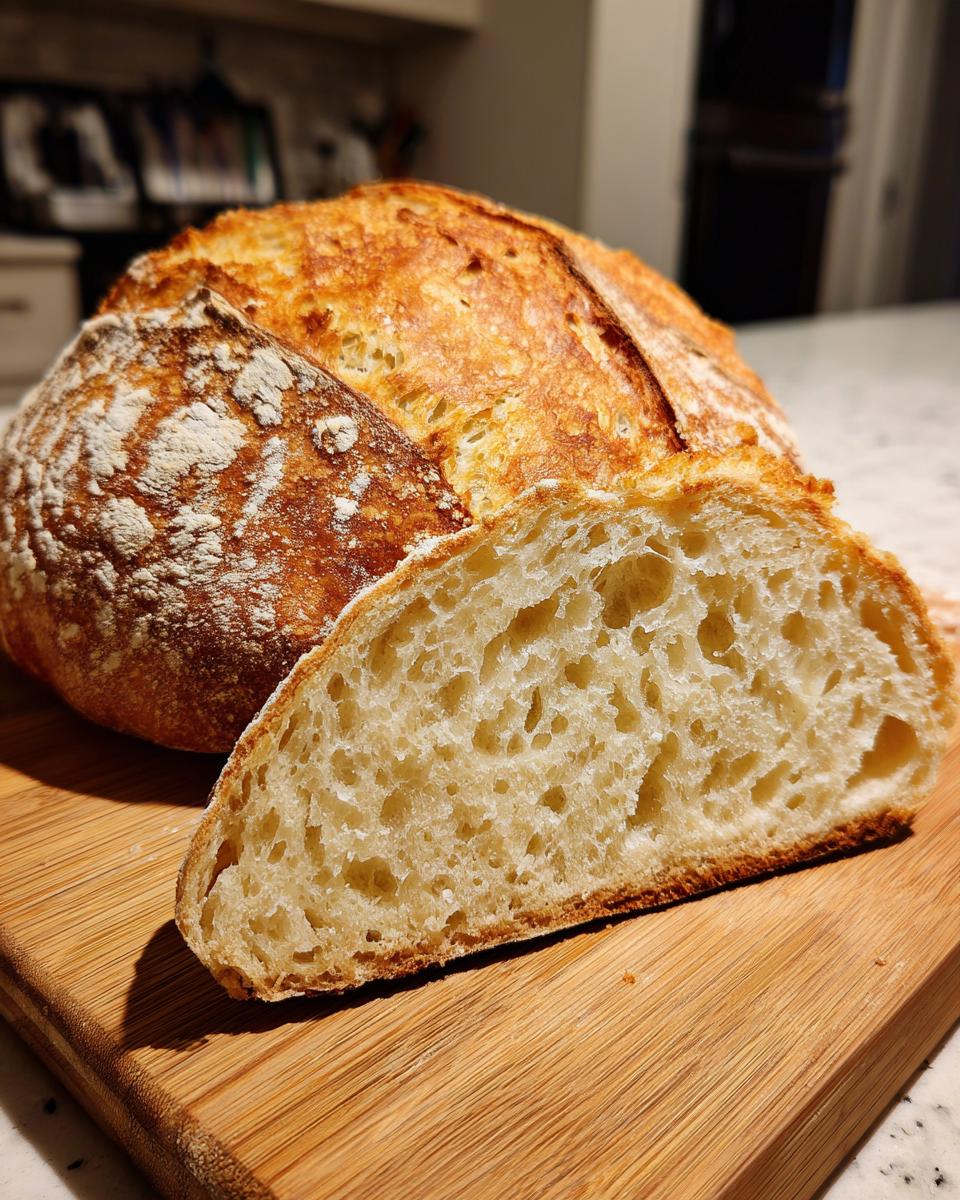
Baking the Bread: Mastering the Dutch Oven Technique
Once the oven is heated and you’ve gently folded your rested dough into a rough ball (don’t knead it, I beg you!), you transfer it onto a piece of parchment paper. That paper is your saving grace! Now, here comes the exciting, slightly scary part: safely getting the dough into that blazing hot Dutch oven. Use heavy oven mitts, pull that pot out carefully, and use the parchment edges like a sling to lower your dough right into the center. Cover it immediately and bake for 30 minutes. This traps the steam for maximal oven spring, which is key to getting that rustic bakery look you see over at Bitezly. After 30 minutes, take the lid off to let that incredible crust form on your beautiful loaf of bread. Be very careful when removing the lid, as the trapped steam is super hot!
Tips for Success When You Bake From Scratch Bread
Since this method is so hands-off, it’s easy to forget a tiny step that can change the texture of your final bread. I’ve learned a few things over the years to guarantee that beautiful, airy crumb and crust every time you bake from scratch bread. Remember, even though it’s no-knead, it isn’t no-attention!
First, I know the recipe calls for cool water for a reason—the long, slow fermentation is everything. But if your kitchen is naturally cold (like mine is in the winter), you might actually get a better rise by using slightly less cool water or letting the dough sit for the full 18 hours. If you rush the fermentation, your bread will taste flat.
Second, when handling the dough during the second rest and loading it into the Dutch oven, try to handle it as little as possible. Think gentle folds, not aggressive stretching. We want to keep those gas bubbles created during fermentation intact! You can find some amazing inspiration on handling and shaping loaves over at The Strawberry Onion.
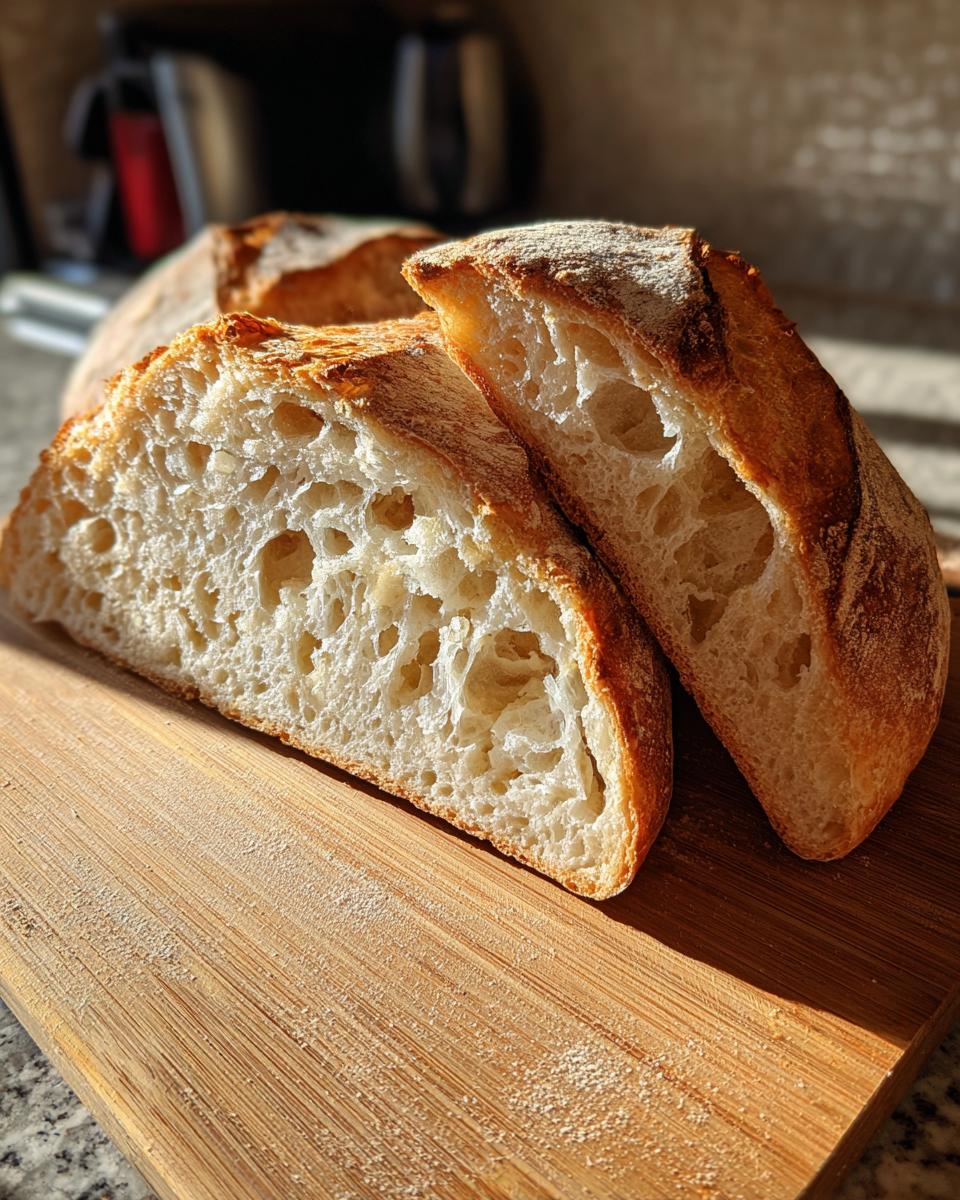
Finally, and this is non-negotiable for me: You must let this bread cool completely on a wire rack before slicing. If you cut into it while it’s still hot, you are trapping steam inside, and the interior structure turns gummy, even if it looks perfect. Patience earns you the best crust!
Variations to Customize Your Artisan Loaf Recipe
While this basic recipe produces an absolutely stunning crusty artisan bread all on its own, sometimes you need to jazz things up a bit for dinner! That long, slow fermentation process makes this dough a perfect canvas for flavor additions. Since we aren’t kneading, you have to be smart about *when* you introduce bulky ingredients so you don’t deflate your beautiful structure.
The best time to introduce mix-ins is right after that first 12-hour rest, during the gentle folding stage. You scrape the dough onto your floured counter, and instead of just folding it into a rough ball, you perform a few delicate turns to incorporate your flavor boosters.
For a savory, flavorful loaf, think about adding things like:
- A cup of shredded sharp cheddar or Gruyère cheese right before the final fold.
- A tablespoon or two of roasted garlic paste mixed directly into the sticky dough.
- A mix of dried herbs—rosemary, thyme, and oregano really shine here. You can see fantastic savory twists on artisan loaves over at Recipesize.
If you’re feeling ambitious and want deep flavor layering, try baking savory cheese and herb variations. Folks over at Aperture on Court have an amazing Italian Herb and Cheese Loaf recipe that inspires me to try adding sun-dried tomatoes or olives to my basic dough before the second rest.
Just remember, whatever you add, keep the total volume of additions under about one cup for this recipe. Too much heavy filling can weigh down the delicate structure we worked so hard to create during that long rest period. Keep the additions gentle, and you’ll have a gourmet loaf ready for dipping!
Storage and Reheating Instructions for Leftover Bread
Even the best bread goes stale, but that doesn’t mean you have to toss it! Because this loaf has that wonderful, very crisp crust, we have to treat it gently when storing it to keep that texture intact. Don’t wrap your cooled loaf tightly in plastic wrap right away; that just traps moisture and softens that perfect crust we worked so hard for. Instead, keep it sitting cut-side down on a cutting board, or loosely wrap it in a linen or paper bag for up to two days.
When you just can’t wait for that second-day slice, the oven is your best friend for reheating. Slice off what you need, spritz it lightly with water—just a little mist—and pop the slice or loaf back into a 350°F oven for about five minutes. That dry heat instantly re-crisps that beautiful exterior. It’s like baking it all over again for a moment!
Frequently Asked Questions About Making This Bread
Even though this is the easiest bread for beginners, I always get a few similar questions popping up. Since you’ve put in the commitment for that long rest, you deserve a perfect result! Let’s clear up any last-minute worries so your final loaf of bread is exactly what you hoped for.
Can I use active dry yeast instead of instant yeast in this bread?
Yes, you absolutely can! Instant yeast is my go-to because it can be mixed right into the dry ingredients, but active dry yeast is totally fine. Since active dry yeast needs a little wake-up call, just mix your 1/4 teaspoon of active dry yeast into the 1 1/2 cups of *cool* water first. Let it sit there for about five minutes until you see a little foamy layer appear. That tells you the yeast is active and ready to work its magic over the next 18 hours. It’s a small extra step for great results!
What if I don’t have a Dutch oven to bake this bread?
Oh, no Dutch oven? Don’t panic! You can still achieve a fantastic crusty artisan bread loaf. You’ll need a heavy baking stone or a sturdy, oven-safe baking sheet. The real key when you skip the Dutch oven is creating the steam manually. Put an empty metal roasting pan on the bottom rack while you preheat the oven (450°F). When you put your un-covered dough onto the hot stone, carefully pour about a cup of hot water into that empty roasting pan on the bottom rack. Quickly close the door. This steam infusion is essential for that initial oven spring. You might need to bake it covered with a large metal bowl inverted over the dough for the first 20 minutes instead of using a Dutch oven lid, and then remove the bowl to finish browning. That method still gets you wonderful easy homemade bread!

For more inspiration on getting that fantastic texture without specialized gear, you can always check out tips from folks like those over at Restless Chipotle on their general baking hacks.
Estimated Nutritional Information for This Artisan Bread
Listen, when you’re making comfort food baking like this, you probably aren’t counting every gram, but it’s always nice to have a ballpark idea of what you’re diving into! I’ve run the numbers based on the ingredients we use—the flour, the very small amount of yeast, and the salt. Remember that since this recipe is designed to be a rustic, simple loaf, the fat and sugar content is naturally quite low compared to something rich like a cinnamon swirl loaf or buttery rolls.
Please keep in mind that these figures are just an estimate based on standard calculations for one slice of the final loaf. If you add those optional Italian herbs, don’t fret; the impact on the numbers will be negligible!
- Serving Size: 1 slice
- Calories: 200
- Fat: 1g
- Saturated Fat: 0g
- Trans Fat: 0g
- Cholesterol: 0mg
- Sodium: 350mg
- Carbohydrates: 42g
- Fiber: 2g
- Sugar: 1g
- Protein: 7g
See? That’s a really clean profile for a loaf that tastes like it came straight from a high-end bakery! It proves that when you bake from scratch and skip the added fats and sugars found in many convenience options, you end up with something wholesome and delicious.
Share Your Homemade Bread Creations
Wow! You did it! You took the plunge and made a real, honest-to-goodness, crusty loaf of bread without all that kneading fuss. I am ridiculously proud of you for conquering this Dutch oven bread recipe! Doesn’t that crackle when you cut into it sound like the best music?
That’s the whole point of Cookery Command—taking recipes that seem intense, like making real artisan bread, and making them feel totally doable. I hope this experience inspires you to try more things from scratch. Maybe next time you’ll whip up some of my favorite easy appetizers and snacks to go alongside your fresh loaf! You can check out those ideas here: simple appetizer ideas.
If you loved this no knead bread and it completely changed the way you feel about baking, please do me a huge favor and come back here to leave a quick rating! Those star ratings really help other beginner bakers see that this is the reliable, high-quality recipe they’ve been searching for.
And please, snap a picture of that beautiful, rustic loaf! Tag me on social media! I absolutely live for seeing your gorgeous, bakery-quality successes. Seeing your creations guarantees that I’ll keep bringing you the most dependable recipes that help you take command of your kitchen!
PrintNo Knead Crusty Artisan Bread Recipe
Make a crusty artisan loaf with a soft interior using this simple no-knead method. This recipe requires minimal effort and is perfect for beginners wanting bakery-quality bread.
- Prep Time: 10 min
- Cook Time: 50 min
- Total Time: 13 hours 50 min
- Yield: 1 loaf 1x
- Category: Baking
- Method: No Knead / Dutch Oven
- Cuisine: American
- Diet: Vegetarian
Ingredients
- 3 cups bread flour
- 1 1/2 teaspoons salt
- 1/4 teaspoon instant yeast
- 1 1/2 cups cool water
- Optional: 1 teaspoon Italian herbs for flavor
Instructions
- In a large bowl, whisk together the flour, salt, and yeast.
- Pour in the cool water and mix with a wooden spoon until just combined. The dough will be shaggy and sticky; do not overmix.
- Cover the bowl tightly with plastic wrap. Let the dough rest at room temperature for 12 to 18 hours. This is the long fermentation period.
- After the long rest, lightly flour a work surface. Gently scrape the dough out of the bowl and fold it over itself a few times to form a rough ball. Do not knead.
- Place the dough ball on a piece of parchment paper. Cover it loosely with a clean kitchen towel and let it rest for 30 minutes.
- About 30 minutes into this second rest, place a Dutch oven with its lid inside your oven. Preheat the oven to 450 degrees Fahrenheit (232 degrees Celsius).
- Once the oven is fully preheated, carefully remove the hot Dutch oven using oven mitts.
- Using the parchment paper as a sling, gently lower the dough into the hot Dutch oven. If adding optional herbs, sprinkle them over the top now.
- Cover the Dutch oven with the lid and place it in the preheated oven. Bake for 30 minutes with the lid on.
- Remove the lid and continue baking for another 15 to 20 minutes, or until the crust is deep golden brown.
- Carefully remove the bread from the Dutch oven and let it cool completely on a wire rack before slicing.
Notes
- For a chewier crust, use bread flour instead of all-purpose flour.
- If you want a softer, buttery roll texture, consider a separate recipe; this method focuses on a rustic, crusty artisan loaf.
- Cooling the bread completely prevents the interior from becoming gummy when you cut into it.
Nutrition
- Serving Size: 1 slice
- Calories: 200
- Sugar: 1
- Sodium: 350
- Fat: 1
- Saturated Fat: 0
- Unsaturated Fat: 1
- Trans Fat: 0
- Carbohydrates: 42
- Fiber: 2
- Protein: 7
- Cholesterol: 0