

There’s just something pure about a homemade breakfast, isn’t there? It sets the entire mood for the day. If you’ve ever dreamed of capturing those perfect, buttery craters—the signature ‘nooks and crannies’—in a store-bought english muffin, I’m here to tell you it’s easier than you think. Forget complicated oven methods! We’re focusing on a simple, stovetop technique here at Cookery Command. As Emily Harrison, I believe cooking should be joyful and accessible, translating classic favorites into reliable recipes for your modern kitchen. This English Muffin Recipe From Scratch is truly beginner-friendly, and it delivers that authentic, fluffy texture every single time. If you need a quick companion recipe while your dough rests, you absolutely must check out my recipe for Fluffy Old-Fashioned Buttermilk Pancakes. Get your griddles ready!
- Why This Homemade English Muffin Recipe Works
- Gathering Ingredients for Perfect english muffin
- Step-by-Step Instructions for english muffin
- Tips for Success Making Your english muffin
- Serving Suggestions for Your Fresh english muffin
- Make Ahead English Muffins and Storage Guide
- Frequently Asked Questions About english muffin
- Nutritional Estimates for Your english muffin
- Share Your Homemade english muffin Creations
Why This Homemade English Muffin Recipe Works
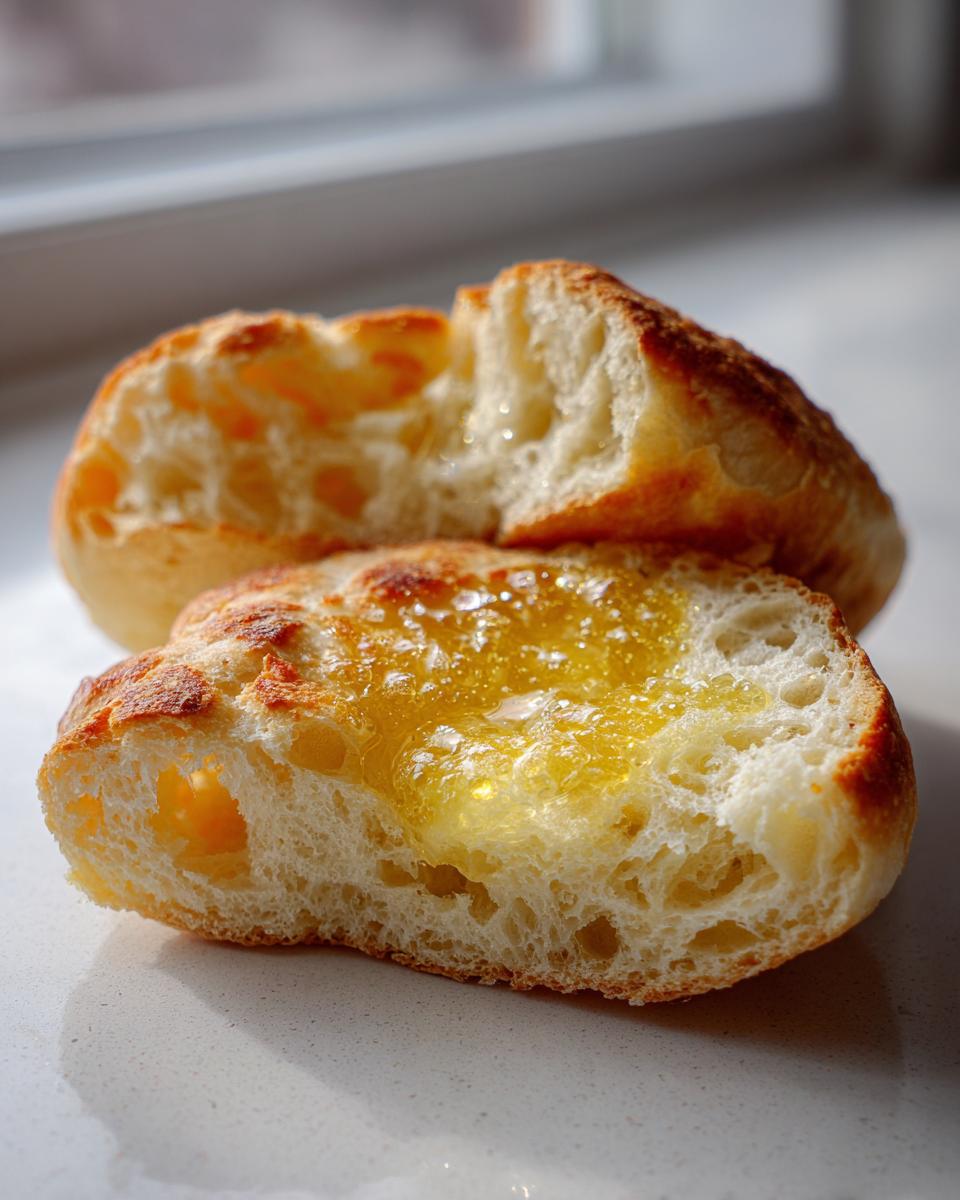
Now, I know there are a million ways to make bread at home, but if you want the real deal—those gorgeous, buttery pockets—you need to respect the process. This recipe isn’t about complicated kneading; it’s about patience and proper heat control. That’s the secret behind achieving the Best English Muffins Nooks and Crannies you’ve ever tasted.
- For the ultimate texture, you need the slow cook! The stovetop method ensures the inside cooks through gently while developing that signature texture we are after. These turn out to be the most Fluffy Stovetop Muffins.
- We treat the dough gently. Unlike a sandwich loaf, we aren’t aiming for a huge oven spring. Our resting time allows the yeast to do just enough work to give us that classic interior structure. I worked hard to make this an approachable English Muffin Recipe From Scratch that works without intimidating anyone! You can read more about my general approach to baking science over at my guide on how to make sourdough starter, but trust me, this one is much quicker!
Achieving the Signature Nooks and Crannies
This is pure science, friends, and it’s fantastic when it works! The nooks form because we cook the dough slowly over low to medium-low heat. If your griddle is too hot, the outside burns before the interior steam can create those little tunnels. Also, don’t skip that final 30-minute rest after cutting; that little breather lets the gluten relax just enough before the heat hits it, setting up the perfect structure. If you want another fantastic, reliable method, check out this method for inspiration!
The Simple Process for English Muffin Recipe From Scratch
What I love most is that this bypasses the oven entirely. That often means a crisper, chewier exterior without drying out the center. This is an Easy Homemade Bread for beginners because it requires almost no physical work—no intensive kneading here! We just mix until *just* combined, which keeps the dough tender and cooperative. It proves that sometimes, fewer steps actually yield a superior bread.
Gathering Ingredients for Perfect english muffin
Okay, gathering your essentials is the next command! When making something classic like this english muffin bread, the quality and preparation of your ingredients really count. We aren’t using a ton of stuff, which I love, but we need to measure precisely. For example, the water temperature is important for waking up the yeast gently!
Here is exactly what you need on your counter:
- 2 cups all-purpose flour (The workhorse in this equation!)
- 1 tablespoon granulated sugar
- 1 teaspoon salt
- 1 teaspoon baking soda
- 1 teaspoon active dry yeast
- 3/4 cup warm water (aim for 105-115°F—it should feel warm, not hot, on your wrist)
- 1/4 cup buttermilk or milk
- 2 tablespoons unsalted butter, melted, plus more for the griddle
- Cornmeal or semolina, for dusting
Ingredient Notes and Substitutions for your english muffin
If you’re staring into your fridge and missing one thing, don’t panic! As I always say, home cooking is about adaptation, too. The structure of these Homemade English Muffins relies heavily on that liquid component.
If you don’t have buttermilk, whole milk works just fine, though buttermilk adds a slight tang that I personally adore. It makes them taste just homemade, you know? Also, don’t skip the dusting material! Cornmeal gives you that classic slightly gritty, crisp bottom texture that signals you’re eating a *real* Classic Griddle Bread. If you’re out of cornmeal, semolina works perfectly as a substitute, but it must be generous on the sheet pan—this is what stops our sticky little rounds from seizing up to your counter during the rest period.
If you are worried about getting the sugar just right in something tricky, I always recommend checking out my guide for Easy Fudge Recipe Without a Thermometer for tips on achieving sweetness levels without bulky equipment!
Step-by-Step Instructions for english muffin
Alright, command center, let’s get this dough together! These instructions are straight from my test kitchen notes because getting the texture right on your english muffin starts right here. Remember, this isn’t a high-drama yeast bread; we’re looking for subtle action. Follow these steps exactly, and you’ll have those incredible Fluffy Stovetop Muffins ready for breakfast tomorrow! If you’re looking to master other classic quick breads alongside these muffins, my recipe for Flaky Southern Buttermilk Biscuits is a must-try.
Mixing and First Rest for the english muffin Dough
First, we whisk the dry ingredients together so everything is evenly distributed. Then, wake up your yeast in the warm water—you know it’s ready when it gets foamy! Combine all the wet ingredients. When you pour the liquids into the dry mix, grab a wooden spoon—we are mixing just until everything gets incorporated. I mean it: stop when it’s combined into a shaggy, sticky mass! If you overmix, you’ll develop too much structure upfront, and we won’t get those air pockets later. Cover the bowl and let it rest for a full hour in a warm spot. Don’t look for a huge rise; this low-yeast dough only puffs up a little bit, maybe 25% bigger. That’s normal for these Homemade English Muffins.
Cutting and Preparing the english muffin Rounds
Once that first rest is done, lightly flour your counter. You don’t want to knead this, so just gently pat or roll the dough out until it’s about half an inch thick. Use a 3-inch cutter to punch out your rounds. You have to be careful with the scraps; just gently press them together, don’t mash them, and cut the rest. Now for one of the non-negotiable steps: generously dust a baking sheet or platter with your cornmeal or semolina. Place the cut rounds on top, giving them plenty of space. Cover loosely and let them sit for another 30 minutes. This second short rest is crucial leading up to the griddle work!
The Slow Stovetop Cook for Fluffy Stovetop Muffins
Heat up your cast-iron griddle or heavy skillet over medium-low heat. I cannot stress this enough: slow and steady wins the race here! If you cook them too fast, they burn before cooking through. Lightly brush the surface with butter—just enough to coat, not enough to fry them. Place your rested rounds on the heat with good space between them. Cook for a solid 8 to 12 minutes on the first side until they are beautifully golden brown. Then, flip them and cook the second side for the same amount of time. That extended, gentle heat develops those amazing interior textures. You can see more great stovetop tips when you check out this process!
Tips for Success Making Your english muffin
We’ve got the dough mixed and cooked, but knowing a couple of quick tricks can turn a good batch into a legendary one. Baking is just like being a kitchen commander; you need field reports on how to handle unexpected situations! These tips will help you conquer any flatness or browning issues while making this Easy Homemade Bread.
First, let’s talk about the temperature test. Before you even put the first muffin down, test your griddle with a tiny drop of water. If it sizzles and evaporates immediately, it’s too hot. If it just sits there, the pan is too cold. You want a gentle, steady stream of tiny bubbles when the water hits it. This perfect medium-low heat is what separates a flat, dense bread from a light, airy one.
My second crucial tip revolves around the cutting. Don’t saw back and forth with your cutter! You need to push straight down firmly and lift straight up. A sawing motion compresses the edges, sealing off the sides before they hit the heat, which prevents those vertical nooks from forming properly. We want clean cuts, not compressed edges.
Finally, if you notice some muffins are browning way faster than others—it usually means those spots on your griddle are hotter. Keep a small spoonful of extra butter nearby. If a spot is lagging, you can brush a tiny bit of butter on *only* the slow side to help it catch up. Don’t overdo it; remember, we want these cooked more like dry toast than fried doughnuts! For other beginner bread projects, I think my guide on Whole Wheat Bread gives insight into texture control.
Serving Suggestions for Your Fresh english muffin
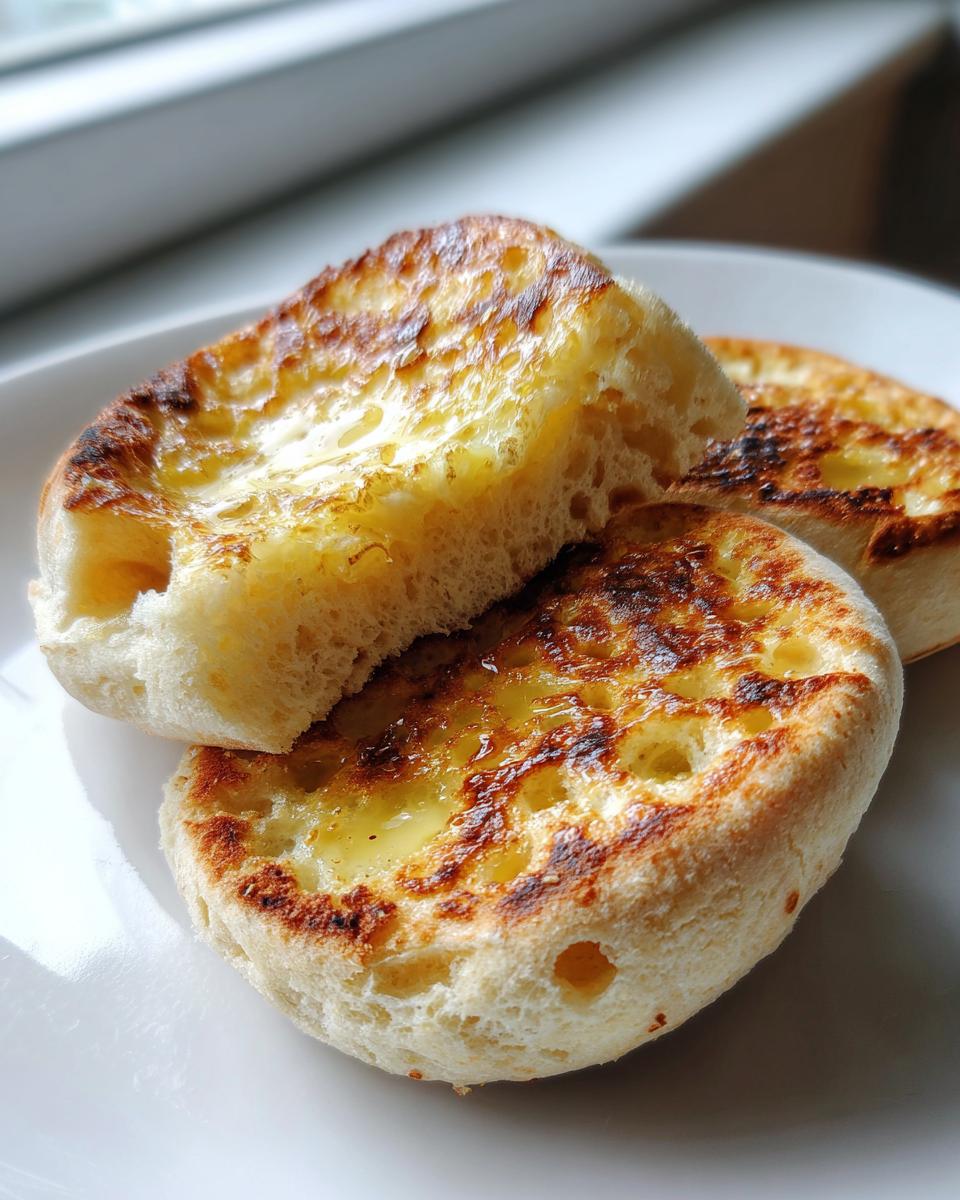
Now that you’ve conquered the cooking, it’s time for the best part: eating! Our freshly made english muffin is so fluffy and tender, it absolutely begs to be slathered with butter the second it comes off the cooling rack. I often can’t wait for them to cool completely, which leads me to the most important serving tip: you MUST split them open with a fork!
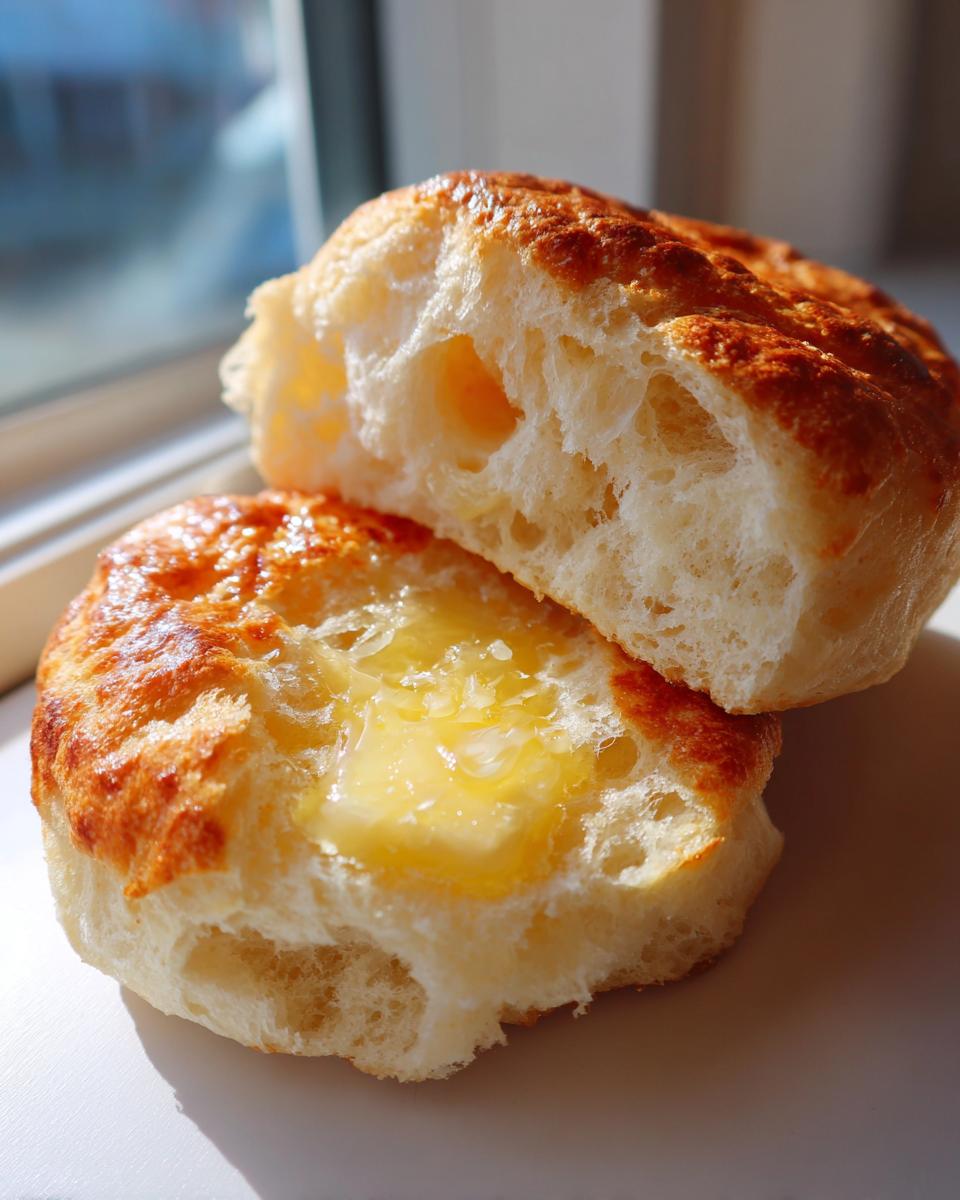
Using a knife flattens those precious, buttery layers we worked so hard to create. A fork gently teases the interior apart, preserving every single nook and cranny so they can soak up butter, jam, or hollandaise sauce perfectly. If you’re planning a fancy brunch, you simply have to try these homemade muffins underneath my Eggs Benedict with Blender Hollandaise—it’s a game-changer.
Honestly, these are fantastic with just a light toasting, but they excel at becoming the foundation for heartier meals. If you’re building a classic stack, these make the ultimate foundation for any English Muffin Sandwich Ideas. Bacon, egg, cheese—you name it, this bread holds up beautifully without getting soggy too quickly.
Quick Breakfast Buns: English Muffin Pizzas
Don’t let these fresh buns only be for breakfast; they make seriously stellar emergency dinners! When you have leftover rounds (if you even have leftovers, ha!), split them, top them with a little tomato paste, mozzarella, and sprinkle some oregano on top. Pop them under the broiler for just a few minutes until the cheese melts.
They transform into the perfect Quick Breakfast Buns substitute for mini pizzas. They are incredibly fast and satisfying, especially if you have little ones who love something savory but need it ready yesterday. If you are finding recipes for small eaters, check out this idea for inspiration on toddler-friendly twists!
Make Ahead English Muffins and Storage Guide
This is one of my favorite things about this recipe, honestly. If you’re like me and enjoy being ahead of the game, you’re going to love this: these english muffin rounds are fantastic for making ahead! Think about it—you spend one afternoon making a huge batch, and suddenly, you have ready-to-toast Freezer Friendly Breakfast Recipes for weeks. This takes all the pressure off busy mornings; you just need a toaster slot!
The steps for freezing are simple, but you have to promise me you’ll follow this cooling rule! Never, ever package them while they are even slightly warm. Warm bread traps moisture, and moisture means you’ll end up with sad, sticky muffins instead of perfectly fluffy ones.
Once they have completely cooled on the rack—and I mean completely—make the decision: are you freezing them whole, or split? I prefer to split them first. It means less thawing time later on! Use that fork to split them down the middle, creating that gorgeous, rough texture we worked for.
Layer them in a heavy-duty freezer bag or wrap them tightly in plastic wrap followed by foil to prevent freezer burn. If you use good protection, these Homemade English Muffins will keep beautifully for up to three months. When you’re ready for breakfast, just toss a frozen, split muffin right into the toaster or under the broiler. They toast up perfectly!
If you’re planning big make-ahead meals, don’t forget to check out my recipe for an Easy Batch Bean Salad—it’s perfect for meal prepping lunch for the week! For more info on how I freeze my bread products, I always rely on the tips shared over at Tastes Better From Scratch.
Frequently Asked Questions About english muffin
I’ve answered the big questions about technique, but I know when you’re dedicated to making something truly wonderful—like cracking the code on the perfect homemade english muffin—you can have more specific queries pop up! That’s the sign of a true kitchen commander! Let’s tackle some of those last bits of doubt so you can move forward with total confidence.
Can I use baking powder instead of yeast for this english muffin recipe?
That’s a great question. To be totally honest with you, if you swap out the yeast for baking powder, you’re not really making an english muffin anymore; you’re making a quick biscuit or a soda bread bun. The yeast is crucial here! It’s what provides that slightly tangy, characteristic flavor and the structure that allows for those beautiful air pockets inside. If you are specifically looking for a No Knead English Muffins recipe that skips the waiting time for yeast, you’ll want to search for recipes specifically labeled as ‘quick bread’ versions. For this batch, though, stick with the yeast—it’s worth the wait for that classic taste!
What is the best temperature for cooking the english muffin on the griddle?
This is perhaps the single biggest secret to achieving that coveted texture, so pay close attention! You absolutely must use medium-low heat. Think slow and gentle. If your heat is high, the outside will get dark brown almost immediately, but the middle will look pale and raw, and you’ll squash your nooks and crannies. We want the heat low enough that you can stand there and watch the edges slowly, gradually deepen in color over 8 to 10 minutes before flipping. This low-and-slow approach is what turns this into satisfying Classic Griddle Bread rather than just a flat pancake. Trust me on the low heat—it’s the key to success!
If you’re ever experimenting with temperatures in baked goods where you can’t use a thermometer, I always point back to my tips for banana zucchini bread because controlling moisture and heat transfer is similar in principle!
Nutritional Estimates for Your english muffin
Now, while I certainly believe that the joy of baking and eating trumps counting every single calorie, I know some of you commanders like to track your ingredients, especially when planning meals. Since we’re using simple, wholesome ingredients here, I was happy to crunch the numbers for you!
Keep in mind these estimates are based on the yield outlined in the recipe (which is about 8 lovely rounds). Your actual counts might shift depending on the specific brand of flour or milk you use. This is just a solid baseline for your english muffin!
Here are the general estimates per one muffin:
- Calories: 180
- Fat: 3 grams
- Saturated Fat: 1.5 grams
- Carbohydrates: 33 grams
- Sugar: 1.5 grams
- Protein: 5 grams
- Fiber: 1 gram
- Cholesterol: 5 mg
See? Pretty reasonable for a homemade breakfast staple! It’s much better than those store-bought versions full of preservatives, that’s for sure. If you’re looking for ways to boost the nutrition in your next batch of baked goods without sacrificing flavor, you should check out my tips on making Easy Sweet Potato Muffins—sweet potatoes sneak in so much goodness!
Share Your Homemade english muffin Creations
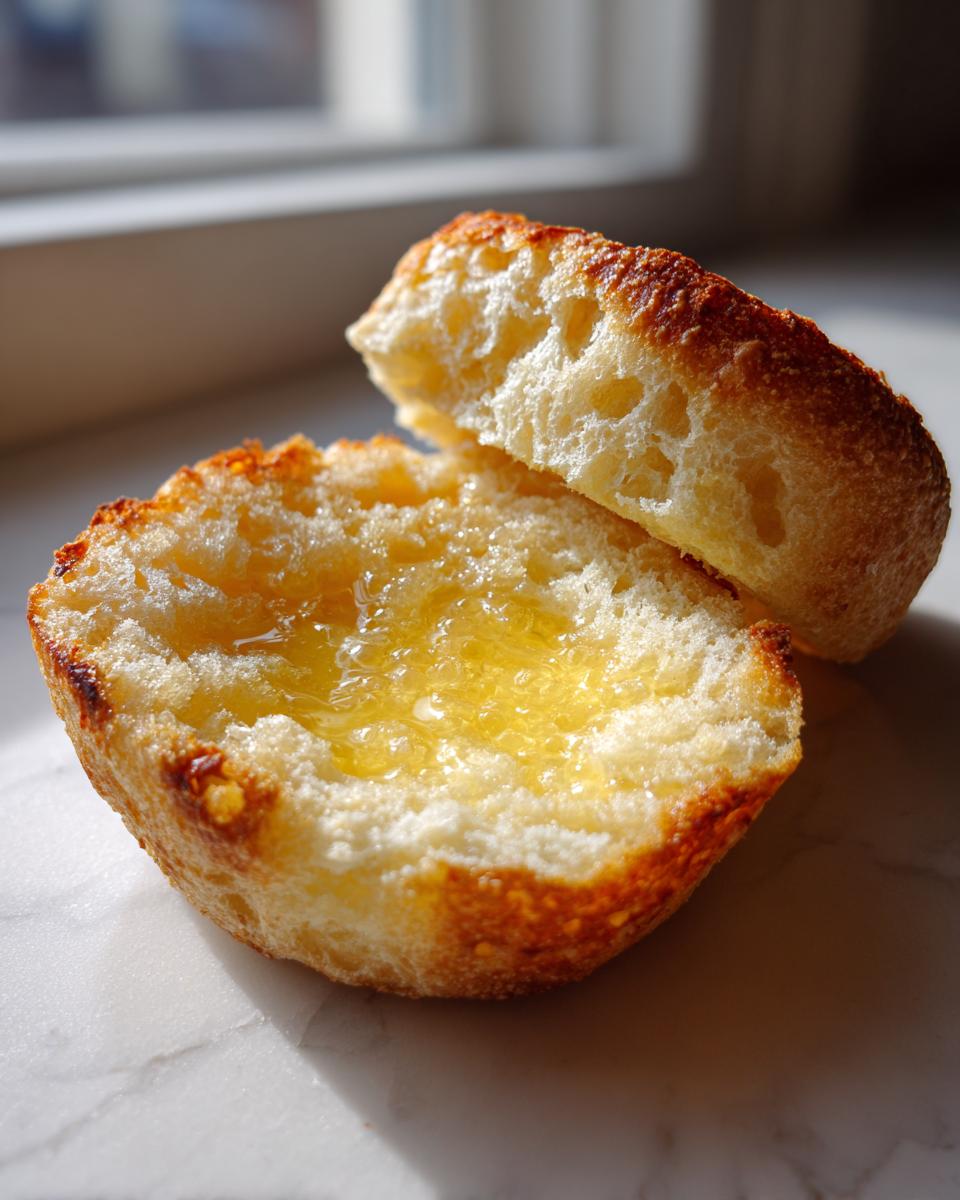
And there you have it, commanders! You’ve successfully navigated the gentle dance of yeast, flour, and low heat to produce authentic, fluffy english muffin rounds right on your own stovetop. I sincerely hope you’re looking at a rack full of golden discs studded with the best nooks and crannies you’ve ever seen. That smell in your kitchen right now? That’s the smell of conquering breakfast!
Now, my job isn’t done until I hear back from you! Home cooking is a community effort, and I absolutely love getting letters and comments about how my recipes worked out in your unique kitchens. Did you achieve those deep, buttery craters? Did that 30-minute rest make all the difference?
Please, take a minute when you cut into that first perfect muffin to drop a comment below. Let me know how you served them—were they glorious eggs benedict bases, or did you simply slather them with butter and jam? Your feedback helps me make my recipes even better for everyone else who comes here looking for their next culinary win.
If you’re already planning your next baking adventure, I highly recommend trying my recipe for Moist Strawberry Muffins next time you need something quick and fruity. Happy baking, and enjoy that incredible satisfaction that only comes from mastering a true classic!
PrintHomemade English Muffins with Signature Nooks and Crannies

Make soft, fluffy English muffins from scratch on your stovetop. This easy recipe delivers the classic nooks and crannies that hold melted butter perfectly.
- Prep Time: 20 min
- Cook Time: 30 min
- Total Time: 1 hour 50 min
- Yield: 8 servings 1x
- Category: Breakfast
- Method: Griddle Cooking
- Cuisine: American
- Diet: Vegetarian
Ingredients
- 2 cups all-purpose flour
- 1 tablespoon granulated sugar
- 1 teaspoon salt
- 1 teaspoon baking soda
- 1 teaspoon active dry yeast
- 3/4 cup warm water (about 105-115°F)
- 1/4 cup buttermilk or milk
- 2 tablespoons unsalted butter, melted, plus more for griddle
- Cornmeal or semolina, for dusting
Instructions
- In a large bowl, whisk together the flour, sugar, salt, and baking soda.
- In a separate small bowl, dissolve the yeast in the warm water and let it sit for 5 minutes until foamy.
- Add the buttermilk and melted butter to the yeast mixture. Stir to combine.
- Pour the wet ingredients into the dry ingredients. Mix with a wooden spoon until just combined into a shaggy, sticky dough. Do not overmix.
- Cover the bowl with plastic wrap and let the dough rest in a warm place for 1 hour, or until it has increased in volume slightly. This is a low-rise dough; it will not double.
- Lightly dust a clean surface with flour. Gently scrape the dough out. Pat or lightly roll the dough to about 1/2 inch thickness.
- Use a 3-inch round cutter to cut out the muffins. Gather the scraps, gently press them together, and cut out any remaining rounds.
- Generously dust a baking sheet or large platter with cornmeal or semolina. Place the cut rounds on the dusted surface, leaving space between them. Cover loosely and let them rest for 30 minutes.
- Heat a large, dry cast-iron griddle or heavy skillet over medium-low heat. You want the griddle hot enough to cook slowly, which helps create the nooks and crannies.
- Lightly brush the griddle surface with a small amount of melted butter. Place the muffins on the hot griddle, leaving space between them.
- Cook for 8 to 12 minutes per side, until golden brown. If they brown too quickly, reduce the heat. The slow cooking process is key to developing the texture.
- Once cooked, transfer the muffins to a wire rack to cool completely.
- To open, use a fork to split the cooled muffins horizontally. Toast before serving.
Notes
- For the best nooks and crannies, cook these muffins slowly on a lightly buttered or dry griddle over medium-low heat.
- You can freeze fully cooled, split muffins in an airtight container for up to 3 months. Toast directly from frozen.
- Use these fresh English muffins for classic breakfast sandwiches or Eggs Benedict.
Nutrition
- Serving Size: 1 muffin
- Calories: 180
- Sugar: 1.5
- Sodium: 350
- Fat: 3
- Saturated Fat: 1.5
- Unsaturated Fat: 1.5
- Trans Fat: 0
- Carbohydrates: 33
- Fiber: 1
- Protein: 5
- Cholesterol: 5