
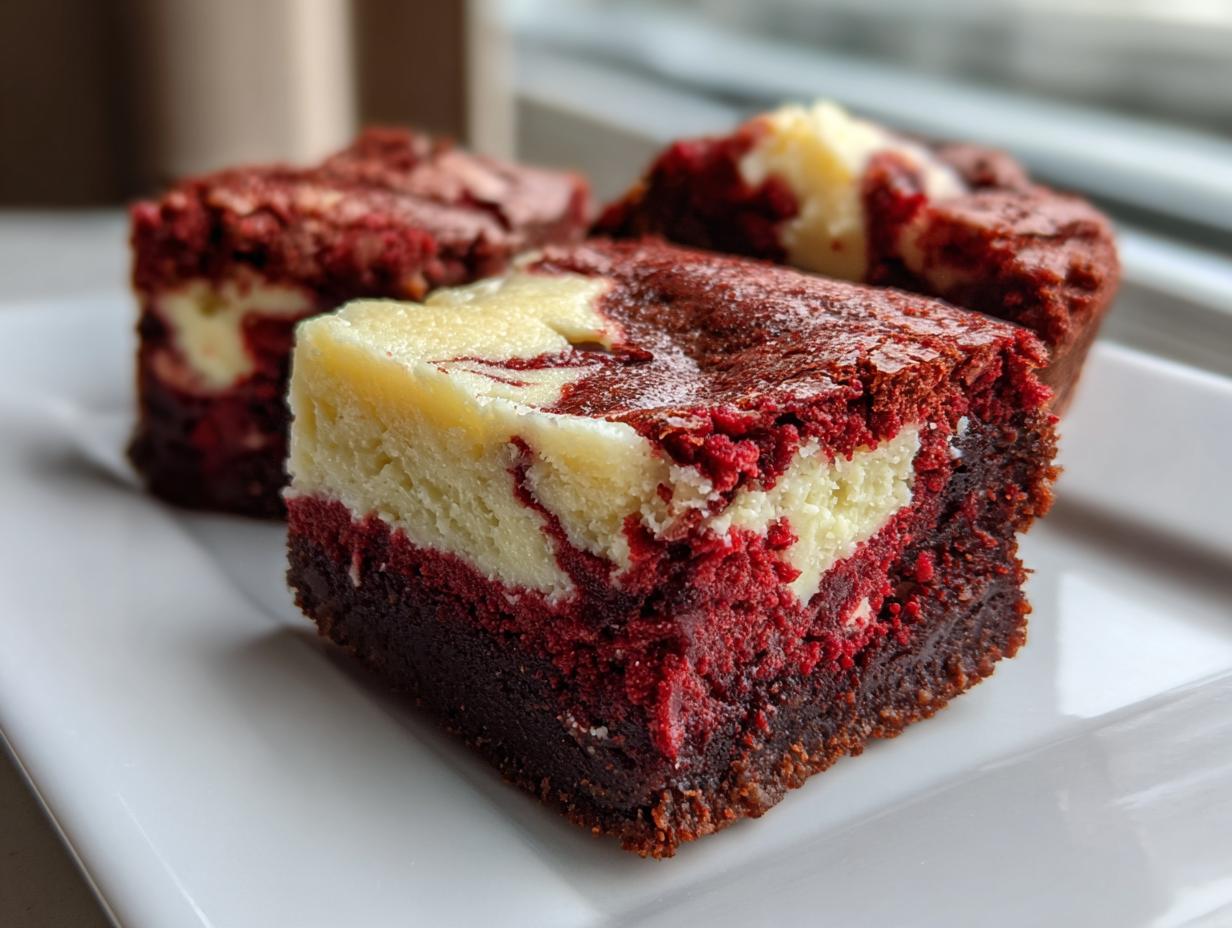
When you’re ready to make something truly showstopping, we reach straight for the heavy hitters: chocolate, cream cheese, and that gorgeous crimson hue. Honestly, there’s nothing better than transforming basic ingredients into something decadent, and our red velvet cheesecake brownies do exactly that. This recipe is the perfect marriage of my grandmother’s old-school baking heart with the precision we bring to the Command Center here at Cookery Command. We spent weeks perfecting the technique so you get two things every single time: a deeply fudgy red velvet base and a smooth, creamy cheesecake swirl that never gets grainy. If you love that classic crimson flavor, be sure to check out my recipe for our best ultra-moist red velvet cake, too! Forget dry cake texture; these marbled dessert bars are pure indulgence, guaranteed.
- Why This Recipe for red velvet cheesecake brownies Stands Above Others
- Gathering Ingredients for Your red velvet cheesecake brownies
- Step-by-Step Instructions to Make Perfect red velvet cheesecake brownies
- Tips for Achieving the Best red velvet cheesecake brownies Texture
- Ingredient Notes and Substitutions for red velvet cheesecake brownies
- Serving Suggestions for Your red velvet cheesecake brownies
- Storage and Reheating red velvet cheesecake brownies
- Frequently Asked Questions about red velvet cheesecake brownies
- Share Your red velvet cheesecake brownies Creations
Why This Recipe for red velvet cheesecake brownies Stands Above Others
I’ve tried so many bar recipes that promise fudge but deliver cakey disappointment. Not here! What makes our red velvet cheesecake brownies different is the ratio control in the brownie batter. We ditch the extra leavening agents so you get that dense, melt-in-your-mouth texture every single time. That’s the secret to achieving the fudgy baseline we crave!
And the swirl? Wow. We use room temperature eggs in the cream cheese mix, which is vital for keeping it completely smooth. This prevents those little white lumps you often see in hastily made treats. The result? Truly visually stunning desserts that easily rank as some of the ultimate dessert bars you’ll ever make. It’s all about technique meeting flavor, just like we do here at Command Central. If you loved the swirl on our sopapilla cheesecake bars, you’re going to adore this one!

Gathering Ingredients for Your red velvet cheesecake brownies
Okay, let’s talk supplies! Getting these components right is half the battle when you’re aiming for that perfect decadent texture. We need two distinct mixtures here, and precision matters, especially with the dairy and eggs. Remember what I always say: ingredients at the right temperature are non-negotiable for texture, especially when we’re trying to lock in that fudgy crumb versus a cakey texture. If you’re curious about getting the absolute smoothest texture in baked goods, you should really check out my guide on achieving creamy cheesecake perfection; those tips carry over here!
For the Fudgy red velvet cheesecake brownies Base
This is where the deep chocolate hits the signature red hue. You’ll notice we call for melted butter—that skips creaming time and helps keep these bars seriously rich. My biggest tip here? Make sure those two large eggs are sitting out on the counter warming up a bit. Room temperature eggs mix in much cleaner with the fats, which is crucial for that smooth brownie top. And please, use Dutch process cocoa; it contributes to that rich, dark chocolate flavor we want!
- 1/2 cup unsalted butter, melted
- 1 cup granulated sugar
- 2 large eggs, room temperature
- 1 1/2 teaspoons red food coloring (get the gel kind, trust me!)
- 2 teaspoons vanilla extract
- 1/2 teaspoon salt
- 3/4 cup all-purpose flour
- 3 Tablespoons Dutch process cocoa powder
For the Cream Cheese Swirl
This layer is what elevates these from simple brownies into something truly special. The key word here is smooth. You absolutely must use 8 ounces of cream cheese that has been sitting out until it’s fully pliable. If it’s cold, you’ll end up with tiny lumps in your swirl later on, and we don’t want that! This mixture is simpler but relies completely on temperature to beat up beautifully until it’s creamy and lump-free.
- 8 ounces cream cheese, room temperature
- 1 large egg, room temperature (just one for the swirl!)
- 1/3 cup granulated sugar (for the cheesecake filling)
Step-by-Step Instructions to Make Perfect red velvet cheesecake brownies
Alright, buckle up! This is where the magic happens. We’re putting together that fudgy base with that creamy layer, and it’s quicker than you think, provided you follow the layering order! Remember, baking is science, so stick to the timings. If you want to check out my instructions for how to make a super simple, foolproof fudge later on, you can do that here: easy fudge recipe. But for now, let’s focus on these showstoppers.
Preparing the Pan and Brownie Batter
First thing’s first, get organized! Preheat your oven to 350°F (175°C) right now. Then, grab that 8×8 inch pan and line it completely with parchment paper, making sure you leave a generous overhang on two sides. That overhang is your built-in handle later—don’t skip it!
In your first bowl, mix that melted butter and the cup of sugar until they look cozy. Then whisk in those two room temperature eggs, one at a time, followed by your vanilla and that vibrant red coloring. Now, for the dry stuff: flour, cocoa powder, and salt. Add those dry ingredients gradually while mixing only until you see no more flour streaks. I mean it—do not overmix! Overmixing develops gluten, and we are chasing that dense, fudgy texture, not sturdy cake texture.
Creating the Cream Cheese Swirl for red velvet cheesecake brownies
Swapping bowls now! This layer needs to be silky smooth so your final bar isn’t gritty. Make sure that cream cheese is soft—the softest it can be! In a clean bowl, beat the 8 ounces of cream cheese until it’s looking velvety. Then, mix in that final egg and the 1/3 cup of sugar until the whole mixture is completely uniform and creamy. If you’re diving deep into baking with cream cheese for other recipes, my guide on handling cream cheese like a pro is super helpful here.
Layering and Creating Marbled Dessert Bars
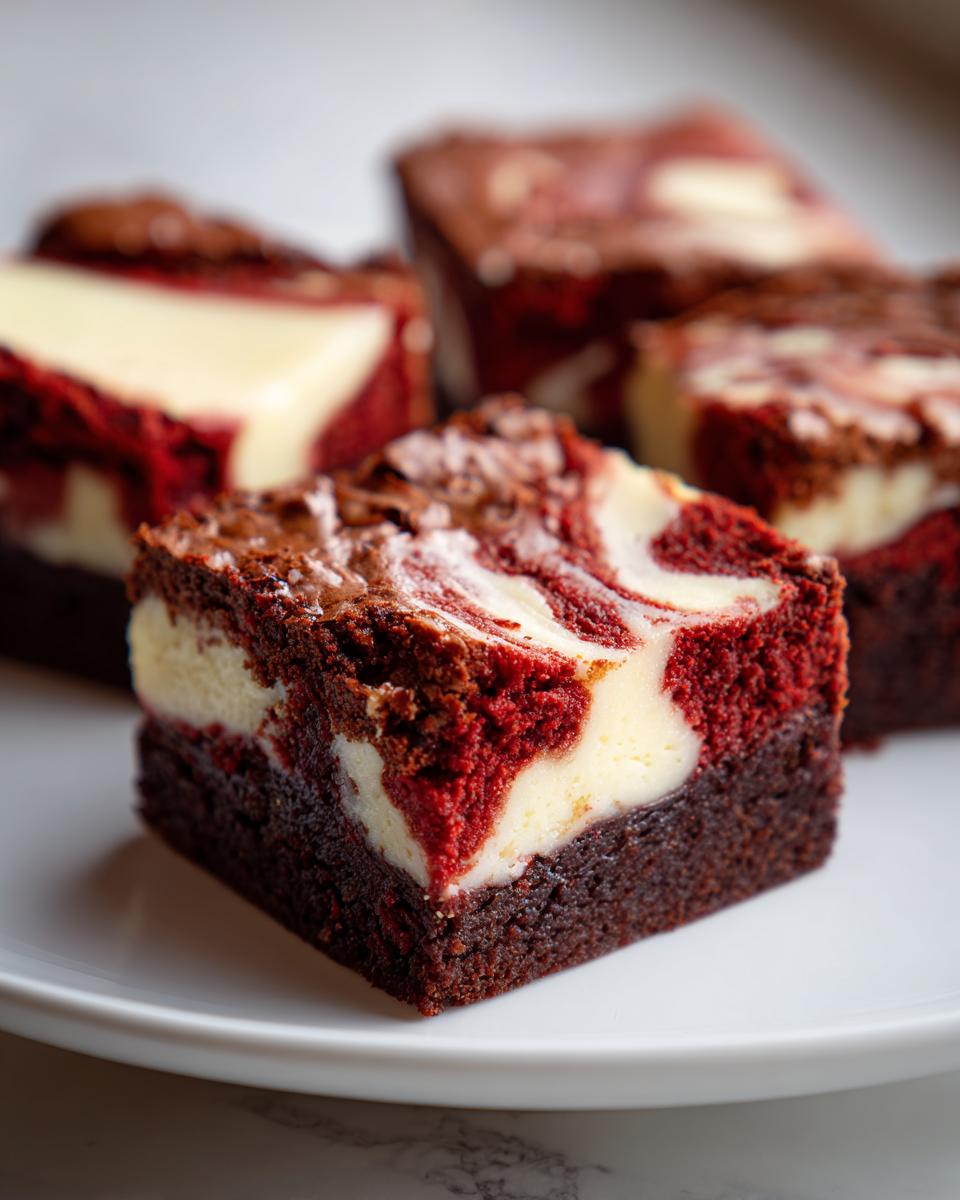
Time to assemble! Spread exactly half of your red velvet brownie batter into the prepared pan, spreading it evenly over the parchment paper base. Next, you’re going to gently dollop or spoon the entire cream cheese mixture right over that first layer of batter. Don’t try to spread it smooth!
Then, drop the remaining half of the red velvet batter randomly over the top of the cream cheese dollops. Now for the fun part: take a dull knife or a skewer and gently run it through the layers, just a little bit, to create those beautiful swirls. You want a marble look, not a muddy mess. Don’t over-swirl, or you’ll just mix it all into one color!
Baking and Cooling the red velvet cheesecake brownies
Slide that pan into your 350°F oven and set a timer for 30 minutes. We are aiming for 30 to 35 minutes total. How do you know when they are done? Stick a toothpick near the center. If it comes out with moist crumbs attached—that’s success! If it’s wet batter, give it five more minutes. If it’s totally dry, you cooked them too long, oops!
The hardest part comes next: cooling. You must let these bars cool completely in the pan on a wire rack. If you even think about cutting them warm, they’ll turn into a gooey disaster. Use those parchment overhangs to lift the whole cooled block out, and then slice them into 16 perfect squares. If you want to learn how to make a super simple, foolproof fudge later on, you can do that here: easy fudge recipe. But for now, let’s focus on these showstoppers.
Tips for Achieving the Best red velvet cheesecake brownies Texture
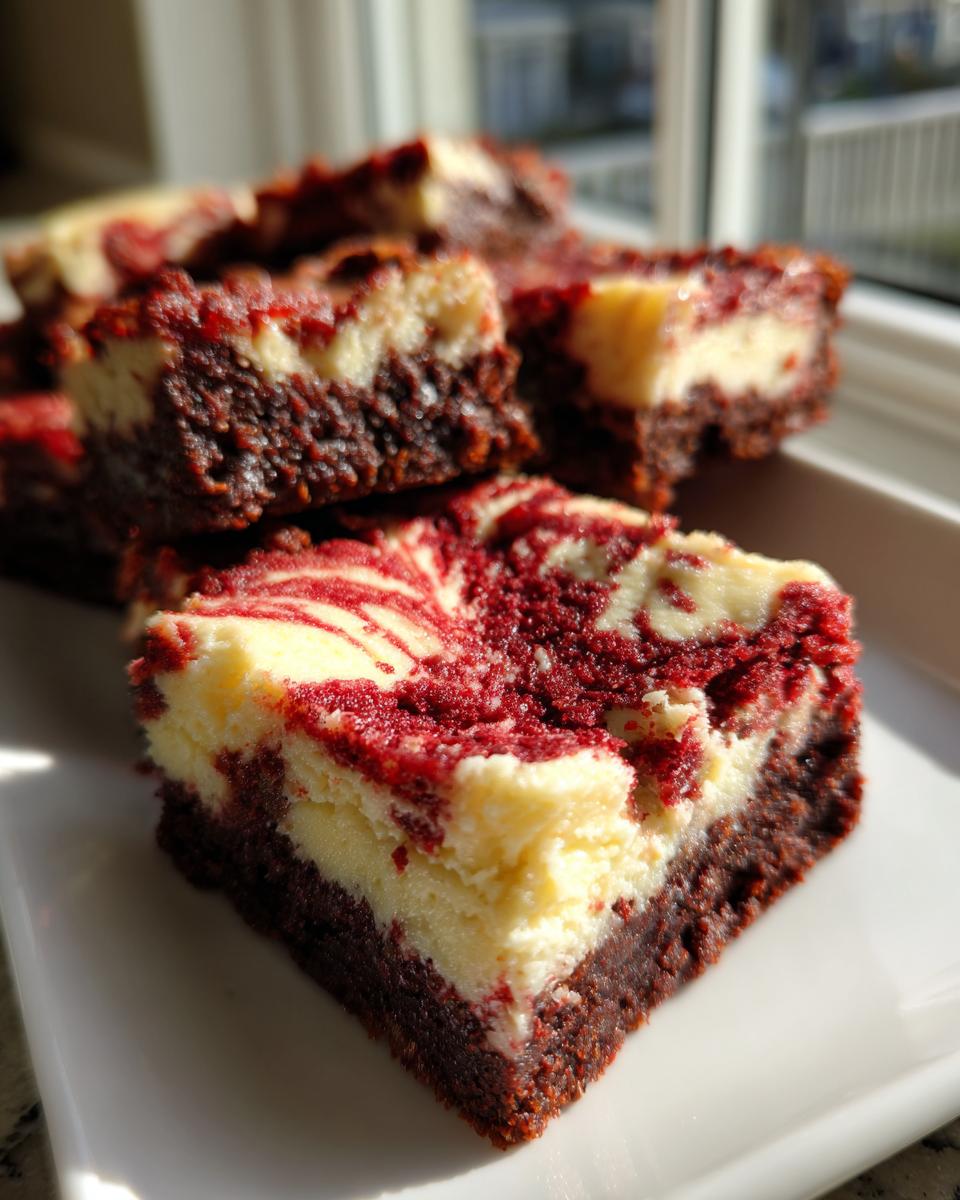
When you bite into one of these, I want you to feel that perfect contrast: the dense, slight chew of the brownie against the cool, silky smoothness of the cheesecake. That texture contrast is everything in these red velvet cheesecake brownies. Since we already covered the importance of room temperature eggs, let’s focus on two other areas where home bakers often trip up: color and timing.
First, that color! If you want that deep, vibrant crimson that makes these bars so striking—especially perfect for Valentine Desserts or any party—you simply cannot use standard liquid food coloring. It just dilutes the batter too much. You need a high-quality gel food coloring. It concentrates the color without adding unnecessary liquid, which keeps our brownie base fudgy instead of cakey. It’s a small investment that pays huge aesthetic dividends!
Second is the fear of underbaking. Don’t let it stop you! Remember that instruction to pull them out when the toothpick shows *moist crumbs*? That is the single most important tip for achieving that amazing, dense fudgyness. Cheesecake firms up as it cools, and the brownie base will continue to set beautifully outside the oven. Overbaking is the quickest way to dry out a bar, no matter how much fat is in the recipe. Trust me on this one; slightly underdone is always better than overdone in the world of rich, decadent chocolate desserts.
If you’re looking for other ways to use that rich chocolate flavor, I highly suggest checking out my recipe for easy chocolate fondue—it’s incredible for dipping fruit!
Ingredient Notes and Substitutions for red velvet cheesecake brownies
So, life happens, right? Maybe you’re out of the Dutch process cocoa, or maybe you only have liquid food coloring sitting in your pantry. Don’t panic! That’s why we talk about the science behind the recipe. Having this knowledge is what helps you become truly confident in the kitchen, which is the whole goal here at Command Central. While I strongly recommend sticking to the list when you have time, these bars are pretty forgiving if you need to make a small switch.
The absolute biggest issue I see when people deviate is temperature. If your cream cheese is cold, it’s going to clump up instantly when you try to mix it. If you forgot to pull it out, here’s my quick fix: cut the cream cheese into small cubes on a plate, microwave them on 20% power for about 10-15 seconds at a time, stirring in between, until it’s soft but not melting. It works wonders!
For the color, if you must use standard liquid red food coloring, just know you’ll need significantly more—maybe a teaspoon or two extra—and be aware that adding that much extra liquid *can* push your brownie ratio slightly towards cakey. Gel coloring gives you that intense red without affecting the structure. If you need a recipe for a gorgeous topper once these are baked, my ultimate cream cheese frosting is the perfect companion to these bars!
As for the cocoa powder: If you only have natural cocoa instead of Dutch process, you can use it, but Dutch process mellows the acidity and gives a deeper, almost oreo-like chocolate foundation that plays really nicely with the tang of the cheesecake. It’s a subtle change, but for the best cheesecake brownies, try to find the Dutch variety!
Serving Suggestions for Your red velvet cheesecake brownies
You’ve done it! You’ve made these stunning, dual-textured bars. Now, how do we present them? Since these red velvet cheesecake brownies are so rich on their own, sometimes subtlety is key. However, when you’re looking to turn this into an absolute showstopper for Festive Holiday Baking tables or a big dessert spread, a simple topping goes a long way.
My favorite way to serve these is completely plain, maybe just dusted lightly with powdered sugar, especially if they are still slightly cool from the fridge. The visual drama of the swirl is enough! They look incredible lined up on a clean white platter—instant Crowd Pleasing Dessert Ideas right there!
But if you insist on adding a little something extra, keep it light. A drizzle of white chocolate ganache complements the cheesecake beautifully without overwhelming the red velvet flavor. To make that drizzle, you just need some white chocolate chips melted down with a touch of heavy cream. If you need a recipe for a fantastic, fluffy topper, you’ve got to try my vanilla buttercream recipe; you can thin that down slightly for a beautiful, airy topping instead of a heavy frosting.
For a truly elegant finish, especially if you’re serving these alongside coffee or espresso, grating a little bit of high-quality white chocolate over the top adds a lovely texture contrast right before serving. They are so rich, you don’t really need much else, but dressing them up just makes them feel extra special!
Storage and Reheating red velvet cheesecake brownies
Now that you’ve successfully baked the ultimate layered bars, we need to talk about keeping them perfect. Because these beauties contain that creamy cheesecake layer, they are significantly different from a standard fudgy brownie. You can’t just leave them on the counter covered in foil for days—we need to keep that cream cheese happy!
The best place for these red velvet cheesecake brownies, once they are completely cooled, is the refrigerator. Pop the whole cooled slab (or tightly wrapped squares) into an airtight container. They’ll stay fresh and delicious for about four to five days this way. The cold helps the cheesecake layer stay firm and prevents any issues with the dairy. Trust me, they are still fudgy straight from the fridge, but I have a little trick for serving them.
When you’re ready to enjoy one, pull it out of the fridge about 20 to 30 minutes before you plan to eat it. Allowing them to sit on the counter brings the temperature up just slightly. This little bit of warming breaks the chill from the cream cheese, bringing back that smooth, melt-in-your-mouth texture that makes these such rich and creamy baked goods. It really takes them from good to absolutely fantastic.
What about freezing? Yes, you can absolutely freeze these! Cut them into individual squares first. Wrap each square tightly in plastic wrap, then place them all into a heavy-duty freezer bag. They last beautifully for up to three months. To reheat or serve, just transfer the wrapped square to the fridge overnight to thaw, and then let it sit on the counter for that final 20 minutes before biting in. Easy peasy!
Frequently Asked Questions about red velvet cheesecake brownies
What if I don’t have Dutch Process Cocoa Powder?
This is a great question for anyone diving into Cheesecake Brownie Recipes! I list Dutch process because it provides a darker, less acidic chocolate base that pairs wonderfully with the tang of the cream cheese. If you only have natural cocoa powder, go ahead and use it! The main thing to watch out for is that natural cocoa is a bit more acidic. Your brownie layer might taste slightly sharper or less “fudgy-brownie” tasting, but it will still be delicious. Since you’re adding the sweet cheesecake layer, the balance will still work out just fine. You won’t ruin the recipe, I promise!
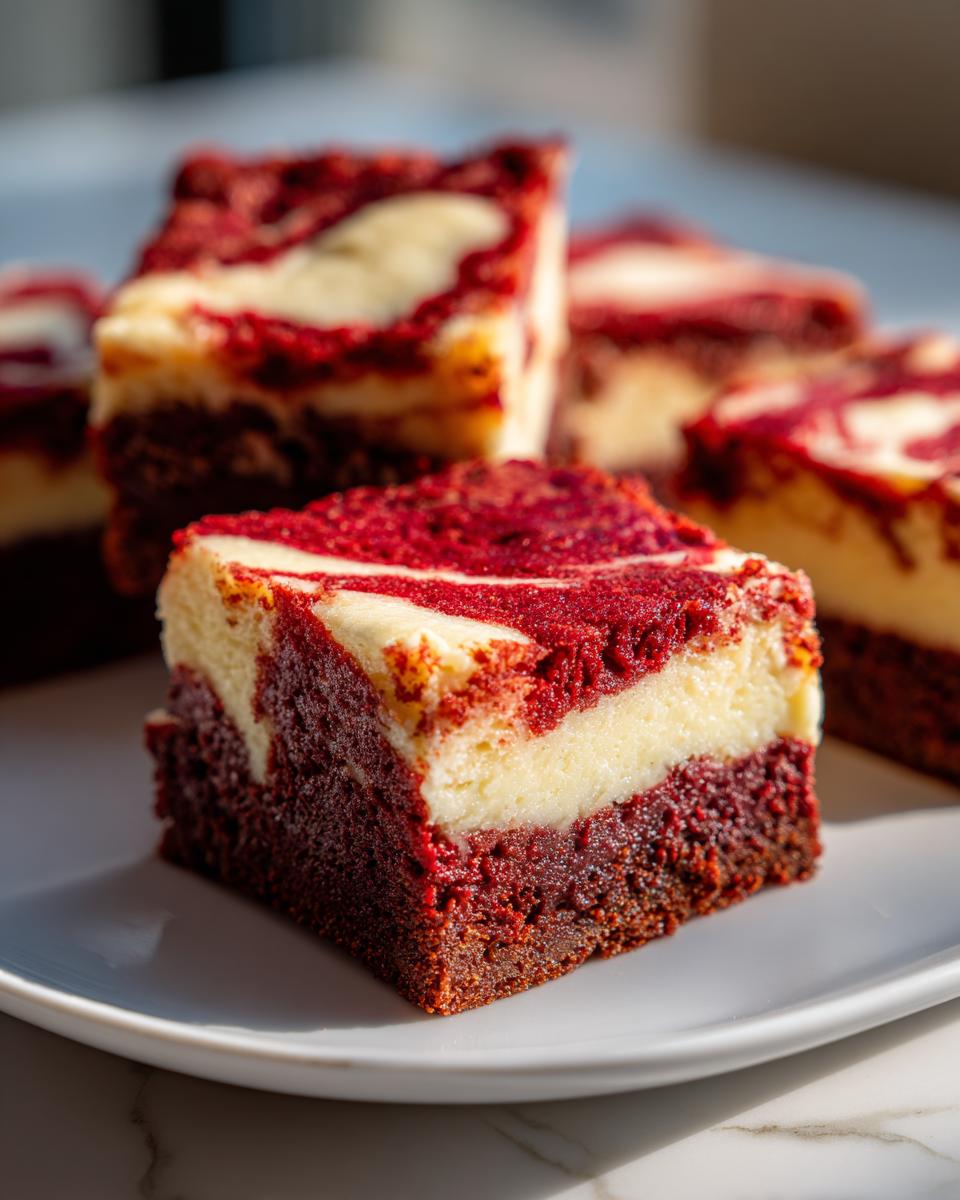
How do I get those gorgeous, sharp marbled layers?
This is where a lot of people panic, thinking they need to be professional bakers to get those beautiful clean lines! The secret is how you swirl, which I mentioned in the steps, but let’s drill down. You need a gentle hand. After you dollop the top layer of batter, take a thin butter knife or a wooden skewer. Insert it maybe an inch deep and drag it through the batter only a few times—no more than three or four passes total across the entire pan. If you keep dragging it back and forth like you’re painting, you’ll just blend everything together into one boring brown-red blob. We want distinct ribbons, remember?
Can I skip the food coloring?
Technically, yes, you can skip the red food coloring, but then they aren’t really red velvet cheesecake brownies anymore, are they? They just become chocolate cheesecake brownies, which are also fantastic, by the way! Red velvet gets its name and much of its appeal from that striking color contrast against the white cheesecake swirl. If you’re baking for a holiday like Christmas or Valentine’s Day, that color is really what makes them pop on the table. If you’re substituting, try to use gel coloring as discussed, but if you skip it entirely, you’ll just have a lovely dark chocolate swirl bar!
Can I make these ahead of time for a party?
Absolutely, and I encourage it! These are actually *better* when made the day before. Why? Because chilling solidifies the cheesecake layer beautifully and allows the flavors to fully meld into the brownie. Plus, it gives you one less thing to worry about on party day! Just make sure you cool them completely before you wrap them tightly and put them in the fridge as described in the storage section. They are perfect served slightly cool, making them one of the best easy brownie variations for entertaining!
Where can I find more amazing layered desserts?
If you loved the layering technique here, you might want to explore some of my other recipes that combine textures! We have so many layered treats here on the site. If you want to see some of my favorite recipe ideas using this keyword, check out what others are making; this link goes to a fantastic source: Cheff Recipes post. It’s always fun to see how other dedicated home cooks approach similar decadent desserts!
Share Your red velvet cheesecake brownies Creations
Now that you’ve pulled those beautiful, marbled squares out of the oven, I want to see what you did! Seriously, these red velvet cheesecake brownies are just begging to be photographed and shown off. Making incredible food is just one part of the joy; the other part is sharing that success and connecting with others who love baking just as much as we do here at Command Center.
When you finish baking, please, please come back and leave a star rating! It helps me know instantly which recipes are hitting the mark for you all, and it helps other home cooks decide if they should pull this dessert out for their next big event. Was your swirl perfect? Did you manage to keep them wonderfully fudgy? Drop all the details in the comments below. I read every single one!
And if you shared photos on social media—especially Instagram or Facebook—please tag us! I absolutely love seeing your takes on our classic American home cooking recipes. Seeing your kitchen in action, filled with the scent of chocolate and vanilla, means the world to me and truly brings our mission full circle. It reminds me that tradition is living on, one perfect brownie at a time.
If you have questions that the FAQs didn’t cover, or maybe you experimented with a fun substitution, don’t hesitate to reach out directly through the contact page. We’re here to support you in taking complete command of your kitchen. Happy baking, friend!
PrintUltimate Red Velvet Cheesecake Brownies Recipe

Create rich, fudgy red velvet brownies swirled with a creamy cheesecake layer. This recipe delivers a visually stunning and decadent dessert bar perfect for any gathering.
- Prep Time: 15 min
- Cook Time: 35 min
- Total Time: 50 min
- Yield: 16 servings 1x
- Category: Dessert
- Method: Baking
- Cuisine: American
- Diet: Vegetarian
Ingredients
- 1/2 cup unsalted butter, melted
- 1 cup granulated sugar
- 2 large eggs, room temperature
- 1 1/2 teaspoons red food coloring
- 2 teaspoons vanilla extract
- 1/2 teaspoon salt
- 3/4 cup all-purpose flour
- 3 Tablespoons Dutch process cocoa powder
- 8 ounces cream cheese, room temperature
- 1 large egg, room temperature (for cheesecake)
- 1/3 cup granulated sugar (for cheesecake)
Instructions
- Preheat your oven to 350°F (175°C). Line an 8×8 inch baking pan with parchment paper, leaving an overhang for easy removal.
- Prepare the brownie batter: In a medium bowl, whisk together the melted butter and 1 cup of granulated sugar until combined.
- Whisk in the 2 room temperature eggs one at a time until fully incorporated. Stir in the red food coloring and vanilla extract.
- In a separate small bowl, whisk together the flour, cocoa powder, and salt. Gradually add the dry ingredients to the wet ingredients, mixing only until just combined. Do not overmix.
- Prepare the cream cheese swirl: In a separate bowl, beat the 8 ounces of cream cheese until smooth. Beat in the 1/3 cup of sugar and the remaining 1 room temperature egg until the mixture is creamy and lump-free.
- Spread half of the red velvet brownie batter evenly into the prepared pan.
- Dollop the entire cream cheese mixture over the brownie layer. Drop the remaining half of the brownie batter randomly over the cream cheese layer.
- Use a knife or skewer to gently swirl the layers together to create a marbled effect. Do not over-swirl.
- Bake for 30 to 35 minutes, or until the edges are set and a toothpick inserted near the center comes out with moist crumbs attached, not wet batter.
- Let the brownies cool completely in the pan on a wire rack before lifting them out using the parchment overhang.
- Cut into 16 squares and serve your decadent dessert bars.
Notes
- For the deepest red color, use high-quality gel food coloring instead of liquid drops.
- Ensure your cream cheese and eggs for the cheesecake layer are at room temperature for the smoothest swirl.
- For fudgy texture, avoid overbaking; moist crumbs on the toothpick indicate they are done.
Nutrition
- Serving Size: 1 brownie square
- Calories: 280
- Sugar: 24g
- Sodium: 150mg
- Fat: 16g
- Saturated Fat: 9g
- Unsaturated Fat: 7g
- Trans Fat: 0.5g
- Carbohydrates: 32g
- Fiber: 1g
- Protein: 4g
- Cholesterol: 65mg