
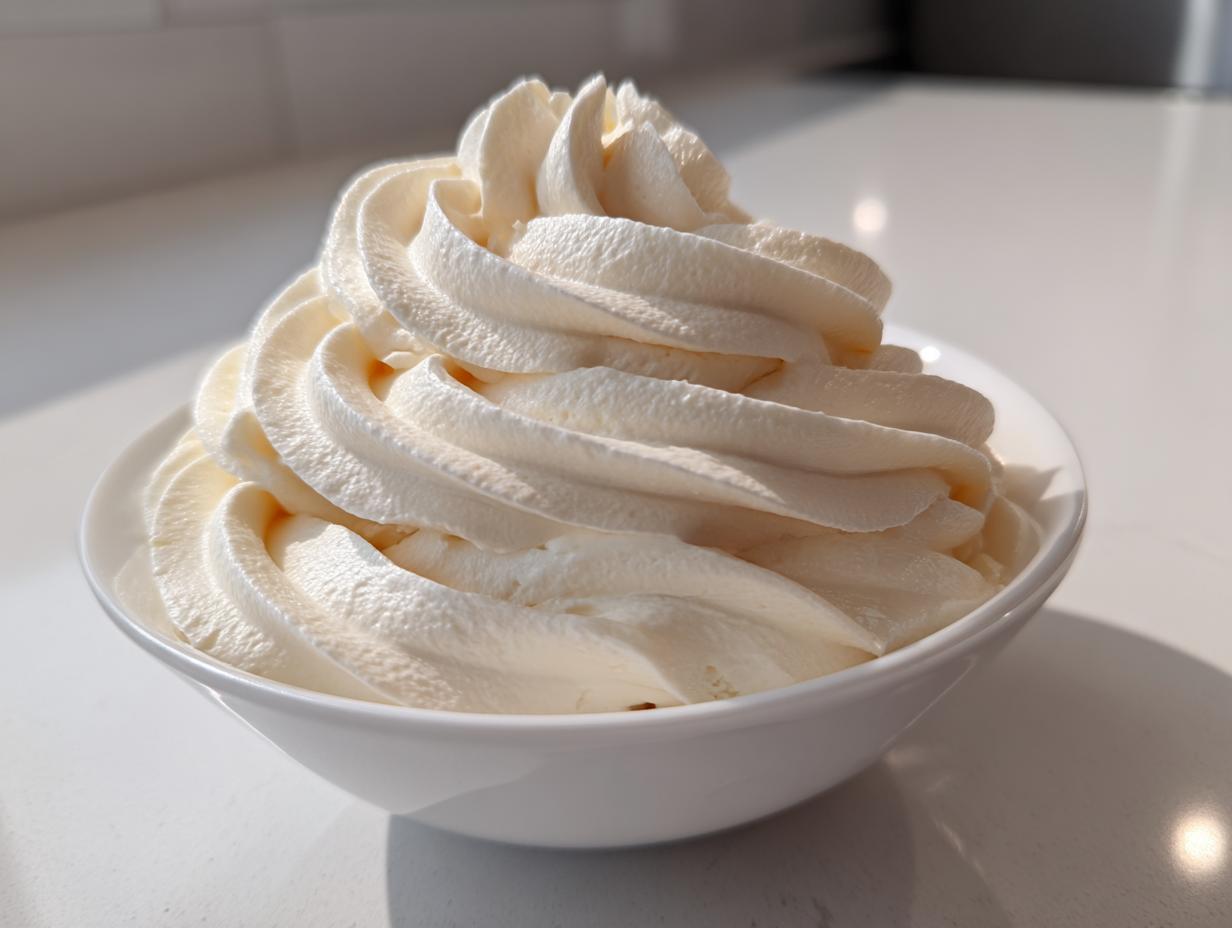
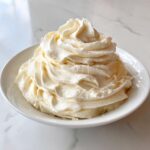
Oh, let’s just be honest for a second: there is nothing more disappointing than pouring your heart into a beautiful cake only to top it with frosting that feels like gritty sugar paste. Seriously, it’s the worst letdown in baking! But forget those sad, grainy mistakes. I’m here to tell you that making the ultimate fluffy and silky vanilla buttercream that stays perfectly smooth is not a mystery—it’s a method. This is the quick vanilla buttercream recipe that has become my non-negotiable staple, ready in about 10 minutes flat.
Here at Command Central, we live right at that sweet spot where cherished tradition meets modern technique. We aim to take those classic American recipes we all love and test them until they are absolutely rock-solid dependable, which is exactly what you find detailed on our About Us page. This specific no-fail frosting recipe proves that dedication; it delivers that airy, bakery-style texture every single time without fail. You won’t believe how simple it is!
- Why This is the Best Vanilla Buttercream Frosting for Your Cakes
- Essential Ingredients for Perfect Vanilla Buttercream
- Quick Vanilla Buttercream Instructions: A Smooth Frosting Tutorial
- Tips for Perfect Piping Frosting Recipe Results
- Using Your Vanilla Buttercream for Cakes and Cupcakes
- Storage and Reheating Instructions for Classic Buttercream Base
- Troubleshooting Common Vanilla Buttercream Issues
- Estimated Nutritional Data for Vanilla Buttercream Frosting
- Share Your Fluffy Vanilla Icing Creations
Why This is the Best Vanilla Buttercream Frosting for Your Cakes
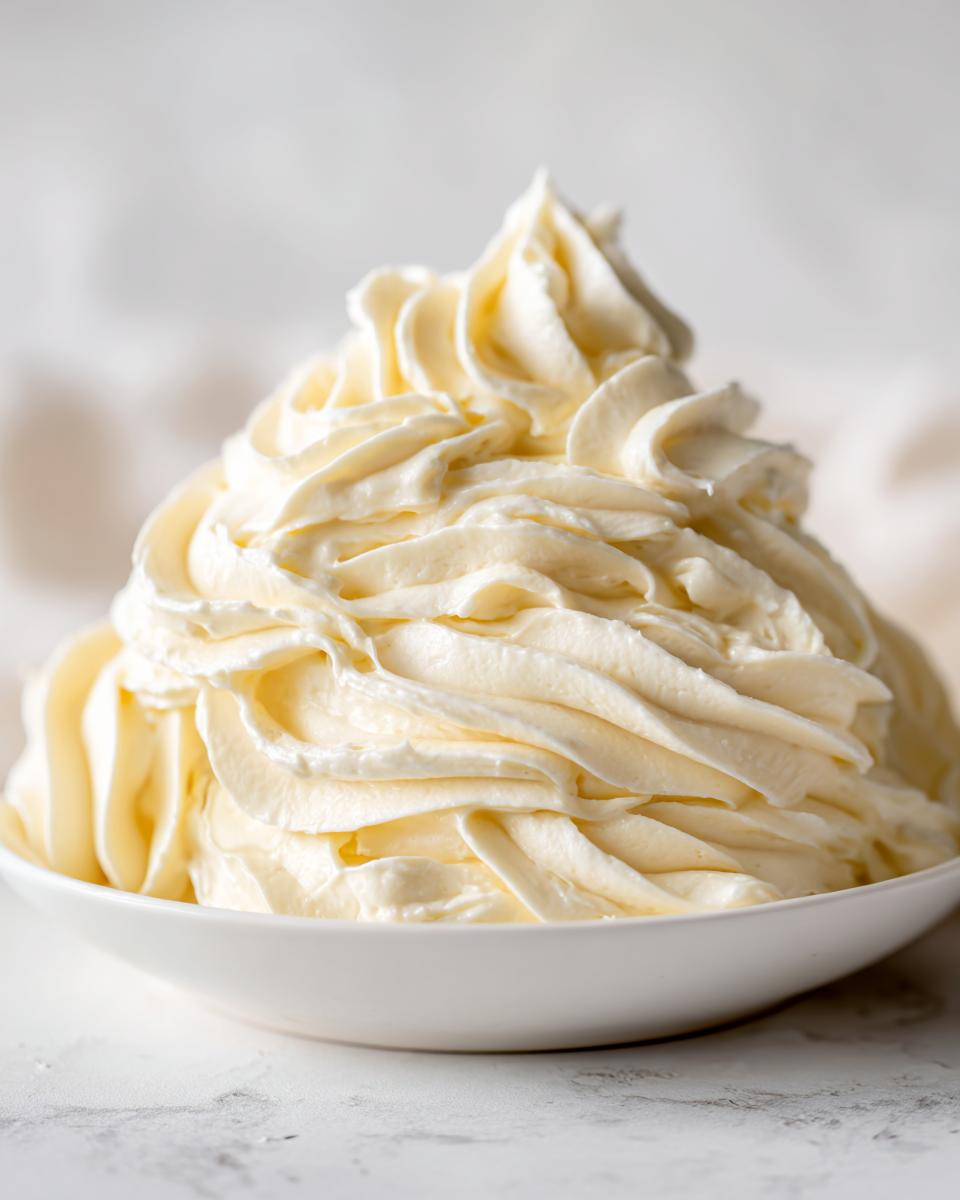
If you are looking for that perfect, creamy cake topping that tastes just as good as it looks, this is it. This American buttercream guide beats all the others because we focus so hard on technique, not just throwing ingredients into a bowl. The result is a truly no-fail frosting recipe that holds its shape beautifully whether you’re coating a full cake or doing delicate piping work on individual cupcakes. Trust me, once you try this method, you’ll realize why everyone raves about this best buttercream frosting.
It’s easy to make the homemade vanilla frosting, but achieving that airy quality takes a little patience during the whipping stage. We guarantee that light, fluffy texture because we honor those classic, methodical steps, making sure your next cake just looks stunning. If you want an amazing cake base to top this off, you should check out my recipe for moist and fluffy vanilla cupcakes!
Achieving Silky Smooth Frosting Without Graininess
The number one enemy of amazing vanilla buttercream is graininess—that awful feeling where you can detect every tiny grain of sugar! That happens when the powdered sugar isn’t fully dissolved into the fat. My secret to avoiding that in this vanilla frosting without graininess is two-fold. First, you must sift that sugar! Second, once everything is added, you have to beat it on medium-high for a solid three to five minutes. That long whip time smooths everything out beautifully and introduces incredible air!
Essential Ingredients for Perfect Vanilla Buttercream
You honestly don’t need a huge ingredient list to make the best buttercream frosting. This easy buttercream recipe relies almost entirely on quality and ensuring everything is prepped just right. When you are making homemade vanilla frosting, the quality of what you put in really shines through, so don’t skimp on the good stuff here. Keep your measurements precise—baking loves that! Remember, everything gets mixed, but preparation is everything.
- 1 cup (226g) unsalted butter, softened to cool room temperature
- 3 ½ cups (420g) powdered sugar, sifted
- 1 teaspoon pure vanilla extract
- 2 to 4 tablespoons heavy cream or milk
- Pinch of salt
Ingredient Notes and Substitutions for Your Vanilla Buttercream
Let’s talk straight about that butter. I cannot stress this enough: it needs to be cool room temperature, not warm or melted! If it’s too soft, your whole frosting will turn soupy before you even add the sugar, and we want that light, whipped buttercream structure. I learned that the hard way when I tried to rush things one Sunday morning!
Sifting your powdered sugar is non-negotiable—think of it as mandatory maintenance for perfect results! It knocks out those little clumps that turn into gritty spots later. Also, about that vanilla: use the best pure vanilla extract you can afford, because that flavor is going to dominate. Now, if you’re baking for a big event or maybe a wedding cake and want a super white color, you can swap the brown, potent pure vanilla for clear (or artificial) vanilla extract. It won’t change the texture one bit, just the color.
Quick Vanilla Buttercream Instructions: A Smooth Frosting Tutorial
This is where the magic happens, and frankly, it’s probably why this recipe is such a fantastic smooth frosting tutorial! Since everything is prepped (butter cool, sugar sifted), this comes together lightning fast. We are aiming for that ethereal, light texture, and timing is everything to get that incredible whipped buttercream result.
First things first: get that paddle attachment on your mixer. Beat the butter on medium speed for a good three to five minutes! Don’t peek, don’t touch the speed dial—just let it go until the butter is pale yellow and looks totally fluffy. Once you slowly add the sifted sugar, vanilla, and salt, you’ll drop the speed back down just to combine it all safely.
Then comes the second crucial timing element: you boost the speed back up to medium-high and beat that mixture for another solid three to five minutes—yes, really! This extended beating step is your ticket to moving from basic icing to unbelievably silky topping. It really works out all the sugar particles and folds in so much air! When you’re done, add your cream slowly, teaspoon by teaspoon, until it’s perfect for spreading or piping. If you try to rush that initial butter whip, I promise, you’ll end up with butter that just tastes like sweet butter, not light cloud frosting!
Mastering the Creaming Stage for Fluffy Vanilla Icing
I’m guilty here! When I first started, I thought beating butter for five whole minutes was overkill—I’d stop at two minutes because it looked “good enough.” Well, my cake looked good, but the frosting was dense and heavy, almost like spackle! It just didn’t have that gorgeous lift.
The initial creaming (Step 1) is all about incorporating air into the fat structure, which gives your fluffy vanilla icing its foundation. The longer you beat it pale, the more tiny air pockets you create. Then, that final, long whip after adding the liquid (Step 4) is what really stabilizes all that air and ensures any residual sugar dissolves completely. That final push is what guarantees that melt-in-your-mouth texture that makes everyone ask where you bought the frosting!
If you need another quick fix for something completely different, check out my 5-minute aioli recipe—it also relies on mastering the initial emulsion!
If you want to see a similar technique in action handled by another great baker, check out Natasha’s excellent take on this frosting over here!
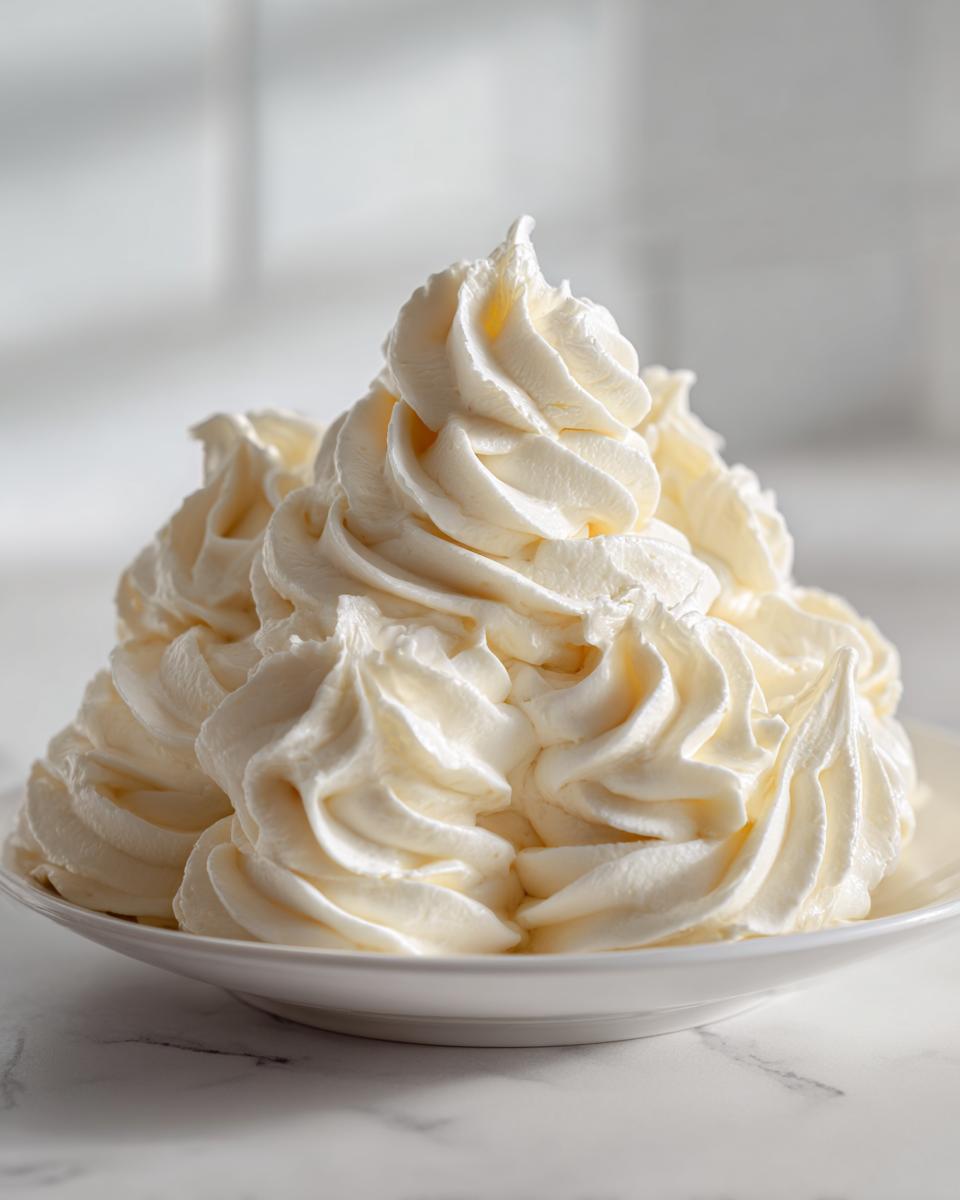
Tips for Perfect Piping Frosting Recipe Results
So you’ve got your beautiful, smooth vanilla buttercream, and now you want to make those gorgeous swirls on your cupcakes or pipe elegant borders on your cake. That’s the final test, right? You need a piping frosting recipe that holds its shape and doesn’t deflate before it hits the cake. The great news is that because we beat this frosting for so long, it naturally develops great structure!
Consistency is everything here. If you’re aiming for sharp edges on your piping tips, you want the frosting to be slightly stiffer than what you’d use just to spread on a cake. If it seems a little floppy after that final whip, don’t panic! Resist the urge to dump in more powdered sugar, which can make it overly sweet and heavy.
Instead, pop that bowl into the fridge for just 10 minutes. Seriously, 10 minutes is usually enough! When you bring it back out, give it a quick 30-second beat on low speed to loosen it up slightly before transferring it to your piping bag. That chill time firms up the butter just enough to give you those crisp, beautiful lines.
If you find your frosting is actually too stiff—maybe your kitchen is cold—you can carefully add another half teaspoon of heavy cream, but add it slowly! Too much liquid and you’re back to soup town. You want it soft enough to move through the tip easily but firm enough that the designs don’t immediately melt into puddles on their own. It’s all about that perfect temperature balance!

For some serious decoration inspiration and to see how others manage their frosting consistency, you can check out the details on how they handle their batches right here. They have some great tips on beating those final stages!
Using Your Vanilla Buttercream for Cakes and Cupcakes
Now that you have this unbelievable vanilla buttercream whipped up, let’s talk about how much you actually need! This is a super practical question every baker asks, and once you get the hang of it, you can plan your batches perfectly. We want to make sure you cover everything beautifully with this creamy cake topping without running out halfway through frosting your masterpiece!
This recipe, yielding about three cups of frosting, is generally perfect for a standard two-layer 8-inch or 9-inch round cake. That gives you enough for a nice, generous filling between the layers, a crumb coat (which you absolutely must do!), and a final thick, beautiful layer on the top and sides. It’s the ideal amount of buttercream for cakes that really want to look impressive.
If you’re focusing on standard-sized cupcakes—say, a dozen—you’ll find this batch is generous enough for a nice swirl on each one, plus maybe a few practice swirls on your own counter! If you’re going for those towering, bakery-style swirls with a big star tip, I always recommend bumping up the batch size by about a third, just to be safe, especially if you hate running short.
If you are working off a bigger base, like making a sheet cake or a tiered cake, you’ll need to scale up! For example, if you’re tackling a bigger project, you might want to look at my recipe for the ultra-moist red velvet cake, which tells you exactly how much frosting that larger size requires. It’s just one less thing to worry about when you’re in the middle of a big bake. Happy frosting!
Storage and Reheating Instructions for Classic Buttercream Base
Okay, you’ve made this gorgeous, silky vanilla buttercream, but maybe you didn’t need all of it for tonight’s dessert, or perhaps you want to save some for a batch of cookies tomorrow. We absolutely need to talk about storing this precious stuff so it stays perfect!
For short-term storage, I often just keep the remaining classic buttercream base right in a bowl covered with plastic wrap pressed directly onto the surface. If you press that wrap down tight, it stops air from getting in and making that ugly crust. If your kitchen is cool, it can sit out for a day or so; it’s still quite stable due to all that sugar!
If you need to store it longer—say, up to two weeks—you absolutely must refrigerate it. Pop it into a truly airtight container or seal that bowl really well. When you pull it out of the fridge, be ready for a little drama, because it will be rock solid. Don’t even think about trying to use it right away!
Here’s the crucial reheating tip, which is a make-or-break moment for buttercream: You cannot microwave it! That melts the butter unevenly, and you’ll just end up with greasy, separated soup. Instead, pull the frosting out about two hours before you plan to use it. Let it sit on the counter until it softens up a bit. Once it’s pliable again, grab your electric mixer—even a hand mixer works fine—and beat it on medium speed for three to five minutes. This rebrings the air in, remixes the fat and sugar, and returns it to that wonderful, light, fluffy texture we worked so hard to achieve initially. It miraculously smooths out every time!
Remember, if you just beat it without letting it come up to room temperature first, you’ll probably just smash the butter into tiny pieces, and it will look grainy and sad. Patience pays off, even in storage!
Troubleshooting Common Vanilla Buttercream Issues
Even with the best technique, sometimes things get a little wonky in the kitchen, right? Don’t worry! That’s why we talk about the fixes. Because this vanilla buttercream recipe is so straightforward—it’s using the basic American style—the fixes are usually just as simple. I’ve messed up batches by adding too much liquid or by trying to rush the butter temperature, so I know exactly what you need to do to keep this from turning into a kitchen disaster scene. We are aiming for a no fail frosting recipe, after all!
The two biggest issues I usually hit are when the frosting gets too runny (soupy!) or if it suddenly starts breaking or separating, which usually means the butter got too warm. If your buttercream is too sweet, well, that’s a tougher fix, but generally, if you’ve used your salt and vanilla correctly, it brings it into balance really well.
Fixing Grainy or Soupy Vanilla Buttercream
Let’s tackle the graininess first, even though we talked about it before. If, after your full 5-minute whip, you still feel a tiny bit of grit, do *not* add more sugar to try and fix it! That will just make it worse. Instead, add just one teaspoon of heavy cream or milk at a time and beat it on medium-high speed for another two full minutes. Often, that small introduction of liquid helps dissolve those last stubborn sugar particles, smoothing everything out. It’s amazing how often that works!
Now, if you accidentally added too much liquid—maybe you needed two tablespoons of cream and accidentally dumped in a quarter cup—your frosting is going to look soupy and sad. Don’t panic and don’t reach for more powdered sugar immediately! Adding a huge amount of sugar when the batter is soupy will just result in heavy, dense icing, not the light, whipped buttercream we want. Instead, cover the bowl and put the whole thing in the fridge for about 15 minutes. You want the butter to firm up a little bit!
Once it’s chilled slightly, scrape down the bowl well, and beat it again on medium speed for about three minutes. That chilling and re-whipping process helps the fat re-emulsify without needing tons more sugar, bringing you back to that lovely, stable consistency you need for spreading buttercream for cakes. While this recipe is tried and true, if you are ever looking for a different base that uses a different fat source, you should peek at my cream cheese frosting guide!
Estimated Nutritional Data for Vanilla Buttercream Frosting
Okay, so we know this vanilla buttercream is decadent and amazing, but I also know some of you are curious about what goes into it nutritionally. We always want to be transparent here at Command Central; remember, we value that full picture of what you’re bringing to your table!
The numbers below are just an estimate based on the standard ingredient amounts in this perfect creamy cake topping recipe. Since everyone uses slightly different brands of butter, sugar, and milk, your actual results might shift a tiny bit. I always say treat this section as a fun guide rather than a strict accounting!
- Serving Size: 1/4 cup
- Calories: 360
- Sugar: 48g
- Sodium: 45mg
- Fat: 19g
- Saturated Fat: 12g
- Unsaturated Fat: 7g
- Trans Fat: 0.5g
- Carbohydrates: 49g
- Fiber: 0g
- Protein: 1g
- Cholesterol: 60mg
There you have it! It’s definitely a treat—all that butter and sugar makes for a wonderful, rich flavor profile—but knowing the estimate means you can serve up this incredible easy buttercream recipe with confidence. Enjoy every silky spoonful!
Share Your Fluffy Vanilla Icing Creations
Alright, my friends, we’ve gone over every single detail to make sure this vanilla buttercream is the smoothest, silkiest batch of fluffy vanilla icing you’ve ever made. Now comes my favorite part: seeing what you’ve created! I truly believe that cooking is better when shared, and knowing that my tried-and-true method helped someone whip up a dessert that looks and tastes like it came straight from a professional bakery just makes my day.
So, I’m asking you for a favor! When you whip up this recipe, please come back here and leave me a star rating right below this section. Let me know how many stars you think this easy buttercream recipe deserves—was it quick? Was it super smooth? I want to hear it all!
And if you took a picture of those gorgeous swirls on your cupcakes or that perfectly frosted layer cake, please share it! Post your creation on social media and tag us so I can see the beautiful results of your hard work. There is nothing better than seeing how my readers adapt these classic American recipes for their own tables. If you are looking for more amazing ideas to put that frosting on, swing by my full collection of dessert recipes and find your next masterpiece!
Happy baking, and I can’t wait to see your smooth, creamy vanilla buttercream!
PrintThe Ultimate Fluffy and Silky Vanilla Buttercream Frosting (No Grainy Texture Guaranteed)
Make classic American vanilla buttercream that is light, creamy, and smooth. This recipe focuses on technique to prevent graininess, making it perfect for coating cakes and piping decorations.
- Prep Time: 10 min
- Cook Time: 0 min
- Total Time: 10 min
- Yield: About 3 cups 1x
- Category: Dessert Topping
- Method: Mixing
- Cuisine: American
- Diet: Vegetarian
Ingredients
- 1 cup (226g) unsalted butter, softened to cool room temperature
- 3 ½ cups (420g) powdered sugar, sifted
- 1 teaspoon pure vanilla extract
- 2 to 4 tablespoons heavy cream or milk
- Pinch of salt
Instructions
- Place the softened butter into the bowl of a stand mixer fitted with the paddle attachment. Beat the butter on medium speed for 3 to 5 minutes until it is very pale and fluffy. This step incorporates air, which is key for a light texture.
- Reduce the mixer speed to low. Gradually add the sifted powdered sugar, about one cup at a time, mixing until just combined after each addition. Scrape down the sides of the bowl as needed.
- Add the vanilla extract and salt. Mix on low speed until incorporated.
- Add 2 tablespoons of heavy cream or milk. Increase the mixer speed to medium-high and beat for 3 to 5 minutes. This extended whipping time is crucial for achieving a silky, smooth texture and removing any graininess.
- Check the consistency. If the frosting is too thick, add the remaining cream or milk, one teaspoon at a time, until you reach your desired spreading or piping consistency.
- If the frosting seems too soft, chill it for 10 minutes before using. If it is too stiff, beat it longer on medium speed.
Notes
- For the smoothest result, ensure your butter is cool room temperature, not warm or melted.
- Sifting the powdered sugar prevents lumps from forming in your final frosting.
- If you want a whiter frosting, substitute clear vanilla extract for the standard brown extract.
- This recipe is excellent for piping decorations because it holds its shape well after whipping.
Nutrition
- Serving Size: 1/4 cup
- Calories: 360
- Sugar: 48g
- Sodium: 45mg
- Fat: 19g
- Saturated Fat: 12g
- Unsaturated Fat: 7g
- Trans Fat: 0.5g
- Carbohydrates: 49g
- Fiber: 0g
- Protein: 1g
- Cholesterol: 60mg