
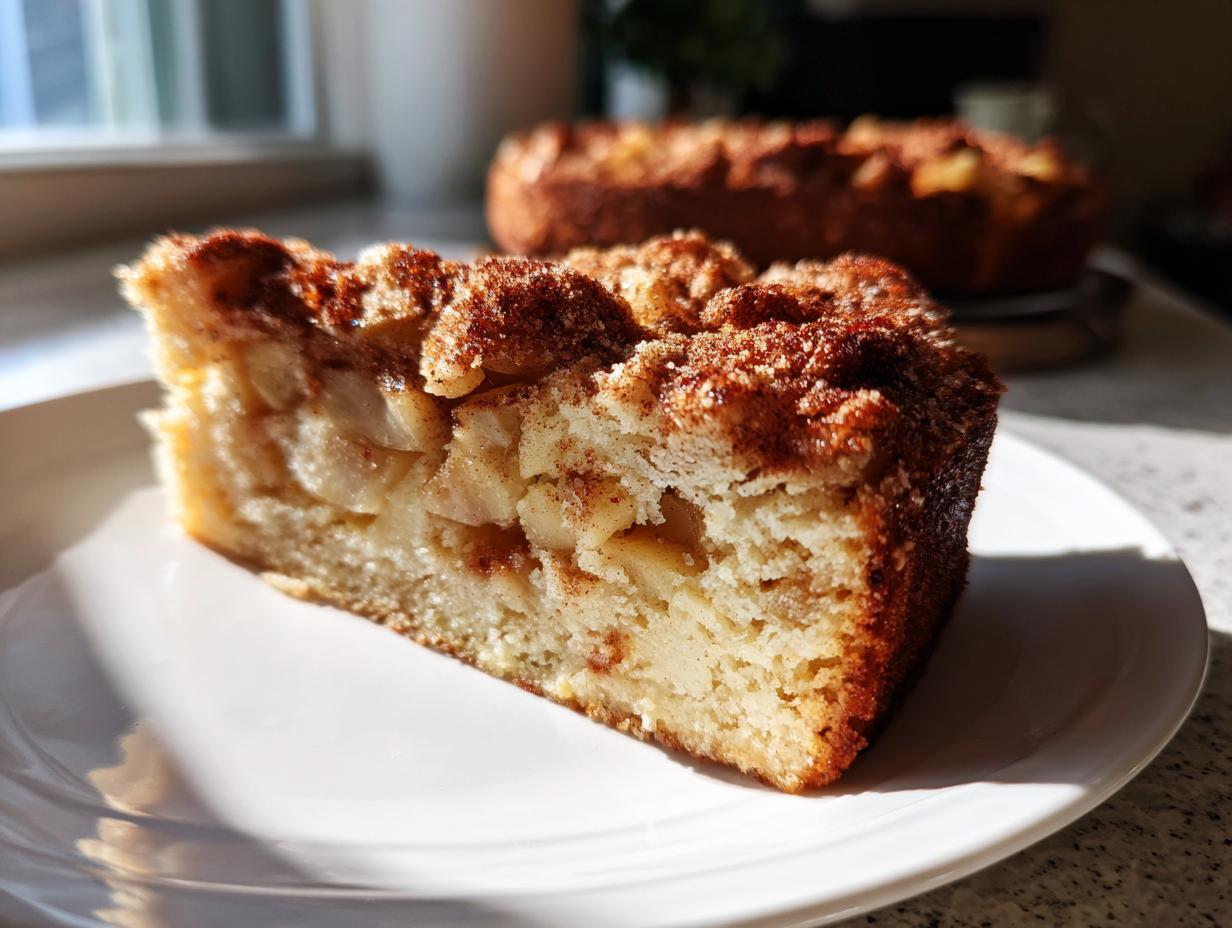
There is nothing quite like the scent of cinnamon and baked apples floating through the house, right? For me, that smell instantly takes me back to holiday tables filled with family and comfort. I’ve spent years chasing that perfect, melt-in-your-mouth texture, and I finally cracked the code for what I truly believe is the best moist, dairy-free jewish apple cake you will ever taste. Forget dry crumbs! This recipe honors tradition—it’s completely dairy-free, which makes it so versatile—but it uses simple tricks to keep every slice unbelievably tender. If you’re looking for a go-to classic jewish dessert that everyone asks for year after year, you’ve found it. I’m so excited to share this with you, based on the baking knowledge I’ve gathered here at Cookery Command, where we honor tradition with perfect technique. You can read a little more about our kitchen philosophy here: our journey.
- Why This Moist Jewish Apple Cake Recipe Stands Out (E-E-A-T Focus)
- Ingredients for the Best Jewish Apple Cake Ever
- Step-by-Step Instructions for a Perfect Jewish Apple Cake
- Baking and Cooling the Classic Jewish Desserts Favorite
- Tips for Baking the Best Apple Cake Ever
- Serving Suggestions for Your Cinnamon Apple Cake
- Storage and Reheating Instructions for Leftover Jewish Apple Cake
- Frequently Asked Questions About This Jewish Apple Cake
- Estimated Nutritional Data for This Dairy Free Apple Cake
- Share Your Experience Making This Traditional Jewish Baking Recipe
Why This Moist Jewish Apple Cake Recipe Stands Out (E-E-A-T Focus)
So, why am I so confident this is the best apple cake ever? Well, it hits all those must-have notes people search for: it’s super moist, it’s naturally dairy-free, and that topping? Forget about it! This isn’t just another spiced cake; it’s a superior moist apple cake recipe that stays perfect three days later. We built this recipe to deliver texture and flavor without relying on butter or milk, which is why it’s such a successful dairy free apple cake.
Achieving Peak Moisture in Your Jewish Apple Cake
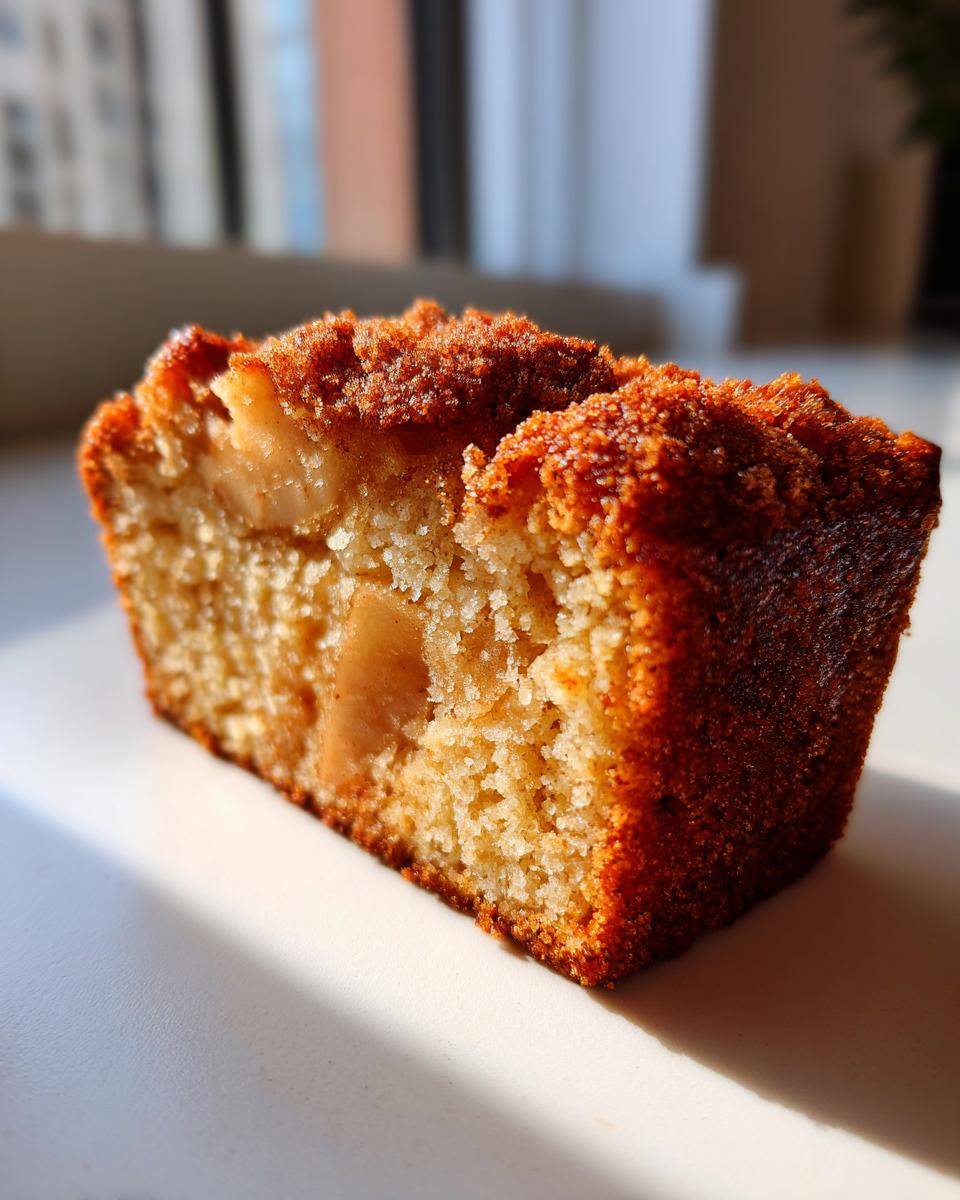
The moisture secret in this jewish apple cake comes down to swapping out the dairy fat for oil and adding applesauce—don’t skip that applesauce! It keeps the crumb soft without weighing it down. We use oil because it stays liquid at room temperature, meaning the cake feels instantly tender when you slice it. Now, here’s my biggest warning: when you mix the flour in, stop stirring the second you see no more streaks of dry stuff. Seriously, stop! Overmixing develops gluten fast, and that’s what turns this beautiful cake into something tough. We want tender, not tough!
The Essential Cinnamon Sugar Crumb Topping
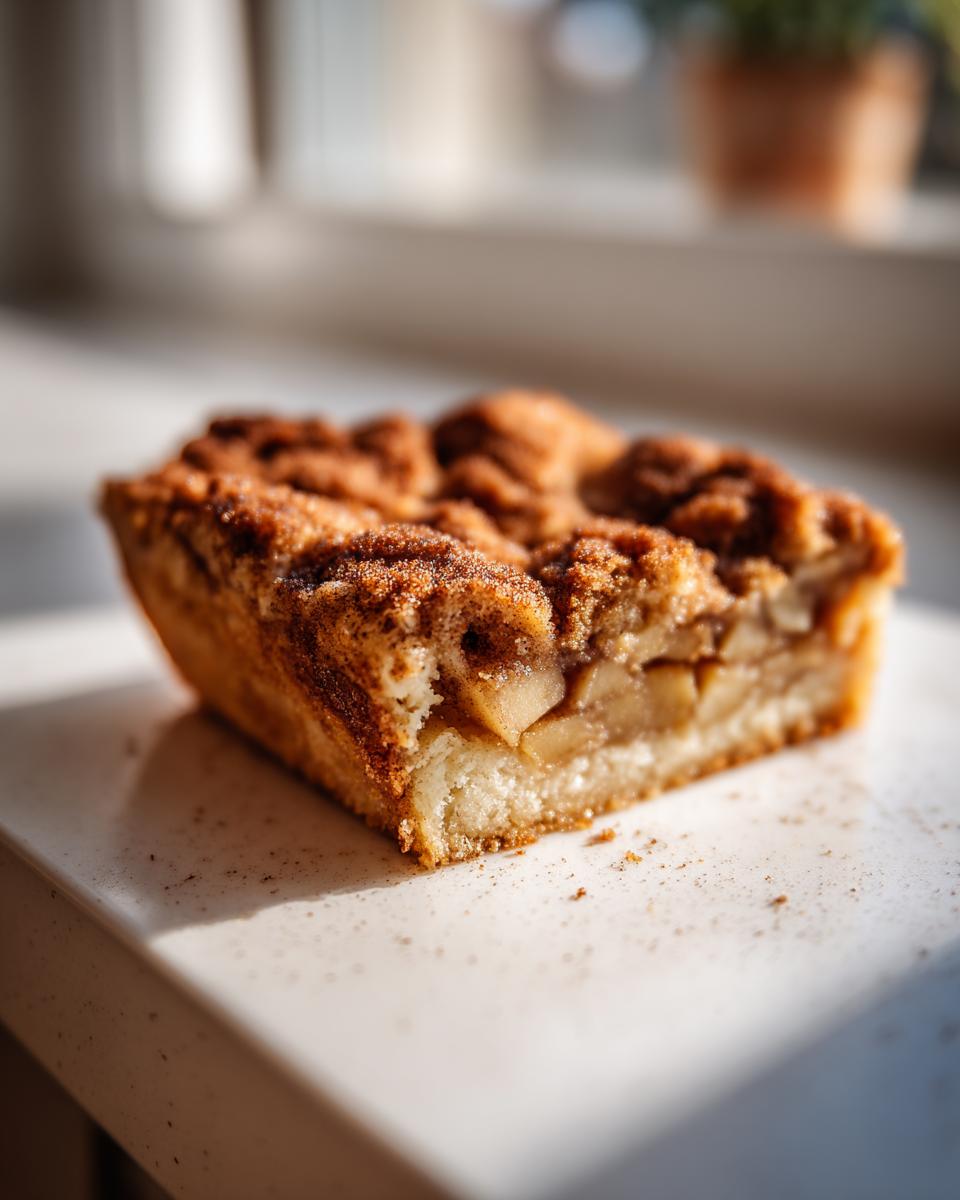
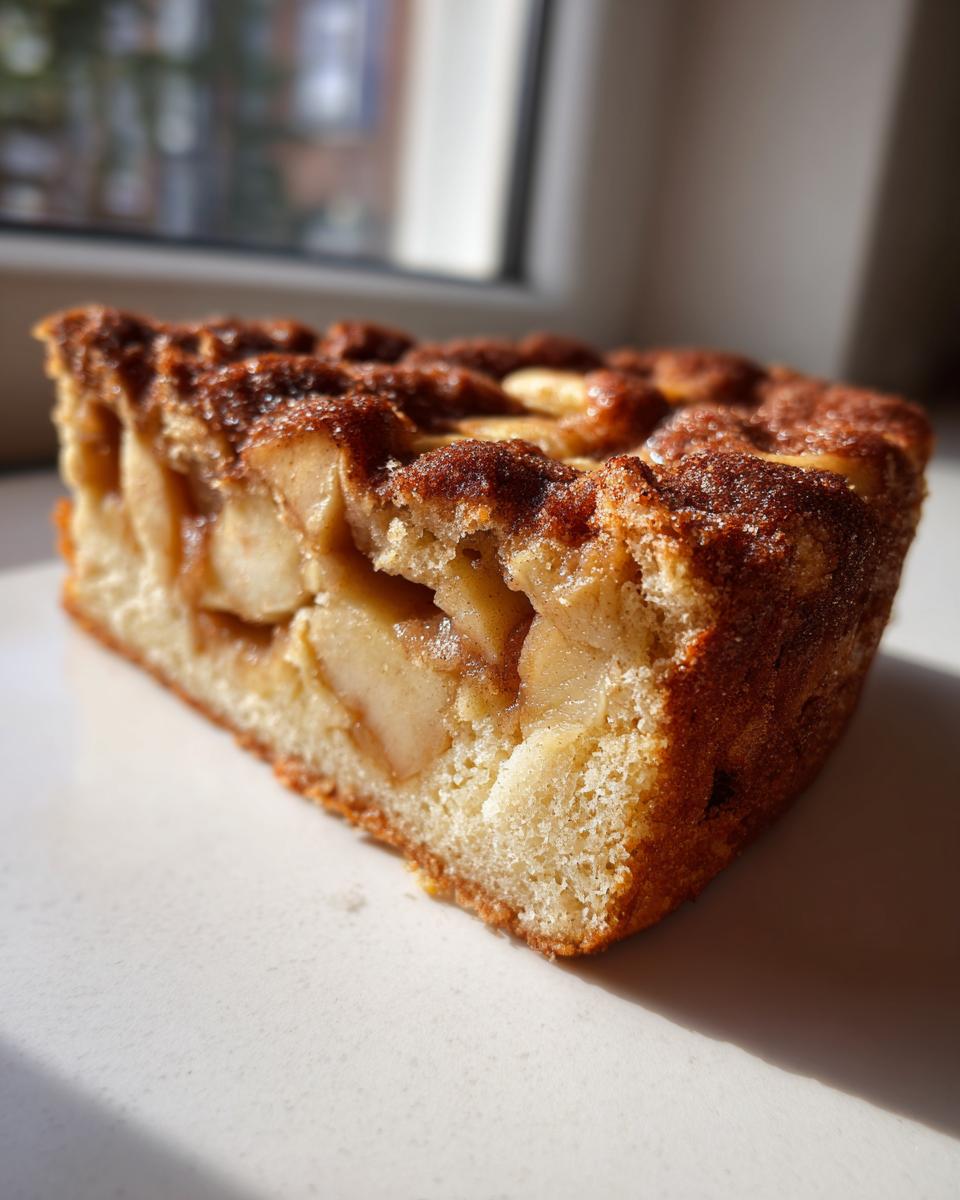
This topping is everything. When you picture that perfect slice of a cinnamon apple cake, you imagine that crackly edge, right? That comes from sprinkling the topping directly onto the batter *before* baking. It sinks just enough during the bake time to create a beautiful, crisp layer that contrasts perfectly with the soft cake underneath. It adds that necessary sugar crunch that elevates this from a snack cake to true holiday apple recipe material.
Ingredients for the Best Jewish Apple Cake Ever
Alright, let’s talk about what goes into making this incredible jewish apple cake. When you see a list of ingredients, I want you to look for quality, not quantity! Since this is a no-fuss cake, using the right items really shines through. We’ve detailed everything below so you can get your mise en place ready before you even think about turning on the mixer. Baking is much less stressful when everything is measured out and waiting! If you’re looking for another easy, buttery bake inspiration, check out my guide to easy apple cobbler.
For our cake batter, here’s what you’ll need:
- 2 cups all-purpose flour
- 1 1/2 teaspoons baking powder
- 1/2 teaspoon baking soda
- 1/2 teaspoon salt
- 1 1/2 teaspoons ground cinnamon
- 1 cup granulated sugar
- 1/2 cup packed light brown sugar
- 3/4 cup vegetable oil
- 4 large eggs
- 1 teaspoon vanilla extract
- 1/4 cup unsweetened applesauce
- 1/4 cup unsweetened orange juice
- 3 large Granny Smith apples, peeled, cored, and diced
And don’t forget the crucial topping—it’s what gives this cinnamon apple cake that signature crunch!
- 1/2 cup granulated sugar for topping
- 1 teaspoon ground cinnamon for topping
Ingredient Notes and Substitutions for Your Apple Cake
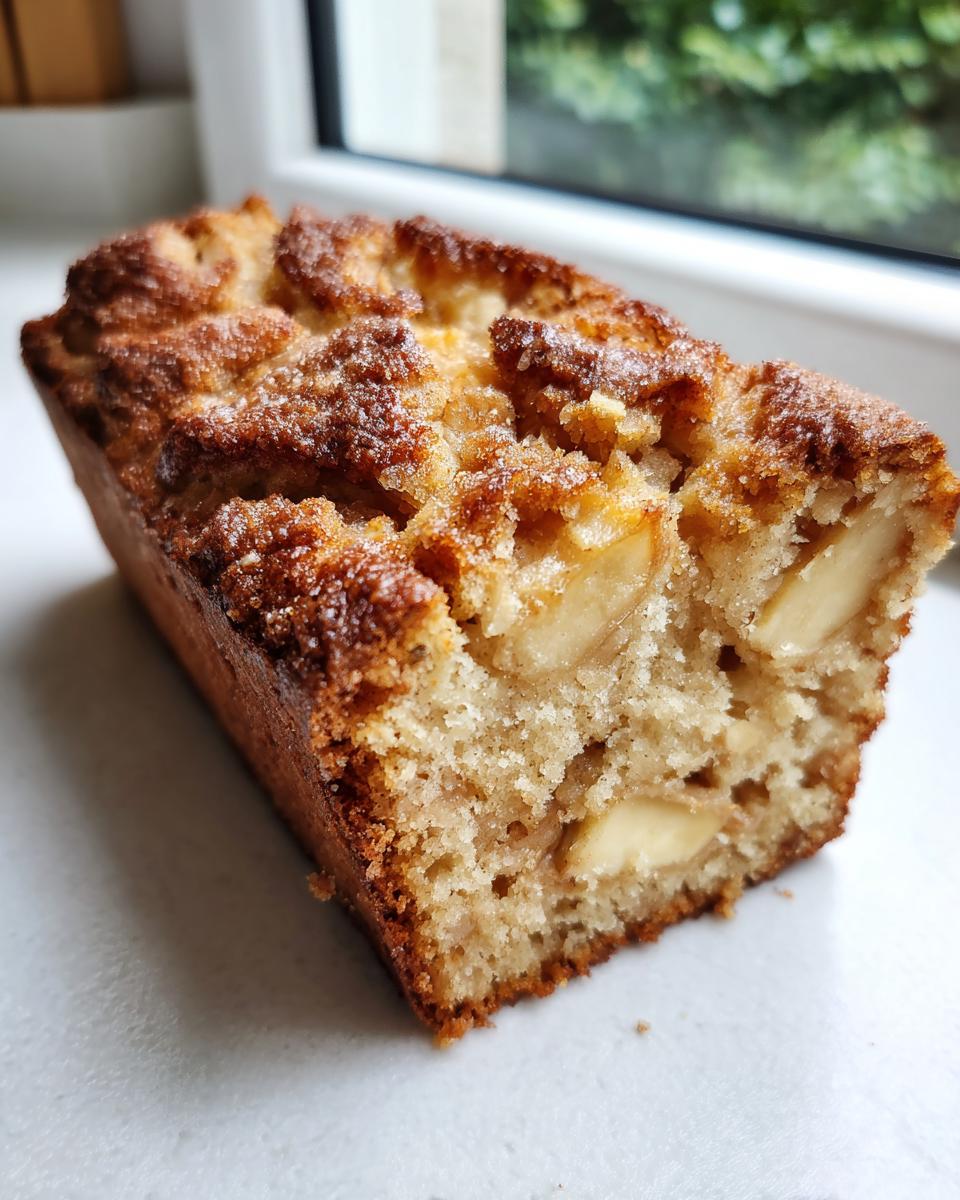
The apples are non-negotiable for me. You absolutely must use firm, tart apples like Granny Smith. They hold their shape perfectly while baking and their slight tartness cuts through the richness of the cake beautifully. If you use a soft apple, it’ll turn to mush, and we want defined chunks in our moist pound cake with apples, right?
Also, about that liquid: I used orange juice because its acidity helps activate the baking soda and adds such a lovely, bright background note. If you don’t keep orange juice handy, don’t panic! You can simply swap it out for apple juice. Either way, you’re guaranteed an amazing result for this easy apple cake baking project.
Step-by-Step Instructions for a Perfect Jewish Apple Cake
Ready to see the magic happen? I always find that following the steps exactly, especially with a moist apple cake recipe like this, leads to the best results. We’re working quickly here, so get your oven hot and your pan oiled up first. You’re using a 10-inch tube pan or a Bundt pan, remember—these tall pans help the cake bake evenly all the way through. If you want a refresher on preparing pans perfectly, I have a whole guide dedicated to making sure nothing sticks, though for this one, simple grease and flour usually does the trick! I’m linking my favorite pound cake preparation tips here in case you’re using fancy decorative Bakeware.
Mixing the Batter for Your Moist Apple Cake Recipe
First things first: oven to 350 degrees F (175 degrees C) and prep that pan! Now, we split the mixing into two bowls, which keeps everything tidy. In a medium bowl, you’re going to whisk together all your dry elements—that’s the flour, baking powder, baking soda, salt, and 1 1/2 teaspoons of cinnamon. Just whisk them until they look uniform; set that bowl aside.
In your big bowl, you’ll combine the wet stuff. Start by whisking the sugars (both the granulated and the lovely dark brown sugar) with the vegetable oil until they look smooth. Then beat in those four eggs, one at a time, making sure each one is fully incorporated before adding the next. After that, you stir in your flavor boosters: vanilla, applesauce, and orange juice. You want that mixture looking nice and homogenous.
Now comes the crucial moment! Gradually add those dry ingredients into the wet ones. Keep your mixer on low—and I mean *low*—mixing only until you see the last bit of flour disappear. Seriously, put the mixer down immediately! We cannot overmix this jewish apple cake if we want that tender crumb we talked about.
Layering and Topping the Jewish Apple Cake
This layering technique is what makes this cake so special and gives it a fantastic texture throughout, not just on top! Take half of your lovely, thick batter and gently pour it into your prepared pan. Don’t smooth it too much; let it settle naturally.
Now, grab the topping mixture—that 1/4 cup sugar and 1/2 teaspoon cinnamon we set aside earlier. Sprinkle that *entire* amount evenly over that first layer of batter. It’s going to sink in while baking, which is exactly what we want to happen! Pour the remaining batter right over top of that sugary layer, making sure to cover it completely. Finally, sprinkle the remaining topping mixture over the very top surface. This top layer bakes up into that signature crust you crave on a perfect jewish apple cake.
Gently fold those diced Granny Smith apples into whatever batter is left in the bowl, then pour that apple-laden batter in last if you managed to separate it, or just give the top a final sprinkle if you mixed them in earlier! (Note: Based on the ingredients list, the apples go in *after* you fold the dry into the wet, just before pouring half the batter—I always make sure to fold them in gently so they get distributed nicely throughout.) Bake that beauty for 60 to 75 minutes!
Baking and Cooling the Classic Jewish Desserts Favorite
This cake needs a little patience at the end, but trust me, it’s worth hearing the timer buzz. We set the oven for 350 degrees F (175 degrees C), and because this is a dense, moist cake, it needs a good, long bake—anywhere from 60 to 75 minutes. Don’t even think about opening the oven door before the 60-minute mark, or you might just deflate all your hard work! This is key to getting that fantastic rise on your jewish apple cake.
How do you know she’s done? The classic wooden skewer test is your best friend here. Stick a wooden skewer or a thin knife right into the center of the cake. If it comes out clean, or maybe just with a few beautiful, moist crumbs clinging to it, you’re golden. If it comes out gooey with wet batter, let her bake a bit longer and check again in five-minute intervals. We’re aiming for done, but never dry!
Now, the cooling process is almost as important as the baking itself for this classic jewish dessert. Once you pull that lovely cake out, you need to let it rest in that hot pan on a wire rack for a full 15 minutes. Why? That initial rest lets the structure set up so it doesn’t just crumble when you try to move it. If you try to flip it right away, you’ll end up with a beautiful mess on your counter, and nobody wants that!
After those 15 minutes are up, go ahead and carefully invert the cake onto that wire rack. Give it a little shake if you need to help it release—sometimes they hold on tight! Once it’s out, let it cool completely before you even think about slicing into it. When it’s fully cooled, the texture stabilizes perfectly, and that cinnamon-sugar topping gets that wonderful crispness. If you need some visual inspiration for getting that perfect bake, check out some great tips over on The Farm Girl Gabs blog for a look at their technique!
Tips for Baking the Best Apple Cake Ever
You’ve followed the steps; you’ve got the right apples, but you want that extra nudge to make this jewish apple cake officially the best one you’ve ever made? I totally get it. Baking is all about those little details that turn a good recipe into an iconic one. Since we are striving for reliability and the absolute best texture, I always insist on a few extra checks before I even turn the oven on. If you’re looking for more easy weekend baking inspiration, make sure you check out my recipe for banana oatmeal muffins!
Here are my top three secrets for guaranteeing success with this moist apple cake recipe every single time:
Use Room Temperature Eggs (And Even Room Temp Juice!)
This is crucial, especially when you’re using oil instead of solid butter. Room temperature ingredients emulsify so much better! When those eggs are cold, they can make the oil separate a bit, and that can lead to a slightly greasy or uneven crumb structure once baked. I usually pull my eggs, applesauce, and even the orange juice out of the fridge about 30 minutes before I want to start mixing. It just makes everything blend into a cohesive, beautiful batter that traps air perfectly for that light, yet sturdy, structure our cinnamon apple cake needs.
Don’t Skimp on the Pan Prep, Especially if Using a Bundt
If you are using a Bundt pan for this apple bundt cake recipe—and I highly suggest you do for presentation—you need to be thorough with the greasing and flouring. Because this cake has sugar in the batter and those glorious sugar crystals on top, it loves to stick if you miss a spot. Don’t just spray and hope! I use a pastry brush to work some vegetable shortening into every nook and cranny, and then dust it generously with flour, shaking out the excess. If you’re nervous, you can look up how Bakers use specialized sprays, but a generous layer of fat followed by a good coat of flour works like a charm. You want that beautiful pattern to release flawlessly!
Wait for the Full Cool-Down Before Slicing
I know, I know! When something smells this amazing—warm apples and cinnamon wafting everywhere—it’s torture to wait! But slicing too early is the absolute fastest way to ruin the structure of any moist pound cake with apples. Because this cake is so rich in moisture from the oil and applesauce, it needs that full cooling period to let those starches set up. Slicing when warm releases steam and moisture too fast, which can make the slice look gummy or even fall apart slightly. Patience is truly the final ingredient here!
If you want to see how one of my favorites handles baking these kinds of apple treats, this recipe from One Sarcastic Baker is a fantastic resource for inspiration on technique!
Serving Suggestions for Your Cinnamon Apple Cake
Now that you’ve successfully baked the most amazing, tender, and completely dairy-free jewish apple cake, the fun part begins: eating it! This cake is so flavorful all on its own, thanks to those apples and the intense cinnamon-sugar crust, but sometimes it’s nice to dress things up a little, especially if you’re serving it as a centerpiece for a holiday meal or a big gathering.
Truthfully, my favorite way to enjoy this cinnamon apple cake is completely plain, maybe warmed up just slightly so the spices really bloom. It’s perfect as an anytime treat or an afternoon coffee cake.
If you are having friends over and want to make it a real showstopper, especially as we get into those beautiful cool months when these fall apple desserts are in high demand, you have a couple of great options:
- A Light Dusting: Don’t overthink it! A very light dusting of powdered sugar right before serving makes it look elegant without hiding that gorgeous crust.
- A Dollop of Cream: Since this is a dairy-free cake, you can pair it beautifully with a scoop of good quality vanilla bean non-dairy ice cream or even a spoonful of rich coconut whipped cream right on the side. It melts just perfectly!
- Sweet Yogurt Swirl: For something a bit tangy, try swirling a little plain Greek yogurt (or use a dairy-free coconut yogurt alternative) with a touch of maple syrup. It’s fantastic alongside a slice!
This traditional jewish baking recipe is so versatile; it works beautifully for Rosh Hashanah brunch or just as a cozy end to a cozy evening meal. If you happen to be planning a whole spread of party food to go with your dessert, I’ve got a fantastic recipe for cocktail meatballs that always disappears fast!
Storage and Reheating Instructions for Leftover Jewish Apple Cake
You know you’ve made a winner when you have leftovers! And trust me, you’ll want to save some of this moist apple cake recipe because it tastes even better the next day. Since this jewish apple cake is made with oil and applesauce instead of butter, its staying power is fantastic, but we still need to store it correctly to protect that lovely crumb and keep that cinnamon topping crisp.
Here’s my trustworthy advice for keeping your slices perfect:
Storing Your Cinnamon Apple Cake at Room Temperature
Because this is a dairy-free cake, it’s actually happier sitting out on the counter for short periods, much like a good coffee cake. Once the cake is completely cool—and I mean stone cold—you need to cover it tightly. I usually wrap the remaining cake loosely in plastic wrap first, and then place it inside an airtight container. This two-step process really seals in the moisture we worked so hard to achieve!
Stored this way, at cool room temperature, this cinnamon apple cake should easily last three to four days. However, avoid storing it anywhere too warm or humid, like near the dishwasher! If it gets too warm, the topping might start to weep or get sticky, and we certainly don’t want that.
Should You Refrigerate This Apple Cake?
Honestly, I try to avoid the fridge if I can. Refrigeration is the enemy of moisture in almost any cake that isn’t heavily frosted! Putting this delicious jewish apple cake in the cold air can make the cake part start to feel a little firm or dense. Only put it in the fridge if your kitchen is extremely hot, or if you plan to keep it longer than four days.
If you do need to chill it, make sure it’s wrapped extremely well—like, Saran Wrap cocoon level tight—before putting it in the fridge. That keeps it from absorbing any strange smells from your fridge. If it comes out tasting a bit firm after a trip to the cold box, don’t worry, we have a quick fix coming up!
Quick Reheating for That Fresh-Baked Flavor
This step brings your leftover slice right back to life! If your cake is room temperature, a quick warm-up is heavenly. If it’s slightly firm from the fridge, this will soften it right up. You only need about 15 to 20 seconds.
I pop a slice on a microwave-safe plate. Heat it in short bursts—10 seconds, check it, then another 10 seconds if needed. You want it just warm enough that the apple pieces soften slightly and the cinnamon smells fresh again. You don’t want it hot, just pleasantly warm. This makes it taste like it just came out of the oven this morning, even if it’s day three! It’s the easiest way to enjoy this traditional jewish baking favorite any time you get a craving.
Frequently Asked Questions About This Jewish Apple Cake
I totally get it—baking is fun, but sometimes you need a quick answer before you dive in, or maybe you’re wondering how to tweak the recipe just a hair! When you’re going through a recipe, especially one that’s meant to be a staple like this jewish apple cake, you want assurance that it will work out perfectly. We’ve covered all the common headaches for you below, so hopefully, you can get baking with confidence! If you’re wondering about other versatile recipes, I’ve got a great guide for easy chicken parmesan that might be next on your list!
Can I make this jewish apple cake ahead of time?
Yes, and I highly encourage it! This is one of those amazing holiday apple recipes that actually tastes better the next day once all those spices have had time to mingle with the apples. You can absolutely bake this cake a full day ahead of time. Let it cool completely—remember that full cooling period we talked about!—wrap it tightly, and store it covered at cool room temperature. Just give it a quick check to make sure your kitchen isn’t too warm before serving. It’s perfect for stress-free entertaining!
What is the best pan size for this easy apple cake baking?
For this recipe, specifically because of how we layer that glorious cinnamon sugar topping, the **10-inch tube pan** is my absolute favorite choice. It gives the cake height and ensures the heat penetrates evenly to bake through the middle layer of topping. A standard **Bundt pan** (usually 10 or 12 cups) also works beautifully and gives you that gorgeous presentation. If you only have standard round pans, you can usually split the batter between two 9-inch round cake pans. Just watch them carefully, as they will likely bake faster than the tube cake—maybe start checking around 45 minutes for those!
I also get questions about making this a loaf cake, and while you certainly can, you’ll need two standard loaf pans, and the baking time might increase significantly, maybe up to 80 minutes. If you want more detail on different pan sizes, Naomi’s site has some great visualization tips!
Is this recipe truly dairy-free, even the topping?
It absolutely is! That’s one of the best things about this particular moist apple cake recipe. Everything in the recipe—the oil instead of butter, the applesauce and orange juice instead of milk or sour cream—keeps it completely dairy-free. Even the delicious cinnamon sugar topping is just sugar and cinnamon mixed together, so there’s zero dairy worry there! This makes it such a friendly recipe to bring to any event, especially if you’re serving Rosh Hashana desserts alongside milk-based dishes.
How important is it to use Granny Smith apples?
They are really important for the outcome you want! Granny Smith apples provide tartness and they hold their shape unbelievably well during that long bake time. If you use a softer apple, like a Red Delicious, the apple chunks will essentially melt into mush rather than remaining nicely defined pieces throughout the crumb. Since we are aiming for the best apple cake ever, stick to those firm cousins like Granny Smith or maybe a Honeycrisp if you can’t find Snyths.
Estimated Nutritional Data for This Dairy Free Apple Cake
Okay, let’s talk numbers! Since we are dealing with a wonderfully moist apple cake recipe that uses oil and lots of sugar (it’s dessert, after all!), knowing the macros can be helpful. I’ve taken our ingredients list—especially the oil and the sugar in that lovely crust—and run the estimates for a single slice. Remember, since we’re using simple pantry staples for this jewish apple cake, these numbers are usually pretty consistent, but they are definitely an estimation based on standard ingredient measurements!
We want this to be clear, so here is the breakdown per serving:
- Serving Size: 1 slice
- Calories: 350
- Fat: 18g (Thankfully, most of that is unsaturated fat!)
- Saturated Fat: 2g
- Trans Fat: 0g
- Carbohydrates: 48g
- Sugar: 35g (Yes, it’s sweet, but that topping is divine!)
- Protein: 4g
- Fiber: 2g
- Cholesterol: 75mg
- Sodium: 250mg
Just a little note, because I am all about transparency here at the Command Center: these figures are calculated based on the recipe yielding 10 good-sized slices, as listed in our prep details. Cake density and your exact slice size can change things. If you cut smaller pieces of this amazing dairy free apple cake, your calorie count will drop, of course! Enjoy the indulgence; this traditional jewish baking treat is worth every single number!
Share Your Experience Making This Traditional Jewish Baking Recipe
Now that you’ve pulled that glorious, moist, and fragrant jewish apple cake out of the oven, the very best part of this whole process is hearing from you! This recipe feels like a treasured piece of history in my kitchen, and I absolutely love knowing it’s making its way onto your tables for your own family celebrations or just a quiet Sunday afternoon coffee break.
Whether you’re celebrating a holiday or just honoring the tradition of home baking, I want to know how it went for you! Did you stick exactly to the recipe, or did you sneak in one of your own little twists? Did your crust turn out perfectly crisp? Did everyone ask for seconds?
Please take a moment to leave a star rating right below this section. It helps other bakers find this reliable recipe, and more importantly, I love reading your notes! Seeing comments about this traditional jewish baking gem reminds me why we share recipes in the first place—it’s all about community and connection through food.
If you have any lingering questions about quantities, substitutions, or storage—though I hope we cleared everything up above!—don’t hesitate to reach out through the contact page. Happy baking, and thank you so much for letting this classic cake into your home!
PrintMoist Dairy-Free Jewish Apple Cake with Cinnamon Sugar Crust
This classic Jewish apple cake delivers a moist texture, rich cinnamon flavor, and a crisp cinnamon-sugar topping. It is a simple, dairy-free recipe perfect for holidays or everyday enjoyment.
- Prep Time: 20 min
- Cook Time: 70 min
- Total Time: 90 min
- Yield: 10 servings 1x
- Category: Dessert
- Method: Baking
- Cuisine: American/Jewish
- Diet: Dairy Free
Ingredients
- 2 cups all-purpose flour
- 1 1/2 teaspoons baking powder
- 1/2 teaspoon baking soda
- 1/2 teaspoon salt
- 1 1/2 teaspoons ground cinnamon
- 1 cup granulated sugar
- 1/2 cup packed light brown sugar
- 3/4 cup vegetable oil
- 4 large eggs
- 1 teaspoon vanilla extract
- 1/4 cup unsweetened applesauce
- 1/4 cup orange juice
- 3 large Granny Smith apples, peeled, cored, and diced
- 1/2 cup granulated sugar for topping
- 1 teaspoon ground cinnamon for topping
Instructions
- Preheat your oven to 350 degrees F (175 degrees C). Grease and flour a 10-inch tube pan or Bundt pan.
- In a medium bowl, whisk together the flour, baking powder, baking soda, salt, and 1 1/2 teaspoons of cinnamon. Set aside.
- In a large bowl, whisk together the 1 cup granulated sugar, brown sugar, and vegetable oil until combined.
- Beat in the eggs one at a time, mixing well after each addition. Stir in the vanilla extract, applesauce, and orange juice.
- Gradually add the dry ingredients to the wet ingredients, mixing on low speed until just combined. Do not overmix.
- Gently fold in the diced apples.
- Pour half of the batter into the prepared pan. Sprinkle half of the topping mixture (1/4 cup sugar mixed with 1/2 teaspoon cinnamon) evenly over the batter.
- Pour the remaining batter over the topping layer. Sprinkle the remaining topping mixture over the top.
- Bake for 60 to 75 minutes, or until a wooden skewer inserted into the center comes out clean.
- Let the cake cool in the pan on a wire rack for 15 minutes.
- Invert the cake onto the rack and allow it to cool completely before slicing.
Notes
- For the best results and a very moist cake, use firm, tart apples like Granny Smith.
- You can substitute the orange juice with apple juice if preferred.
- This cake is naturally dairy-free, making it suitable for serving with meat meals.
Nutrition
- Serving Size: 1 slice
- Calories: 350
- Sugar: 35
- Sodium: 250
- Fat: 18
- Saturated Fat: 2
- Unsaturated Fat: 16
- Trans Fat: 0
- Carbohydrates: 48
- Fiber: 2
- Protein: 4
- Cholesterol: 75