
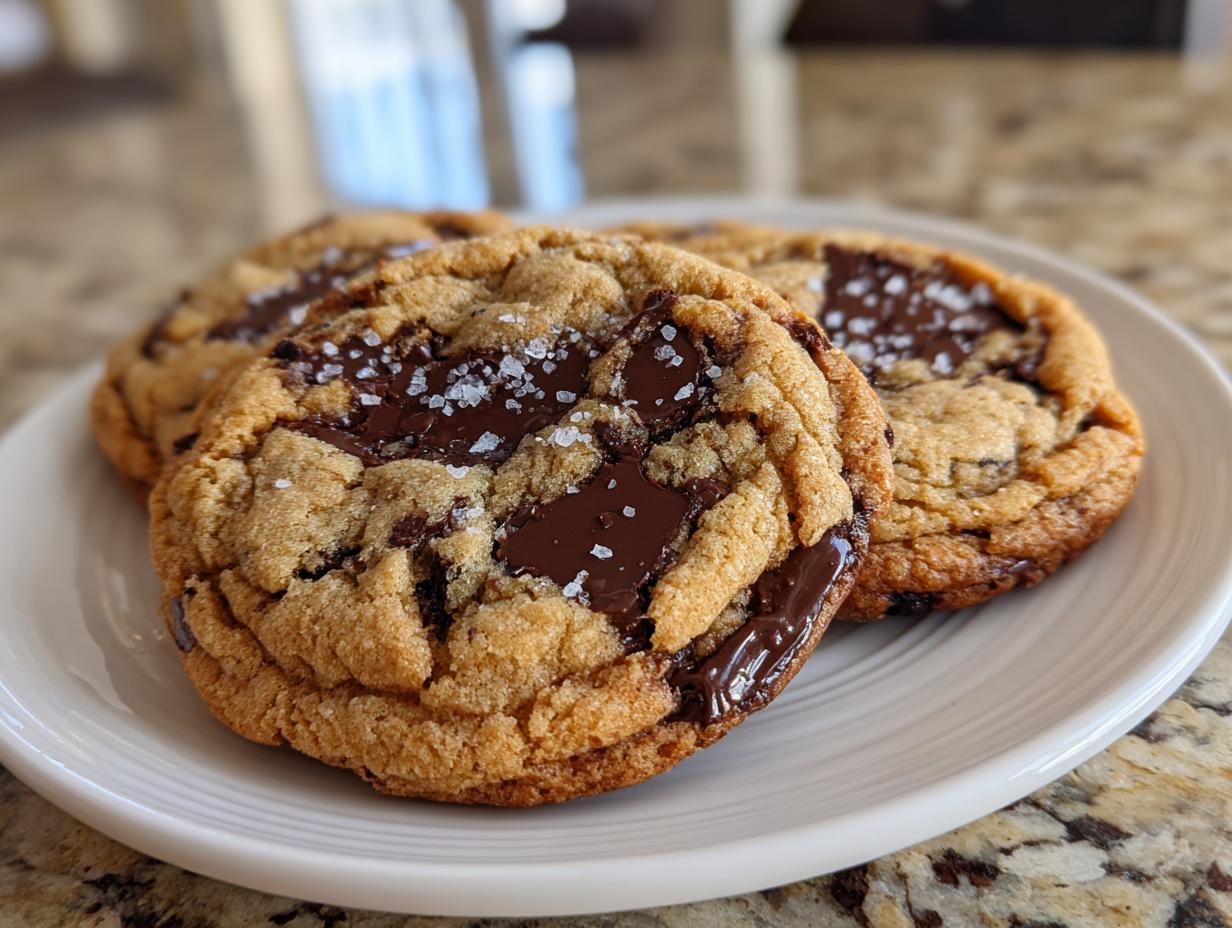
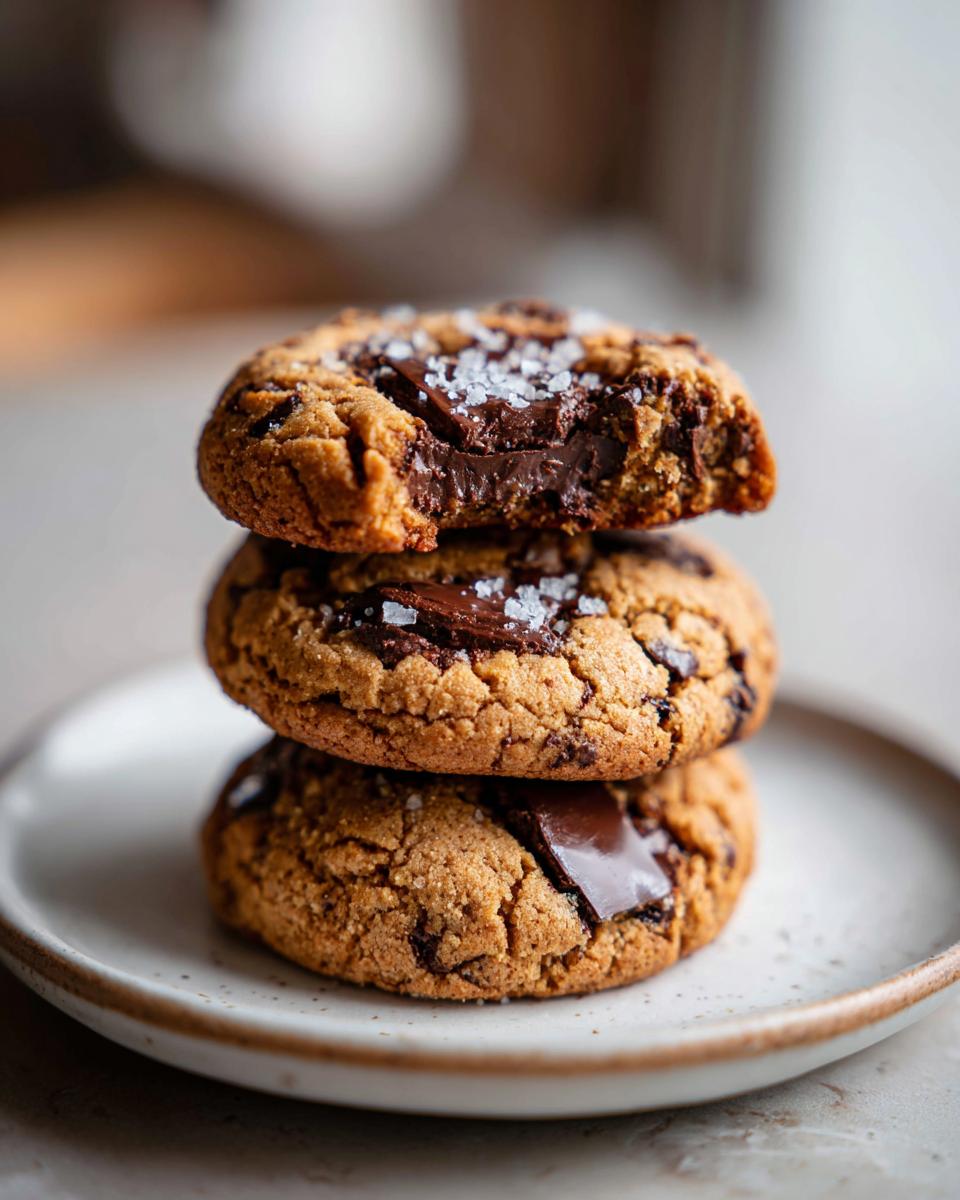
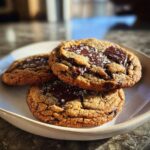
You think you know the perfect chocolate chip cookie? Think again. We’re taking that classic comfort food and launching it straight into gourmet territory with the depth of toasted nuttiness only browned butter can deliver. Meet what I sincerely believe are the ultimate brown butter chocolate chip cookies—they have those beautifully crisp outer edges that shatter just right, holding onto centers that stay incredibly chewy. This recipe is the result of rigorous testing, blending the time-honored traditions I learned growing up with the precise techniques honed in a professional test kitchen, ensuring they come out perfectly every single time you bake them.
- Why Our brown butter chocolate chip cookies Recipe Stands Apart
- Essential Ingredients for Ultimate brown butter chocolate chip cookies
- Mastering the Browned Butter Technique for brown butter cookies
- Step-by-Step Instructions for Chewy chocolate chip cookies
- Tips for Perfect bakery style cookies Every Time
- Ingredient Notes and Substitutions for brown butter chocolate chip cookies
- Storing and Reheating Your brown butter chocolate chip cookies
- Frequently Asked Questions about brown butter chocolate chip cookies
- Nutritional Estimates for This Ultimate chocolate chip cookie
Why Our brown butter chocolate chip cookies Recipe Stands Apart
I get asked all the time why I bother with the extra step of browning the butter. Honestly, once you taste the result? You’ll never go back, I promise! This process changes the molecular structure of the butter, sending the flavor way beyond standard cookie goodness. It’s about maximizing flavor and controlling texture, because good cookies should never be complicated.
- Deep, Nutty Flavor Profile: The star here is the brown butter, which adds a profound, almost toffee-like essence. It completely transforms your standard chocolate chip cookie into something totally nutty chocolate chip cookies with serious depth.
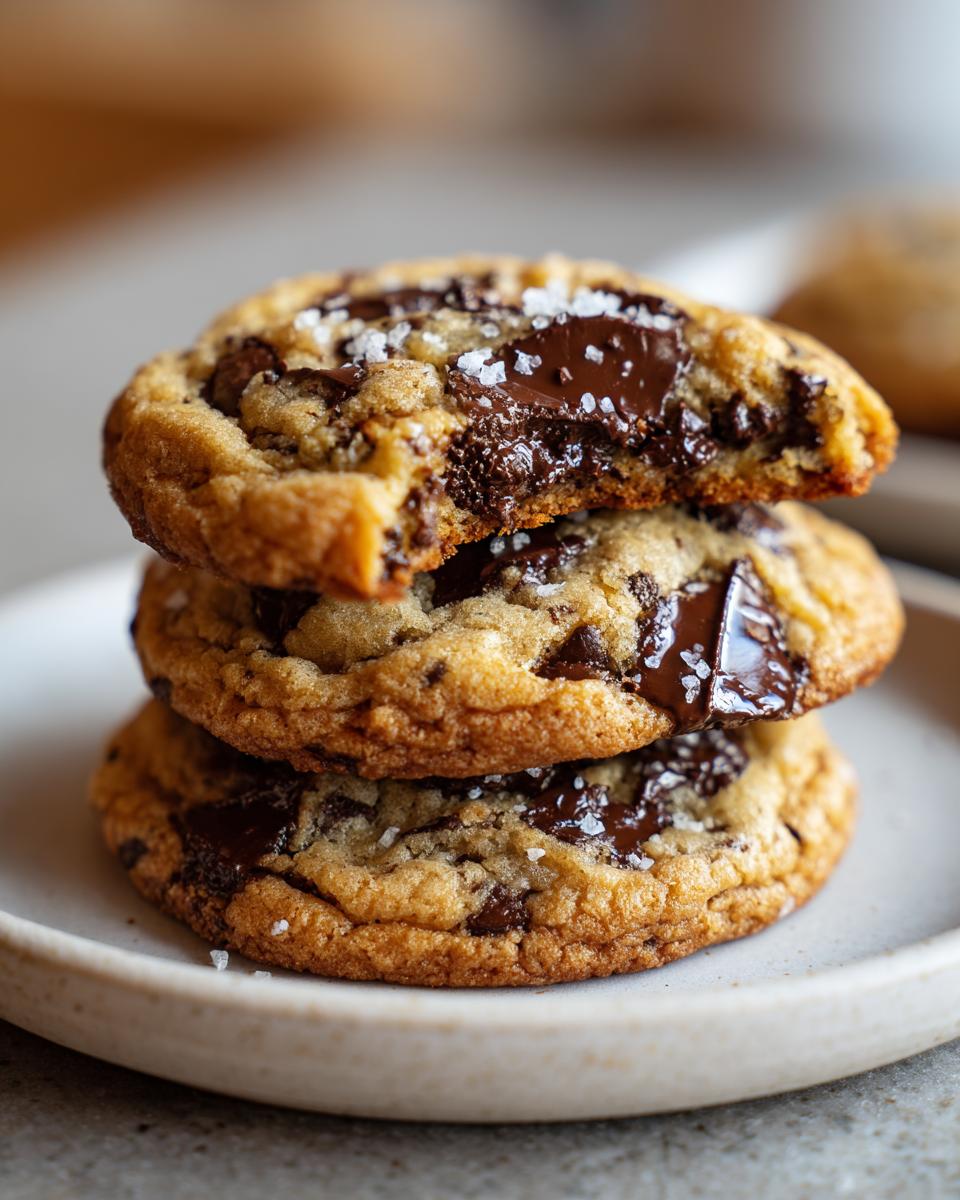
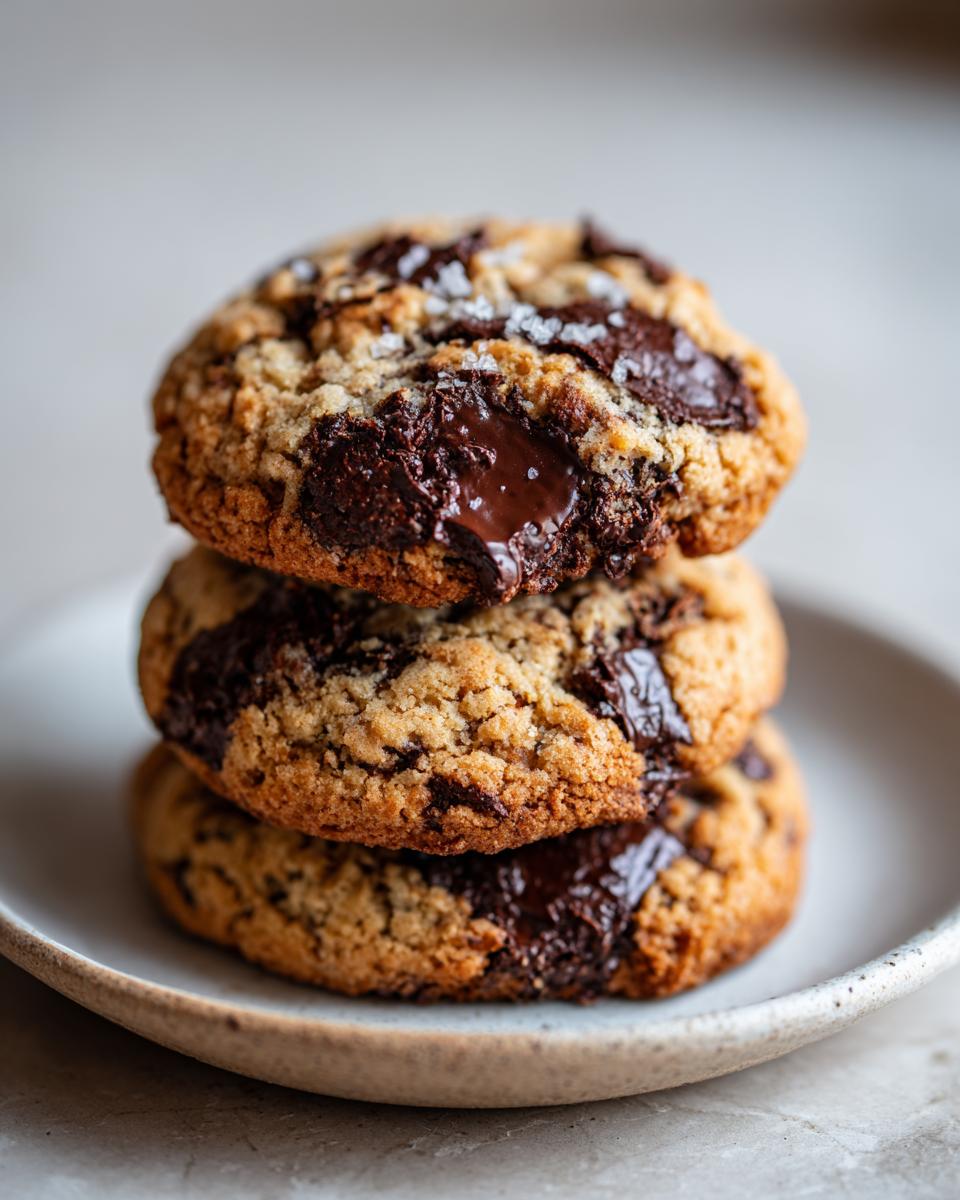
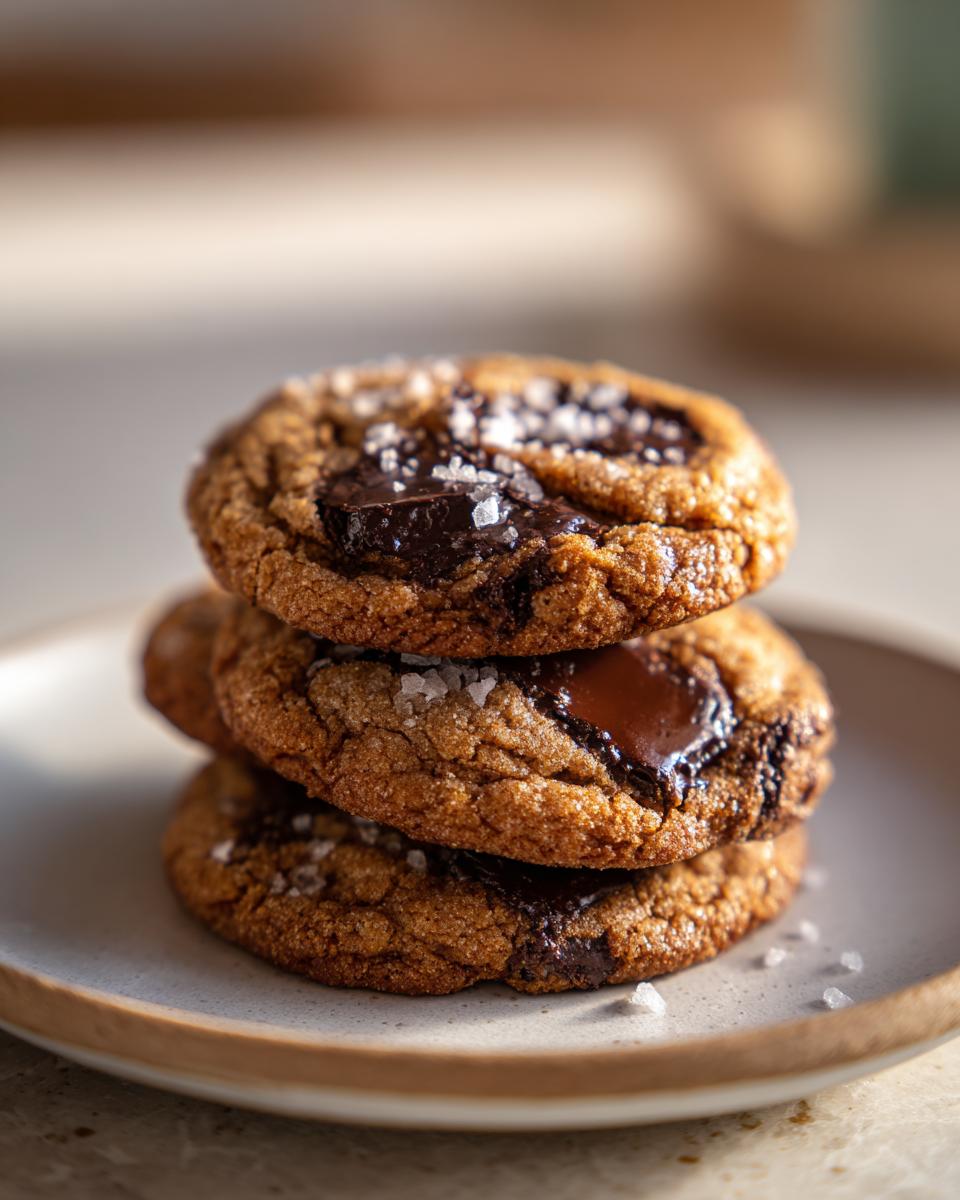
- The Ultimate Texture Goal: We nail that coveted bakery standard: edges that go golden brown and crisp up perfectly, wrapping around a center that stays wonderfully soft and gooey. We’re aiming for those ideal crispy edge soft center cookies.
- Flavorful Dough Base: Because we let the brown butter cool, we get all that rich, caramelized flavor locked into the dough before we even add the sugars. This equals richer, more complex brown butter cookies.
- Reliability is Key: This isn’t a fussy recipe. It’s designed to be straightforward once you master the browning, guaranteeing you get a thick, gourmet-quality cookie without a lot of guesswork.
Essential Ingredients for Ultimate brown butter chocolate chip cookies
Okay, listen up, because this is where the magic starts, but also where you absolutely *cannot* cheat the system! For these brown butter chocolate chip cookies, every ingredient needs to be exactly right. Remember, we’re aiming for that deeply toasty, nutty flavor you can’t get any other way.
It’s so important that you use unsalted butter. Since we’re making our own salted flavor with the browning bits, we need to control the salt level ourselves. Also, make sure your two eggs have time to come up to room temperature—this helps them incorporate better into that cooled, rich butter base!
- 1 cup (226g) unsalted butter (This is what we brown!)
- 1 cup (200g) light brown sugar, making sure it’s nicely packed in the cup
- 1/2 cup (100g) granulated sugar
- 2 large eggs, well-chilled is a no-go; they need to be at room temperature
- 1 tablespoon vanilla extract
- 2 1/4 cups (270g) all-purpose flour
- 1 teaspoon baking soda
- 1 teaspoon kosher salt (For the dough itself)
- 1 1/2 cups (255g) semi-sweet chocolate chips or chunks—I love using chunks for those gooey pools!
- Flaky sea salt, which is non-negotiable for sprinkling right at the end!
Mastering the Browned Butter Technique for brown butter cookies
Okay, this next part? It’s the entire reason these are the best chocolate chip cookies you’ll ever make. Browning the butter builds layers of flavor—we’re talking nutty, toasted, and slightly caramelized notes that you just can’t get by creaming cold butter. Don’t be intimidated by this step; it just requires your full attention for about five minutes. Seriously, use a light-colored saucepan so you can actually see the color change coming. This is how we turn simple butter into glorious, rich, toasted butter cookies!
If you’re nervous, check out how my friends at Modern Honey handle this process; they have some great visuals that really help you see when it’s happening. Click here for more inspiration on making the most of your browned butter.
Browning Butter: Step-by-Step Visual Guide
For this bit, you must stay by the stove—it goes from perfect to burned in the blink of an eye, trust me! Start with your butter melting in the pan over medium heat. It’ll foam up dramatically, which is normal. Keep stirring gently. Once the foam subsides, you’ll see little brown specks forming at the bottom, and that incredible nutty aroma starts filling the kitchen. Stop cooking the instant those little milk solids turn a deep amber color—that toastiness is your goal!
Step-by-Step Instructions for Chewy chocolate chip cookies
Now that we have our glorious, deep-flavored butter cooled down, it’s time to assemble the dough! Follow these steps exactly, and I promise you’ll end up with those amazing chewy chocolate chip cookies you’ve been dreaming of. We bake them hot and fast at 375 degrees Fahrenheit. Remember, we are looking for slightly underbaked centers when they come out!
Mixing Wet and Dry Components
First, whisk that cooled brown butter really well with both the brown sugar and the white sugar until it feels smooth. Then you’ll beat in your room-temperature eggs one at a time, making sure each one is fully incorporated before adding the next. Stir in that vanilla extract. In a second bowl, quickly whisk your flour, baking soda, and salt together so everything is distributed. Now, add the dry mix to the wet, mixing on low speed until they *just* come together. Stop the mixer the second you don’t see streaks of white flour left. Overmixing here is how you accidentally make cakey cookies!
The Critical Chilling Phase for brown butter chocolate chip cookies
This is the step that separates a good cookie from a truly great, thick, bakery-style cookie. You absolutely must chill the dough. Chilling lets the flour fully hydrate, intensifies that nutty brown butter flavor, and solidifies the fat, which keeps your cookies from spreading into sad, thin puddles in the oven. Cover the bowl tightly—I just use plastic wrap—and stick it in the fridge for a minimum of two hours, but honestly, if you can wait 24 hours, the flavor payoff is even better. You deserve these rich, chocolate chip cookies recipe results!
Tips for Perfect bakery style cookies Every Time
We’ve done the hard work with the browning and the chilling, but pulling those gorgeous, thick rounds out of the oven requires just a few final, crucial moves. If you want your homemade cookies to look like they came straight from a high-end place—you know, those incredible gourmet chocolate chip cookies that have amazing height and texture—you need to pay attention to what happens in the last five minutes of the baking process.
This attention to detail is what separates a good batch from a show-stopping batch. Listen to what I’ve learned over the years in the kitchen!
- Scoops Should Be Generous: Don’t think tiny little teaspoons here; we need substance to create that height. I use a standard 2-tablespoon cookie scoop for every ball. If your dough is really cold from the fridge, it won’t spread much, allowing you to stack those scoops high for magnificent, thick cookies.
- Don’t Overcrowd the Pan, Ever: This is critical for even baking! Give your dough balls plenty of space—at least two inches between them—so the heat can circulate freely around each mound. If they touch while baking, you end up with one giant cookie slab, which defeats the purpose of that crispy edge.
- The Temperature Check: Don’t be afraid of a slightly hotter oven (375°F, as listed). That heat shocks the outside, setting the edges quickly while leaving the middle soft. If you bake too low and slow, the butter runs out before the outside sets, resulting in flat puddles.
- Flaky Salt is Your Best Friend: This step happens IMMEDIATELY when they come out of the oven. See those little melted chocolate pools? Sprinkle a few crystals of flaky sea salt right into the center of the molten chocolate. It balances the overall sweetness and makes the cookie taste incredibly sophisticated. If you wait until they cool, the salt just sits on top, and you miss that flavor burst! If you need inspiration on how to handle that, check out some of my friends’ beautiful shots here.
- The 5-Minute Sit: Do not move the cookies right away! Let them rest on the hot baking sheet for a full five minutes after they exit the oven. This allows the bases to solidify enough so they don’t tear or collapse when you transfer them to the cooling rack.
Ingredient Notes and Substitutions for brown butter chocolate chip cookies
I know trying a new recipe makes you wonder about flexibility, so let’s talk specifics. Since the whole point here is that nutty flavor base, we absolutely cannot substitute the butter for anything else—the toasting process is what makes these caramelized butter cookies shine! You just have to commit to the browning step, trust me on this one.
Now, let’s talk chocolate. I strongly push for chunks over chips if you want that true bakery feel, like the ones you see on all those fancy dessert blogs. Chips have stabilizers that prevent them from melting fully; chunks bleed out that gorgeous, gooey chocolate when they’re warm. Also, be careful measuring your flour! If you scoop directly from the bag, you’ll end up with too much flour and dry cookies. Use the “spoon and level” method for the most accurate results!
Storing and Reheating Your brown butter chocolate chip cookies
These brown butter chocolate chip cookies taste like they were just pulled from the oven, even on day three, provided you store them correctly! Because of that gorgeous fat content from the browned butter, they stay remarkably tender. The key is airtight storage. Do not use plastic wrap directly on them, as that can sometimes make the crispy edges a little soggy.
You want to place them in a sturdy, airtight cookie jar or container at room temperature. I find they last beautifully for about four or five days this way, maybe longer if you’re disciplined enough not to eat them all at once! If you manage to freeze any dough balls, place them on a small baking sheet first, freeze solid, and then move them all into an airtight freezer bag. They bake perfectly straight from frozen, just add a couple of minutes to the baking time.
Now, what if you have leftovers and they’ve lost that fresh-out-of-the-oven magic? Don’t just microwave them! That makes the edges soft and the center cakey. To perfectly restore that crispy edge and gooey heart in your caramelized butter cookies, you need a quick zap of dry heat. Pop one or two cookies onto a small baking sheet and heat them in a 350°F oven for just 4 to 6 minutes. Pull them out when they are warm all the way through, maybe even slightly too hot to handle. Let them sit for just 30 seconds, and that texture is instantly back to its bakery-quality best!
Frequently Asked Questions about brown butter chocolate chip cookies
I get so many lovely messages asking about the details when people bake these for the first time! It’s totally normal to have questions, especially when you’re working with browned butter for the first time. Don’t sweat it; we are here to turn those questions into fantastic results, making sure you get those perfect chewy brown butter cookies.
Why did my cookies spread too much?
This is the number one texture issue and it almost always comes down to temperature management! If your cookies spread into thin, crispy disks, it means your brown butter wasn’t cooled enough when you added the sugar and eggs, or you skipped the chilling step. If the fat is too warm, it melts too quickly in the oven before the flour has a chance to set the structure. Remember, we want those gorgeous, thick, homemade cookies best recipe mounds, not flat ones!
How dark should the butter get?
This is where the magic happens! When you are making these browned butter desserts, you are looking for the milk solids to turn a lovely deep amber color, almost like a dark honey or light maple syrup. You definitely want to see those tiny brown specks forming on the bottom of the pan. If you pull it out when it’s just pale yellow, you haven’t developed the nutty flavor yet. Pull it off the heat *right* before it hits dark brown/black, because those last 60 seconds are crucial! That deep color is what gives you the greatest flavor depth in your final gourmet chocolate chip cookies.
Can I skip chilling the dough?
Oh, I really, really wouldn’t advise it! While you *can* technically bake it right away, the results are just dramatically different, and you won’t get the ultimate chocolate chip cookie texture we are aiming for. Chilling does two huge things: first, it solidifies the fat again, which results in a thicker cookie that doesn’t spread wide. Second, it allows the flour to soak up all that rich brown butter flavor, making the dough taste ten times better. If you want that bakery result, the chill time is non-negotiable for these best chocolate chip cookies!
Do I really need the flaky sea salt on top?
Yes! If you want truly gourmet chocolate chip cookies, you need that finishing salt. The salt crystals don’t dissolve; they create lovely little bursts of salinity that cut through the richness of the brown butter and the sweetness of the chocolate. It sounds fancy, but it’s the quickest way to elevate your cookie game and provide that perfect savory counterpoint. It literally takes two seconds!
Nutritional Estimates for This Ultimate chocolate chip cookie
I always feel a little awkward putting numbers to something this wonderful, but for those planning ahead, here’s a peek at what’s packed into one of these decadent treats. Remember, based on the ingredients—especially all that glorious brown butter—these are more of an indulgence than an everyday snack! These figures are just estimates, calculated using standard measurements, so they aren’t meant to replace professional dietary advice. You can see the full ingredient breakdown if you check out the main recipe card, and I know you’ll agree that enjoying one of these ultimate chocolate chip cookie beauties is totally worth it!
- Serving Size: 1 cookie
- Calories: 240
- Sugar: 18g
- Sodium: 150mg
- Fat: 13g
- Protein: 3g
The Best Brown Butter Chocolate Chip Cookies: Chewy Centers and Crisp Edges
This recipe uses browned butter to give your chocolate chip cookies a deep, nutty, caramelized flavor. You achieve bakery-style results with chewy centers and crisp edges.
- Prep Time: 20 min
- Cook Time: 15 min
- Total Time: 2 hours 35 min
- Yield: 18 cookies 1x
- Category: Dessert
- Method: Baking
- Cuisine: American
- Diet: Vegetarian
Ingredients
- 1 cup (226g) unsalted butter
- 1 cup (200g) packed light brown sugar
- 1/2 cup (100g) granulated sugar
- 2 large eggs, room temperature
- 1 tablespoon vanilla extract
- 2 1/4 cups (270g) all-purpose flour
- 1 teaspoon baking soda
- 1 teaspoon kosher salt
- 1 1/2 cups (255g) semi-sweet chocolate chips or chunks
- Flaky sea salt, for sprinkling
Instructions
- Place the butter in a light-colored saucepan over medium heat. Melt the butter completely, then continue cooking, stirring occasionally. The butter will foam, then subside, and brown bits will form at the bottom. You will smell a nutty aroma. This takes about 5 to 8 minutes. Immediately pour the brown butter into a heatproof bowl, scraping in the brown bits. Let it cool for 15 minutes.
- In a large bowl, whisk together the cooled brown butter, brown sugar, and granulated sugar until fully combined.
- Beat in the eggs one at a time, mixing well after each addition. Stir in the vanilla extract.
- In a separate medium bowl, whisk together the flour, baking soda, and kosher salt.
- Gradually add the dry ingredients to the wet ingredients, mixing on low speed until just combined. Do not overmix.
- Fold in the chocolate chips or chunks.
- Cover the dough and chill in the refrigerator for at least 2 hours, or up to 24 hours, for best flavor and texture.
- Preheat your oven to 375 degrees Fahrenheit (190 degrees Celsius). Line baking sheets with parchment paper.
- Scoop the dough into balls, about 2 tablespoons each, and place them 2 inches apart on the prepared sheets.
- Bake for 10 to 13 minutes, or until the edges are golden brown and the centers look slightly underbaked.
- Immediately sprinkle the tops with flaky sea salt. Let the cookies cool on the baking sheet for 5 minutes before transferring them to a wire rack to cool completely.
Notes
- To brown butter, watch the milk solids carefully; they turn from white to light tan to dark brown quickly. Stop cooking when they reach a deep amber color.
- Chilling the dough is critical for preventing the cookies from spreading too much and developing a better texture.
- Use high-quality chocolate chunks for a more gourmet result and better melt.
Nutrition
- Serving Size: 1 cookie
- Calories: 240
- Sugar: 18g
- Sodium: 150mg
- Fat: 13g
- Saturated Fat: 8g
- Unsaturated Fat: 5g
- Trans Fat: 0g
- Carbohydrates: 30g
- Fiber: 1g
- Protein: 3g
- Cholesterol: 45mg