
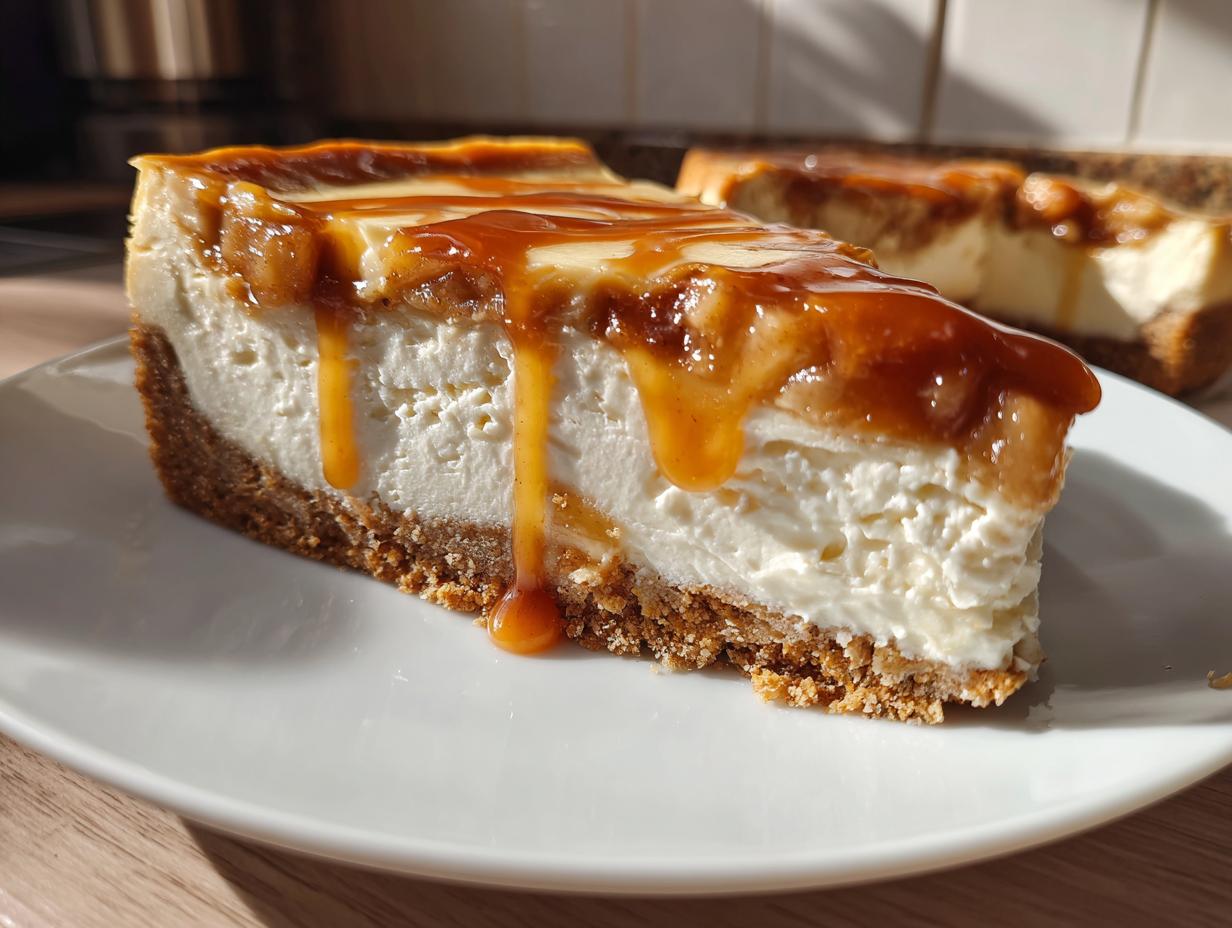
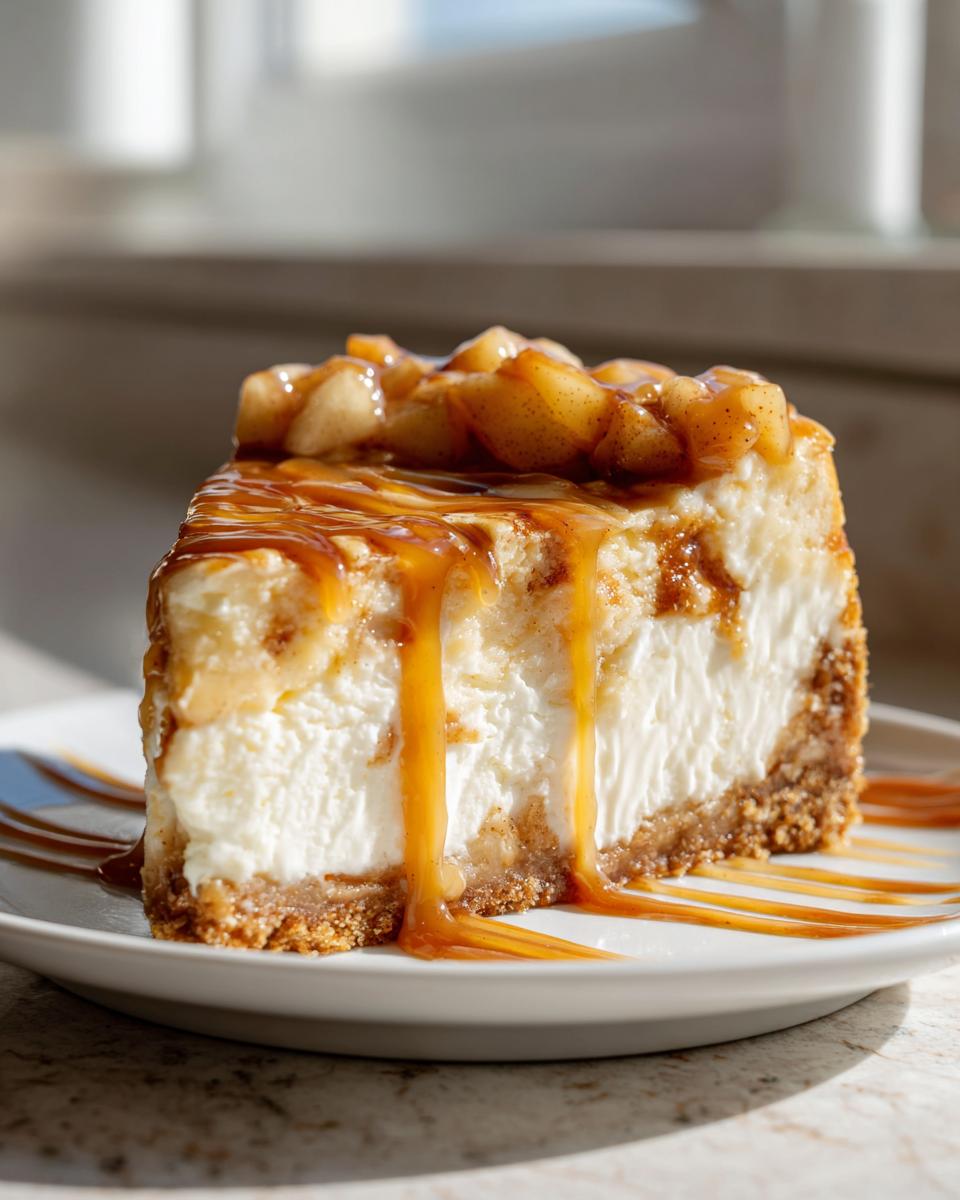
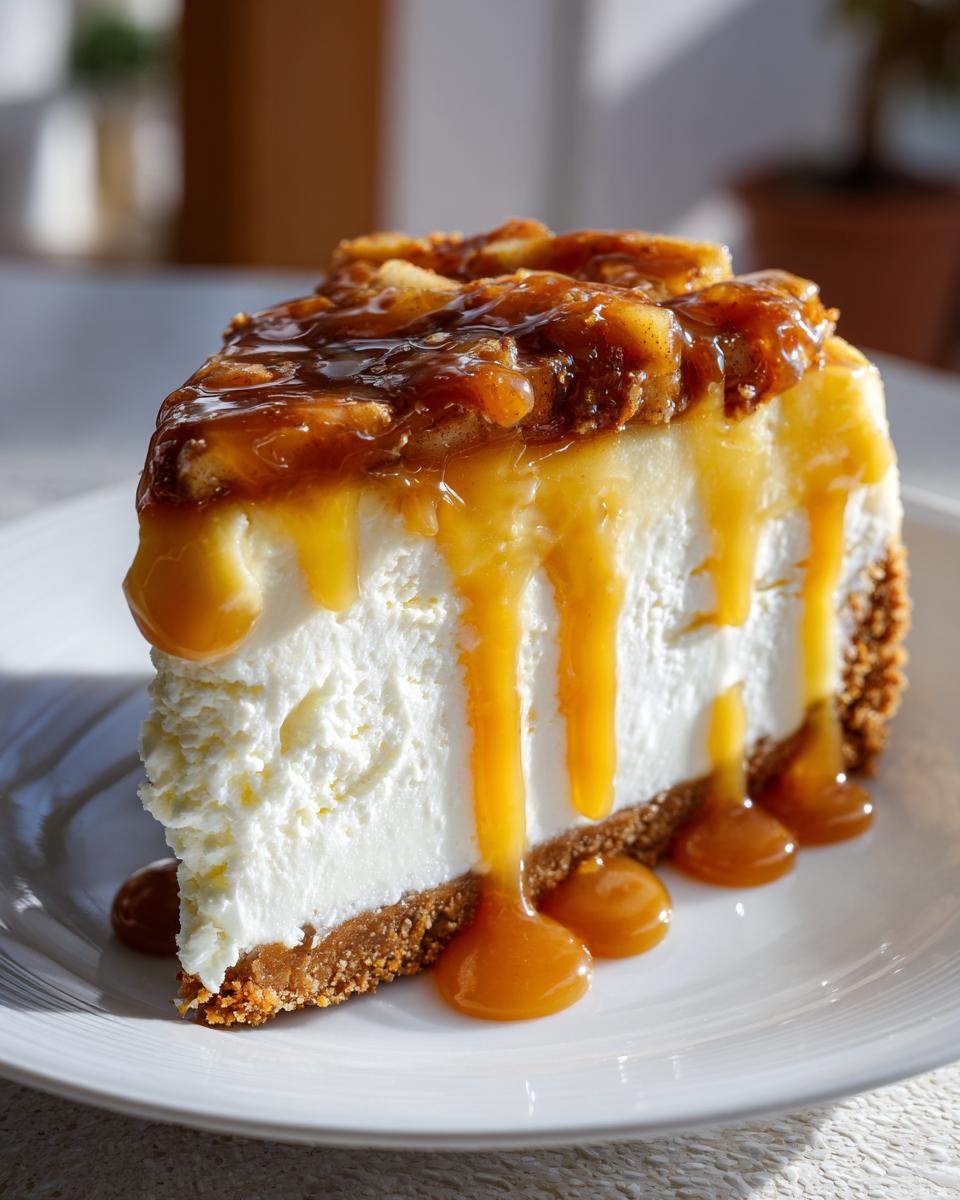
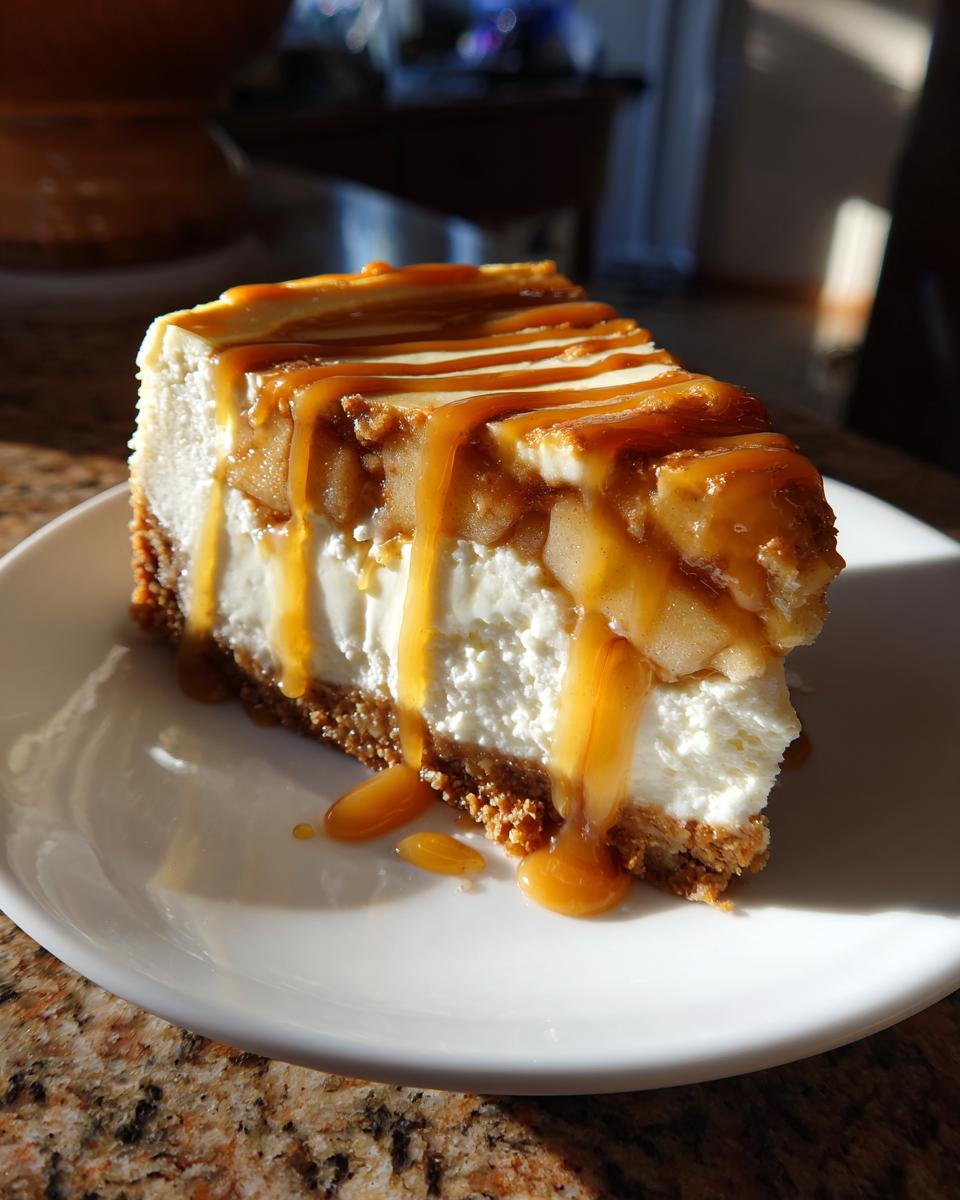
There is nothing I love more than when two great desserts decide to get married in the oven—it’s the ultimate comfort food mashup! When you take the buttery, spiced goodness of an old-fashioned apple pie and marry it to a dense, velvety cheesecake, you get magic. That’s exactly what we’re doing today with this show-stopping apple pie cheesecake. Trust me, this is quickly going to become your go-to for any major event, especially those big Thanksgiving dessert ideas. Because I spent time honing my skills in professional test kitchens, I can guarantee this apple pie cheesecake recipe isn’t just delicious; it’s reliably perfect every single time you bake it.
- Why This Salted Caramel Apple Pie Cheesecake is the Best Apple Pie Cheesecake Recipe
- Essential Ingredients for Your Apple Pie Cheesecake
- How to Make Apple Pie Cheesecake: Simple Steps for Success
- Tips for the Perfect Apple Pie Cheesecake Texture
- Making Ahead Desserts and Storing Your Apple Pie Cheesecake
- Variations: Try Apple Crisp Cheesecake or Stuffed Options
- Serving Suggestions for This Holiday Cheesecake Recipe
- Frequently Asked Questions About Apple Pie Cheesecake
- Nutritional Estimate for Apple Pie Cheesecake
- Share Your Apple Pie Cheesecake Creations
Why This Salted Caramel Apple Pie Cheesecake is the Best Apple Pie Cheesecake Recipe
So, why should you choose my recipe when there are a million desserts out there? Because this isn’t just a simple fusion; it’s a full culinary partnership! I took all the elements you love—the snap of the crust, the spice of the apples, and the pure, velvety cheesecake—and made sure they worked in perfect harmony. This is easily the most decadent baked dessert you’ll make all year, and yet, it’s surprisingly straightforward. I’ve found that when it comes to getting that truly impeccable texture, techniques used for a classic creamy cheesecake really shine through here.
- You get that incredible contrast between the warm, soft apples and the cool, creamy cheesecake dessert filling.
- The salted caramel? It cuts through the richness just perfectly. You’ll want to drizzle it on everything.
- We’ve baked in reliability. No endless searching for perfect results—this reliable method means success for you.
- It’s a showstopper that feels special enough for holidays but easy enough for a weekend project.
The Perfect Dessert Mashup for Fall Baking Recipes
This recipe is the epitome of fall baking recipes. You get the buttery structure of the graham cracker crust, the tender bite of cinnamon-spiced apples, and that unmatched silky texture from the cheesecake base. It layers beautifully, giving you a new amazing texture in every single bite. It truly is the ultimate autumnal indulgence!
Essential Ingredients for Your Apple Pie Cheesecake
Okay, this is where we stop dreaming and start measuring! For a dessert this special—a true apple pie cheesecake—you can’t just eyeball things. The success of this bake relies on having the right building blocks, which is why I’ve broken the ingredient list down by component. If you’re planning ahead, this makes it so much easier to shop for. For those apples, remember, you can dive into my full guide on making homemade apple pie filling, but for this recipe, we’re doing a quick stovetop cook right in the pan!
For the Graham Cracker Crust Dessert Base
The base needs to be sturdy enough to hold all that glorious filling, and melted butter is the secret binder here. You don’t want it dry!
- 1 1/2 cups graham cracker crumbs
- 1/4 cup granulated sugar (for crust)
- 6 tablespoons unsalted butter, melted
For the Cinnamon Spiced Apples Topping
This is where the “pie” part really comes to life! We need good texture, so we’re using a bit of cornstarch to get that perfect thick sauce consistency around the fruit, paired with plenty of cinnamon to give it that classic warm flavor we all love.
- 4 cups sliced apples (Granny Smith or Honeycrisp work wonderfully!)
- 1/2 cup packed brown sugar
- 1 tablespoon cornstarch
- 1 teaspoon ground cinnamon
- 1/4 cup water
For the Creamy Cheesecake Dessert Batter
This is the heart of the whole thing! Remember, room temperature is your best friend for a smooth, lump-free mix that results in that beautiful creamy cheesecake dessert texture. Make sure those cream cheese packages are soft and the eggs are totally relaxed before you start beating!
- 3 (8 ounce) packages cream cheese, softened
- 1 1/2 cups granulated sugar (for filling)
- 1 teaspoon vanilla extract
- 1/4 teaspoon salt
- 3 large eggs
How to Make Apple Pie Cheesecake: Simple Steps for Success
Now for the fun part—putting this amazing dessert together! I’m going to walk you through every step to ensure you nail that perfect texture, especially since we’re aiming for that beautiful, decadent baked result. Don’t let the water bath scare you; it’s just a little insurance policy for a crack-free surface, and I promise it makes the final product incredible. If you’ve ever felt nervous about baking a big cheesecake, this step-by-step guide will show you exactly how to make apple pie cheesecake so you feel like a total pro!
Preparing the Crust and Preheating for Your Apple Pie Cheesecake
First things first, get your oven humming at 350°F (175°C). Because we are using a water bath later, you absolutely have to wrap your 9-inch springform pan really well in heavy-duty foil. Use two layers, trust me, or water might sneak in! Mix those crust crumbs and melted butter until it looks like wet sand, press it into the bottom of the pan nice and tight, and then give it a quick 10-minute bake. Let it cool off while you tackle the filling.
Mixing the Creamy Cheesecake Filling
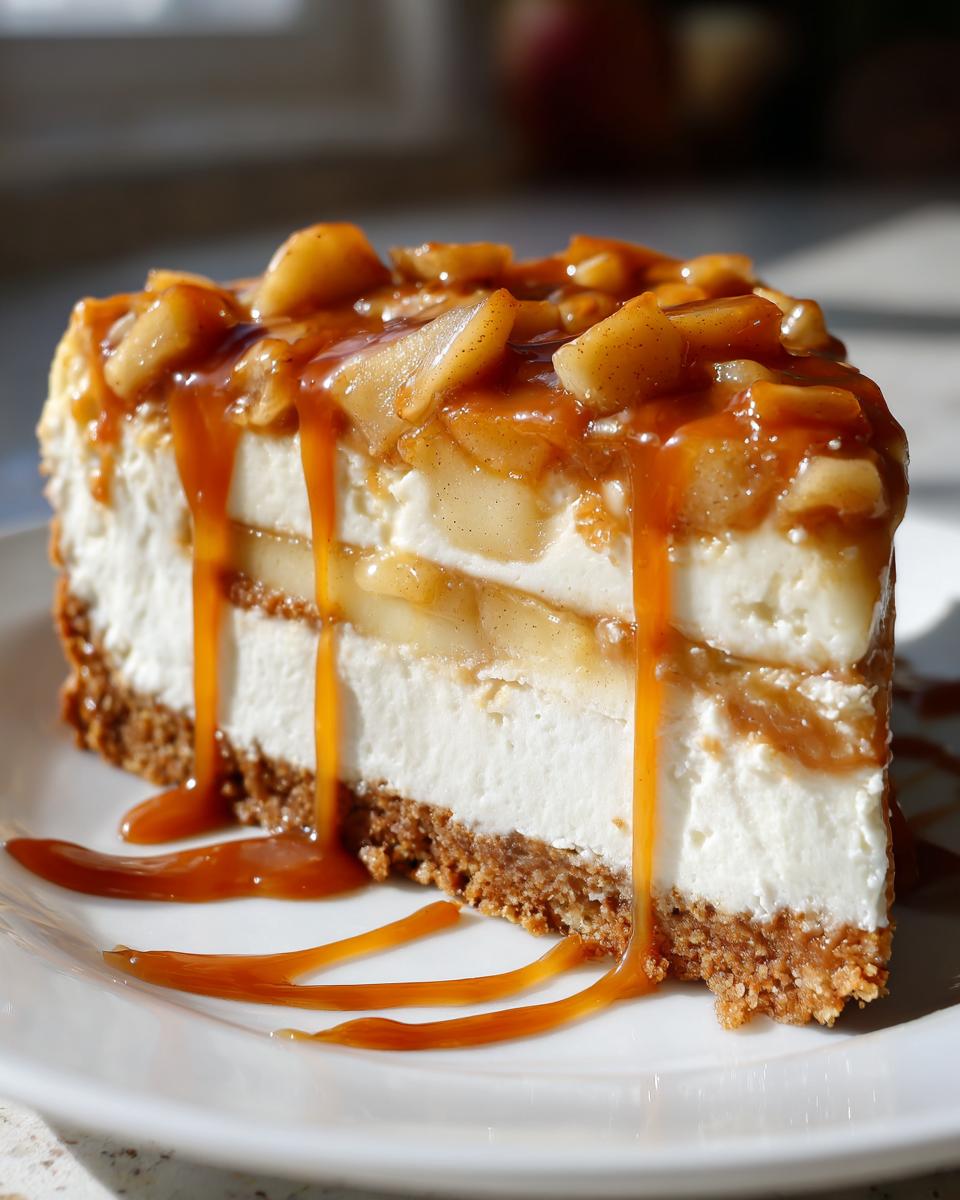
Once your cream cheese is perfectly softened, you beat it with the main sugar until it’s just smooth—no visible lumps allowed! When adding those eggs, this is key: mix them in one at a time, and stop as soon as each egg disappears into the batter. Seriously, stop mixing! Over-beating brings in too much air, leading to cracks later, and we want silk, not sponge. Once mixed, layer half the batter over the cooled crust, then sprinkle on half of your cooked apples, then the rest of the batter, finishing with the remaining apples on top.
Cooking the Cinnamon Spiced Apples
While the crust cools, grab a saucepan for your apples. Toss those slices in with the brown sugar, cornstarch, cinnamon, and water. You want to cook this over medium heat, stirring until everything bubbles and the sauce gets nice and thick around the apples, which should take about 8 to 10 minutes. Once they’re tender-crisp, pull it off the heat and let those spiced apples cool down for about 10 minutes before you start layering them into the cheesecake batter. Warm apples melt the cool batter, and we don’t want that!
Baking the Apple Pie Cheesecake in a Water Bath
This part is important for preventing cracks and getting that signature smooth texture! Place your foil-wrapped springform pan inside a big roasting pan. Now, carefully pour hot water into the roasting pan until it comes about halfway up the sides of your cheesecake pan—that’s your water bath. Bake this beauty for 60 to 75 minutes. You’re looking for edges that look set, but the very center should still have a tiny wiggle when you gently tap the pan. When it’s done, turn the oven OFF, crack the door open slightly, and just let it sit in that warm environment for a full hour. This slow cool-down is your second secret weapon against cracking! If you ever need a tricky baking refresher, I always check out posts like the one about testing doneness without a thermometer to keep my instincts sharp.
Tips for the Perfect Apple Pie Cheesecake Texture
Alright, listen up, because nailing that creamy, silky texture is what separates a good cheesecake from one that makes people weep happy tears. We’ve built a fantastic framework with the water bath, but let’s talk about the other little secrets that guarantee success, especially if you’re looking for an easy apple pie cheesecake that still tastes like it took days to make. These aren’t just suggestions; these are things I learned running tests in a professional kitchen where lumps were simply not allowed!
Room Temperature Ingredients for Silky Cheesecake
I know, I know, you want to just dump everything in the bowl and go, but please, please take the time for this step. If your cream cheese is stiff straight from the fridge, it will never mix smoothly with the sugar. You’ll end up with those tiny, stubborn lumps that just won’t dissolve. It’s the same deal with the eggs!
Cold ingredients don’t blend; they just break up into chunks. When everything is at room temperature, it emulsifies beautifully, creating that smooth, uniform batter that bakes into a silky texture. It’s worth pulling everything out 45 minutes early, trust me. If I don’t have to worry about lumps, I can focus on things like getting that perfect, subtle hint of spice, which you can read more about when I talk about browning butter; technique matters everywhere!
Water Bath Alternatives for Your Apple Pie Cheesecake
Now, the water bath is my preferred way—it cooks gently and evenly, locking in moisture. But what if you’re already running behind, or maybe you just don’t want to deal with the foil wrapping? I get it! If you skip the water bath, you have to compensate on temperature and time.
Instead of placing the pan in the water, just bake the cheesecake directly on the center rack. You’ll need to lower your oven temperature a bit to compensate for the more aggressive dry heat. Drop it down to 325°F (160°C). Since the temperature is lower, the total bake time will stretch out a bit, probably needing between 70 to 85 minutes instead of the 60-75 minutes for the bath. Keep an eye on it, but the slow bake at a lower temperature helps prevent that dreaded big crack on top!
Making Ahead Desserts and Storing Your Apple Pie Cheesecake
One of the absolute best things about any great cheesecake, and especially this apple pie cheesecake, is that it *needs* to be made ahead of time. You can’t rush deliciousness, folks! This is why this recipe falls squarely into the category of excellent make ahead desserts. That long chill isn’t just a suggestion; it’s mandatory structural development time for the filling.
You need to chill the assembled cheesecake in the refrigerator for a minimum of six hours, but honestly, overnight is always better. When it sets up completely after that long rest, the texture transforms from soft to perfectly firm, silky, and ready to handle that heavy caramel topping without sinking. I always plan to make mine the day before any gathering. If you need more tips on timing your big meals, check out my guide on planning out your make ahead desserts so you aren’t stressed on the day!
When it comes to storage, just keep it covered tightly in the fridge. If you leave it uncovered, it tends to soak up other fridge smells, and nobody wants a faintly onion-flavored cheesecake! Cover it well with plastic wrap or foil (be careful not to let the wrap touch the caramel topping if you added it right away).
For serving, I love to pull it out of the fridge about 30 to 45 minutes before cutting. Serving it bone-chilling cold mutes some of that vanilla and spice flavor. Letting it warm up slightly toward room temperature really brings out the depth in those cinnamon-spiced apples and makes the cheesecake even creamier. If you drizzled the caramel on ahead of time, make sure it’s not too cold when you pull it out, or the caramel can get a little too stiff.
Variations: Try Apple Crisp Cheesecake or Stuffed Options
The beauty of a wonderful base recipe like this apple pie cheesecake is that once you master the technique, you can use it to launch a whole fleet of spectacular desserts! We went with salted caramel for this version because it’s just so indulgent, but don’t stop there. You have so many ways to customize this for your family or next big potluck.
If you are really feeling that autumn vibe, a fantastic swap is turning this into an apple crisp cheesecake. Instead of drizzling all that caramel on top at the end, save back about half a cup of the caramel sauce—or better yet, use some butter, brown sugar, and maybe some oats mixed together—and layer that crumble on top after the second apple layer goes in. Then, drizzle the remaining caramel over that crumble after it’s chilled and set. The crunch factor is just divine alongside the creamy filling!
We also get a lot of questions about an apple pie stuffed cheesecake. Now, my recipe layers everything beautifully, which is the standard for cheesecake, but if you want that “stuffed” effect where the fruit seems to be encased, you can try this: before you layer the second half of the batter, sprinkle a generous layer of crushed graham cracker crust or even some crunchy toffee pieces over the first apple layer. Then, it’s batter, then apples, then you finish baking. It gives you that surprise texture burst inside the filling that feels truly decadent.
If we’re talking pure apple focus, don’t forget to check out how I use apples in my moist apple dapple cake recipe too! It’s a completely different texture, but it uses some of the same warm spices we love here.
Serving Suggestions for This Holiday Cheesecake Recipe
Look, when you go through the effort of making something this lush—a dessert that perfectly embodies the spirit of holiday cheesecake recipes—you want the presentation to match the flavor explosion! I think this apple pie cheesecake shines best when it’s slightly softened from a deep chill. Yes, you must chill it overnight, don’t skip that step! But if you pull it out of the fridge about 30 minutes before you plan to serve, the cheesecake relaxes just enough, and that texture becomes incredibly luxurious.
If you’re serving a large crowd for Thanksgiving or Christmas, keep the presentation simple and elegant. The swirls of that salted caramel act as their own decoration, honestly. Make sure you use a nice, sharp knife to cut those clean slices—wiping the knife between cuts (I use a tiny bit of hot water and then dry it immediately) makes the slices look professional and Instagram-ready!
Now, what about pairings? A slice of this is rich, so it pairs perfectly with something that cuts through the sweetness. A hot cup of strong black coffee or a dark roast espresso is fantastic. If you decide to skip the salted caramel swirl on top, this cheesecake is also incredible, served with a whisper-light topping of homemade whipped cream. I have a recipe for vanilla buttercream that I sometimes fold into homemade whipped cream for a stable, cloud-like topping that really complements the spiced apples beautifully.
Honestly, whether it’s the centerpiece of your Christmas dessert table or just a Friday night treat in October, this cheesecake demands a little fanfare. Let it be the star!
Frequently Asked Questions About Apple Pie Cheesecake
Can I make a No Bake Apple Pie Cheesecake instead?
That’s a fantastic question! I totally get the appeal of jumping straight to dessert without turning on the oven, especially since the no bake apple pie cheesecake ideas are so popular right now. This specific recipe here is designed to be baked—we rely on those eggs and that slow bake in a water bath to get that signature density and creamy texture. If you absolutely need a no-bake version, you should definitely look up a dedicated recipe for that! Usually, the no-bake ones rely on gelatin or whipped cream mixed with the cream cheese to set up solid in the fridge, so the ratios are totally different, but it’s a great alternative when you’re short on time.
What apples are best for the apple pie cheesecake topping?
When you’re cooking apples for a topping, especially one that needs to hold up to baking without turning into mush, you want something firm and a little tart. My top recommendation, which I used in this recipe, is the Granny Smith. They have that required tartness to balance out all the sugar in the crust and the filling, and they just hold their shape so much better after cooking. Honeycrisp is a close second if you prefer something slightly sweeter, but don’t use anything too soft, or you’ll just end up with apple sauce instead of that beautiful cinnamon-spiced topping!
How do I prevent my cheesecake from cracking?
This is the number one question for all cheesecake bakers, and luckily, we built this recipe with crack-prevention protocols baked right in! You have two main defense lines here against surface cracks in your apple pie cheesecake. First, you absolutely must use the water bath. It creates a humid environment that cooks the edges and the center at the exact same slow, gentle pace.
Second, and this is non-negotiable, you have to cool it slowly. That one hour sitting in the turned-off oven with the door cracked is vital. If you pull that hot, delicate cheesecake straight out onto a cool counter, the rapid temperature change causes the whole thing to contract too quickly, leading to that big, sad crack right down the middle. Slow cooling keeps everything settled, giving you a beautiful surface, ready for that caramel drizzle! If you ever need more general tips on temperature management during baking, I sometimes refer back to my notes on baking muffins; it’s amazing how heat science applies everywhere!
Nutritional Estimate for Apple Pie Cheesecake
Now, I have to preface this by saying these numbers are my best estimate based exactly on the ingredients listed above—especially if you use low-fat cream cheese or reduce the sugar, your numbers will shift! Since we are using full-fat cream cheese, a good amount of sugar, and butter in that crust, this is absolutely an indulgent, decadent baked dessert, not something you should eat every day, truth be told!
This data assumes you cut the finished cheesecake into 12 even slices, right down the middle, ready for serving with that glorious salted caramel drizzle. Keep in mind, since this is a recipe developed with traditional methods, it leans toward comfort over counting calories, but I wanted you to have a starting point!
- Serving Size: 1 slice
- Calories: Approximately 480 per slice
- Total Fat: About 29g (a good chunk from that butter and cream cheese!)
- Carbohydrates: Around 50g
- Protein: Roughly 8g
- Total Sugar: This one comes in high, around 45g, thanks to the brown sugar in the apples and the filling.
If you’re trying to make this lighter, your biggest lever is reducing the sugar in the filling slightly or even skipping the final salted caramel topping. But honestly? When you make an apple pie cheesecake this good, you just surrender to the decadence for the holiday!
Share Your Apple Pie Cheesecake Creations
Creating this epic apple pie cheesecake feels like a celebration, and I truly want to see what you all whip up! Baking is so much better when we can share the results, right? Once you’ve gone through the chill time—which I know is the hardest part—and drizzled that salted caramel on top, I hope you take a moment to capture a picture!
If you loved how this apple dessert mashup turned out, please, please hop back here and leave a star rating right on the recipe card. Those ratings are how I know what’s truly working for you in your kitchens! It also helps other bakers feel confident trying this recipe out.
Did you try skipping the water bath? Did you add toasted pecans to the crust? Did you think the slow cooling made a huge difference? Tell me all about it in the comments below! Don’t be shy if you have questions either; that’s what this space is for!
You can also tag me in your photos over on social media! Seeing my recipes turn into your family traditions is honestly the best part of my job. Reach out anytime via my contact page if you need anything at all while you’re mid-bake!
PrintSalted Caramel Apple Pie Cheesecake

You create a show-stopping dessert by combining creamy cheesecake, spiced apples, and a buttery graham cracker crust, finished with a salted caramel drizzle. This recipe is perfect for holidays and fall gatherings.
- Prep Time: 30 min
- Cook Time: 75 min
- Total Time: 9 hours 45 min
- Yield: 12 servings 1x
- Category: Dessert
- Method: Baking
- Cuisine: American
- Diet: Vegetarian
Ingredients
- 1 1/2 cups graham cracker crumbs
- 1/4 cup granulated sugar (for crust)
- 6 tablespoons unsalted butter, melted
- 3 (8 ounce) packages cream cheese, softened
- 1 1/2 cups granulated sugar (for filling)
- 1 teaspoon vanilla extract
- 1/4 teaspoon salt
- 3 large eggs
- 4 cups sliced apples (such as Granny Smith or Honeycrisp)
- 1/2 cup packed brown sugar
- 1 tablespoon cornstarch
- 1 teaspoon ground cinnamon
- 1/4 cup water
- 1/2 cup salted caramel sauce (for topping)
Instructions
- Preheat your oven to 350°F (175°C). Wrap the outside of a 9-inch springform pan tightly in heavy-duty aluminum foil.
- Prepare the crust: Mix graham cracker crumbs, 1/4 cup sugar, and melted butter until combined. Press the mixture firmly into the bottom of the prepared springform pan. Bake for 10 minutes. Set aside to cool slightly.
- Prepare the cheesecake filling: In a large bowl, beat the softened cream cheese with 1 1/2 cups sugar, vanilla extract, and salt until smooth. Beat in the eggs one at a time, mixing just until combined after each addition. Do not overmix.
- Pour half of the cheesecake batter over the cooled crust.
- Prepare the apple topping: In a medium saucepan, combine the sliced apples, brown sugar, cornstarch, cinnamon, and water. Cook over medium heat, stirring occasionally, until the apples soften slightly and the sauce thickens, about 8 to 10 minutes. Let the apple mixture cool for 10 minutes.
- Spoon half of the cooled apple mixture evenly over the cheesecake layer in the pan. Pour the remaining cheesecake batter over the apples. Top with the remaining apple mixture.
- Bake the cheesecake in a water bath: Place the foil-wrapped springform pan inside a larger roasting pan. Carefully pour hot water into the roasting pan until it reaches halfway up the sides of the springform pan.
- Bake for 60 to 75 minutes, or until the edges are set but the center still has a slight jiggle.
- Turn off the oven, crack the door open, and let the cheesecake cool inside the oven for 1 hour. This prevents cracking.
- Remove the cheesecake from the water bath and let it cool completely on a wire rack. Chill in the refrigerator for at least 6 hours, or preferably overnight.
- Before serving, remove the springform ring and drizzle generously with salted caramel sauce.
Notes
- For the silkiest texture, bring your cream cheese and eggs to room temperature before mixing.
- If you do not want to use a water bath, bake the cheesecake at 325°F (160°C) for 70-85 minutes and cool slowly in the turned-off oven.
- You can substitute the apple topping with store-bought apple pie filling for a quicker preparation.
Nutrition
- Serving Size: 1 slice
- Calories: 480
- Sugar: 45g
- Sodium: 310mg
- Fat: 29g
- Saturated Fat: 17g
- Unsaturated Fat: 12g
- Trans Fat: 0.5g
- Carbohydrates: 50g
- Fiber: 2g
- Protein: 8g
- Cholesterol: 115mg