

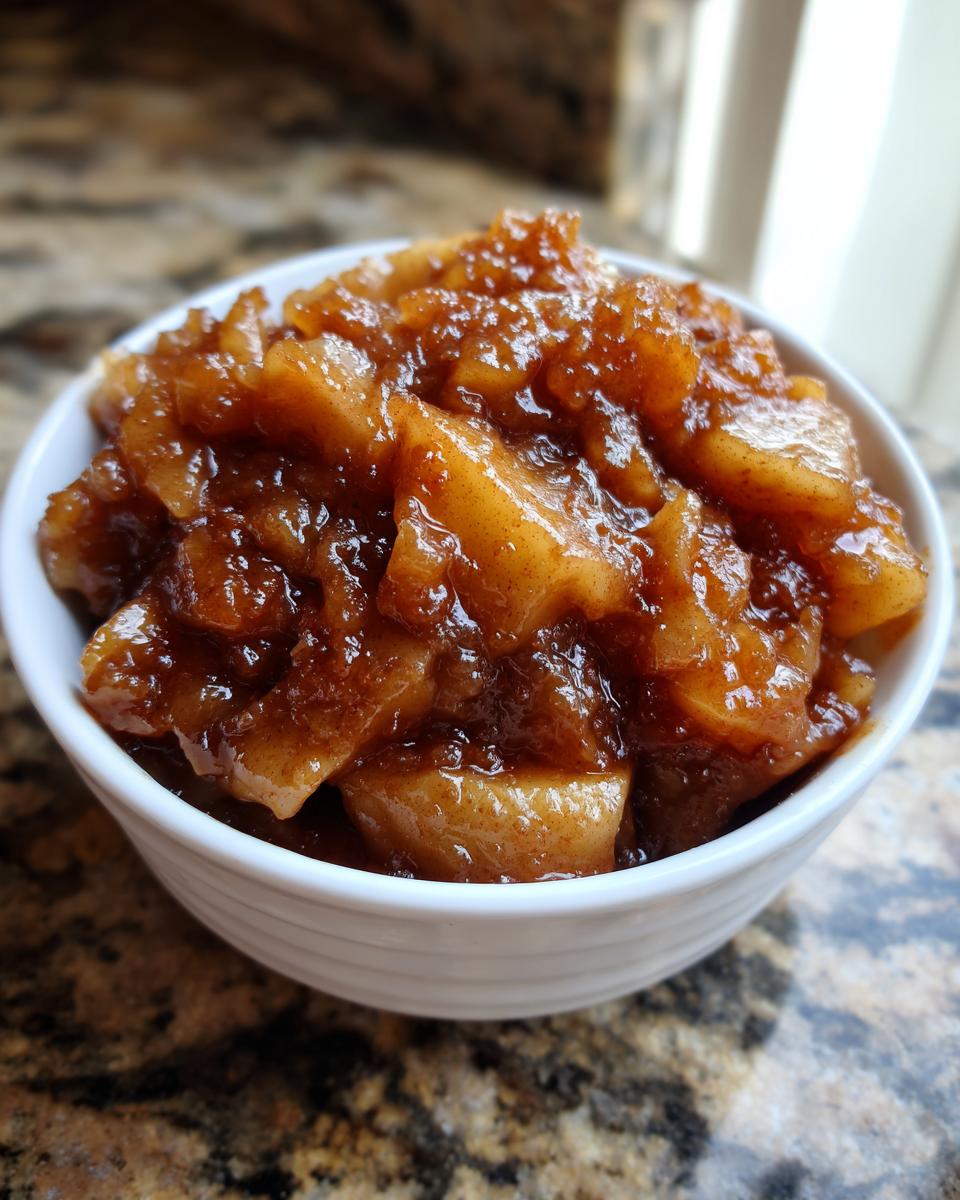
Listen to me, because this is important: Store-bought filling is just sad, flavorless goop waiting to ruin your perfectly crimped crust. No thank you! Here at Cookery Command, we believe that the foundation of a great dessert starts with zero compromises. That’s why I’m handing over what I truly believe is the best apple pie filling recipe you’ll ever need. It comes together on the stovetop in about 15 minutes, delivering that thick, luscious glaze everyone craves, not that watery mess you usually get. Trust me, as someone whose training has spanned both old-school American heritage cooking and professional test kitchen rigor, this method is foolproof. It’s easy, it’s quick, and it tastes like everything good about autumn. If you love this kind of cozy baking, you absolutely have to check out how we do our easy apple cobbler recipe too!
- Why This is the Best Apple Pie Filling Recipe for Your Kitchen
- Gathering Ingredients for Your Apple Pie Filling Recipe
- How to Make Quick Apple Pie Filling From Scratch
- Versatile Uses for Your Homemade Apple Pie Filling
- Storage and Freezing Tips for This Apple Pie Filling Recipe
- Frequently Asked Questions About Making Apple Pie Filling Recipe
- Estimated Nutrition for This Sweet Apple Topping
- Share Your Perfect Apple Pie Filling Recipe Experience
Why This is the Best Apple Pie Filling Recipe for Your Kitchen
There are so many reasons why this stovetop version beats anything in a can. When I started developing this, my main goal was to skip the tedious, long cooking times while still getting that deep, rich flavor. We use packed light brown sugar, which is non-negotiable—it gives you that beautiful caramel depth that white sugar just can’t touch. Plus, it’s unbelievably fast! You can have the apple pie filling recipe ready and cooled before your oven even finishes preheating. It’s reliability packed into one sauce pan.
- Speed: Ready in under 15 minutes total cook time.
- Flavor: That signature warmth from nutmeg and allspice, boosted by brown sugar.
- Texture: We guarantee you won’t have swimming apples in liquid!
If you’re looking for something a little more elegant afterwards, make sure you check out how we handle our easy classic French apple tart base recipes!
Achieving the Perfect Thick Apple Pie Filling Recipe Glaze
The secret handshake for thickness is actually combining the flour with the sugars *before* anything hits the heat. We aren’t making a slurry in a separate cup; we’re gently dusting the apples with dry sugar and flour. When that liquid releases from the apples during cooking, the flour immediately begins to hydrate and thicken that liquid. It ensures you get that glossy, perfect coat around every slice, absolutely eliminating that watery filling disappointment you might have had before.
Gathering Ingredients for Your Apple Pie Filling Recipe
Okay, let’s talk about what goes into this magic. Honestly, the ingredient list is so simple, which thrills me because it means fresh flavors shine through! We’re using basic pantry staples, but the quality matters, especially with the sugar. You will see that 3/4 cup of packed light brown sugar is absolutely essential—it’s what gives us that incredible depth. Don’t skimp on packing it down in the cup, either; the molasses content is key.
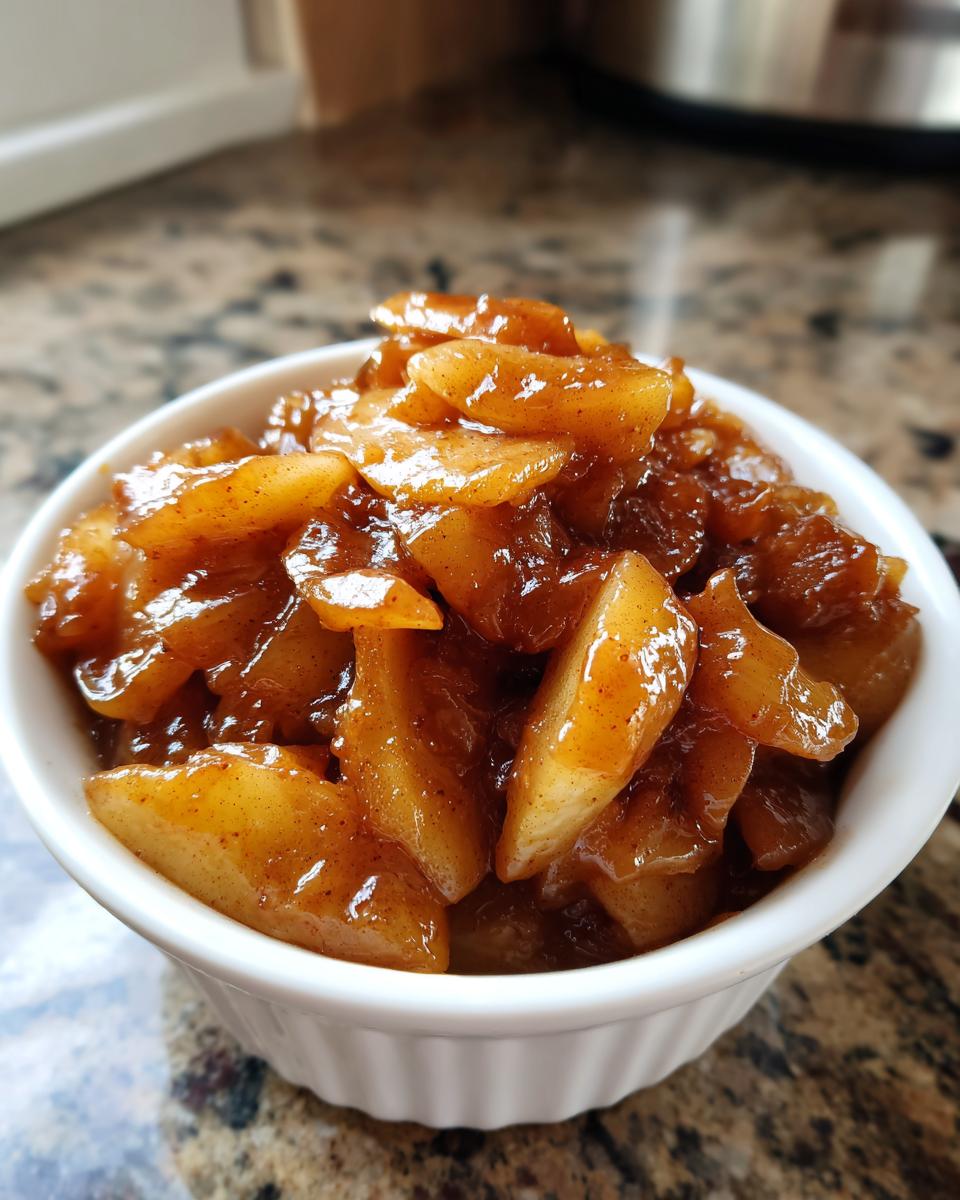
Beyond the sugars and spices, you need about two pounds of apples. That usually shakes out to six medium ones, give or take. They need to be peeled, cored, and sliced consistently thin—and I mean 1/4-inch thick. If you slice them too thick, they won’t cook evenly. If you slice them too thin, well, you know what happens: instant mush! We add just a touch of water and lemon juice to help jumpstart the softening process.
If you haven’t tried our easy honey butter skillet corn side, you’re missing out on simple flavor combinations too!
Ingredient Notes and Substitution Tips for Apple Pie Filling
This is where the technique truly shines, because even with simple ingredients, you can make mistakes. First up: the apples! I never recommend using just one kind. The absolute best results come from mixing tartness and sweetness. My go-to is usually two tart Granny Smiths for that nice structure and bite, mixed with four sweeter apples like Honeycrisp or Fuji. They hold up beautifully when cooked.
Now, about thickness—we use flour in the main recipe because it’s always on hand, but if you want an even glossier, slightly more ‘bakery-style’ finish, you can absolutely swap that 2 tablespoons of flour for 1 teaspoon of cornstarch. If you do that, make sure to mix your cornstarch with a tablespoon of *cold* water in a tiny cup until smooth before adding it to the pan in the last minute of cooking. That step prevents lumps, which is the last thing any baker needs!
How to Make Quick Apple Pie Filling From Scratch
This is where the magic happens, and honestly, it happens fast! I always tell people to get all their ingredients measured and chopped before they even turn on the stove, especially since we are aiming for that sweet spot of tender apples without them turning into applesauce. I remember once rushing this entire process and ended up with a soupy mess—never again! Precision with the timing here is how you create a perfect apple pie filling recipe base that sets up beautifully when baked.
If you’re pie-making newb, feel free to check out linking up these amazing filling recipes with a great base recipe like our banana pancakes ultimate fluffy recipe for a nice contrast. And for another easy dessert idea, you should save this one for later: easy no-bake eclair cake recipe.
Prepping the Apples for an Ideal Apple Pie Filling Recipe Texture
This comes first: you must peel, core, and slice those apples to be very uniform—think 1/4-inch thick pieces. Consistency is your best friend in the pan! If you have some thick chunks and some thin slivers, the thin ones will melt away while the thick ones are still fighting to soften. Use a decent knife or a mandolin if you’re brave, but take your time here. This is the only real prep work involved, so do it proudly!
Cooking Down the Apple Pie Filling Recipe on the Stovetop
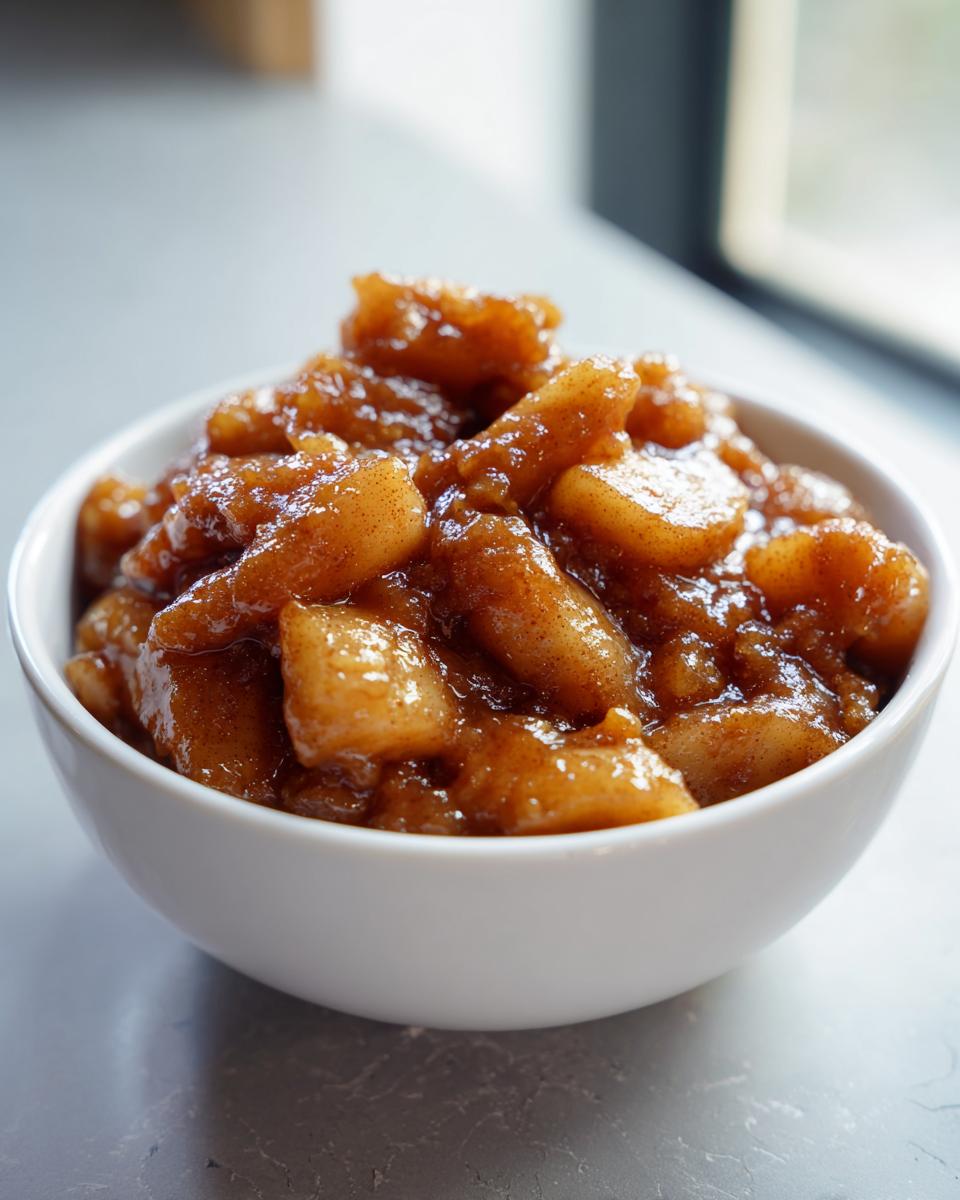
First thing’s first: toss those sliced apples with the lemon juice and water right in your saucepan. In a separate bowl, whisk your sugars, flour, and spices until they are totally combined—this is the step that prevents those nagging clumps! Pour this dry mix right over the apples and toss everything really well to coat. Now, add that tablespoon of butter and set the pan over medium heat. You only need to cook this apple pie filling recipe for about 8 to 12 minutes, stirring every so often. Stop cooking the second the liquid turns into a syrupy glaze and the apples have softened just a touch—they should still have some bite. If you want even more great tips, check out this amazing resource: homemade apple pie filling with brown sugar recipe.
Versatile Uses for Your Homemade Apple Pie Filling
Okay, so you made a batch of this glorious, thick stuff. Are you going to just bury it all under a double crust and call it a day? Maybe! But honestly, this filling is too good to be relegated only to Thanksgiving dinner. This is truly the best apple pie topping you can have in your arsenal, period.
Once it cools down a bit, the glaze firms up nicely, which means you can use it for so many things besides a traditional pie base. If you haven’t started making desserts that feature filling instead of full-blown pastry, you’re missing out on some real weeknight magic! Have you tried our easy apple cobbler recipe? This filling works perfectly in that, just skip the extra sugar you’d usually put in the topping.
Think simple! This is your shortcut to making cozy fall dessert filling flavor happen instantly. You can use it:
- As a fantastic apple crisp filling—just add oatmeal and butter topping on top and bake until bubbly. So much easier than chopping all those fruit pieces!
- Spoon it warm over vanilla ice cream. Seriously, stop what you are doing and try this later.
- Swirl it into pancake or waffle batter, or use it as a rich topping for your morning pancakes. It pairs perfectly with the flavors in our banana oatmeal muffins batter, too, if you want to get creative.
- Dollop it onto thick slices of toasted brioche or pound cake. It’s almost dessert on its own!

It’s that good. Whenever I have extra, I just make a quick crisp—it uses up the leftovers, and I don’t have to fuss with rolling out any pie dough, which, let’s be honest, is rarely as easy as the filling recipe!
If you want to get incredibly creative, you could even skip the baking entirely and use some of this amazing stuff in a savory application, like a warm side for pork chops. For a savory spin idea, take a peek at our guide for easy sheet pan lasagna and think about flavor contrasts!
Storage and Freezing Tips for This Apple Pie Filling Recipe
What if you aren’t baking a pie immediately? That’s smart thinking! You definitely don’t want to pour hot filling into a cold jar or container, right? That’s a recipe for disaster, or at least for a cloudy jar. Once your amazing apple pie filling recipe is done cooking, take it off the heat and let it cool down on the counter for a good solid thirty minutes. You want it just warm, not steaming hot, before you put it away.
For the fridge, this filling will keep wonderfully for about a week. If you want to save it for those dreary winter baking days, absolutely freeze it! Pour the cooled filling into thick, freezer-safe bags or containers, leaving about an inch of space at the top because the liquid expands. It freezes perfectly for up to three months. When you thaw it, give it a little stir before using it in your crust. For more great tips on storage, I always look at places like this resource for general preservation ideas!
If you’re looking for other ways to preserve flavor, try checking out my guide on making easy restaurant-style spicy kani salad to see how different flavor profiles can be stored sharp and fresh!
Frequently Asked Questions About Making Apple Pie Filling Recipe
I figured you might have a few burning questions after seeing how easy this stovetop method is! It’s totally normal when switching from store-bought to homemade. We want guaranteed results every single time, right? This amazing apple pie filling recipe is designed for success, but here are a few things people often ask me about texture and ingredients.
Can I use this as a no cook apple pie filling?
Oh, honey, no, you really can’t skip the cooking part here! While some pie recipes call for raw apples that cook inside the pie, this specific recipe is designed as a pre-cooked filling. We need that stovetop time—those 8 to 12 minutes—for two huge reasons. First, the heat activates the flour and turns our juices into that thick, glossy glaze. If you don’t cook it, you’ll end up with sugary apple soup inside your crust! Second, cooking slightly softens the fruit beforehand, ensuring you get tender apples that have fully absorbed all that lovely cinnamon and brown sugar, rather than ending up with slices that are rock hard inside a baked pie.
What are the best apples for pie filling?
This is my favorite question because it proves you’re thinking like a true baker! The primary goal when selecting apples for any apple pie filling recipe is firmness and a nice tart kick. Super soft apples, like McIntosh, are just going to dissolve into mush almost immediately when they hit the heat. You absolutely need apples that hold their shape under pressure. That’s why I always suggest mixing it up. You need that firm, tart backbone from Granny Smith apples—they are unbeatable for texture. Pair those with a sweeter, slightly firmer apple like Honeycrisp or Fuji for balance. Mixing two types guarantees you get flavor complexity and structural integrity!
Speaking of amazing flavor, if you’re looking for another reliable dessert that handles apples well, you have to try our Jewish apple cake best moist recipe!
Can this filling be successfully canned for later use?
Yes, you absolutely can process this recipe for canning, but there’s a catch! Since this is a cooked filling, you have to follow strict canning guidelines to ensure food safety, especially because this recipe contains fruit mixed with sugar and spice. To safely can this homemade apple pie filling, you must increase the liquid slightly, and you need to process the jars in a boiling water bath for the time specified for high-acid foods in your area. I recommend looking up tested canning recipes specifically for apple filling, often doubling the batch size when you do it, because you’re investing a lot of time! For immediate use, freezing is much simpler, as outlined above.
Estimated Nutrition for This Sweet Apple Topping
Now, nobody is making this glorious filling because they are counting carbs, right? It’s dessert, after all! But I know some of you want the numbers, so here they are. I always run the numbers through my standard calculator based on the ingredients I use, but please remember these are just estimates based on the recipe as written for one serving slice (which is 1/8th of the whole pie). Brands make a difference, so take these as a friendly guideline.
For one slice, you are looking at:
- Calories: About 285
- Total Fat: A tiny 2 grams
- Carbohydrates: A hefty 68 grams
- Sugar: About 45 grams (that’s where the deliciousness hides!)
- Protein: Just 1 gram
We keep the cholesterol and saturated fat really low because we only use that one tablespoon of butter for the whole batch, which is exactly how I like it! This just proves that homemade goodness doesn’t have to be heavy to taste incredible. It’s all about smart ingredient ratios, like using the apples for bulk and moisture instead of loading up on butter everywhere.
If you are looking for some truly lighter snack ideas that still bring amazing flavor, you have to check out my recipe for easy no-bake protein balls. Sometimes you just need that quick hit of energy!
Share Your Perfect Apple Pie Filling Recipe Experience
Now that you have the secret to the easiest, thickest, and most flavorful apple pie filling recipe, I need to hear from you! Don’t keep all that spiced goodness to yourself! Did you use Granny Smiths or did you sneak in some Gala apples? Did you drizzle it hot over a scoop of melting ice cream or manage to successfully tuck it under a flaky crust?
Don’t be shy! Head down to the comments section below and let me know how your filling turned out. I absolutely encourage you to rate this recipe five stars if it brought the comfort and flavor you were looking for. Seeing your creative twists—maybe you added cardamom or perhaps a splash of bourbon instead of water—is one of my favorite parts of running this kitchen command center!
If you want to learn more about the philosophy behind why we test these recipes until they are absolutely perfect, I invite you to read up on our full story here. And if you ever have questions while you’re in the middle of making something delicious, don’t hesitate to reach out to me directly through the contact page. Happy baking, friends!
PrintThe Best 15-Minute Homemade Apple Pie Filling (Thick & Perfectly Spiced)
Make this easy apple pie filling from scratch for pies, crisps, or as a sweet apple topping. This recipe uses brown sugar to create a thick, perfectly spiced glaze that tastes much better than store-bought.
- Prep Time: 15 min
- Cook Time: 12 min
- Total Time: 27 min
- Yield: Enough for one 9-inch pie 1x
- Category: Dessert Filling
- Method: Stovetop Cooking
- Cuisine: American
- Diet: Vegetarian
Ingredients
- 6 medium apples (about 2 lbs, peeled, cored, and sliced 1/4-inch thick)
- 3/4 cup packed light brown sugar
- 1/4 cup granulated sugar
- 1/4 cup water
- 2 tablespoons all-purpose flour
- 1 tablespoon lemon juice
- 1 teaspoon ground cinnamon
- 1/4 teaspoon ground nutmeg
- 1/8 teaspoon ground allspice
- 1 tablespoon unsalted butter
Instructions
- Prepare your apples: Peel, core, and slice the apples to about 1/4-inch thickness. Place them in a large bowl.
- In a separate small bowl, whisk together the brown sugar, granulated sugar, flour, cinnamon, nutmeg, and allspice. This mixture prevents clumps.
- Pour the lemon juice and water over the sliced apples. Toss gently to coat.
- Add the dry sugar and spice mixture to the apples. Toss everything together until the apples are evenly coated in the spice mixture.
- Transfer the apple mixture to a large saucepan. Add the tablespoon of butter.
- Cook over medium heat, stirring frequently, until the liquid thickens into a glaze and the apples soften slightly but still hold their shape (about 8 to 12 minutes). Do not overcook; you want tender slices, not mush.
- Remove the pan from the heat. The filling will thicken more as it cools.
- Use immediately in your pie crust or allow it to cool completely before using it as an apple pie topping for pancakes or ice cream.
Notes
- For the best texture, use a mix of apples. Granny Smith provides tartness and structure, while Honeycrisp or Fuji offer sweetness. Avoid overly soft apples.
- If you prefer a thicker glaze, mix 1 teaspoon of cornstarch with 1 tablespoon of cold water and stir it into the filling during the last minute of cooking.
- This recipe makes enough filling for one standard 9-inch pie. You can easily double the recipe for two pies or for canning/freezing.
Nutrition
- Serving Size: 1/8 of recipe
- Calories: 285
- Sugar: 45
- Sodium: 3
- Fat: 2
- Saturated Fat: 1
- Unsaturated Fat: 1
- Trans Fat: 0
- Carbohydrates: 68
- Fiber: 4
- Protein: 1
- Cholesterol: 5