
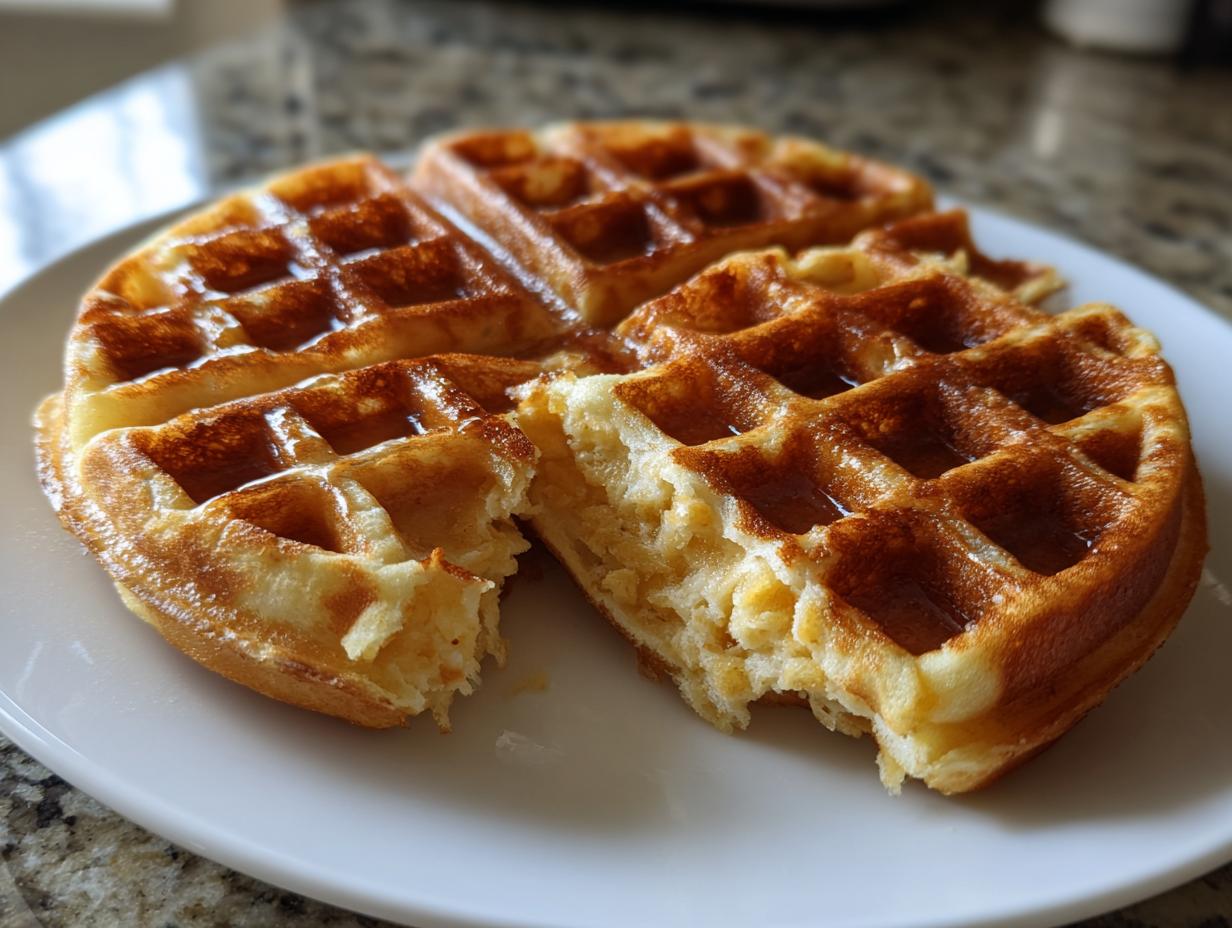
If your breakfast routine is feeling a little flat lately, I have the answer you never knew you needed! Forget baking powder; we’re going back in time to use yeast for the most spectacularly airy and delightfully tangy waffles you’ll ever make. Seriously, the texture is unreal—crispy on the outside but practically cloud-like inside. Here at Cookery Command, we live where tradition meets technique, and mastering ingredients like oats with natural leaveners is a core mission. These oat yeast waffles aren’t just a recipe; they’re a perfected family technique designed to give you that superior, complex breakfast flavor every single time.
This isn’t a quick fix, but trust me, the overnight chill is where all the magic happens. You’ll wake up to batter that’s ready to transform into the best breakfast you’ve had all year. You can check out my tips for similar preparations like fluffy oatmeal pancakes, but nothing beats the lift yeast gives!

- Why These Oat Yeast Waffles Belong in Your Breakfast Rotation
- Essential Components for Perfect Oat Yeast Waffles
- Step-by-Step Guide to Making Waffles with Yeast
- Techniques for Crispy Yeasted Waffles Technique
- Ingredient Notes and Substitutions for Whole Grain Yeasted Waffles
- Serving Suggestions for Your Fermented Oat Breakfast
- Storage and Reheating Instructions for Leftover Oat Yeast Waffles
- Frequently Asked Questions About Yeasted Waffles
- Share Your oat yeast waffles Creations
Why These Oat Yeast Waffles Belong in Your Breakfast Rotation
Honestly, if you’ve been using only baking powder, you’re missing out on this flavor dimension. Using yeast transforms the texture entirely. It’s what separates a good waffle from one you dream about later. These oat yeast waffles are worth the planning.
- They nail the texture: super crispy outside plates meeting a light, airy center.
- The oats give it great body without making it heavy like some whole grain options.
- We get that perfect, subtle tang that just screams ‘homemade, slow-made goodness.’
It’s a far cry from standard quick pancakes, which is why I love pulling these out when we have company, and you can explore my other favorite breakfast inspirations here: fluffy old-fashioned buttermilk pancakes.
Achieving Airiest Oat Yeast Waffles Through Fermentation
Yeast is a biological leavener, and that does way more than just baking soda! As the yeast wakes up overnight, it produces tiny, delicate gas bubbles which create pockets in the batter. This is how we get those unbelievably airiest oat waffles you’ve been searching for. Chemical stuff just can’t replicate this slow, deep lift. It’s science, but in the best, tastiest way possible!
The Appeal of Naturally Leavened Waffles
That long, slow fermentation isn’t just for airiness; it tenderizes the oats and develops a wonderfully complex flavor. You end up with these lovely, delicate, tangy yeast waffles that aren’t overly sweet. It’s bright! It cuts through rich toppings like cinnamon butter perfectly. It’s just a more grown-up, interesting breakfast flavor, if you ask me.
Essential Components for Perfect Oat Yeast Waffles
When we commit to a recipe like this, especially one that uses time to build flavor, we have to get the foundation right. Trust me, skipping out on good quality ingredients here is just going to sabotage the texture you worked so hard to cultivate overnight. This recipe hinges on using the proper oats and ensuring our yeast is happy before we let it rest. My goal in sharing this is to make sure you feel totally confident grabbing these items at the store. When you see precision in ingredients, you know we’ve tested this to the nth degree, which is what we do here at Cookery Command—we respect the classics while guaranteeing success!
If you’re interested in how these core ingredients work together in baking generally, I’ve got a great piece on mastering soft honey bread that explains flavor integration!
Dry and Wet Ingredients for Your Yeasted Waffles Recipe
Let’s look at exactly what we need before we start mixing. You’ll notice we aren’t using a huge amount of flour here; the oats are doing the heavy lifting. Make sure your water is truly warm—not scalding hot!—because we need friendly water for our yeast buddies to wake up. We use a tiny bit of sweetener, either maple syrup or sugar, just to give that yeast something to munch on during its initial proofing phase.
- 1 cup old fashioned rolled oats (not instant, please!)
- 1 cup warm water (aim for about 105-115°F, nice and cozy!)
- 1 teaspoon active dry yeast
- 1 tablespoon maple syrup or granulated sugar
- 1 large egg
- 1/4 cup milk (whatever you have on hand works!)
- 1/4 cup melted unsalted butter or neutral oil, plus more for the iron
- 1 teaspoon vanilla extract
- 1/2 teaspoon salt
- 1/2 cup all-purpose flour
Step-by-Step Guide to Making Waffles with Yeast
Okay, now for the fun part—bringing this beautiful batter together! Even though we’re using yeast, the actual mixing part is super quick, way faster than kneading bread, thankfully. The technical trick here isn’t heavy mixing but respecting that yeast. We want it alive and kicking before it goes into the fridge for its long nap. Pay attention to the water temperature in this first step, because that makes or breaks whether your yeast even bothers to wake up. This is core to the process of making waffles with yeast successfully.
I always measure everything out first, almost like setting up a little assembly line. You might want to check out my tips for the perfect no-fail English muffin as well, since fermentation science is similar! I love looking at how to make english muffins from scratch when I get into these fermentation phases!
Activating Yeast and Mixing the Overnight Oat Waffle Batter
First thing, we soak those rolls oats in the warm water—it gives them a head start. While that’s happening, bloom your yeast! Dissolve it with that tiny bit of sweetener in just 2 tablespoons of that warm water—it needs to be between 105 and 115°F, nice and warm. Wait about five minutes until it’s foamy; that foam means success! Then, we whisk in the egg, milk, butter, and salt to the oats. Finally, stir in the flour until it *just* disappears. Seriously, stop mixing when you see streaks—overmixing develops the gluten way too much for a fluffy waffle.
The Fermentation Rest for Flavor Development
This is where patience wins the breakfast game. Cover that bowl tightly. You absolutely need to tuck it into the refrigerator for a minimum of eight hours, but honestly, overnight is my recommendation. When you pull it out the next morning, it will smell subtly sour, look bubbly, and be full of the air that makes these oat yeast waffles so light. That long rest is non-negotiable for that amazing, authentic flavor!
Techniques for Crispy Yeasted Waffles Technique
So, we’ve done the hard work letting that batter rest and develop its personality. Now we have to make sure the final product delivers that perfect contrast: shatteringly crisp on the outside and unbelievably light inside. This is where the waffle iron itself matters! People always ask me how I get that perfect golden crunch, and it all comes down to making sure the iron is scorching hot before that delicate, yeasted batter ever touches it. Don’t rush this preheating step, I promise! This focus on surface heat is the key to mastering the crispy yeasted waffles technique.
I also recommend keeping a little extra milk handy right beside the iron. Once the batter has fermented overnight, it’s usually super thick. You might need to thin it out just a touch so it pours easily and fills all those little nooks and crannies. Check out how I manage crispy textures on other things like ultimate crispy roast potatoes for parallel advice!
Preheating and Cooking Your Fluffy Yeast Waffles
I let my iron preheat for at least 10 minutes—it shouldn’t just beep that it’s ready; it needs to be *hot*. Then, brush on a light layer of fat, either butter or a neutral oil, even if your iron is supposedly non-stick. Pour slowly, locking the lid gently. They take a little longer than baking powder versions, usually around 4 to 6 minutes total. You know they’re done when the heavy steam stops pouring out almost completely; that’s the visual cue that the moisture is cooked away and the crust has set.
Ingredient Notes and Substitutions for Whole Grain Yeasted Waffles
Since we’re leaning into the texture of the oats here, ingredient choices are really important for your oat yeast waffles. I lean heavily on old-fashioned rolled oats. Quick oats work in a pinch because they soften more during the soak, but they won’t give you the same hearty chew. If you absolutely must go gluten-free, you could swap the all-purpose flour for a good quality 1:1 GF blend, but you might lose a little bit of the structure that the binder in wheat flour provides.
For sweeteners, stick to maple syrup or molasses-heavy brown sugar if you can manage it. That extra bit of dark sugar feeds the yeast beautifully and enhances the underlying flavor profile. If you want to experiment with making these oatmeal pancakes style but skip the yeast, you’d need to compensate heavily with baking powder, but it just won’t hit the same!
Serving Suggestions for Your Fermented Oat Breakfast
Now that you’ve done the work and pulled out those beautifully browned, structured waffles, what goes on top? Because these have a lovely, subtle tanginess from the fermentation, they pair wonderfully with rich or bright toppings. I love keeping things simple—a little swirl of high-quality maple syrup and maybe some toasted pecans for crunch. Honestly, it’s perfection!
If you want something sweeter, my personal Emily favorite is a thin layer of my easy homemade maple fudge, slightly softened, crumbled over the top. That richness against the slight sourness of this fermented oat breakfast is just spectacular!
Storage and Reheating Instructions for Leftover Oat Yeast Waffles
You’re going to have leftovers, trust me! Because these oat yeast waffles are so substantial, they keep really well. The absolute best way to store them is cooled completely, layered between pieces of parchment paper inside an airtight container in the fridge for up to three days. Never use plastic wrap directly on them if you want a crisp crust later!
To reheat, the microwave is your enemy—it turns them instantly rubbery. I insist you use a toaster oven or finish them in a dry, hot skillet for about two minutes per side. You can also freeze them! Just stack them with parchment squares and reheat straight from frozen in the toaster oven until warm and crisp. For other make-ahead breakfast tips, check out my easy sweet potato muffins!
Frequently Asked Questions About Yeasted Waffles
It’s totally normal to have questions when you start working with yeast in something other than bread! It feels a little different from standard breakfast batters, but once you get the hang of it, you’ll realize how easy these oat yeast waffles truly are. The overnight fermentation is the biggest difference, but people often ask about quick fixes or ingredient swaps, so here are the most common things I hear in my kitchen.
If you are fascinated by this kind of living cultures, seriously look over my guide on how to make a sourdough starter from scratch—it really helps demystify yeast!
Can I make oat yeast waffles without the overnight rest?
Oh, yes, you absolutely can, especially if you forgot to plan ahead! If you skip the fridge rest, just cover the batter and let it sit at a warm room temperature for about an hour. It will still rise and be much fluffier than any baking powder version. The trade-off? You won’t get that deep, complex, tangy yeast waffles flavor we are aiming for. It’s a good compromise for a quick weekday, but overnight is always better for taste!
What kind of yeast works best for naturally leavened waffles?
I developed this specific recipe using active dry yeast, which requires that gentle warming in water to prove it’s alive. If you only have instant yeast, you can skip the separate blooming step—just whisk the instant yeast right in with the flour and the other dry ingredients. It functions a little faster, so watch your rise closely; you might not need the full 8 hours for activation!
Share Your oat yeast waffles Creations
I’ve poured so much testing into getting these **oat yeast waffles** just right for you, and now I want to know what you think! Did the overnight rest give you the ultimate tang? Please leave a rating below so other cooks know this recipe is reliable. Even better, snap a picture and share it on social media tagging us! I love seeing how you bring these recipes to life. Find more ideas perfect for slow Sunday mornings right here: breakfast and brunch recipes!
PrintAiry, Tangy Yeasted Oat Waffles (Overnight Fermentation)

Make naturally leavened waffles using oats and yeast for an exceptionally light texture and a subtle, pleasant tang. This recipe uses an overnight soak for deep flavor development.
- Prep Time: 15 min
- Cook Time: 20 min
- Total Time: 8 hours 35 min
- Yield: 4 large waffles 1x
- Category: Breakfast
- Method: Waffling
- Cuisine: American
- Diet: Vegetarian
Ingredients
- 1 cup old fashioned rolled oats
- 1 cup warm water (about 105-115°F)
- 1 teaspoon active dry yeast
- 1 tablespoon maple syrup or granulated sugar
- 1 large egg
- 1/4 cup milk (any type)
- 1/4 cup melted unsalted butter or neutral oil, plus more for the iron
- 1 teaspoon vanilla extract
- 1/2 teaspoon salt
- 1/2 cup all-purpose flour
Instructions
- Combine the rolled oats and warm water in a medium bowl. Let stand for 10 minutes.
- In a separate small bowl, dissolve the yeast and maple syrup/sugar in 2 tablespoons of the warm water set aside from the initial measurement. Let stand for 5 minutes until foamy.
- Add the foamy yeast mixture, egg, milk, melted butter, vanilla extract, and salt to the oat mixture. Whisk until combined.
- Stir in the all-purpose flour until just incorporated. Do not overmix; a few lumps are fine.
- Cover the bowl tightly with plastic wrap and place it in the refrigerator to ferment for at least 8 hours, or preferably overnight. This step develops the tangy flavor and airiness.
- The next morning, preheat your waffle iron according to the manufacturer’s directions.
- Lightly grease the iron plates with butter or oil.
- Gently stir the fermented batter. It will be thick and bubbly. If it seems too thick to pour, add 1 to 2 tablespoons of milk until the desired consistency is reached.
- Pour the batter onto the hot iron and cook until golden brown and crispy, usually 4 to 6 minutes, depending on your iron.
- Serve immediately with your preferred toppings.
Notes
- For the crispiest yeasted waffles, ensure your waffle iron is fully preheated before adding the batter.
- If you prefer a quicker method, you can let the batter rest at room temperature for 1 hour instead of overnight, though the flavor will be less developed.
- This batter works well for making a large batch; store leftovers in an airtight container in the refrigerator for up to 3 days and reheat in a toaster oven for best crispness.
Nutrition
- Serving Size: 1 waffle
- Calories: 310
- Sugar: 6
- Sodium: 280
- Fat: 13
- Saturated Fat: 5
- Unsaturated Fat: 8
- Trans Fat: 0
- Carbohydrates: 42
- Fiber: 4
- Protein: 10
- Cholesterol: 55