
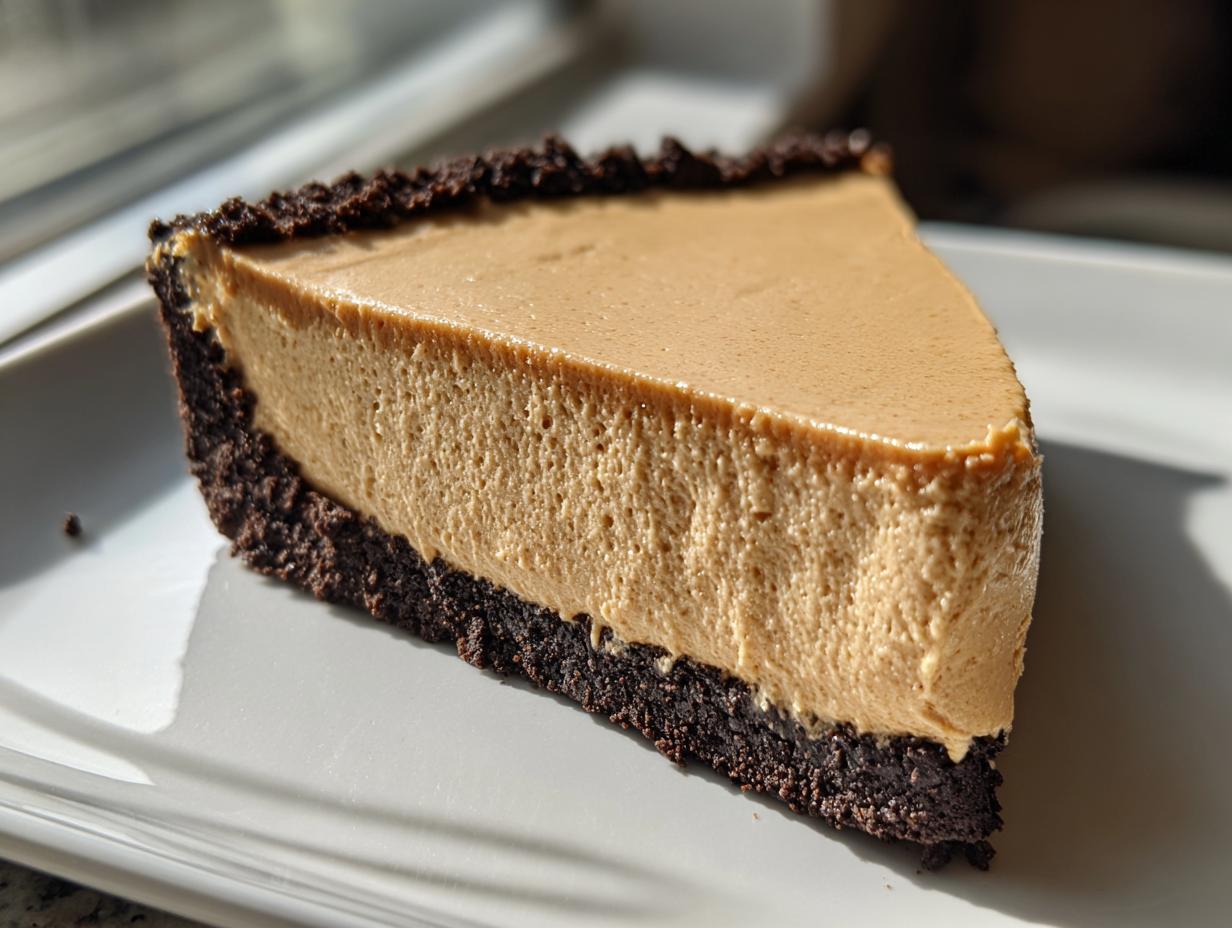
When the summer heat rolls in, the last thing I want to do is turn on the oven! If you’re nodding along with me, then prepare for your new favorite thing: the easiest, creamiest no bake peanut butter pie you will ever meet. Seriously, this one is ridiculously simple, and we’re kicking things off with a decadent chocolate Oreo crust—it’s the best foundation!
Here at Cookery Command, we honor the classic, comforting American desserts, and this pie fits right into that heritage. My founder learned from the best Midwestern cooks, so you know this velvety filling comes packed with tried-and-true flavor. It comes together in about 20 minutes of active work, and then it just chills out in the fridge, waiting for you. Trust me, this is the perfect potluck dessert or quick sweet fix.

Because we value foolproof results, we’ve made sure every step in this no bake peanut butter pie recipe guarantees a firm, rich filling every single time. Say goodbye to baking stress and hello to chilled, creamy perfection!
- Why This No bake Peanut Butter Pie Is Your New Favorite Easy Dessert Recipes
- Gathering Ingredients for Your No Bake Peanut Butter Pie
- Ingredient Notes and Substitutions for Your No Bake Peanut Butter Pie
- Step-by-Step Instructions for Making the No Bake Peanut Butter Pie
- Tips for Success with Your No Bake Peanut Butter Pie
- Make Ahead Desserts and Storage for This No Bake Peanut Butter Pie
- Variations on the Classic No Bake Peanut Butter Pie
- Frequently Asked Questions About This No Bake Peanut Butter Pie
- Nutritional Estimates for One Slice of No Bake Peanut Butter Pie
- Share Your Experience with This Simple Sweet Recipe
Why This No bake Peanut Butter Pie Is Your New Favorite Easy Dessert Recipes
Honestly, if you need a dessert fast, this is the one I always turn to. It’s one of those amazing easy dessert recipes that seems way fancier than the effort you put in. We designed this to be reliable, especially when you’re trying to pull together *quick dessert ideas* for unexpected guests.
- It gives you that incredible, satisfying flavor payoff with almost zero oven time, making it ideal for those scorching summer dessert recipes days.
- We skip the messy work! The active prep time is under twenty minutes—that’s faster than making toast, almost!
- It sets up beautifully in the fridge, meaning you can easily make it the day before your big event.
Quick Dessert Ideas: Ready Fast, Chill Later
Seriously, you’re looking at maybe 20 minutes of actual mixing and pressing. You crush the cookies, melt the butter, mix the filling, and press it all into the plate. That’s it! If you need a last-minute contribution for a potluck or just suddenly realize you need a sweet ending to dinner tonight, this is your total lifesaver. Just remember, the longer it chills, the firmer it gets!
Crowd-Pleasing Creamy Pie Recipes
This isn’t one of those dry, crumbly pies that sits sadly on the plate. Nope! The filling is velvety, fluffy, and wonderfully rich, thanks to that cream cheese base. It’s the signature of great creamy pie recipes. Everyone dives right into this one at gatherings. It’s the perfect creamy addition when you’re looking for reliable potluck desserts that transport well!
Gathering Ingredients for Your No Bake Peanut Butter Pie
Okay, getting organized is half the battle for any great dessert, right? Since this is a no bake peanut butter pie, we don’t need a whole pantry raid. The ingredients list is short, sweet, and focuses on making that filling absolutely dreamy. Before you dive in, here is my number one pro tip that guarantees a smooth filling: Your cream cheese needs to be truly softened. I mean, room temperature soft! Don’t try to rush it in the microwave unless you enjoy chunks in your velvety dessert!
For this version, we are using those famous chocolate cookies, but I’ve included notes below if you want to switch to a classic graham cracker base. Keep everything ready to go because the active mixing part flies by quickly once you get started.
For the Chocolate Crust Pie
- 1 1/2 cups finely crushed Oreo cookies (We’re talking about 25 cookies, give or take, depending on the size!)
- 6 tablespoons unsalted butter, melted—make sure it’s melted completely, not just soft.
For the Velvety Pie Filling
- 1 (8 ounce) package cream cheese, softened (Remember what I said about softening this!)
- 1 cup creamy peanut butter—yes, creamy is non-negotiable here for that smooth texture!
- 1 1/2 cups powdered sugar (Don’t try to swap this; powdered sugar dissolves perfectly for that fluffy texture.)
- 1 teaspoon vanilla extract
- 1 (12 ounce) container frozen whipped topping, thawed (Make sure this container is fully thawed before you fold it in, or it won’t mix right.)
You’ll also need your 9-inch pie plate ready to go! That’s it for gathering treasures. Now we build this magnificent, oven-free dream!
Ingredient Notes and Substitutions for Your No Bake Peanut Butter Pie
I always get questions about ingredient swaps when people see this recipe because they want to make it their own. That’s just fine! We want this perfect no bake peanut butter pie to fit your pantry. Since my background involves a lot of testing, I can tell you exactly what works and what might turn your beautiful filling runny. We need structure, especially since we aren’t baking it hard!
For example, if you decide to use creamy peanut butter instead of natural peanut butter, you are golden. Natural peanut butter often separates; if you must use it, make sure you stir that oil back in super well before measuring! Don’t forget, understanding your ingredients is key to mastering any great recipe, even something as simple as this creamy garlic aioli analogy applies here—proper emulsification matters!
Graham Cracker Crust Pie Option
If you’re not feeling the delightful crunch of chocolate Oreos—maybe you want a more traditional vibe—you can absolutely swap them out! For the base of your graham cracker crust pie, you’ll need 1 1/2 cups of graham cracker crumbs. Then, you only need about 1/4 cup of melted butter instead of the 6 tablespoons the Oreos call for. Press that into the pan the same way, freeze it, and get ready for filling time!
Peanut Butter Choices and Flavor Boosts
To really kick up that peanut butter richness, you can mix your 1 cup of creamy peanut butter with a half-cup of melted peanut butter chips. You just melt them down carefully and let them cool just slightly before you start beating them in with the cream cheese. Wow, that makes a difference!
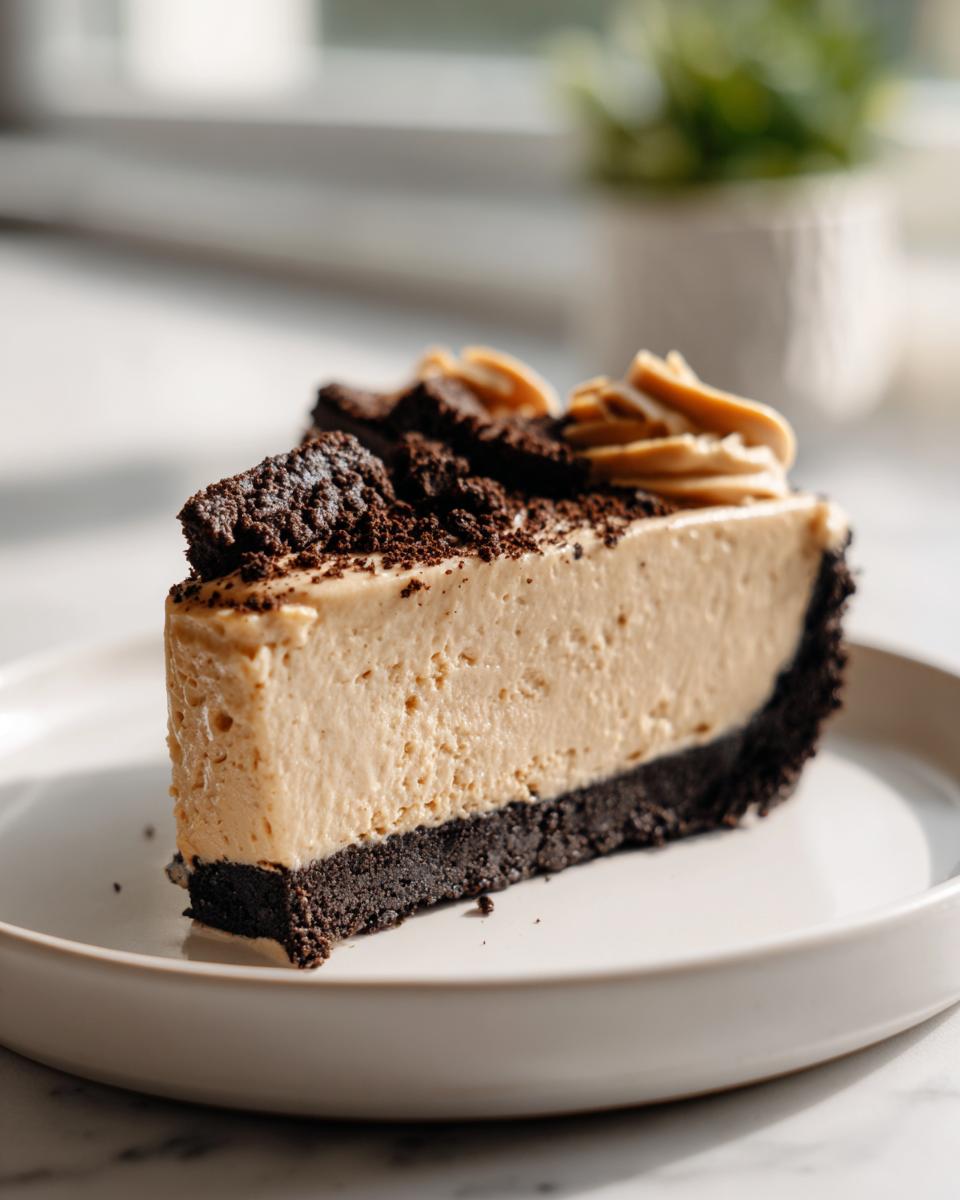
Also, if you’re looking for a serious indulgence, consider topping this with chopped Reese’s peanut butter cups after it chills! It takes this from a simple sweet recipe to an absolute showstopper.
Step-by-Step Instructions for Making the No Bake Peanut Butter Pie
This is where the magic happens, and I mean magic because you aren’t even going to touch your oven! Since this is a classic make ahead desserts dream, the steps are all about combining cold and room-temperature ingredients perfectly. Follow my lead here, and I promise you’ll get that dreamy, rich texture every time. Remember, patience during the chilling phase is the secret ingredient that makes this pie so amazing!
Preparing the Chocolate Crust Pie Base
First things first, we need that glorious chocolate foundation! Grab a bowl and mix your crushed Oreo cookies right into that melted butter. You want it to look like wet sand—just sticky enough to hold together. Press that mixture firmly into the bottom and all up the sides of your 9-inch pie plate. I like to use the bottom of a measuring cup to really tamp it down tight. Once it’s packed nicely, slide that crust right into the freezer. This freezing step keeps the crust from getting soggy once the creamy filling goes in!
Creating the Fluffy Dessert Filling
While that crust is hardening up, whip up the filling! In a separate large bowl, use your electric mixer on the cream cheese first. Beat it until it is completely smooth and creamy—no lumps allowed! Now, switch to low speed and add in your cup of peanut butter, making sure it’s fully incorporated. Next, slowly stream in that powdered sugar and the vanilla. Scrape down the sides! For the final touch, you need to gently fold in your thawed whipped topping. And I mean gently! You want to keep all the air in there for that fluffy dessert experience. Don’t overmix or you deflate all the volume we just worked to create.
Chilling and Serving the No Bake Peanut Butter Pie
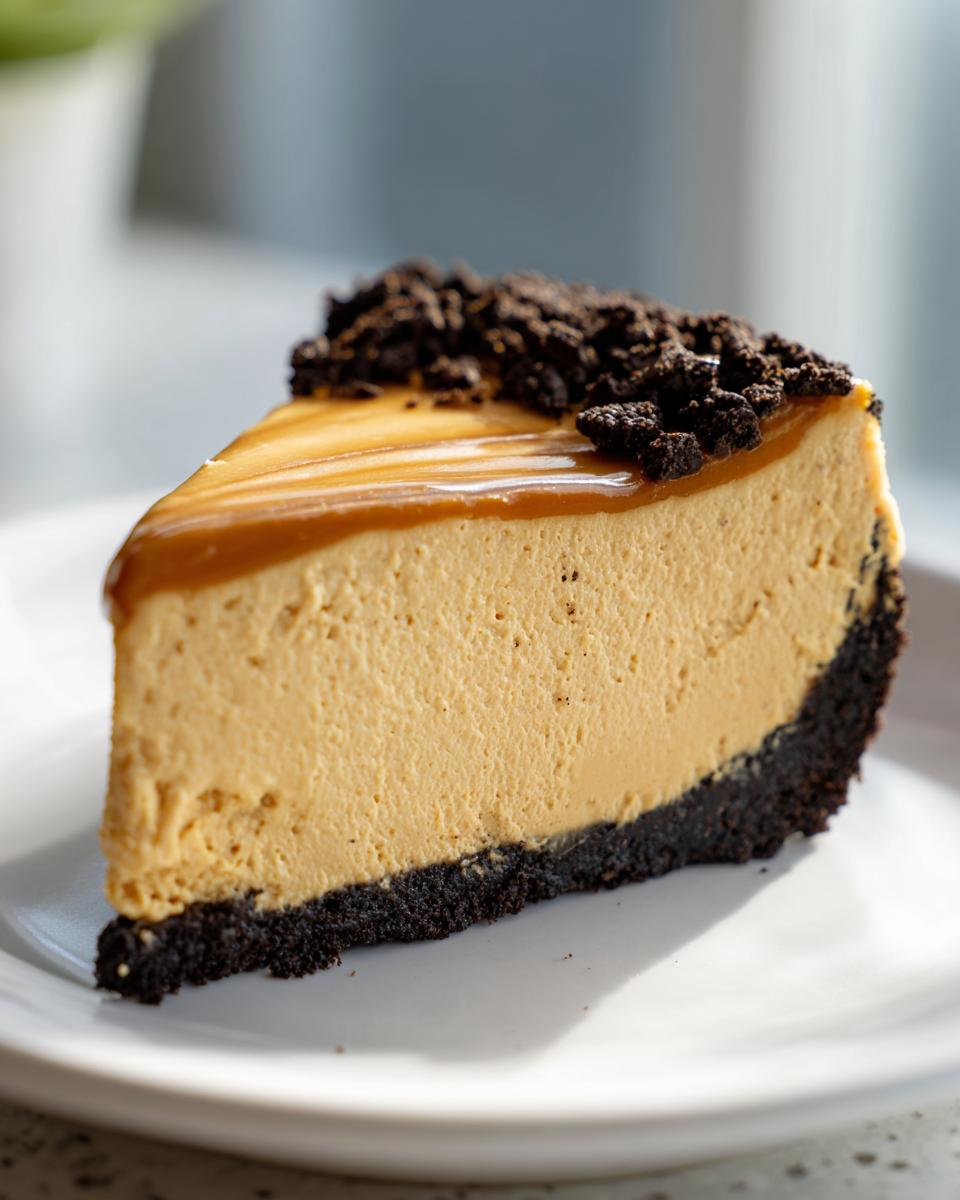
Time to assemble! Spoon all that beautiful peanut butter filling right into your chilled Oreo crust and smooth off the top with your spatula. Now comes the hardest part: waiting. You absolutely must chill this no bake peanut butter pie for a minimum of four hours. I usually leave mine overnight because watching it set is half the fun! Don’t even think about slicing it before four hours, or you’ll have a puddle, not a pie slice. Once it’s firm, drizzle it with chocolate syrup or sprinkle on some chopped peanut butter cups if you’re feeling extra decadent. Serve it straight from the fridge!
Tips for Success with Your No Bake Peanut Butter Pie
I’ve made this no bake peanut butter pie so many times that I know exactly which little slip-ups can turn a perfect dessert into a floppy mess. Since there’s no oven baking to set things firm, technique really is everything here. If you’ve ever ended up with a runny filling, don’t worry! We can fix that with a few crucial checks before you mix.
First, let’s talk about that cream cheese again. If it’s too cold, it won’t blend properly with the peanut butter and sugar, leaving you with visible lumps when you try to fold in the whipped topping. Make sure it’s truly soft and pliable; you should be able to press a finger into it easily. This makes the start of the filling beautifully smooth, which sets you up for success!
Next, look at your whipped topping—this is where most people lose that beautiful fluffiness. It needs to be completely thawed, but you should never, ever whisk or beat it once it’s liquid. You just want it soft enough to gently fold into the peanut butter mixture. If you whip it, you break those airy little bubbles, and suddenly your pie filling won’t be light and fluffy; it’ll go flat! Fold it in deliberately, using a spatula, just until the streaks disappear. That creamy texture deserves your patience here.
Finally, don’t skip the freeze time for the crust! A well-chilled, firm Oreo crust acts like a sturdy container holding down all that creamy goodness while it sets in the fridge. A runny crust means a messy slice later on, so give it a solid 15 minutes in the freezer before you move to the filling step. These little checks make the difference between a good pie and the *best* no bake peanut butter pie!
Make Ahead Desserts and Storage for This No Bake Peanut Butter Pie
One of the best things about any good make ahead desserts, especially one that doesn’t need the oven like our no bake peanut butter pie, is that you can totally take it off your plate for tomorrow!
This pie is fantastic when made ahead of time. In fact, I think it tastes even better the next day once the peanut butter and the chocolate from the crust have really had time to mingle and deepen their flavors overnight. I try to get mine assembled and chilling by early evening so it sets up perfectly the next morning.
The sweet spot, I’ve found, is making it no more than 24 hours ahead of when you plan to serve it. Why 24 hours? Because while the filling stays wonderfully fresh, the Oreo crust can start to absorb a little too much moisture from the filling if it sits too long, and we want that chocolate crunch to hold up!
When you store it, make sure you cover it tightly. Use plastic wrap, but try not to let the wrap touch the top of the filling unless you’ve already added your topping. If you aren’t topping it with chocolate syrup or peanut butter cups yet, use a layer of plastic wrap that lightly drapes over the surface, or even better, carefully place the pie inside an actual airtight container once it’s fully set. It stays great in the refrigerator for up to three days, but trust me, this pie rarely lasts that long at our house!
If you want to get ahead even further, you can make the crust a day in advance, wrap it well, and keep it chilling in the fridge. Then, just whip up the filling fresh the day you need to serve it. It’s the ultimate flexible recipe for busy days, kind of like those no bake sugar cookie truffles!
Variations on the Classic No Bake Peanut Butter Pie
Look, part of the fun of any recipe is making it completely yours, right? While this original no bake peanut butter pie with the Oreo crust is heaven itself, I always encourage people to experiment a little. It’s such a sturdy base that you can really layer on the flavors without worrying about baking anything!
You asked about making it decadent? We can do that! Or maybe you want to lean into that classic, almost Amish-style peanut butter flavor. It’s all doable without needing to fire up the stove or the oven—which keeps us firmly in the no bake treats zone.
If you’re looking to dip your toes into making this pie even richer, check out these simple tweaks. These ideas are great if you are tired of basic recipes and want something a little more exciting, maybe something akin to those wonderful brownie batter dip treats!
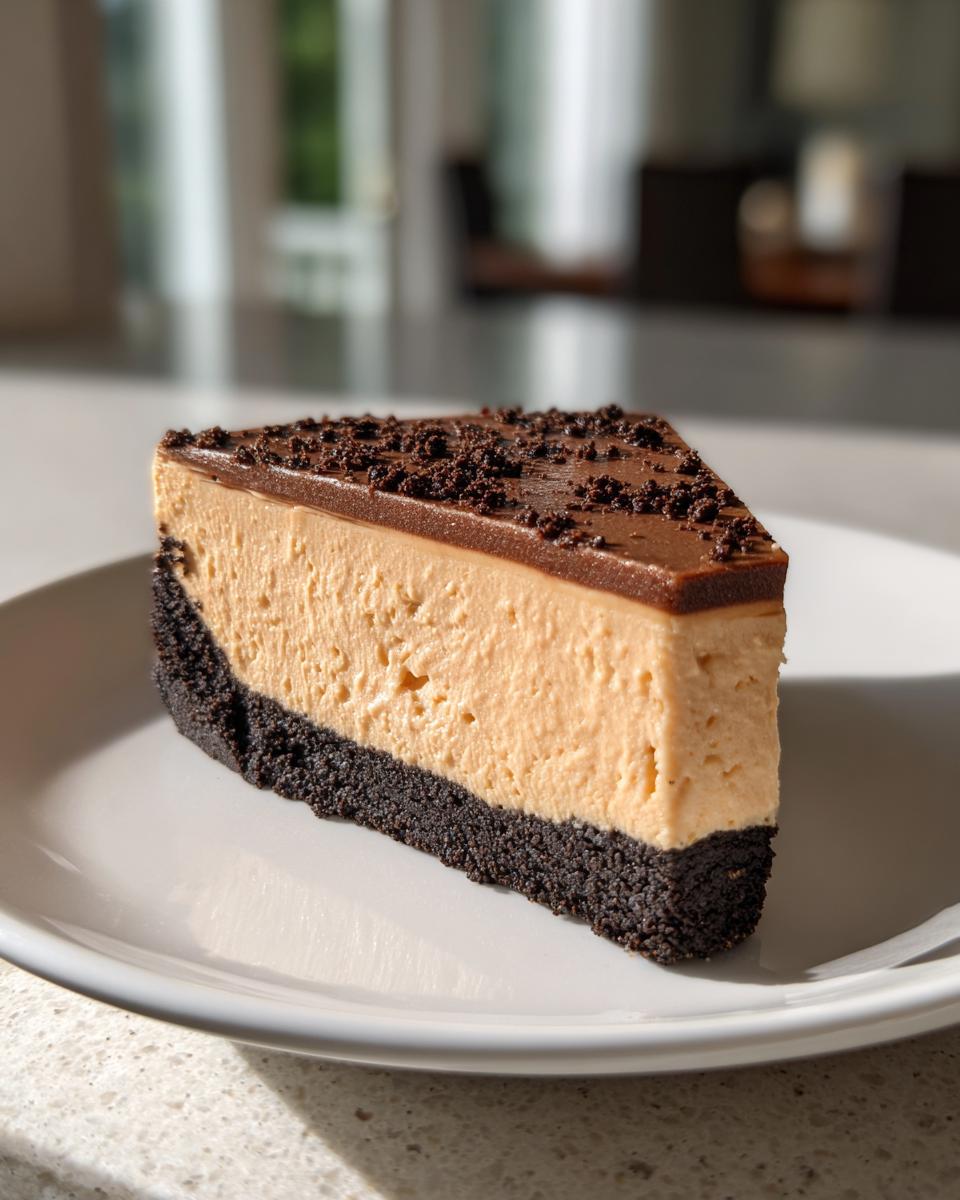
The Chocolate Lover’s Dream: Adding a Layer!
If you have a spare 15 minutes, you absolutely must try layering in some chocolate ganache. Once your peanut butter filling is spread evenly in the crust (but before it chills), just take about half a cup of your favorite melting chocolate chips, melt them down with a teaspoon of butter or cream. Drizzle that right over the peanut butter layer. When the whole pie sets, you get this amazing, thick, fudgy layer right below the creamy filling. It’s fantastic if you love Reese’s peanut butter cup desserts!
Swapping for a Fancier Crust
We went with Oreos because they are just too easy and delicious, but what about a crisp, salty-sweet base? Crush up some pretzels instead of cookies and mix them with that melted butter! A salty-sweet crust works beautifully with the rich, slightly sweet peanut butter filling. It adds a great textural contrast.
Making it Fluffier for Summer
For those hot summer dessert recipes where you want maximum fluff and less density, you can adjust the whipped topping ratio. Next time, gently fold in a little extra thawed whipped topping—maybe an extra half cup if you have space. This lightens the whole thing up, making it almost cloud-like. Just watch your chilling time; you might need those extra four hours to ensure it stays perfectly firm!
See? It’s so easy to personalize! Whether you stick to the original or try a rich chocolate layer, you end up with a stunning, easy treat perfect for any occasion.
Frequently Asked Questions About This No Bake Peanut Butter Pie
I totally get it—when you find a recipe you love, you immediately start thinking about tweaks and what happens if you run out of one little thing! Since this is one of my favorite quick, reliable no bake treats, I’ve probably already answered most of the questions you have in my head. We want this pie to succeed for you!
Here are the ones I hear the most. If you’re wondering about using a different type of peanut butter or leaving out the cream cheese, I’ve got the scoop for you. Remember, the whole point of this pie is that it’s easy, but understanding why an ingredient is there helps you modify it successfully!
Can I make this no bake peanut butter pie without cream cheese?
That’s a tough one, honestly! For this specific version, the cream cheese is doing a lot of heavy lifting. It blends with the powdered sugar and fat to give you that rich, ultra-smooth, and firm texture that makes it one of the best creamy pie recipes. If you leave it out, your filling might end up being too soft—more like a bowl of peanut butter dip than a sliceable pie!
If you absolutely cannot use cream cheese, you *can* try substituting it with heavy whipping cream that you’ve whipped stiff and stabilized with a tiny bit of gelatin. But I have to warn you, that adds a whole other layer of technique, and it changes the flavor profile a bit. For the simple, classic experience we aim for here, I really recommend keeping the cream cheese in!
Is this considered an old fashioned peanut butter pie?
That’s a wonderful question! You might see this called an “old fashioned” or “Amish” pie in different circles, and usually, that means it’s made with a cooked custard or perhaps just peanut butter and powdered sugar. Our version definitely uses some modern shortcuts, like the store-bought whipped topping, which helps us keep the active prep time to under 20 minutes. That’s how we keep it on the list of quick dessert ideas!
However, the flavor profile—that deep, rich peanut butter mixed with the slight tang from the cream cheese—definitely captures that comforting, classic American dessert feeling. So, while the labor is modern, the soul of the no bake peanut butter pie tastes wonderfully traditional!
Will crunchy peanut butter work in the filling?
You certainly *can* swap the creamy peanut butter for crunchy peanut butter if that’s what you have, or if you just prefer a little bite in every spoonful! Just know that the filling won’t be quite as smooth and velvety. You’ll have little peanut flecks running through it, which some people actually prefer!
Since creamy peanut butter offers a more consistent texture, it helps that filling set up perfectly uniform. If you use crunchy, just mix it exactly as directed. It’s a great way to make this a personalized simple sweet recipe!
How long does this pie stay fresh in the refrigerator?
Because this is a no bake recipe, it relies on chilling to stay firm, so keep it cold! I always aim to serve it within the first day for the absolute best texture. It holds up really well in the fridge for about 2 to 3 days, provided it’s covered tightly. After day three, the crust might start looking a little sad and soggy from hanging out with the filling, but honestly, I’ve never had leftovers last that long!
Nutritional Estimates for One Slice of No Bake Peanut Butter Pie
I know, I know, when a dessert is this good—creamy, loaded with peanut butter, and coming straight from the fridge—who really wants to talk about numbers? But since we believe in full transparency here at Cookery Command, I wanted to lay out the approximates for this amazing no bake peanut butter pie.
Keep in mind, these figures are just estimates based on the standard ingredients listed in the recipe. If you swap out the Oreos for something lighter, or use a sugar substitute, these numbers will change! But for a slice of this rich, satisfying treat, here is what you can generally expect. This is one of those decadent simple sweet recipes that’s best enjoyed in moderation!
- Serving Size: 1 slice
- Calories: 450
- Sugar: 35g
- Sodium: 300mg
- Fat: 28g
- Saturated Fat: 10g
- Unsaturated Fat: 18g
- Trans Fat: 0g
- Carbohydrates: 45g
- Fiber: 2g
- Protein: 8g
- Cholesterol: 35mg
See? Still worth every single bite! It’s packed with flavor, and knowing the ingredients are primarily cream cheese, good peanut butter, and chocolate crust makes it feel a little less guilty. Enjoy it cold, slice it thick, and don’t feel bad about going back for seconds!
Share Your Experience with This Simple Sweet Recipe
Now that you’ve whipped up this incredible, no-oven-required no bake peanut butter pie, I really want to hear about it! Seriously, come back here once it’s chilled and set, and tell me how it went.
Did you stick to my rich chocolate Oreo crust? Or did you try swapping in the graham cracker crumbs like we talked about? I absolutely thrive on seeing how you customize these classics. If you tried adding that secret chocolate layer, you *have* to leave a comment and tell me if it changed the whole game for you!
If this recipe saved your weeknight dinner or was the star of your summer potluck, please take a quick moment to give it a rating! We aim for five stars because this pie deserves it. Your feedback helps other folks know they can trust this recipe for their own simple sweet recipes collection.
We love seeing your creations! Snap a picture after it sets up nicely and share it on social media—tag us so we can swoon over your perfectly sliceable, creamy, wonderful no bake peanut butter pie. Happy dessert making!
PrintEasy No Bake Peanut Butter Pie with Oreo Crust
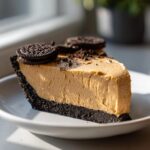
Make this simple, creamy no bake peanut butter pie using a chocolate Oreo crust. It requires no oven time and comes together quickly, making it a perfect quick dessert for any gathering.
- Prep Time: 20 min
- Cook Time: 0 min
- Total Time: 4 hr 20 min
- Yield: 8 servings 1x
- Category: Dessert
- Method: No Bake
- Cuisine: American
- Diet: Vegetarian
Ingredients
- 1 1/2 cups finely crushed Oreo cookies (about 25 cookies)
- 6 tablespoons unsalted butter, melted
- 1 (8 ounce) package cream cheese, softened
- 1 cup creamy peanut butter
- 1 1/2 cups powdered sugar
- 1 teaspoon vanilla extract
- 1 (12 ounce) container frozen whipped topping, thawed
- Optional topping: Chocolate syrup or mini peanut butter cups
Instructions
- Prepare the crust: Combine the crushed Oreo cookies and melted butter in a medium bowl. Press the mixture firmly into the bottom and up the sides of a 9-inch pie plate. Place the crust in the freezer while you prepare the filling.
- Make the filling: In a large bowl, beat the softened cream cheese with an electric mixer until smooth. Add the peanut butter and beat until combined.
- Gradually add the powdered sugar and vanilla extract, mixing until the mixture is smooth and creamy.
- Gently fold in the thawed whipped topping until no streaks remain. Do not overmix.
- Spoon the peanut butter filling evenly into the chilled Oreo crust. Smooth the top with a spatula.
- Chill the pie in the refrigerator for at least 4 hours, or until firm.
- Before serving, top with chocolate syrup or chopped peanut butter cups, if desired. Slice and serve cold.
Notes
- For a graham cracker crust, substitute 1 1/2 cups of graham cracker crumbs for the Oreos and use 1/4 cup of melted butter.
- If you prefer a richer flavor, use 1/2 cup of creamy peanut butter and 1/2 cup of peanut butter chips (melted and cooled slightly) in the filling.
- This pie holds up well when made one day ahead of time.
Nutrition
- Serving Size: 1 slice
- Calories: 450
- Sugar: 35g
- Sodium: 300mg
- Fat: 28g
- Saturated Fat: 10g
- Unsaturated Fat: 18g
- Trans Fat: 0g
- Carbohydrates: 45g
- Fiber: 2g
- Protein: 8g
- Cholesterol: 35mg