
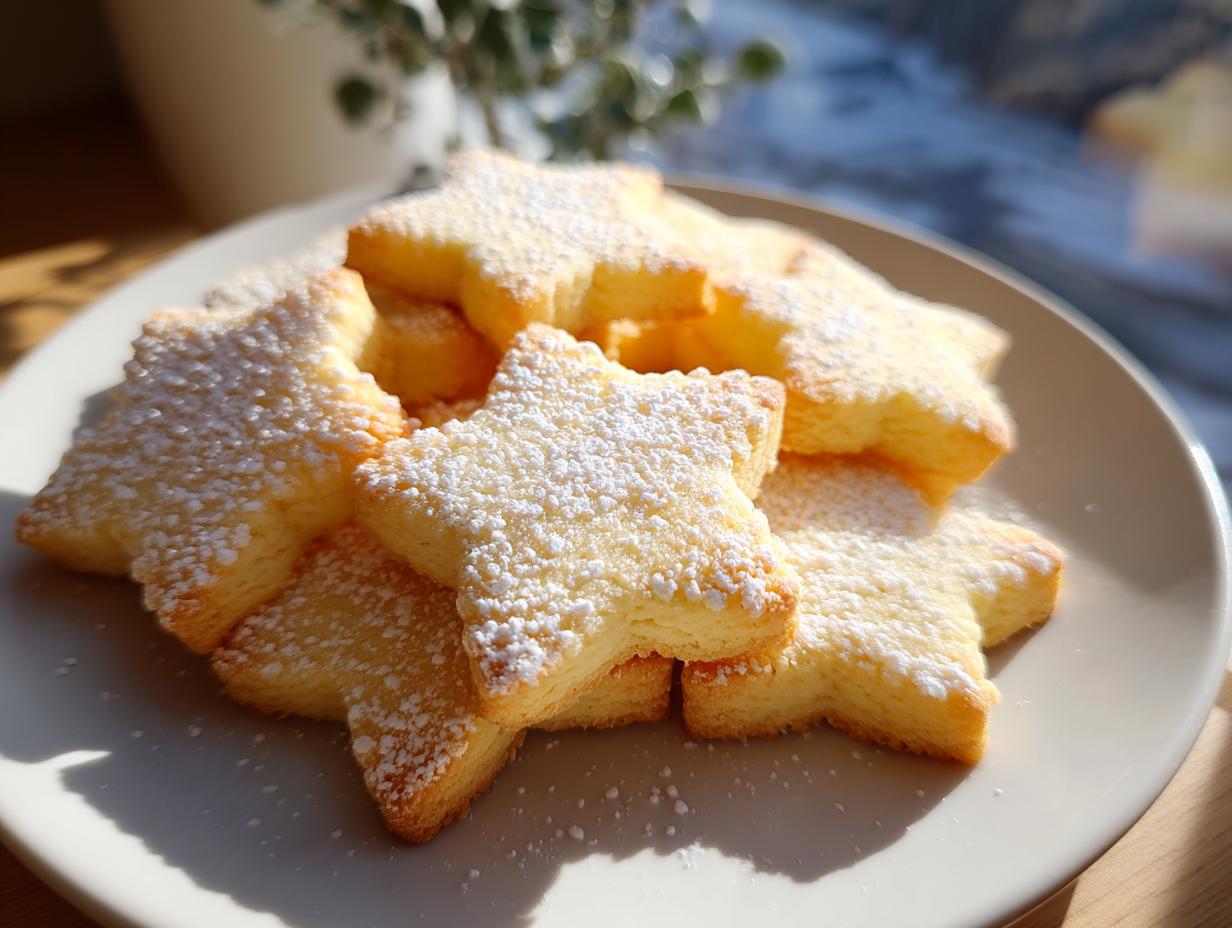
Doesn’t every baker dream of cracking the code to those perfect, delicate cookies you find in the corner Italian pastry shop? You know the ones—rich with butter, impossibly light, and they practically vanish the second they hit your tongue. I’m Emily, and I get it! That’s why my absolute favorite recipe to share is for **italian butter cookies**. Trust me, making these bakery style cookies that genuinely melt in your mouth doesn’t require fancy chemistry. It starts with the same respect for good ingredients that my grandmother instilled in me while baking in our Ohio kitchen. We’re cutting out all the fuss and focusing on a straightforward method that guarantees tender, buttery perfection every single time, no complicated steps necessary. If you also love a good chocolate experience in your holiday baking, you should check out my recipe for chocolate crinkle cookies later!
- Why These italian butter cookies Are a Must-Try (Bakery Style)
- Essential Ingredients for Authentic italian butter cookies
- Step-by-Step Instructions for Bakery Style italian butter cookies
- Finishing Touches: Glazing and Dipping Your italian butter cookies
- Tips for Success with Traditional Italian Sweets
- Serving Suggestions for Your Homemade Italian Treats
- Storage and Reheating Instructions for italian butter cookies
- Frequently Asked Questions About italian butter cookies
- Nutrition Estimates for These european butter biscuits
Why These italian butter cookies Are a Must-Try (Bakery Style)
If you’ve ever been disappointed by store-bought cookies that leave you chewing forever, you need these. These **bakery style cookies** have an intensity of flavor that just can’t be beaten because we’re using a high ratio of real butter to sugar. That’s the secret I learned from watching European bakers—it guarantees the most incredibly rich, tender crumb. Forget dry, crumbly biscuits; these are truly **soft butter cookies** designed to collapse beautifully on your tongue.
This recipe is what I turn to when I need a batch of impressive, authentic **Italian cookies** that look fancy but are surprisingly simple to execute. People usually think this texture is impossible to achieve at home, but I promise, it’s all about honoring the fat content! If you love great butter cookies, you absolutely must try my snickerdoodle recipe next for another soft cookie experience.
Achieving the Perfect Melt in Your Mouth Cookies Texture
The magic really happens in the creaming step. When you beat that butter and sugar together until it’s pale and almost cloud-like, you are creating thousands of tiny air pockets. Those pockets are what ultimately give you that wonderful melt in your mouth result once baked. After mixing the dough, you absolutely must chill it! Chilling keeps the rich butter right where it belongs until the cookie hits the heat, preventing any unnecessary spreading. This controlled structure is how we get that delicate, tender crumb every time.
Essential Ingredients for Authentic italian butter cookies
When we talk about **authentic Italian baking**, we are really talking about honoring the ingredients, especially the fat! For these **European butter biscuits**, skip anything that isn’t real, high-quality butter. I’ve listed everything you need below, but pay close attention to the extracts—they make the difference between a plain cookie and a true delicacy.
- 1 cup unsalted butter, softened to room temperature—I mean *soft*, but not greasy!
- 1 cup granulated sugar
- 1 large egg yolk—just the yolk, please! Keep the white aside for making a lovely vanilla buttercream later.
- 1 teaspoon vanilla extract
- 1/2 teaspoon almond extract—don’t skip this part!
- 2 1/2 cups all-purpose flour
- 1/4 teaspoon salt
- 1/2 cup powdered sugar (for dusting or glaze)
- (Optional additions like chocolate chips and milk are listed in the finishing section!)
Ingredient Notes and Substitutions for Butter Cookies Recipe
If you can find **European butter**, grab it. It usually has a higher fat content, which gives you an even richer mouthfeel for these **melt in your mouth cookies**. The almond extract is non-negotiable for that classic Italian bakery flavor; vanilla alone just doesn’t give you the same signature taste. While I discourage major flour swaps for this specific dough—it needs that tenderness—remember that this base recipe is fantastic. Bake it plain, dust it, or use this dough as a starting point for those gorgeous **jam filled cookies** or the rich **chocolate dipped cookies** later on!
Step-by-Step Instructions for Bakery Style italian butter cookies
Okay, deep breath! This is where we turn that beautiful, pale dough into stunning, buttery shapes. The instructions look long, but trust me, it’s just simple actions performed in the right order. First things first: creaming! You need to beat that softened butter and sugar until it actually looks lighter in color—we’re talking fluffy, almost like pale whipped cream. If it looks grainy, keep going for another minute! That aeration step is how we get those delicate **soft butter cookies**.
Once the dough comes together, get it wrapped tight and into the fridge immediately. I learned the hard way that trying to press warm dough ends in absolute disaster—it just oozes everywhere! You need that dough firm, so plan for at least one full hour chilling time. After chilling, preheat your oven to 350°F (175°C) and line those sheets with parchment paper. You have to use parchment, or these delicate little guys will stick right to the pan!
Now for the fun part: shaping! When I first tried using my grandma’s old cookie press, everything came out wonky, and I almost gave up right then! But once you get the hang of it, piping those little rosettes or wreath shapes is a breeze. Fill your press (or piping bag fitted with a star tip) with the dough and pipe neat little swirls directly onto the lined sheets. They bake fast, so keep an eye on them.
Shaping and Baking Your Soft Butter Cookies
When you’re piping, make sure your shapes aren’t too close together; they puff up just a tiny bit. Pop those trays into the oven for just 10 to 12 minutes. You are looking for the edges to just barely turn golden brown, but honestly, the centers should still look pale. If they brown too much, they start losing that signature tender quality. Once they are out, resist the urge to touch them! Let them sit right there on the hot baking sheet for a good five minutes to firm up slightly. Moving them too soon is how they shatter. Once they are sturdy enough, gently transfer them to a wire rack to cool completely before you even think about dusting them or dipping them in chocolate. If you want to try a fantastic glaze next, check out my guide on foolproof cookie icing! These always go great alongside a slightly spiced treat, like my coffee cake cookies.
Finishing Touches: Glazing and Dipping Your italian butter cookies
Alright, our cookies are baked and cool—they are already amazing just plain, dusted with powdered sugar, right? But if you want that true **bakery style cookies** appeal, we are going to jazz them up! This is where you can really personalize them. If you want to lean into the chocolate vibe, melting down some good quality semi-sweet chocolate chips is totally the way to go.
When melting chocolate, please, please be careful! If you are using the microwave, do it in short 30-second bursts, stirring well between each one. Chocolate burns so fast, and melted chocolate that’s seized up is no fun to work with. If you’re feeling fancy, a double boiler is always safer for a smoother melt. Once it’s silky smooth, dip about half of each cooled cookie and lay them on parchment paper to set up completely. If you want the best, smoothest dip possible, check out how I make my easy chocolate fondue; that method works perfectly for dipping!
These **chocolate dipped cookies** look absolutely spectacular piled high on a holiday tray. They look impressive, but you know the secret is that the base is just our simple, buttery dough!
Tips for Success with Traditional Italian Sweets
When you’re aiming for perfection in **Authentic Italian baking**, that little bit of extra attention makes all the difference. Look, if your butter isn’t right, the whole cookie structure suffers, so let’s talk about room temperature butter—this is huge! You want the butter to be soft enough that your finger leaves a dent, but it shouldn’t look oily or shiny. If it’s too warm, the dough will spread into flat, sad puddles in the oven, losing that beautiful piped shape we worked so hard for. Keep it cool, but pliable!
Beyond that tip, I always like to offer my readers a fun variation on the plain cookie. If you didn’t pipe a perfect rosette, you can totally pivot and make gorgeous **jam filled cookies** instead. Before baking the dough, just use your thumb or the back of a teaspoon to gently press a small divot right into the center of each cookie shape. Fill that little pocket with raspberry or apricot jam right after they cool down. It’s an easy way to get two different finishes from one batch of dough! For more inspiration on jam-filled perfection, you really need to check out my raspberry thumbprint cookies, too.
Serving Suggestions for Your Homemade Italian Treats
Now that you’ve got dozens of these luxurious, buttery treats cooling, it’s time to think about how you’re going to share (or perhaps not share!) them. These are absolute rockstars on any table, especially when arranged beautifully on a platter for the holidays. They fit right into any collection of **Holiday cookie recipes** you might be planning.
If you’re keeping them home, I personally think they are one of the best **coffee pairing desserts** out there—that delicate sweetness cuts through the bitterness of a strong espresso perfectly. They also look fantastic displayed as part of a wider **buttery dessert collection**, sitting next to something maybe a little fruitier, like my blueberry scone recipe!
And if you’re gifting them? Pack them tightly in tins or cellophane bags paired with a little bow. Everyone loves receiving something that tastes this authentic. If you need another easy treat to add to that gift basket, check out this other great simple Italian butter cookie recipe I found!
Storage and Reheating Instructions for italian butter cookies
These **italian butter cookies** are fantastic because they are quite stable thanks to that gorgeous butter content! You absolutely want to store them in an airtight container right on your counter; room temperature is best. If you put them in the fridge to try and keep them longer, I worry they’ll absorb moisture and lose that lovely, soft quality we worked so hard to develop. They should stay perfectly tender for at least a week, maybe even longer if you didn’t dip them in chocolate!
If you have a huge batch (which you should!), they freeze like a dream. Lay the cookies on a baking sheet first and freeze them solid—this stops them from sticking together. Then, transfer them into a heavy-duty freezer bag. They last beautifully for about two to three months, and honestly, they taste just as good thawed out on the counter. If you want to try another great make-ahead item, you have to see my recipe for refrigerator dilly beans!
Frequently Asked Questions About italian butter cookies
Can I use a different extract besides almond in these cookies?
That’s a great question, especially if you’re worried about finding almond extract! While almond is key for that **authentic Italian baking** flavor profile, you totally can substitute it. If you skip the almond extract, bump up the vanilla to 1 1/2 teaspoons total for vanilla, or even try lemon extract if you want a brighter taste that still pairs well with coffee. Just remember that changing the extract changes the traditional profile, transforming it from classic **Italian butter cookies** into a lovely vanilla or lemon sugar cookie variation.
Why did my cookies spread so much when baking?
Ah, the spreading nightmare! This almost always comes down to the butter temperature. If your butter was too warm when you creamed it with the sugar, it introduced too much oiliness without trapping enough air. That melted fat spreads instantly in the oven. Another reason for flat cookies is skipping the chilling step—we need that dough firm! If you struggle with spreading, you might also enjoy my recipe for Christmas cookie bars, which are much more forgiving!
Do I absolutely need a cookie press for this recipe?
Nope, not at all! A cookie press makes those gorgeous swirls super fast, but if you don’t own one, don’t panic. This dough is tender enough to be shaped by hand. You can simply roll the dough into small logs—about half an inch thick—and slice them into one-inch rounds. Or, you can place the dough into a sturdy piping bag fitted with a large star tip (like I mentioned in the instructions!), which is a great substitute for getting that classic piped look.
Are these soft butter cookies the same as Spritz cookies?
That’s what I thought when I first started baking them! They are *very* similar because they both use a cookie press and rely heavily on butter. They fall into the same family of European butter biscuits. The main difference usually lies in the flavoring. Traditional Spritz cookies often rely just on vanilla or sometimes a hint of lemon, whereas these **italian butter cookies** almost always feature that signature almond extract to give them their distinctly Italian flair. For more ideas on other delightful Italian creations, you can see what the folks over at Our Salty Kitchen are baking up!
Nutrition Estimates for These european butter biscuits
Now, I have to be really clear about something important here. Because I’m a baker who cooks from the heart, not a nutritionist, the detailed breakdown of calories and specific macros can change wildly based on what you do—like adding that amazing chocolate dip or maybe using a salted butter instead of unsalted.
So, while I provided the estimated nutrition facts in the preparation notes for general reference, please view those numbers as a rough guide only for the plain cookie base. Always remember that these **European butter biscuits**, like any **homemade Italian treat**, are best enjoyed in moderation—especially when they are this delicious! If you’re aiming for a lighter treat, remember that dusting with powdered sugar adds far fewer calories than a heavy chocolate coating, so every choice matters!
PrintBakery-Style Italian Butter Cookies

Make rich, tender Italian butter cookies at home that melt in your mouth. This simple recipe yields authentic, buttery biscuits perfect for holidays or coffee pairing.
- Prep Time: 25 min
- Cook Time: 12 min
- Total Time: 1 hour 37 min
- Yield: 3 dozen 1x
- Category: Dessert
- Method: Baking
- Cuisine: Italian
- Diet: Vegetarian
Ingredients
- 1 cup unsalted butter, softened
- 1 cup granulated sugar
- 1 large egg yolk
- 1 teaspoon vanilla extract
- 1/2 teaspoon almond extract
- 2 1/2 cups all-purpose flour
- 1/4 teaspoon salt
- 1/2 cup powdered sugar (for dusting/glaze)
- 1/4 cup milk (for glaze, optional)
- 1 cup semi-sweet chocolate chips (for dipping, optional)
Instructions
- Beat the softened butter and granulated sugar together in a large bowl until the mixture is light and fluffy.
- Beat in the egg yolk, vanilla extract, and almond extract until just combined.
- In a separate bowl, whisk together the flour and salt. Gradually add the dry ingredients to the wet ingredients, mixing on low speed until a soft dough forms. Do not overmix.
- Place the dough in a large zip-top bag or wrap it tightly and chill in the refrigerator for at least 1 hour.
- Preheat your oven to 350°F (175°C). Line baking sheets with parchment paper.
- Transfer the chilled dough to a cookie press fitted with your desired plate (such as a star or wreath shape) or roll the dough and cut out shapes. For traditional swirls, pipe small rosettes onto the prepared baking sheets.
- Bake for 10 to 12 minutes, or until the edges are lightly golden. The centers should remain pale.
- Let the cookies cool on the baking sheet for 5 minutes before transferring them to a wire rack to cool completely.
- For a simple finish, dust the cooled cookies with powdered sugar. For chocolate dipping, melt the chocolate chips in a double boiler or microwave. Dip half of each cooled cookie into the melted chocolate and set them on parchment paper to set.
Notes
- For a classic jam-filled cookie, press a small indentation into the center of the dough before baking and fill with raspberry or apricot jam after they cool.
- These cookies are excellent when dipped in coffee or tea.
- If you do not have a cookie press, you can shape the dough into small logs or use a piping bag with a star tip.
Nutrition
- Serving Size: 1 cookie
- Calories: 135
- Sugar: 10
- Sodium: 35
- Fat: 8
- Saturated Fat: 5
- Unsaturated Fat: 3
- Trans Fat: 0
- Carbohydrates: 15
- Fiber: 0
- Protein: 2
- Cholesterol: 30