
Let’s be honest, diving into the world of homemade sourdough bread can look incredibly intimidating from the outside. All those gorgeous, deeply scored artisan loaves make you think you need years of practice and a whole professional setup. But here in my kitchen, we don’t believe in complication; we believe in reliability. That’s why I perfected this Soft & Fluffy Sourdough Sandwich Bread recipe, designed specifically for those of you just starting out. We’re skipping the heavy kneading and relying on the magic of a Dutch oven to give you that perfect shape every time. If you need to get your starter in fighting shape first, check out my guide on how to make sourdough starter from scratch. Trust me, this simple method brings the professional bread baking experience right to your countertop.
- Why This Beginner Sourdough Bread Recipe Works (EEAT Focus)
- Essential Ingredients for Your Sourdough Bread Recipe
- Equipment Needed for Dutch Oven Sourdough
- Step-by-Step Instructions for Homemade Sourdough Bread
- Best Sourdough Tips for a Fluffy Sourdough Recipe
- Troubleshooting Common Sourdough Bread Issues
- Storing and Keeping Your Sliceable Sourdough Fresh
- Frequently Asked Questions About Beginner Sourdough Baking
- Enjoying Your Homemade Sourdough Bread
Why This Beginner Sourdough Bread Recipe Works (EEAT Focus)
When you’re new to this, the last thing you need is a recipe that fails you! That’s why this particular approach to an easy sourdough loaf cuts through the complexity. Many recipes demand intense kneading, but honestly, who has the time? We swap out heavy work for smart timing here in our beginner sourdough baking guide. The confidence comes from knowing the technique is sound, even if you’re still learning to read your dough.
The game-changer? The Dutch oven. This old trick traps all the steam the bread needs when it first hits the heat. That steam prevents the crust from setting too fast, allowing for maximum ‘oven spring’—that beautiful puff that gives you height and airiness. It’s truly an expert technique made simple for your home kitchen. If you want another reliable, simple bakery item, you should check out my English muffin recipe from scratch next!
Achieving a Soft Sourdough Sandwich Bread Texture
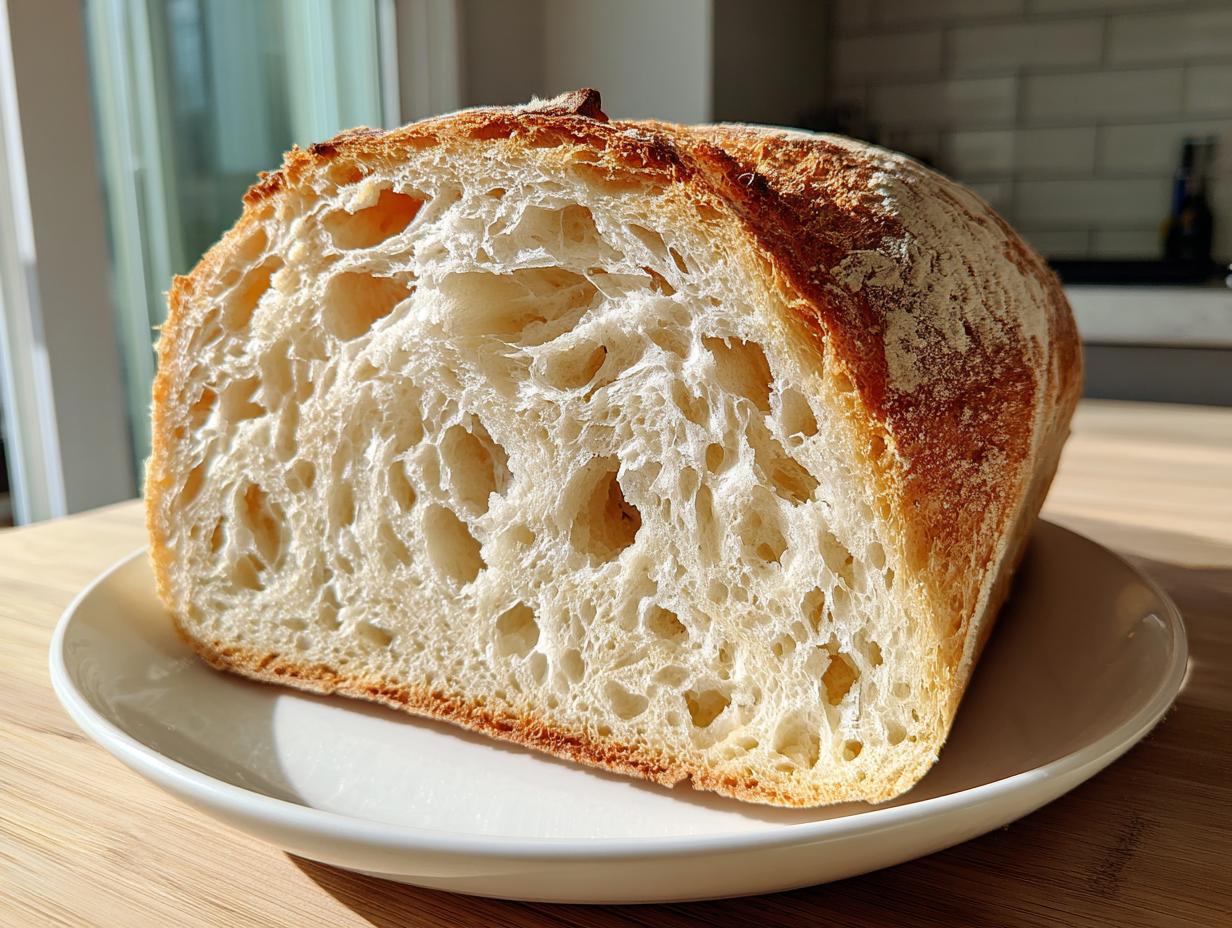
That nice, pillowy crumb you’re after happens because of that long, cold sleep in the fridge. While it rests overnight, the dough develops incredible flavor, but more importantly, the structure stabilizes beautifully. This controlled rise keeps the dough from spreading out sideways in the oven. When it bakes up tall instead of flat, you end up with that light, airy structure you need for a truly great sliceable sandwich bread. It’s science, but it tastes like magic!

Essential Ingredients for Your Sourdough Bread Recipe
To guarantee this easy sourdough loaf turns out perfectly fluffy, you simply cannot mess around with the ingredients. Precision matters here, and showing you exactly what I use makes you feel more confident in your homemade sourdough bread journey. You need four things, and they need to be right!
- 100g active sourdough starter: This needs to be bubbly and ready to go, not just leftover discard.
- 375g warm water: Warm, not hot—we don’t want to shock our little yeast friends!
- 500g bread flour: High protein content helps build that amazing structure.
- 10g fine sea salt: Don’t reach for the iodized table salt here; fine sea salt dissolves better and tastes cleaner.
Keep these measured out, and you’re already winning half the battle. If you want to see how I handle another soft bread formula, take a peek at my soft condensed milk bread next!
Equipment Needed for Dutch Oven Sourdough
Okay, you’ve got your ingredients ready, but let’s talk gear. Making truly fantastic sourdough bread at home doesn’t mean you need to run out and buy a huge, fancy oven. We keep this setup simple and use tools you might already have, or ones that make a huge difference right away. Having the right tool makes your first attempt much less stressful!
First up, you definitely need a large mixing bowl. I mean large—the dough expands a lot during that bulk fermentation time. Next, the star of the show: your Dutch oven. I strongly recommend a 5 or 6-quart size. This is crucial because it traps the steam needed to get that beautiful crust and rise. If your Dutch oven doesn’t have a good, tight-fitting lid, you might struggle a bit with steam retention.
Don’t forget parchment paper! This is my little secret weapon for getting the dough in and out of that scorching hot pot without messing up the shape you worked so hard to create. Seriously, use the parchment as a sling. Almost done here—you’ll also need a very sharp blade or a specialized baker’s lame for scoring the top. Scoring lets the dough expand exactly where you want it, which we call oven spring. If you want to see how I approach no knead sourdough when I’m not using a Dutch oven, check out my recipe for crusty artisan bread no knead bread!
Step-by-Step Instructions for Homemade Sourdough Bread
Alright, this is where we turn a shaggy bowl of ingredients into what will become your perfect, sliceable sourdough loaf. Don’t let the steps scare you—it’s all manageable if you just go by the clock and trust your hands. We are doing minimal active work here, which is what makes this recipe so friendly for those who are new to the whole from scratch bread making game.
Mixing and Bulk Fermentation for Your Sourdough Bread
First things first, get that active sourdough starter mixed with the warm water until things look happy and cloudy. Then, plop in your flour and salt. Mix it all by hand until there are no dusty flour patches left. It’s going to look messy and rugged—that’s perfect! Cover it up now; this is called the autolyse, and we let it chill for just 30 minutes to hydrate everything nicely. Next, we build strength. Wet your hands lightly, grab one edge of the dough, stretch it right up toward the ceiling, and fold it gently over the center. Spin the bowl a quarter turn and do that three more times. Cover, rest 30 minutes. Repeat this stretch and fold process two more times, resting 30 minutes in between each set. That’s it for the heavy lifting! That structure is crucial for a fluffy outcome.
Shaping and Overnight Sourdough Proofing
After you finish the third set of folds and the final 30-minute rest (so about 2.5 hours into bulk fermentation), let the dough sit, covered, for a full hour untouched. Now, lightly flour your counter. Gently turn the dough out—try not to flatten it! You want to gently tuck the edges under itself to form a tight little ball, a boule. This shaping technique is vital; if it’s not tight, your bread will spread too wide instead of rising up tall. Tuck that shaped loaf, seam-side UP, into your floured proofing basket. Now, here’s the best part of the overnight sourdough approach: into the fridge it goes for 12 to 18 hours. It slows everything down so you can sleep!
Baking Your Sourdough Bread in a Dutch Oven
Pull that dough out of the cold when you’re ready to bake! About an hour before you plan to put the bread in, place your Dutch oven, lid and all, right inside your oven while it blasts up to 500 degrees Fahrenheit. That pot needs to be screaming hot. Carefully take that hot pot out—watch your fingers!—and gently drop your cold dough (still on its parchment sling) right into the center. Score the top quickly with a sharp blade to encourage a nice oven spring. Put the lid on, drop the temperature down to 450°F, and bake covered for 20 minutes. Then, slip the lid off and bake another 20 to 25 minutes until it’s that deep, glorious mahogany brown color!
If you want to see how I handle a different type of flour in a sourdough setting, take a look at this easy soft honey whole wheat bread recipe. And for another great no-knead option, check out my no knead sourdough tutorial. If you want to compare results with a different technique, maybe look at this recipe I found for soft sourdough sandwich bread!
Best Sourdough Tips for a Fluffy Sourdough Recipe
Even with a solid recipe, a couple of little tricks can take your loaf from good to absolutely incredible. Think of these as my little secrets Emily pulled straight from the test kitchen, ensuring you get that wonderful, airy crumb instead of a heavy doorstop!
First and foremost for that fluffy sourdough recipe: make absolutely sure your starter is mature and very active before you feed it into the dough. If it’s sluggish, your whole loaf pays the price with a weak rise. Always aim for it at least doubling in size about 4 to 6 hours after feeding. Second, since we are aiming for that soft sandwich texture, you must try this immediate post-bake trick: brush the top of the hot loaf lightly with melted butter right when it comes out of the Dutch oven. It softens the crust beautifully, making it heavenly for slicing!
Also, don’t forget that longer fermentation equals better flavor. While this can be a quick sourdough recipe if you rush it through bulk fermentation, letting it sleep overnight really deepens the flavor profile you want in that homemade sourdough bread. If you want to see another recipe that focuses on fluffiness, check out my guide for easy fluffy homemade marshmallows! And for basic technique reinforcement, this beginner sourdough bread recipe is always reliable.
Troubleshooting Common Sourdough Bread Issues
Don’t you worry for a second if your first loaf isn’t the stunning masterpiece you saw online. That’s not failure; that’s just information! Every single baker who masters from scratch bread making has a stack of flat, dense rounds sitting in their past. The key is figuring out what the bread is trying to tell you so your next attempt is better!
The most common complaint I hear is, “Why is my homemade sourdough bread so dense?” Usually, this boils down to two things we’ve already talked about. Did your starter look bubbly and strong when you mixed it? A weak starter equals a weak rise, plain and simple. Or, did you perform those stretch and folds properly? If you skip building that internal structure, the dough can’t hold the gas, and it collapses on itself. Go back and watch a fast video on those folds if you suspect that’s the culprit.
Another texture worry is that gummy or sticky crumb inside. This almost always means the bread was sliced too soon! That loaf needs to cool completely—and I mean totally cool—to at least 75 degrees before you break the seal. Slicing hot bread releases steam too fast, leaving you with that unpleasant, doughy layer. Patience is tough when the house smells amazing like this, but trust me, waiting is half the battle!
If you’re struggling to get that initial puff (the oven spring), it’s often a scoring issue or a cold/steamy oven. Make sure your Dutch oven is screaming hot before the dough goes in, and use that sharp blade to make one decisive slash before baking. If you want to use up some of that starter that isn’t quite prime yet, you can always make my sourdough discard cinnamon rolls!
For general technique reminders, I always point new bakers toward this wonderful guide on simple baking fundamentals, which you can find here: how to bake simple sourdough bread.
Storing and Keeping Your Sliceable Sourdough Fresh
The hardest part about baking this amazing homemade sourdough bread is waiting for it to cool down! You have to stop yourself, though. If you slice into that beautiful loaf while it’s still warm, the internal structure collapses, and you’re left with that disappointing gummy layer we worked so hard to avoid. Let it cool completely on a wire rack—at least two hours is ideal.
Once it is totally cool, ditch any plastic bags. Plastic traps moisture, and that crispy crust we worked for in the Dutch oven will turn sad and leathery fast. I always store mine cut-side down in a paper bag on the countertop for the best texture throughout the week. This keeps it sliceable sourdough friendly for sandwiches.
If you happen to have leftovers after a few days, don’t throw them out! You can revive that crust beautifully. Just spritz the outside lightly with water and pop it back into a 350°F oven for about five minutes. It comes out tasting almost freshly baked. This works wonders before you smother it with sauce from my easy homemade tomato sauce recipe!
Frequently Asked Questions About Beginner Sourdough Baking
Can I skip the overnight rest and make this a same day sourdough?
You absolutely can! If you’re searching for a quick sourdough recipe, you can certainly skip the long, cold proof and bake it on the same day. Instead of putting it in the fridge for 12 to 18 hours, let the shaped dough finish its final rise at warm room temperature for about 90 minutes to 2 hours, or until nicely puffy. Just know that while you get fresh bread today, the flavor won’t be as deep and complex as the overnight sourdough version. It’s a trade-off, but one worth making when you’re eager to try your homemade sourdough bread!
What flour works best for this easy sourdough loaf?
For this specific soft sourdough sandwich bread recipe, I strongly recommend using standard, high-protein bread flour. This flour has the necessary gluten structure to capture all those beautiful gases released by your starter, which leads to that light and airy crumb you want. While whole wheat is healthier, it can weigh the dough down, making it denser. Stick with white bread flour for your first few attempts when you are focusing on mastering the technique. It makes the process of achieving an artisan bread at home feel much simpler!
What is the purpose of the Dutch oven in this recipe?
The Dutch oven is your secret weapon for mimicking a professional steam-injected deck oven right in your home range. When you first put the dough in that scorching hot pot and cover it, the trapped moisture from the dough itself creates steam. This steam is critical because it keeps the outside layer of the dough soft and pliable for those first 20 minutes. This softness allows the dough to expand to its maximum potential—that beautiful oven spring—before the crust hardens. If you want to read more about the science behind using that piece of equipment, check out this great article on Dutch oven sourdough!
We use foundational recipes like this because they build confidence! If you’re looking for other simple, reliable recipes that use cheese, I have a great easy beer cheese recipe that is always a crowd-pleaser.
Enjoying Your Homemade Sourdough Bread
Now that you’ve mastered the bake, it’s time for the best part! This soft, sourdough bread is just begging to be piled high. It’s perfect for the ultimate grilled cheese sandwich or simply slathered thick with good salted butter. If you’re going for breakfast, a thick slice makes the absolute best avocado toast you’ll ever have. I hope this reliable recipe guides you toward creating your own traditions in your kitchen. Once you see how easy it is, share your first perfect loaf with me—I’m so excited for you!
If you need a great topping for your fresh bread that isn’t butter, you should try my recipe for easy healthy homemade salad dressing recipes, which doubles nicely as a savory dip!
PrintSoft & Fluffy Sourdough Sandwich Bread for Beginners (Dutch Oven Method)

This beginner sourdough bread recipe creates a truly soft, sliceable loaf perfect for everyday sandwiches. We skip heavy kneading and use a Dutch oven for a reliable, fluffy homemade sourdough bread.
- Prep Time: 20 min
- Cook Time: 45 min
- Total Time: 1 hour 5 minutes
- Yield: 1 loaf 1x
- Category: Bread
- Method: Baking
- Cuisine: American
- Diet: Vegetarian
Ingredients
- 100g active sourdough starter
- 375g warm water
- 500g bread flour
- 10g fine sea salt
Instructions
- Mix the active sourdough starter and warm water in a large bowl until combined.
- Add the bread flour and salt to the wet ingredients. Mix by hand until no dry flour remains. The dough will be shaggy.
- Cover the bowl and let the dough rest for 30 minutes (autolyse).
- Perform the first set of stretch and folds: wet your hands, grab one side of the dough, stretch it up, and fold it over the center. Rotate the bowl 90 degrees and repeat three more times (four folds total). Cover and rest for 30 minutes.
- Repeat the stretch and fold process two more times, resting 30 minutes between each set. This builds structure for your fluffy sourdough recipe.
- After the final rest, let the dough rest, covered, for 1 hour at room temperature.
- Lightly flour your work surface. Gently turn the dough out and shape it into a tight round (boule). Do not overwork the dough.
- Place the shaped dough seam-side up into a proofing basket or a bowl lined with a floured kitchen towel.
- Cover the basket and place it in the refrigerator for a long, cold proof for 12 to 18 hours (overnight sourdough).
- About one hour before baking, place your Dutch oven with the lid on inside your oven. Preheat the oven to 500 degrees Fahrenheit.
- Carefully remove the hot Dutch oven from the oven. Gently turn the cold dough out onto a piece of parchment paper. Score the top of the dough with a sharp blade.
- Using the parchment paper as a sling, carefully lower the dough into the hot Dutch oven. Cover with the lid.
- Bake for 20 minutes with the lid on.
- Reduce the oven temperature to 450 degrees Fahrenheit. Remove the lid and bake for an additional 20 to 25 minutes, until the crust is deep golden brown.
- Remove the bread from the Dutch oven and cool completely on a wire rack before slicing. This ensures a sliceable sourdough loaf.
Notes
- Use a mature, active sourdough starter for the best rise and flavor.
- For a softer crust, lightly brush the top of the loaf with melted butter immediately after removing it from the oven.
- If you prefer a quicker bake, you can perform a shorter bulk fermentation (about 4 hours total with folds) and bake the same day, though the flavor will be less developed.
Nutrition
- Serving Size: 1 slice
- Calories: 250
- Sugar: 0.5
- Sodium: 200
- Fat: 1.2
- Saturated Fat: 0.2
- Unsaturated Fat: 1.0
- Trans Fat: 0.0
- Carbohydrates: 50
- Fiber: 2.5
- Protein: 10
- Cholesterol: 0