
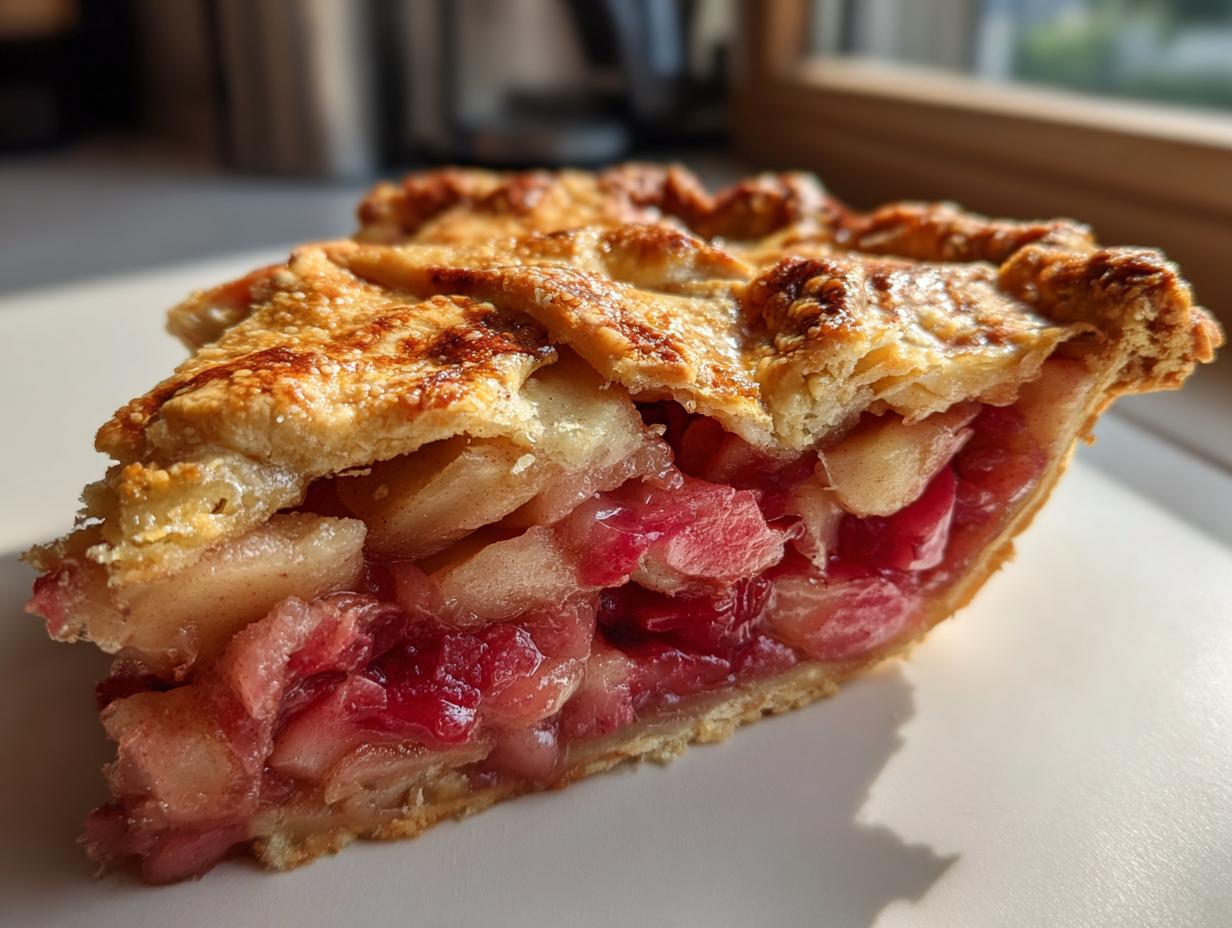
Oh, friends, when that first tender rhubarb stalk pops up, signaling the start of summer baking, you just *know* it’s time for pie! There’s nothing quite like the satisfying snap of a true, flaky crust giving way to that vibrantly tart, yet perfectly sweet, filling. Forget those overly watery or aggressively sour versions you might have struggled with before; I’m handing you the keys to the definitive classic double-crust rhubarb pie.
This isn’t just some random recipe I whipped up last week. This is the culmination of years of work. Here at Cookery Command, especially influenced by the Midwestern heritage of our founder, Emily Harrison, we take our pie seriously. We tested and tweaked until we nailed the exact balance of tartness and brought that all-butter crust to legendary status. Trust me, once you master this technique, you’ll have the best homemade rhubarb pie recipe in your arsenal, guaranteed.
- Why This is the Best Homemade Rhubarb Pie Recipe
- Ingredients for Your Classic Flaky Pie Crust Guide
- Assembling the Perfect Rhubarb Pie Filling
- Step-by-Step Instructions for Easy Rhubarb Pie From Scratch
- Baking Tips for Perfectly Sweet and Tart Rhubarb Pie
- Cooling and Serving Suggestions for Your Rhubarb Pie
- Storage and Reheating Instructions for Leftover Rhubarb Pie
- Frequently Asked Questions About Making Rhubarb Pie
- Share Your Perfect Rhubarb Pie Creation
Why This is the Best Homemade Rhubarb Pie Recipe
I know, I know—everyone claims they have the best homemade rhubarb pie recipe. But ours is different because we attack the two main problems head-on: a soggy bottom and screamingly sour filling. We’ve integrated heritage techniques with modern testing right here at Cookery Command to make sure you get perfection every single time. You won’t have to cross your fingers hoping the filling sets up! If you love those show-stopping desserts, check out our apple pie cheesecake recipe with salted caramel for another showstopper!
- Perfectly Balanced Flavor: We strike that magical chord between tartness and sweetness. It tastes like spring and summer without making your face pucker up!
- Guaranteed Flaky Crust: This recipe uses an all-butter dough chilled perfectly, meaning shatteringly flaky layers that hold up to that juicy filling. No more tough crusts!
- Set Filling Technology: We use a specific flour-to-fruit ratio and two-stage baking heat to ensure your slices hold their beautiful shape, every single time.
Tender Rhubarb Pie Secrets Revealed
My biggest revelation when baking with fresh rhubarb stalks was realizing how much better the flavor gets when you don’t just rely on sugar to mask the tartness. That’s why we always sneak in a little something extra. A half teaspoon of bright orange zest and a teaspoon of lovely vanilla bean paste gently lifts and rounds out the rhubarb tang. They don’t make the pie taste *like* orange or vanilla; they just make the rhubarb flavor sing louder! It’s a subtle trick that makes a huge difference.
Ingredients for Your Classic Flaky Pie Crust Guide
Alright, let’s talk foundation. You can have the prettiest fruit filling in the world, but if your crust flops, the whole experience tanks, right? That is why we treat the dough with the respect it deserves. Getting that shatteringly flaky texture requires precision, mainly centered around temperature. Keep everything COLD, and I mean iceberg cold!
For the dough, we stick to the classic formula, ensuring we have the right ratios for a truly sturdy base that won’t weep or steam on you. If you want a deep dive right now on making this dough perfect, I have another great guide on making an easy flaky crust recipe, but for this rhubarb pie, here is exactly what you need.
You’re aiming for visual perfection in your measurements here, especially with the fat. We need:
- 2 1/2 cups all-purpose flour
- 1 teaspoon salt
- 1 cup (2 sticks) cold unsalted butter, cut into cubes (This is crucial! Smaller, pea-sized butter chunks are your insurance policy for flakiness).
- 1/2 cup ice water, plus use more if needed (Keep an ice bath ready!)
That’s it for the flour! Notice we don’t add sugar to the crust here; we want that buttery, savory contrast to the tart fruit filling. Keeping your butter cubed and your water ice-cold is the main secret to achieving the best homemade rhubarb pie recipe results. Don’t compromise on that!
Assembling the Perfect Rhubarb Pie Filling
Okay, listen up, because this is where we lock in the flavor that makes this pie special. Learning how to make rhubarb pie filling that isn’t just a runny, overly sharp mess is key to any great traditional rhubarb dessert recipe. The amount of sugar feels like a lot, but trust me, fresh rhubarb stalks seriously pack a punch!
When I was first learning to bake this, I almost always used too little sugar, and my grandmother would grimace after the first bite. She explained that you have to respect the rhubarb’s natural acidity. Her trick was to taste the raw mixture—rhubarb, sugar, and flour—before it ever hit the oven, usually right after tossing it together. If it made her squint, we added another tablespoon of sugar. That’s how we learned to tailor it perfectly every time.
For thickening, we rely on simple flour; it works beautifully when we use that two-stage baking method. Make sure everything is gently coated. I love tossing it all together with a big wooden spoon until that sweet grit clings to every pink and green piece. If you’re looking for another filling technique inspiration, you might want to check out my apple pie filling recipe notes for general thickener ratios!
Ingredient Notes and Substitutions for Your Rhubarb Pie
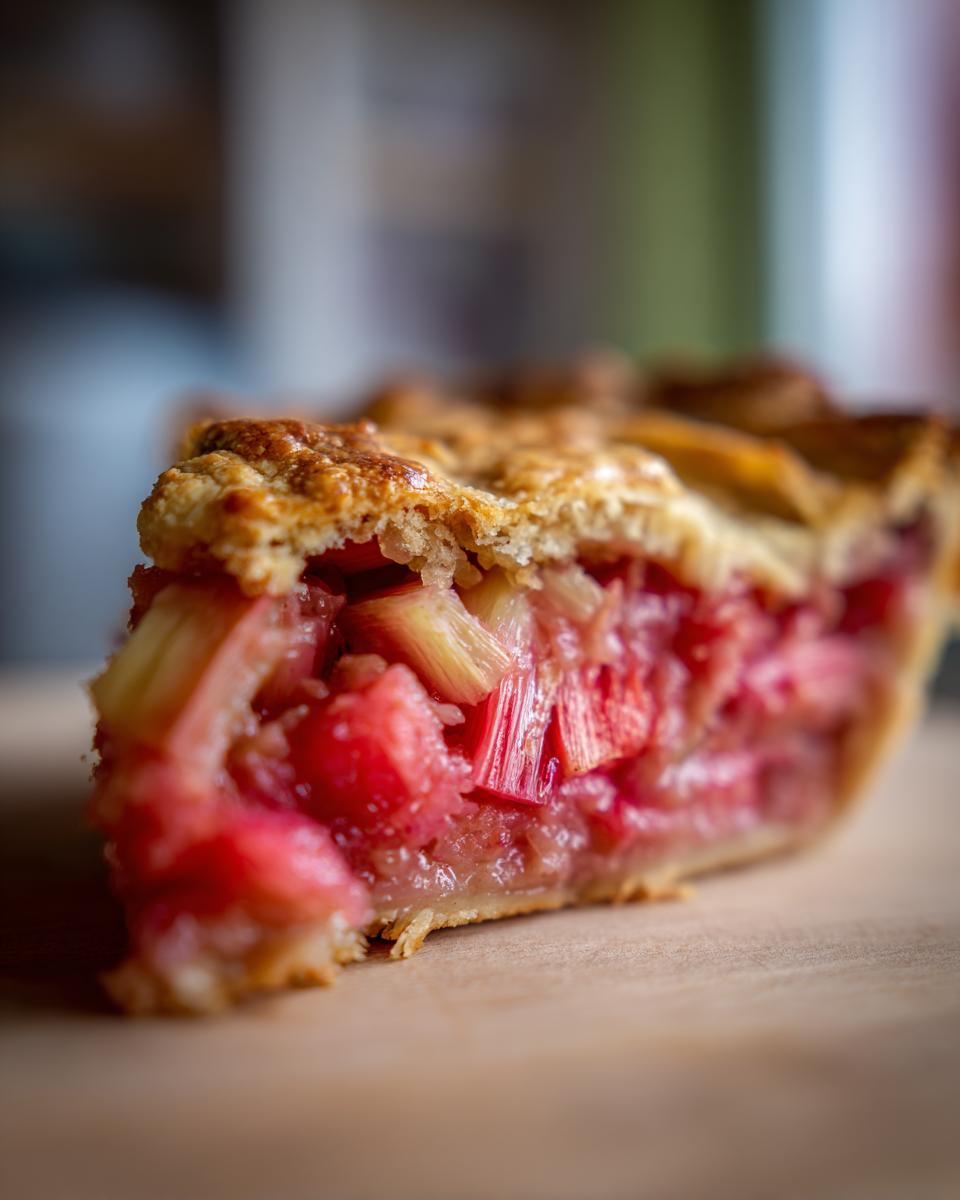
When you’re working with baking with fresh rhubarb stalks, the cut matters! Chop them into uniform 1-inch pieces. This helps them cook evenly and prevents some pieces from turning to complete mush while others stay raw.
What if you can’t get fresh stalks? You can thaw and drain frozen rhubarb, but you’ll need to drain off a lot of liquid first or your pie will be soupy, even with the flour. If you happen to be making those popular strawberry rhubarb pie variations, you can substitute two cups of fresh, sliced strawberries for two cups of the rhubarb listed here. Strawberries naturally add sweetness and moisture, so you might slightly reduce the sugar by a tablespoon or two in that case.
Step-by-Step Instructions for Easy Rhubarb Pie From Scratch
Getting this rhubarb pie into the oven is a process of chilly patience and careful assembly. We broke the steps down so you can follow along easily, whether this is your first time or your fiftieth! Remember, these instructions rely heavily on that foundational work we did chilling the dough.
First up, if you haven’t already, get your dough disks nice and cold from the fridge—at least an hour is the minimum for success. While that’s chilling, toss together your fruit filling ingredients (rhubarb, sugar, flour, vanilla, and zest) until everything looks perfectly coated. Once your dough is happy, grab one disk and roll it out gently on a floured surface until it’s about 12 inches across. Carefully lay that into your 9-inch pie plate and trim the edges, leaving about an inch hanging over the side. Back into the fridge it goes while you work on the top!
Now for the magic part: the top crust. Roll out the second disk. This is where you decide if you want vents or a beautiful woven pattern. Once assembled, pour that glorious rhubarb filling right into the cool bottom crust. Dab a little water around the edge of the bottom crust—this is our “glue.” Place your top crust or lattice over the fruit. Trim the edges again, seal them tightly, and give the whole top a good brushing with an egg wash (that beaten egg and milk mix) and sprinkle on some coarse sugar for sparkle.
Time for the heat! We start hot and then drop the temperature. Preheat your oven to a high 400 degrees F. Put the pie on a sturdy baking sheet—I promise you, you’ll thank me when that filling bubbles over! Bake it hard for 20 minutes to set that crust structure, then immediately drop the temperature down to 375 degrees F for another 35 to 45 minutes. If the edges look like they are getting darker than you like before the filling is goo-ey, just cover them loosely with aluminum foil. If you need a refresher on the basic mechanics of pie making, my beginner pie making guide covers the essentials!
Mastering Lattice Top Pie Instructions
If you’re feeling fancy and want to show off a gorgeous lattice top, this is exactly how you nail it. After rolling out your top dough disk, cut it into uniform strips—about 3/4 inch wide is perfect. Lay half of those strips parallel across the pie filling, spacing them about an inch apart. Now, this is the tricky part: fold back every other strip halfway. Lay one perpendicular strip down across the center, and then unfold the folded strips back over it. You are essentially weaving under, over, under, over. Keep alternating which strips you fold back until you have a checkerboard pattern. Once woven, trim the ends flush with the bottom crust edge before sealing and crimping everything together!
Baking Tips for Perfectly Sweet and Tart Rhubarb Pie
Now we move from assembly to alchemy! This baking phase is critical for achieving that perfectly sweet and tart rhubarb pie texture we’ve been working toward. My first, non-negotiable tip is using that baking sheet underneath the pie dish. I learned this the hard way during one particularly enthusiastic summer bake where the filling overflowed onto the oven floor—it was a disaster to clean up! Place the pie on a rimmed baking sheet before it goes into the oven; it catches any drips and makes sliding the hot pie in and out so much easier.
Remember that two-stage temperature process? We start hot at 400 degrees F for 20 minutes. That blast of initial heat helps set the bottom crust, preventing that frustrating sogginess. Once 20 minutes are up, drop the heat to 375 degrees F. Don’t peek or open the door during this second phase for at least 30 minutes.
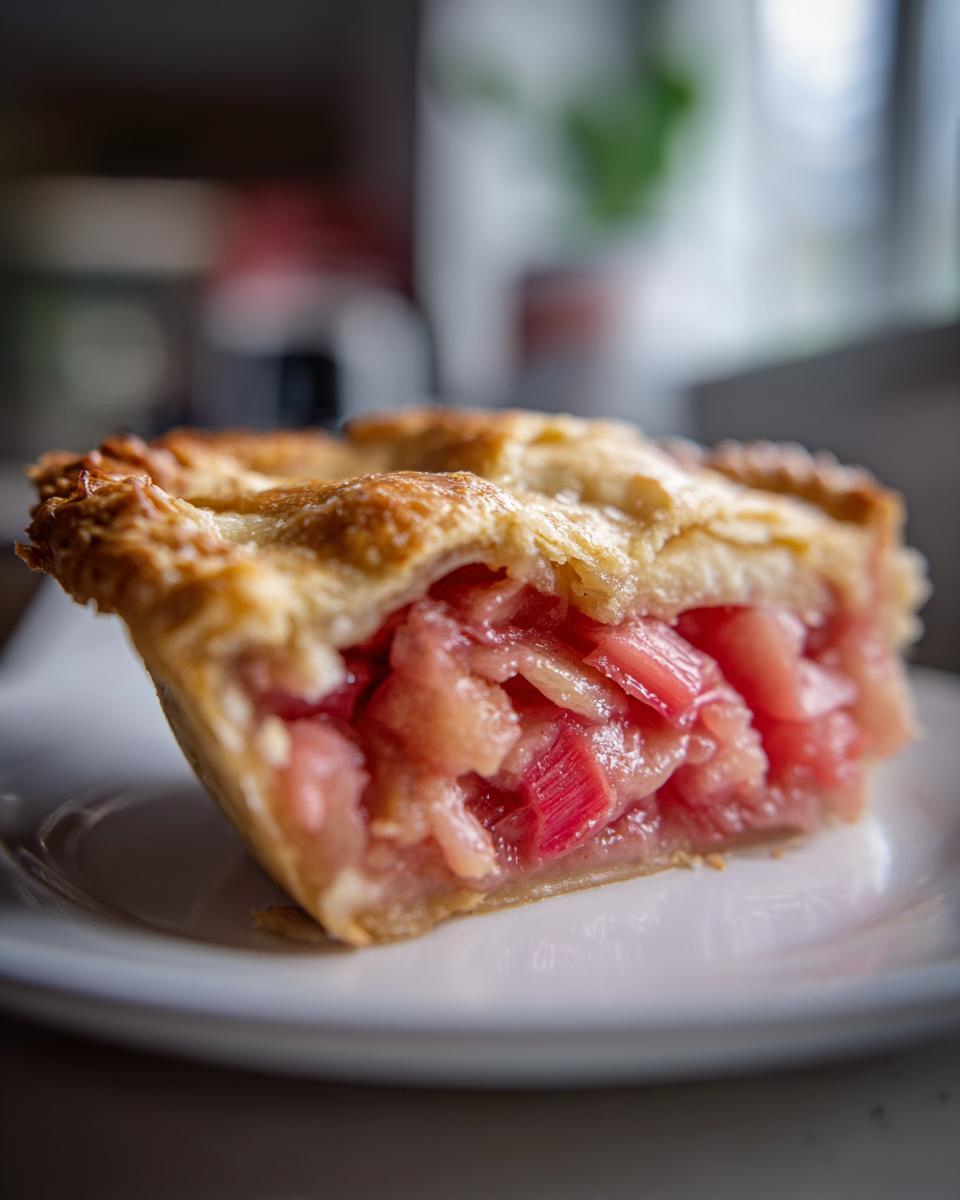
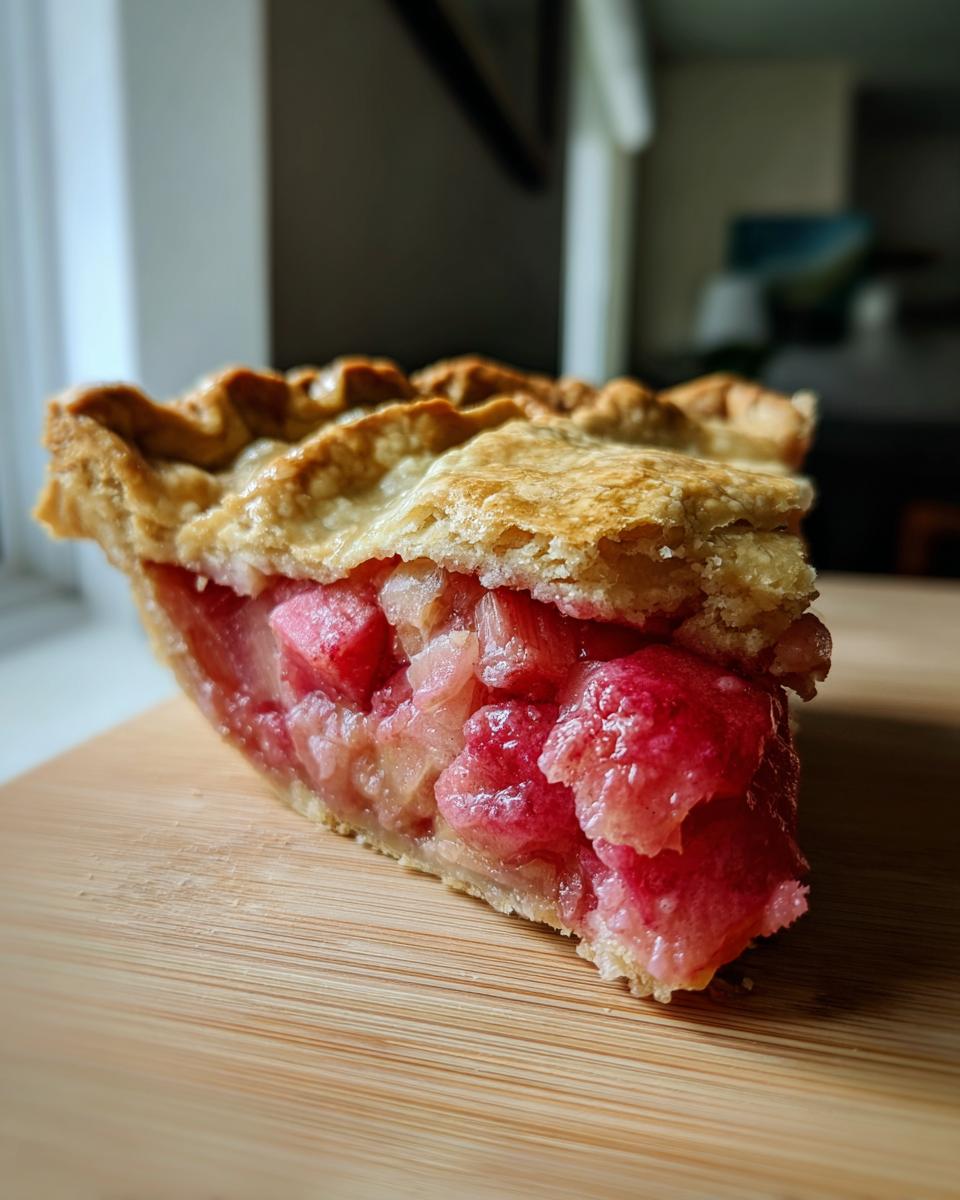
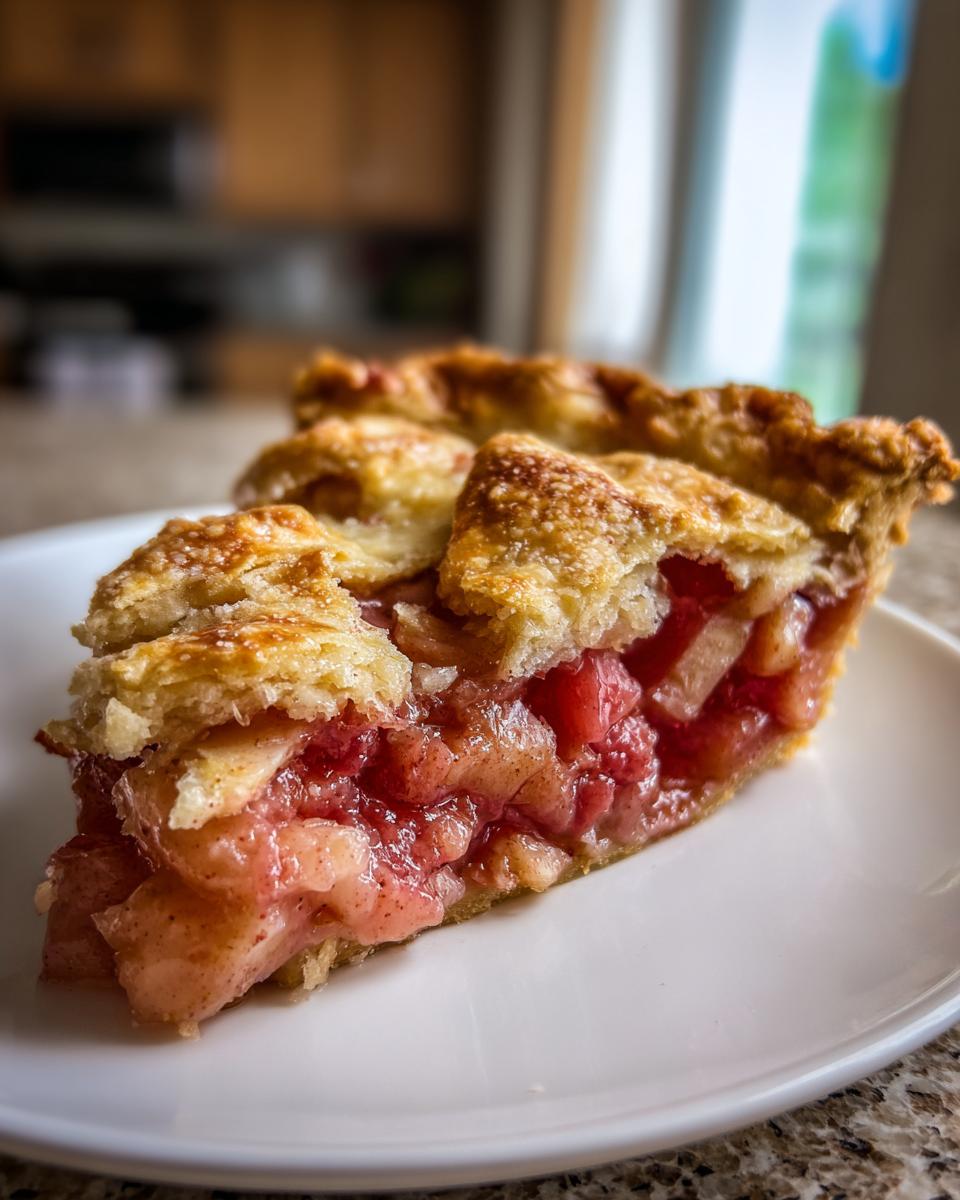
How do you know when it’s done? You look for the filling to be bubbling thickly through the vents or lattice. If you see juices moving sluggishly or thinly, it needs more time. You want to see those thick, slow, almost jammy bubbles—that means the flour thickener has activated and set up. If you notice the outer crust edges are getting dark too quickly—maybe after 40 minutes total—just grab some foil and loosely cover just the rim of the pie. This protects the edges while the center finishes cooking. Patience here guarantees a perfect slice!
Cooling and Serving Suggestions for Your Rhubarb Pie
Oh, the hardest part! You’ve just successfully navigated the heat, the bubbling, and the tempting aroma filling your entire house. You are done baking, but hold on just one second! If you cut this masterpiece too soon, you will be so disappointed. I’m begging you, please allow your beautiful rhubarb pie to cool completely—and I mean completely. That means a solid three to four hours on a wire rack.
If you slice into it hot, all that wonderful thickening work we did with the flour will still be liquidy and runny inside. The magic truly happens as it chills and sets up. Seriously, a warm filling leads to a very sad presentation. If you’re looking for inspiration for other warm-weather treats, this one belongs right alongside the best vanilla buttercream recipes on your list for great summer pie recipes to bake.
When it finally reaches room temperature, it’s ready! The perfect accompaniment, in my book, is a huge scoop of homemade vanilla ice cream—the melting creaminess against that tart rhubarb is just heaven. A dollop of freshly whipped cream works beautifully too, but a cold slice of pie eaten alone works just as well on a hot evening. Make sure you tell everyone this step is non-negotiable; patience really is the final secret ingredient!
Storage and Reheating Instructions for Leftover Rhubarb Pie
Now, let’s talk about the day after. Usually, a pie this good doesn’t last long, but if you managed to save a slice or two—or if you bravely made two pies because you knew how good the first one would be—proper storage is essential to keep that crust tasting fresh.
Because this pie filling is made with a flour thickener and contains fruit acids, it handles storage pretty well. You can definitely leave it sitting on the counter at room temperature for about 24 hours, especially if it’s still somewhat warm or if you don’t live in a super humid area. Just cover it loosely with foil or a large overturned bowl so the crust doesn’t dry out completely.
If you need it to last longer than that—say, until the weekend—wrap the pie tightly in plastic wrap and stash it in the refrigerator. It should be perfectly fine for up to three or four days this way. The cold will make the crust seem naturally softer, which is totally normal.
What about freezing? Yes! This rhubarb pie freezes beautifully, which is great when rhubarb is perfectly in season. You can freeze the entire cooled pie or just individual slices. Wrap it first in plastic wrap, then again in heavy-duty aluminum foil. It keeps well in the freezer for about three months. Just thaw it slowly in the fridge overnight before reheating.
When it comes time to reheat, forget the microwave for the crust! The microwave turns flaky dough into sad, chewy rubber. You want crispy again, right? So, the best method is the oven. Pop that leftover slice on a baking sheet—again, use a sheet!—and heat it up at 325 degrees F for about 10 to 15 minutes. That slow, gentle heat lets the filling warm through while crisping up the crust nicely. Serve it warm with a little extra whipped topping, and it’ll taste almost as good as when it first came out of the oven!
Frequently Asked Questions About Making Rhubarb Pie
I know when you’re trying a brand new recipe, especially a classic like this, your brain floods with little questions. That’s totally normal! I’ve gathered the ones I get asked most often about achieving that tender rhubarb pie secrets perfection right here. If you still can’t find what you need, you can always reach out to us on our contact page!
Do I need to pre-cook the rhubarb for my rhubarb pie?
Absolutely not! And I actually discourage it for this recipe. Pre-cooking the rhubarb releases a ton of juice before it even hits the oven, which makes your filling watery—nobody wants that! Because we use our two-stage baking method (starting hot!) and we toss the raw stalks with enough flour to handle the moisture release, we skip that extra, messy step entirely. The raw stalks cook perfectly right inside the pie shell.
What are the best spices for rhubarb pie?
That’s a fun one! While some folks reach for a heavy hand of cinnamon or nutmeg, I actually find that too much spice masks the delicate, clean flavor of the rhubarb itself. In our recipe, we rely heavily on the vanilla bean paste and orange zest to enhance the fruit. If you want just a *tiny* touch of traditional warmth, go ahead and dust in just a whisper of ground nutmeg—maybe 1/8th of a teaspoon. Keep it subtle so your pie tastes like spring, not pumpkin spice!
My crust always turns out tough, not flaky. What am I doing wrong?
Oh, that’s the number one rookie mistake! The enemy of a flaky crust is rubbing the butter in too much. You should stop mixing the butter into the flour the second you see pieces about the size of small peas floating around. If you rub it until it looks like cornmeal, you’ve incorporated all the cold, layered fat, and you’ll end up with a tough, biscuit-like texture instead of distinct flaky layers. Remember our classic flaky pie crust guide advice: keep the butter pieces intact and cold!
How do I make sure my filling is perfectly sweet and tart?
This circles back to what I mentioned earlier about learning how to make rhubarb pie filling taste right! Rhubarb acidity varies wildly depending on the weather and the specific stalks you get. The only real answer is to taste the filling raw mixture—rhubarb, sugar, and flour—before you put the top crust on. If it makes your mouth pucker immediately, add sugar a tablespoon at a time until it makes you smile instead. We target just slightly sweeter than what you’d like to eat plain, because the butter in the crust and the sugar on top will balance it out during baking.
Share Your Perfect Rhubarb Pie Creation
Now that you have the knowledge—the chilly butter, the balancing zest, and that mandatory cooling time—it’s time for you to step into the kitchen and create some magic! I truly believe that the success of this rhubarb pie is guaranteed when you follow these steps closely. This recipe belongs to the tradition of American home cooking, and I want to see what you do with it!
Don’t be shy! Once you pull that gorgeous, golden creation out of the oven and wait the requisite four hours for the filling to set, I want to hear all about it. Did you go with that gorgeous lattice top we talked about? Did you serve it with vanilla ice cream or just a big cloud of whipped cream?
Head down to the comments section right now and drop those ratings and reviews. Telling me what worked (and maybe what you substituted!) helps our entire community build confidence. We absolutely love seeing your baking triumphs on social media too—tag us so we can share your beautiful slices! If you want to learn more about how we test and perfect these treasured heritage recipes, check out our About Us page. Now go bake something wonderful!
PrintClassic Double-Crust Rhubarb Pie

Follow this reliable recipe to create a perfectly balanced, tart-sweet rhubarb pie with a flaky, all-butter crust. This guide covers the best techniques for a tender filling.
- Prep Time: 45 min
- Cook Time: 65 min
- Total Time: 110 min
- Yield: 8 servings 1x
- Category: Dessert
- Method: Baking
- Cuisine: American
- Diet: Vegetarian
Ingredients
- 2 1/2 cups all-purpose flour
- 1 teaspoon salt
- 1 cup (2 sticks) cold unsalted butter, cut into cubes
- 1/2 cup ice water, plus more if needed
- 5 cups fresh rhubarb stalks, cut into 1-inch pieces
- 1 3/4 cups granulated sugar (adjust to rhubarb tartness)
- 1/4 cup all-purpose flour (for filling)
- 1 teaspoon vanilla bean paste
- 1/2 teaspoon orange zest
- 1 large egg, beaten with 1 tablespoon milk (for egg wash)
- 1 tablespoon coarse sugar (for topping)
Instructions
- Prepare the Crust: In a large bowl, whisk together the flour and salt. Cut in the cold butter using a pastry blender or your fingers until the mixture resembles coarse crumbs with some pea-sized pieces of butter remaining. Gradually add the ice water, one tablespoon at a time, mixing until the dough just comes together. Do not overmix. Divide the dough in half, flatten each half into a disk, wrap in plastic, and chill for at least 1 hour.
- Prepare the Filling: In a separate bowl, gently toss the cut rhubarb with the granulated sugar, 1/4 cup flour, vanilla bean paste, and orange zest until the rhubarb is evenly coated. Set aside while you roll out the dough.
- Assemble the Bottom Crust: On a lightly floured surface, roll out one dough disk into a 12-inch circle. Carefully transfer it to a 9-inch pie plate. Trim the edges, leaving a 1-inch overhang. Return the pie plate to the refrigerator.
- Assemble the Top Crust: Roll out the second dough disk. You can cut vents or create a lattice top according to your preference.
- Fill and Top: Pour the rhubarb filling into the chilled bottom crust. Moisten the edge of the bottom crust with water. Place the top crust (or lattice) over the filling. Trim the edges and crimp them together to seal. Brush the top crust with the egg wash and sprinkle with coarse sugar.
- Bake: Preheat your oven to 400 degrees F (200 degrees C). Place the pie on a baking sheet to catch drips. Bake for 20 minutes at 400 degrees F. Then, reduce the oven temperature to 375 degrees F (190 degrees C) and continue baking for 35 to 45 minutes more, or until the crust is golden brown and the filling is bubbling thickly. If the edges brown too quickly, cover them loosely with foil.
- Cool: Let the pie cool completely on a wire rack for at least 3 to 4 hours before slicing. This allows the filling to set properly.
Notes
- For a truly flaky pie crust, keep all ingredients, especially the butter and water, very cold.
- If your rhubarb is very tart, you may need to increase the sugar slightly, but taste the raw mixture first to gauge the tartness level.
- If you prefer a strawberry rhubarb pie, substitute 2 cups of sliced fresh strawberries for 2 cups of the rhubarb.
Nutrition
- Serving Size: 1 slice
- Calories: 380
- Sugar: 35g
- Sodium: 210mg
- Fat: 20g
- Saturated Fat: 12g
- Unsaturated Fat: 8g
- Trans Fat: 0.5g
- Carbohydrates: 50g
- Fiber: 3g
- Protein: 5g
- Cholesterol: 55mg