
When the air turns crisp and the scent of woodsmoke drifts in, I know it’s time for serious fall baking. But let’s be honest, nobody wants to spend all day over the stove when there are family members to see and football to watch! That’s where my go-to, no-fail recipe for pumpkin crunch comes in. This layered marvel is the ultimate crowd-pleaser for every gathering, from casual Sunday nights to the big Thanksgiving spread. Here at Cookery Command, like Emily Harrison from our Midwestern roots, we promise reliability. This isn’t just any dessert; it’s meticulously tested comfort food built on the foundation of generations of trusted home cooking, ensuring absolute success every single time you make it. If you love reliable, easy treats, you might also want to check out my guide for making easy fudge without a thermometer!
- Why This Layered Pumpkin Crunch Recipe Works So Well
- Essential Ingredients for the Best Pumpkin Crunch Recipe
- Step-by-Step Instructions for Perfect Pumpkin Crunch
- Tips for Success with Your No-Fail Holiday Dessert
- Variations: Exploring Hawaiian Pumpkin Crunch Style
- Storage and Reheating Instructions for Pumpkin Crunch
- Serving Suggestions for This Crowd-Pleasing Pumpkin Treat
- Frequently Asked Questions About Pumpkin Crunch Cake Recipe
- Estimated Nutritional Data for Pumpkin Crunch
Why This Layered Pumpkin Crunch Recipe Works So Well
When I tell people this is my favorite easy fall dessert, they assume it takes hours, but that’s the magic! This dessert delivers massive flavor and texture payoff without any fuss. It’s built on reliable American baking foundations—using a boxed yellow cake mix dessert base means you skip the tedious step of mixing dry ingredients from scratch, guaranteeing perfection.
This combination of simple base and rich filling is why it’s always the first thing gone at a holiday table. It’s genuinely foolproof.
- It’s consistently reliable, thanks to the balanced chemistry of the canned ingredients and cake mix.
- It feeds a crowd easily since we bake it in a big 9×13 pan.
- It’s built for speed, which means you can get it into the oven and back to mingling!
The Speed of This Quick Pumpkin Dessert
Seriously, you will be shocked. I can have this thing assembled and ready for the oven in about fifteen minutes, tops. I try not to even use measuring spoons for the topping; it’s almost a “dump cake style” layering process, which is just divine when you’re trying to wrangle all the Thanksgiving appetizers.
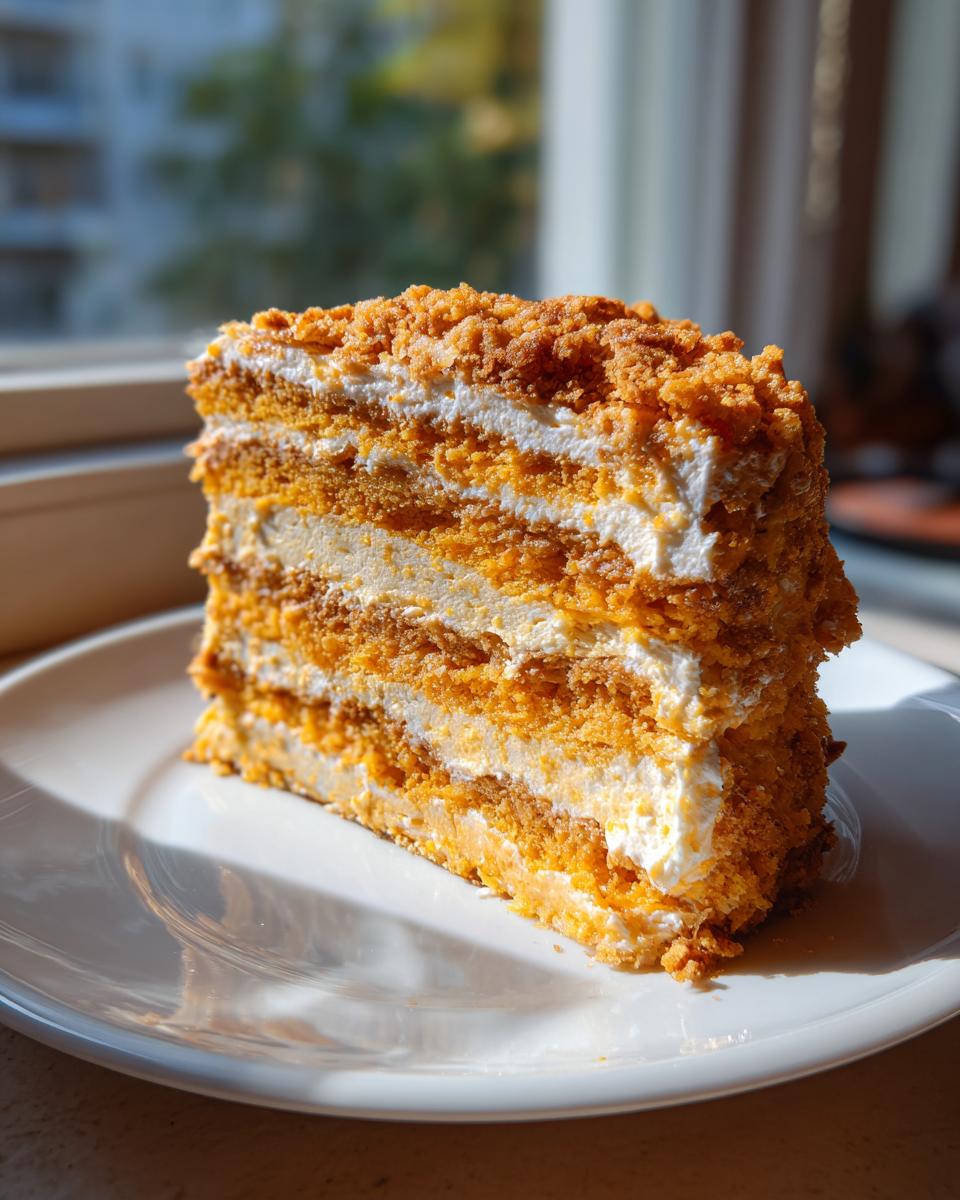
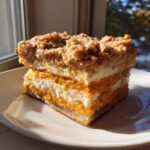
Perfect Textures in Every Bite of Pumpkin Crunch
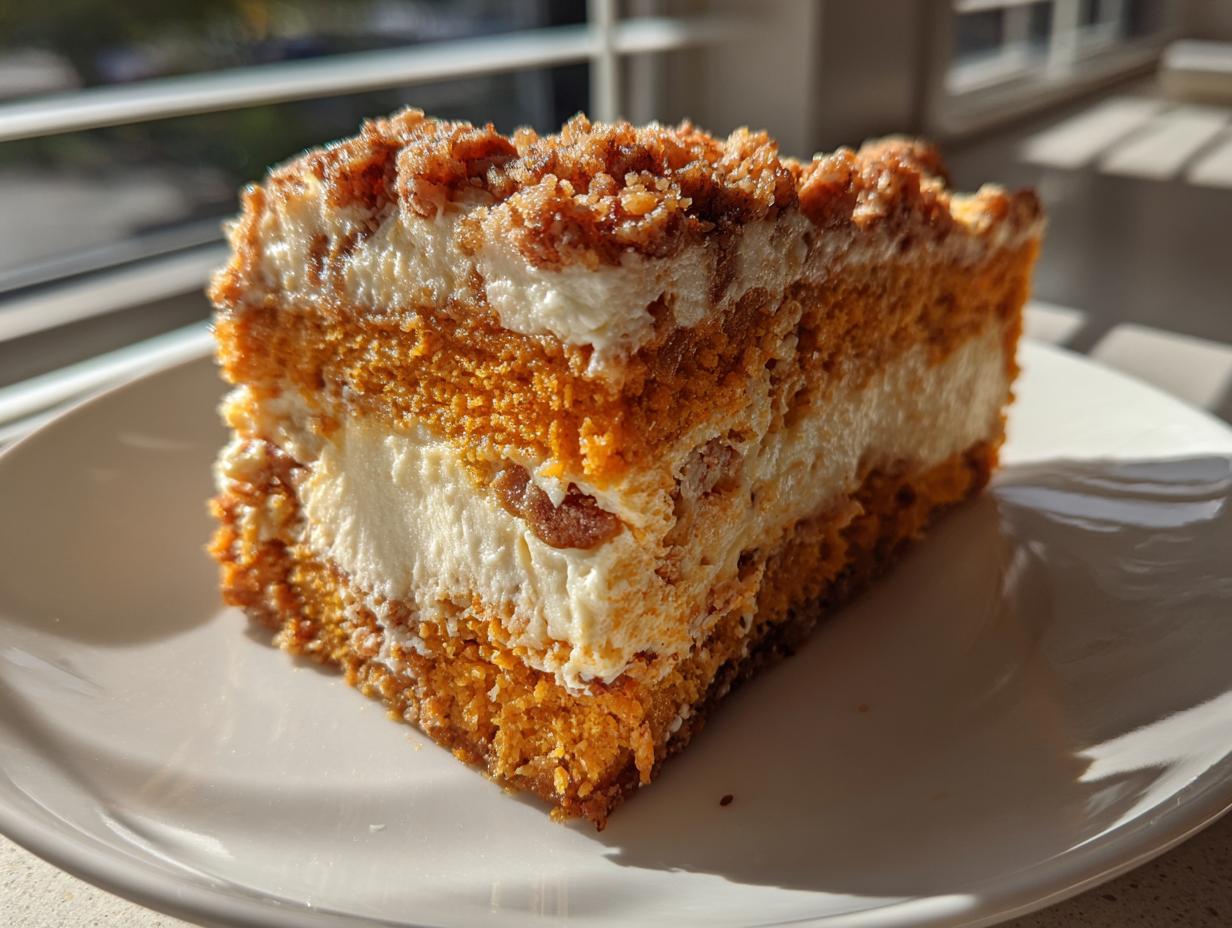
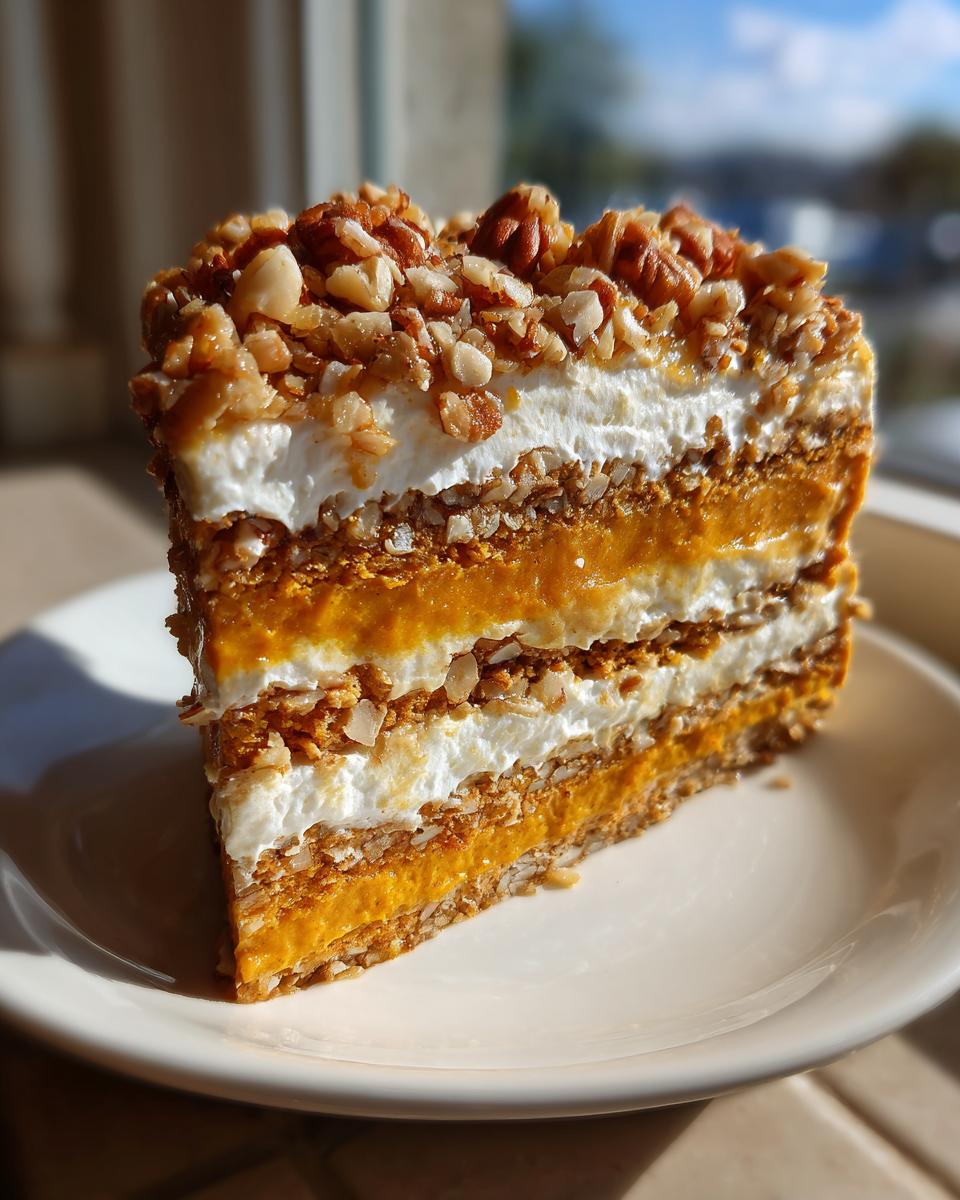
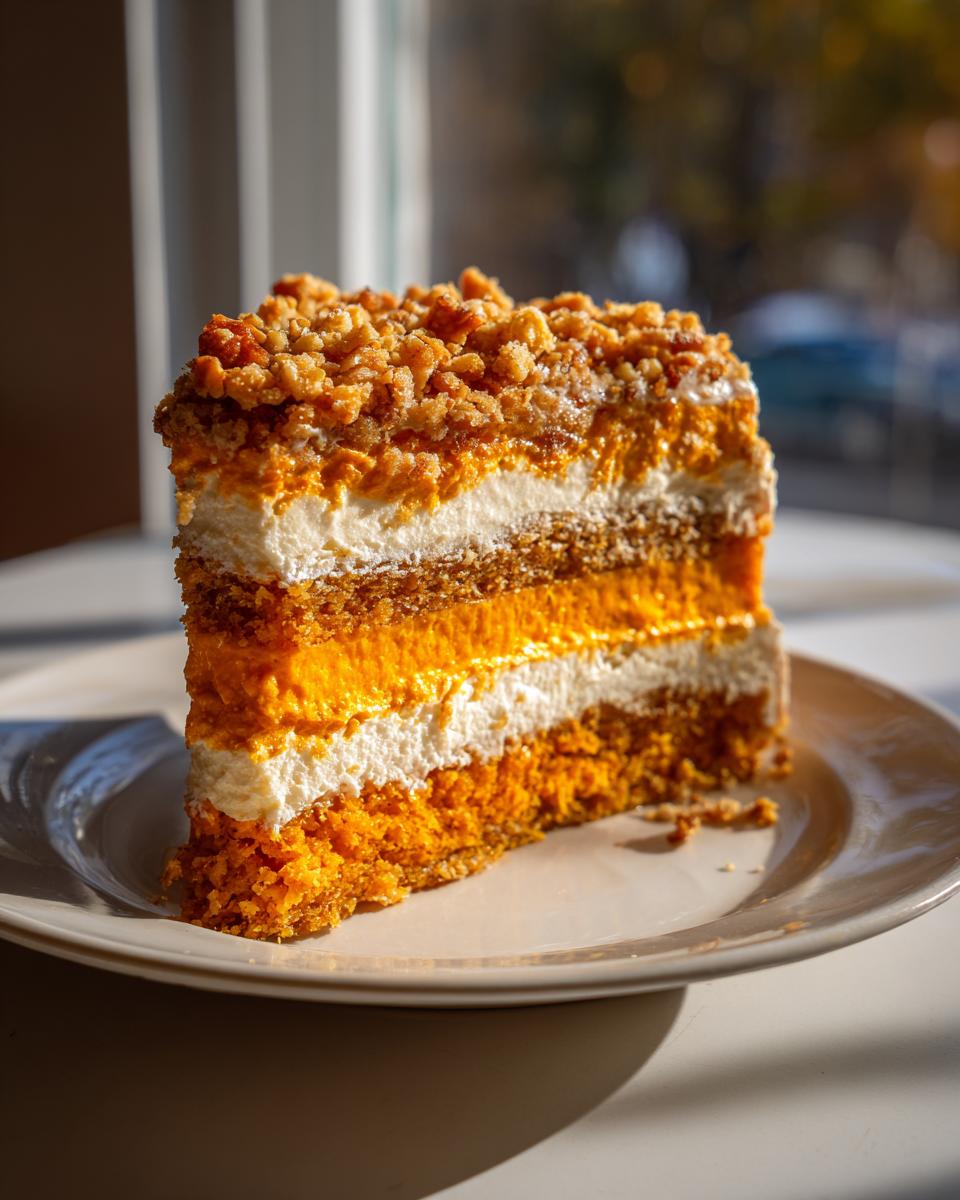
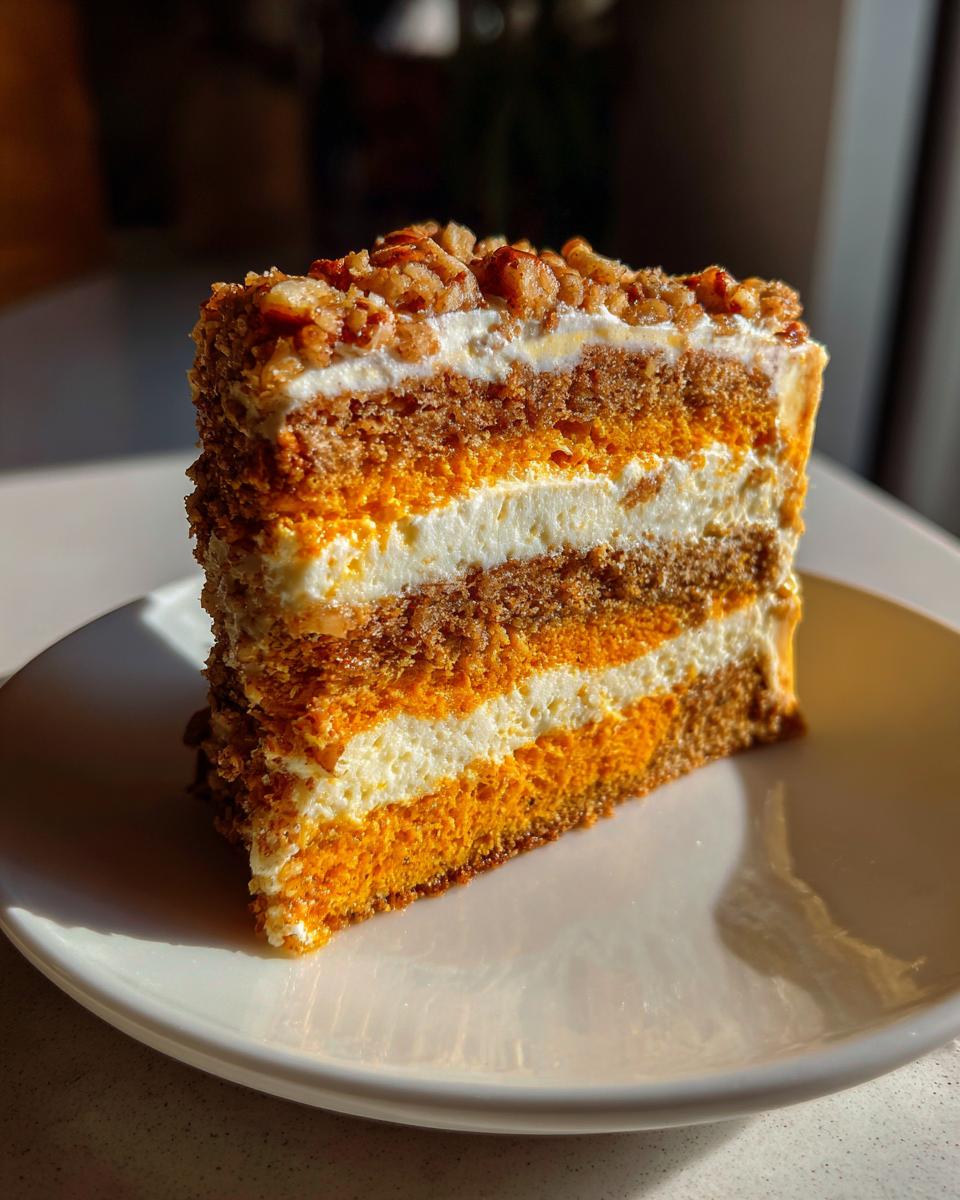
Ah, the texture is everything, isn’t it? That moment when your fork breaks through the warm, golden pecan topping into the cool, velvety smooth creamy pumpkin filling underneath? That contrast is what makes the pumpkin crunch so addictive. We aren’t aiming for cake here; we’re aiming for glorious layers!
Essential Ingredients for the Best Pumpkin Crunch Recipe
When you’re committed to making the absolute best pumpkin crunch, you have to honor the ingredients. Because this recipe is so straightforward—only a handful of things are needed—every single component matters a lot! You don’t need a pantry full of exotic flours or tricky spices; we’re working with hearty American staples that always deliver. Having these measured out before you start is my favorite trick for keeping that 15-minute prep time snappy. Trust me, having everything ready to go makes assembly feel like you’re just coloring inside the lines!
- 1 box (15.25 oz) yellow cake mix
- 1 cup unsalted butter, melted
- 1 cup chopped pecans
- 1 can (15 oz) pure pumpkin puree
- 1 can (14 oz) sweetened condensed milk
- 2 large eggs
- 2 teaspoons pumpkin pie spice
- 1 teaspoon vanilla extract
- 1 tub (8 oz) frozen whipped topping, thawed (for serving)
Notes on the Buttery Streusel Topping Components
The star here is that crunchy top layer, and for that, you need three things working in harmony. First, the yellow cake mix—don’t substitute this with any other flavor; the plain yellow delivers that classic, slightly sweet base. Second, the butter needs to be fully melted so it coats everything evenly. For the pecans, I strongly recommend skipping the pre-chopped bags. When you chop them yourself, you get a better texture. If you want a really rustic, extra crunchy pumpkin crunch topping, use a mix of finely chopped pecans and walnuts. It gives the topping some real personality!
Creating the Creamy Pumpkin Filling Base
This is where we build that decadent interior! Rule number one: you absolutely must use **pure pumpkin puree**, not the canned pumpkin pie filling. The filling already has the sugar and spices added, and we need full control over our baking chemistry here. We rely on the sweetness from the sweetened condensed milk to balance the pure pumpkin and our required two teaspoons of pumpkin pie spice. That spice mix is what gives you that wonderful Pumpkin Spice Crunch flavor profile, so measure it out carefully!
Step-by-Step Instructions for Perfect Pumpkin Crunch
Okay, this is the fun part where we take all those beautiful components and assemble them into a stunning, effortless Pumpkin Crunch Cake Recipe. The beauty of this layered dessert is that there’s no difficult folding or gentle stirring; it’s about building distinct layers that the oven will fuse together perfectly. First things first, get your oven warmed up to 350 degrees Fahrenheit. And listen, before you measure a single speck of flour, you have to properly grease that 9×13 baking dish. I usually use a quick spray of cooking oil and then wipe it with a paper towel—you don’t want anything sticking to the sides!
Mixing the Crunchy Pecan Topping for your Pumpkin Crunch
We start by building the crust and the topping simultaneously. Grab a medium bowl and dump in your box of dry yellow cake mix and your cup of chopped pecans. Now, pour that melted butter right over the top. You’re not looking for a batter here; you just want to use a fork or spatula to gently stir it all together until every bit of the dry mixture looks moist. It should crumble easily between your fingers. Don’t over-mix it, or you’ll activate the flour too much and lose that desirable sandy texture for the crunch. Once it looks shaggy and evenly coated, set that bowl aside—it’s patient!
Assembling the Layers of This Layered Pumpkin Dessert
This layering sequence is critical to mastering your pumpkin crunch! Take half of that prepared cake/pecan topping mixture and sprinkle it evenly across the bottom of your greased dish. This becomes your base crust. Next, gently pour the entire smooth pumpkin mixture over that base layer. Spread it out easily with the back of a spoon, just to cover everything. Finally, take the remaining half of the dry crunch mixture and sprinkle it lightly over the top. I mean *lightly*! Do not press it down at all; we want that topping to stay light and airy so it toasts up beautifully while baking.
Baking Times and Cooling for the Pumpkin Crunch Cake Recipe
Pop that dish into your preheated 350°F oven. It generally takes between 45 and 55 minutes to bake through, but ovens vary, you know how it is. You’re looking for that top pecan layer to be beautifully golden brown, and your toothpick test should come out with moist crumbs clinging to it, not wet batter. Once it’s done, pull it out, but here’s the make-or-break tip for serving: you must let this cool completely, usually for about two hours on a wire rack. If you try to top it warm, the whipped topping just melts into soup! Patience yields the best results for that classic cool and crunchy payoff.
Tips for Success with Your No-Fail Holiday Dessert
I absolutely promise that following these steps results in the best pumpkin crunch you’ll ever serve. My biggest tip, which I cannot stress enough, is patience during the cooling stage. If you rush serving this dessert, that gorgeous whipped topping becomes a sad, soupy mess, and you’ve lost the texture contrast that makes it special.
Also, try to keep your layers even when assembling; an overly thick top crumble will result in an undercooked pumpkin layer, so ensure that middle layer is poured evenly across the crust. When you go to test for doneness, don’t obsess over a perfectly clean toothpick—moist crumbs mean it’s ready to come out and chill towards that perfect, crunchy finish. Trust the visuals: golden brown on top, set in the middle. That’s how you achieve that no-fail holiday dessert magic!
Variations: Exploring Hawaiian Pumpkin Crunch Style
Now, if you’ve heard whispers about this dessert having a regional flair, you’re exactly right! The Hawaiian Pumpkin Crunch style is famous, especially the version Sam Choy made iconic. It’s certainly worth playing around with the end step to match that island flavor profile!
My recipe finishes with that light, fluffy whipped topping, right? Well, for a more traditional approach, especially if you want to replicate the iconic Sam Choy Pumpkin Crunch experience, you can skip the whipped topping entirely. Seriously, just let it cool completely and serve it just like that—plain, letting the rich pumpkin and the buttery streusel do all the talking. That gives you maximum crunch!
Another fun swap is making a simple glaze instead of using the topping. Mix a cup of powdered sugar with just a tablespoon or two of milk or even coconut milk until it’s thin enough to drizzle over the cooled dessert before slicing. It adds a different kind of sweetness that really complements the spices. If you’re interested in other island flavors, you have to check out my recipe for Hawaiian garlic shrimp next!
Storage and Reheating Instructions for Pumpkin Crunch
Once you’ve successfully made this amazing pumpkin crunch, the biggest question is how to save the leftovers! Since we top this beautiful dessert with a layer of whipped topping, immediate refrigeration is a must. If you try to leave it out on the counter, that dairy layer gets sad really fast. Cover the 9×13 dish tightly with plastic wrap—make sure the wrap isn’t touching the whipped topping, or you’ll scratch the pretty surface!
It keeps really well in the fridge for about four days. If you’re planning ahead for Thanksgiving week, this is a big plus! You can bake the whole thing, let it cool completely, and keep it covered in the fridge for up to two days before you add the final whipped topping layer the day you want to serve it.
Now, can you reheat it? That’s tricky, honestly. Since this dessert is intended to be served chilled or at room temperature to maintain that wonderful texture contrast, warming it up usually compromises the crunch factor of the topping and makes the whipped cream melt. If you absolutely must have it warm, I’d suggest carving out a slice, leaving the topping off, and giving that portion just 10 or 15 seconds in the microwave. But generally, this pumpkin crunch cake recipe is best enjoyed cold!
Serving Suggestions for This Crowd-Pleasing Pumpkin Treat
This crowd-pleasing pumpkin treat is fantastic all by itself, but the right topping can truly elevate it for dessert time! Because the dessert is already so rich and spiced, I usually keep the additions simple. It’s amazing served straight from the fridge alongside a strong, hot cup of coffee—the creaminess against the dark roast is just perfect.
If you want to get fancy, adding a drizzle of warm caramel sauce right over the slice before serving adds another layer of depth that plays beautifully with that pumpkin spice. A scoop of vanilla bean ice cream is classic, but honestly, I find that the whipped topping provided in the recipe stands up as the perfect fluffy contrast to the crunchy pecan base all on its own!
Frequently Asked Questions About Pumpkin Crunch Cake Recipe
Whenever I share this recipe, I always get a few questions about substitutions, which is totally normal when you’re baking for crowds! Don’t stress if you need to make a little swap, but for the absolute best results in this pumpkin crunch cake recipe, I always recommend sticking close to the original plan. It’s one of those desserts where the chemistry is just right!
Can I use pumpkin pie filling instead of puree in my pumpkin crunch?
Oh, please don’t! This is so important for your creamy pumpkin filling. Pumpkin pie filling is already loaded up with spices and a lot of sugar. If you use that, your filling will be way too sweet and throw off the density we are aiming for. We need that pure, unsweetened pumpkin puree so we can control the exact amount of spice we add. Sticking to the puree ensures you get that perfect scoopable, creamy texture rather than something too runny or overly spiced.
Is this a good Thanksgiving Dessert Idea if I am short on time?
Yes, yes, and yes! This is honestly my secret weapon for Thanksgiving—it’s one of the best Thanksgiving Dessert Ideas precisely because it’s so fast. You can get the whole thing assembled—the crust, the filling, the topping—in about 15 minutes prep time. I often bake it the night before, let it cool completely, and then just keep it covered in the fridge. That way, on Thanksgiving day, you just take it out 30 minutes before serving, dollop on the whipped cream, and you’re done! It’s an utter lifesaver.
Estimated Nutritional Data for Pumpkin Crunch
Now, I know we bake for love and comfort, not usually for the numbers, but sometimes folks ask! Since this pumpkin crunch is such a hit at parties, I ran the numbers based on my standard measurements. Remember, these figures are just estimates—they can jump around depending on what brand of cake mix or condensed milk you grab off the shelf!
When you look at this data, realize it’s a rich, celebratory dessert, perfect for those special autumn occasions. We’re looking at a slice size based on dividing the recipe into 12 generous portions.
- Calories: 380
- Sugar: 35g
- Fat: 22g (with about 10g of that being saturated fat from the butter and dairy)
- Carbohydrates: 45g
- Protein: 5g
For a slice of this crowd-pleasing pumpkin treat, that fat content is what gives you that amazing buttery crunch and creamy mouthfeel, so don’t sweat it too much if you’re having a piece at Thanksgiving. Just enjoy that seasonal comfort!
PrintThe Ultimate Easy Layered Pumpkin Crunch Cake
Create this crowd-pleasing, layered Pumpkin Crunch Cake, featuring a creamy pumpkin filling, a simple yellow cake mix base, and a buttery pecan streusel topping. This recipe is reliable and perfect for Thanksgiving or any fall gathering.
- Prep Time: 15 min
- Cook Time: 50 min
- Total Time: 2 hours 5 min
- Yield: 12 servings 1x
- Category: Dessert
- Method: Baking
- Cuisine: American
- Diet: Vegetarian
Ingredients
- 1 box (15.25 oz) yellow cake mix
- 1 cup unsalted butter, melted
- 1 cup chopped pecans
- 1 can (15 oz) pure pumpkin puree
- 1 can (14 oz) sweetened condensed milk
- 2 large eggs
- 2 teaspoons pumpkin pie spice
- 1 teaspoon vanilla extract
- 1 tub (8 oz) frozen whipped topping, thawed (for serving)
Instructions
- Preheat your oven to 350 degrees Fahrenheit. Lightly grease a 9×13 inch baking dish.
- Prepare the crunch topping: In a medium bowl, combine the dry yellow cake mix and the chopped pecans. Pour the melted butter over the mixture and stir until the dry ingredients are evenly moistened. Set aside.
- Prepare the pumpkin layer: In a separate large bowl, whisk together the pumpkin puree, sweetened condensed milk, eggs, pumpkin pie spice, and vanilla extract until the mixture is smooth and uniform.
- Assemble the dessert: Sprinkle half of the cake mix and pecan mixture evenly over the bottom of the prepared baking dish.
- Carefully pour the entire pumpkin mixture over the crust layer, spreading it gently to cover the base.
- Sprinkle the remaining half of the cake mix and pecan mixture evenly over the top of the pumpkin layer. Do not press it down.
- Bake for 45 to 55 minutes, or until the topping is golden brown and a toothpick inserted near the center comes out mostly clean.
- Remove the dish from the oven and let it cool completely on a wire rack, about 2 hours.
- Once cooled, spread the thawed whipped topping evenly over the top layer before slicing and serving.
Notes
- For a variation inspired by Hawaiian Pumpkin Crunch, you can substitute the whipped topping with a simple glaze made from powdered sugar and milk, or serve it plain for a more intense crunch.
- You can prepare this dessert a day ahead; cover and refrigerate after it has fully cooled.
- If you prefer a stronger spice flavor, increase the pumpkin pie spice to 2.5 teaspoons.
Nutrition
- Serving Size: 1 slice
- Calories: 380
- Sugar: 35
- Sodium: 280
- Fat: 22
- Saturated Fat: 10
- Unsaturated Fat: 12
- Trans Fat: 0.5
- Carbohydrates: 45
- Fiber: 2
- Protein: 5
- Cholesterol: 55