
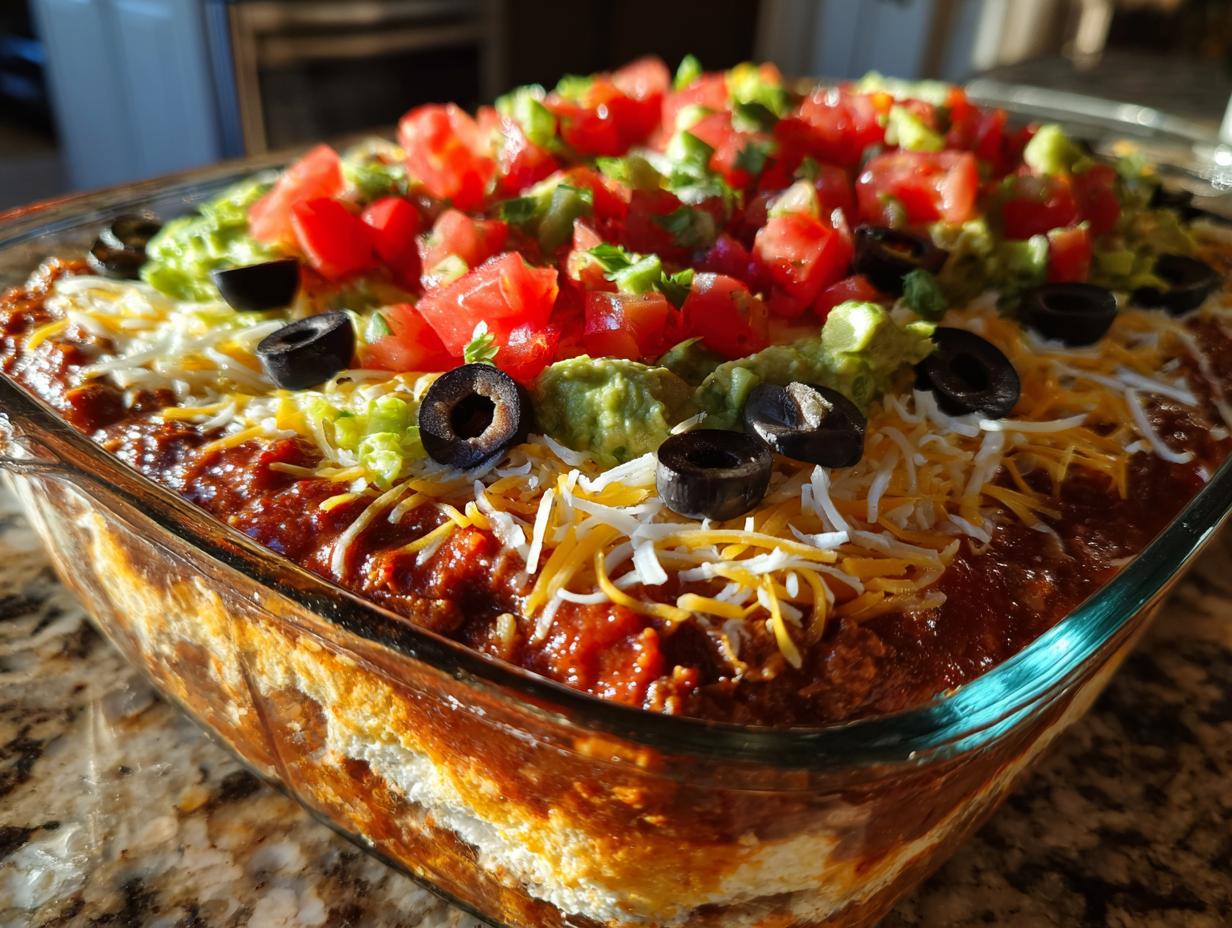
If you’re anything like me, when game day rolls around or a potluck invite hits the calendar, your brain immediately jumps to snacks. Specifically, dips! We need something big, something colorful, and something that disappears the second you set it out. That is why I always fall back on the Classic Seven Layer Dip. Trust me, this isn’t just any dip; this is *the* ultimate layer dip.
It’s a rockstar appetizer because it manages to be both perfectly balanced—creamy, cheesy, zesty—and incredibly simple to pull together in a single dish. I just love the look on people’s faces when they see all those distinct stripes heading into the bowl. You want a recipe that guarantees compliments? This is it. If you’re looking for more easy finger foods to round out your spread, take a peek at my guide to easy appetizers and snacks, but first, let’s make this masterpiece!
- Why This Classic Seven Layer Dip is the Best Layer Dip for Any Gathering
- Gathering Your 7 Layer Dip Ingredients
- Step-by-Step Instructions for the Perfect Layered Dip Recipe
- Tips for Success Making a Classic Layered Dip
- Variations: Customizing Your Layer Dip
- Make Ahead Dip and Storage Instructions
- Frequently Asked Questions About This Layered Nacho Dip
- Estimated Nutrition for This Simple Party Food
- Share Your Homemade Layer Dip Experience
- Estimated Nutrition for This Simple Party Food
- Share Your Homemade Layer Dip Experience
Why This Classic Seven Layer Dip is the Best Layer Dip for Any Gathering
When you’re hosting a crowd, you need food that pulls its weight, and this dip does it every single time. It’s my go-to because it checks every box for a successful appetizer. Honestly, I can guarantee it will be gone before the main food is even ready!
- It requires zero cooking time—just layering and chilling. That’s a huge win for the host!
- The layers stay distinct because we check the moisture content of the salsa closely. Nobody wants a soggy bean layer.
- It pulls straight from classic Tex-Mex flavors, so everyone already loves the profile.
- It scales up beautifully. Whether you have ten people or thirty, you just grab a bigger dish!
If you loved the ease of this, you should definitely check out how I handle my Pumpkin Cheese Ball when fall rolls around. Same simple assembly, massive flavor!
Gathering Your 7 Layer Dip Ingredients
Okay, let’s talk about what you need to make this Best Seven Layer Dip truly pop. The secret to any great layered dish is making sure each layer is perfect on its own. Remember, you aren’t mixing these things together until they’re ready to serve, so quality matters!
I know sometimes recipes just list ingredients, but I want you to pay close attention to the prep details here, especially draining the salsa. That tiny extra step prevents the whole dish from turning soupy. Here’s what you’ll need to gather up for this fiesta in a dish.
For the Creamy Base Layer
This is the foundation, the glue that holds everything together, and it needs to be velvety smooth. You absolutely must use cream cheese that is room temperature—softened is the magic word here. If it’s too hard, you’ll get lumps!
- Cream Cheese: 1 (16 ounce) package, softened wonderfully
- Sour Cream: 1 cup
- Taco Seasoning Mix: 1 packet (1 ounce)
For the Toppings and Layers
This section covers layers two through seven. The most important instruction here, seriously, is about the salsa. You need to drain off any liquid before you start scooping. We want flavor, not watery goo!
- Refried Beans: 1 (16 ounce) can
- Guacamole: 1 cup (use your favorite store-bought or make a batch!)
- Salsa: 1 cup, and I mean drained well—use a fine-mesh sieve if you have to!
- Shredded Cheese: 1 cup of Mexican blend works perfectly
- Diced Tomatoes: 1 cup
- Black Olives: 1/2 cup, sliced and drained
Grab these components, and we can start assembling this incredibly simple, yet always impressive, layer dip!
Step-by-Step Instructions for the Perfect Layered Dip Recipe
Alright, now for the fun part—layering! This is where the visual magic happens for our Layered Dip Recipe. The trick to a truly excellent layer dip is taking your time with each spread. If you rush, the layers start to blend, and we definitely don’t want that muddy middle area, right?
Preparing the Seasoned Cream Cheese Layer
First things first, let’s get that foundation mixed up. In a bowl, you’re going to combine your softened cream cheese, the sour cream, and that whole packet of taco seasoning. Use a hand mixer—or if you’re feeling enthusiastic, a sturdy whisk—and just whip it until it’s perfectly smooth and smells totally awesome. You want no lumps at all!
Take your 9×13 dish and spread this creamy mixture out across the entire bottom like you’re frosting a very large, savory cake. Make sure you get right to the edges so every chip has something tasty to grab.
Building the Remaining Layers of the Layer Dip
Next up, the beans! Gently spread that can of refried beans right on top of the cream cheese base. Be gentle here; push outward just enough to cover the layer beneath, but don’t dig in!
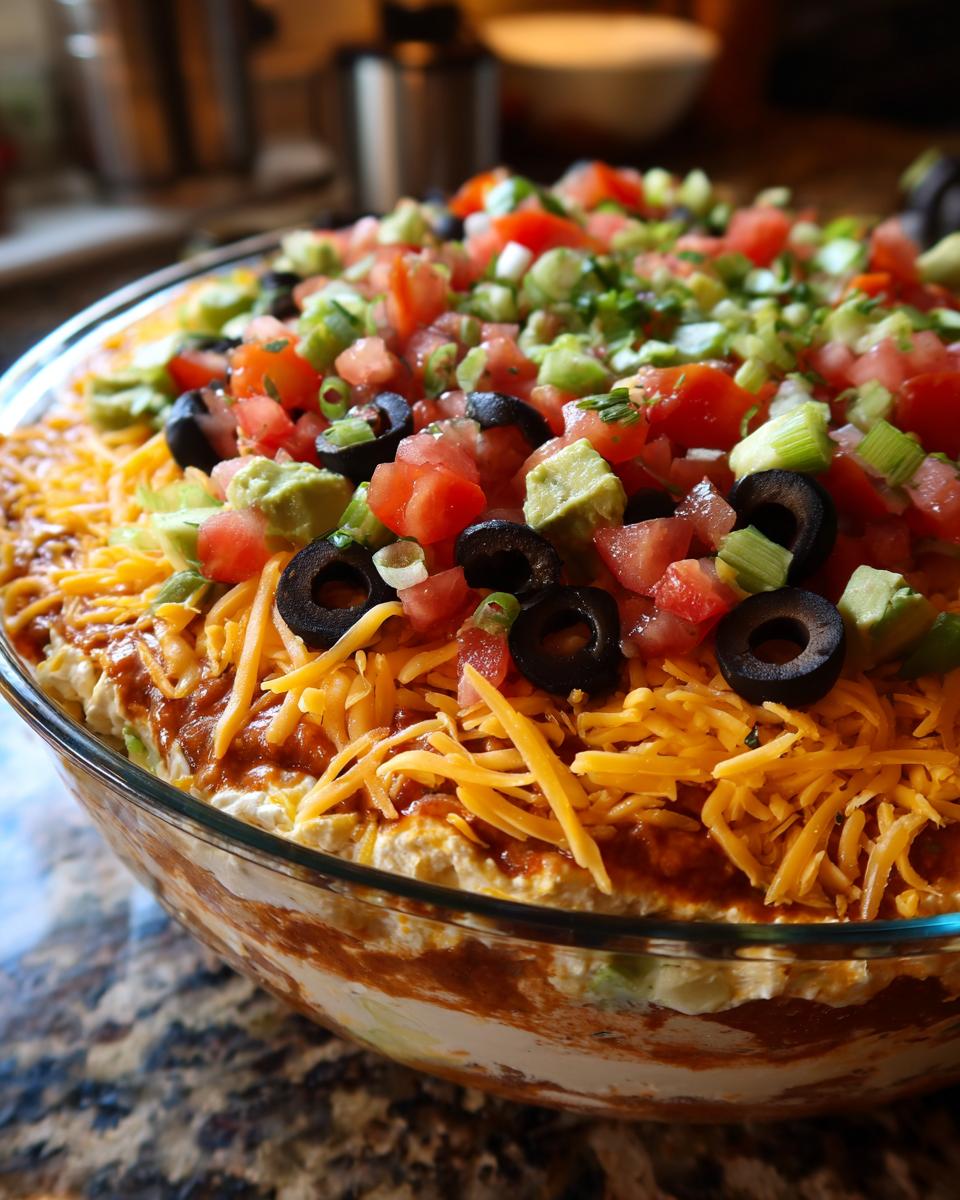
After the beans, carefully layer on your guacamole. Then, spoon over that salsa you made sure to drain—it should sit nicely on top of the guac. Finish it off by sprinkling the shredded cheese evenly, and then scatter your diced tomatoes and those sliced olives over the top. Try not to glob them in one spot!
Chilling and Serving Your Crowd Pleasing Appetizer
You absolutely cannot skip this step if you want this Crowd Pleasing Appetizer to hold its shape. Cover the whole dish tightly with plastic wrap and pop it into the fridge. You need at least one hour for those layers to firm up and settle into each other just enough that they don’t slide around.
Serve this beauty cold, usually straight from the fridge, with a big basket of sturdy tortilla chips. If you’re interested in making a quick topping sauce that pairs well with these flavors, check out my recipe for creamy garlic aioli—it makes a great drizzle condiment!
Tips for Success Making a Classic Layered Dip
I’ve made this layer dip so many times for so many different gatherings that I’ve learned all the little tricks that keep it looking crisp and tasting fresh for hours. The biggest battle you fight with multilayer dips is moisture management, hands down. If things get too wet, the layers bleed into one another, and you just end up with a big, beige pile of flavor instead of distinct visual appeal.
My number one rule, which I mentioned before, is draining! You need to drain the salsa aggressively—I mean, put it in a fine-mesh sieve and let it sit over the sink while you mix the cream cheese layer. Seriously, don’t skimp on this part.
When you are spreading the layers, use a spatula or the back of a spoon and work gently. Think of it like applying delicate wallpaper. Don’t press down hard or scrape around too much, especially right next to the edge of the dish. If you hear squishing noises, you’re pressing too hard!
Also, make sure to use the coolest ingredients possible for the upper layers. Your sour cream, guacamole, and salsa should be straight from the fridge when you layer them on top of the bean layer. This helps them sit firmly on top without immediately melting into the layer below while they wait for the final chill time.
If you ever need to make a creamy sauce that plays well with these flavors—though for a dip like this, sometimes simplicity is best—you can always rely on my recipe for easy homemade Alfredo sauce for a totally different kind of richness. But for this Tex-Mex classic, keep those liquids controlled, and you’ll have the Best Seven Layer Dip in the room!
Variations: Customizing Your Layer Dip
Now, while this Classic Layered Dip is absolutely perfect as is, I always love encouraging people to make a recipe their own! Think of this seven-layer structure as a fantastic blueprint. You can absolutely twist the standard setup to fit your crowd’s favorite flavors. It’s really hard to mess up a dip this forgiving, so have fun with it!
If you’re serving a crowd that loves a heavier appetizer, or maybe you just have a bunch of football fans coming over, you have to consider adding a meat layer. This is super simple. Just brown up about a pound of ground beef—you know, cook it up, drain all the grease away—and mix in a little packet of taco seasoning. Then, you just spoon that right over your refried bean layer before you add the guacamole. Bam! Suddenly, it’s a heartier, meaty layer dip that feels even more satisfying. If you’re looking for other protein-packed main dishes, you might appreciate my easy chicken parmesan recipe for another night.

If you prefer to keep things vegetarian, or maybe just want to load up on more texture, there are tons of easy swaps. I sometimes swap out half of the shredded Mexican blend cheese for a sharp pepper jack; that little bit of spice melts beautifully.
Another fun addition is corn! You can toss in a cup of drained, canned yellow corn right on top of the salsa layer. It adds a sweetness and a nice pop of color. Or, if you want to go completely off-script, sometimes I layer in a thin layer of cream cheese mixed with roasted green chilies right under the olives. That gives it a fantastic, smoky kick. No matter how you customize it, remember to keep those layers distinct!
Make Ahead Dip and Storage Instructions
One of the absolute best perks of making this wonderful layer dip? You can totally get ahead of the game! I know we all get swamped before parties, so knowing you can mix up a guaranteed Crowd Pleasing Appetizer the day before is such a relief. Yes, this is definitely a fantastic Make Ahead Dip.
You can assemble the entire thing—all seven glorious layers—up to 24 hours before you plan on serving it. When you do this, you must cover it tightly with plastic wrap. Make sure the plastic wrap isn’t touching the top layer of olives or tomatoes, or they might stick and look messy when you pull it off later. Pop the whole thing straight into the refrigerator.
When it’s time for the party, just pull it out about 15 minutes before guests arrive so it loses that icy edge from the fridge, but keep it chilled right up until serving time. Letting it sit overnight actually helps the flavors marry a little bit—that slight mellowing of the taco seasoning is lovely!
Now, what about leftovers? Because this dip has so much moisture from the beans and salsa, it won’t last forever, but it’s pretty resilient. You can usually keep leftovers in the fridge for three to four days. Just keep it covered tightly. The texture might change slightly, especially the guacamole layer, as it sits, but honestly, it still tastes fantastic scooped onto chips the next day. It’s certainly better than tossing out any extra! If you’re already planning ahead for future meals, you might want to look at my recipe for easy baked cranberry chicken; planning ahead really saves the day!
If you notice the top veggies looking a little sad after a couple of days, just gently scrape off the olives and tomatoes, maybe add a fresh sprinkle of cheese, and serve it up again. Nobody needs to know!
Frequently Asked Questions About This Layered Nacho Dip
I always get questions when I bring this dip to a party because everyone wants to know my secret for keeping the layers neat and keeping the flavor big! It helps to put some of those common concerns right up front. Don’t worry if you’re new to making a Tex Mex Dip; following the steps guarantees success!
Can I make this a vegetarian layer dip?
Oh, absolutely! As written, this Classic Layered Dip is completely vegetarian. The base recipe I gave you uses refried beans, and that’s it for the hearty middle layer. If you happen to check the notes and see where I suggested adding seasoned ground beef for a heartier version, just skip that step! It’s just as good, if not better, as a vegetarian offering for your next gathering. It’s truly an Easy Party Dip either way you choose!
What is the best chip to serve with this Game Day Dip?
This is surprisingly important for a good dipping experience, since we don’t want broken chips full of dip bits—that’s the worst! For this Game Day Dip, you need something with structural integrity. My first pick, always, is sturdy, restaurant-style tortilla chips. They have that great salty crunch that works perfectly.
If you’re looking for lighter options, sturdy scoop-shaped chips are fantastic because they hold an entire scoop of all the layers. And hey, if you want to keep things healthier, lots of fresh veggies work great! Think crisp bell pepper strips or thick cucumber slices. Everyone can find something they love to dip!
How many layers does the Classic Layered Dip actually have?
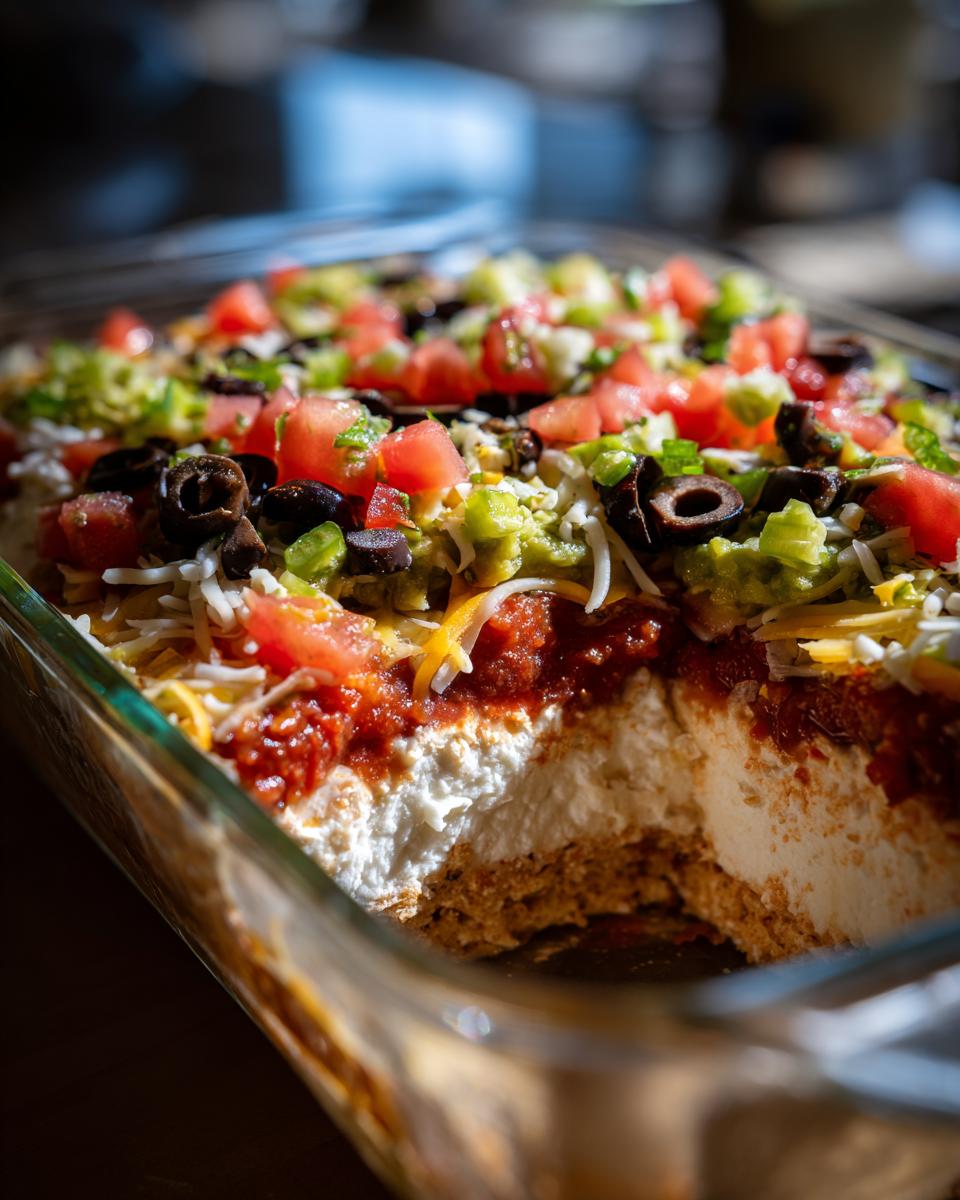
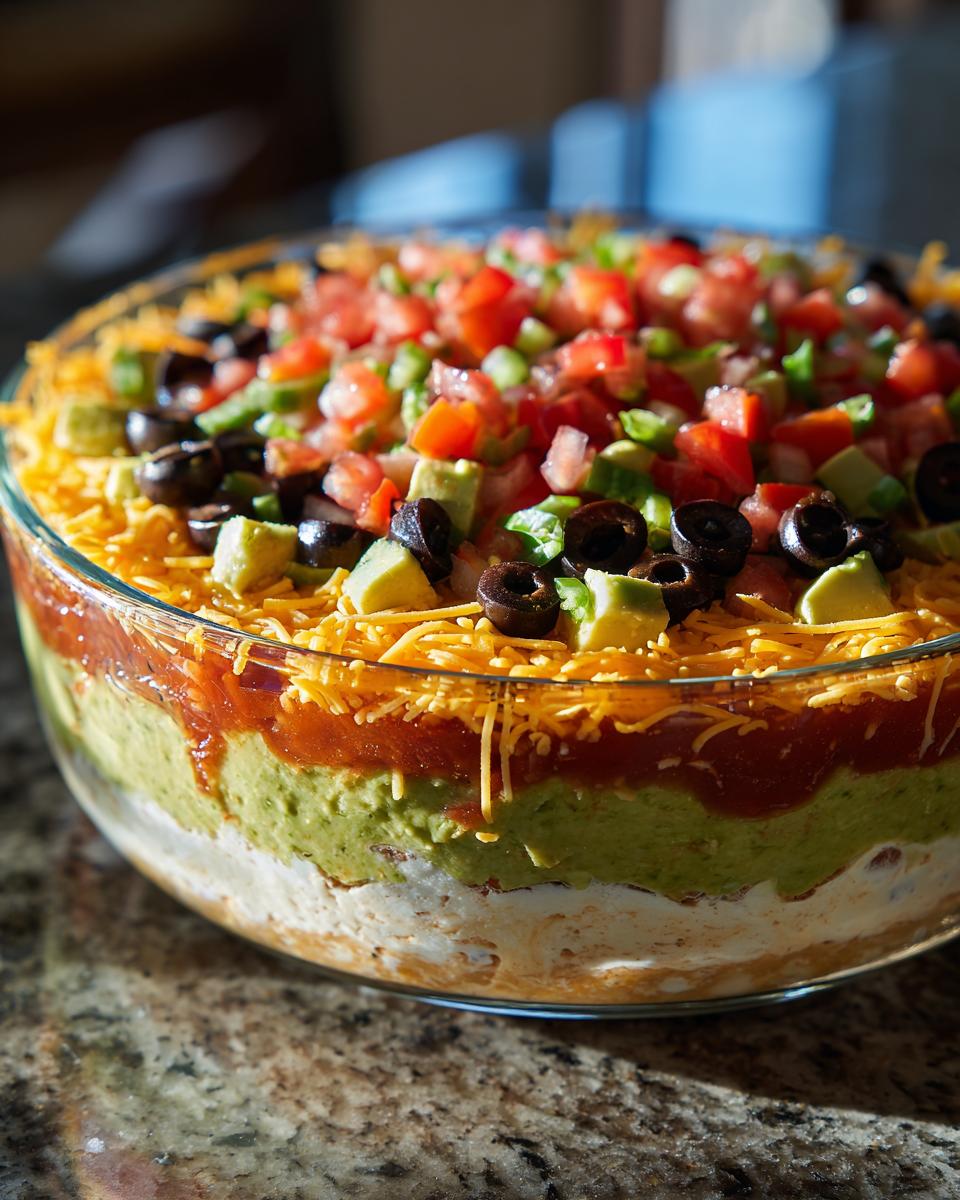
That’s a fun question! This recipe is named for the seven distinct strata you build in the dish, but we load it up with even more flavor on top. You have the cream cheese mixture, then the beans, then the guacamole, then the salsa. That’s four!
Then you add the cheese, the diced tomatoes, and finally, the olives. So, yes, we are hitting that magic number of seven core layers! It’s impressive when you see it all separated in the glass dish. If you’re interested in other recipes that rely on simple layering techniques, check out my favorite brownie batter dip—it stacks up beautifully too!
Estimated Nutrition for This Simple Party Food
Since we’re dealing with cheese, beans, and sour cream, this is definitely a satisfying treat! People always ask about the numbers, so here is an honest breakdown of the estimated nutrition facts for this Simple Party Food, based on serving size being 1/10th of the entire recipe.
Keep in mind that because ingredients vary so much—especially the brand of refried beans or the amount of cheese you sprinkle on—these are solid estimates, not exact science. But they give you a good idea of what you’re serving up!
- Calories: Roughly 280 per serving
- Total Fat: About 20 grams (aiming for that rich, comforting texture!)
- Carbohydrates: Around 18 grams
- Protein: A solid 9 grams, thanks to the beans and dairy!
- Sodium: This is higher, around 550mg, because of the taco seasoning and canned goods, so keep that in mind if you’re watching salt intake.
For any sauce work or dressings where precise nutrition matters more, you can check out the details on my creamy garlic sauce recipe, which lets you control the ingredients right down to the teaspoon!
Share Your Homemade Layer Dip Experience
Now that you have all my history, secrets, and guidance for building the perfect presentation, I really want to hear how it turned out for you! Did your layers stay perfectly separated? Did you sneak in a meat layer like I suggested? Don’t be shy!
Drop a rating for this layer dip recipe below—your feedback really helps me and other home cooks know that this recipe is dependable. And if you snap a picture of your beautiful dip spread at your next game day or fiesta, tag me on social media!
I love seeing these classic recipes show up on your tables. If you have any lingering questions after you’ve made it, or if you just want to share your favorite dipping scoop technique, please head over to my contact page. Happy dipping, everyone!
PrintClassic Seven Layer Dip Recipe

Make this easy, crowd-pleasing Seven Layer Dip for your next party or game day gathering. It features distinct, flavorful layers and is always a hit.
- Prep Time: 20 min
- Cook Time: 0 min
- Total Time: 1 hour 20 min
- Yield: 10 servings 1x
- Category: Appetizer
- Method: No Bake/Chilling
- Cuisine: Tex-Mex
- Diet: Vegetarian
Ingredients
- 1 (16 ounce) package cream cheese, softened
- 1 cup sour cream
- 1 packet (1 ounce) taco seasoning mix
- 1 (16 ounce) can refried beans
- 1 cup prepared guacamole
- 1 cup salsa, drained well
- 1 cup shredded Mexican blend cheese
- 1 cup diced tomatoes
- 1/2 cup sliced black olives, drained
Instructions
- In a medium bowl, combine the softened cream cheese, sour cream, and taco seasoning mix. Mix until smooth. This is your first layer.
- Spread the cream cheese mixture evenly over the bottom of a 9×13 inch serving dish.
- Spread the refried beans evenly over the cream cheese layer.
- Gently spread the prepared guacamole over the bean layer.
- Spoon the drained salsa evenly over the guacamole layer.
- Sprinkle the shredded cheese over the salsa layer.
- Top with diced tomatoes and sliced black olives.
- Cover the dish and chill in the refrigerator for at least 1 hour before serving. This allows the layers to set.
- Serve cold with tortilla chips.
Notes
- For the best flavor and texture, drain excess liquid from the salsa before adding it as a layer.
- You can prepare this dip up to 24 hours ahead of time. Keep it covered in the refrigerator.
- If you prefer a meat layer, cook 1 pound of ground beef with taco seasoning and spread it over the refried beans before adding the guacamole.
Nutrition
- Serving Size: 1/10 of recipe
- Calories: 280
- Sugar: 4
- Sodium: 550
- Fat: 20
- Saturated Fat: 10
- Unsaturated Fat: 10
- Trans Fat: 0.5
- Carbohydrates: 18
- Fiber: 3
- Protein: 9
- Cholesterol: 45