
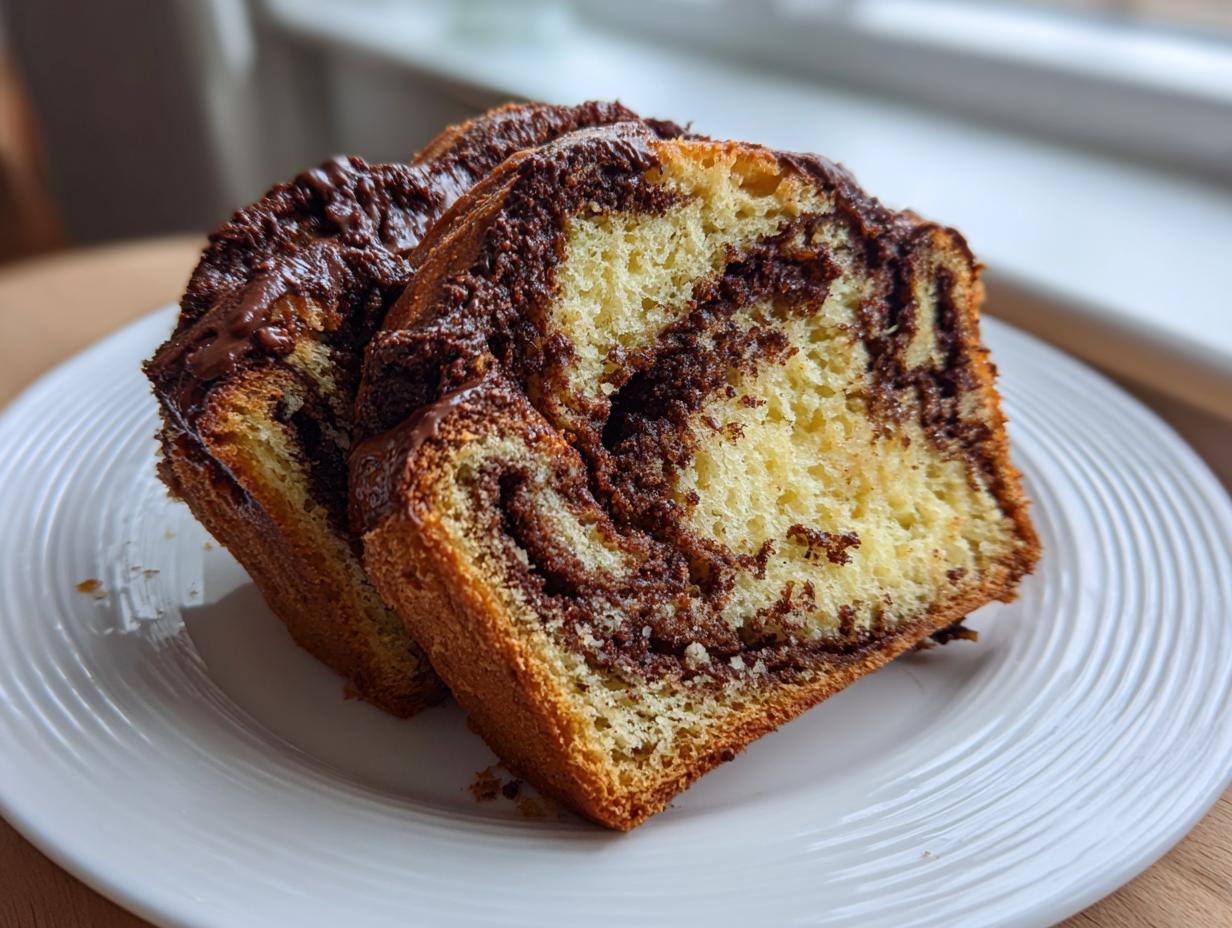
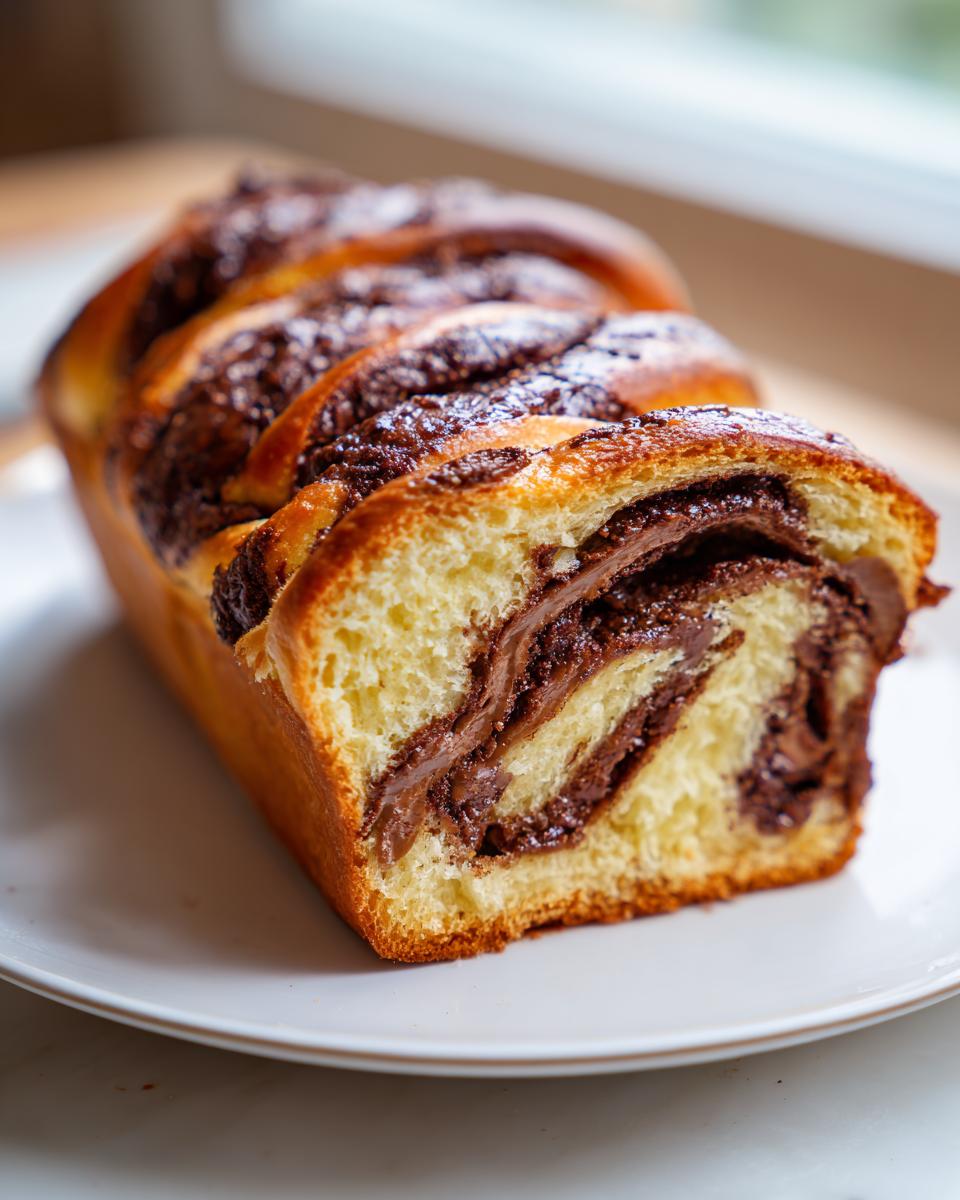
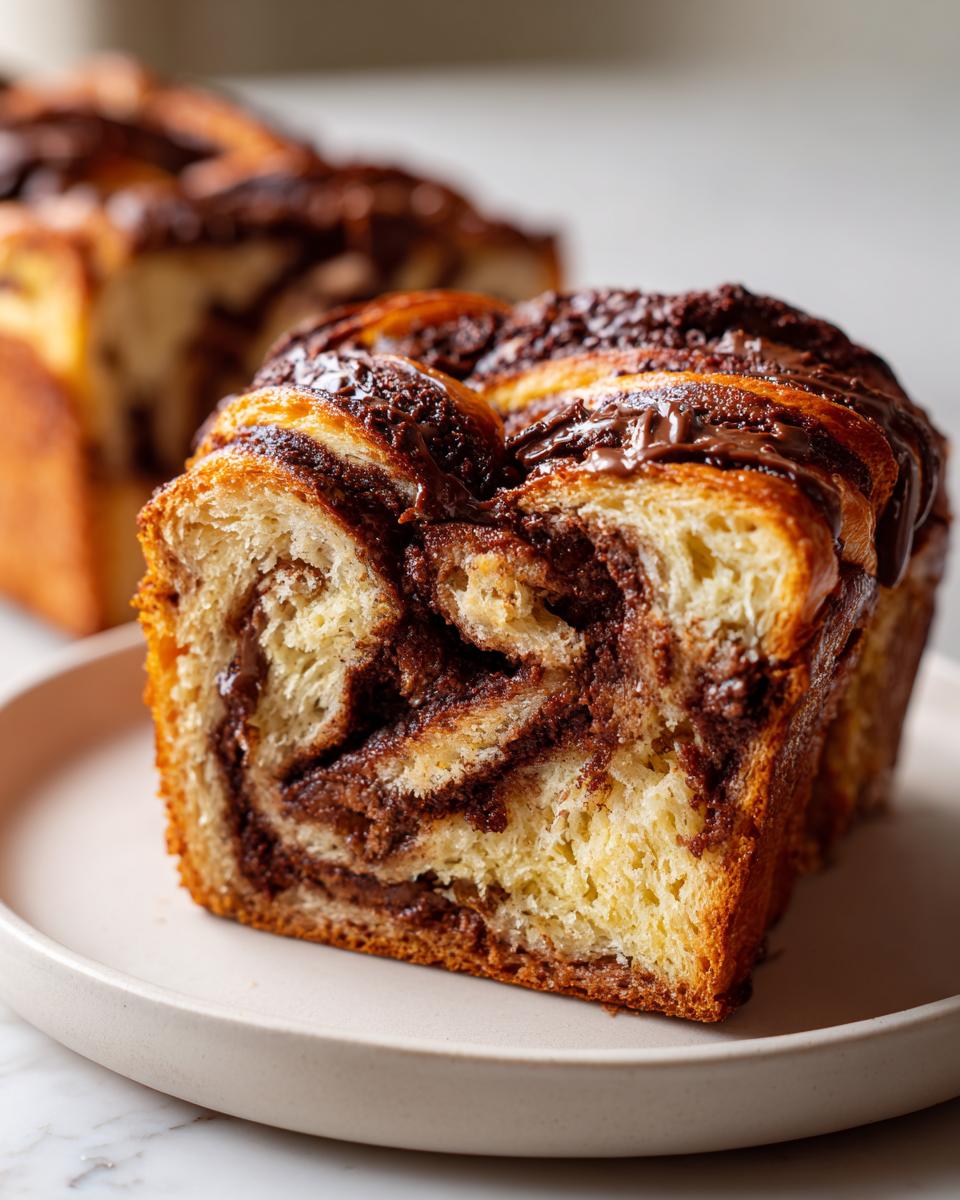
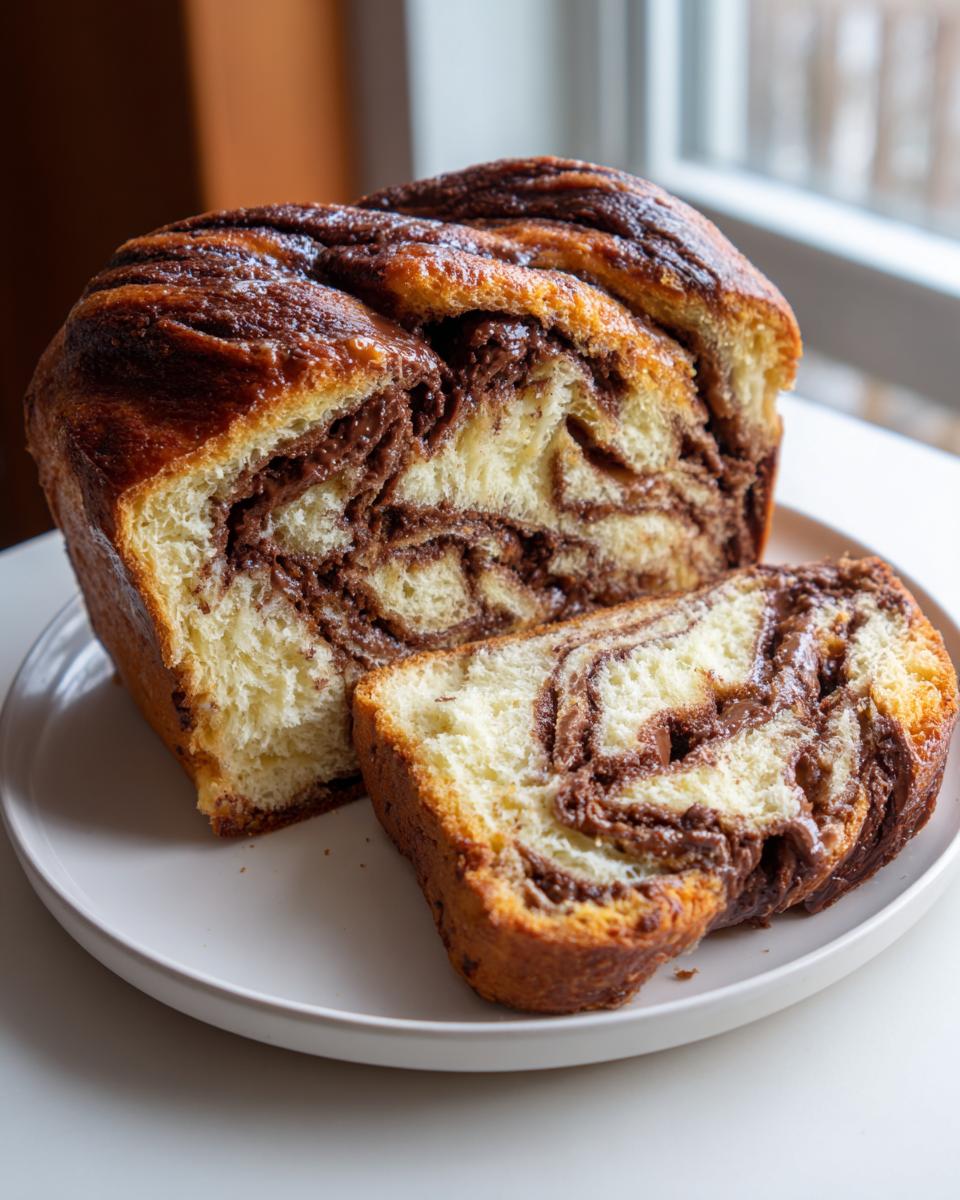
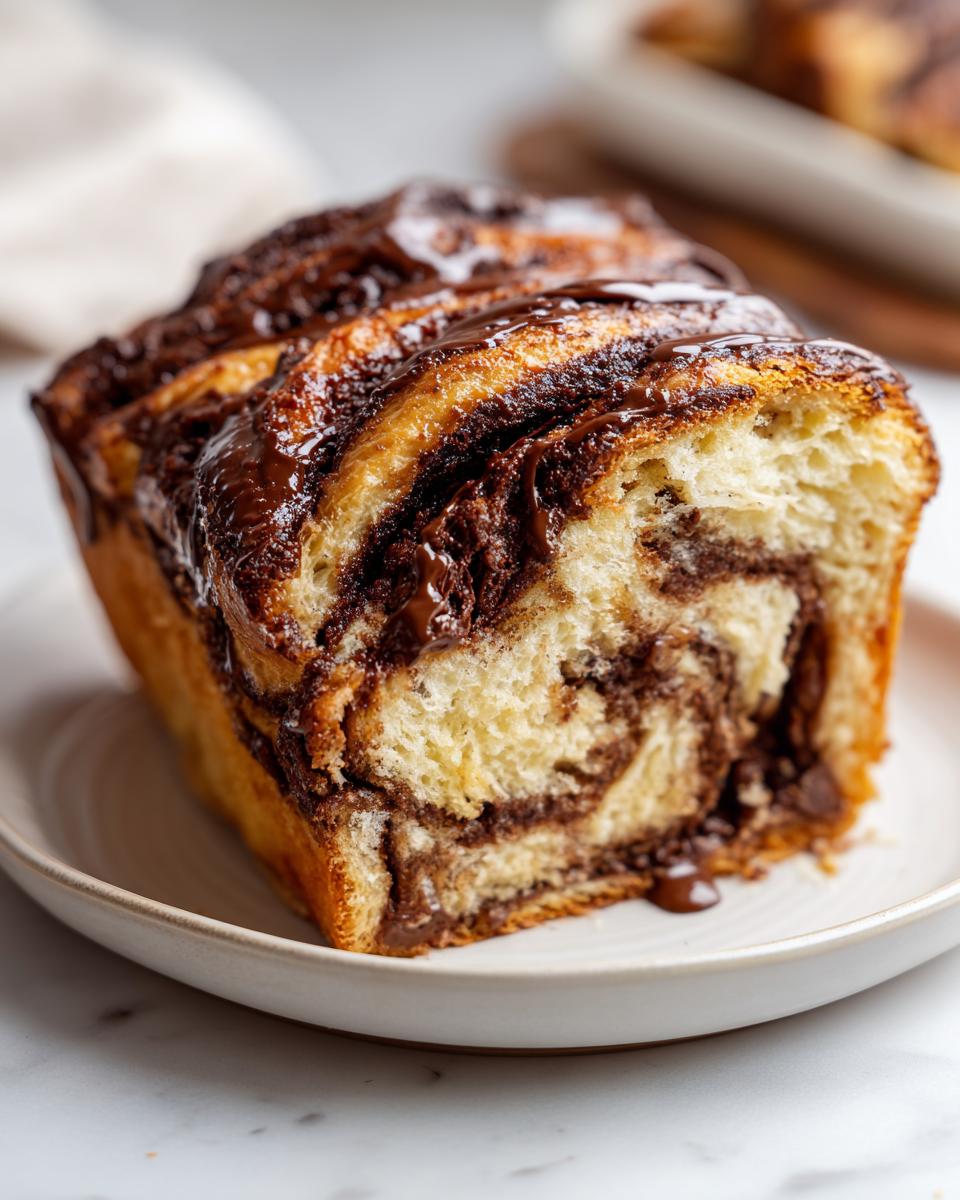
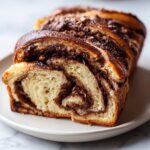
There is nothing quite like pulling a fully braided, glistening loaf of homemade chocolate babka out of the oven. It immediately signals that something special is happening in your kitchen! I know you’ve seen those stunning, swirled loaves at bakeries and thought, “I could never manage that.” Well, I’m here to tell you differently. This is the Ultimate Easy, Step-by-Step Homemade Chocolate Babka Recipe, designed specifically to give you that incredibly tender dough and rich, gooey chocolate swirl without the fuss. At Cookery Command, we blend the old wisdom of traditional yeast breads—much like the techniques we use in our recipe for Japanese milk bread—with modern, tested techniques, so you can confidently conquer this showstopper!
- Why This Homemade Babka Bread Recipe Delivers Bakery Style Results
- Ingredients for the Ultimate Chocolate Babka
- How to Make Babka Dough: Mastering the Tender Sweet Bread Recipe
- Creating the Decadent Chocolate Filling Bread Swirl
- Step-by-Step Guide to Braided Chocolate Pastry Shaping
- Baking and Glazing Your Chocolate Babka
- Tips for Success with Your Chocolate Babka Recipe
- Storing Your Homemade Babka Bread
- Frequently Asked Questions About This Chocolate Babka
Why This Homemade Babka Bread Recipe Delivers Bakery Style Results
When you’re tackling a recipe that looks this impressive, you need reliability, and that’s exactly what we built into this chocolate babka. I’ve taken the classic, rich dough—a close cousin to a good cinnamon raisin bread—and simplified the steps so newcomers aren’t intimidated. We are guaranteeing you amazing results!
- Tender Sweet Bread Recipe Quality: We use room temperature eggs and a specific ratio of softened butter added gradually. This prevents the dough from getting tough and keeps that signature melt-in-your-mouth texture we all want in a tender sweet bread recipe.
- Easy Step-by-Step Process for Beginners: Don’t let the braiding scare you! I break down the rolling, filling, and twisting process into simple, visual steps that ensure you get a beautiful loaf without frustration.
- Rich Buttery Swirled Bread Texture: The high fat content from the butter and the chocolate filling combine during baking to create incredibly moist layers. This is what separates a good bread from a truly decadent one.
- Perfect Yeast Bread Swirl: By chilling the filling slightly and spreading it evenly almost to the edges, we guarantee those dramatic yeast bread swirls that make babka famous.
Ingredients for the Ultimate Chocolate Babka
When you’re ready to bake, make sure you pull out your ingredients ahead of time. Especially the eggs and butter—room temperature is non-negotiable for this rich dough! It really makes all the difference in achieving that perfect, soft crumb we are aiming for, much like when I make my blueberry cream cheese bread. Having everything ready makes the actual mixing process feel so smooth!
We are dealing with two main components here: the rich, buttery dough and the decadent chocolate filling. Here’s what you’ll need to gather:
For the Tender Dough:
- 1 cup whole milk, warmed just right to 105-115°F (If it’s too hot, you’ll kill your yeast, so watch that thermometer!)
- 2 1/4 teaspoons active dry yeast
- 1/2 cup granulated sugar, divided (we use a little now, a little later!)
- 3 large eggs, brought to room temperature
- 1 teaspoon vanilla extract
- 1 teaspoon salt
- 4 cups all-purpose flour, plus extra for dusting surfaces
- 1 cup (that’s two full sticks!) unsalted butter, softened nicely and cut into small pieces
For the Decadent Chocolate Filling Bread Swirl:
- 1/2 cup unsalted butter, melted completely (this makes the filling spreadable)
- 1 cup powdered sugar
- 1/2 cup unsweetened cocoa powder (use the good stuff here, trust me!)
- 1/4 cup heavy cream
- 1 teaspoon vanilla extract
- 1/4 teaspoon salt
- 1/2 cup semi-sweet chocolate chips (optional, but highly encouraged for extra gooey pockets)
For the Simple Syrup Glaze:
- 1/4 cup water
- 1/4 cup granulated sugar (Note: If you want a less sweet glaze, you can definitely cut this down to just 2 tablespoons of sugar!)
How to Make Babka Dough: Mastering the Tender Sweet Bread Recipe
Alright, this is where we start building the foundation for that incredible, soft texture. If you want a truly tender sweet bread recipe that eats like brioche but is easier to handle, paying attention during the dough phase is everything. We’re going to walk through how to make babka dough step-by-step, ensuring that rich, buttery quality comes through in every bite. Don’t rush this—patience here leads directly to that dreamy, swirled final product we want!
Activating Yeast and Initial Mixing
First things first: we need happy yeast! Gently warm your milk—it should feel warm but not hot to the touch, right around 110°F is perfect. Whisk in the yeast and just a tiny bit of that sugar. Let it sit until it looks foamy and alive. Once it’s bubbly, toss in the rest of your sugar, the eggs, vanilla, and salt. We mix in almost all the flour next until it looks rough and shaggy. We aren’t aiming for smooth yet!
Incorporating Butter for Rich Buttery Swirled Bread
Now for the magic that makes this a rich buttery swirled bread. We’ve already kneaded for about five minutes to develop some structure. Now, add your softened butter pieces in slowly, handful by handful. You must knead it in fully before adding the next batch. This gradual incorporation is crucial—it builds the incredible soft texture similar to a classic buttermilk biscuit development process. Keep going until the dough is smooth, elastic, and pulls away nicely from the bowl—it’ll take a good 10 to 15 minutes. If you feel like you aren’t getting anywhere, just keep kneading; the butter needs time to fully emulsify!
Once the butter is totally incorporated, the dough will feel soft, almost too soft, but trust the process! We finish with the first rise, which gives us time to chill out before we start the real fun. Speaking of great recipes that start with yeast, if you ever want to compare notes on technique for another showstopper, check out this amazing chocolate babka recipe inspiration!
Creating the Decadent Chocolate Filling Bread Swirl
While our beautiful, buttery dough is taking its first heavenly rest, it’s time to whip up the star of the show: that rich, dark chocolate filling. This step is why people fall utterly in love with this braided masterpiece. We need this filling to be luscious and easy to spread evenly—no huge clumps allowed if you want that perfect chocolate swirl sweet bread effect!
This filling comes together really quickly, much like a quick chocolate sauce you might use for hot cocoa (you can see my favorite method for that here). The secret to spreading success is making sure that melted butter isn’t scorching hot when you mix it in. If it’s too hot, it’ll cook the cocoa powder slightly and make the powdered sugar seize up on you.
Just follow Step 5 exactly: grab a bowl and combine that half-cup of melted butter with your powdered sugar, cocoa powder, heavy cream, vanilla, and salt. You’re aiming for something smoother than pudding, but thicker than gravy. It should flow nicely off your spoon when you tilt the bowl, but still hold its shape on the dough without immediately running everywhere.
I choose semi-sweet chocolate chips because they hold their shape slightly better than chopped chocolate, giving you those wonderful pockets of melted chocolate goodness after baking. Fold those right in at the end. If you find your filling feels too stiff—maybe your butter cooled down too much or your kitchen is chilly—just stir in one teaspoon of warm milk or cream at a time until it’s perfectly spreadable. Don’t skip this smooth consistency tip; it’s vital for getting those stunning layers when you roll it up later! If you need extra visual guidance on the rolling and shaping that comes next, you can check out the amazing step-by-step process used by my friends over at Recipes by Eloise!
Step-by-Step Guide to Braided Chocolate Pastry Shaping
Okay, deep breath! This is often the part that makes people pause, but I promise you, mastering the shape is what turns this from just a nice sweet bread into a showstopper braided chocolate pastry. We are moving from making a simple roll to creating those signature, beautiful twists. We’re going to nail Steps 6, 7, and 8 together, and you’ll feel like a true professional baker when this comes out of the oven!
First, punch down that beautifully risen dough—it smells amazing, right? Turn it out onto a lightly floured surface. Now, grab your rolling pin and roll that dough into a big rectangle, approximately 12 by 18 inches. Think big! This generous size ensures we have enough dough for tight layers.
Next, take that rich chocolate filling we just mixed up (Step 5) and spread it around evenly. Don’t be shy, but leave about a one-inch border clear along one of the long edges. That empty strip is your seal, so don’t cover it! Once filled, starting on the long side *opposite* the empty strip, start rolling the dough up tightly into a neat log. When you reach the end, pinch that un-filled edge firmly onto the main log to seal it shut. We want all that chocolate goodness trapped inside for now!
Now for the part that requires focus—the big reveal! Take a very sharp knife. Starting from the sealed edge, slice that log straight down the center lengthwise. You want to cut right through the center so you expose all those glorious chocolate layers inside. You should end up with two long halves, connected at the bottom, looking like two chocolate-filled ribbons.
Here is the trickiest bit, and this is what guarantees you see those amazing yeast bread swirls: We need to twist these two halves together. Turn the strands so the cut sides are facing *up* towards the ceiling. Now, lay them over each other and twist them gently around each other, making sure those cut, chocolatey sides are always showing. It’s like braiding hair, but you are intentionally keeping the inside layers exposed. Once twisted all the way, pinch the two ends together firmly to make sure the loaf holds its shape, and carefully move it into your greased 9×5 loaf pan. It might look a bit unruly, but trust the process! If you need a pause to watch someone do this exact twist, definitely take a peek at the excellent visuals provided by The Dough Whisperer for extra reassurance. After this shaping, let it rest one more time to puff up before baking!
Since we are finishing a complicated dough here, another great technique to use for tricky baked goods—though not needed for this specific loaf—is mastering your baking surface. For things that might stick, I always recommend having some good non-stick supplies on hand, just for peace of mind!
Baking and Glazing Your Chocolate Babka
We are so close now! After all that kneading and braiding, the hardest parts are behind us. Now we just need the heat to work its magic. Remember, we let that beautifully twisted dough rise a second time (Step 9)? Please don’t skip it! That final puff ensures your loaf isn’t dense; it gives it that light, airy structure we love in a homemade pastry.
You’ll want to preheat your oven to 350°F (175°C). It needs to be totally ready when the babka goes in. Bake it for about 35 to 45 minutes. How do you know it’s done? Look for that wonderful deep golden brown color! If you gently tap the top, it should sound slightly hollow. In the kitchen, we look for visual cues like that—it’s much more reliable than just the clock!
But here’s the real secret to ensuring you get that incredibly moist chocolate bread we promised: the simple syrup glaze. While the babka is baking away, quickly whisk together your water and sugar in a small saucepan over medium heat until the sugar dissolves completely. Easy peasy. This syrup isn’t for intense sweetness; it’s a moisture lock!
The timing on the glaze application is critical, so read this carefully! As soon as you pull that hot, fragrant loaf out of the oven, grab a pastry brush—and I mean *immediately*—and brush that warm simple syrup all over the top and sides of the babka. The heat of the bread pulls that syrup right down into the crust, keeping it incredibly soft and lending it a gorgeous, professional shine. It smells heavenly, just like the aroma from my maple fudge!
Once it’s thoroughly glazed, let it cool in the pan for just 15 minutes to firm up a bit. Then, gently turn it out onto a wire rack to finish cooling completely. Trying to slice it while it’s piping hot will just cause the tender layers to squish together, and we don’t want that messy result!
Tips for Success with Your Chocolate Babka Recipe
Baking something this beautiful takes a little finesse, but honestly, the hard work is mostly done! I want to make sure your experience follows those notes my grandma would have scribbled on the recipe card. These little details, which come from years of testing, are what elevate your efforts from a good loaf to one everyone calls the best chocolate babka.
First, let’s talk about the dough if things get sticky during kneading. If your kitchen is warm, the dough might feel a little greasy or slack—that’s normal because this is such a buttery recipe! If it’s too sticky to handle, just pop it in the fridge for 15 minutes while you clean up. That brief chill firms up the butter just enough to make rolling easier later on.
Remember what the recipe notes say: you can absolutely make the dough a day ahead! I love doing the first rise overnight in the fridge. It develops a deeper flavor, just like letting my apple crisp batter rest sometimes! You’re looking to make-ahead like a pro!
- Flour Swap Secret: If you want an even richer, more pillowy feel—closer to a true brioche—swap out half of that all-purpose flour for bread flour. It handles the high butter content beautifully.
- Glaze Timing is Everything: Don’t forget to brush that simple syrup on while the babka is piping hot right out of the oven. That’s how you keep it from drying out!
- Glaze Adjustment: If you find the standard syrup too sweet, reducing the sugar in the syrup (as noted in the recipe) is my go-to move for a softer crust without overwhelming sweetness.
Storing Your Homemade Babka Bread
You’ve done the hard work, and now you have this glorious, rich, swirled loaf. The absolute best way to enjoy your homemade babka bread is on Day One, warmed slightly, maybe with a cup of coffee. But let’s be real, sometimes we have leftovers—and we have to make sure that bread stays gorgeously moist and tender for days!
Since this is a rich, yeast-based pastry, it doesn’t dry out as fast as a lean loaf, especially since we locked in all that moisture with that beautiful simple syrup glaze. However, air is the enemy of softness, so proper storage is everything!
Once your babka is completely, totally cool—I mean room temperature—you need to wrap it up tight. I prefer using plastic wrap first, wrapping the entire loaf securely end-to-end. Then, for extra protection, I usually sneak that wrapped loaf into a large zip-top bag or an airtight container. This traps any residual moisture and keeps that amazing chocolate swirl from hardening up.
Stored this way on the counter, it should stay wonderfully fresh for a good three days. Now, if you know you won’t get to it by day three, don’t panic! This recipe freezes beautifully. Slice the babka first before freezing; it makes reheating individual portions so much easier later on. Pop the slices into a freezer-safe bag, squeeze out all the air, and stick it in the deep freeze. It’s perfect for making a quick, decadent breakfast weeks later!
When you’re ready to enjoy that frozen slice, just let it thaw on the counter for about an hour, or warm it up very briefly in a low oven (about 250°F) for about ten minutes. It comes right back to life! Trust me, nothing beats having a slice of this on a dreary morning when you can barely remember making it. If you’re looking for other fantastic recipes to utilize your time in the kitchen, you should definitely check out my recipe for hearty black bean soup—it’s wonderful comfort food while you wait for your next baking adventure to finish!
If you’re looking for more tips on keeping homemade baked goods fresh, my friends at Tastes Better From Scratch have some great ideas for long-term storage, too!
Frequently Asked Questions About This Chocolate Babka
I know when you look at a recipe that involves yeast, rolling, and braiding, your mind starts filling up with questions! That’s totally normal, especially when aiming for that **bakery style babka** that looks so complicated. I’ve gathered the questions I get asked most often about this **chocolate babka recipe** so we can clear everything up right now!
Is the babka dough supposed to taste very sweet?
That’s a great question regarding the **tender sweet bread recipe** fundamentals! No, the dough itself isn’t meant to be heavily sweetened. We keep the sugar lower in the main *dough* because the sweetness comes almost entirely from the rich chocolate filling and that beautiful simple syrup glaze we brush on top. If the dough itself were too sweet, the final loaf would be cloyingly sugary. This balance is key to a complex flavor!
Can I substitute the melted butter in the filling with something like Nutella?
Oh, you can certainly try it! Many folks love making a **chocolate swirl sweet bread** using Nutella or another hazelnut spread. However, keep in mind that Nutella behaves differently than our butter/cocoa mixture. Our recipe is designed for the high fat content of butter, which creates a specific texture when it bakes and sets. If you use Nutella, you might end up with a decidedly looser, perhaps runnier, filling, as Nutella contains less fat and more sugar than our butter base suggests. For the absolute best, gooey result, stick with the recipe, but if you experiment, be ready for a slightly different texture!
How long do I need for the first rise if my kitchen is cold?
Yeast really hates the cold, so if your kitchen is chilly—say, under 70°F—you must plan ahead. The recipe calls for 1.5 to 2 hours in a warm spot. If it’s cold, that time could stretch to three or even four hours! A reliable trick I use, especially when making doughs like this ahead of time, is letting that first rise (Step 4) happen slowly overnight in the refrigerator. The cold temperature slows the yeast way down, allowing the flavor to deepen—just like letting soup stock simmer for hours develops an amazing flavor, similar to how I build flavor in my French onion soup! Just ensure the dough is completely cold before moving on to the rolling stage.
Why is the kneading so long for this homemade babka bread?
It’s all about establishing the infrastructure! This isn’t a quick flatbread; it’s an enriched bread, meaning it’s packed with fat (butter and eggs). Fat coats the gluten strands, making it hard for them to connect properly without a lot of work. We need those strong gluten networks to trap the gas from the yeast and to support that heavy **decadent chocolate dessert** filling! That 10 to 15 minutes of intensive kneading builds the structure needed so that when you roll it out, it doesn’t just tear when you twist it for that perfect **braided chocolate pastry** look.
PrintThe Ultimate Easy, Step-by-Step Homemade Chocolate Babka Recipe
Make a bakery-style chocolate babka at home. This recipe yields a soft, buttery, yeast-based bread with rich, gooey chocolate swirls, perfect for breakfast or dessert.
- Prep Time: 45 min
- Cook Time: 45 min
- Total Time: 3 hours 30 min
- Yield: 1 loaf 1x
- Category: Dessert
- Method: Baking
- Cuisine: Jewish/American
- Diet: Vegetarian
Ingredients
- 1 cup whole milk, warmed to 105-115°F
- 2 1/4 teaspoons active dry yeast
- 1/2 cup granulated sugar, divided
- 3 large eggs, room temperature
- 1 teaspoon vanilla extract
- 1 teaspoon salt
- 4 cups all-purpose flour, plus more for dusting
- 1 cup (2 sticks) unsalted butter, softened and cut into pieces
- 1/2 cup unsalted butter, melted (for chocolate filling)
- 1 cup powdered sugar
- 1/2 cup unsweetened cocoa powder
- 1/4 cup heavy cream
- 1 teaspoon vanilla extract
- 1/4 teaspoon salt
- 1/2 cup semi-sweet chocolate chips
- 1/4 cup water (for simple syrup)
Instructions
- Activate the yeast: In a large bowl, combine the warm milk, yeast, and 1 tablespoon of the sugar. Let stand for 5 to 10 minutes until foamy.
- Make the dough: Add the remaining sugar, eggs, vanilla extract, salt, and 3 cups of the flour to the yeast mixture. Mix until combined. Add the remaining flour gradually until a shaggy dough forms.
- Knead the dough: Turn the dough out onto a lightly floured surface. Knead for 5 minutes. Gradually add the softened butter pieces, kneading until fully incorporated and the dough is smooth, about 10 to 15 minutes. The dough will be soft.
- First rise: Place the dough in a lightly oiled bowl, turning to coat. Cover and let rise in a warm place for 1.5 to 2 hours, or until doubled in size.
- Prepare the chocolate filling: While the dough rises, combine the 1/2 cup melted butter, powdered sugar, cocoa powder, heavy cream, vanilla extract, and salt in a bowl. Mix until smooth. Stir in the chocolate chips.
- Roll and fill: Punch down the risen dough. Turn it onto a lightly floured surface and roll it into a large rectangle, about 12×18 inches. Spread the chocolate filling evenly over the dough, leaving a 1-inch border on one long edge.
- Shape the loaf: Starting from the long edge opposite the border, tightly roll the dough into a log. Pinch the seam closed.
- Braid the loaf: Using a sharp knife, slice the log lengthwise down the center, exposing the layers. Turn the cut sides up. Twist the two halves around each other, keeping the cut sides facing up. Pinch the ends together firmly.
- Second rise: Carefully transfer the twisted dough to a greased 9×5 inch loaf pan. Cover loosely and let rise for 45 to 60 minutes, or until puffy.
- Bake: Preheat your oven to 350°F (175°C). Bake for 35 to 45 minutes, until golden brown and cooked through.
- Make simple syrup: While the babka bakes, combine the water and remaining sugar in a small saucepan. Heat until the sugar dissolves.
- Glaze: Immediately upon removing the babka from the oven, brush the hot simple syrup generously over the top. Let the babka cool in the pan for 15 minutes before transferring it to a wire rack to cool completely.
Notes
- For a richer dough, you can substitute half of the all-purpose flour with bread flour.
- If you prefer a less sweet glaze, reduce the simple syrup ingredients to 1/4 cup water and 2 tablespoons sugar.
- You can make the dough a day ahead and let it complete the first rise slowly in the refrigerator overnight.
Nutrition
- Serving Size: 1 slice
- Calories: 450
- Sugar: 35
- Sodium: 250
- Fat: 25
- Saturated Fat: 15
- Unsaturated Fat: 10
- Trans Fat: 0
- Carbohydrates: 50
- Fiber: 3
- Protein: 7
- Cholesterol: 80