
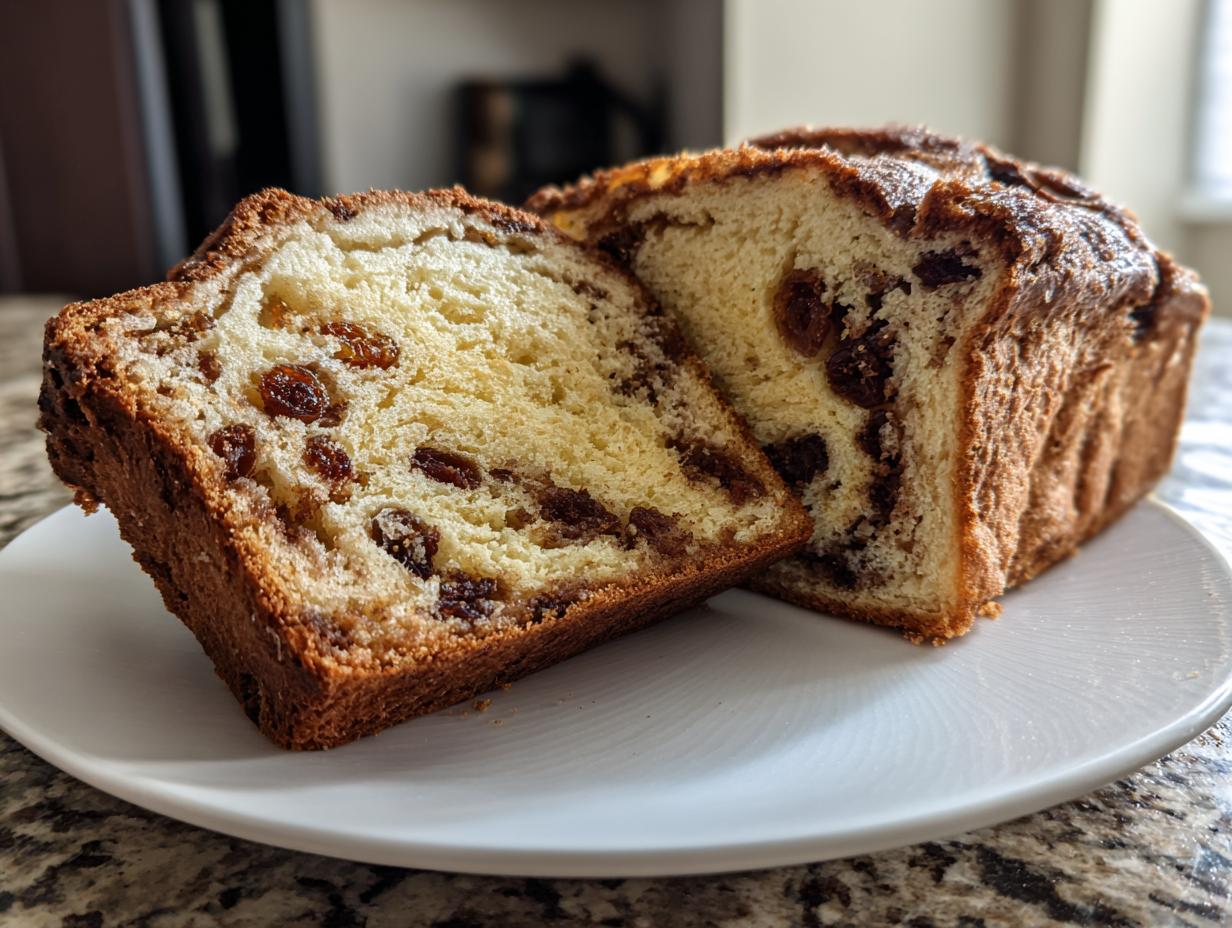
There’s just nothing that beats the aroma of yeast bread baking, especially when it’s filled with sweet spice and plump fruit. If you’re looking for that perfect slice of homemade comfort, you’ve found it! This is, without a doubt, the absolute best homemade cinnamon raisin bread recipe you’ll ever try. We aren’t messing around with dry, crumbly loaves here; we are aiming for that signature soft and fluffy bread texture with glorious ribbons of cinnamon swirling through it. For me, Emily Harrison, this classic raisin bread represents everything I learned growing up: take quality ingredients, respect the time they need to rise, and the result is pure joy for breakfast or brunch. Forget store-bought—command your kitchen with this loaf!
- Why This Homemade Raisin Bread Recipe Works So Well (The Soft & Fluffy Secret)
- Gathering Your Ingredients for the Best Cinnamon Raisin Bread
- How to Prepare Soft and Fluffy Raisin Bread from Scratch
- Tips for Perfect Artisan Raisin Bread Baking
- Serving Suggestions for Your Fresh Baked Bread Aroma Loaf
- Storage and Reheating Instructions for Homemade Raisin Bread Recipe
- Frequently Asked Questions About Making Raisin Bread
- Estimated Nutritional Data for Classic Raisin Bread
- Share Your Homemade Raisin Bread Creations
Why This Homemade Raisin Bread Recipe Works So Well (The Soft & Fluffy Secret)
When you’re chasing that bakery-quality loaf, it comes down entirely to science and a little bit of love. This recipe stands above the rest because we focus heavily on texture. You want soft and fluffy bread, right? That’s not an accident! We nail the density and the flavor delivery every single time, which makes this the best cinnamon raisin bread you’ll bake. If you love making baked goods that are truly light, you should check out my secret for making banana pancakes that are unbelievably fluffy too!
- The incredible cinnamon swirl, which concentrates flavor beautifully in every slice.
- Guaranteed soft and fluffy bread texture that stays moist for days.
- Reliable results—this sweet yeast bread doesn’t need fussy, complicated steps to succeed.
Key Components for Perfect Raisin Bread
It’s the small details that make the difference here, trust me. Making sure your egg is room temperature helps it incorporate smoothly into the dough, preventing the mixture from separating. We use melted butter in the dough for tenderness, but we switch to softened butter specifically for the filling. Why? Because softened butter acts like glue to hold that sweet cinnamon sugar layer right where it belongs!
And please, don’t skimp on the kneading! A good 10 minutes of working that dough creates the gluten structure we need for that wonderful springiness. Think of it as building a strong net that can hold all the air bubbles we create later on. If you skip this, you skip the fluff!
Gathering Your Ingredients for the Best Cinnamon Raisin Bread
Okay, it’s time to grab your bowls and measure everything out! When you’re baking something as special as this homemade raisin bread recipe, you have to be precise. I’ve listed everything below exactly how I write it on my own recipe cards. You’ll notice I’m very specific about a few things, and that’s because these details really impact your final loaf.
We need the wet stuff, the dry stuff, and then the amazing filling that becomes our beautiful cinnamon swirl bread. Do yourself a favor and make sure your milk is exactly the right temperature—too hot, and you kill the yeast, too cold, and it just lazily sits there. We want action!
Ingredient Notes and Raisin Preparation
Let’s dive into those little bits of advice that make our loaf better than everyone else’s. First thing: those raisins! If you just toss them in dry, they act like tiny sponges and pull moisture right out of your beautiful bread dough, leaving you with dry spots. Don’t do it!
You absolutely must plump those raisins. I usually just hit them with very hot, almost boiling water for about ten minutes while I’m getting the yeast going. Drain them well afterward, and pat them mostly dry before using them. That moisture is now locked inside them, ready to burst open in the oven.

Also, remember that rule about temperature? That goes for your egg too! A cold egg can shock the yeast mixture. Get your egg out a little early so it is just room temperature. If you’re feeling extra fancy—truly leaning into gourmet toast territory—you can absolutely toss in about half a cup of chopped pecans with your raisins for a little crunch. That raisin bread with pecans is decadent!
Finally, for a little extra flair, if you ever want to shake things up, adding pecans or even dried cranberries instead of raisins works, but honestly, this classic combination is what makes it the best cinnamon raisin bread.
How to Prepare Soft and Fluffy Raisin Bread from Scratch
Now we get to the fun part—turning those ingredients into actual bread! When you’re ready to dive into baking bread from scratch, remember that time is your friend. Patience during rising equals fluffy bread later on, period. Even making this easy homemade bread requires respecting those timeline cues I’ve listed below!
Activating Yeast and Mixing the Dough for Raisin Bread
First things first: wake up that yeast! You mix the warm milk and the yeast and watch it bubble—that foam means you’re ready to go. Once that’s happy, whisk in the sugar, the egg, your melted butter, and salt. Then, start adding the flour slowly. You’ll notice it gets tough fast. Stop mixing when you have what I call a “shaggy dough.” It looks messy and sad, but don’t add more flour yet! Turn that whole mess onto a lightly floured surface and start kneading. You need to work it—about 8 to 10 solid minutes—until it feels smooth and stretchy, like a nice piece of fabric. Then you let it rest in an oiled bowl for about an hour and a half until it doubles up. It’s getting ready to handle all that cinnamon goodness!
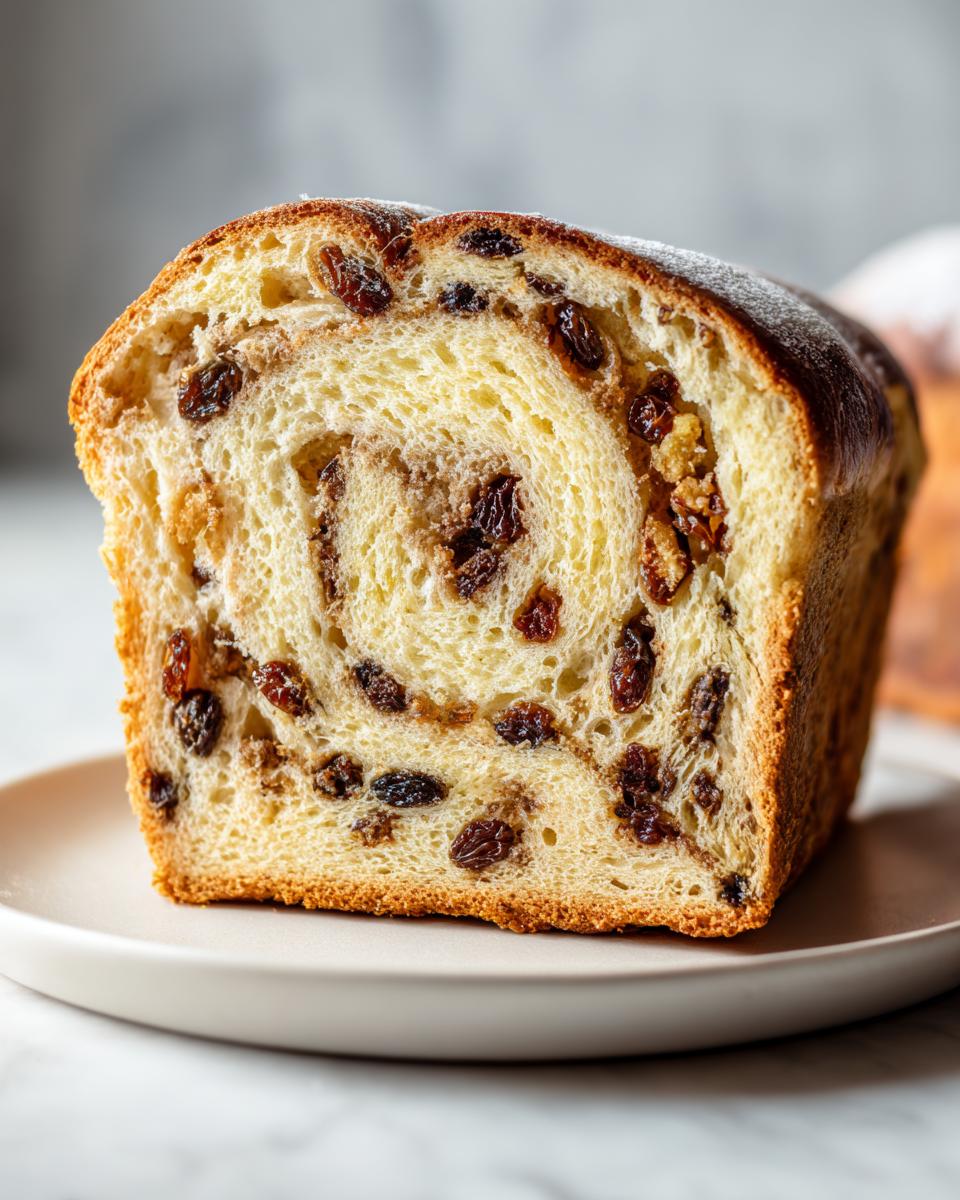
Creating the Signature Cinnamon Swirl in Your Raisin Bread
When your dough has puffed up nicely, punch it down gently—it’s just releasing that built-up gas. Turn it out and roll it into a big, thin rectangle, about 12 by 18 inches. This is where the magic for your raisin swirl bread happens! Melt that soft butter—the second amount we listed—and brush it everywhere. Don’t leave any dry spots! Then, liberally sprinkle that pre-mixed brown sugar and cinnamon over the whole thing. Scatter your plumped raisins, and then, starting on the long side, roll it up as tightly as you possibly can. You want a taut log so that when it bakes, those layers don’t separate! Crimp that final seam shut and place it seam-side down into your greased loaf pan.
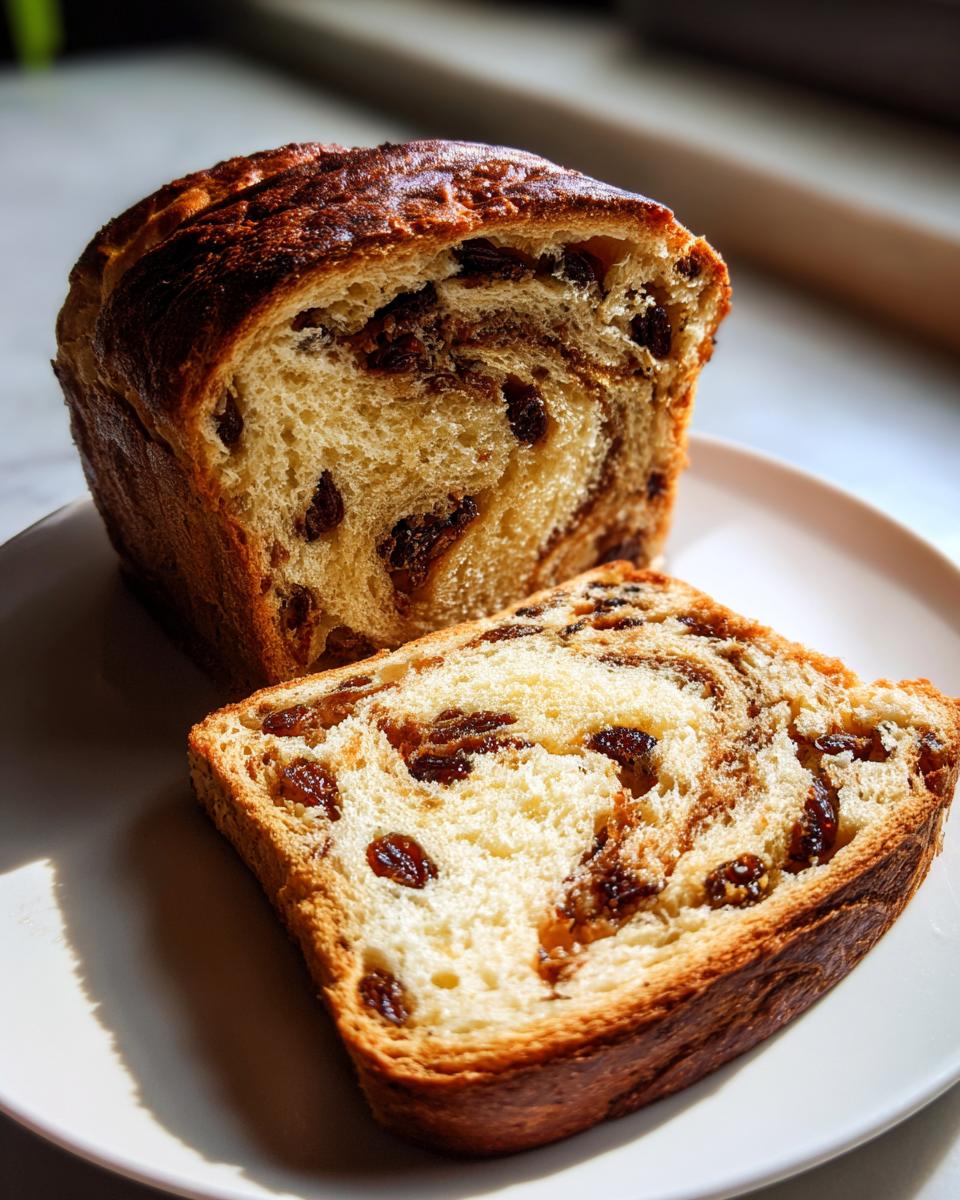
Final Proofing and Baking Your Homemade Raisin Bread Recipe
Don’t rush the second rise! This is crucial for that lovely puffy top. Cover the pan loosely and let it sit in a warm spot for about 30 to 45 minutes. You want the dough to rise up until it’s crowned about an inch over the rim of the pan—that’s your signal! Preheat your oven to 375°F while it’s finishing this rise. Bake for 30 to 35 minutes. You’ll know it’s done when it’s beautifully golden brown. As soon as it comes out, yank it right out of the pan and place it on a wire cooling rack. If you leave it in that hot metal pan, the bottom will steam itself soggy, and we worked too hard for a soggy bottom, didn’t we? Head over to The Carefree Kitchen for a different perspective on this classic!
Tips for Perfect Artisan Raisin Bread Baking
Now that you have mastered the basic loaf, you’re probably ready to elevate this into something truly artisan, right? We want that golden crust and a crumb that just screams gourmet toast ideas. Baking bread from scratch is all about tweaking the process. If you want to see how I approach the science of texture, my recipe for flaky biscuits really shows how temperature affects structure!
Don’t be afraid to experiment a little bit once you nail this foundational sweet yeast bread. It’s a very forgiving recipe, which is why it’s such a fantastic Sunday project. To get some great visual inspiration, you should definitely check out the gorgeous bakes over at Origin Oven!
Adapting This Raisin Bread for a Bread Machine
I totally get it—sometimes you just want to set it and forget it, especially on busy mornings when you need that quick breakfast bread! If you are using your bread machine for this cinnamon raisin bread, the biggest adjustment is the order you add things in. Your machine manual is the ultimate guide here, but almost always, the liquids—the warm milk, egg, and melted butter—go in first. Then add your salt, sugar, and flour on top, creating a layer.
Finally, put your yeast on top of the flour layer so it stays dry until the initial mixing starts. Use the ‘Basic’ or ‘Sweet Bread’ cycle, but here’s the catch: stop the machine before the final long proofing cycle. Why? Because machine proofing can sometimes dry out the dough too much. Wait until the kneading is done, pull the dough out, shape it into your beautiful swirl log, and then pop it into a standard loaf pan for that final rise on your counter before baking in your standard oven. It usually comes out better that way!
Making No Knead Raisin Bread Variations
If you’re aiming for a true no knead raisin bread experience—where minimal work is key to your holiday bread baking—you can absolutely adapt this! We rely heavily on kneading for the final fluffiness, but extended rising time can develop similar gluten bonds. For a no knead method, stick to Steps 1 and 2 exactly as written (yeast activation and wet ingredients mixed with flour to make a shaggy dough).
Instead of kneading for 10 minutes, just mix it until it’s barely combined. Then, cover that bowl tightly with plastic wrap and let it sit overnight—we’re talking 10 to 14 hours—in the fridge or at cool room temperature overnight. After that super long first rise, gently turn the dough out, perform your cinnamon butter swirl (Steps 5-7), roll it tight, and let it proof in the pan for that final 45 minutes. It won’t be quite as springy as the kneaded version, but it’s still a delicious, rustic loaf perfect for snacking!
Serving Suggestions for Your Fresh Baked Bread Aroma Loaf
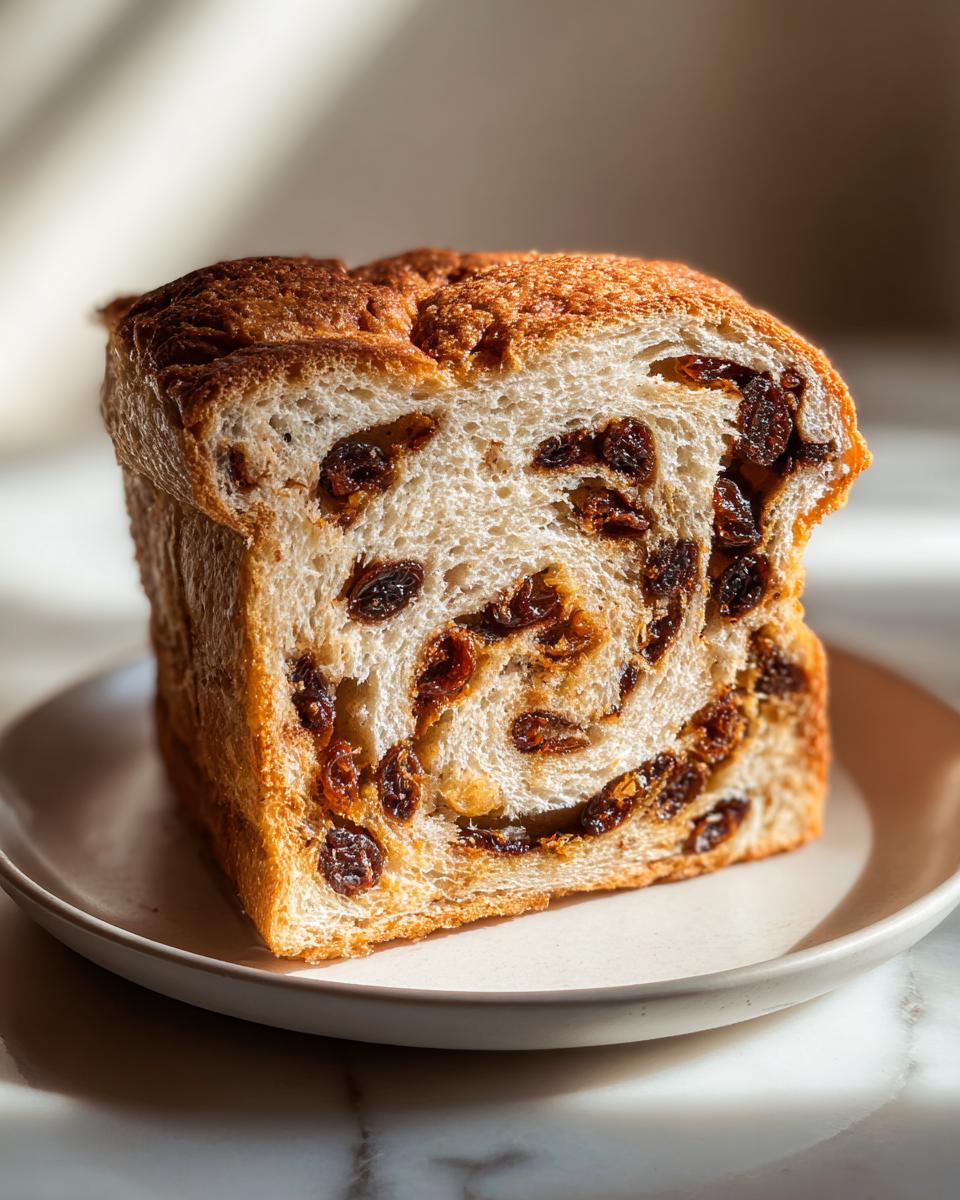
Okay, the hardest part is over—it’s cooled, and now you get to eat it! This sweet yeast bread is truly fantastic when it’s fresh, but it really shines as a breakfast loaf. If you’re having it for breakfast, skip the thin white bread aisle; this deserves the star treatment!
My favorite way to enjoy a slice of this homemade raisin bread is toasted until the edges are just crisp, then slathered thickly with softened cream cheese. If you want a real gourmet toast idea, try brushing a slice with a little melted butter first before you toast it. For something slightly different, I sometimes whip up a quick honey butter—you can find my favorite way to make a simple version when cooking sides like honey butter.
It’s also utterly divine served warm, cut thickly, with just a whisper of salted butter melting into those cinnamon pockets. Honestly, you can’t go wrong!
Storage and Reheating Instructions for Homemade Raisin Bread Recipe
The best part about baking from scratch is having this incredible food around for a few days, but we have to protect that gorgeous soft and fluffy bread texture we worked so hard for! Once this loaf is completely cool—and I mean truly cool to the touch, maybe even slightly stiff—you need to wrap it up tight. Air is the enemy of freshness, so grab some plastic wrap, or if you want to keep it out of the pantry for longer, use foil.
I usually wrap half the loaf immediately and leave the other half out on the counter, tightly covered, for the first day. We aim for 3 to 4 days on the counter, wrapped well, before it starts to get a little questionable in texture. If you know you won’t get through it by then, slice the rest and freeze it! You can wrap individual slices in plastic wrap and then toss them into a large freezer bag. They last months this way.
Now, reheating is where you bring the magic back. If it’s just a day or two old, you can slice it and simply toast it—that crispy exterior against the still-soft center is perfection. If it’s a frozen slice, don’t thaw it first! Just take it straight from the freezer, wrap that single slice snugly in a small piece of aluminum foil, and pop it in a 350°F oven for about 8 to 10 minutes. This gentle heat warms the raisins through and steams the bread slightly, bringing back almost all of that original softness. If you feel like taking a peek at how others handle their dessert loaves, check out the lovely recipes on Cocin Inspiradora!
Frequently Asked Questions About Making Raisin Bread
I know that when you tackle something like this sweet yeast bread for the first time, questions are going to pop up! That’s perfectly normal; that’s how we all learn to command our kitchens. I’ve gathered a few things folks ask me the most frequently after they try this homemade raisin bread recipe. If you still can’t find your answer, feel free to reach out using my contact page!
Can I use dried cranberries instead of raisins in this raisin bread?
Oh, absolutely! I love a good mix-up now and then. If you swap out the raisins for dried cranberries, you’ll get a much brighter, tarter flavor profile, which is really nice against all that cinnamon. My main tip here is about texture. Cranberries tend to be a bit drier than raisins unless they are the plumped-up kind. If your cranberries feel really dry, you might want to soak them for just 5 minutes instead of 10, and then pat them extra dry before mixing them in. Even if you plump them, I wouldn’t add any extra liquid to the dough, just to be safe!
What is the best way to get a truly soft and fluffy bread texture?
This is the million-dollar question! We covered this a bit earlier, but I’ll shout it again because it’s that important for achieving truly soft and fluffy bread. First, you have to commit to the kneading time! Ten full minutes of working that dough develops the necessary gluten network that gives the bread its springiness and structure. If your mixer does the work, run it for a solid 8 minutes on medium-low speed. Second, the proofing temperature has to be just right for the second rise. If it’s too cold, the yeast is sluggish, and you end up with a dense brick. Aim for a warm, draft-free spot in your kitchen for that final rise so the dough really puffs up nicely over the pan!
How long does this homemade raisin bread recipe keep?
Honestly, my bread rarely lasts more than two days because we toast it for breakfast immediately! But for storage, if you’ve let it cool completely before wrapping it tightly in plastic wrap and then maybe foil (double wrapping is your friend!), you can keep this loaf on the counter at average room temperature for about 3 to 4 days. If you want it to last longer, slice it up and wrap individual portions before freezing. It keeps beautifully in the freezer for up to two months. When you take a frozen slice out, just reheat it wrapped in foil in a 350°F oven until warm, and it tastes almost like it was just baked that morning!
Estimated Nutritional Data for Classic Raisin Bread
Alright, let’s talk about the numbers, because even in the comfort of home baking, it’s smart to know what you’re working with. I’ve pulled the key nutritional estimates right from the recipe breakdown we put together. This is for one slice, so keep in mind that if you cut thicker slices for that perfect gourmet toast idea, these numbers will shift!
I want to be very clear here: These figures are based on the exact ingredients and measurements I listed above—no extra glaze, no butter added after baking, just the loaf itself. Since we are baking from scratch, it’s nearly impossible for home measures to match lab results exactly, so consider this your baseline guide! This sweet yeast bread uses real ingredients, which means the nutrition reflects actual butter and sugar, not substitutes.
- Calories: Around 220 per slice
- Fat: Approximately 5 grams
- Protein: About 5 grams
- Carbohydrates: 42 grams total
- Sugar: Roughly 14 grams (That’s where those beautiful cinnamon swirls live!)
If you decide to get really enthusiastic and add pecans to the dough, or if you are slathering it with my favorite honey butter while toasting, you definitely need to add those extras in to your personal tally! But as a starting point for enjoying this lovely homemade raisin bread recipe, those numbers should give you a good snapshot.
Share Your Homemade Raisin Bread Creations
Seriously, seeing your loaves makes my whole day! That’s the thing about home cooking—it’s not just about following a recipe; it’s about taking that blueprint and making it uniquely yours. I pour my heart into making sure this homemade raisin bread recipe gives you the absolute best, softest, fluffiest results, but I absolutely love hearing how you made it your own.
Did you add pecans like I suggested? Did you try the no-knead trick and the texture blew you away? Or maybe you’ve found a supreme gourmet toast idea that needs sharing? Please, drop a rating below if this has earned a permanent spot in your breakfast rotation! Your feedback helps other cooks feel confident tackling this sweet yeast bread.
We are building a community here where we swap tips and celebrate success, not just here in the bread column, but across everything we cook. If you made something delicious before you sat down to enjoy your slice, I’ve got tons of great inspiration for easy appetizers and snacks for your next gathering, too!
Don’t be shy—share your pictures! When you’ve spent all that time kneading and swirling, you deserve to show off that golden crust and those beautiful interior ribbons. Knowing that my recipe brought that fresh baked bread aroma into your home is exactly why I love doing this. For even more inspiration on nailing those perfect swirls and textures, check out the technical advice over at Pastry Chef Online!
PrintSoft and Fluffy Homemade Cinnamon Raisin Bread
Create the best cinnamon raisin bread with this reliable recipe. You achieve a soft, fluffy texture and a sweet cinnamon swirl perfect for breakfast toast.
- Prep Time: 30 min
- Cook Time: 35 min
- Total Time: 2 hr 40 min
- Yield: 1 loaf (12 slices) 1x
- Category: Breakfast
- Method: Baking
- Cuisine: American
- Diet: Vegetarian
Ingredients
- 1 cup warm milk (105-115°F)
- 2 1/4 teaspoons active dry yeast
- 1/4 cup granulated sugar
- 1 large egg, room temperature
- 1/4 cup unsalted butter, melted
- 1 teaspoon salt
- 3 1/2 cups all-purpose flour, plus more for dusting
- 1 cup raisins, plumped
- 1/2 cup packed light brown sugar
- 2 tablespoons ground cinnamon
- 2 tablespoons unsalted butter, softened (for swirl)
Instructions
- Combine the warm milk and yeast in a large bowl. Let stand 5 minutes until foamy.
- Stir in the granulated sugar, egg, melted butter, and salt into the yeast mixture.
- Gradually add the flour, mixing until a shaggy dough forms. Knead the dough on a lightly floured surface for 8 to 10 minutes until smooth and elastic.
- Place the dough in a lightly oiled bowl, turning to coat. Cover the bowl and let it rise in a warm place for 1 to 1.5 hours, or until doubled in size.
- While the dough rises, prepare the filling: In a small bowl, mix the brown sugar and cinnamon together.
- Gently punch down the risen dough. Turn it out onto a lightly floured surface. Roll the dough into a 12×18 inch rectangle.
- Spread the 2 tablespoons of softened butter evenly over the dough surface. Sprinkle the cinnamon-sugar mixture over the butter, covering the dough completely. Scatter the plumped raisins over the sugar layer.
- Starting from the long edge, tightly roll the dough into a log. Pinch the seam closed.
- Place the log seam-side down into a greased 9×5 inch loaf pan. Cover loosely and let it rise again for 30 to 45 minutes, or until the dough has crowned about 1 inch over the rim of the pan.
- Preheat your oven to 375°F (190°C). Bake for 30 to 35 minutes, or until the top is golden brown and the internal temperature reaches 200°F (93°C).
- Remove the bread from the pan immediately after baking and cool completely on a wire rack before slicing.
Notes
- To plump raisins, soak them in hot water for 10 minutes, then drain and pat them dry before adding to the dough.
- For a bread machine method, add ingredients in the order specified by your machine’s manual, using the ‘Basic’ or ‘Sweet Bread’ setting.
- Serve this fresh baked bread aroma loaf toasted with cream cheese or butter for a gourmet toast idea.
Nutrition
- Serving Size: 1 slice
- Calories: 220
- Sugar: 14
- Sodium: 250
- Fat: 5
- Saturated Fat: 3
- Unsaturated Fat: 2
- Trans Fat: 0
- Carbohydrates: 42
- Fiber: 2
- Protein: 5
- Cholesterol: 25