
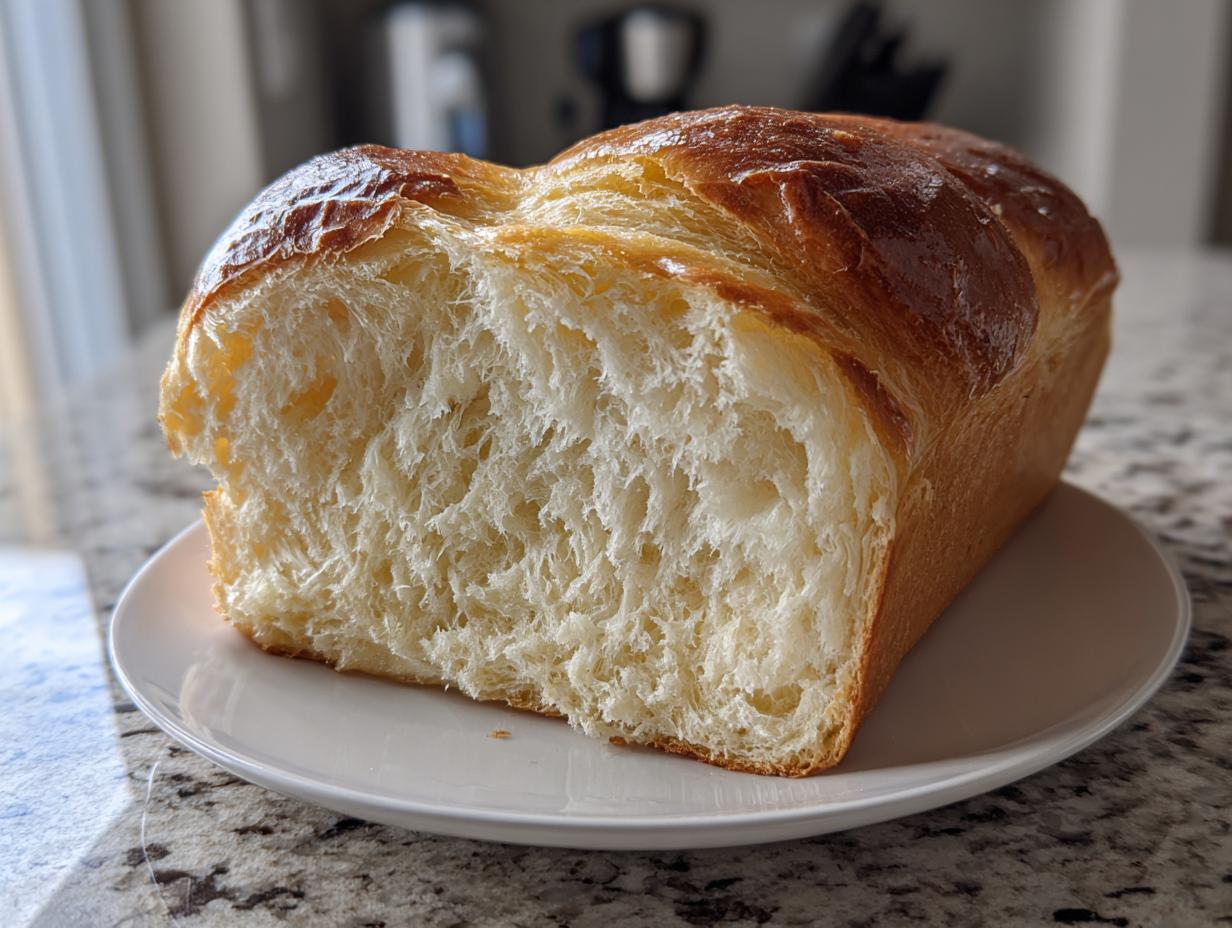
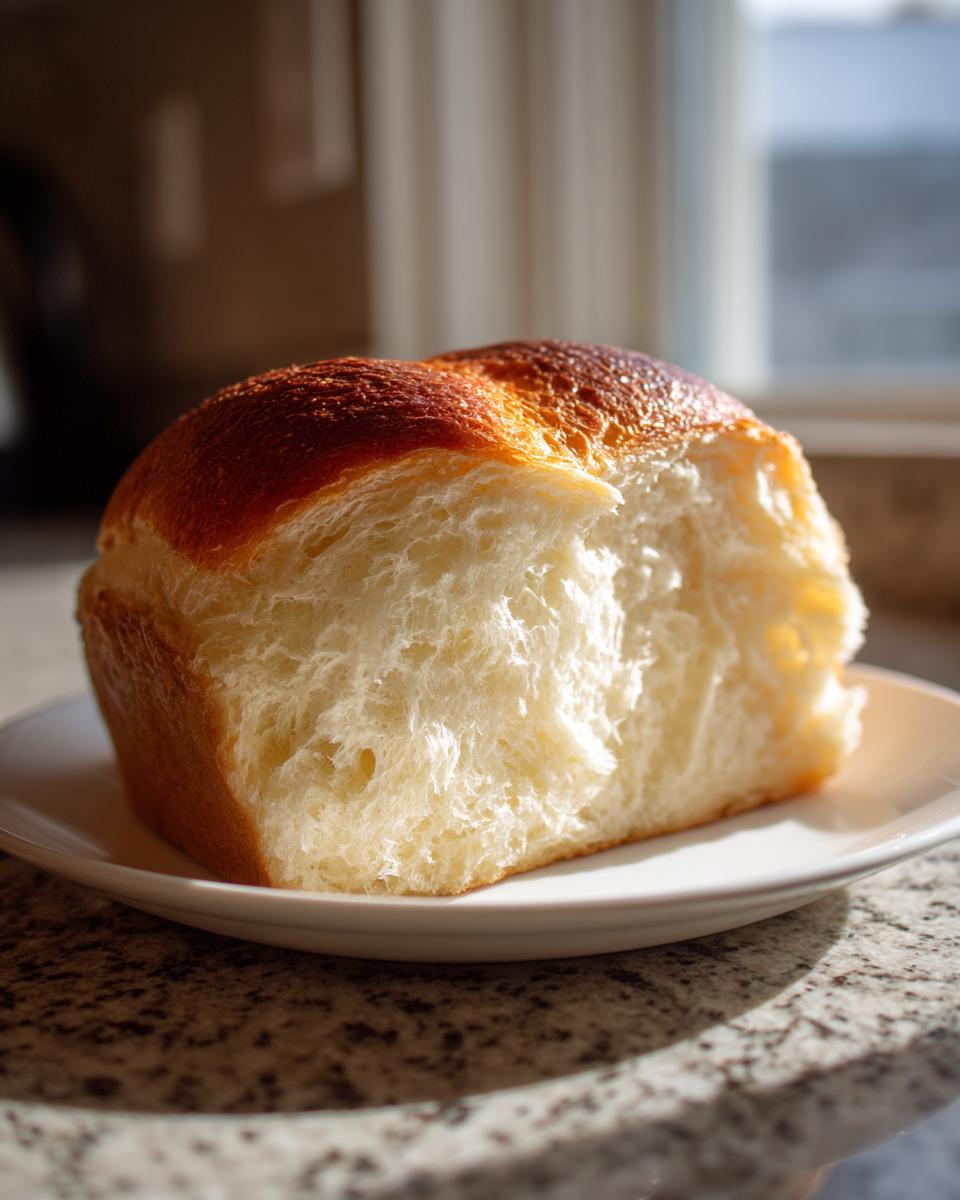
If you’ve ever walked into a Japanese bakery and been stopped dead in your tracks by the sight of those impossibly tall, impossibly soft loaves, I know exactly how you feel. For years, I thought that cloud-like crumb was reserved only for professional ovens, but I was delightfully wrong! Mastering the secret to authentic Japanese milk bread, or Shokupan, is a rite of passage, and I promise you, it’s achievable right on your own counter. The magic isn’t just in the milk; it’s all about how we treat the flour first, using the famous Tangzhong method. When you successfully finish your first pull-apart-soft loaf—one that just melts when you slice it—you’ll feel like you’ve conquered the baking world. I recall the first time mine rose perfectly; it felt like I’d finally learned a special language of baking. I want to share every single detail so you can experience that same joy! It’s all about confident home cooking here.
- Why This is the Best Japanese Milk Bread Recipe You Will Ever Make
- Gathering Your Ingredients for Authentic Japanese Milk Bread
- Step-by-Step Instructions for the Ultimate Japanese Milk Bread
- Tips for Success When Baking Japanese Milk Bread at Home
- Storage and Reheating Instructions for Tender Sandwich Bread
- Serving Suggestions for Your Pillowy Loaf Recipe
- Frequently Asked Questions About Japanese Milk Bread
- Nutritional Estimates for Homemade Asian Bread
- Share Your Cloud Bread Baking Experience
Why This is the Best Japanese Milk Bread Recipe You Will Ever Make
Honestly, I’ve tested so many bread recipes that ended up dense or disappointing. But this process? It works, every single time, which is what matters when you’re relying on a loaf for your family’s breakfasts. This recipe is superior because we’re not cutting corners on technique. You get reliable results that taste like they came straight from a high-end Japanese bakery.
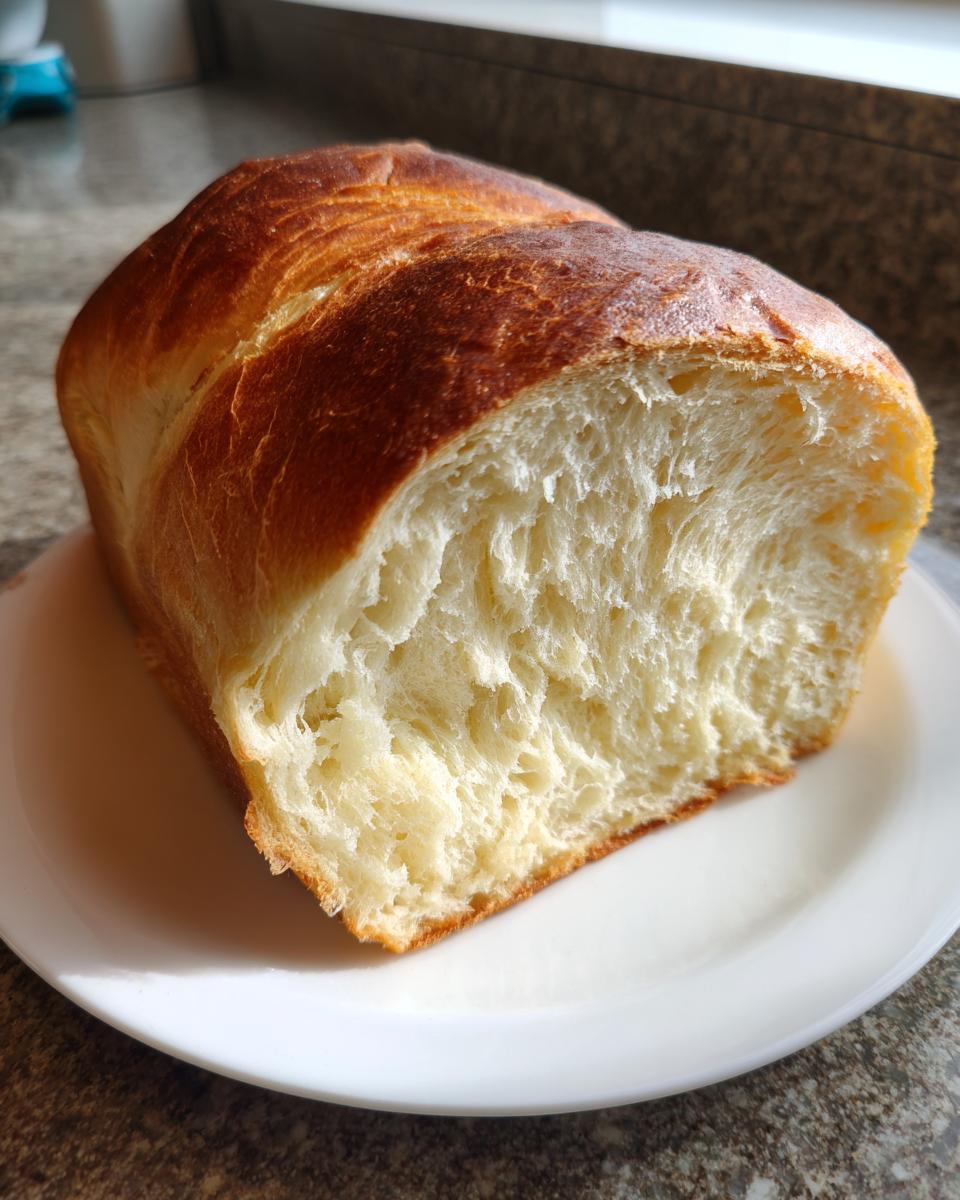
- The softness is absolutely unmatched; it truly feels like eating a cloud, not bread.
- Our foolproof Tangzhong technique guarantees that texture without being fussy.
- This loaf stays beautifully tender and fresh for days longer than your standard white bread, which is a huge bonus for busy households!
The Secret to Fluffy Bread: Understanding Tangzhong
You might hear people talk about Yudane, but we’re sticking to the Tangzhong for this recipe because I find it gives us the ultimate softness. What is it? Simply put, we cook a small portion of the flour and liquid from the recipe into a thick paste first. This cooking process, called gelatinization, basically pre-cooks the starches. When those starches hit the main dough, they can absorb and hold onto way more moisture than raw flour can. That trapped moisture is what keeps your loaf unbelievably pillowy and soft even two days later. It’s pure science creating pure delight!
Gathering Your Ingredients for Authentic Japanese Milk Bread
When we talk about baking something this special, the ingredients really have to be spot-on, but don’t panic! The list isn’t too intimidating. Since we are making that magical Tangzhong first, I’ve separated the ingredients so you know exactly what goes into the starter paste and what goes into the main dough. Using the right measurements here is crucial, especially since the final texture of this loaf depends on precise ratios. We need everything ready to go before we start that initial cooking step. I always lay everything out on the counter first—it keeps me calm and organized!
For the Tangzhong paste, make sure you measure out that smaller portion of bread flour and milk carefully. For the main body of the dough, we are using the rest of the flour, sugar, yeast, salt, the beaten egg, softened butter, and the remainder of the milk. Trust me, having that soft butter ready to go when the dough is developed makes the final mixing process so much smoother.
Ingredient Notes and Substitutions for Your Japanese Milk Bread
To get that truly professional structure, you absolutely must use bread flour for the main dough part, not just all-purpose. Bread flour has a higher protein content, which is what helps us develop that strength needed for a huge rise and that incredible pull-apart quality. For richness, I strongly recommend using whole milk; it adds a subtle depth and works better with the Tangzhong than low-fat options. Instant dry yeast is preferred here because it mixes right in without needing to be proofed separately, making our process faster!
Step-by-Step Instructions for the Ultimate Japanese Milk Bread
Now we put all those carefully measured ingredients to work! Baking this bread relies on patience during the rising and kneading phases, so don’t rush the mixers. This is where the structure for that incredible texture really sets in. Remember, we are aiming for that tall, gorgeous loaf that shows off your baking prowess. I make sure my oven is set and ready to go for the final bake, but we only preheat during the very last rise. We’ve got ten key steps here that will guide you from goo to golden perfection. Follow these instructions for your beautiful homemade loaf.
Mastering the Tangzhong Preparation
This is Step 1, and it’s the most technical part, but you’ve got this! In a small saucepan, whisk together the small portion of bread flour, sugar, and milk until there are no lumps left. You need to cook this gently over medium-low heat. Keep stirring constantly—and I mean constantly! You are looking for it to thicken into a paste, almost like a very thick gravy. A happy paste will hit about 160°F (71°C) on your thermometer. Once it thickens like that, pull it right off the heat and stir in just a splash of the rest of your milk. Transfer it to a bowl and cover the surface directly with plastic wrap—this stops that little skin from forming. It absolutely must cool all the way down to room temperature before it touches the rest of your dough, or you’ll accidentally stop the yeast from doing its job!
Kneading and Developing the Japanese Milk Bread Dough
Once your Tangzhong is totally cool, it’s time to mix the main dough in your stand mixer. We combine all the dry ingredients first—the bulk of the flour, the rest of the sugar, yeast, and salt. Then we add the cooled paste, the egg, and the remaining milk. Mix low until it’s just combined into a shaggy mess. Now, turn the speed up and knead for about 5 to 7 minutes. It will look messy, but you’ll notice it start to clean up the sides of the bowl. Now comes the critical part: we add the softened butter, piece by piece. You have to wait for each bit to disappear before you add the next. Keep kneading for a solid 10 to 15 minutes after the butter is in. You’re developing the gluten, and the sign that you’re done is the windowpane test—you should be able to stretch a small piece of dough thin enough to see light through it without tearing. This long knead is non-negotiable for that tender structure.
Shaping and Proofing Your Fluffy Bread
After that hard work, let the dough rest until it doubles, usually an hour or so. Then, gently nudge the air out and divide it into three equal pieces. Roll each piece firmly into a log—this helps keep those air bubbles tight. Place the three logs seam-down, side-by-side, into your greased 9×5 loaf pan. Cover it loosely and let it rise again. This second rise is key; wait until the dough has nearly doubled and is cresting about 1 whole inch over the rim of the pan—this usually takes 45 to 60 minutes. Only start preheating your oven to 350°F (175°C) during the last 15 minutes of this proof. When you handle these risen pieces, be gentle! Too much rough handling after the first rise means you’ll knock out those precious air pockets that result in that spectacular japanese milk bread texture.
Tips for Success When Baking Japanese Milk Bread at Home
Baking this bread is mostly patience, followed by a couple of crucial moments where you need to pay close attention. Don’t let the long kneading time scare you; the stand mixer does all the heavy lifting! My biggest piece of practical advice revolves around the oven right at the end. If you notice your loaf is getting too dark on top early—say, after just 20 minutes—don’t panic and don’t turn the temperature down. Instead, gently tent the top with a piece of aluminum foil. This allows the inside to finish baking thoroughly without burning that beautiful golden crust we worked so hard for.
Also, and this is non-negotiable if you want that authentic pillowy crumb: you must remove the loaf from the pan immediately once it comes out of the oven. If you leave it in the hot metal pan, the residual heat will cause the sides and bottom to steam and compact. Let it cool completely on a wire rack, just like I show in the instructions for making my creamy fluffy scrambled eggs! This final step locks in the lightness.
Storage and Reheating Instructions for Tender Sandwich Bread
Because we took the time to create that wonderful Tangzhong paste, this loaf behaves differently than standard bread—it stays soft for ages! Seriously, the moisture retention is fantastic, which means less waste and more delicious, ready-to-eat slices whenever you want them. The absolute best way to store it is whole or in large chunks in an airtight container or a sturdy zip-top bag at room temperature. Don’t try refrigerating it; that actually speeds up staling, and we certainly don’t want that!
If you plan on freezing any, slice it first! Flash freeze the slices on a tray, then transfer them to a freezer bag. That way, you only pull out what you need. Now, for reheating those slightly older slices to bring back that just-baked tenderness—this is where the magic happens again.
You have two great options. If you just want one slice for a quick snack, pop it into the toaster, but don’t let it get crunchy; aim for a short cycle. If you want that full ‘fresh-baked’ experience, I love briefly reviving it with steam. You can wrap the slice loosely in a damp paper towel and microwave it for about 10 to 15 seconds. It instantly softens up, making it perfect for slathering with my easy garlic aioli or butter. Treating this bread gently ensures it stays perfect for your sandwiches all week!
Serving Suggestions for Your Pillowy Loaf Recipe
Okay, now that you’ve made what might be the softest bread ever, I know that just slicing it and toasting it feels a little too basic, right? While it’s undeniably amazing toasted with butter, this bread is too versatile to limit yourself! Because it’s sturdy yet ridiculously tender, it’s my go-to for creating delicate tea sandwiches—think cucumber and cream cheese or thinly sliced ham and mustard. The slight sweetness of the Japanese milk bread plays so nicely against savory fillings.
But my absolute favorite way to use up the last few slices? French toast! Because of that rich, dense crumb structure, dipping it in custard doesn’t make it fall apart immediately like flimsy white bread does. Try soaking it for my French onion soup pairing if you want something truly decadent! It’s perfect for weekend brunch, soaking up all that eggy goodness without becoming soggy.
Frequently Asked Questions About Japanese Milk Bread
I know diving into a new baking technique like Tangzhong can bring up a few questions, and that’s totally fine! That’s why I put together this little FAQ section. Baking this kind of specialty bread, especially if you’re looking at other guides, can sometimes be confusing, but stick with this method, and you’ll be fine. We want you to succeed in this Shokupan Tutorial!
Can I use the Yudane Method instead of Tangzhong for this Japanese Milk Bread Recipe?
That’s a great question, because both methods achieve incredible softness! The main difference is the liquid: Tangzhong (which we use here) cooks flour with a mix of milk and water into that thick paste. The Yudane method is similar but uses just boiling water instead of milk/water, making a slightly gelatinized paste. While both road lead to soft bread, I strongly prefer the Tangzhong technique with the milk here because it contributes more richness and moisture directly into the dough, giving this specific loaf its melt-in-your-mouth quality. Feel free to check out a Yudane Bread Recipe if you want to compare, but stick to the Tangzhong for this version!
How long does it take to make this Soft Fluffy Bread?
It definitely takes time, but remember most of that time is hands-off waiting for the dough to rise! Our total time is about 2 hours and 20 minutes for the entire process. However, you are only actively working for about 45 minutes (that includes making the Tangzhong, mixing, and shaping). The rest of the time is the first rise (around an hour) and the second proofing (about 45–60 minutes). So, plan for an afternoon, but know that most of that time you can be doing other things around the house. The results are completely worth the wait for such tender sandwich bread!
If you ever have other questions while you’re baking, please don’t hesitate to drop a comment below or reach out; I love hearing from fellow kitchen commanders [let’s compare notes!]
Nutritional Estimates for Homemade Asian Bread
Now, I know some of you are tracking macros or just curious about what’s in this rich loaf, so I put together the estimated nutritional breakdown for you. Please know that this is just a general guide for one serving—one slice—of our beautiful bread. If you swap out whole milk for heavy cream, or use a different brand of butter, those numbers are going to shift slightly. Baking is wonderfully flexible, but my lab coat brain insists on that disclaimer!
These estimates come directly from the recipe serving size, which yields one loaf (and we estimate that as about 14 slices). Because we use real milk and good quality butter, you get a slightly richer profile than some of the leaner recipes out there, but that fat is what makes it so tender! If you’re looking for simple ways to add more easily digestible fuel to your day, check out my recipe for no-bake protein balls, which is a great contrast!
Here is the general snapshot per slice:
- Calories: About 180
- Total Fat: Roughly 5g
- Carbohydrates: Around 28g
- Protein: About 5g
- Sugar: Near 7g
It’s important to remember that while this is a treat, the texture is so satisfying you won’t need huge slices to feel content. It’s perfect just as it is for delicious, everyday meals!
Share Your Cloud Bread Baking Experience
Okay, now that you have your perfectly pillowy loaf cooled down and sliced—or maybe you’re already tearing pieces off while it’s still warm, I won’t judge!—I want to hear everything about it. Truly, the best part of mastering a complex technique like the Tangzhong method is seeing your successes! Did your loaf rise high and majestic? Did your kids fight over the end pieces? Let me know!
Please take a moment to drop a star rating right below the recipe card. That feedback is how I know this Japanese Milk Bread Recipe is working for home bakers like you around the country. It helps other people feel confident stepping into the kitchen to try their hand at something new!
If something didn’t go quite right, or if you found a slight trick that worked even better for your oven environment, please share that in the comments too. We build our confidence as bakers together, learning from each other’s experiences. Don’t be shy about asking questions; there are no silly questions here at Cookery Command. Whether you used a specific brand of flour or had trouble with the initial shaping, utilize the comments section as your personal help desk! You can always reach out via my contact page if you need something more private, but usually, community advice is the best advice!
Go ahead, brag a little about your success making that Cloud Bread Baking dream come true, or ask any lingering doubts you might have. Happy baking, friend!
PrintThe Ultimate Tangzhong Japanese Milk Bread (Shokupan) Recipe: Achieving Cloud-Like Softness at Home
Master the secret to unbelievably soft, fluffy Japanese Milk Bread (Shokupan) using the Tangzhong method. This tutorial provides foolproof instructions for a pillowy crumb and golden crust, perfect for tender sandwich bread or toast.
- Prep Time: 45 min
- Cook Time: 35 min
- Total Time: 2 hours 20 min
- Yield: 1 loaf 1x
- Category: Baking
- Method: Baking
- Cuisine: Japanese
- Diet: Vegetarian
Ingredients
- 75g Bread Flour (for Tangzhong)
- 250ml Whole Milk (divided)
- 25g Granulated Sugar (for Tangzhong)
- 350g Bread Flour (for dough)
- 50g Granulated Sugar (for dough)
- 1 teaspoon Instant Dry Yeast
- 1 teaspoon Fine Sea Salt
- 40g Unsalted Butter, softened
- 1 Large Egg, lightly beaten
Instructions
- Prepare the Tangzhong: Whisk the 75g bread flour and 25g sugar into 60ml of the milk in a small saucepan. Cook over medium-low heat, stirring constantly, until the mixture thickens into a paste (about 160°F or 71°C). Remove from heat, stir in 1 tablespoon of the remaining milk, and transfer to a small bowl. Cover the surface directly with plastic wrap and let it cool completely to room temperature.
- Combine Dry Ingredients: In the bowl of a stand mixer fitted with the dough hook, combine the 350g bread flour, 50g sugar, yeast, and salt. Mix briefly on low speed.
- Mix Dough: Add the cooled Tangzhong, the remaining milk (about 180ml), and the beaten egg to the dry ingredients. Mix on low speed until a shaggy dough forms.
- Knead: Increase the speed to medium-low and knead for 5 to 7 minutes until the dough starts to pull away from the sides of the bowl.
- Add Butter: Add the softened butter, one piece at a time, allowing each piece to incorporate before adding the next. Continue kneading for another 10 to 15 minutes until the dough is very smooth, elastic, and passes the windowpane test. This extended kneading develops the structure needed for a pillowy crumb.
- First Rise (Bulk Fermentation): Place the dough in a lightly oiled bowl, turning to coat. Cover and let rise in a warm place until doubled in size, about 1 to 1.5 hours.
- Shape the Loaf: Gently deflate the dough. Divide it into three equal pieces. Roll each piece into a tight log. Place the three logs side-by-side, seam-down, into a greased 9×5 inch loaf pan.
- Second Rise (Proofing): Cover the pan loosely and let it rise again in a warm spot until the dough has nearly doubled and crests about 1 inch over the top of the pan, about 45 to 60 minutes. Preheat your oven to 350°F (175°C) during the last 15 minutes of rising.
- Bake: Bake for 30 to 35 minutes, or until the top is golden brown and the internal temperature reaches 200°F (93°C). If the top browns too quickly, lightly tent it with foil.
- Cool: Immediately remove the bread from the pan and cool completely on a wire rack before slicing. This step is crucial for the final texture.
Notes
- A stand mixer is highly recommended for the extended kneading time required to develop the gluten structure for this soft bread.
- For an even richer flavor and softer texture, you can substitute some of the milk with heavy cream.
- This bread stays tender longer than standard loaves due to the Tangzhong, making it excellent for sandwiches.
Nutrition
- Serving Size: 1 slice
- Calories: 180
- Sugar: 7
- Sodium: 150
- Fat: 5
- Saturated Fat: 3
- Unsaturated Fat: 2
- Trans Fat: 0
- Carbohydrates: 28
- Fiber: 1
- Protein: 5
- Cholesterol: 25