
I think we can all agree that the difference between a sad, steamed vegetable and one that sings with flavor comes down completely to texture. That beautiful, browned char that tastes nutty and deep? That’s what we’re chasing today! I’m going to show you the simplest technique for achieving perfectly charred, incredibly delicious roasted cauliflower florets. Honestly, this is one of those staples that proves Emily Harrison’s entire philosophy: complex results don’t need complicated methods. This recipe is reliable, quick, and gives you that earthy, wholesome side dish you’ve been hoping for every single time. Forget everything you thought you knew about bland veggies; we’re turning up the heat and making this cauliflower the star.
- Why This Roasted Cauliflower Recipe Delivers Nutty Perfection
- Gathering Ingredients for Perfect Roasted Cauliflower Florets
- The Essential Steps to Master Roasted Cauliflower
- Tips for Achieving The Best Roasted Cauliflower Texture
- Serving Suggestions for Your Roasted Cauliflower Recipe
- Storage and Reheating Instructions for Leftover Roasted Cauliflower
- Frequently Asked Questions About Roasted Cauliflower
- Nutritional Snapshot of This Healthy Side Dish
- Share Your Perfectly Roasted Cauliflower Creations
Why This Roasted Cauliflower Recipe Delivers Nutty Perfection
When I first started testing vegetables for the test kitchen, I thought roasting was just about tossing things in oil and baking them. Nope! If you want that texture everyone talks about—the one that makes you forget you’re eating something super healthy—you need a streamlined approach. This roasted cauliflower recipe cuts out all the guesswork, which means less time fussing and more time eating that delicious, charred goodness.
We nail the texture because we focus on technique, not a million ingredients. You’ll be amazed how simple it is to turn plain cauliflower into something restaurant-worthy. If you’ve been searching for repeatable results when it comes to oven baked vegetables, this method is your new secret weapon.
Quick Prep for Your Oven Baked Vegetables
Honestly, this is nearly instant. Seriously! Prep time clocks in at maybe ten minutes, tops. You just need to chop the head, drizzle the oil, and shake on the seasonings. That’s it. You don’t need to babysit these florets; they handle the work themselves in the oven.
Achieving Deeply Flavored Roasted Cauliflower
The real magic that brings out that nutty, earthy tone is the heat. We crank that oven up to 425°F. Why so high? Because we deliberately want some crisp edges to develop. This high temperature forces out moisture quickly and encourages browning, which is where all that fantastic, developed flavor lives. It completely transforms the cauliflower, making it way better than any steamed version.
Gathering Ingredients for Perfect Roasted Cauliflower Florets
Okay, now for the setup! Getting the right things ready is half the battle won, especially when we want that perfect texture. You don’t need a huge list of fancy spices here; simplicity is what keeps this a reliable, healthy side dish. I’ve laid out exactly what I use every single time to get that consistent, deep nuttiness you’re looking for in your roasted cauliflower.
Grab the following list before you even preheat the oven. This ensures you don’t get halfway through and realize you’re out of salt!
- 1 large head cauliflower, cut into bite-sized florets
- 3 tablespoons olive oil
- 1 teaspoon kosher salt
- 1/2 teaspoon black pepper
- 1/4 teaspoon garlic powder
Ingredient Notes and Substitutions
The quality of your cauliflower matters, trust me. You want a nice, tight head—no yellowing spots or soft patches creeping in around the base. A tight head means less watery florets, which equals better char! We use standard olive oil, but if you happen to have a really vibrant, fruity one, it will certainly enhance that earthy flavor profile we love when making these oven baked vegetables.
If you’re running low on spices, swap the garlic powder for smoked paprika for a real depth of flavor, or add a pinch of dried thyme! Keep the salt and pepper; those are non-negotiable for drawing out moisture. If you don’t have kosher salt, use regular table salt, but reduce the amount by about a third because it’s finer and saltier.
The Essential Steps to Master Roasted Cauliflower
This is where the magic truly happens, and honestly, it’s almost shockingly straightforward! If you follow these steps precisely, you’re guaranteed a tray full of perfect florets next time. My main goal here is to ensure that every single piece gets direct, screaming-hot contact with the pan surface; that’s what gives you that amazing, nutty sear.
First things first: get your oven hot! We need 425 degrees Fahrenheit. Line a good, sturdy baking sheet with parchment paper—it saves you scrubbing later, and I trust parchment more than any non-stick spray sometimes when I’m really pushing for browning. Speaking of things that help, make sure you have your crispy roast potatoes recipe ready for when you realize you need another batch of these immediately!
Prepping the Cauliflower and Seasoning for Roasting
Toss those bite-sized florets into a big mixing bowl. Don’t be shy with the main ingredient! Drizzle on all three tablespoons of olive oil. Now, sprinkle your salt, pepper, and garlic powder right over the top. Now, get in there! Use your hands (clean ones, obviously!) and toss everything around until you see every little edge of cauliflower has a thin, glistening coat of oil and seasoning. You don’t want pools of oil at the bottom of the bowl, just even coverage.
Baking Time and Flipping for Even Browning
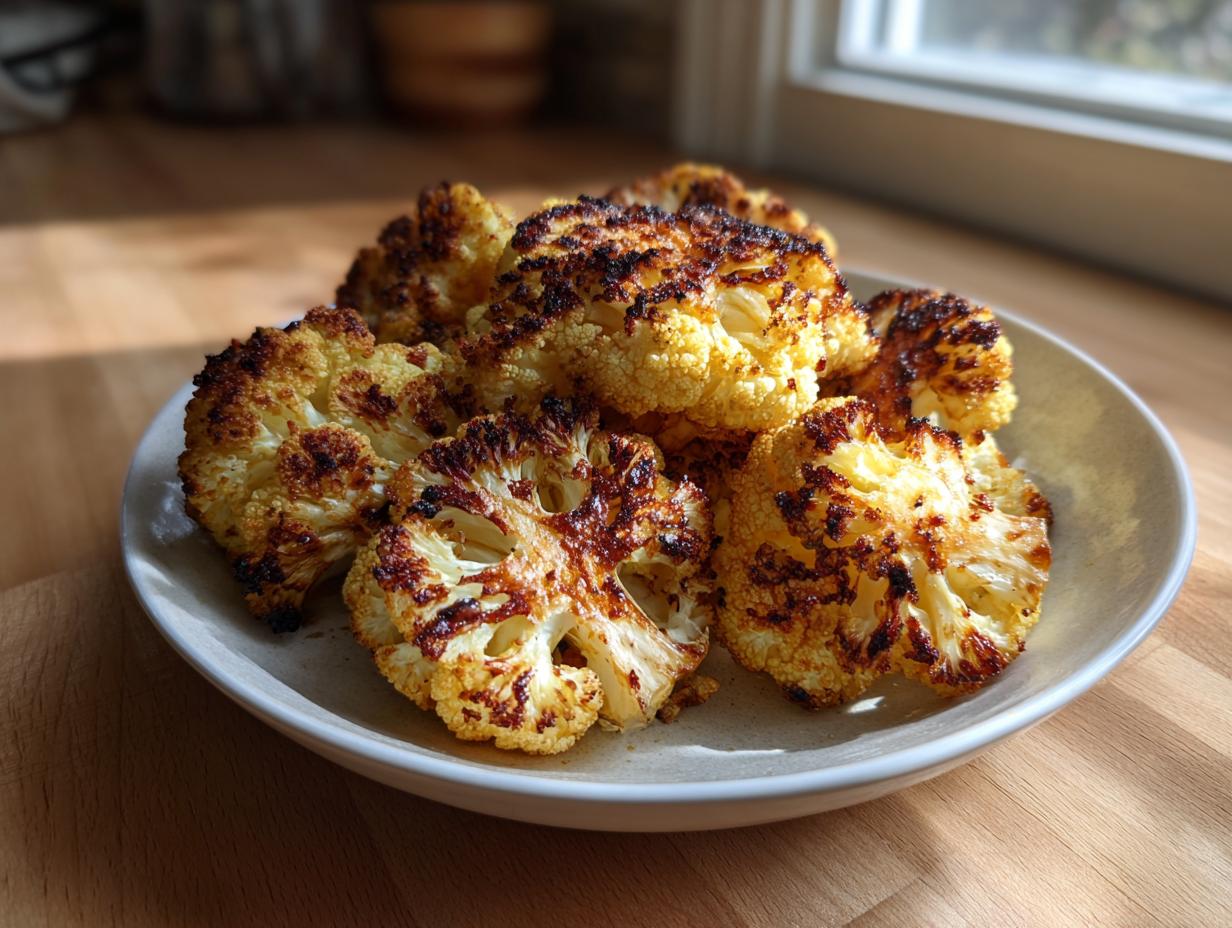
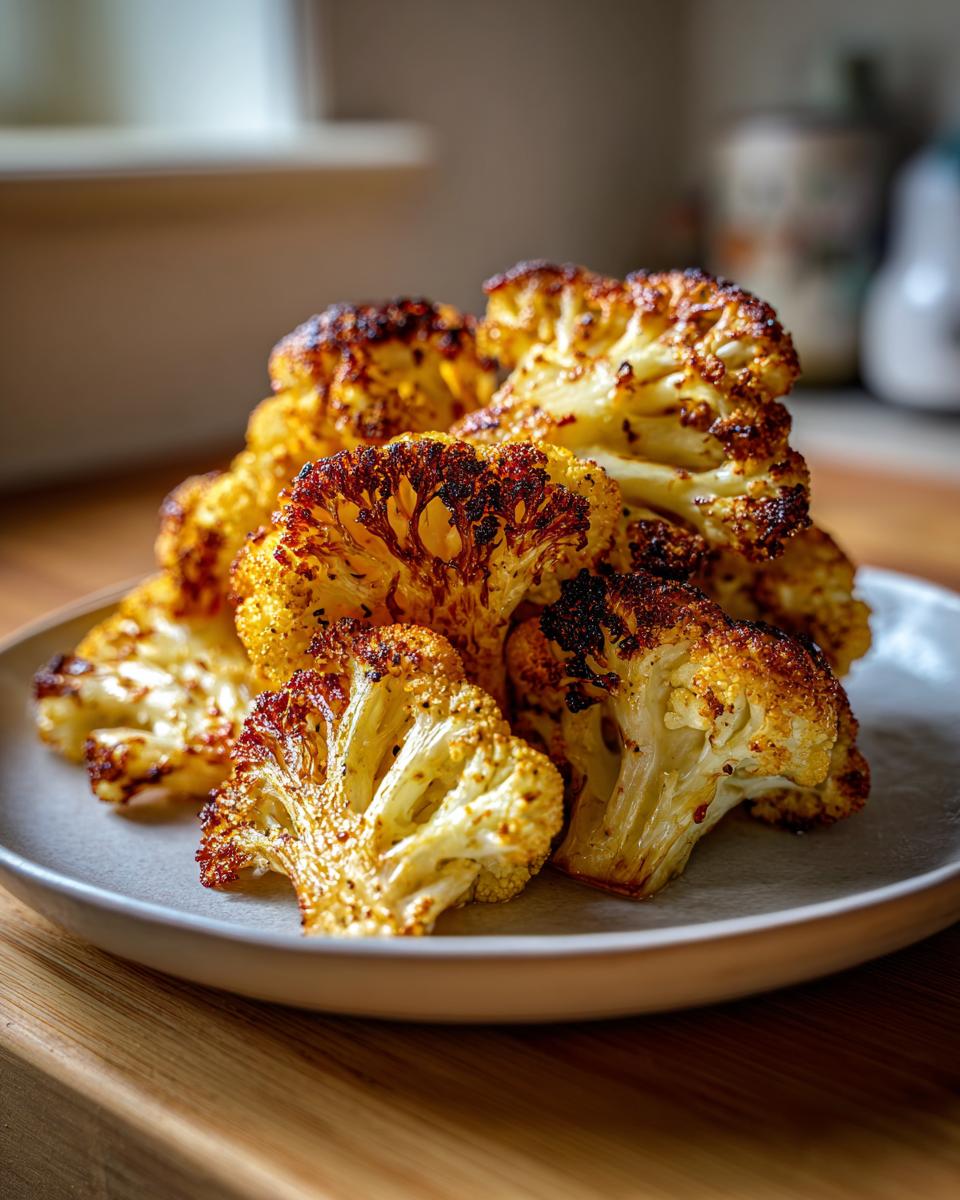
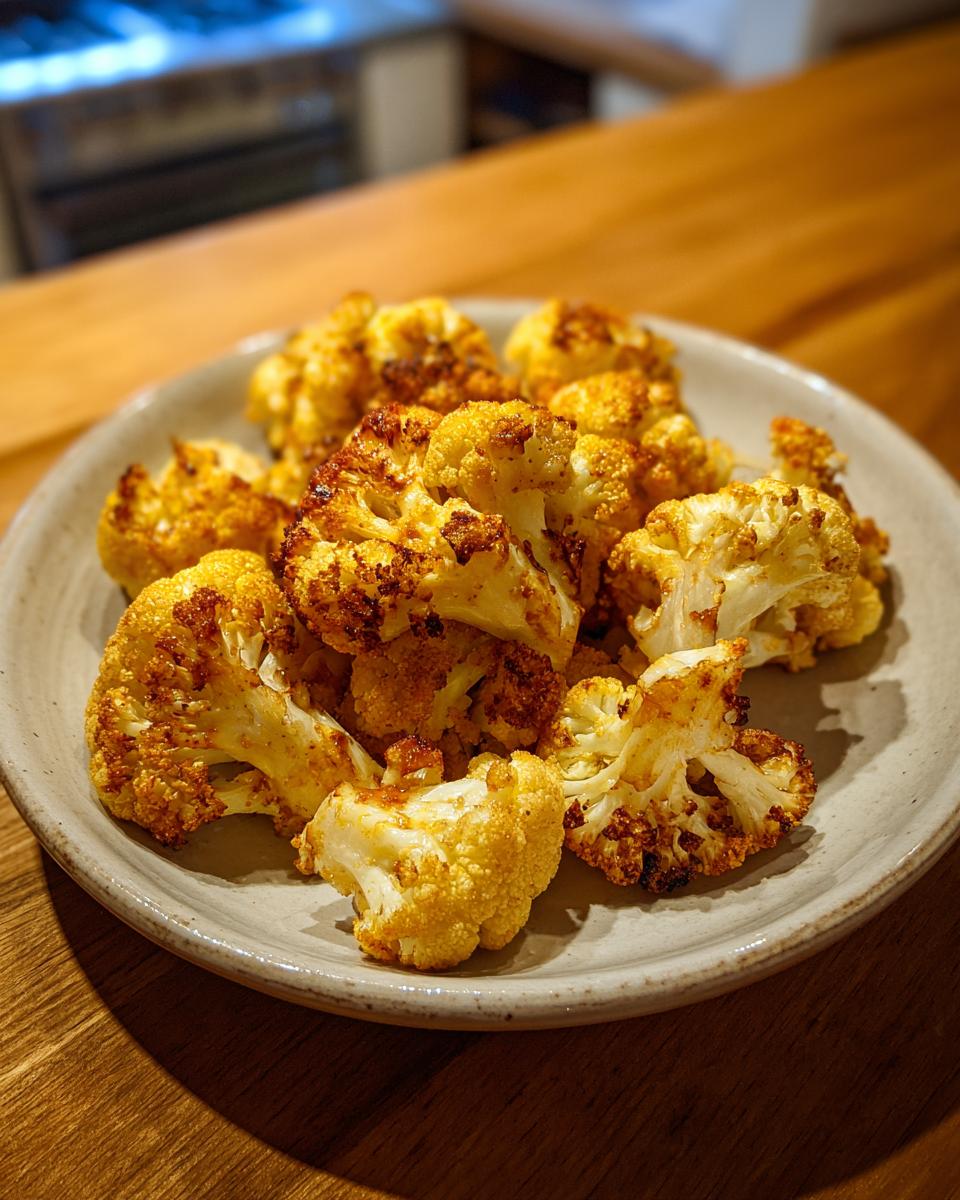
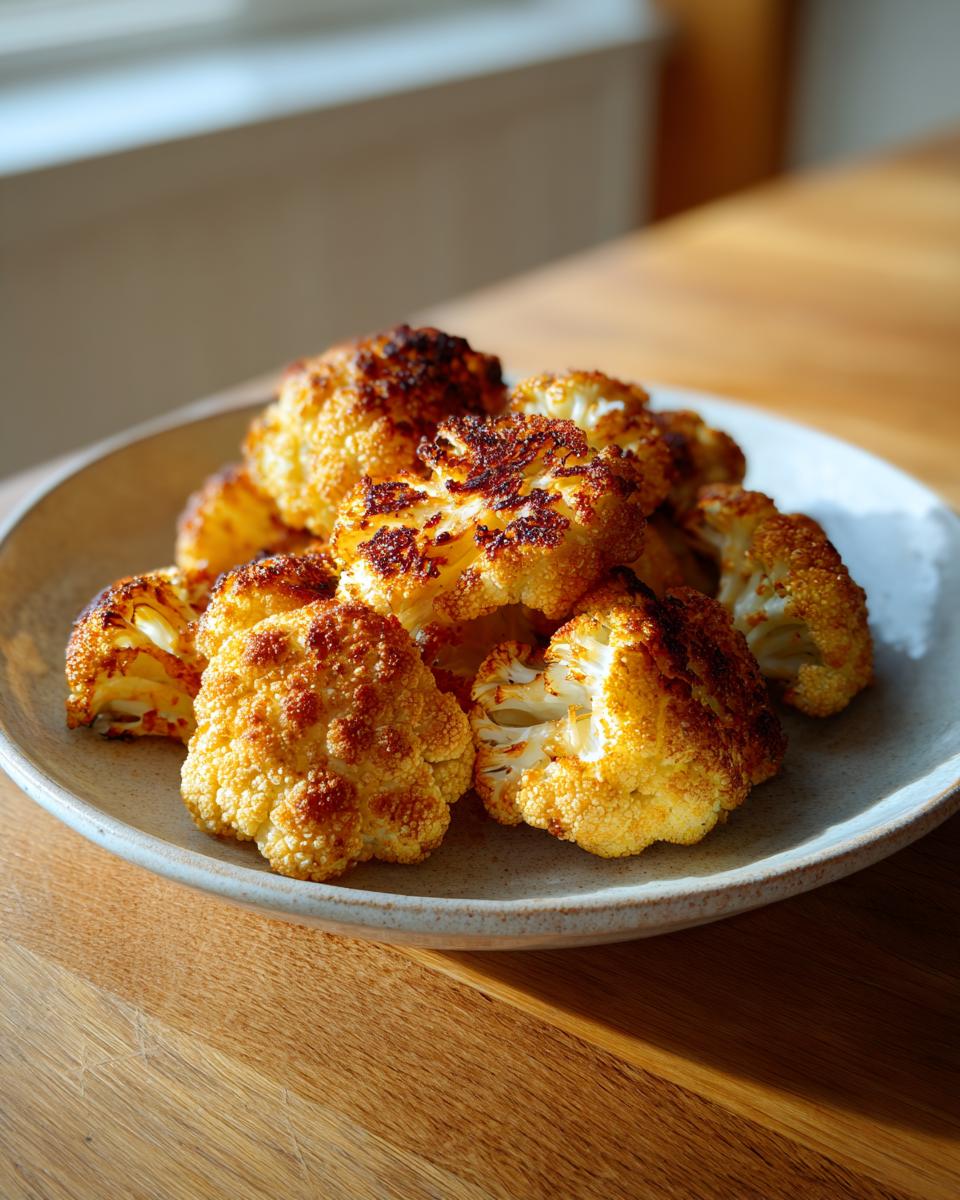
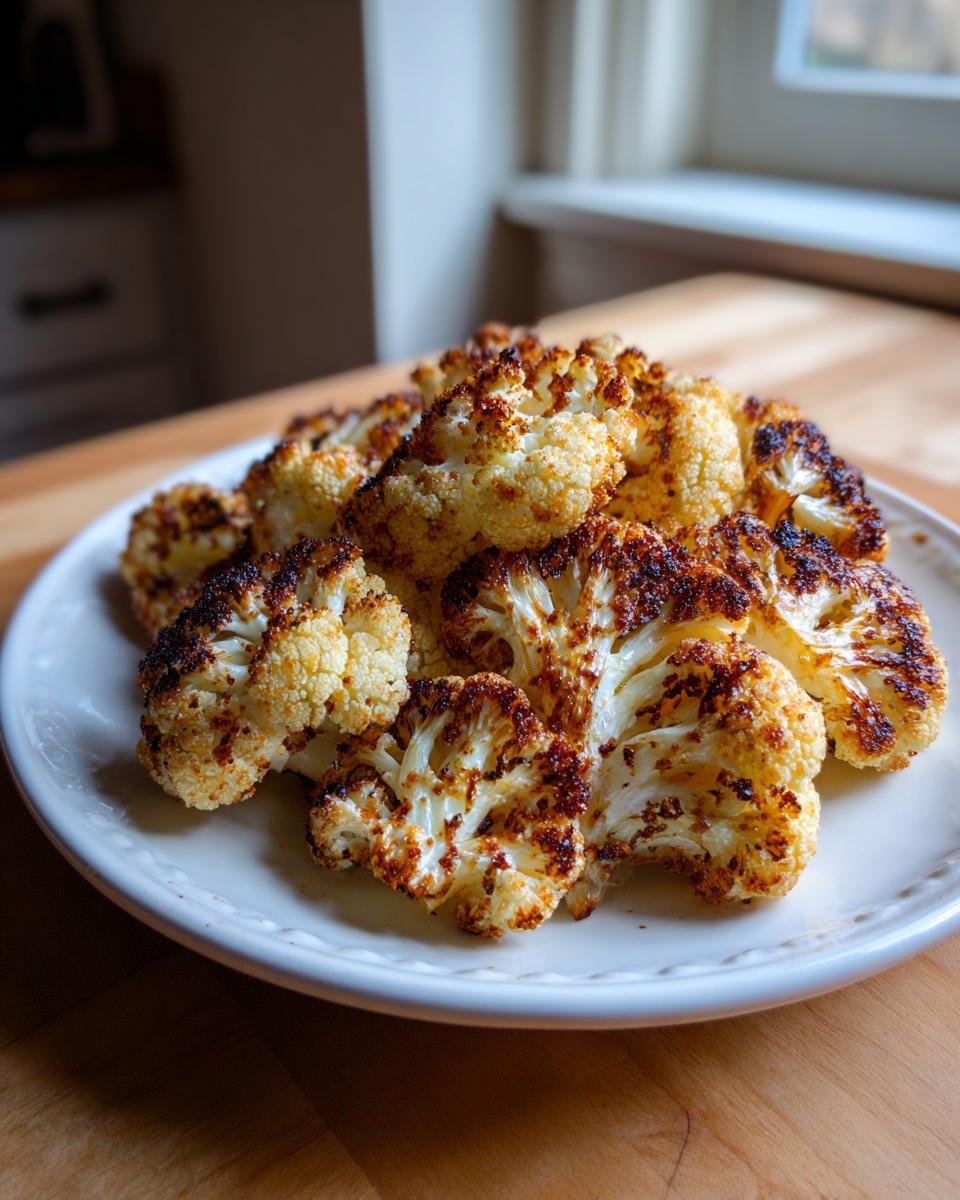
Carefully spread the seasoned cauliflower onto your prepared sheet. And I mean carefully! This is the most critical visual check: they must be in a single layer. If they are piled up, they steam, and steam equals mushy cauliflower, which we absolutely won’t stand for. If you have to use two pans, do it!
Bake them at 425°F for about 20 to 25 minutes total. Around the 12-minute mark, you must pull them out and flip them over. You want that dark, caramelized char on one side, and then you flip so the other side can catch up. When they come out, they should be fork-tender but deeply browned—that’s the sign of amazing roasted cauliflower.
Tips for Achieving The Best Roasted Cauliflower Texture
You know, I spent many afternoons testing this vegetable, trying to figure out why sometimes I got pale, soft blobs instead of those nutty, satisfyingly crisp bites. It all boiled down to a couple of seemingly tiny mistakes that really derail the final product. If texture is your main goal—if you want that perfect crunch that makes this a genuinely healthy side dish—you have to pay attention to how the florets sit on that pan.
We are aiming for that beautiful Maillard reaction, which means two things: lots of heat and plenty of space! Don’t hesitate to pull out a second baking sheet if this means you can spread things out a little more. You absolutely need that direct contact with the hot metal to build that flavor.
Do Not Crowd Your Baking Sheet
This is probably the number one mistake home cooks make with any roasting recipe. Overcrowding the pan traps moisture released by the vegetables—and cauliflower lets go of quite a bit of water! When that steam gets trapped around the florets, they basically steam themselves instead of roast. Steamed cauliflower is soft, a little soggy, and has zero of that amazing, nutty character we’re seeking. For the best roasted cauliflower, every piece needs breathing room around it. It’s the golden rule for crispy oven baked vegetables!
Considering Cauliflower Steaks for a Different Cut
Sometimes I get lazy and just hack up the head, but other times, I want something a little more dramatic that still cooks up gorgeously. In those instances, I switch entirely to cauliflower steaks. You simply slice straight down through the core into thick, one-inch slabs. They take longer to roast—maybe an extra five to ten minutes since they are denser—but they get these huge, impressive, charred edges that look fantastic on any plate. It’s a brilliant way to change up how you present this simple vegetable.
Serving Suggestions for Your Roasted Cauliflower Recipe
Now that you have this perfectly roasted cauliflower—nutty, tender on the inside, and beautifully browned—the real fun starts: deciding what to eat it with! This isn’t just a side dish that sits quietly next to the main course. Oh no, this cauliflower demands attention! Because it’s so sturdy and packed with flavor, it fits right into that spot where you need a great healthy side dish that doesn’t taste like cardboard.
First, you absolutely have to try the finishing touch I mentioned! Right when it comes out of the oven, before it cools down, drizzle it with a little fresh lemon juice or whisked tahini. That bright acidity or creamy nuttiness makes the char pop. If you’re looking for something creamy but don’t want dairy, you can whip up a quick sauce using a recipe like my easy homemade salad dressing recipe as a base for a luxurious drizzle.
For vegan dinner ideas, this cauliflower is killer. You can toss it straight into a grain bowl, maybe over some farro or quinoa. I frequently add a cup of these warm florets over a bed of chickpeas and serve it with a vibrant vinaigrette. It’s also amazing mixed into a hearty salad, similar to how I use beans in my high-protein bean salad—it gives the whole dish substance and texture.
Don’t forget simple pairings! It’s incredible next to grilled tofu or tempeh. Honestly, you can skip the main protein altogether if you toss the roasted cauliflower with some toasted nuts and feta (if you eat dairy). It’s hearty enough all by itself!
Storage and Reheating Instructions for Leftover Roasted Cauliflower
Listen, I know you think this is going to disappear instantly because it’s just that good, but what if you have some leftovers? That’s the beauty of roasting vegetables correctly—they hold up surprisingly well! However, we need to be smart about storage if we want to keep that coveted texture intact. Don’t put those beautiful, charred florets in the fridge right away, though. Let them cool down completely on the counter first. Hot food steaming up in a sealed container is the express lane to a soggy disaster!
Once they are totally cooled, transfer the roasted cauliflower to an airtight storage container. I try to use glass containers if I can; they just seem to manage temperature better. You should get a solid three to four days out of them in the refrigerator. If you wait much longer than that, the texture starts to turn a bit soft, and the flavor just isn’t as bright.
Reheating is where you need to show some respect for the original char! Never, ever use the microwave if you can avoid it—that heat will steam those edges right into oblivion. My absolute favorite way to bring these back to life is back in the oven or in an air fryer. Spread them out again on a baking sheet (or hit the air fryer basket) and bake at a medium heat, say 350°F, for about 5 to 7 minutes. You just want to warm them through and give those edges a little kiss of dry heat again. It revives most of that delightful crispness!
Frequently Asked Questions About Roasted Cauliflower
I get so many messages about vegetable recipes, and I totally get it—it’s easy to mess up the texture! These are the questions I hear the most when folks are trying to master this simple, wonderful roasted cauliflower recipe. Hopefully, these quick tips help you get that perfect, nutty result every single time, whether you’re making this as a basic healthy side dish or incorporating it into something more robust!
Can I use an air fryer for this roasted cauliflower recipe?
Oh absolutely, yes! If you have an air fryer, you can often get even *more* convincing char faster. The air fryer is just like having a tiny, super-powerful convection oven that circulates heat incredibly well. I ditch the baking sheet entirely for this method. Just toss your seasoned florets with a little less oil than the recipe calls for, pop them in the basket (don’t fill it too high—we still don’t want steaming!), and cook at about 400°F for 12 to 15 minutes. Shake the basket halfway through, and they’ll be done!
What spices work well with oven baked vegetables like this?
Garlic powder is great because it’s mellow, but if you want to pivot your flavor profile, you have so many options! Smoked paprika is my absolute favorite addition; it gives everything this warm, rich color and mimics a fire-roasted flavor, especially when paired with the char we get on the roasted cauliflower. A half teaspoon of ground cumin or even a dash of coriander powder really elevates these into something that tastes amazing if you’re serving them alongside other vegan dinner ideas.
How do I ensure my roasted cauliflower is tender inside?
This goes back to the non-crowding rule, but it’s worth repeating! Soft insides and crispy edges are the goal. If you pile them high, the outside roasts while the inside just gets steamy and soft because it can’t release its water. Make sure you can see the baking sheet between most of the pieces. Then, when you test them with a fork, a gentle poke should sink through with minimal resistance. If you have to stab it hard, give it another five minutes. That fork test is your guarantee for perfectly cooked oven baked vegetables.
And hey, if you had so much success with roasting that you ended up with tons of leftovers, you should really check out my recipe for creamy roasted cauliflower soup! It’s a fantastic way to use up the harvest.
Nutritional Snapshot of This Healthy Side Dish
I love that this recipe is not just delicious and textural, but it’s also super clean eating! Since we are aiming for those robust, earthy flavors without heavy sauces, this roasted cauliflower truly shines as a wholesome option. It fits perfectly into so many different eating styles, whether you’re strictly vegan or just trying to get more nutrient-dense healthy side dishes onto your plate.
Here is a quick look at what you can expect from one serving—just remember that because we are using whole ingredients, these numbers are estimates based on my testing! If you use way more oil or add rich toppers like tahini, those calories will climb, but the core vegetable is a powerhouse.
- Serving Size: 1 cup
- Calories: 110
- Fat: 7g (Mostly healthy unsaturated fats!)
- Carbohydrates: 10g
- Fiber: 4g (That’s fantastic for veggie content!)
- Protein: 4g
- Sugar: 4g
- Cholesterol: 0mg
See? Low in sugar, high in fiber—that’s exactly what I want when I’m reaching for something easy to roast alongside the main course. It proves you don’t need loads of processed food to make something satisfying!
Share Your Perfectly Roasted Cauliflower Creations
Well, that’s it! You’ve officially mastered the key to getting that fantastic, nutty char on your vegetables. Now that you’re in command of achieving perfect roasted cauliflower texture, I really, truly want to hear how it went! Did you nail that deep browning on the first try? Tell me everything!
Did you try the tahini drizzle? Or maybe you went bold and used smoked paprika instead of garlic powder? Head down to the comments section and leave a rating for the recipe. Knowing that you successfully followed the high-heat technique builds my confidence that Cookery Command is truly helping you take control in the kitchen. We are all about building skills here, and roasting vegetables without steaming them is a huge win!
If you snap a photo of your perfectly blistered florets—maybe you made cauliflower steaks instead!—tag us on social media. Seeing your success is truly why Emily and the whole team work so hard to test and refine every single recipe we share with you. Happy roasting, friends!
PrintPerfectly Roasted Cauliflower Florets

Achieve nutty, charred cauliflower florets with this simple oven-baked vegetable recipe. It is a reliable, healthy side dish.
- Prep Time: 10 min
- Cook Time: 25 min
- Total Time: 35 min
- Yield: 4 servings 1x
- Category: Side Dish
- Method: Baking
- Cuisine: American
- Diet: Vegetarian
Ingredients
- 1 large head cauliflower, cut into bite-sized florets
- 3 tablespoons olive oil
- 1 teaspoon kosher salt
- 1/2 teaspoon black pepper
- 1/4 teaspoon garlic powder
Instructions
- Preheat your oven to 425 degrees Fahrenheit. Line a large baking sheet with parchment paper for easy cleanup.
- Place the cauliflower florets in a large bowl. Drizzle with olive oil.
- Sprinkle the salt, pepper, and garlic powder over the florets. Toss everything together until the cauliflower is evenly coated.
- Spread the seasoned cauliflower in a single layer on the prepared baking sheet. Do not overcrowd the pan; use two sheets if necessary to promote browning.
- Roast for 20 to 25 minutes, flipping the florets halfway through the cooking time. The cauliflower is done when it is tender inside and has deeply browned, nutty edges.
- Remove from the oven and serve immediately as a healthy side dish or vegan dinner idea.
Notes
- For an earthy modern flavor, toss the finished roasted cauliflower with 2 tablespoons of tahini or a squeeze of fresh lemon juice before serving.
- If you prefer thicker pieces, cut the cauliflower into 1-inch thick cauliflower steaks instead of florets and increase the roasting time by 5 to 10 minutes.
Nutrition
- Serving Size: 1 cup
- Calories: 110
- Sugar: 4
- Sodium: 350
- Fat: 7
- Saturated Fat: 1
- Unsaturated Fat: 6
- Trans Fat: 0
- Carbohydrates: 10
- Fiber: 4
- Protein: 4
- Cholesterol: 0