
Oh, I remember the smell of the fairgrounds perfectly! That pure, sticky sweetness that instantly takes you back to childhood summers—that’s what we’re bottling up today. Forget those dry, overly sweet grocery store versions; we are making the ultimate cotton candy cake. This isn’t just a dessert; it’s a showstopper, guaranteed to bring smiles with those gorgeous pastel swirls. My promise to you, coming from my years spent blending heritage baking with modern technique, is that this recipe is utterly reliable. You are going to achieve that incredibly fluffy cake recipe texture and the most authentic sweet carnival flavor you’ve ever tasted in a homemade cake.
- Why This Cotton Candy Cake Recipe is Your Next Showstopper Dessert
- Ingredients for Your Fluffy, Pastel Cotton Candy Cake
- Step-by-Step Instructions for the Cotton Candy Cake
- Tips for Success When Making a Cotton Candy Cake
- Ingredient Notes and Substitutions for Nostalgic Baking
- Storage and Serving Suggestions for Your Cotton Candy Cake
- Frequently Asked Questions About Making a Cotton Candy Cake
- Estimated Nutritional Data for This Cotton Candy Cake
- Share Your Whimsical Desserts Creation
Why This Cotton Candy Cake Recipe is Your Next Showstopper Dessert
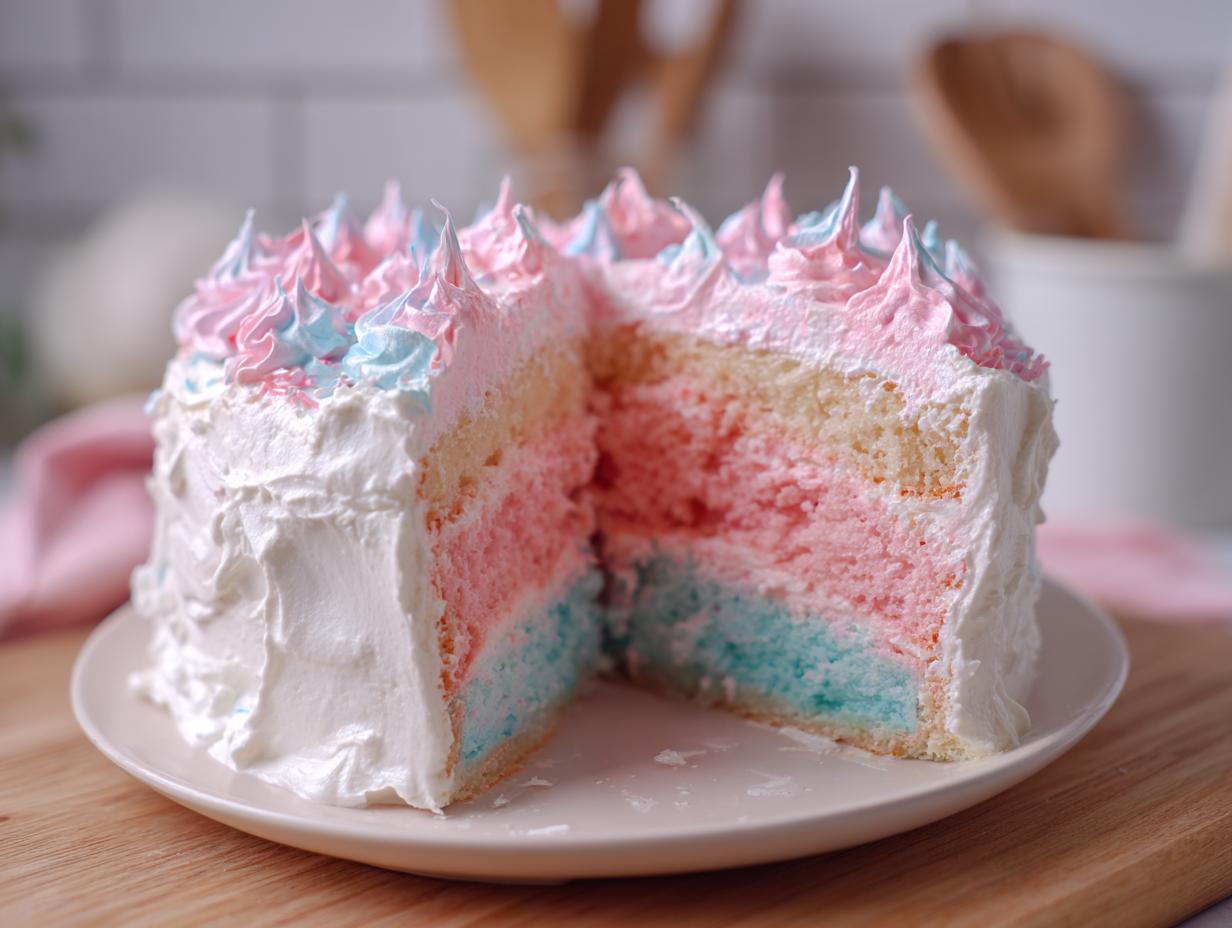
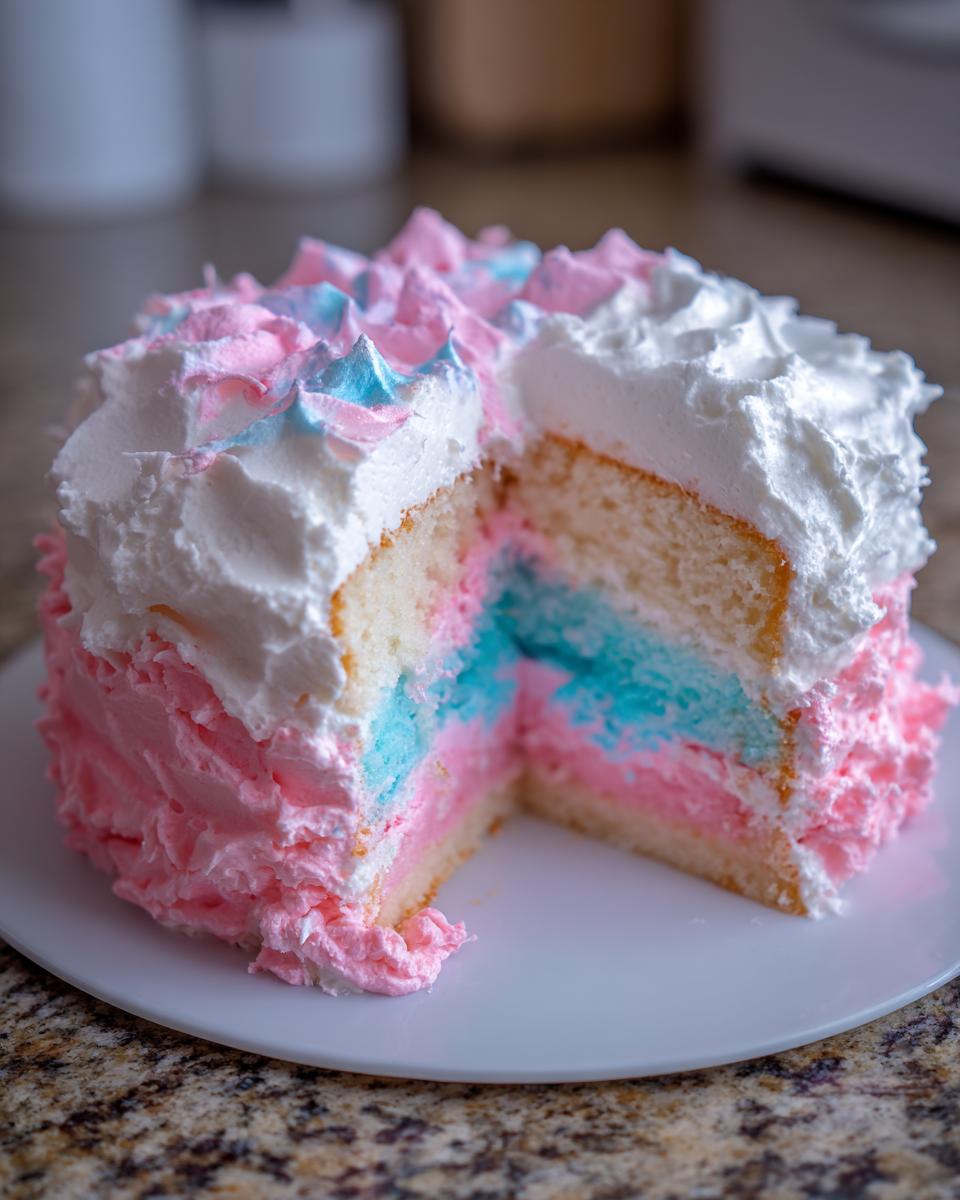
Honestly, when you see those vibrant pink and blue layers, you expect a complicated process, but that’s where we take command! This isn’t one of those sad, overly artificial cakes you get from a box mix. This cotton candy cake delivers real bounce and that unmistakable sweet carnival flavor. It truly becomes a showstopper dessert because we nailed the texture while keeping the steps simple enough for any celebration. Trust me, seeing this cake on the table makes any event feel instant party magic.
Achieving the Fluffy Cake Recipe Layers
The fluffiness comes down to technique, my friend. We make sure the butter and sugar are perfectly creamed to whip in air, and we use just the right amount of leavening. It’s about aeration before baking, which guarantees that light, airy crumb you want in a fluffy cake recipe, not a dense brick!
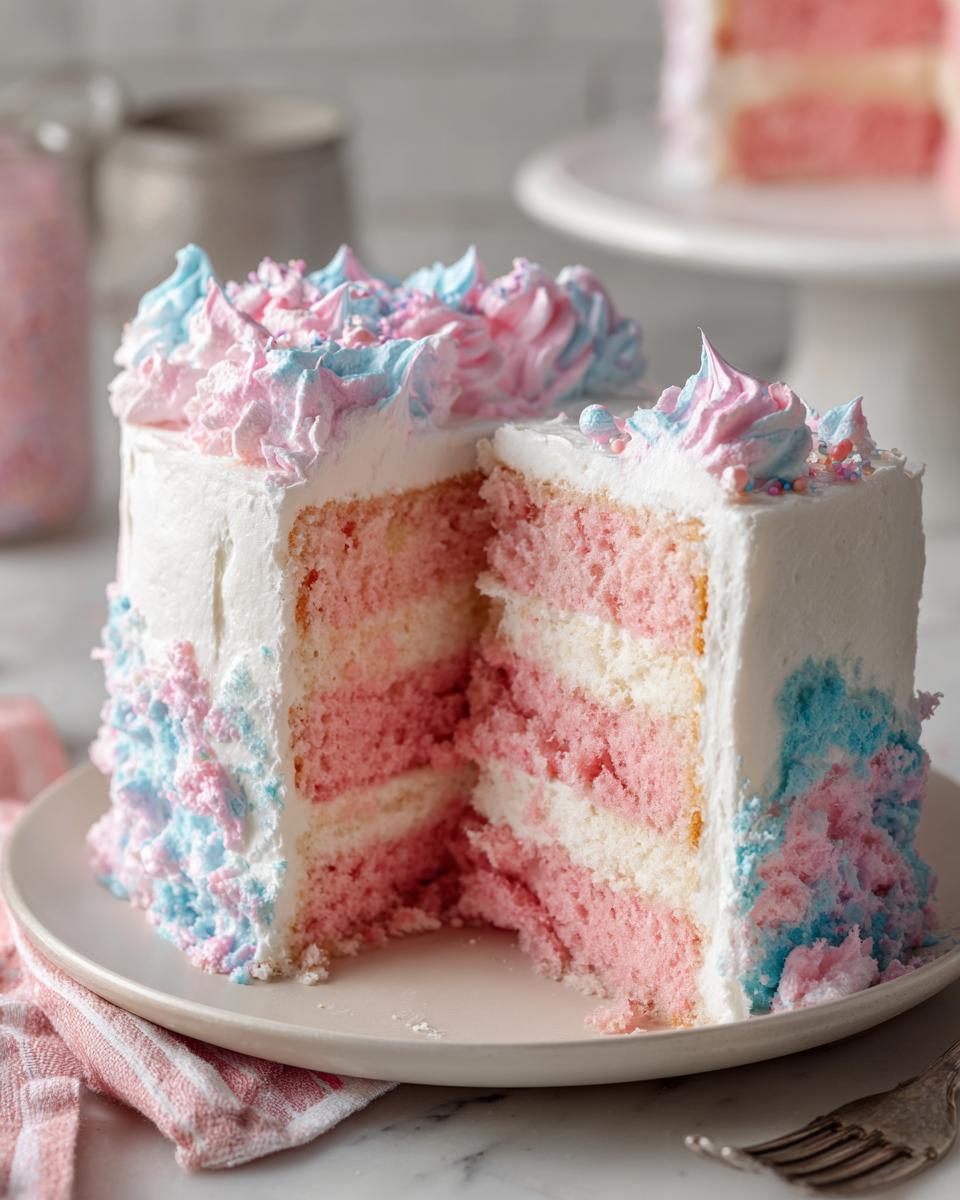
Creating the Perfect Pastel Birthday Cake Look
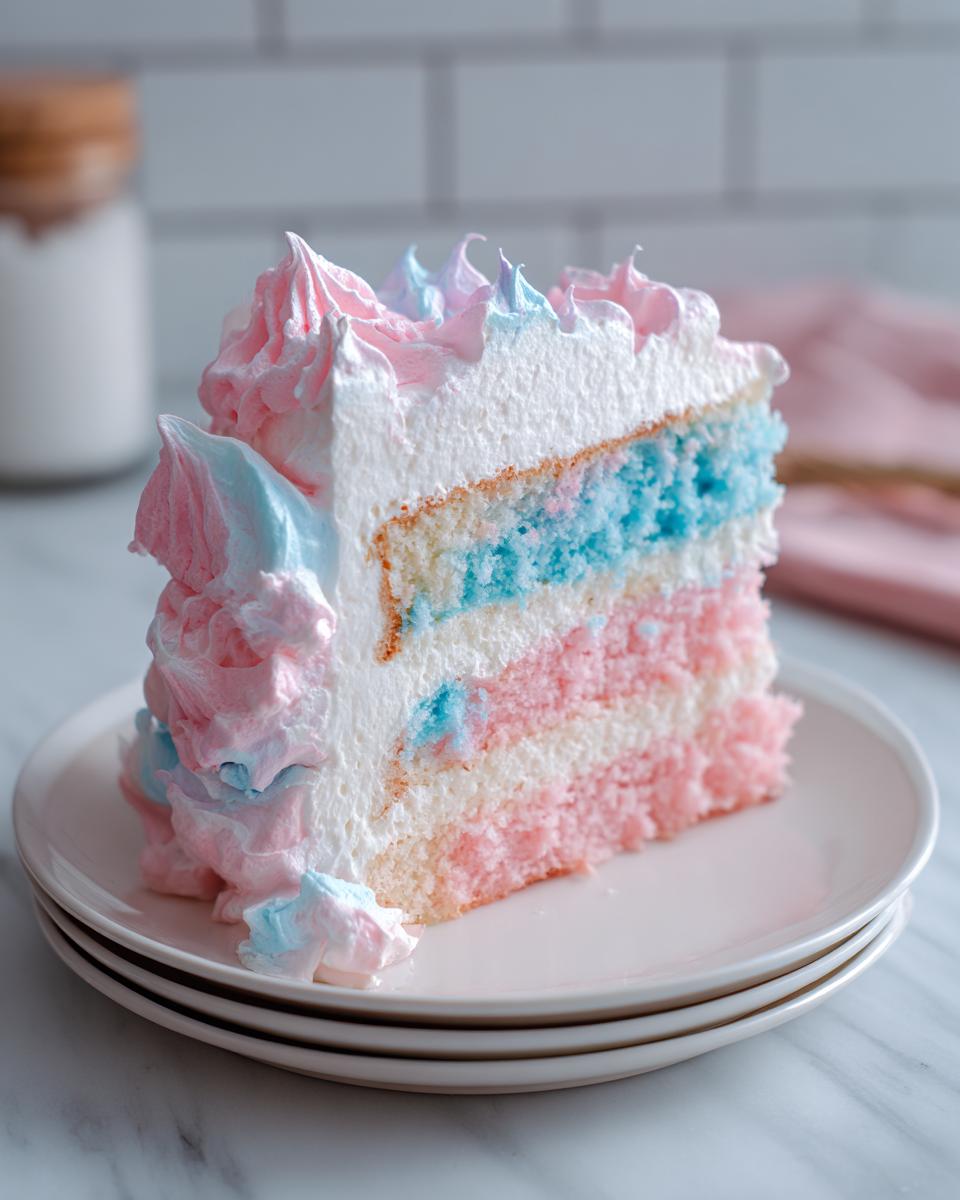
Getting those dreamlike pink and blue hues is easy with gel coloring—liquid coloring can thin out the batter too much. Dividing the batter evenly ensures that gorgeous, soft swirl when the layers are stacked. This makes it the perfect pastel birthday cake and a guaranteed hit for any kids party dessert!
Ingredients for Your Fluffy, Pastel Cotton Candy Cake
Alright, let’s get organized! Making a showstopper cotton candy cake is a beautiful balancing act, and having everything measured out beforehand is the first step toward total command in the kitchen. We are separating these ingredients into two groups: what goes into our light cake layers and what makes the amazing homemade cotton candy frosting. You’ll notice that we need specific things, like flavoring oil instead of extract, to keep that sweet flavor true without adding extra liquid that might throw off our fluffy texture.
For the Cotton Candy Cake Layers
Remember what I said about technique? Well, it starts here! Your eggs and milk absolutely need to be at room temperature. Trust me on this one—it helps everything emulsify beautifully, creating that smooth, consistent batter we need before we divide it up for coloring. Here’s what you need for those light layers:
- 1 1/2 cups all-purpose flour
- 1 1/2 teaspoons baking powder
- 1/2 teaspoon salt
- 1 cup granulated sugar
- 1/2 cup unsalted butter, softened (and I mean softened, not melted!)
- 2 large eggs (room temperature is key!)
- 1 teaspoon vanilla extract
- 1/2 cup whole milk (also room temperature, please!)
- 1/2 teaspoon clear cotton candy flavoring oil
- Pink gel food coloring
- Blue gel food coloring
For the Homemade Cotton Candy Frosting
The frosting is where we get that incredible smooth finish. The butter needs to be perfectly soft so it creams up without any lumps. We want airy volume, not greasy clumps, so don’t try to rush this part! If you need pointers on making fantastic buttercream in general, I have a guide to cream cheese frosting basics that applies a lot here, too.
- 1 cup (2 sticks) unsalted butter, softened
- 4 cups powdered sugar, sifted (yes, sifted! Don’t skip this for smoothness)
- 1/4 cup heavy cream
- 1/2 teaspoon clear cotton candy flavoring oil
- Pinch of salt
- Pink and blue cotton candy, for topping (the fresh stuff works best!)
Step-by-Step Instructions for the Cotton Candy Cake
Okay, deep breath! This is the part where we switch from preparation to creation. This cotton candy cake looks like it took days, but I promise you, once you’re mixing, it moves fast. The secret to keeping it a wonderful easy baking project is moving through these steps deliberately. We’re focusing on gentle mixing to keep that amazing air we whipped in earlier. If you follow these steps for your homemade cake from scratch exactly, you’ll get that heavenly texture every time.
Preparing the Fluffy Cake Batter and Coloring
First things first: get that oven going up to 350°F (175°C). While it warms up, grease and flour those 8-inch pans and don’t forget the parchment paper on the bottom—it’s insurance against sticking! Whisk your dry ingredients (flour, powder, salt) separately. In your main bowl, cream that butter and sugar until it’s pale and fluffy. Eggs go in one by one, followed by your vanilla and that key cotton candy oil. Now, for the structure: mix the dry goods in slowly, alternating with the milk—always starting and ending with the dry stuff. Stop mixing the second it’s combined! That’s crucial for your fluffy cake recipe success. Step five is the fun part: divide that batter and gently fold in just enough pink gel into one and blue gel into the other until you get beautiful, light pastels.
Baking, Cooling, and Making the Cotton Candy Frosting
Pour the colors into their respective pans and bake them for about 28 to 32 minutes. You’ll know they’re done when your toothpick comes out clean. Ten minutes in the pan, then flip ‘em onto a rack to cool completely—no rushing here, or we ruin the structure! While they cool, we whip up the frosting. If you need a refresher on getting ultra-smooth buttercream, check out my tips on vanilla buttercream because the process is similar! Beat that softened butter until it’s smooth as silk. Then, low speed: add the sifted powdered sugar, alternating with the heavy cream until it comes together. Only then do you crank the mixer high, adding that last bit of flavoring oil and salt, beating it for a full five minutes until it’s unbelievably light. That’s how you get the right consistency for your cotton candy frosting!
Assembling Your Cotton Candy Cake
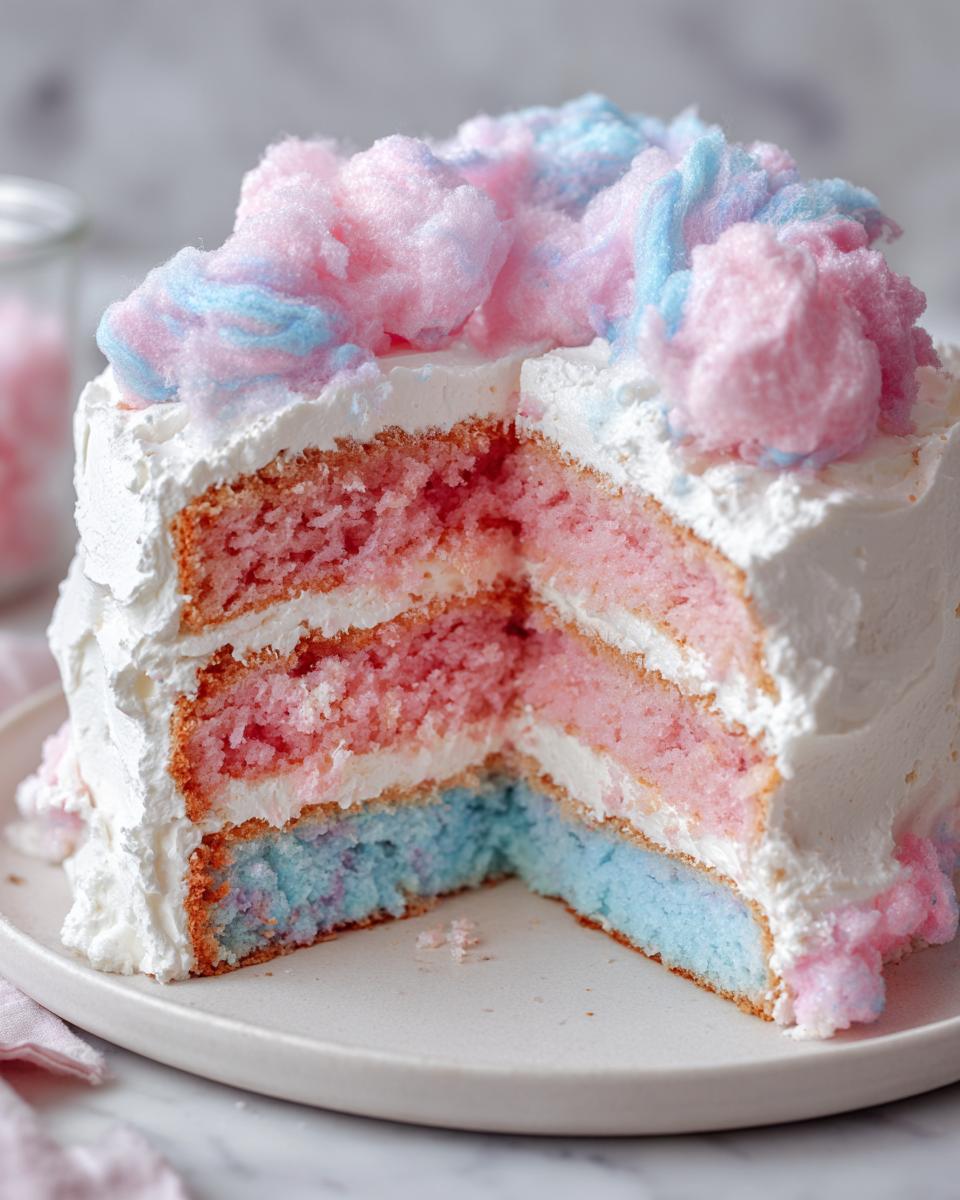
Time to stack! Bottom layer down, spread about a third of that fluffy frosting across the top. Place that second layer right on top. Now, take the rest of your frosting and cover the whole deal—top and sides. If you want those gorgeous colorful buttercream swirls that make this such a whimsical dessert, here’s the trick: reserve just a tiny bit of the white frosting, dye a spoonful pink and a spoonful blue, dollop those colors onto the outside, and gently swirl them in with an offset spatula just once or twice. Finally, top it with that incredible fluffy pink and blue cotton candy, but wait—just before you serve it, okay?
Tips for Success When Making a Cotton Candy Cake
We’ve done the heavy lifting creating this gorgeous cotton candy cake, but a few final bits of advice can take it from great to absolutely legendary. When you’re dealing with something that looks this fun and whimsical, the small details really matter for textural success. This recipe for fun celebration cakes is so dependable because we’ve accounted for the tricky spots. If you’re worried about sinking or dissolving cotton candy, stick close to these final commands for serving perfection! If you love making fun desserts, you should check out my guide to making other fun easy baking projects too.
Ingredient Temperature Matters for Your Cotton Candy Cake
I can’t stress this enough: room temperature eggs and milk are non-negotiable for the cake layers. When cold ingredients hit that creamed butter and sugar, they seize up! That instantly deflates the air you worked so hard to whip into the mixture—and that air is what gives you that signature fluffy cake recipe structure. Cold ingredients cause the batter to break, leading to uneven mixing and a denser cake. It takes extra planning, but setting out your eggs and milk thirty minutes before you start makes all the difference between a perfectly emulsified batter and one that fights you.
Timing the Addition of Fluffy Cotton Candy Topping
This is the moment where you need that last bit of strategic planning! That beautiful fluffy topping—the actual cotton candy—is basically spun sugar and air. In humid conditions, or even just sitting out for too long, it starts to weep and melt right into your beautiful cotton candy frosting. Because of this, you absolutely must reserve applying the topping until the very last second before slicing and serving. If you are making the pastel birthday cake the day before, store it wrapped well in the fridge, but leave the topping off entirely. Just before the party starts, grab your pink and blue fluff and press it gently onto the top frosting. It’s the only way to guarantee that pure, delightful sweetness lasts!
Ingredient Notes and Substitutions for Nostalgic Baking
When we create a truly memorable cotton candy cake, the ingredients are where we cement that sense of fun and nostalgia—this is serious nostalgic baking, after all! Since cotton candy itself doesn’t really have a vanilla base—it’s just pure, bright sugar flavor—we use a standard, quality vanilla cake recipe for our layers. Don’t try to overcomplicate the cake itself; we want that soft, fluffy texture we worked so hard for! The magic flavor comes almost entirely from that special flavoring oil we call for.
This is super important: You must use clear cotton candy flavoring oil, not an extract. Extracts usually contain alcohol and water, which can change the delicate structure of our batter and frosting. Because the oil is concentrated, it gives us that intense, sweet carnival flavor without introducing excess liquid that would compromise the fluffiness. If you use an extract, you’re going to end up with a weaker flavor and potentially a slightly denser crumb. It’s worth seeking out the oil—it’s the difference between tasting ‘pink’ and tasting true cotton candy cake!
If you can’t find the specific oil, vanilla is your fallback, but you’ll miss that distinct note. If you go with vanilla, you might want to slightly increase the sugar in the frosting to compensate for the lack of that artificial bright sweetness. But the goal here is authenticity, so hunt down that clear oil! When you’re experimenting with these components, remember the rules we established about temperature and creaming; they apply no matter what flavorings you decide to use. Ready for more kitchen commands? I have a fantastic, easy easy maple fudge recipe in the archives if you want to keep that sweet baking momentum going!
Storage and Serving Suggestions for Your Cotton Candy Cake
Now that you’ve created this magnificent, whimsical showstopper, how do we keep it looking amazing until party time? Storing a cotton candy cake requires a little strategy because of that gorgeous, fluffy topping we added right at the end! We need to keep the structure firm but protect the integrity of that sweet, airy fluff.
For storage, if you haven’t added the actual cotton candy topping yet, you can keep the frosted cotton candy cake tightly covered in the refrigerator for up to three days. The cold keeps the buttercream firm, which is great for transport. However, cake never tastes its best straight from the fridge! About an hour before you plan to serve it, take it out and let it sit on the counter to come up to room temperature. This allows the butter in the cake and frosting to soften just slightly, bringing out the full flavor and restoring that incredible fluffiness we worked so hard to achieve. It’s amazing how much flavor gets locked up when it’s too cold!
But here is the absolute golden rule: Only apply the actual pink and blue cotton candy right before presentation. Seriously, give yourself five minutes max! If you try to store the cake with the cotton candy on it, humidity in your fridge or even your kitchen air will cause it to dissolve into sticky, damp puddles. That’s the biggest bummer for a pastel birthday cake!
When it comes to serving these incredible sweet treat ideas, you really don’t need much fuss alongside such a bold dessert. Since the cake is incredibly sweet, simple complements work best. I love serving slivers of this cake alongside a scoop of really good, plain vanilla bean ice cream—the cold richness contrasts beautifully with the cake’s sugary notes. If you’re doing a main party spread, I always find that a nice, crisp sparkling cider or even just cold water helps cleanse the palate between those super-sweet bites. If you want more easy sweet treat ideas for party prep, you should definitely peek at my guide for an easy ice cream pie, which is great for making ahead!
If you happen to have leftovers—which I doubt, because this cotton candy cake disappears fast—you can store the unwrapped, un-topped frosted cake in an airtight container on the counter for a day. For longer storage, wrap slices tightly in plastic wrap and freeze them for up to a month. Just thaw them on the counter before indulging in that wonderful sweet carnival flavor again! And hey, if you need some great savory items for appetizers to balance out all this sugar, I have some thoughts on easy appetizers and snacks too!
Frequently Asked Questions About Making a Cotton Candy Cake
I get so many great questions whenever I share this cotton candy cake recipe, which is wonderful! It just shows how excited everyone is to make this incredible showstopper dessert at home. I’ve gathered the ones I hear most often, especially about achieving that specific look and that powerful sweet carnival flavor. Getting these details right is how you take command of your baking and turn this into your new favorite fun celebration cakes recipe!
Can I make the pink and blue cake layers swirl together instead of separate?
Yes, you totally can, especially if you love that classic marbled look! If you prefer a swirl over the distinct pink and blue layers, the method changes slightly during step five. Instead of pouring all the pink batter into one pan and all the blue into the other, you alternate spoonfuls of each color directly into your prepared baking pans. You want to drop them somewhat randomly across the bottom. Then, take a butter knife—nothing fancy, just a regular one—and gently run it through the batter once or twice in a figure-eight motion. Stop immediately! Over-swirling is the enemy here; it just makes mud. We are looking for clouds of color blending together, not total integration. Keep checking those edges for doneness, as the subtle temperature difference between the two batters can sometimes slightly alter the bake time.
How do I get the Cotton Candy Frosting to taste strong enough?
That rich, bright flavor is key to this whole whimsical dessert experience! The best way to guarantee a strong taste in the cotton candy frosting is using that high-quality, clear cotton candy flavoring oil we talked about. Extracts often dilute the flavor profile because they are water-based, but the oil packs a punch without ruining your frosting’s texture. If you’ve used the oil and still crave just a little extra nostalgic kick, here’s a little trick from my test kitchen notes: take about half a cup of dry, fluffy cotton candy—the pink or blue kind—and gently crush it between your fingers until it’s almost powder. Then, fold that dry powder into your finished white frosting right before you frost the cake. It dissolves slightly, boosting both flavor and color intensity, but remember what I said: only do this right before you are ready to cover the cake!
Is this a suitable Homemade Cake From Scratch for beginners?
Absolutely, yes! I know this cake looks incredibly complicated because of the colors and the towering layers, but I developed this recipe specifically so that anyone could master it. At its core, this is a very reliable homemade cake from scratch recipe based on a standard, tender butter cake. The process of creaming the butter, alternating the wet and dry ingredients, and using reliable leavening agents are fundamental skills that, when followed closely, yield perfection. This is a fantastic easy layer cake project to build your confidence! Once you master the basic batter, dividing and coloring it becomes intuitive. Don’t let the fun facade intimidate you; your first try at this kids party dessert is going to be a huge success if you just follow the mixing commands carefully!
If you have any other questions after you’ve tried it out, feel free to look through my other extensive guides on baking techniques, like how to make this amazing easy Mexican street corn dip—wait, wrong section! (Oops, my command center is focused on sweets today!) Just kidding—if you have more baking questions, you know where to find me!
Estimated Nutritional Data for This Cotton Candy Cake
Now, I always share the nutritional rundown for my recipes from my test kitchen because I believe in transparency when you’re commanding your kitchen, even when dealing with something as perfectly fun as a cotton candy cake. Because this is a richer, homemade cake utilizing real butter and substantial sugar for that incredible structure and flavor, the numbers reflect a truly decadent slice. Remember, these figures are always estimates!
We base these calculations on the ingredients listed and standard portion sizes (about 1/10th of the cake). Your final numbers could shift just a bit depending on the specific brands of butter, cream, or the exact amount of frosting you decide to slather on your layers. But this gives you a solid baseline for enjoying this showstopper dessert responsibly!
- Serving Size: 1 slice (about 1/10th of the cake)
- Calories: 450
- Sugar: 65g (That’s where the fun lives!)
- Sodium: 250mg
- Fat: 20g
- Saturated Fat: 12g
- Unsaturated Fat: 8g
- Trans Fat: 0g
- Carbohydrates: 68g
- Fiber: 1g
- Protein: 4g
- Cholesterol: 75mg
There you have it! It’s a celebration cake, absolutely—meant to be enjoyed fully and joyfully. If you are looking for something lighter, you might want to check out my guide on easy appetizers and snacks for something savory to balance out all that sweetness, but honestly, when you make a cotton candy cake, you just lean into the joy of it!
Share Your Whimsical Desserts Creation
Now that you’ve taken command of the recipe and created your own spectacular cotton candy cake, I genuinely want to see the magic you made! Sharing our successes—and even our funny little baking oops moments—is what builds confidence in the kitchen. This is where Cookery Command really comes alive: connecting home cooks who dare to create something truly fun and colorful.
If you followed these steps for the perfect fluffy cake recipe and ended up with that stunning pastel birthday cake, please take a picture! Snap that shot of your finished cake before the kids devour it, tag us on social media, and use that hashtag so I can find it. Seriously, seeing your amazing frosting work and those vibrant layers means the world to me.
And if you loved how this showstopper dessert turned out, please come back here and leave a rating! Five stars lets me know I’ve provided you with a recipe that is reliable and truly delivers that blast of sweet carnival flavor we were aiming for. Your feedback helps me keep refining and testing things so I can bring you more fantastic whimsical desserts like this one. If you have any final questions or want to drop me a line about your experience, you can always reach out through the Contact page. Happy baking, and I can’t wait to see your beautiful swirls!
PrintThe Ultimate Fluffy, Pastel Cotton Candy Cake Recipe with Homemade Cotton Candy Frosting

Create a magical cotton candy cake that is wonderfully sweet and fluffy. This easy recipe delivers soft, pastel-colored layers and a homemade cotton candy frosting, perfect for birthdays and fun celebrations.
- Prep Time: 30 min
- Cook Time: 35 min
- Total Time: 65 min
- Yield: 10 servings 1x
- Category: Dessert
- Method: Baking
- Cuisine: American
- Diet: Vegetarian
Ingredients
- 1 1/2 cups all-purpose flour
- 1 1/2 teaspoons baking powder
- 1/2 teaspoon salt
- 1 cup granulated sugar
- 1/2 cup unsalted butter, softened
- 2 large eggs
- 1 teaspoon vanilla extract
- 1/2 cup whole milk
- 1/2 teaspoon clear cotton candy flavoring oil
- Pink gel food coloring
- Blue gel food coloring
- 1 cup (2 sticks) unsalted butter, softened (for frosting)
- 4 cups powdered sugar, sifted (for frosting)
- 1/4 cup heavy cream (for frosting)
- 1/2 teaspoon clear cotton candy flavoring oil (for frosting)
- Pinch of salt (for frosting)
- Pink and blue cotton candy, for topping
Instructions
- Preheat your oven to 350°F (175°C). Grease and flour two 8-inch round cake pans. Line the bottoms with parchment paper.
- In a medium bowl, whisk together the flour, baking powder, and salt. Set aside.
- In a large bowl, cream together the granulated sugar and softened butter until light and fluffy. Beat in the eggs one at a time, mixing well after each addition. Stir in the vanilla extract and cotton candy flavoring oil.
- Gradually add the dry ingredients to the wet ingredients, alternating with the milk, beginning and ending with the dry ingredients. Mix until just combined; do not overmix.
- Divide the batter evenly between two bowls. Add a few drops of pink gel food coloring to one bowl and blue gel food coloring to the other. Gently fold the color into each batter until you achieve a light pastel shade.
- Pour the pink batter into one prepared pan and the blue batter into the other pan. Bake for 28 to 32 minutes, or until a toothpick inserted into the center comes out clean.
- Let the cakes cool in the pans for 10 minutes before inverting them onto a wire rack to cool completely.
- Prepare the Cotton Candy Frosting: In a large bowl, beat the softened butter until smooth. Gradually add the sifted powdered sugar, alternating with the heavy cream, mixing on low speed until combined.
- Add the cotton candy flavoring oil and salt. Increase the mixer speed to medium-high and beat for 3 to 5 minutes until the frosting is light and fluffy.
- To assemble the cake, place one cooled cake layer on a serving plate. Spread about one-third of the frosting evenly over the top. Place the second cake layer on top.
- Frost the top and sides of the entire cake with the remaining frosting. For a whimsical look, you can swirl small amounts of remaining pink and blue coloring into the white frosting before applying the final coat.
- Top the finished cake with fluffy pink and blue cotton candy just before serving.
Notes
- For the fluffiest cake layers, make sure your milk and eggs are at room temperature before mixing.
- Do not add the cotton candy topping until immediately before you plan to serve the cake, as it will dissolve quickly, especially in humid conditions.
- If you want a stronger cotton candy flavor, you can gently fold a small amount of finely crushed, dry cotton candy into the frosting just before the final spread.
Nutrition
- Serving Size: 1 slice
- Calories: 450
- Sugar: 65
- Sodium: 250
- Fat: 20
- Saturated Fat: 12
- Unsaturated Fat: 8
- Trans Fat: 0
- Carbohydrates: 68
- Fiber: 1
- Protein: 4
- Cholesterol: 75