
The weather just turned gorgeous, hasn’t it? Suddenly, the thought of turning on the oven for a May evening gathering feels downright criminal. You need something spectacular that requires zero fuss and definitely zero heat, right? Trust me, I get it! That’s where this incredible, simple Oreo icebox cake swoops in to save your gathering. Here at Cookery Command, Emily Harrison always says the kitchen should be a place of joy, not complication, and this recipe is pure, chilled joy. It comes together so fast, and I promise you, no one will ever guess this stunning, creamy treat only needs three core ingredients. If you want more like this, you can check out our collection of easy 3 ingredient desserts. Get ready for the easiest, most impressive chilled dessert you’ll ever assemble.
- Why This Oreo Icebox Cake is Your Perfect No-Bake Solution
- Gathering Ingredients for Your Oreo Icebox Cake
- Essential Equipment for Assembling the Oreo Icebox Cake
- Step-by-Step Instructions to Assemble the Oreo Icebox Cake
- Expert Tips for the Best Oreo Icebox Cake Results
- Variations for Your No Bake Oreo Cake
- Storage and Make-Ahead Instructions for Your Oreo Icebox Cake
- Frequently Asked Questions About the Oreo Icebox Cake
- Estimated Nutritional Snapshot of This Oreo Icebox Cake
Why This Oreo Icebox Cake is Your Perfect No-Bake Solution
When you need a showstopper without the sweat, this is the answer. This recipe nails that maximum impact, minimum effort balance we all crave for a Friday night!
- It’s lightning fast to assemble—less than fifteen minutes of active work.
- We only need three main ingredients, keeping your shopping list short.
- It’s the ultimate summer savior since it requires zero oven time.
We test every single recipe rigorously here, and this no bake Oreo cake is rock solid reliable. You can trust it will come out perfectly creamy and soft after chilling. For more simple preparations, take a peek at my guide to no bake granola bars.
Gathering Ingredients for Your Oreo Icebox Cake
Since this absolutely qualifies as an easy 3 ingredient dessert, getting organized is a breeze. You only need three things, and you might even have them stocked already!
- 1 (14.3 ounce) package Oreo cookies
- 2 cups heavy whipping cream
- 1/4 cup powdered sugar
That’s it! No complicated puddings or extra binders needed here. If you want to see how we make another staple from scratch, check out our guide for marshmallows.
Essential Equipment for Assembling the Oreo Icebox Cake
You don’t need a huge arsenal of tools for this, which is part of the beauty! Just gather these few things, and you’re ready to go. Confidence in the kitchen starts with having what you need set aside.
- An 8×4 inch loaf pan (or an 8×8 inch square pan if you prefer).
- Plastic wrap—this is crucial for removing the cake easily later on!
- An electric mixer, either hand-held or stand mixer, to whip the cream properly.
- A large mixing bowl for creating that fluffy layer.
That’s it! See? No fancy springform pans or complicated attachments required. You are ready to start assembling this dream dessert.
Step-by-Step Instructions to Assemble the Oreo Icebox Cake
Putting this together is like building a fantastic, edible tower, only you don’t need any glue—just cold cream! Remember, the magic doesn’t happen fast; patience is absolutely required here. For more no-fuss assembly recipes, check out my guide on the brownie refrigerator cake.
Preparing the Pan and Whipped Cream Base
First things first, grab your loaf pan and line it completely with plastic wrap, making sure you leave a big overhang on the sides. This overhang is your handle! Next, get that heavy cream and powdered sugar into a clean bowl. You have to beat this mixture hard until you see stiff peaks—that means when you lift the whisk, the cream stands straight up and doesn’t flop over. This whipped cream is the heart of our cookies and cream cake!
Layering Your Oreo Icebox Cake
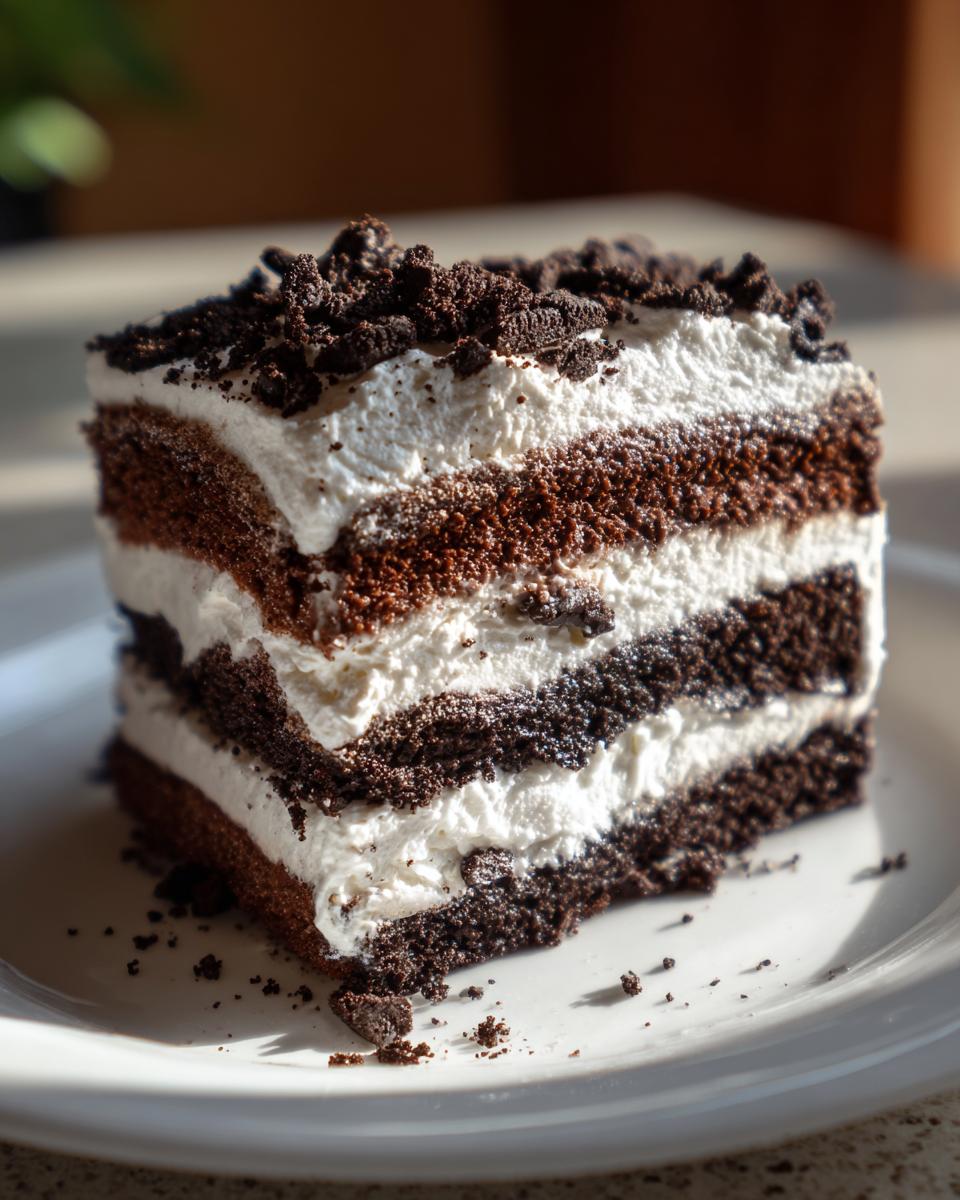
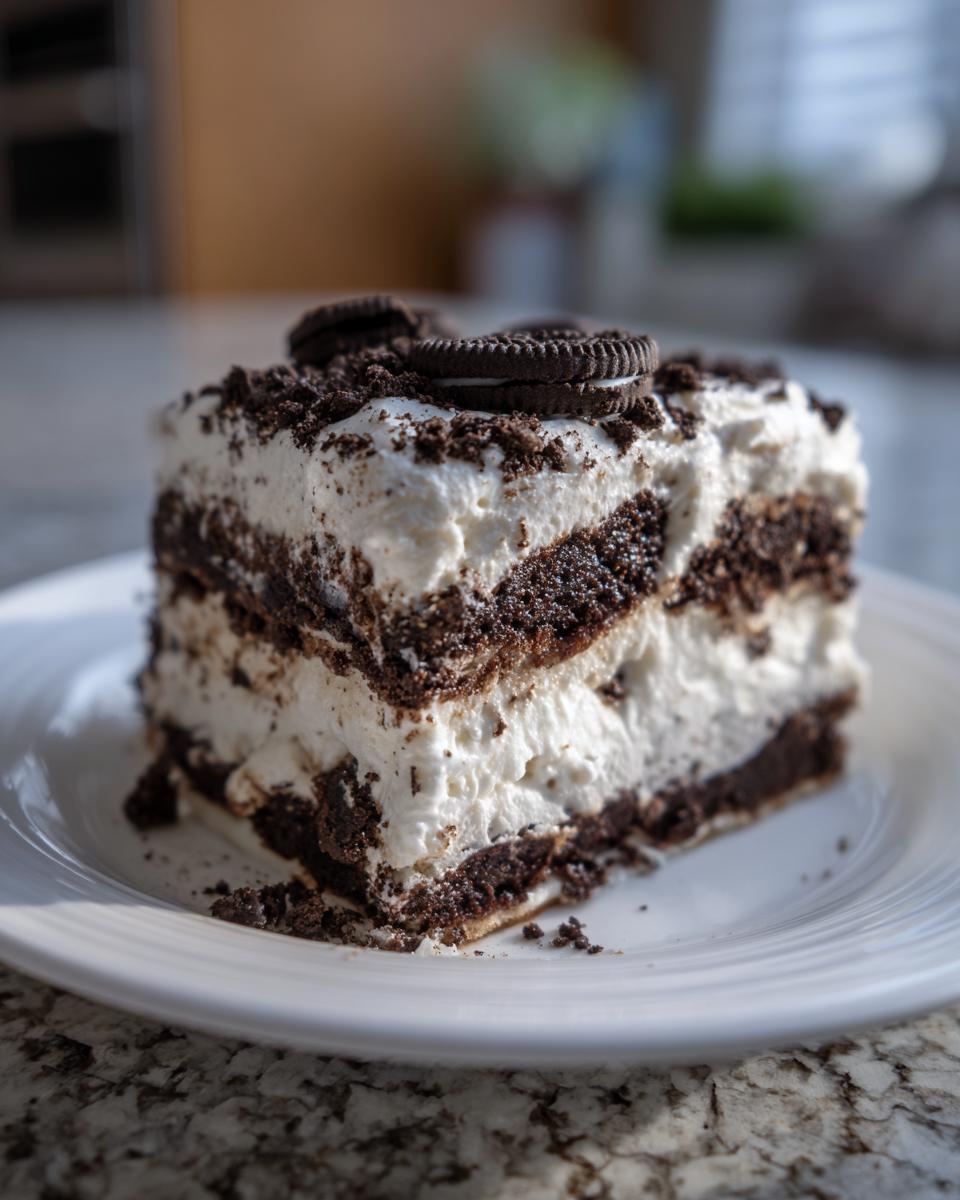
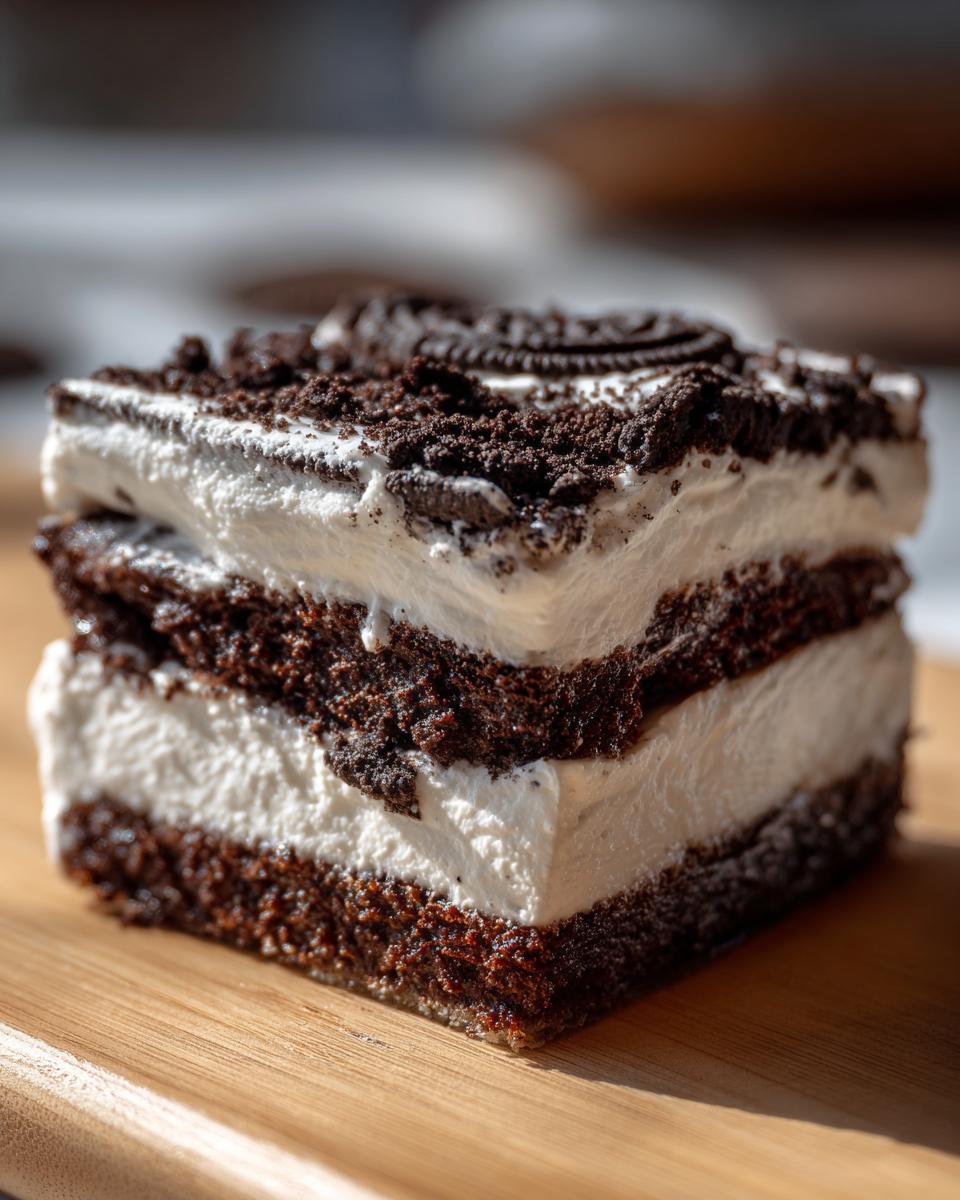
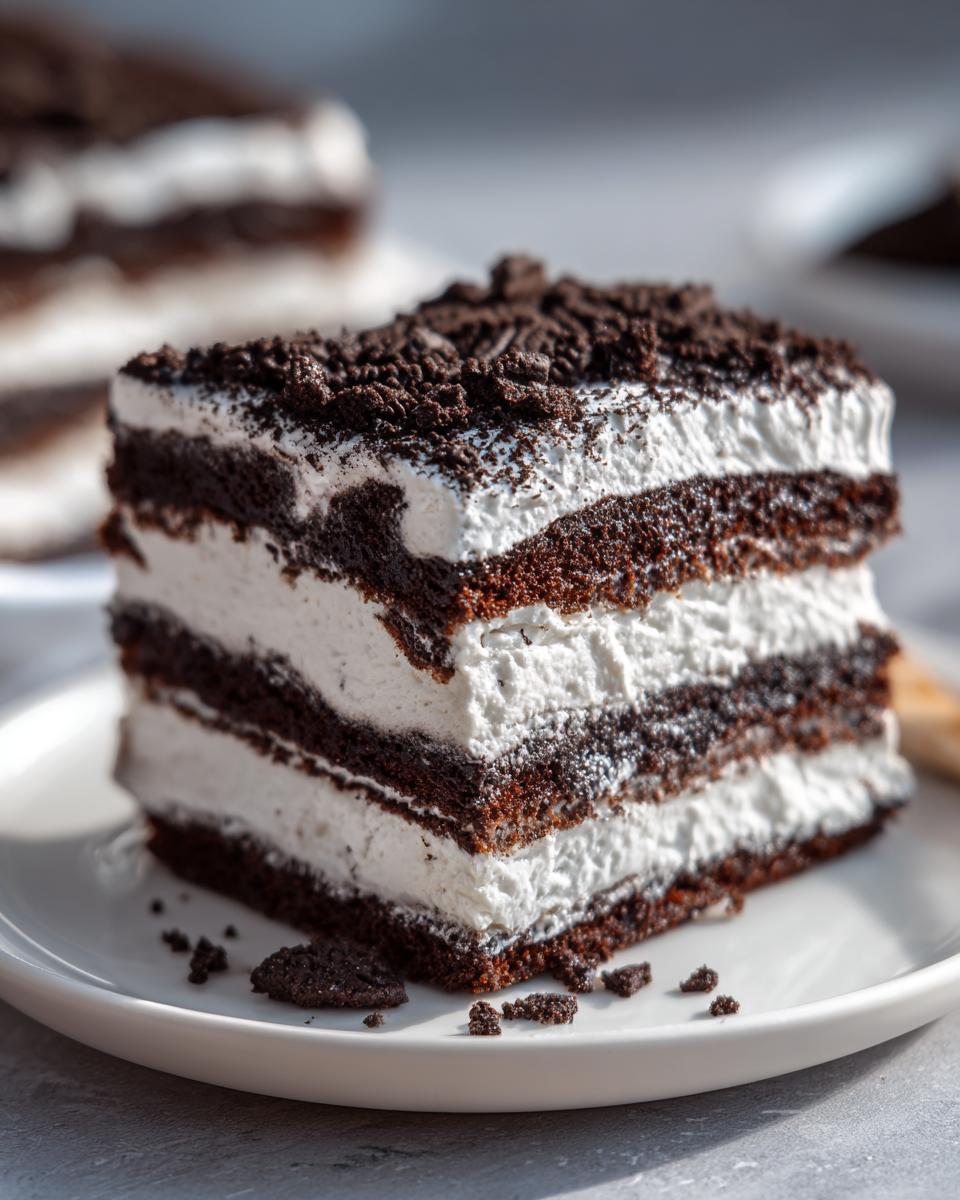
Now we build! Lay a single layer of those whole Oreos right down on the bottom of your plastic-lined pan. Then, take about a third of your perfectly whipped cream and spread it gently over those cookies. Keep alternating: cookies, then cream, cookies, then cream. You want to make sure you finish with a nice, thick layer of that fluffy white cream right on top.
Chilling and Final Presentation of the Oreo Icebox Cake
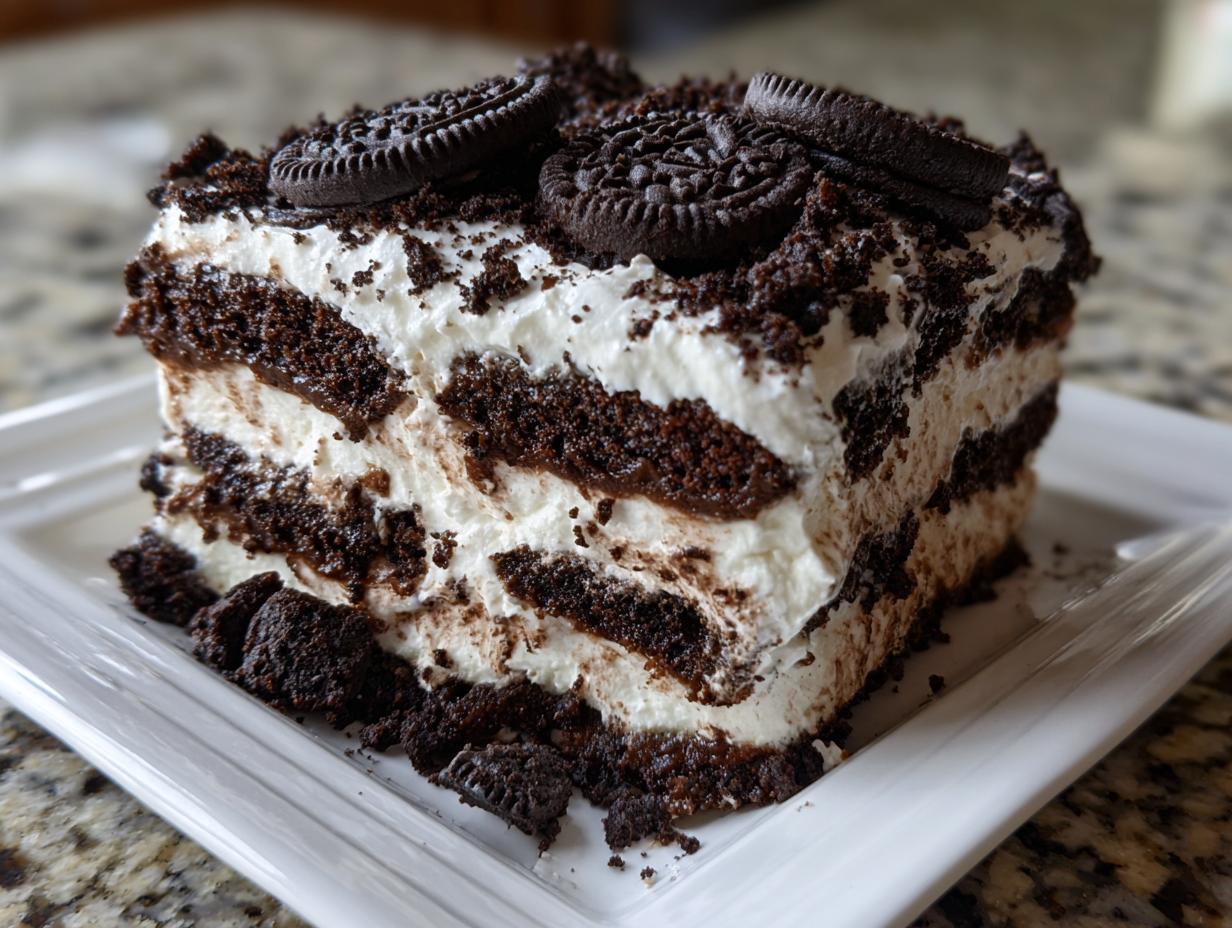
This is the hardest part, but you absolutely cannot skip it! Fold that plastic wrap overhang over the top, tucking it in gently. This needs to chill for a minimum of six hours, but honestly, overnight is where the real transformation happens. That chilling time is what makes those crisp cookies soften into a cake-like texture—that’s how you get the perfect chilled dessert! When you’re ready, use the plastic handles to lift the whole thing out, unwrap it, and decorate with a few crushed Oreos if you feel fancy.
Expert Tips for the Best Oreo Icebox Cake Results
We’ve been testing icebox cake recipes for years here, and I have a few non-negotiable secrets to guarantee success. One thing you can always do for richer flavor is use chilled, stabilized whipped topping instead of whipping the cream yourself; it holds up beautifully. If you aren’t fond of the loaf pan shape, don’t stress! You can totally assemble this in an 8×8 inch square pan for a shorter, wider result. For a tiny boost of sweetness in your no bake Oreo cake, I sometimes sneak in a teaspoon of vanilla extract before I start whipping—it’s lovely.
Now, I learned this the hard way: Don’t rush the chill time! I once tried to serve this after only three hours because guests arrived early. Big mistake! It was still just creamy layers stacked on crunchy cookies. You absolutely need that minimum six hours, or preferably overnight, for the cookies to truly absorb the moisture and turn into that perfect, soft cake texture. For more creamy, no-fuss desserts, you must check out my chocolate mousse pie recipe with no-bake Oreo crust!
Variations for Your No Bake Oreo Cake
Just because we’re keeping this a quick, no bake Oreo cake doesn’t mean we can’t have fun shaking things up a bit! The base recipe is perfect, but switching out the cookie type completely changes the profile. Have you ever tried this with Golden Oreos instead of the originals? It gives you a completely different, beautiful color palette for your chilled dessert.
Or, if you’re feeling a little festive, grab those Mint Oreos! That minty cream nestled between the sweet whipped topping is unbelievably refreshing for a warmer evening. You can also play around by adding flavor extracts—almond extract works surprisingly well with the chocolate notes. If you love experimenting with flavors, you should really look at my recipe for tiramisu cookies next time you’re baking!
Storage and Make-Ahead Instructions for Your Oreo Icebox Cake
Oh, this is my favorite part about these icebox cake recipes—you can completely make it ahead of time! This is the ultimate secret weapon for being relaxed when guests arrive. I usually assemble mine on Thursday night if I’m hosting on Friday, or even on Saturday morning for an evening party.
The crucial thing is how you wrap it up. Once you have finished layering and have that final layer of cream on top, you need to use that plastic wrap overhang to wrap the entire cake tightly. I always go for an extra layer of aluminum foil over the plastic wrap for extra security, just to make sure no fridge odors sneak in.
This keeps beautifully in the refrigerator for up to three days—though honestly, it’s rarely around that long in my house! The cookies actually get even softer and more cake-like on day two, which some people prefer. Just keep it chilled, serve it cold, and don’t forget to check out my guide on crafting an easy ice cream pie with a no-bake Oreo crust for future planning!
Frequently Asked Questions About the Oreo Icebox Cake
What if I don’t have 6 hours to chill this no bake Oreo cake?
I totally get it when you need a dessert fast! While you technically can eat it after 3 or 4 hours, you won’t get that signature soft texture. Remember, the chilling time is when the magic happens—the cookies absorb the moisture from the cream and transform into cake. If you need it faster, try assembling it in a thinner layer, like in a 9×13 pan, which might cut down the chilling time by an hour or so. But for the best texture, give it the full overnight rest!
Can I use Cool Whip instead of whipping heavy cream?
Yes, you absolutely can use a quality stabilized whipped topping like Cool Whip if you want to skip the whipping step and shave off even more prep time! This is a great shortcut for preparing amazing no bake desserts. If you go that route, you can skip the powdered sugar entirely unless you want it sweeter. It’s one of the best variations for quick chilled desserts.
Will this cake hold up if I make it two days in advance?
It holds up fantastically! In fact, I think it’s even better on day two. Just make sure you keep it wrapped tightly—the plastic wrap overhang we talked about is your best friend here. The flavor profile deepens nicely overnight. It should stay perfect for 2-3 days stored in the fridge. Don’t worry about it getting soggy; the high fat content of the cream keeps everything stable.
Can I skip the Oreos and use another cookie?
While this is the classic Oreo icebox cake for a reason, you certainly can experiment! Nabisco’s vanilla wafers work amazingly well, yielding a lighter, subtly sweet flavor profile. I haven’t tried shortbread, but I think it might be too dense and crumbly. Stick to chocolate sandwich cookies or vanilla wafers for guaranteed success in this simple layering technique.
Estimated Nutritional Snapshot of This Oreo Icebox Cake
Now, I always tell folks that we’re focusing on comfort and joy here, not worrying too much about tracking every single bite, especially when it comes to a party treat like this!
But just so you have an idea—because we take precision seriously here at Cookery Command—here’s what we estimate for one serving of this delicious no bake Oreo cake, based on standard ingredient brands. Remember, this is just an estimate; your portion size might vary!
- Serving Size: 1 slice
- Calories: 350
- Sugar: 28g
- Sodium: 250mg
- Fat: 22g
- Saturated Fat: 14g
- Protein: 4g
- Carbohydrates: 35g
It’s a decadent treat, but totally worth every creamy, chocolatey bite when you factor in zero oven time!
PrintNo-Bake Oreo Icebox Cake

Make this easy 3 ingredient dessert for your Friday gathering. This no bake Oreo cake requires no oven time and assembles quickly for a perfect chilled dessert.
- Prep Time: 15 min
- Cook Time: 0 min
- Total Time: 6 hours 15 min
- Yield: 6 servings 1x
- Category: Dessert
- Method: Chilling
- Cuisine: American
- Diet: Vegetarian
Ingredients
- 1 (14.3 ounce) package Oreo cookies
- 2 cups heavy whipping cream
- 1/4 cup powdered sugar
Instructions
- Line an 8×4 inch loaf pan with plastic wrap, leaving an overhang on the sides for easy removal.
- Place a single layer of Oreo cookies on the bottom of the prepared pan.
- In a large bowl, whip the heavy whipping cream and powdered sugar together with an electric mixer until stiff peaks form. This is your cookies and cream cake base.
- Spread about one-third of the whipped cream mixture evenly over the layer of cookies.
- Repeat the layering process: cookies, then whipped cream, until all ingredients are used, ending with a layer of whipped cream on top.
- Cover the pan with the plastic wrap overhang and refrigerate for at least 6 hours, or preferably overnight, to allow the cookies to soften.
- Before serving, lift the cake from the pan using the plastic wrap overhang. Remove the plastic wrap and frost the top and sides with any remaining whipped cream or garnish with crushed Oreos.
- Slice and serve this chilled dessert immediately.
Notes
- For a richer flavor, you can use chilled, stabilized whipped topping instead of making whipped cream from scratch.
- If you do not have a loaf pan, you can assemble this in an 8×8 inch square pan for a slightly shorter cake.
- If you want a slightly sweeter cake, add 1 teaspoon of vanilla extract to the heavy cream before whipping.
Nutrition
- Serving Size: 1 slice
- Calories: 350
- Sugar: 28
- Sodium: 250
- Fat: 22
- Saturated Fat: 14
- Unsaturated Fat: 5
- Trans Fat: 0
- Carbohydrates: 35
- Fiber: 1
- Protein: 4
- Cholesterol: 60