
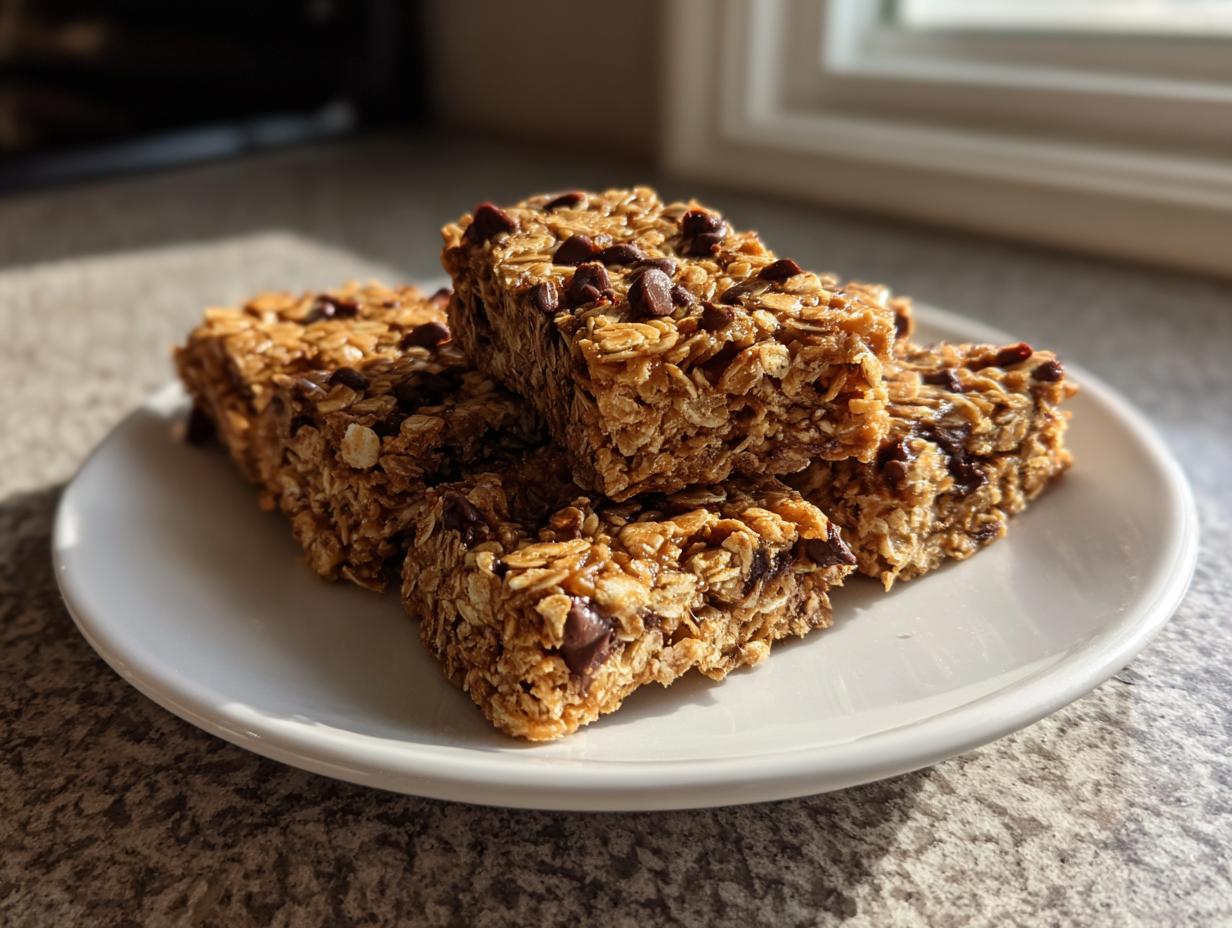
Oh, you know those days, right? The ones where the to-do list is a mile long, the oven feels like a furnace in the summer heat, and suddenly you realize the kids are home from school and demand—no, *require*—a snack immediately? I used to panic and grab the nearest box of processed sugar. But not anymore! My whole kitchen command center shifted gears when I perfected these ultimate chewy no bake granola bars. Seriously, they take perhaps 15 minutes of actual prep time, and then they just chill out in the fridge, waiting for you. That’s my kind of efficiency! If you’re looking for easy no bake snacks that actually hold together and taste incredible, you’ve landed exactly where you need to be. This recipe is truly my secret weapon for keeping healthy grab and go bars stocked up!
I remember one Saturday when I was supposed to be photographing three different savory dishes, and my youngest declared he was starving. I threw everything together for this batch in under fifteen minutes, pressed them into the pan, and set the timer for the fridge. By the time I finished cleaning up my messy countertops, they were firm enough to cut! That’s the freedom these bars give you. You get that wholesome, homemade granola bars satisfaction without ever needing to turn on the heat. It’s time to take command of your snack drawer! If you love this kind of easy, no-fuss recipe, you absolutely have to check out my guide on easy no-bake protein balls, too—they’re just as simple!
- Why These Ultimate Chewy No Bake Granola Bars Are Your New Go-To Snack
- Essential Ingredients for Perfect No Bake Granola Bars
- Step-by-Step Instructions for Homemade Granola Bars
- Tips for Success When Making No Bake Granola Bars
- Customizing Your No Bake Granola Bars: Variations
- Storage and Make Ahead Snacks for These No Bake Granola Bars
- Serving Suggestions for Quick Breakfast Bars
- Frequently Asked Questions About No Bake Granola Bars
- Share Your Homemade Granola Bars Creations
Why These Ultimate Chewy No Bake Granola Bars Are Your New Go-To Snack
Honestly, I keep these recipes close to my chest because they save me on chaotic weekday afternoons! When you’re relying on quick snack recipes, you need reliability. These no bake granola bars deliver every single time. They are designed to be the perfect structure for all your busy life needs. I promise, once you see how fast this comes together, you won’t even think about reaching for the box mix again.
- They are real healthy grab and go bars—packed with oats and seeds, giving you lasting energy instead of a sugar crash.
- Total active time is 15 minutes max! That’s faster than preheating the oven, folks.
- They are the ultimate batch of meal prep granola bars; I make two pans on Sunday, and we’re set for lunches all week long.
- They are firm enough for transport but still maintain that absolutely dreamy, soft chew.
Speed and Simplicity: 15 Minutes to No Bake Granola Bars
This is where we really shine! We toss the oven completely out of the equation. These count as true no oven required snacks. You’re just mixing, pressing, and chilling. Since the prep is so quick, this becomes my go-to easy no bake snack when I need to whip something up before running out the door. No fuss, no messy cleanups from splatters on hot racks—just pure convenience!
Achieving the Perfect Chewy No Bake Treats Texture
The biggest complaint I hear about homemade bars is that they crumble into a sad pile of oats the second you pick them up. Not here! The secret to achieving those fantastic chewy no bake treats texture isn’t complicated, but it does rely on technique. We gently warm the nut butter and syrup binder. This helps everything mix smoothly and ensures that when it cools, you get that beautiful, adhesive, chewy structure instead of a dry, brittle mess. Trust me, warming that binder is non-negotiable for that perfect bite.
Essential Ingredients for Perfect No Bake Granola Bars
Okay, let’s talk about what actually goes into these wonders! Like I always tell my readers, the quality of your raw materials determines the success of your *no bake granola bars*. Since we aren’t using the oven to develop deep, caramelized flavors, we have to rely on our ingredients to bring the depth. You want wholesome things here, things that make you feel good about eating them! Here’s the core lineup:
- 2 cups rolled oats (the star of these oat energy bars!)
- 1 cup creamy natural peanut butter (or almond butter if that’s your thing!)
- 1/2 cup honey or pure maple syrup (this is our glue!)
- 1/4 cup ground flaxseed or chia seeds (for binding and nutrition)
- 1 teaspoon vanilla extract
- 1/2 teaspoon salt (don’t skip this—it makes the sweet pop!)
- 1/2 cup mix-ins (you get to choose your adventure here!)
This list makes about 12 sturdy, satisfying bars. If you want to see more recipes that utilize that wonderful peanut butter foundation, check out my guide for nut butter cookies—they are just as easy to command!
Ingredient Notes and Substitution Options
Because I want everyone, no matter their dietary needs, to be able to make these homemade granola bars, we have a few notes on swaps. If you need a gluten free no bake option, you must confirm that your rolled oats are certified gluten free—oats often cross-contaminate in processing, so label reading is important here. We use honey or maple syrup for binding, but if you want a different sticky element, brown rice syrup works well as a substitute, though it might make them slightly less sweet.
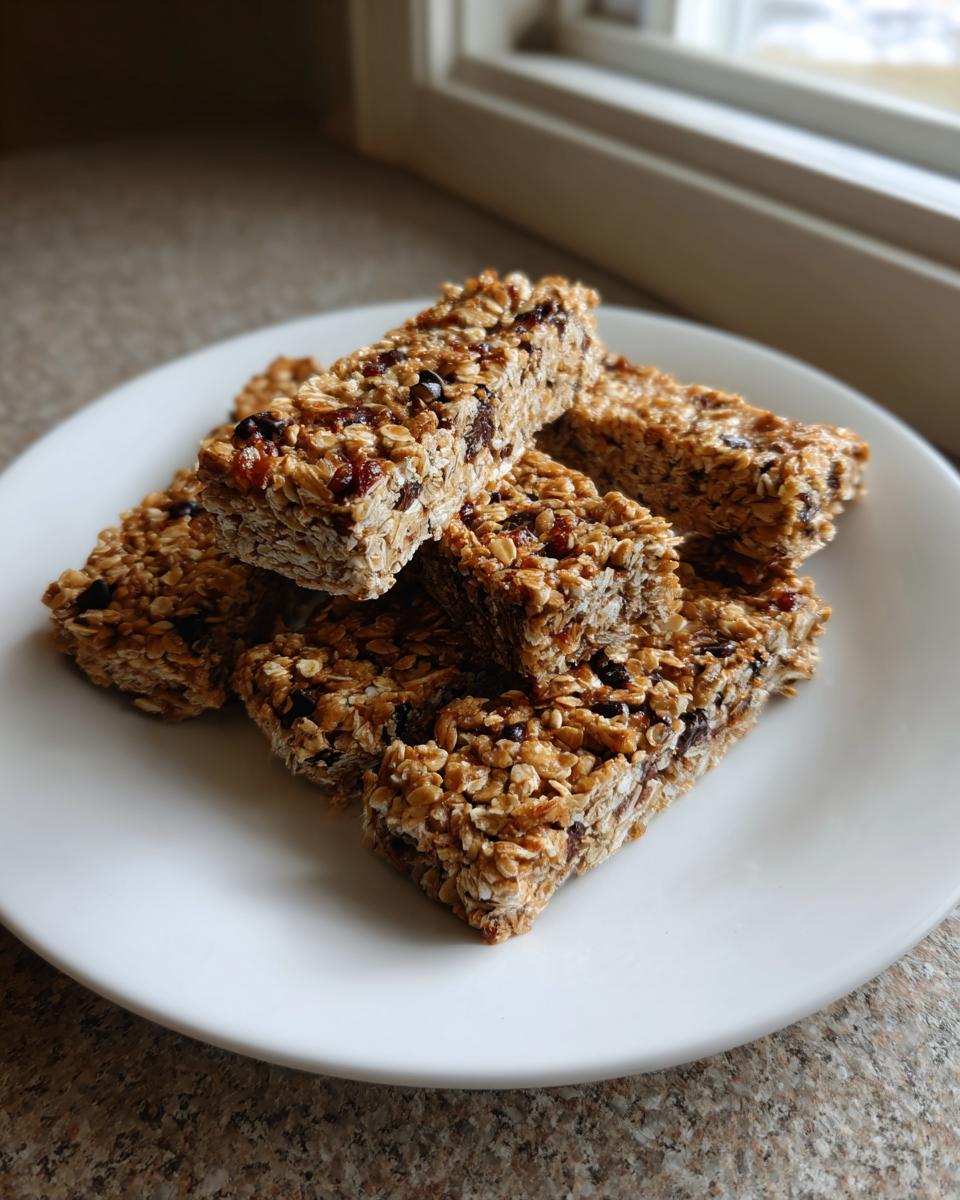
For the 1/2 cup of mix-ins, this is where you customize! Think about what appeals to you. Mini chocolate chips make them feel like a treat, while dried cranberries or chopped apricots add a nice tartness.
Step-by-Step Instructions for Homemade Granola Bars
Putting together these homemade granola bars is honestly more like assembling than cooking, which is why I love them so much for everyday use. We’re moving fast here, but precision matters, especially with steps involving the binder. I’ve streamlined my technique so you can get this done in the time it takes to empty the dishwasher! Follow these steps closely, and you’ll see why these are perfectly structured meal prep granola bars.
- First things first: line an 8×8 inch pan with parchment paper. Make sure you leave a big overhang on two sides—this is how we get those perfect healthy grab and go bars out later without wrecking them! Think of it as creating built-in handles.
- In a nice big bowl, we combine all the dry stuff: your oats and your flax or chia seeds. Give that a quick whisk just to marry them together.
- Now for the magic binder! In a small saucepan, gently warm your peanut butter and honey (or maple syrup). I mean *warm*, not hot. We want smooth and pourable, like thick lava. Do not boil this mixture! Boiling changes the chemical structure and you’ll end up with candy instead of chewy treats.
- Once you take that binder off the heat, immediately stir in your vanilla and that essential pinch of salt.
- Pour that gorgeous, warm binder right over your oat mixture. Use a sturdy wooden spoon or a silicone spatula—this might get tough! You need to fold everything together until every dry piece is coated. Don’t be shy; you have to work it in.
- Stir in those yummy 1/2 cup mix-ins last, like getting the final sprinkles on a project.
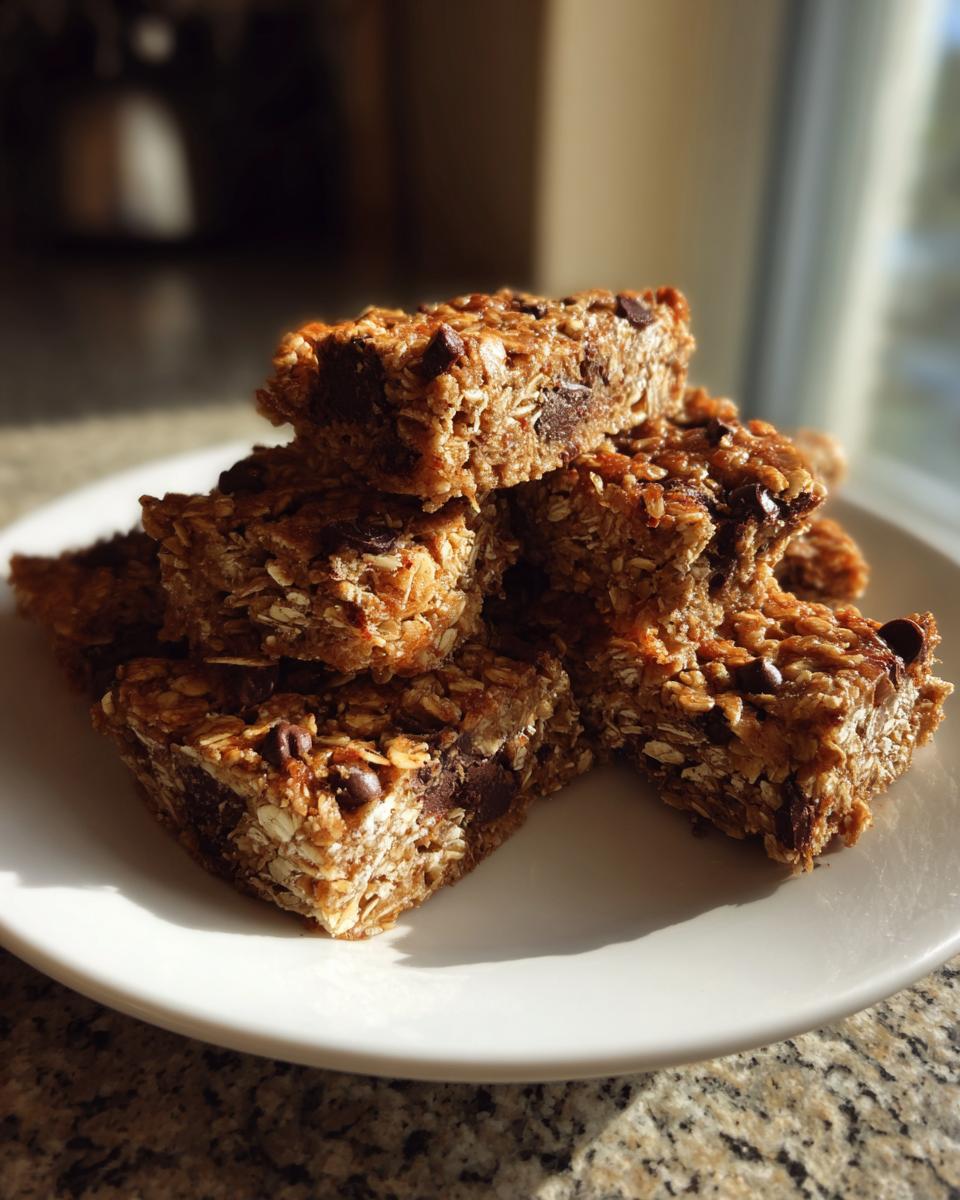
- Transfer the whole sticky mess into your prepared pan. This is the most critical step for that perfect density: Use the back of a spatula or even another piece of parchment paper and press. Press firmly, really push down hard until the surface is completely flat and compact. We are aiming for firm, chewy no bake treats here, so press like you mean it!
- Now, the non-active time: Slide the whole pan into the refrigerator. You must let these chill for at least 2 full hours, or until they feel totally solid. Seriously, plan ahead for these quick snack recipes; patience during the chilling process is key!
- Once firm, use those parchment paper handles to lift the whole slab out onto a cutting board. Slice into 12 or 16 evenly sized bars.
- Store these amazing oat energy bars in an airtight container in the fridge.
Preparing the Dry Base and Warming the Binder
When we warm the nut butter and syrup, we are essentially unlocking their stickiness. If you use heat that’s too high, you risk scorching the sugars, which ruins the clean, wholesome flavor we’re aiming for. Keep that saucepan on low and stir constantly for just a minute or two until the mixture flows easily. As soon as you add the vanilla and salt, incorporate it immediately into the dry ingredients. That little bit of residual heat helps the oats absorb the binder nicely.
Mixing and Firmly Pressing Your Oat Energy Bars
When you start mixing the warm binder into the dry oats, it will look crumbly at first, I promise! Keep mixing until every last oat flake is clinging to that binding liquid. Then comes the pressure test. You have to compact these firmly into the pan so they don’t crumble when you slice them or pack them for lunch. If you press hard, they will set up beautifully dense and chewy. This action is what separates a good batch of no bake granola bars from a failed one!
If you happen to have leftover warm chocolate from another recipe—maybe you made some easy chocolate fondue and had some spare?—don’t let it go to waste; drizzle it right on top before chilling for an extra layer of decadence!
Tips for Success When Making No Bake Granola Bars
Okay, listen up, because this section is where we turn good no bake granola bars into legendary ones! Even with a recipe this easy, small things can throw off that perfect texture. If you get into the bowl and your mixture seems way too dry or crumbly—like it refuses to come together when you pinch it—don’t panic, and definitely don’t throw it out! Just add a tiny bit more liquid, maybe one tablespoon at a time. I usually start with a teaspoon of water, mix it in again, and see how it feels. You want it sticky, not soupy.
Also, for those perfectly neat cuts? Chill time is your best friend. Don’t rush out of the fridge after two hours if it still feels a little soft in the middle. Once they are rock-solid, let them sit on the cutting board for about five minutes *before* you slice. This lets them firm up just enough so your knife glides through them cleanly. For inspiration on other quick things to whip up, check out my easy refreshing watermelon smoothie guide for when you need something cold next time!
Customizing Your No Bake Granola Bars: Variations
This is the fun part! Remember how I said you get to choose your adventure with that 1/2 cup of mix-ins? That’s what keeps these no bake granola bars exciting week after week. We can easily shift the flavor profile to keep things fresh. If you’re trying to use up ingredients you have on hand, this is the perfect recipe for that.
You can easily make these into almond butter granola bars by swapping the peanut butter—just make sure the almond butter is creamy and natural, similar to the peanut butter, for the best binding results. For a bit of crunch, you can amp up the nuts from the initial recipe. Chopped pecans or walnuts are fantastic. If you want more chew, dried cherries or finely diced apricots mix in beautifully.
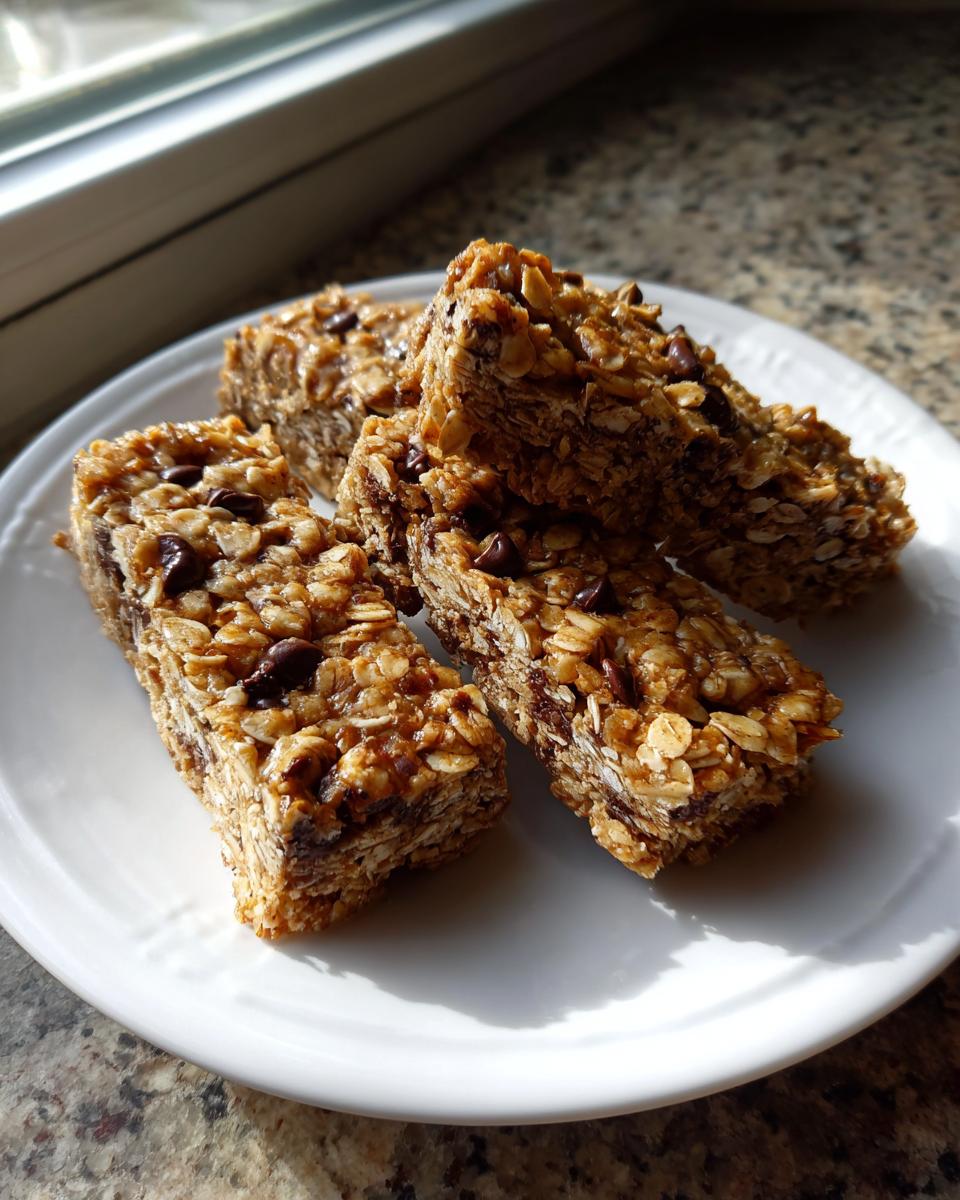
If you’re making these for the little ones (and trust me, they become wonderful kid friendly snack bars when customized), mini chocolate chips are non-negotiable, in my opinion! They just melt slightly when you chill the bars, giving you that lovely chocolate swirl throughout the texture. For an adult twist, try adding a tablespoon of unsweetened shredded coconut and some finely chopped dark chocolate—it tastes almost gourmet!
If you want more ideas on how to throw a bunch of different, delicious things into one container, you should definitely look at my approach for kitchen sink cookies; the philosophy is the same—use what you love!
Creating Gluten Free No Bake Options
We talked about this briefly before, but I want to stress it again because getting this wrong means the bars might not set right, or worse, they carry unwanted gluten. If you are making gluten free no bake options for guests or family members, you must ensure your rolled oats are certified gluten free. The main body of the bar relies heavily on the oats absorbing that binder correctly, so make sure you are grabbing the right package. Everything else in the recipe—the nut butter, the syrup, the seeds—is naturally gluten free, so it’s just that one key ingredient we need to verify!
Storage and Make Ahead Snacks for These No Bake Granola Bars
If you’ve made these bars successfully, you’ll want them to last forever, right? Good news! Because they are dense and full of good fats, these turn into amazing freezer snack recipes. Keep them airtight in the refrigerator for up to one week. They stay perfectly chewy even when slightly chilled—I use that coolness when I want a super firm, cold bite!
But for real make ahead snacks planning, head to the freezer. If you wrap individual bars tightly in plastic wrap or parchment paper before placing them in a freezer bag, they last for up to three months. Seriously! When you need a quick energy boost, just pull one out a half-hour before you plan to eat it. They thaw beautifully at room temperature or just sitting on the counter. This is the trick for never running out of quick snack recipes!
If you’re looking for other wonderful things to keep tucked away in the fridge, you absolutely have to try my recipe for easy refrigerator dill pickles. They are so satisfying to pull out when you need a crisp side!
Serving Suggestions for Quick Breakfast Bars
You’ve made the perfect batch of no bake granola bars—now how do you eat them? While they are fantastic on their own as a simple energy boost, sometimes you want to bulk them up, especially when serving them as quick breakfast bars in the morning. They are incredibly versatile buddies for all sorts of wholesome things!
My personal favorite way to start the day is grabbing one of these bars alongside a hot cup of strong coffee. If you need a little more substance, break a bar up! It crumbles surprisingly nicely over a bowl of plain Greek yogurt. The chewiness mixes beautifully with the creamy texture of the yogurt. This really elevates them from just a snack to a satisfying light meal.
Another fantastic option is pairing them with fruit. Since these bars provide density and protein, they balance perfectly with something fresh. Grab an apple or a handful of berries! You can even dip the corner of the bar into a little swirl of almond butter if you’ve made an extra batch. For a truly hearty breakfast that still feels fast, try crumbling these bars over a warm bowl of my creamy stovetop apple cinnamon oatmeal. Now that is an energy powerhouse ready in minutes!
Frequently Asked Questions About No Bake Granola Bars
I know you might have a few questions swarming around while you’re waiting for your wonderful no bake granola bars to set up in the fridge! That’s totally normal. When you eliminate baking, you sometimes worry about the structure. That’s where my experience comes in handy! I’ve collected the most common queries I get about these easy no bake snacks so you can move forward with total confidence.
Can I use a different nut butter than peanut butter?
Absolutely! I love seeing people customize their nut butter granola bars. You can use almond butter, cashew butter, or even sunflower seed butter if you need to avoid nuts entirely. The key, though, is to make sure whatever you choose is creamy and natural—meaning it doesn’t have added oils or stabilizers that might mess with the ratio when you warm it. If your replacement nut butter is super stiff right out of the jar, you might need to warm it just a touch longer to get it really smooth and pourable.
Why aren’t my no bake granola bars setting firmly?
This is the number one panic moment for folks making chewy no bake treats! Usually, it comes down to one of two things: either you didn’t press hard enough in Step 7, or you didn’t use enough binder. If you look at the recipe, the honey/syrup ratio to oats is crucial. If yours aren’t setting, your kitchen might be warmer than mine, or maybe your nut butter was too thick. If they still seem soft after four hours in the fridge, just pop them in the freezer for 30 minutes—that usually firms them right up. They won’t have the same chew, but they’ll at least hold their shape as healthy grab and go bars!
Can I easily make these into vegan make ahead snacks?
Yes, this is one of the easiest recipes to adapt into vegan make ahead snacks! You just need one swap: use pure maple syrup instead of honey. Maple syrup works just as well as our binder, and it keeps the recipe entirely plant-based. We don’t use any eggs or dairy in the base recipe, so as long as you use vegan mix-ins (like dairy-free chocolate chips), you’re good to go! It’s a wonderful way to ensure you have reliable wholesome snack ideas for everyone.
Are these oat energy bars good for meal prep?
They are literally *perfect* for meal prep granola bars! That’s one of the biggest reasons I developed this recipe! Because they are stored cold, they stay fresh and maintain that chewy texture for much longer than baked versions. I highly recommend making a double batch and following the freezing instructions I provided! They are truly the best quick breakfast bars when you’re rushing out the door.
If you end up with extra oat scraps or want to try a different take on a quick, wholesome treat, maybe look at some of my ideas for morning glory muffins—they use a lot of the same great textures and flavors! And for even more inspiration on healthy bars, I often refer back to this great guide from another kitchen I trust over at Home Bite Recipes.
Share Your Homemade Granola Bars Creations
Now it’s your turn to take command of the kitchen! I’ve shared all my secrets for making the ultimate, ridiculously easy no bake granola bars, and I truly hope they become a staple in your busy schedule just like they are in mine. Seriously, don’t be shy—these are foolproof, so you can be confident in your results!
I would absolutely love to hear about your batches! Did you stick to simple chocolate chips, or did you get creative with the mix-ins? What kind of nut butter worked best for achieving that perfect chew? Please hop down into the comments below, leave me a star rating if you loved them, and tell me what variations you tried out. It helps other home cooks see just how versatile these oat energy bars are!
If you have any lingering questions as you go—maybe about scaling the recipe or troubleshooting a texture—don’t hesitate to ask! You can always reach out to us directly via the Contact Page for personalized assistance. Happy snacking, everyone!
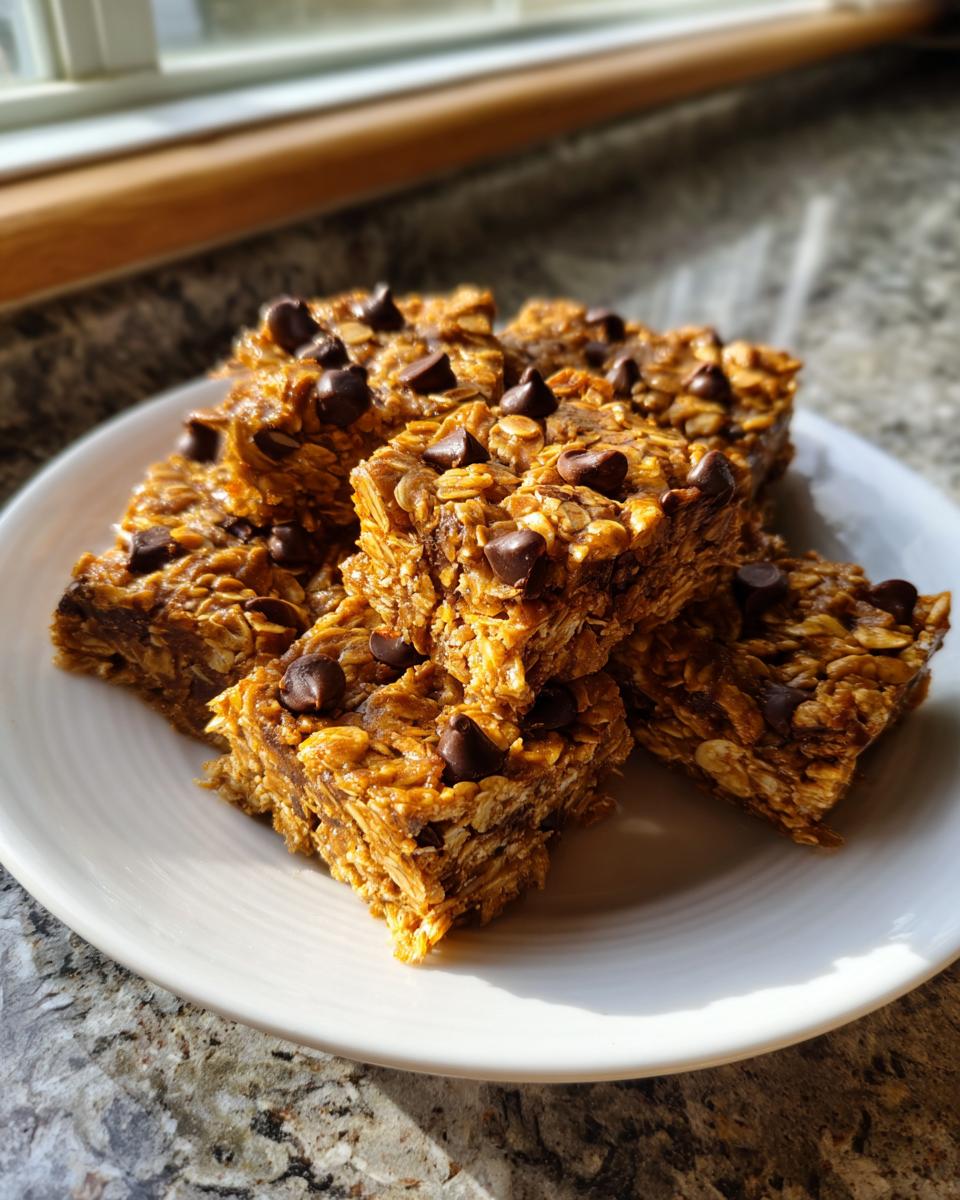
PrintUltimate Chewy No Bake Granola Bars: 15-Minute Prep for Healthy Meal Prep
Make these easy no bake granola bars in just 15 minutes of prep time. They are chewy, wholesome, and perfect for healthy grab and go bars or quick breakfast bars when you need a make ahead snack.
- Prep Time: 15 min
- Cook Time: 0 min
- Total Time: 2 hours 15 min
- Yield: 12 servings 1x
- Category: Snack
- Method: No Oven Required
- Cuisine: American
- Diet: Vegetarian
Ingredients
- 2 cups rolled oats
- 1 cup creamy natural peanut butter (or almond butter)
- 1/2 cup honey or maple syrup
- 1/4 cup ground flaxseed or chia seeds
- 1 teaspoon vanilla extract
- 1/2 teaspoon salt
- 1/2 cup mix-ins (e.g., mini chocolate chips, chopped nuts, or dried cranberries)
Instructions
- Line an 8×8 inch baking pan with parchment paper, leaving an overhang on the sides for easy removal.
- In a large bowl, combine the rolled oats and ground flaxseed or chia seeds.
- In a small saucepan over low heat, gently warm the peanut butter and honey (or maple syrup) until they are smooth and easily pourable. Do not boil.
- Remove the mixture from the heat and stir in the vanilla extract and salt.
- Pour the warm binder mixture over the dry ingredients. Mix well until everything is evenly coated.
- Stir in your chosen mix-ins, such as chocolate chips or dried fruit.
- Transfer the mixture to the prepared pan. Press the mixture down firmly and evenly into the pan using the back of a spatula or another piece of parchment paper. Pressing firmly is key for chewy no bake treats.
- Chill the pan in the refrigerator for at least 2 hours, or until completely firm.
- Use the parchment paper overhang to lift the slab out of the pan. Cut into 12 to 16 bars.
- Store these oat energy bars in an airtight container in the refrigerator for up to one week, or freeze for longer storage.
Notes
- For a gluten free no bake option, use certified gluten free rolled oats.
- If you prefer a different binder, substitute the honey/maple syrup with brown rice syrup for a slightly different texture.
- To make these kid friendly snack bars extra appealing, use mini chocolate chips as your primary mix-in.
- If the mixture seems too dry, add one tablespoon of water or milk until it holds together when pressed.
Nutrition
- Serving Size: 1 bar
- Calories: 220
- Sugar: 10g
- Sodium: 110mg
- Fat: 12g
- Saturated Fat: 2.5g
- Unsaturated Fat: 9.5g
- Trans Fat: 0g
- Carbohydrates: 27g
- Fiber: 3g
- Protein: 7g
- Cholesterol: 0mg