
If you think you know sugar cookies, I want you to take a deep breath and get ready to meet their much more flavorful cousin. We’re ditching the basic, flat, one-note cookie world and stepping firmly into gourmet territory, all without any complicated fuss. My goal here at Cookery Command is always to take a beloved classic and elevate it using smart, foundational technique. That’s exactly what happens when we introduce browned butter to the mix! We’re always honoring tradition here, much like the careful technique you’d see in our Italian butter cookies recipe.
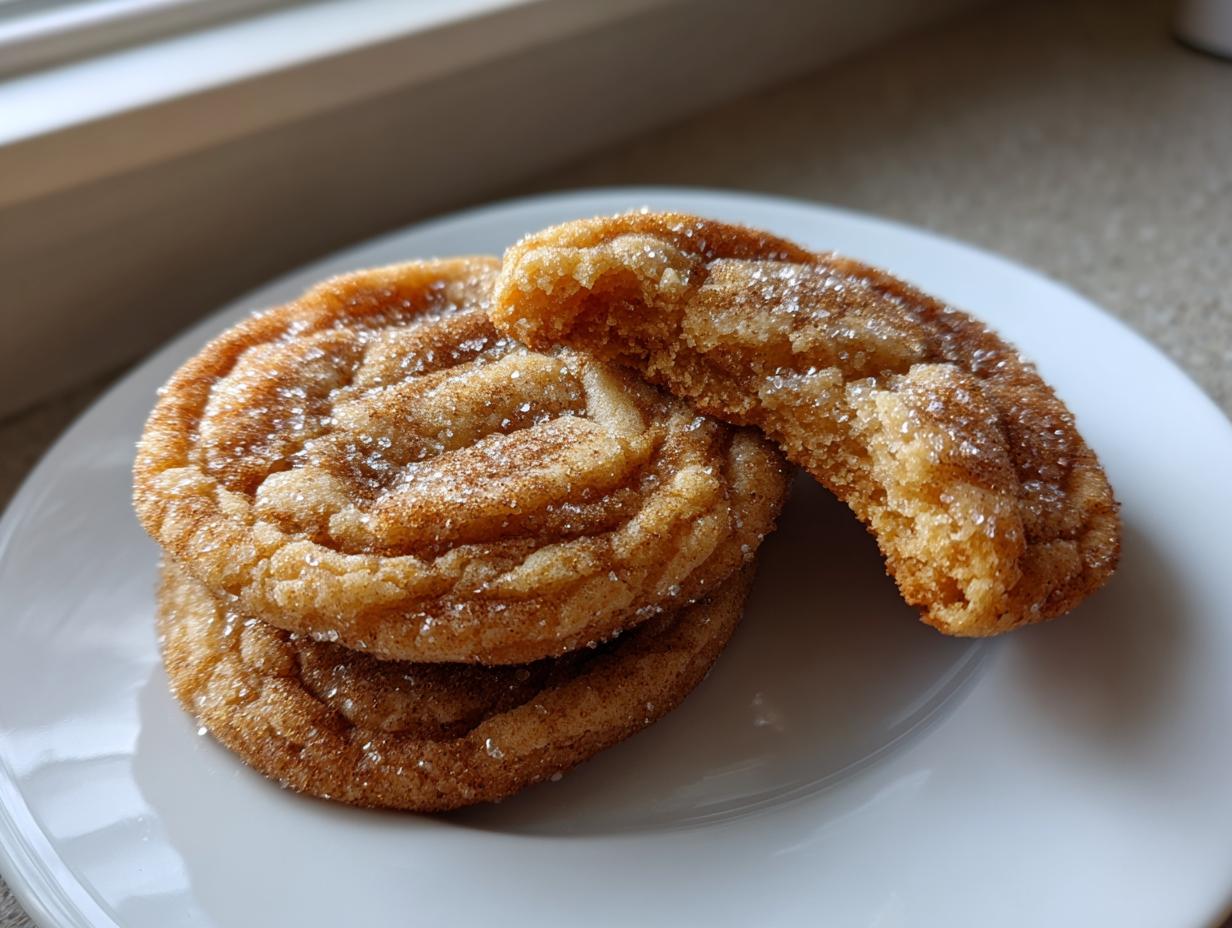
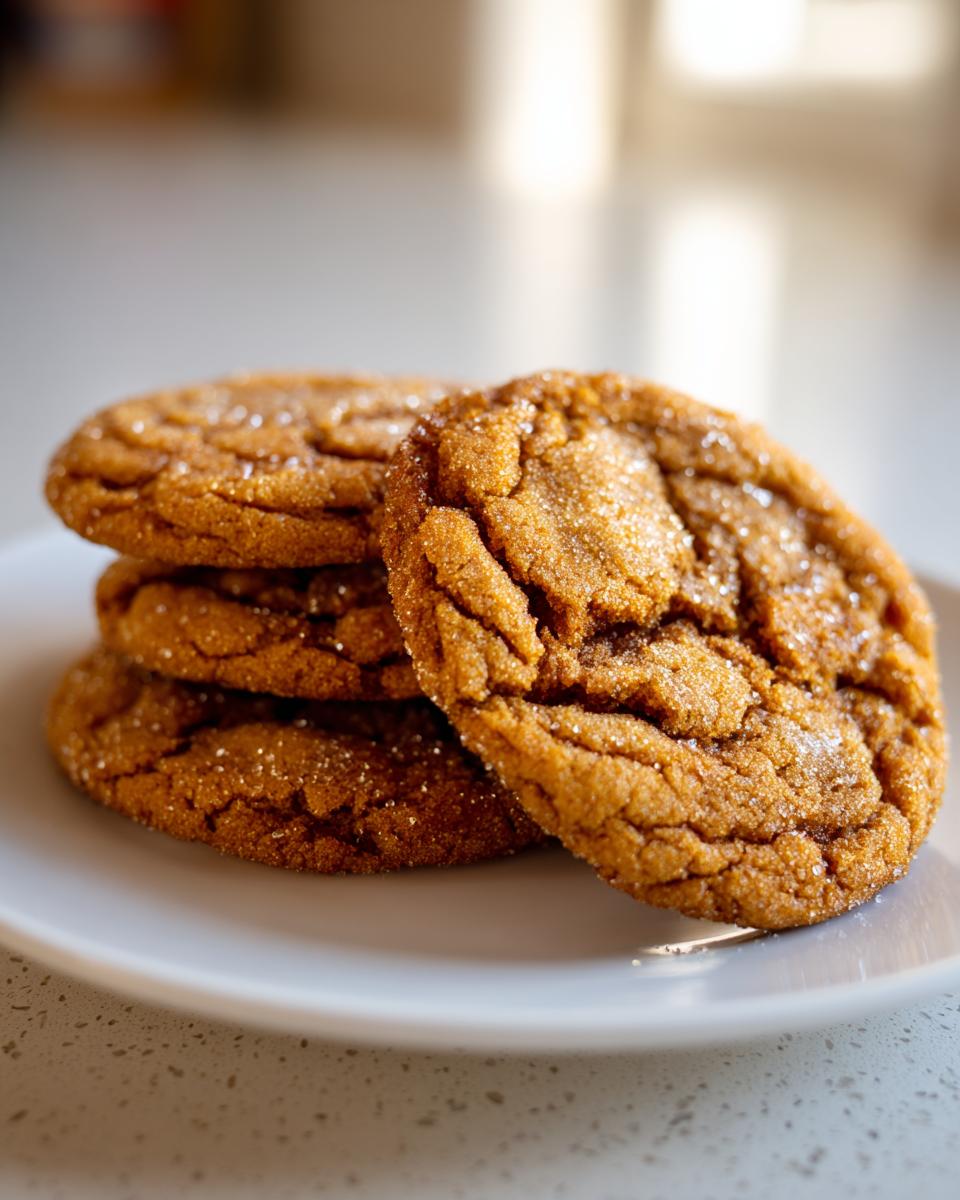
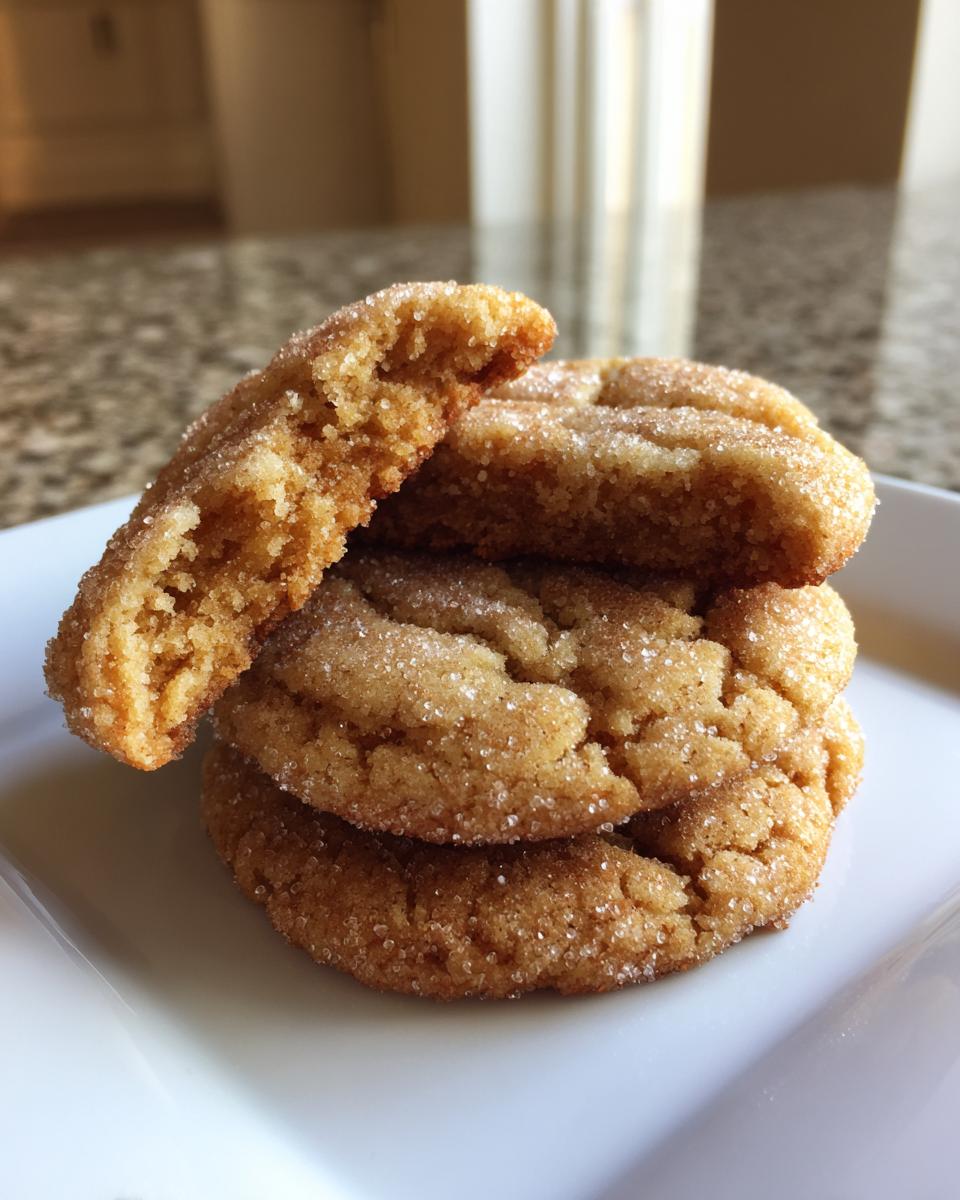
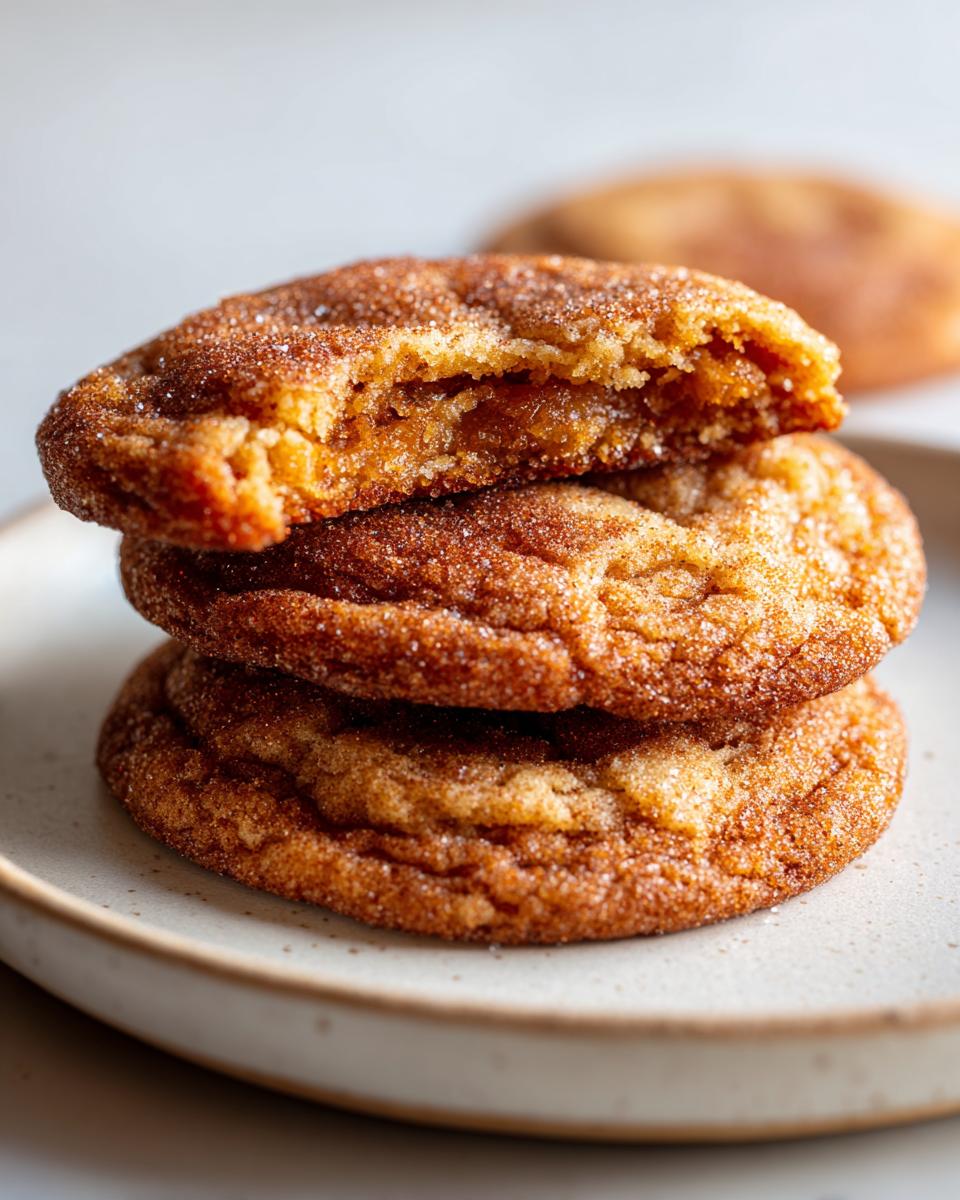
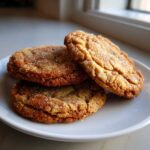
These **brown butter sugar cookies** are my absolute favorite for feeling fancy while keeping things simple. Browning the butter transforms the flavor, adding that deep, nutty, caramel note everyone craves. Trust me when I say, these are the ultimate cookies that give you that perfect textural win: satisfyingly **chewy centers** hugged by delightfully **crispy edges**. Let’s make something truly special **from scratch** today!
- Why These Brown Butter Sugar Cookies Are Your New Favorite
- Gathering Ingredients for Brown Butter Sugar Cookies
- The Secret to Nutty Butter Cookies: Browning the Butter
- Instructions for Making Chewy Sugar Cookies
- Tips for Perfect Brown Butter Sugar Cookies Every Time
- Variations for Your Brown Butter Cookies
- Storage and Reheating Brown Butter Sugar Cookies
- Frequently Asked Questions About Brown Butter Sugar Cookies
- Estimated Nutritional Data for These Gourmet Sugar Cookies
Why These Brown Butter Sugar Cookies Are Your New Favorite
I love when a simple swap makes a huge difference, and that’s precisely what brown butter does here. These aren’t just any old cookies; they are an experience! You get that incredible depth of flavor that tastes like it took hours, even though we keep the process straightforward.
- The rich, **nutty flavor** from the browned butter is unmistakable.
- We nail that textural balance—super **chewy centers** combined with those satisfying **crispy edges**.
- It’s a truly memorable **from scratch cookie** that feels gourmet but is surprisingly easy to pull off.
If you’re looking for a cookie that proves small changes yield huge rewards, you’ve found it. For more recipes where texture is king, check out how we get amazing results with our fudgy crinkle cookies!
Gathering Ingredients for Brown Butter Sugar Cookies
Okay, before we start melting things on the stove, let’s make sure your pantry is stocked. Since these are **brown butter sugar cookies**, the quality of your butter matters, even *after* we brown it! I’ve listed everything you need right here, but remember that crucial detail: the butter must be browned first and then cooled down completely before you even think about mixing it with the sugars. That cooling time is just as important as the browning itself!
We rely on a few key players to give us those **buttery sugar cookies**—especially that brown sugar for moisture. Don’t forget this is a **from scratch cookies** recipe, so measure everything carefully!
- 1 cup (2 sticks) unsalted butter, browned and cooled
- 1 cup packed light brown sugar
- 1/2 cup granulated sugar
- 1 large egg plus 1 large egg yolk (That extra yolk helps with chew!)
- 1 tablespoon vanilla extract
- 2 3/4 cups all-purpose flour
- 1 teaspoon baking soda
- 1/2 teaspoon salt
- 1/4 teaspoon ground nutmeg (optional, but I always add it for depth!)
- 1/2 cup granulated sugar, for rolling
If you’re looking for other easy-to-make things **from scratch**, you might enjoy my recipe for easy fluffy homemade marshmallows. But for now, let’s focus on getting that butter brown!
The Secret to Nutty Butter Cookies: Browning the Butter
This step, my friends, is where the magic for these **gourmet sugar cookies** truly happens. We’re taking regular butter and turning it into liquid gold—it develops those spectacular **caramel flavored cookies** notes you just can’t get otherwise. You’ll melt the butter over medium heat. Watch it bubble and foam up! When that foam calms down, you’ll start seeing tiny brown flecks form at the bottom of the pan. That smell? It should be richly nutty, not burnt. Seriously, keep a close eye on it once the foam subsides!
Once you see those little toasted bits and smell that intoxicating aroma, you need to immediately pour the butter into a heatproof bowl. If you leave it in the hot pan, it will burn instantly! It needs to cool to room temperature before we mix it with the sugars. It takes about 30 minutes, so use this time to clean up or just enjoy the amazing smell filling your kitchen. Making great brown butter chocolate chip cookies hinges on this cooling phase.
Expert Tip for Perfect Browning
My biggest piece of advice for never burning your butter is twofold: use a light-colored saucepan so you can literally see the color changing, and swirl the pan constantly. Don’t walk away! Swirling ensures the milk solids cook evenly instead of scorching on the bottom. Trust me, that slight caramelization is everything for these brown butter sugar cookies.
Instructions for Making Chewy Sugar Cookies
Now that our beautifully **browned butter recipes** are ready and cooled down, it’s time for the assembly line! This is where we turn that rich, nutty fat into the structure of our **soft centered cookies**. Preheat your oven to 375°F (190°C) right away so it’s ready when the dough is mixed. We are going to move fast here!
- In the big bowl with your cooled brown butter and sugars, beat everything together until it looks light and fluffy—usually about two minutes with the mixer.
- Add in your egg, that extra yolk, and the vanilla extract. Mix until it just comes together. Don’t beat it forever, just enough to incorporate.
- In a separate bowl, whisk your dry stuff: flour, baking soda, salt, and that tiny whisper of nutmeg we added.
- Slowly add the dry ingredients into the wet ingredients on low speed. Stop mixing the second you no longer see streaks of flour. Overmixing is the enemy of **chewy sugar cookies**!
- Grab that reserved 1/2 cup of granulated sugar and put it in a shallow dish.
- Scoop your dough into tablespoon-sized balls—I use a small scoop, about 1.5 ounces each. Roll them until they are totally coated in sugar. This outer layer is key!
- Place them on parchment-lined baking sheets, 2 inches apart. They spread a little, so give them space to breathe. If your kitchen is warm, you might want to chill these sugared balls for 15 minutes before baking!
- Bake for 9 to 11 minutes. You’re looking for the edges to be set and light brown, but the centers should still look slightly soft, like they might still wiggle if you nudge the pan.
- Crucially, let them rest on the hot sheet for a solid 5 minutes before transferring them to a wire rack to cool completely. This resting period sets up those edges perfectly. You can see more no-chill tips that still work great for these types of cookies over at Partylicious.
For more straightforward baking methods that still deliver amazing results, you should check out my directions for making sugar cookie icing that dries hard, or perhaps these amazing cinnamon sugar snowball cookies!
Achieving Crispy Edge Cookies Texture
The texture is everything here! To guarantee those sought-after **crispy edge cookies**, you need two things: that thick coating of granulated sugar and pulling them out just before they look completely done. That extra sugar on the outside caramelizes and creates the crunch. Remember that five-minute mandatory rest on the hot pan? That’s when the residual heat finishes cooking the center just enough to keep it soft while the edges firm up into that satisfying crispness. Don’t skip that rest, or they might collapse!
Tips for Perfect Brown Butter Sugar Cookies Every Time
I learned a lot from my testing when developing these **brown butter sugar cookies**, and I want to smooth out the path for you! The texture we are aiming for—**soft centered cookies** with those chewy insides—can sometimes be tricky if the dough temperature isn’t quite right.
My notes always include a warning about the butter browning. Seriously, watch that stuff like it’s your favorite TV show! You need to stop cooking it the second those milk solids turn golden brown because they go from perfect to burnt in about three seconds flat. You can actually see this risk in action when trying to make other homemade items, but butter is faster!
Also, remember that dough consistency is key for getting flaky, great sugar cookies. If your kitchen is warm, or if you just feel like the dough is a little too soft after mixing, pop it into the fridge for 30 minutes. Chilling the dough gives you a thicker cookie and helps prevent too much spread, which is essential for getting those perfect **crispy edge cookies** you want. If you skip chilling, you might end up with flatter rounds, just like the results you might see detailed over at Segolas.
One of Grandma’s tricks I borrowed for other recipes? A gentle pat down right before baking helps ensure they bake evenly across the surface. For these, you can lightly flatten the dough balls with the bottom of a glass if you want extra-crispy edges right off the bat. Happy baking!
Variations for Your Brown Butter Cookies
Even though these **brown butter sugar cookies** are spectacular as written, I always love messing with a good base! Because the **brown butter cookies** flavor is so complex and nutty, we don’t need much to make them interesting.
For a little warmth, definitely try adding just half a teaspoon of cardamom along with your nutmeg; it pairs beautifully with the caramel notes. If you’re feeling adventurous, swap out that vanilla extract for an equal amount of bourbon or almond extract before adding the eggs.
Want a slightly different texture? Try swapping just half of the brown sugar for dark brown sugar—that extra molasses really deepens the flavor profile. These little tweaks are what turn a simple recipe into your signature bake! Speaking of molasses, you should check out my recipe for apple dapple cake with a moist brown sugar glaze for another perfect use of that ingredient.
Storage and Reheating Brown Butter Sugar Cookies
We want these cookies to taste just as good on Day Three as they did coming off the rack, right? The key to keeping that chewy center and that **crispy edge cookie** texture is storage! Keep them in a truly airtight container at room temperature. Don’t overcrowd them, or the steam might soften those edges up too much!
They honestly taste best in the first couple of days, but they’ll last well for about four days. If you need to store them longer, they freeze like a dream! Lay the cooled cookies flat on a tray, flash freeze them, and then transfer them to a zip-top bag. If you need a quick refresher, pop them in a 300°F oven for just 3 minutes—it brings back that fresh-baked warmth. For more sweet preservation ideas, check out my guide for easy fudge that never fails!
Frequently Asked Questions About Brown Butter Sugar Cookies
I know you might have questions floating around, especially when it comes to that crucial first step of browning the butter. It’s the mark of truly **gourmet sugar cookies**, but it can freak first-time bakers out! Here are the things I get asked most often about mastering these **caramel flavored cookies**.
Can I skip browning the butter and just use melted butter?
Oh, you totally can, but you’ll be missing the entire point of this recipe, my dear! If you use regular melted butter, you get a standard, good sugar cookie, but you lose that incredible nutty depth and **caramel flavored cookies** profile. Browning the butter is the step that makes them special! You absolutely need to try it at least once to see the difference it makes for these **brown butter cookies**.
Can I substitute salted butter for the unsalted butter required?
I usually suggest sticking to unsalted butter anytime we are making **from scratch cookies** so we have total control over the salt content. If you only have salted butter, reduce the added salt in the dry ingredients down to just 1/4 teaspoon. Keep in mind that salted butter sometimes varies in salt level, so be cautious!
How long should I chill the dough before rolling?
The beauty of this specific recipe is that it actually doesn’t require a long chill time, which is great for quick baking! However, if you want those *extra* thick cookies—the ones that are almost cakey in the middle—I recommend chilling the scooped and *sugared* balls for about 30 minutes. This slight chill helps maintain that separation between the **chewy centers** and the **crispy edges**.
Do these freeze well?
Yes, they freeze wonderfully! I often make a huge batch, just like I do for my dressing recipes for later use. You can freeze the baked cookies airtight for up to three months, or even freeze the dough balls before rolling them in sugar. You’ll find more tips on making your baking go further in my guide to easy beef noodle soup!

If you’re curious about the actual numbers, check out the details below, but remember these are just estimates based on standard measurements we used for this bake, similar to what you might see on sites like Just Worthi.
Estimated Nutritional Data for These Gourmet Sugar Cookies
As much as I love talking about flavor and texture, I do believe in being transparent about what we’re eating here at Cookery Command! Remember, these are **gourmet sugar cookies**, and browning the butter adds a certain richness, so we need to be mindful! The values provided below are careful estimates based on standard ingredient measurements for exactly one cookie in this recipe.
Think of these numbers as a general guide, not a hard rule. If you use a different brand of flour or slightly less sugar for rolling, things will shift a little. We always prefer sharing the facts, much like how we provide clear nutritional estimates for our easy moist old-fashioned fruit cake recipe.
- Serving Size: 1 cookie
- Calories: 195
- Fat: 10g
- Saturated Fat: 6g
- Carbohydrates: 25g
- Sugar: 16g
- Protein: 2g
- Cholesterol: 45mg
They are certainly worth every single bite, but knowing the facts helps you plan your perfect treat day!
PrintChewy Brown Butter Sugar Cookies with Crispy Edges
Make these from-scratch brown butter sugar cookies for a rich, nutty flavor. They achieve the perfect texture: chewy centers with delightfully crispy edges, making them a gourmet twist on a classic.
- Prep Time: 20 min
- Cook Time: 11 min
- Total Time: 61 min
- Yield: 20 cookies 1x
- Category: Dessert
- Method: Baking
- Cuisine: American
- Diet: Vegetarian
Ingredients
- 1 cup (2 sticks) unsalted butter, browned and cooled
- 1 cup packed light brown sugar
- 1/2 cup granulated sugar
- 1 large egg plus 1 large egg yolk
- 1 tablespoon vanilla extract
- 2 3/4 cups all-purpose flour
- 1 teaspoon baking soda
- 1/2 teaspoon salt
- 1/4 teaspoon ground nutmeg (optional, for depth)
- 1/2 cup granulated sugar, for rolling
Instructions
- Brown the butter: Place the butter in a light-colored saucepan over medium heat. Cook, swirling often, until the butter melts, foams, and then brown bits form at the bottom, releasing a nutty aroma. Immediately pour the browned butter into a heatproof bowl to stop cooking. Let it cool completely to room temperature (about 30 minutes).
- In a large bowl, use an electric mixer to beat the cooled brown butter, brown sugar, and granulated sugar until light and fluffy, about 2 minutes.
- Beat in the egg, egg yolk, and vanilla extract until just combined. Scrape down the sides of the bowl.
- In a separate medium bowl, whisk together the flour, baking soda, salt, and nutmeg, if using.
- Gradually add the dry ingredients to the wet ingredients, mixing on low speed until just combined. Do not overmix. The dough will be soft.
- Place the remaining 1/2 cup of granulated sugar in a shallow dish.
- Scoop the dough into rounded tablespoons (about 1.5 ounces each). Roll each portion into a ball, then roll thoroughly in the granulated sugar until completely coated.
- Place the dough balls 2 inches apart on baking sheets lined with parchment paper.
- Bake at 375°F (190°C) for 9 to 11 minutes. The edges should look set and golden brown, but the centers should still look slightly soft.
- Let the cookies cool on the baking sheet for 5 minutes before transferring them to a wire rack to cool completely. The edges will crisp as they cool.
Notes
- To brown butter, watch carefully after the foam subsides; the milk solids will quickly turn from white to golden brown to burnt.
- For extra crispy edges, slightly flatten the dough balls with the bottom of a glass before baking.
- If you prefer a thicker cookie, chill the dough for 30 minutes before rolling in sugar and baking.
Nutrition
- Serving Size: 1 cookie
- Calories: 195
- Sugar: 16
- Sodium: 110
- Fat: 10
- Saturated Fat: 6
- Unsaturated Fat: 4
- Trans Fat: 0
- Carbohydrates: 25
- Fiber: 1
- Protein: 2
- Cholesterol: 45