
There is nothing quite like that moment during the holidays or around Valentine’s Day when you bite into a truly decadent, classic confection. Forget those chalky, sad versions you sometimes find! My goal here at Cookery Command is to bring that professional-level flavor right into your home kitchen, and that starts with making authentic chocolate covered cherries from scratch. We bridge tradition—the nostalgia of that juicy, bursting core—with solid technique to ensure you get that perfect, glossy dark chocolate shell every single time. You can compare this level of homemade delight to the satisfaction of baking our Christmas cookie bars; it’s all about creating memories! Trust me, once you master this simple fondant wrap, you’ll never look back. You are absolutely going to be in command of these treats.
- Why You Will Make These Homemade Chocolate Covered Cherries
- Essential Ingredients for Perfect Chocolate Covered Cherries
- Step-by-Step Instructions for Homemade Chocolate Covered Cherries
- Tips for the Best Chocolate Covered Cherries Results
- Storage and Reheating Instructions for Chocolate Covered Cherries
- Variations on Classic Candy Recipes
- Serving Suggestions for Your Homemade Cherry Cordial Recipe
- Frequently Asked Questions About Chocolate Covered Cherries
- Estimated Nutritional Data for Chocolate Covered Cherries
Why You Will Make These Homemade Chocolate Covered Cherries
I know what you’re thinking: “Making candy is complicated!” But I promise you, once you see how quickly this comes together, you’ll ditch the store-bought boxes forever. This recipe for chocolate covered cherries is all about bringing that rich, layered experience home without needing a ton of specialized equipment. It’s my favorite kind of magic!
You need these candies in your life because they deliver everything you want in a gourmet sweet, simplified for the home cook. We’ve taken the time to perfect the processes so you reap all the rewards. Compare this simple joy to making our easiest peanut butter bars—pure satisfaction!
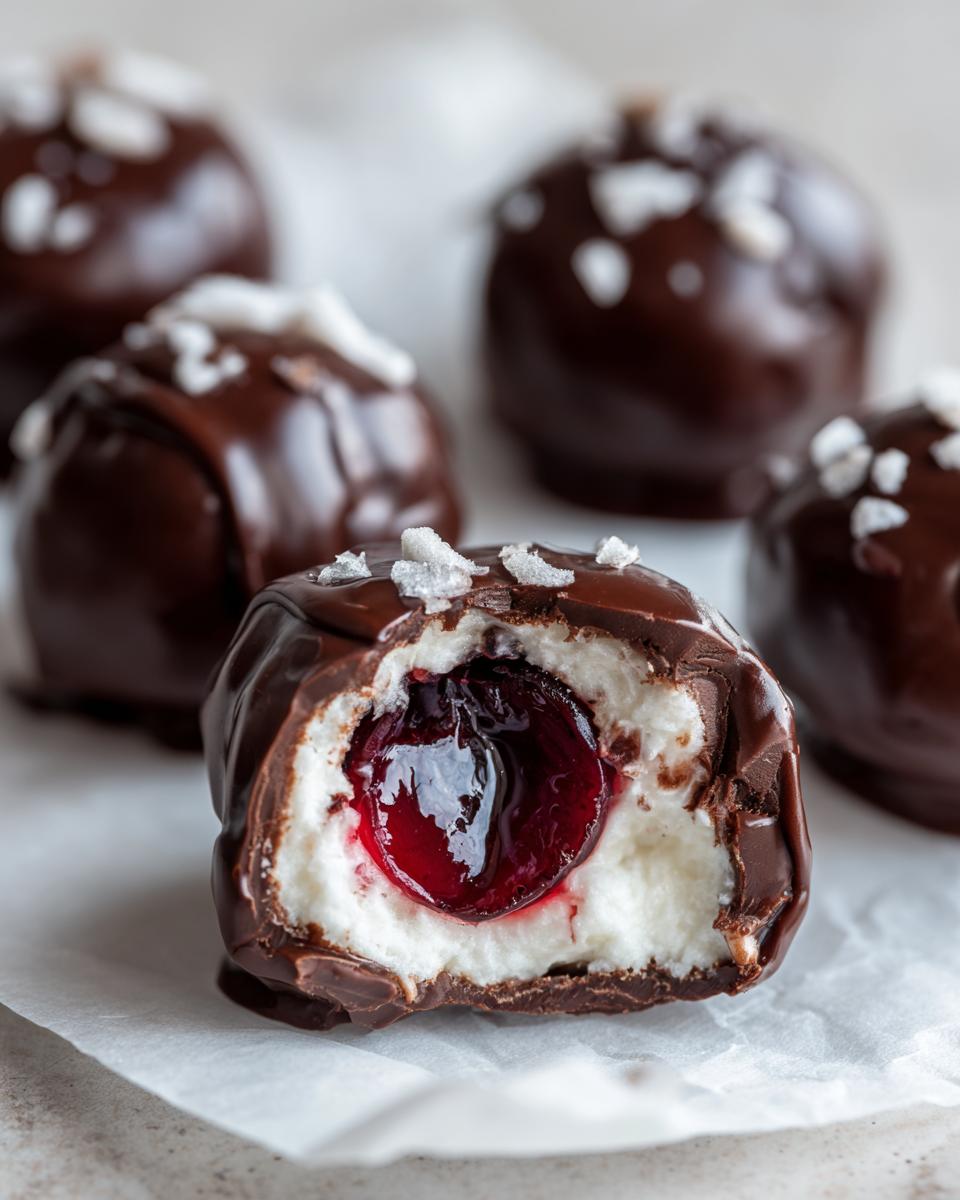
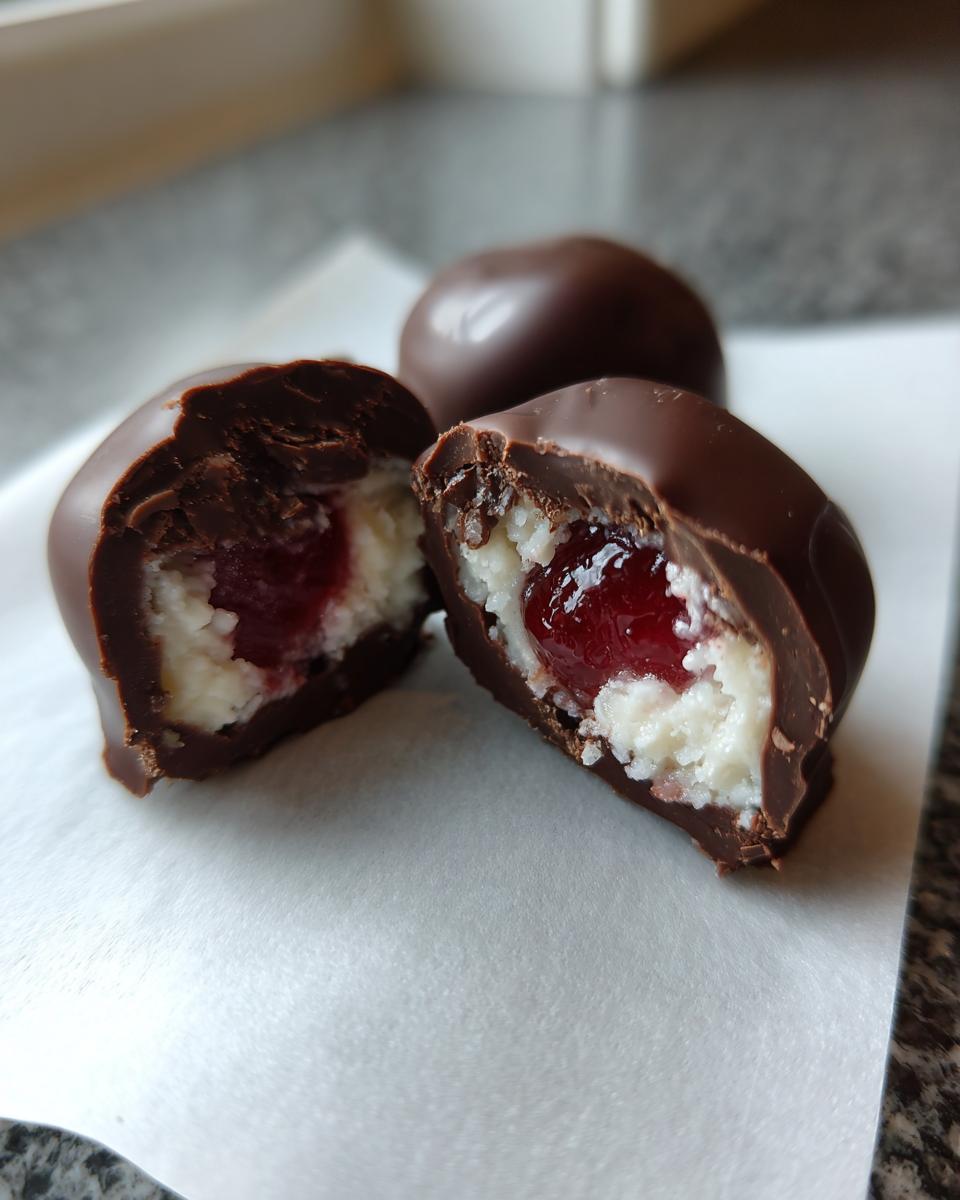
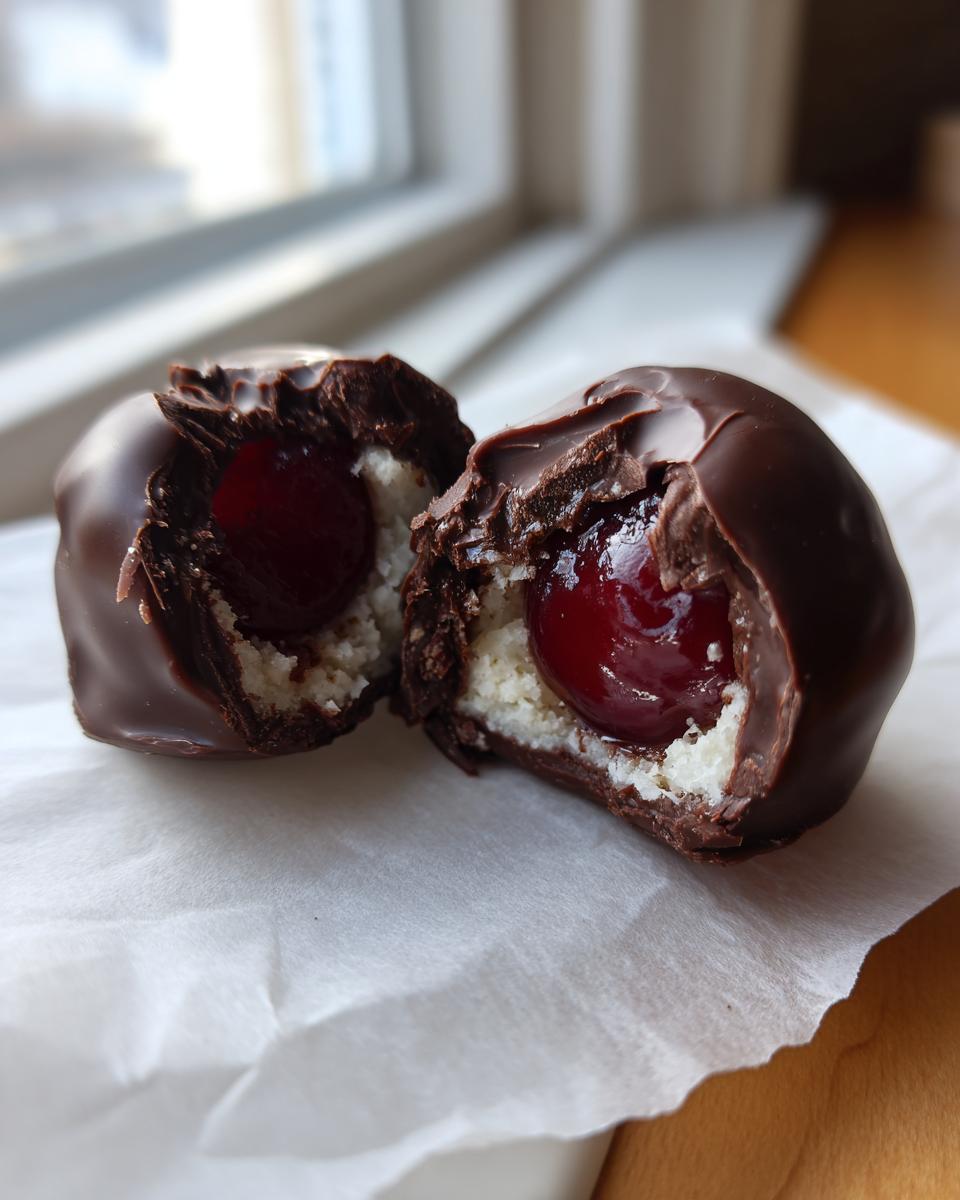
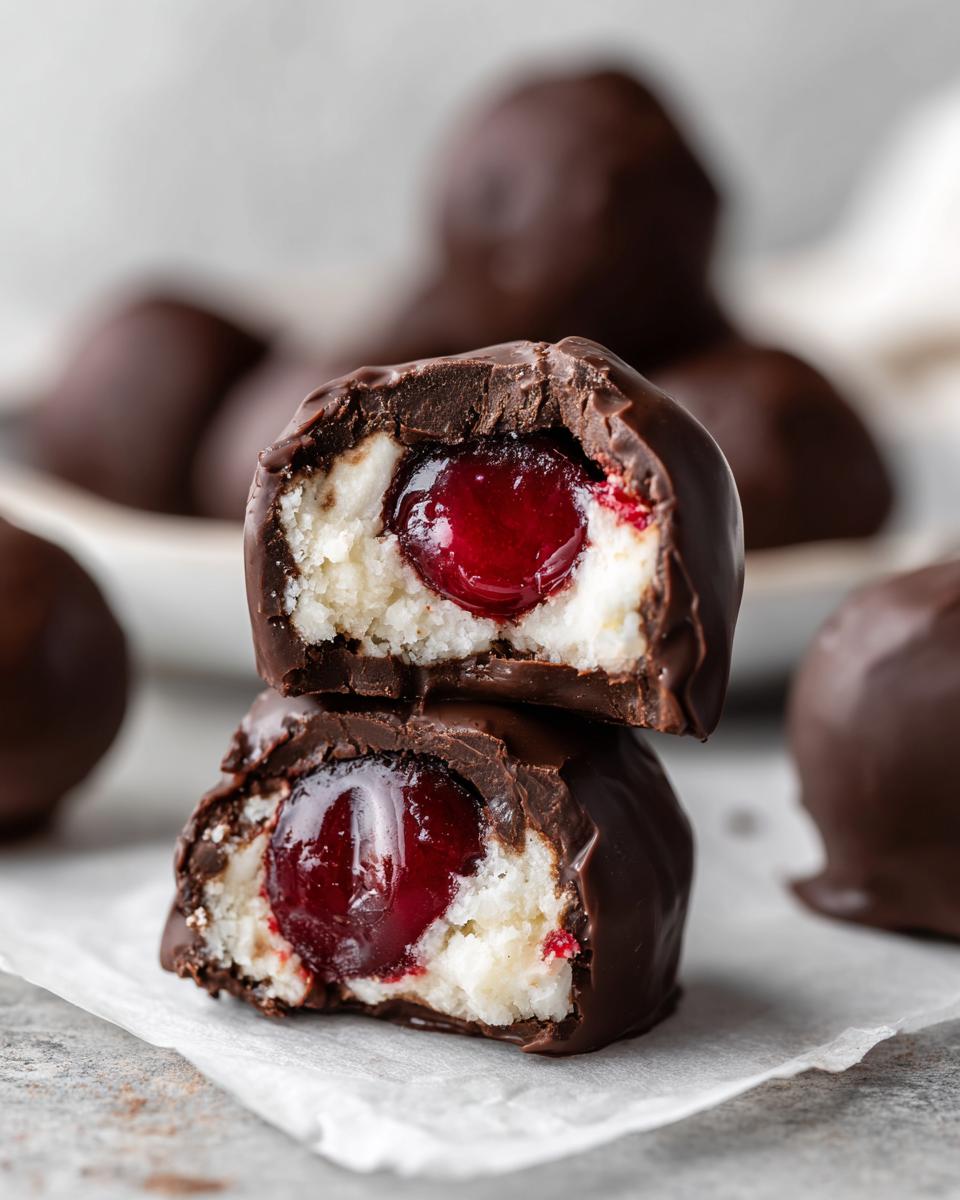
- That Liquid Cordial Center: This isn’t just a marshmallow fluff filling! We set up the fondant to break down over a few days, creating that signature, syrupy burst of cherry juice you only find in the truly fancy cordials.
- Superior Chocolate Quality: When you dip it yourself, you control the chocolate! We use real, high-quality dark chocolate that melts down into a flawless, glossy shell instead of that waxy coating you sometimes get commercially.
- Simple Fondant Base: The entire wrapping layer is made from pantry staples—butter, sugar—requiring absolutely zero cooking or candy-making skills. It’s practically no-bake candy making!
- Perfect for Gifting: Nothing says love or holiday cheer like a box of homemade, impressive sweets. These look utterly professional but carry that wonderful, personal touch.
Essential Ingredients for Perfect Chocolate Covered Cherries
Getting the right ingredients is the first step toward commanding this recipe, just like ensuring you have the best cocoa powder for our easy homemade chocolate chip cookies. Since we aren’t actually cooking the center, the texture relies entirely on these components being measured and prepared correctly. Pay careful attention to the draining and sifting notes; they are non-negotiable for that perfect result!
Fondant Center Components
- 1 jar (10 oz) maraschino cherries, drained really well
- 1/4 cup maraschino cherry juice (you must reserve this!)
- 2 cups powdered sugar, sifted finely
- 1/4 cup butter, softened completely
- 1/4 teaspoon almond extract
Chocolate Coating Ingredients for Chocolate Covered Cherries
This is where we achieve that professional gloss, so don’t skimp here! Using a higher quality chocolate makes all the difference.
- 1 pound dark chocolate, high quality, for dipping
- 1 tablespoon shortening or coconut oil (optional, but trust me, it makes dipping so much smoother)
Step-by-Step Instructions for Homemade Chocolate Covered Cherries
Okay, now we move into the fun part—actually assembling these beautiful no-bake granola bars-level beauties! This process is about layering textures. Everything needs to be ready before we introduce the warm chocolate, so organization is key here. We are moving from fruit prep to fondant structure to that final, glossy coat. Remember, patience during the chilling phases pays off HUGE for the final look! This part of the process is where you really feel like you’re crafting something special, just like making elegant homemade gifts mentioned by sources like this one.
Preparing the Maraschino Cherries
This might seem minor, but trust me, if the cherries are wet, your fondant filling will collapse into soup later. Seriously, drain those maraschino cherries like they owe you money! Lay them out flat on several thick layers of paper towels. Gently, but firmly, press down to wick away every last drop of moisture. While you do this, make sure you save that lovely pink juice—we need a bit of it later! We’re aiming for dry cherries ready for their cozy fondant blanket.
Creating the Fondant Center Candies
Grab your bowl! You’re going to cream the softened butter with the almond extract until it’s smooth—we want that creamy base established. Now, start beating in the sifted powdered sugar gradually. Once it’s a stiff dough, you carefully add that reserved cherry juice, just a teaspoon at a time, until the dough feels like very thick peanut butter. This is the exact consistency you need for wrapping; don’t be tempted to add too much liquid at once!
Wrapping and Chilling the Chocolate Covered Cherries
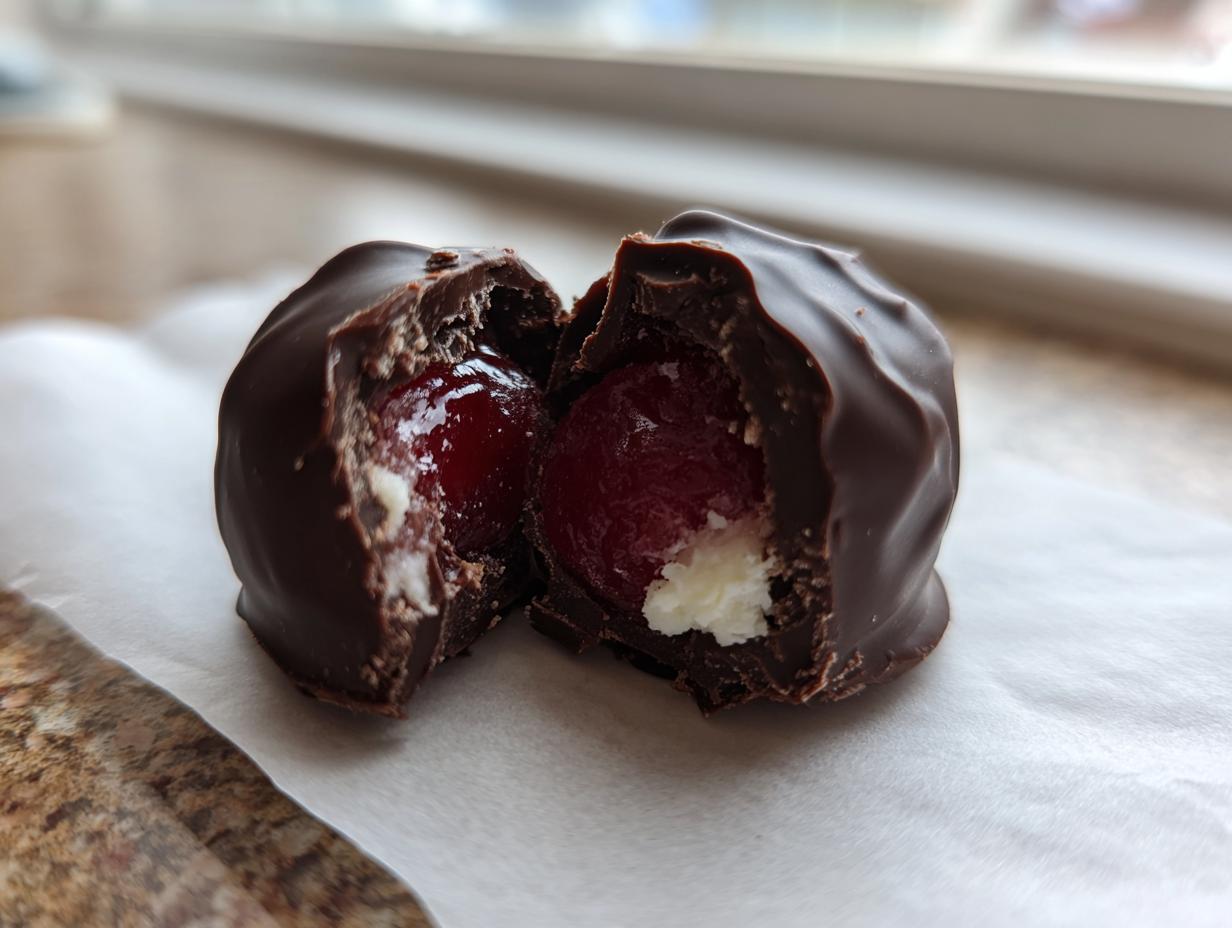
Take a tiny spoonful (about a teaspoon) of that fondant mixture and flatten it in your palm. Place one dried cherry right in the middle, and carefully wrap the fondant all the way around it, smoothing it out until the cherry is completely encased. Roll it gently until it’s a nice little oval or ball. Pop these wrapped beauties onto a sheet of parchment paper and get them into the fridge. They need to chill for a minimum of two hours—you want them rock hard before they even think about meeting the warm chocolate. Seriously, don’t rush this chilling time!
The Art of Melted Chocolate Dipping
While those centers are getting frosty, melt your dark chocolate. I usually use a double boiler, but if you’re quick, the microwave works if you use 30-second bursts, stirring constantly so you don’t scorch it. If you want that easy, professional flow, stir in that tiny bit of shortening or coconut oil right at the end until it’s like silk. Now, work fast! Take one chilled center out at a time (use dipping tools or two forks) and completely submerge it. Let the extra drizzle off, and place it back on the parchment. If you’re feeling extra, sprinkle some chopped nuts right on top before the chocolate sets. That’s it for the dipping!
Tips for the Best Chocolate Covered Cherries Results
We’ve successfully wrapped and dipped our candies, but to get that true, old-fashioned cherry cordial experience—the one where the chocolate cracks beautifully and the center turns into luscious syrup—we need a little patience and a few expert moves derived from years of testing. These tips are what elevate your chocolate covered cherries from simple homemade candy to something truly gourmet. You’ll see that our technique focuses on letting chemistry do the final hard work!
Achieving the Classic Liquid Center
This is the big secret, and it requires resisting the urge to eat them all on day one! If you want that famous liquid center that melts in your mouth, you absolutely cannot refrigerate the finished candies right away. The process requires time for the sugar in the fondant to interact with the moisture of the cherry, turning that firm center into the syrup we love. You need to store them in an airtight container at cool **room temperature** for about two to three days before serving. Seriously, hide these from yourself! If you chill them too early, the sugar structure stabilizes and you’ll end up with a soft fondant center instead of a liquid burst.
Improving Your Chocolate Dipped Treats Shell
If you look closely at those gorgeous, glossy chocolate candies you buy in fancy shops, you’ll notice they usually have a pretty thick, uniform shell. To replicate that professional thickness and hide any minor gaps, you can absolutely go back in for a second dip! Wait until the first layer of chocolate is completely set—it should be hard and not bendy at all. Then, quickly dip them again, making sure to cover any spots you missed the first time. This double-coating technique is a lifesaver if your first dip was a bit thin, and it gives you that satisfying *snap* when you bite in. Mastering this dipping technique is key to making impressive sweets, just like when we finish our brown butter chocolate chip cookies!
For more insights on perfecting the final look of your candies, check out the detailed tips shared by the folks over at Ricoloranz; they really focus on that polished finish we’re aiming for here.
Storage and Reheating Instructions for Chocolate Covered Cherries
How you store these homemade beautiful chocolate covered cherries is actually the secret weapon to achieving that liquid center we are obsessing over! Once the chocolate shell is totally firm—and I mean hard to the touch—you need to move them immediately to a cool, dry spot. Think of a pantry shelf or a cool corner of your countertop, not the fridge.
If you put them straight into the refrigerator, that cold temperature will lock up the fondant, and it won’t break down into the syrup. We want them sitting at a cozy room temperature for those 2 to 3 days to let that magic happen. Once they are perfectly gooey inside, you can keep them in an airtight container. If you ever need to refresh them, they certainly don’t need reheating, but a gentle 15 minutes on the counter before serving is lovely. Maybe next time you can try them alongside our easy chocolate fondue!
Variations on Classic Candy Recipes
While I am absolutely devoted to the perfect dark chocolate and cherry combination—it’s a classic for reason!—that doesn’t mean we can’t play around a little bit once you’ve mastered the core structure of these homemade cordials. When you feel completely confident with the fondant wrapping and the chilling process, you’ve unlocked the basic framework for all sorts of chocolate dipped treats. Think of this as your jumping-off point for amazing holiday candy ideas!
Because the method is so simple, small ingredient swaps yield huge flavor changes. You have total control over the final product, which is the best part of making candy at home!
- Switch Up the Chocolate: Don’t stop at dark chocolate! Try melting high-quality white chocolate (you might need a little extra shortening for a thinner melt) for a completely different, sweeter profile. Or, grab some milk chocolate if that’s your jam. A half-and-half dip—first dark, then drizzles of white—looks stunning for a festive platter.
- Get Salty or Nutty: Before the chocolate fully sets, use a tiny sprinkle of flaky sea salt just on top. It cuts through the sweetness perfectly! Alternatively, you can dip your just-coated cherries right into finely chopped pecans or toasted almonds for added crunch.
- Flavor the Fondant: Want an extra layer of complexity in the filling? Beyond the almond extract, try adding just a tiny dash of orange zest into the fondant mixture, or use a teaspoon of high-quality bourbon instead of a teaspoon of the reserved cherry juice when mixing the base. That boozy note pairs beautifully with the cherry, making these feel extra gourmet.
No matter which direction you go, remember that the initial steps—drying the cherry and chilling the wrapped fondant—are what keep these from becoming sticky messes. Once those steps are nailed down for your basic homemade chocolate covered cherries, you’re free to experiment!
Serving Suggestions for Your Homemade Cherry Cordial Recipe
These stunning chocolate covered cherries just beg to be noticed! Since they look so beautiful and taste like something you’d find in a fancy shop, they are the absolute perfect addition to any holiday spread or used as a thoughtful gift. Think about packaging them up in small, clear boxes tied with a velvet ribbon—they become instant gourmet chocolate gifts.
They pair wonderfully with a strong cup of coffee or a cozy glass of red wine after dinner. If you’re making them for a party platter, set them next to something simple, like plain shortbread cookies, so their rich flavor really stands out. For more beautiful ideas on setting up dessert tables, I’ve always loved seeing what others put together, like the arrangements shared over at One Sweet Mama!
Frequently Asked Questions About Chocolate Covered Cherries
It’s totally normal to have questions when moving from store-bought candies to making your own! Getting the texture just right, especially that famous dissolving center, is where people sometimes get stuck. Don’t worry, we’ve figured out all the little tricks so you can command perfect results every time! If you’re looking for more general tips on candy making, feel free to check out our guide on easy homemade chocolates.
How long do I have to wait for the liquid center to form in my chocolate covered cherries?
This is the big one! To get that beautiful, syrupy liquid center that melts in your mouth, you need patience. You must allow the finished candies to sit at a cool room temperature—think 65-70°F—for about two to three days after dipping. If you put them straight into the fridge, the cold sets the sugar structure of the fondant, and it stays set! We need that time at room temperature for the cherry moisture to interact with the sugar and create that perfect syrup.
Can I use fresh or frozen cherries instead of maraschino cherries for this recipe?
Oh, I wish you could, because fresh cherries are heavenly! However, no, you really need those jarred, bright red maraschino cherries for this specific recipe. The reason is twofold: first, maraschino cherries are preserved in a high-sugar brine, which helps the fondant structure stay firm while wrapping. Second, we need that high sugar content to actually draw moisture out later to create the liquid center. Fresh or frozen cherries just won’t interact with the fondant correctly for this cordial effect.
What is the best way to store these chocolate dipped treats if I am not eating them right away?
Airtight containers are your friend here! Make sure the chocolate shell is completely hard before sealing them up. You want to store them in a location that is cool, dark, and stable. Avoid the refrigerator if you are aiming for the liquid center, but if you need to speed up the setting process or are storing them in a very warm kitchen, a spot away from direct sunlight or heat sources is crucial. Don’t let them shake around too much, as we don’t want that gorgeous shell cracking!
Estimated Nutritional Data for Chocolate Covered Cherries
Now, I always tell folks that when you’re making incredible homemade candy, you shouldn’t be counting calories, but I know some of you like to peek! Since every ingredient goes into this gorgeous treat, here is the estimated breakdown per piece based on standard measurements. Remember, since this is all from scratch and based on the quality of the chocolate you choose, these are an educated guess, not a lab result. It’s just good to know what you’re indulging in! If you ever want to see the nutrition breakdown for something heartier, check out the data over on my easy creamy white chicken enchiladas recipe.
- Serving Size: 1 piece
- Calories: 150
- Sugar: 18g
- Sodium: 15mg
- Fat: 8g
- Saturated Fat: 5g
- Carbohydrates: 20g
- Protein: 2g
Homemade Chocolate Covered Cherry Cordials with Liquid Center

Make classic chocolate covered cherries at home using maraschino cherries wrapped in a simple fondant, then dipped in rich dark chocolate for a decadent, melt-in-your-mouth treat ideal for gifting.
- Prep Time: 45 min
- Cook Time: 15 min
- Total Time: 60 min
- Yield: About 24 candies 1x
- Category: Dessert
- Method: No Bake/Dipping
- Cuisine: American
- Diet: Vegetarian
Ingredients
- 1 jar (10 oz) maraschino cherries, drained well
- 1/4 cup maraschino cherry juice (reserved from draining)
- 2 cups powdered sugar, sifted
- 1/4 cup butter, softened
- 1/4 teaspoon almond extract
- 1 pound dark chocolate, high quality, for dipping
- 1 tablespoon shortening or coconut oil (optional, for smoother dipping)
Instructions
- Prepare the cherries: Drain the maraschino cherries completely. Place them on several layers of paper towels and press gently to remove as much excess moisture as possible. Set aside 1/4 cup of the draining juice.
- Make the fondant center: In a medium bowl, cream together the softened butter and almond extract until smooth. Gradually beat in the sifted powdered sugar until a stiff dough forms.
- Add liquid: Add the reserved cherry juice, one teaspoon at a time, mixing until the dough is soft but still manageable, similar to thick peanut butter. Do not over-moisten.
- Wrap the cherries: Take a small piece of fondant (about 1 teaspoon) and flatten it in your palm. Place one dried cherry in the center and carefully wrap the fondant completely around the cherry, sealing it well. Roll it into a smooth ball or oval shape.
- Chill the centers: Place the fondant-covered cherries on a parchment-lined baking sheet. Chill in the refrigerator for at least 2 hours, or until very firm. This step is critical for successful dipping.
- Melt the chocolate: Chop the dark chocolate into small, uniform pieces. Melt the chocolate using a double boiler or in the microwave in 30-second intervals, stirring well after each interval, until smooth. Stir in the shortening or coconut oil if using, to thin the chocolate slightly.
- Dip the cherries: Working quickly, use a dipping tool or two forks to submerge one chilled cherry completely in the melted chocolate. Lift it out, allowing excess chocolate to drip off.
- Set the coating: Place the dipped cherry back onto the parchment-lined baking sheet. If desired, immediately drizzle or sprinkle with extra chocolate or chopped nuts before the coating sets.
- Final set: Allow the chocolate to set completely at room temperature or briefly in the refrigerator until the shell is hard and glossy.
Notes
- For the best liquid center, allow the finished cordials to sit at cool room temperature for 2 to 3 days before serving. The sugar in the fondant will draw moisture from the cherry, creating the classic syrup.
- If you want a thicker shell, perform a second dip after the first layer of chocolate has set completely.
- Use high-quality chocolate for the best flavor and glossiest finish.
Nutrition
- Serving Size: 1 piece
- Calories: 150
- Sugar: 18g
- Sodium: 15mg
- Fat: 8g
- Saturated Fat: 5g
- Unsaturated Fat: 3g
- Trans Fat: 0g
- Carbohydrates: 20g
- Fiber: 1g
- Protein: 2g
- Cholesterol: 10mg