
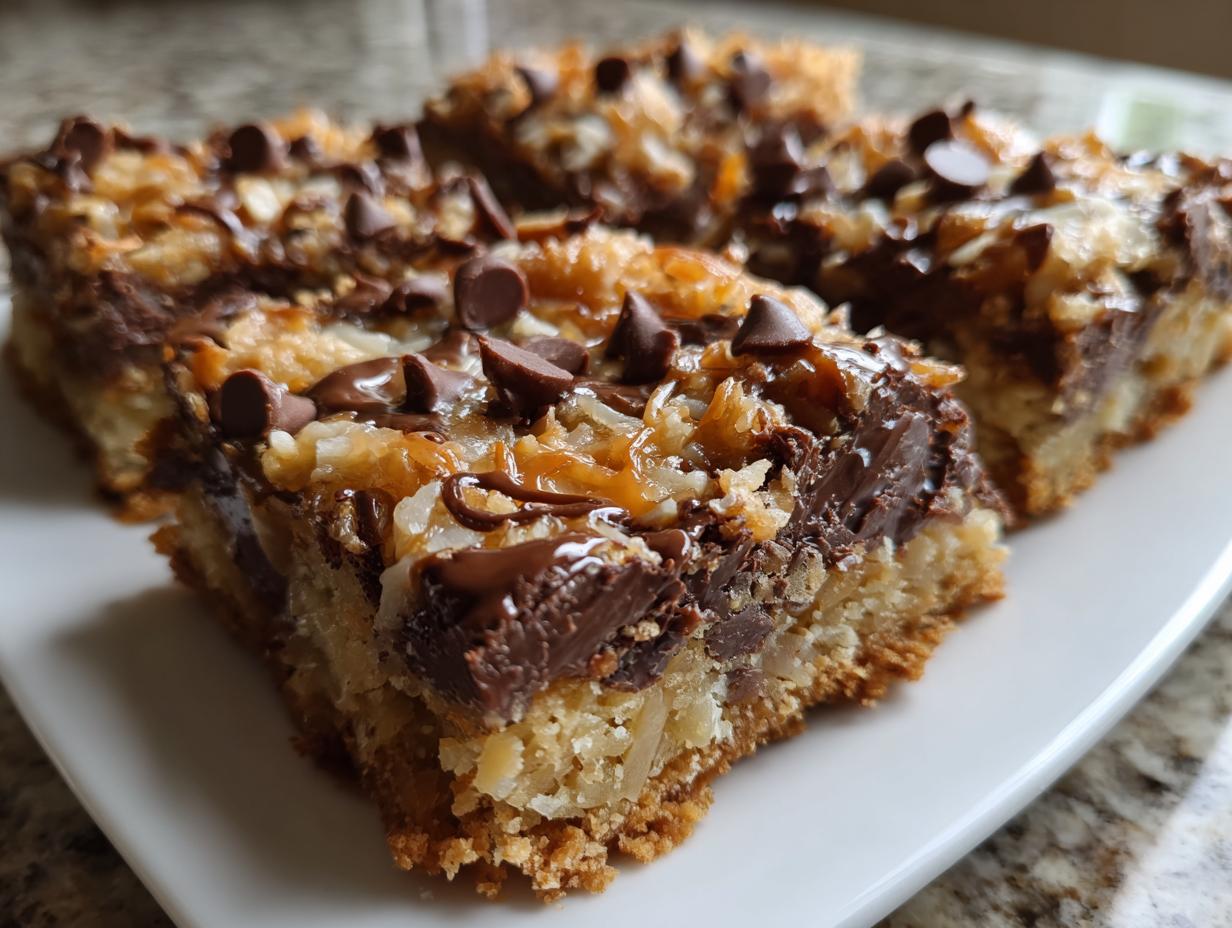
There’s just something about a dessert that tastes exactly like childhood, isn’t there? For me, nothing hits that sweet spot of nostalgia quite like a rich, multi-layered baked good. When the holidays roll around, or honestly, any time I need a guaranteed crowd-pleaser, I turn to this recipe for the ultimate magic cookie bars. Forget dry, crumbly squares—we are aiming for seriously decadent, gooey perfection here!
When I was developing this recipe here at Cookery Command, my goal was simple: create the easiest bar cookie possible that tastes impossibly impressive. I leaned on techniques I learned long ago to ensure that beautiful, sticky texture you crave. These are the classic layered bars that everyone remembers, but perfected for reliability. Baking these always brings me comfort; it smells like home, and I know you’ll feel that assurance stepping into your own kitchen. You can check out my notes on other great holiday recipes like my Christmas cookie bars while you’re here!
We’re using simple pantry staples to build those perfect layers. If you’re looking for a recipe that minimizes stress and maximizes ooey-gooey goodness, you’ve definitely found it. We’re going to make the best magic bars together!
- Why This Magic Cookie Bars Recipe Stands Out (E-E-A-T Focus)
- Gathering Your Ingredients for Classic Layered Bars
- Step-by-Step Instructions for Easy Bar Cookies
- Tips for Success When Making Magic Cookie Bars
- Storage and Reheating Instructions for Gooey Dessert Bars
- Serving Suggestions for Your Homemade Magic Bars
- Frequently Asked Questions About Magic Cookie Bars
- Nutritional Estimate for Rich Dessert Bars
- Share Your Holiday Cookie Bars Creations
Why This Magic Cookie Bars Recipe Stands Out (E-E-A-T Focus)
When you’re looking for the best magic bars, you aren’t just looking for ingredients; you’re looking for guaranteed gooeyness, right? That’s what we deliver here. This isn’t some dry, crumbly imitation. This classic layered dessert is built on ratios that work every single time you bake it.
- Perfect balance of chips, coconut, and nuts means even distribution in every bite.
- The initial crust bake sets up the foundation so you don’t end up with a soggy mess.
- It’s truly the simplest recipe—just layer and pour, making it ideal for last-minute potlucks.
We’ve tested the sweetened condensed milk measurement over and over until we got that signature, sticky pull we all love. You can dive into my tips for other reliable bar recipes like my apple cheesecake bars!
Achieving the Perfect Gooey Texture in Magic Cookie Bars
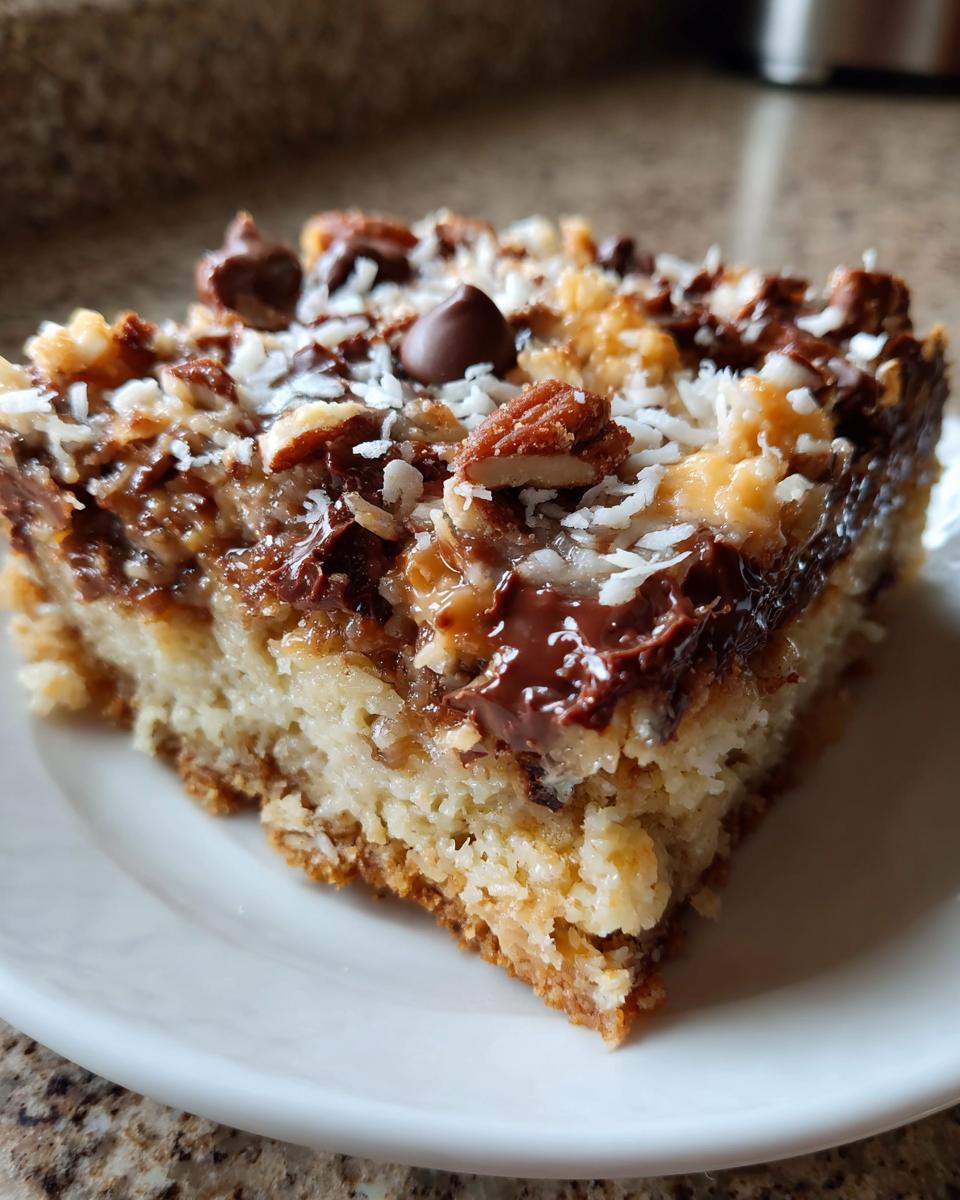
The secret sauce to the gooey texture, and this is non-negotiable, is the way that can of sweetened condensed milk interacts with the chips and coconut as it bakes. It essentially caramelizes around the mix-ins, which is what makes these gooey dessert bars so incredible.
But here’s the trick: you *must* let them cool fully. Resist the urge to cut them hot out of the oven! That cooling time is when the binding magic happens. If you rush it, they just smear everywhere. Patience yields chewy perfection, trust me on this one!
Gathering Your Ingredients for Classic Layered Bars
Okay, getting everything ready for assembly is the fun part! I love that putting together these magic cookie bars feels like building something delicious rather than actual baking. You probably have most of this stuff right now, which proves just how easy these rich dessert bars are for a quick treat. We just need a few simple layers to create that legendary texture.
Remember to have your 9×13 pan lined and ready to go. If you want a peek at another family favorite you can make with nuts, check out my recipe for pecan pie cobbler!
Ingredient Notes and Substitutions for Your Magic Cookie Bars
This is where we talk quality control! If you want the *best* results, pay attention to these little details. First thing: sweet stuff matters. You absolutely must use sweetened condensed milk. Please don’t swap in evaporated milk; it’s entirely different and won’t create that creamy, sticky binder we are obsessed with. We need the sugar content!
For the chips, I love the classic semi-sweet and butterscotch combo—it tastes like the 70s in the best way possible! But if you can’t find butterscotch, go ahead and use plain milk chocolate chips instead. If you have a nut allergy in the house, skip the pecans entirely. I usually add an extra half cup of chocolate chips, which just makes them even more decadent. Just remember, any swaps mean they aren’t *exactly* the original, but they’ll still be delicious!
Step-by-Step Instructions for Easy Bar Cookies
Alright, let’s get these beautiful magic cookie bars assembled! Since we’re aiming for speed and deliciousness here, I break this down into three simple phases. You’ll have these layered up and heading into the oven before you know it. I always tell folks that if you can sprinkle things, you can make these bars! If you need a little inspiration for another quick treat while you’re waiting, don’t forget to check out my easy chocolate fondue recipe.
Preparing the Graham Cracker Crust Base
First order of business: oven on to 350 degrees Fahrenheit. While that’s warming up, mix your graham cracker crumbs and melted butter until they look sandy and damp. Get them into that 9×13 pan you lined with parchment paper—leave those edges hanging out! Now, press that mixture down super firmly. Seriously, use the bottom of a flat measuring cup to really compact it. This firm press is my E-E-A-T secret; it stops the crust from crumbling apart when you try to cut those gorgeous squares later. Pop it into the oven for just 8 minutes to set things right before we start layering.
Layering and Pouring for Perfect Seven Layer Bars
Once that warm crust comes out, you jump right into layering! Sprinkle your chocolate chips first—nice and even. Then follow up with your butterscotch chips. Don’t worry if they overlap a little; that’s part of the charm. Next is the flaked coconut, spread evenly, and top that with your chopped pecans. This is the crunchy part of the symphony!
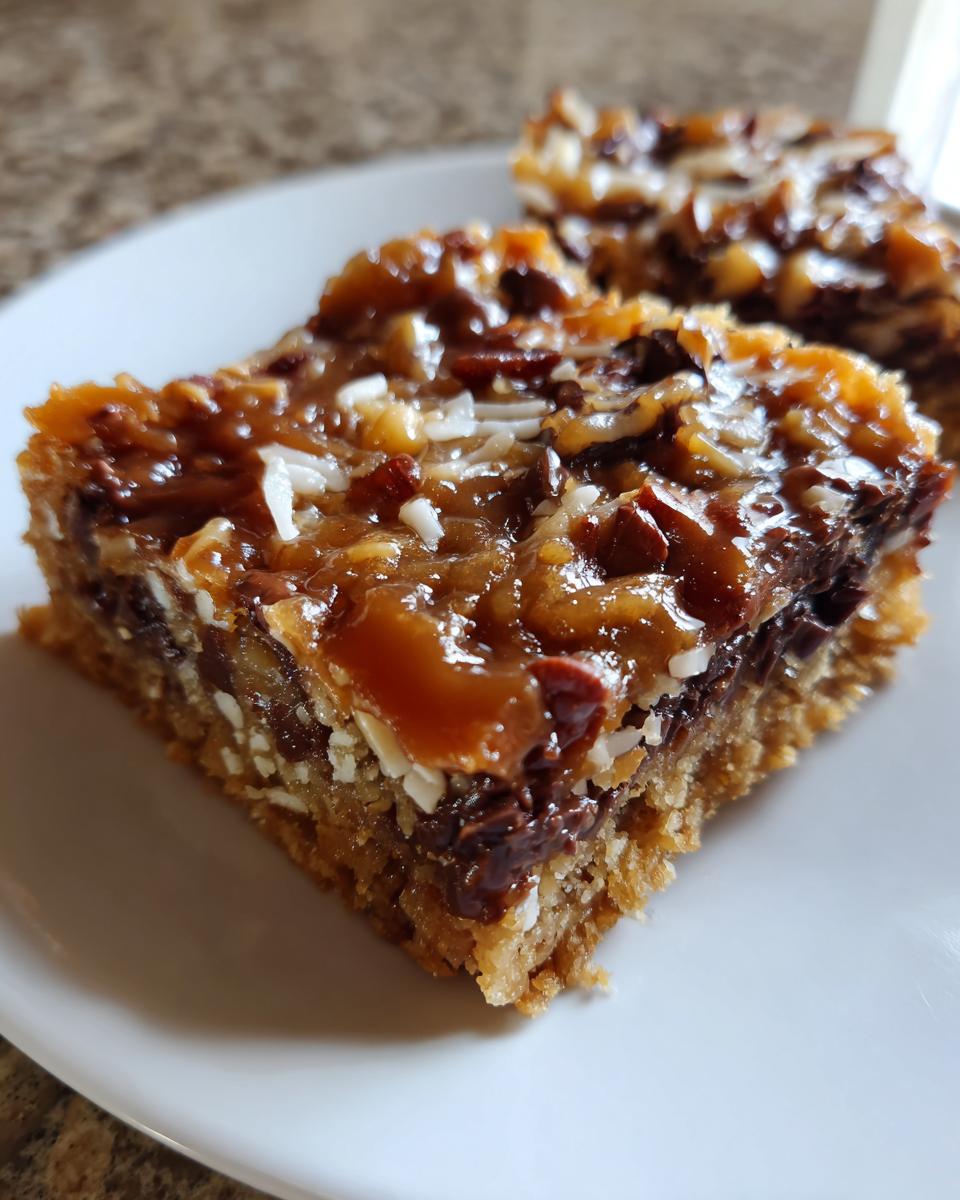
Now for the grand finale of assembly: the sweetened condensed milk. You need to pour this entire can slowly, in a thin stream, zig-zagging back and forth over all those chips and nuts. Make sure you cover every inch! This sticky liquid is what holds everything down and becomes that amazing chewy layer we waited for. Don’t rush the pour! Once the milk is settled, pop it back into the oven. For the baking time, aim for about 25 to 30 minutes. You’re looking for bubbly edges and a lovely golden-brown top. Once they’re done, you can see a great example of a similar classic recipe over at Allrecipes Magic Cookie Bars from Eagle Brand, but trust me, ours cools better!
Tips for Success When Making Magic Cookie Bars
You’ve got your gorgeous layers together, but trust me, a couple of simple steps right at the end will elevate these from good to legendary. These aren’t just ideas; they are my tried-and-true methods to stop common baking frustrations with these gooey dessert bars.
First tip: If you are worried about sticking—and who isn’t?—make sure you use the parchment overhang I mentioned earlier. You need that lift mechanism when they come out! Also, if you test them around 20 minutes and they seem a little loose, pull them out anyway. They continue to firm up outside the heat, and that’s how you keep them wonderfully gooey.
My absolute biggest tip for serving? You have to let them chill. Seriously. If you try to slice them warm, you’ll end up with a sweet, crumbly mess. Letting the homemade magic bars cool completely on the counter, and then chilling them in the fridge for at least two hours, makes for crystal-clear squares. For more baking foolproof tips, check out my guide on foolproof cookie icing! If you’re just assembling, you can always see how others bake them over at Cook That Dish.
Storage and Reheating Instructions for Gooey Dessert Bars
Since these are so rich, getting the storage right keeps them tasting fresh for days! The absolute best way to keep your gooey dessert bars perfect is to let them cool completely—and I mean completely, ideally after that two-hour chill—before you even think about cutting them. Warm bars are sticky bars, and sticky bars make a mess!
Once they are cut into squares, store them in a single layer (if you can manage it!) in a truly airtight container. They keep beautifully on the counter at room temperature for about three days. The high sugar content and the condensed milk act as natural preservatives, so you don’t usually need the fridge unless your kitchen is blazing hot.
Now, if you do store them in the fridge, they will firm up *a lot* because the butter and chocolate are going to solidify. That’s okay! If you find they are getting too hard straight from the fridge, just let them sit on the counter for about 30 minutes before serving. That little bit of time brings back that perfect, chewy softness. I would avoid microwaving them, honestly. You risk melting all that gorgeous gooey layer right out of the bar! They really shine when they are just slightly warmer than room temperature.
Serving Suggestions for Your Homemade Magic Bars
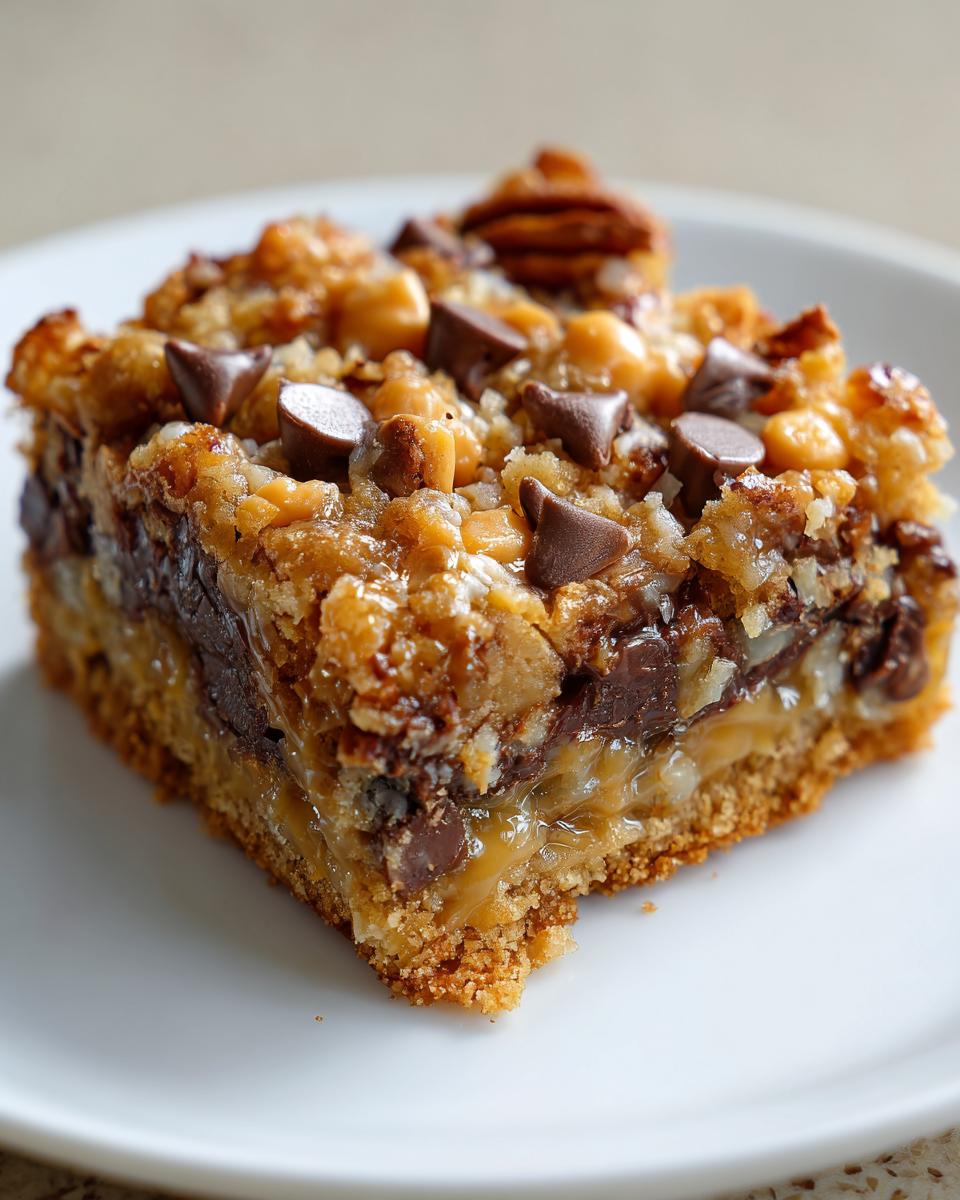
Whew, okay, these magic cookie bars are rich. I mean, mouth-wateringly, end-of-the-night, “I need one more bite” rich! Because the layers—the chocolate, the coconut, the condensed milk—are so intensely sweet and decadent, I usually like to pair them with something that cuts through that sweetness just a little bit. It makes the eating experience so much better, honestly.
If I’m serving these after a big dinner, I always have a good, strong cup of black coffee brewed. The slight bitterness of the coffee plays perfectly against that intense sugar rush from the bars. It’s a fantastic contrast!
For a warm-weather treat or alongside a brighter dessert spread, a small scoop of high-quality vanilla ice cream is heavenly. The cold vanilla creates this amazing temperature contrast with the chewy bar. If you’re feeling extra fancy—and why shouldn’t you?—a handful of fresh raspberries or sliced strawberries on the side adds a beautiful tartness. Those berries cut right through the richness of the nuts and chocolate!
And, just in case you’re craving another classic sweet element without the actual cookies, you should really take a look at how I handle my vanilla buttercream recipe sometime. It’s the perfect topping for pretty much anything!
Frequently Asked Questions About Magic Cookie Bars
I get so many questions about these bars just because they can seem intimidating with all those layers! Honestly, they are so simple, but it’s smart to ask about technique. People always want to know how to guarantee that perfect, gooey center, or if they can tweak the ingredients. Don’t hesitate to ask—that’s how we all learn to bake better!
If you are looking for a huge variety of mix-ins, you might also want to check out my thoughts on my kitchen sink cookies recipe sometime. But for these rich dessert bars, keeping it classic is usually best!
Can I make these Sweetened Condensed Milk Cookies without nuts?
Oh, absolutely! Dealing with allergies or just personal preferences is super common, and these bars are totally flexible. If you leave out the pecans or walnuts, you might find that the layers shift a little too much because you’ve lost some bulk. In the main recipe notes, I suggest just adding an extra half cup of chocolate chips or butterscotch chips to fill that gap. You could even add some dried cherries for a fun flavor pop! Either way, they will still be fantastic chewy bar cookies.
What is the difference between Magic Cookie Bars and Seven Layer Bars?
That’s a fun one! I can tell you, in my kitchen, there is absolutely no difference in the final product. These names—Magic Cookie Bars, Seven Layer Bars, Magic Squares—they are all just colorful names for the exact same concept: a buttery graham cracker crust topped with chips, coconut, nuts, and the magical binder of sweetened condensed milk. They are just different ways people talk about this wonderful, simple dessert. If you see a recipe calling for 7-layer bars, you can bet it’s going to be just as delicious and gooey as ours! For more ideas on layered treats, you can see how another great recipe handles them over at Weeknight Dishes.
Nutritional Estimate for Rich Dessert Bars
Okay, let’s talk numbers for a second. I’m Emily, and I come from a nutrition background, so I always try to give you a reliable estimate of what you’re getting into with these decadent treats. Because these rich dessert bars are so intensely satisfying, remember that they are a special occasion dessert, not an everyday snack!
Below is the estimated nutritional data based on standard measurements using the ingredients listed in the recipe. I always stress that these are just estimates, folks! If you use dark chocolate instead of semi-sweet, or if your can of condensed milk was slightly larger, things will shift a tiny bit. This calculation assumes you cut the 9×13 pan into 24 equal squares.
- Serving Size: 1 bar
- Calories: 220
- Sugar: 20g (Remember, a lot of this is locked in that condensed milk!)
- Fat: 13g
- Saturated Fat: 7g
- Carbohydrates: 25g
- Protein: 3g
- Sodium: 75mg
A quick note from me: This data doesn’t account for any substitutions, like using light condensed milk or different nuts. When you’re whipping up these magic cookie bars for family gatherings, enjoy the moment and don’t stress the details too much! The main goal is comfort and flavor, and these absolutely deliver on that!
Share Your Holiday Cookie Bars Creations
And just like that, you’ve done it! You’ve successfully navigated the assembly of the ultimate gooey, sticky, and incredibly satisfying magic cookie bars. Didn’t I tell you this recipe was straightforward? That’s the Cookery Command promise—taking those treasured recipes that feel like home and turning them into something you can execute with total confidence, every single time.
I am so proud of the deliciousness you’re about to pull out of your oven. These holiday cookie bars are perfect for gifting, setting out at a potluck, or just quietly enjoying with a cup of tea when the kids are finally asleep.
Now, this is the part where I need your help! If this recipe brought you that perfect hit of nostalgic sweetness, please, please leave a star rating right here on the page. It helps other home bakers find reliable recipes like this one.
Also, when you get those perfect squares cut—and remember that chilling rule is key for clean slicing!—snap a photo! Tag me on social media when you share these amazing simple chocolate coconut bars. I absolutely love seeing your successes, whether they are your first time making them or you’re rolling them out for the tenth time. If you’re already thinking about what to bake next, check out my instructions for my decadent chocolate crinkle cookies recipe!
If you are looking for inspiration on how others have loved these bars, I always peek over at Love From The Oven for fun variations. Happy baking, friends. Go enjoy those incredible, rich dessert bars!
PrintClassic Magic Cookie Bars: The Ultimate Gooey Seven Layer Treat
Make the best Magic Cookie Bars, also known as Seven Layer Bars. This simple recipe delivers rich, gooey layers using a graham cracker crust and sweetened condensed milk, perfect for any gathering.
- Prep Time: 15 min
- Cook Time: 30 min
- Total Time: 45 min
- Yield: 24 servings 1x
- Category: Dessert
- Method: Baking
- Cuisine: American
- Diet: Vegetarian
Ingredients
- 1 1/2 cups graham cracker crumbs
- 1/2 cup unsalted butter, melted
- 1 (14 ounce) can sweetened condensed milk
- 1 cup semi-sweet chocolate chips
- 1 cup butterscotch chips
- 1 1/2 cups flaked coconut, sweetened
- 1 cup chopped pecans or walnuts
Instructions
- Preheat your oven to 350 degrees Fahrenheit. Line a 9×13 inch baking pan with parchment paper, leaving an overhang for easy removal.
- Prepare the crust: In a medium bowl, mix the graham cracker crumbs and melted butter until the crumbs are evenly moistened. Press this mixture firmly into the bottom of the prepared baking pan.
- Bake the crust for 8 minutes. Remove from the oven.
- Layer the ingredients: Sprinkle the chocolate chips evenly over the warm crust. Follow with a layer of butterscotch chips.
- Next, evenly sprinkle the flaked coconut over the chips. Top with the chopped nuts.
- Pour the entire can of sweetened condensed milk slowly and evenly over all the layers. This binds the bars together.
- Bake for 25 to 30 minutes, or until the edges are golden brown and the center is set. The condensed milk should be bubbly.
- Let the magic cookie bars cool completely in the pan on a wire rack before lifting out using the parchment paper overhang.
- Cut into squares and serve.
Notes
- For an extra gooey texture, slightly reduce the baking time, checking frequently after 20 minutes.
- If you omit the nuts, consider adding an extra half cup of chocolate chips or butterscotch chips.
- Allow the bars to chill in the refrigerator for at least two hours before cutting for cleaner squares.
Nutrition
- Serving Size: 1 bar
- Calories: 220
- Sugar: 20
- Sodium: 75
- Fat: 13
- Saturated Fat: 7
- Unsaturated Fat: 6
- Trans Fat: 0
- Carbohydrates: 25
- Fiber: 1
- Protein: 3
- Cholesterol: 25