How to Make a Sourdough Starter From Scratch: A Beginner’s Day-by-Day Guide
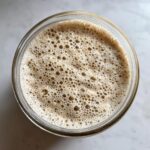
Follow this simple, step-by-step guide to create your own active sourdough starter using only flour and water. This method is reliable for beginners starting their sourdough journey.
- Prep Time: 5 min
- Cook Time: 0 min
- Total Time: 7 days (active creation period)
- Yield: Approx. 100g active starter
- Category: Baking Essentials
- Method: Fermentation
- Cuisine: American
- Diet: Vegetarian
Ingredients
Scale
- 100g Whole Wheat or Rye Flour (for initial days)
- 100g Unbleached All-Purpose Flour (for later days)
- 100g Unchlorinated Water (room temperature)
Instructions
- Day 1: Mix 50g of whole wheat or rye flour with 50g of room temperature water in a clean glass jar. Stir until fully combined. Cover loosely and let it sit at room temperature (68-75°F) for 24 hours.
- Day 2: Discard half of the mixture. Add 50g of whole wheat or rye flour and 50g of water to the remaining starter. Mix well, cover loosely, and wait 24 hours.
- Day 3: You might see a few bubbles. Discard half. Switch to using unbleached all-purpose flour. Mix 50g of all-purpose flour and 50g of water into the remaining starter. Wait 24 hours.
- Day 4: Discard half. Feed with 50g all-purpose flour and 50g water. You should see more activity. Wait 24 hours.
- Day 5: Discard half. Feed with 50g all-purpose flour and 50g water. Wait 24 hours.
- Day 6: Discard half. Feed with 50g all-purpose flour and 50g water. Wait 24 hours. The starter should show significant bubbling and growth.
- Day 7: Discard half. Feed with 50g all-purpose flour and 50g water. If your starter consistently doubles in size within 4-8 hours after feeding, it is active and ready for baking.
- Maintenance: Once active, switch to a 1:1:1 ratio (starter:flour:water by weight) for daily feeding if kept at room temperature, or feed once a week if stored in the refrigerator.
Notes
- Use a clear jar so you can track the rise and see the bubbly sourdough starter developing.
- Maintain a consistent room temperature between 68 and 75 degrees Fahrenheit for best results during the initial creation phase.
- If your starter does not show activity by Day 4, keep feeding it daily; patience is key to creating a strong homemade yeast starter.
- When feeding, always use filtered or unchlorinated water, as chlorine can inhibit yeast growth.
Nutrition
- Serving Size: 100g
- Calories: 180
- Sugar: 0.5g
- Sodium: 1mg
- Fat: 0.5g
- Saturated Fat: 0.1g
- Unsaturated Fat: 0.4g
- Trans Fat: 0g
- Carbohydrates: 37g
- Fiber: 2g
- Protein: 5g
- Cholesterol: 0mg