
We all hit that wall, right? You desperately crave that piping hot, cheesy, impossibly soft delivery-style side dish, but you are DONE spending thirty bucks for something that’s mostly air and highly processed cheese. Trust me, I get it! That’s where we turn to what I call ‘indulgent fuel.’ We want the flavor of restaurant-style comfort, but we want the nutrition to actually keep us going.
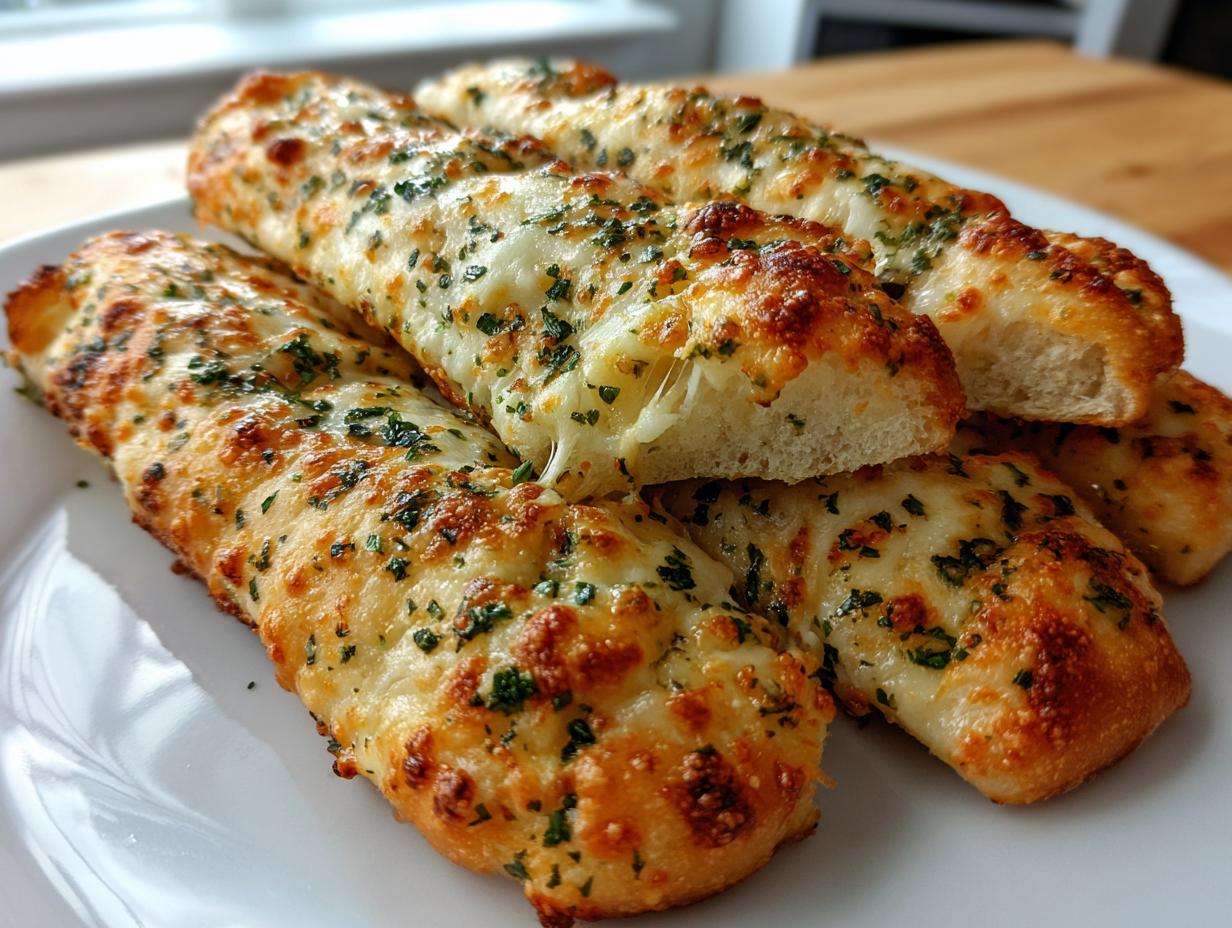
That’s exactly why I perfected these Garlic cheesy breadsticks. We’re ditching the complicated yeast dough and leaning into a method I’ve been refining: a seriously soft, high-protein texture built right into the dough using cottage cheese. Yes, cottage cheese! It sounds wild, but when you blend it right, it gives you that amazing pull and softness that mimics the best takeout sides, only this version is packed with protein and way easier on your wallet. If you love cheesy bread, you absolutely must check out my recipe for easy cheese bread too!
Here at Cookery Command, we honor those classic, home-cooked tastes, but we layer in the technique needed to make them work perfectly week after week. These breadsticks are the result—a celebration of that rich, garlicky goodness you crave, made fast, and made right here in your own kitchen.
- Why You Will Love These High Protein Garlic Cheesy Breadsticks
- The Secret to Soft Cottage Cheese Dough for Garlic Cheesy Breadsticks
- Step-by-Step: Preparing Your Easy Side Dishes of Garlic Cheesy Breadsticks
- Tips for Success with High Protein Breadsticks
- Ingredient Notes and Substitutions for Your Garlic Cheesy Breadsticks
- Serving Suggestions for Garlic Cheese Bread
- Storage and Reheating Instructions for Garlic Cheesy Breadsticks
- Frequently Asked Questions About Cottage Cheese Dough Garlic Cheesy Breadsticks
- What to Do After Making Your Garlic Cheesy Breadsticks
Why You Will Love These High Protein Garlic Cheesy Breadsticks
These aren’t just another weeknight side dish; these are my answer to those moments when you deserve serious comfort food that doesn’t leave you feeling completely weighed down afterwards. We developed these to be pure indulgence that still supports your goals. It’s the best of both worlds, I’m telling you!
- Serious Protein Punch: Forget empty carbs! Thanks to that secret dough base, you are looking at nearly 9 grams of protein per stick. This is truly indulgent fuel that keeps you satisfied way longer than standard bread. If you enjoy protein-packed baking, you have to check out my ultimate high-protein baked cheesecake recipe!
- Takeout Taste Without the Takeout Price: Seriously, calculate what you spend ordering breadsticks from your favorite pizza place. These taste just as garlicky, just as buttery, and offer that irresistible cheese pull for a fraction of the cost. It’s a massive win for the budget.
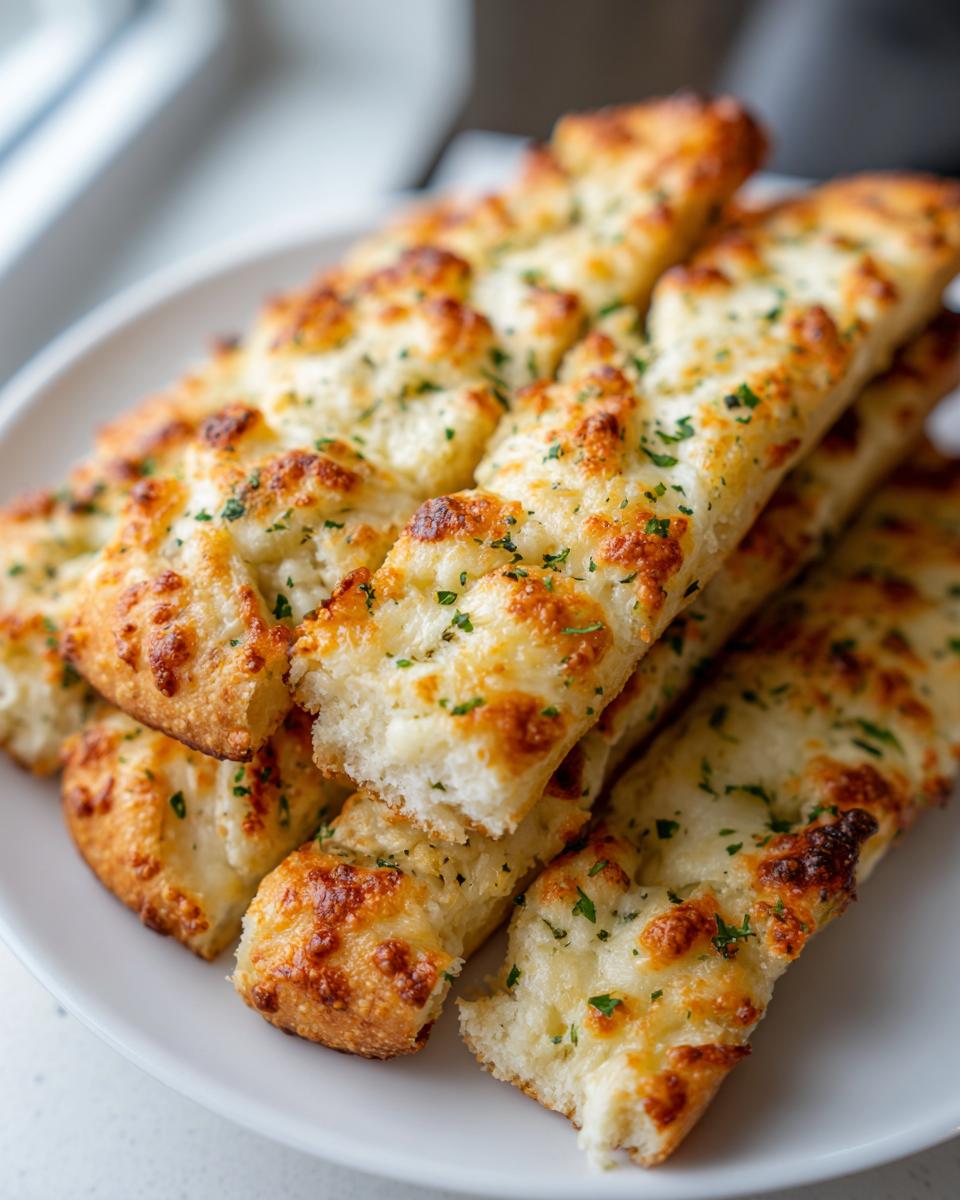
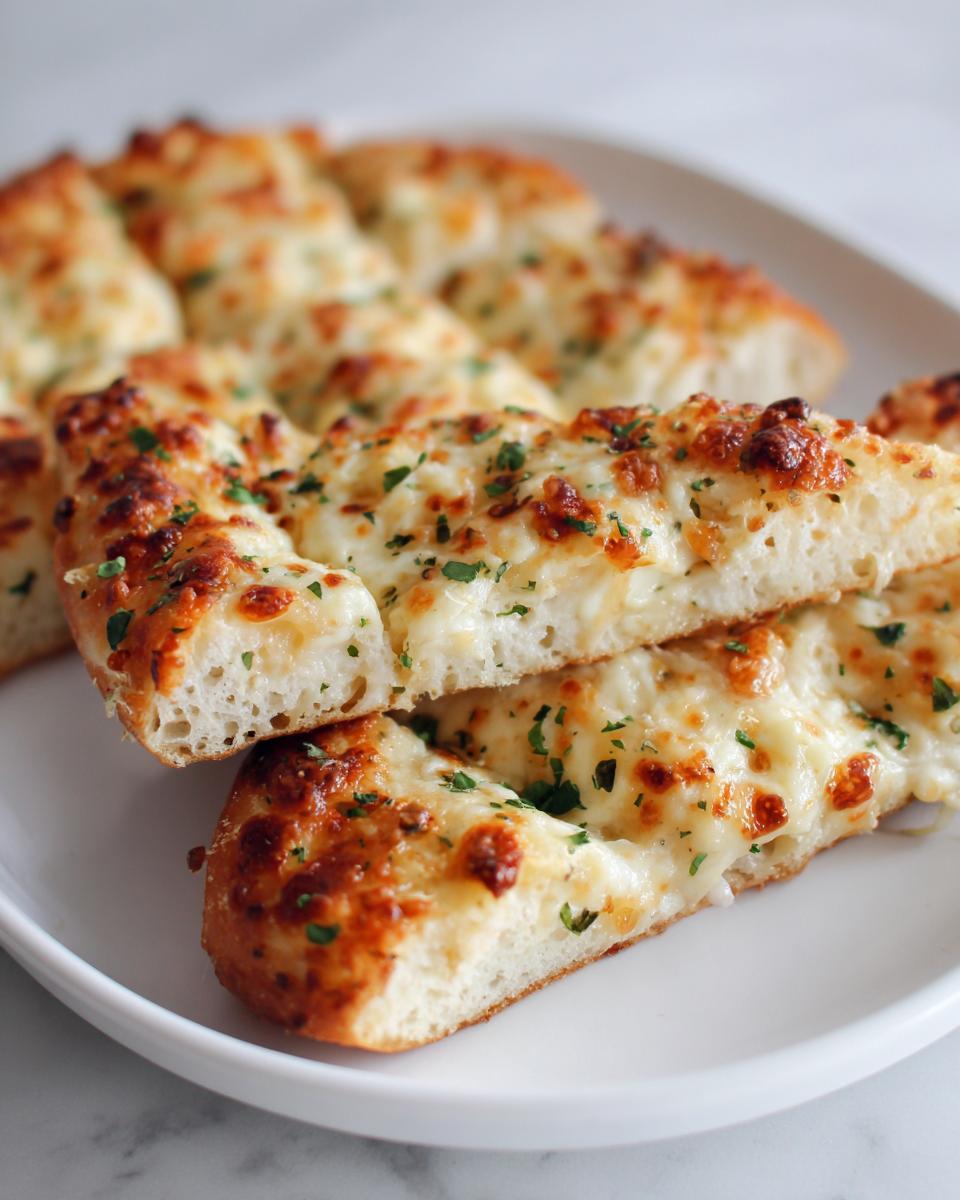
- The Softest Texture Imaginable: That cottage cheese magic ensures these turn out incredibly tender. They are fluffy, slightly chewy, and melt in your mouth, which is exactly what you want when you’re craving that classic, soft breadstick experience.
- Speedy Solution: From start to finish, we are looking at about 30 minutes total. That’s faster than most delivery drivers get to your house! Perfect for when that craving hits hard.
The Secret to Soft Cottage Cheese Dough for Garlic Cheesy Breadsticks
The real game-changer here, the core of why these are so much better than your average flour-only dough, is the base: the cottage cheese dough. I know, I know, you might be thinking that sounds slimy or weird, but trust me on this one. When you blend good quality cottage cheese with an egg until it’s totally smooth, it creates the perfect foundation for structure and moisture.
This method is fantastic because it brings an unbelievable amount of protein to the breadstick without needing any yeast or long rising times. It keeps the final product super tender—that’s the moisture talking! It makes this recipe one of my favorite tricks for getting that soft, authentic feel in an easy side dish, all while keeping things healthier.
Essential Ingredients for Perfect Garlic Cheesy Breadsticks
Getting the right measurements on these few ingredients is key. Don’t eyeball the cheese ratio; we need to save some for the top layer!
- 1 cup low-fat cottage cheese
- 1 large egg
- 1 cup all-purpose flour
- 1 teaspoon baking powder
- 1/2 teaspoon salt
- 1/2 cup shredded mozzarella cheese, divided
- 4 tablespoons unsalted butter, melted
- 4 cloves garlic, minced
- 2 tablespoons fresh parsley, chopped
Step-by-Step: Preparing Your Easy Side Dishes of Garlic Cheesy Breadsticks
Okay, the process is ridiculously simple once you have your ingredients lined up. Since these are so quick—seriously, we’re talking 15 minutes in the oven—you want to make sure your station is ready to go. This recipe is perfect for those nights when you need a satisfying side dish fast! If you are looking for more quick recipes, check out my full guide on easy side dishes.
Making the Cottage Cheese Dough Base
First things first: Preheat your oven to 400°F (200°C) and get your baking sheet lined with parchment paper. This little step saves you a whole heap of scrubbing later, so don’t skip it!
Now for the magic maker: the food processor. Toss in your cup of low-fat cottage cheese and that large egg. You need to blitz this mixture until it is completely smooth—I mean zero visible curds. Scrape the sides down a couple of times just to be sure you capture everything. If your food processor isn’t super powerful, take your time here; this smoothness is crucial for the breadstick texture later on.
Next, add your dry ingredients: the flour, baking powder, and salt. Pulse this a few times until it just barely starts to clump together into a shaggy, messy dough. Transfer that mess onto a lightly floured surface. Knead it very gently—we’re talking maybe 60 seconds max! Over-kneading gluten into this dough makes it tough, and we want soft, not tough. Gently stir in half of your mozzarella cheese—just until you see strands mixed in—then roll that dough out into a rectangle about a quarter-inch thick. Cut it into 10 to 12 strips and get them onto that lined sheet.
Bake those strips for about 10 to 12 minutes until they look just lightly golden. They won’t be fully browned yet, and that’s perfect because they need to be hot for the topping!
Baking and Applying the Garlic Butter Topping for Garlic Cheesy Breadsticks
While those initial bakes are happening, whisk together your melted butter, that heavy dose of minced garlic (remember, we want flavor here!), and fresh parsley in a small bowl. This is the heart of the aroma!

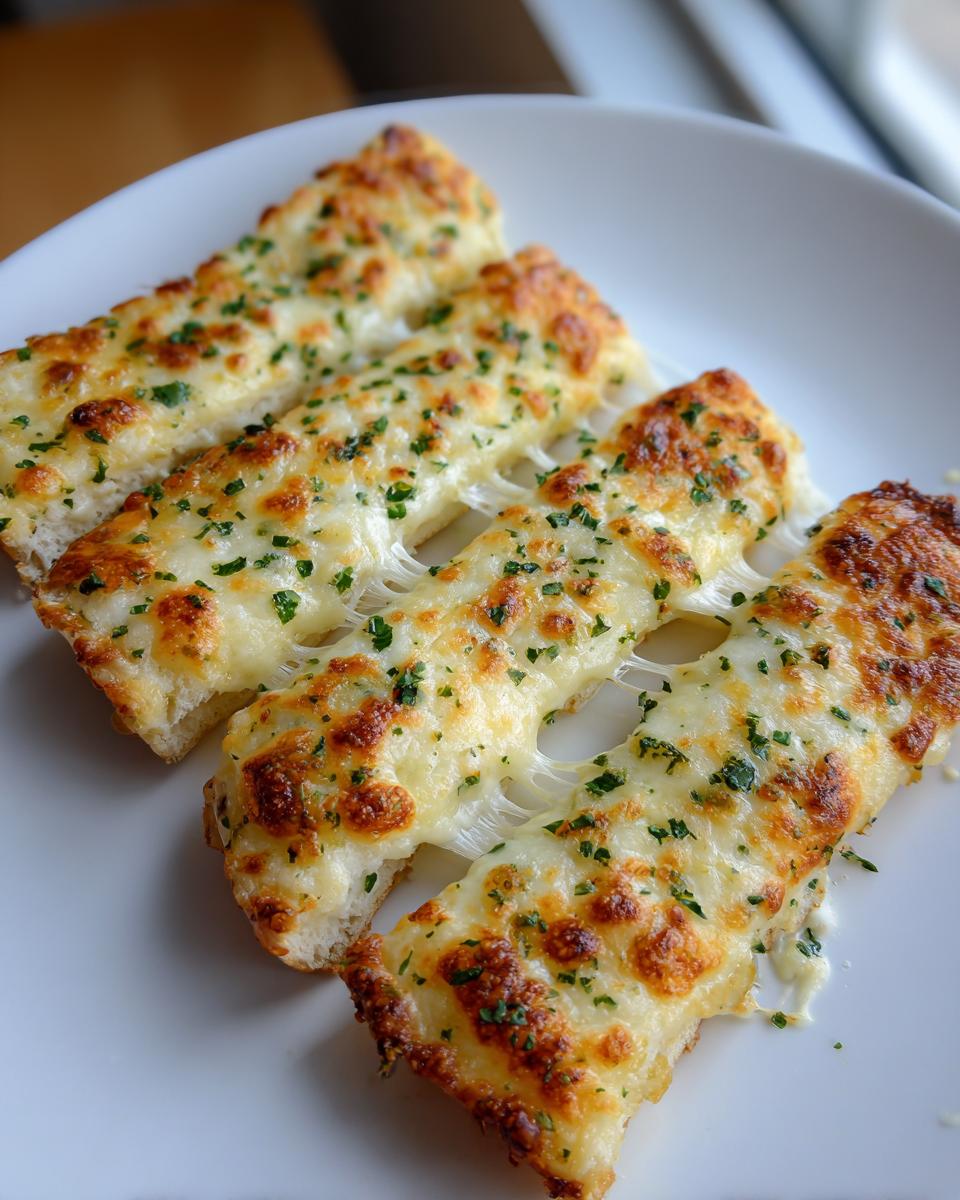
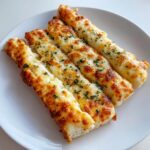
As soon as the breadsticks come out of the oven from that first bake, brush that beautiful garlic butter mixture all over every single strip. Don’t be shy! Then, sprinkle that remaining mozzarella cheese evenly over the tops. Pop the sheet back into the oven for just 2 or 3 minutes. You only need to go until that cheese is gloriously melted, bubbly, and starting to look sticky. Pull them out, let them cool for just one minute so you don’t burn your tongue, and dive in!
Tips for Success with High Protein Breadsticks
Whenever I develop a recipe that swaps out traditional ingredients for something healthier—like using a high-protein base—I always worry about losing that rich, comforting texture people expect. That’s why these small tips for working with the cottage cheese dough are so important. Seriously, follow these, and you’ll never look back!
First, let’s talk about that blending stage. I cannot stress enough how much better these breadsticks turn out if you aim for absolute smoothness in step two. If your food processor seems to be struggling to break down the curds, don’t force it! My trick, which I learned when testing my lasagna recipes, is to press the cottage cheese through a fine-mesh sieve *before* putting it in the processor. It takes an extra minute, but it guarantees a silky batter instead of a bumpy one, which is everything for structure.
Second, remember that brief kneading time I mentioned? That’s vital for those high protein breadsticks. Because we aren’t using yeast, we don’t have long gluten strands developing naturally. We only add the flour right at the end, and you only knead it enough to bring the dough together into a workable ball—maybe 60 seconds! If you start working it like traditional bread dough, it gets chewy and dense in a bad way. We want fluffy tenderness, not workout resistance!
Lastly, when applying that garlic butter, do it right when they come out of the first bake. The residual heat melts the butter *into* the surface just a little, which seals in the moisture and makes the herbs stick perfectly before you add the final layer of cheese. A little attention to temperature timing makes all the difference in the final flavor payoff!
If you make these breadsticks, they are fantastic alongside a crisp salad dressed with my easy homemade salad dressing recipes!
Ingredient Notes and Substitutions for Your Garlic Cheesy Breadsticks
I always tell people that my foundation recipes are solid, but they should also feel free to make them *yours*! With this recipe, since it relies on the chemical reaction between the flour and the baking powder rather than a slow yeast rise, you do have a little wiggle room, but you have to be cautious around the flour part.
If you are trying to lean into the healthy garlic bread angle even more, you can certainly substitute up to half of the all-purpose flour with white whole wheat flour. That gives you a bit more fiber and nutrients right away. But here’s my honest warning from experience: whole wheat flour absorbs liquid differently. You might notice the dough feels a bit stiffer or drier right away. If that happens, just add a teaspoon of water or milk at a time until you get that same shaggy ball consistency we are looking for before kneading.
If you happen to be out of fresh parsley, don’t stress! Fresh herbs are lovely for that bright finish, but they aren’t essential to the structure. You can absolutely swap it out for dried herbs. I’d suggest using about two teaspoons of dried parsley or even throwing in a little dried Italian seasoning if you want a more savory, herbaceous kick in your garlic butter. It works just fine, and you still get that wonderful fresh-baked smell wafting through the kitchen!
As for the cheese, mozzarella is the gold standard for that pull factor. If you need to switch it up, a mild provolone will melt beautifully too, just drain any excess moisture before shredding it. But honestly, keep the mozzarella ratio high for the best bubbly finish!
Serving Suggestions for Garlic Cheese Bread
Now that you have these golden, garlicky strips fresh from the oven, what do you serve them with? Don’t let them sit alone! These are the ultimate companion for almost any comfort meal. They are fantastic dipped straight into my easy homemade tomato sauce or even a creamy ranch dressing. Seriously, dipping them is half the fun!
Because they are so hearty, they stand up beautifully next to soup—think minestrone or a rich creamy tomato soup. And, of course, they are the perfect accompaniment to pretty much any pasta dish you can dream up. They officially upgrade your weeknight dinner!
Storage and Reheating Instructions for Garlic Cheesy Breadsticks
These breadsticks are almost criminally good when they are fresh from the oven, butter dripping and cheese gooey. I know we usually want to save a plate for later, but I have to give you a heads-up: because these are made with that super soft cottage cheese dough, they don’t hold up quite as nicely as traditional yeast bread.
If you’ve got leftovers and know you’ll eat them within 24 hours, the best thing you can do is keep them at room temperature in an airtight container. Don’t put them in the fridge! Refrigerating them makes that high-protein dough firm up way too fast. They’ll still be edible, but they lose that wonderful airy chewiness we worked so hard to create.
When it comes time to reheat, forget the microwave entirely. That’s the fastest way to turn a soft breadstick into a piece of hard rubber—and nobody wants that! The secret to bringing these Garlic Cheesy Breadsticks back to life is dry heat. Pop them on a baking sheet and warm them up in a toaster oven or a standard oven set to about 325°F (160°C) for about 5 to 7 minutes. That gentle heat allows the butter and residual moisture to soften things up again, giving you that ‘just baked’ feel without drying out the interior. Trust me; it’s worth the extra three minutes of oven time!
Frequently Asked Questions About Cottage Cheese Dough Garlic Cheesy Breadsticks
I always get questions when I introduce a slightly unconventional ingredient like cottage cheese into a usually yeast-driven recipe. It’s completely normal to wonder about substitutions or different preparation methods! Here are a few things I hear most often when people are making these high protein breadsticks for the first time.
Can I freeze the cottage cheese dough before baking?
You absolutely can! This is a lifesaver if you plan ahead. Once the dough has been mixed (Step 3, before you add the mozzarella), wrap the whole ball tightly in plastic wrap. Pop it straight into a freezer-safe bag. It will keep perfectly for up to two months. When you want to bake them later, just thaw the dough in the fridge overnight, then let it sit on the counter for about 30 minutes before you proceed with rolling it out, kneading in the cheese, and baking as written. It works beautifully!
I don’t love mozzarella. Can I use a different cheese inside or on top?
For the melting factor inside the dough, you want something that melts well, like mozzarella or a mild provolone. But here’s a fun tip: for the topping—that final bubbly layer—try mixing that mozzarella with a tablespoon or two of grated Parmesan cheese. It adds a sharp, salty depth that plays wonderfully with the strong garlic butter! If you are interested in other ways to incorporate cottage cheese into your meals, check out my cottage cheese lasagna recipe; it’s another high-protein favorite.
How do I convert this to a gluten-free garlic cheesy bread?
This is where I always caution people because the cottage cheese dough relies heavily on the structure created by all-purpose flour. If you substitute 1:1 with a standard 1-to-1 gluten-free blend, you might find the dough is too wet or sticky because gluten-free flours absorb liquid differently. If you attempt GF, I seriously recommend cutting the liquid (the blended CC mixture) by about 1/4 cup initially and seeing how the dough feels. You might need a little extra flour, or you might need to roll it between two sheets of parchment, as it will be far sticker than the standard recipe.
Why do I need to blend the cottage cheese so smooth?
This is the key to avoiding any grainy texture in your final breadstick. If you leave those cottage cheese curds, they bake into little hard pockets inside your otherwise soft bread. We are aiming for a smooth, protein-rich batter that behaves like a very thick heavy cream *before* the flour is added. It’s an extra minute in the machine, but it ensures every bite of your garlic cheesy breadsticks is uniformly tender.
What to Do After Making Your Garlic Cheesy Breadsticks
Honestly, the hardest part of this recipe is waiting for them to cool down enough to eat! But once you’ve managed to restrain yourself and devoured those golden, garlicky strips, I really, really want to hear what you thought. Seriously, you put the effort in, and I want to know if these scratch that delivery-style itch we were aiming for.
Did they hit that ‘indulgent fuel’ mark? Were they softer or cheesier than you expected? Head down to the recipe card and leave a star rating—that feedback helps me understand what’s working best for all of you! And if you snapped a picture of those beautiful, bubbly breadsticks, share it on social media and tag me. I love seeing your kitchen wins!
Thank you so much for trusting Cookery Command with your weeknight baking. If you’re looking for more easy sides or want to know more about the science behind these amazing recipes, feel free to read up on our mission here. Happy cooking!
PrintHigh Protein Cottage Cheese Garlic Cheesy Breadsticks
Make soft, buttery, and intensely garlicky breadsticks at home using a simple cottage cheese dough. This recipe gives you an indulgent fakeaway side dish that is cheaper and packed with protein.
- Prep Time: 15 min
- Cook Time: 15 min
- Total Time: 30 min
- Yield: 10 servings 1x
- Category: Side Dish
- Method: Baking
- Cuisine: American
- Diet: Vegetarian
Ingredients
- 1 cup low-fat cottage cheese
- 1 large egg
- 1 cup all-purpose flour
- 1 teaspoon baking powder
- 1/2 teaspoon salt
- 1/2 cup shredded mozzarella cheese, divided
- 4 tablespoons unsalted butter, melted
- 4 cloves garlic, minced
- 2 tablespoons fresh parsley, chopped
Instructions
- Preheat your oven to 400°F (200°C). Line a baking sheet with parchment paper.
- Combine the cottage cheese and egg in a food processor. Blend until completely smooth. Scrape down the sides as needed.
- Add the flour, baking powder, and salt to the food processor. Pulse until a shaggy dough forms.
- Transfer the dough to a lightly floured surface. Knead briefly, about 1 minute, until it comes together. Stir in half (1/4 cup) of the mozzarella cheese until just combined.
- Roll the dough out into a rectangle approximately 1/4 inch thick. Cut the dough into 10 to 12 strips.
- Place the strips on the prepared baking sheet. Bake for 10 to 12 minutes, or until lightly golden brown.
- While the breadsticks bake, prepare the topping: In a small bowl, mix the melted butter, minced garlic, and chopped parsley.
- Remove the breadsticks from the oven. Brush the garlic butter mixture evenly over the hot breadsticks.
- Sprinkle the remaining 1/4 cup of mozzarella cheese over the tops. Return the sheet to the oven for 2 to 3 minutes, until the cheese is melted and bubbly.
- Remove from the oven and serve immediately.
Notes
- For the smoothest dough, press the cottage cheese through a fine-mesh sieve before blending if your food processor struggles to fully break down the curds.
- You can substitute dried parsley for fresh, using 2 teaspoons of dried herbs.
- These breadsticks are excellent served with marinara sauce for dipping.
Nutrition
- Serving Size: 1 stick
- Calories: 145
- Sugar: 1
- Sodium: 280
- Fat: 6
- Saturated Fat: 3.5
- Unsaturated Fat: 2.5
- Trans Fat: 0
- Carbohydrates: 15
- Fiber: 1
- Protein: 9
- Cholesterol: 30