
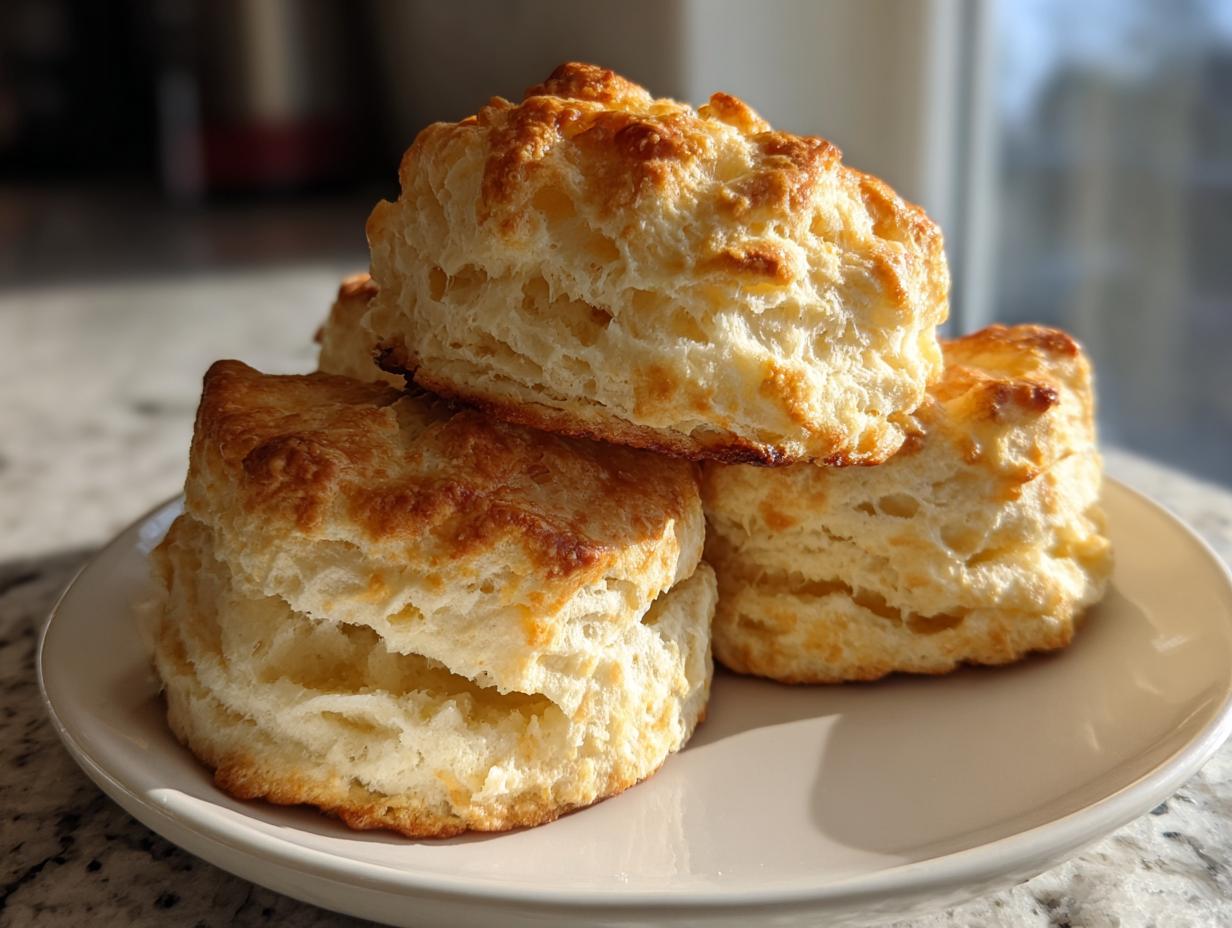
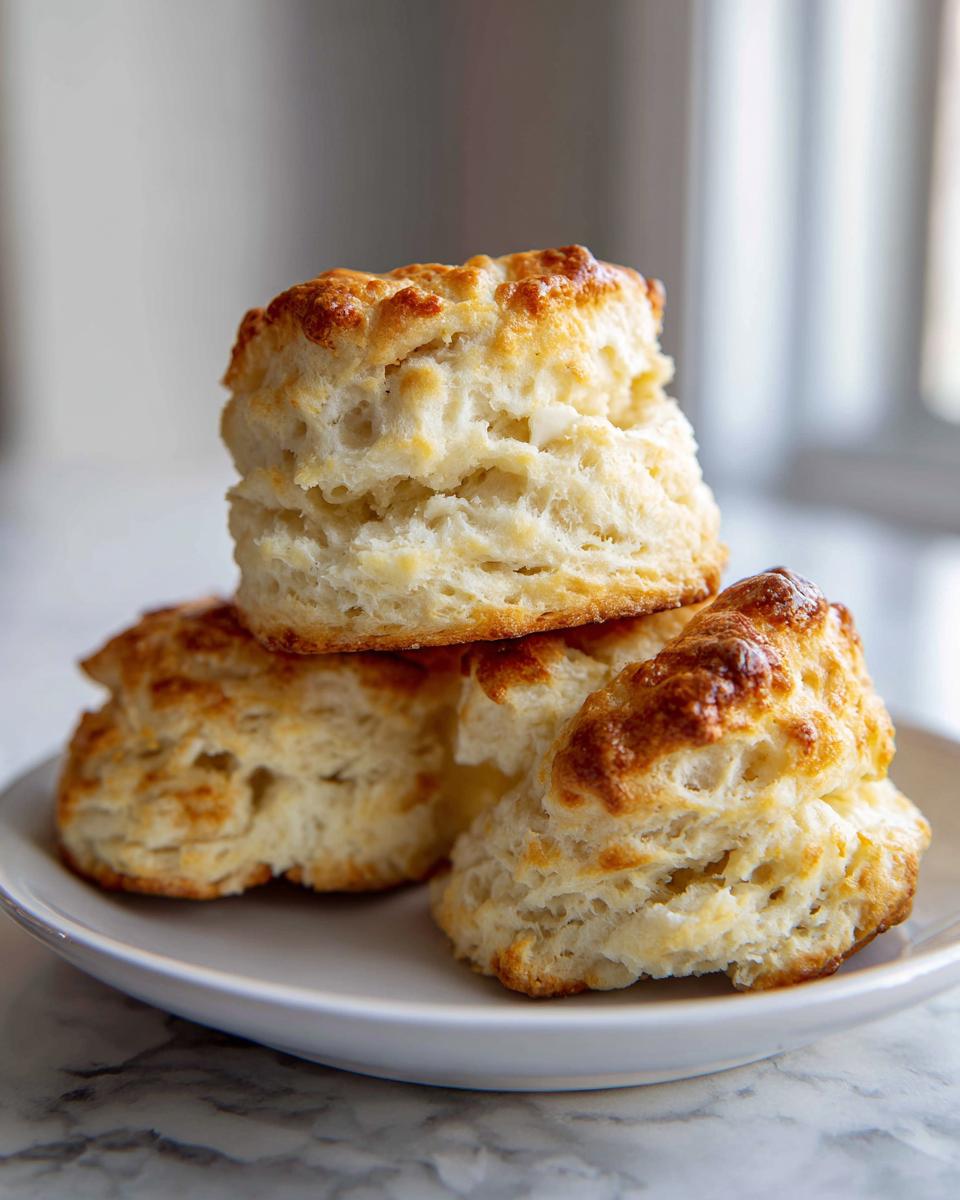
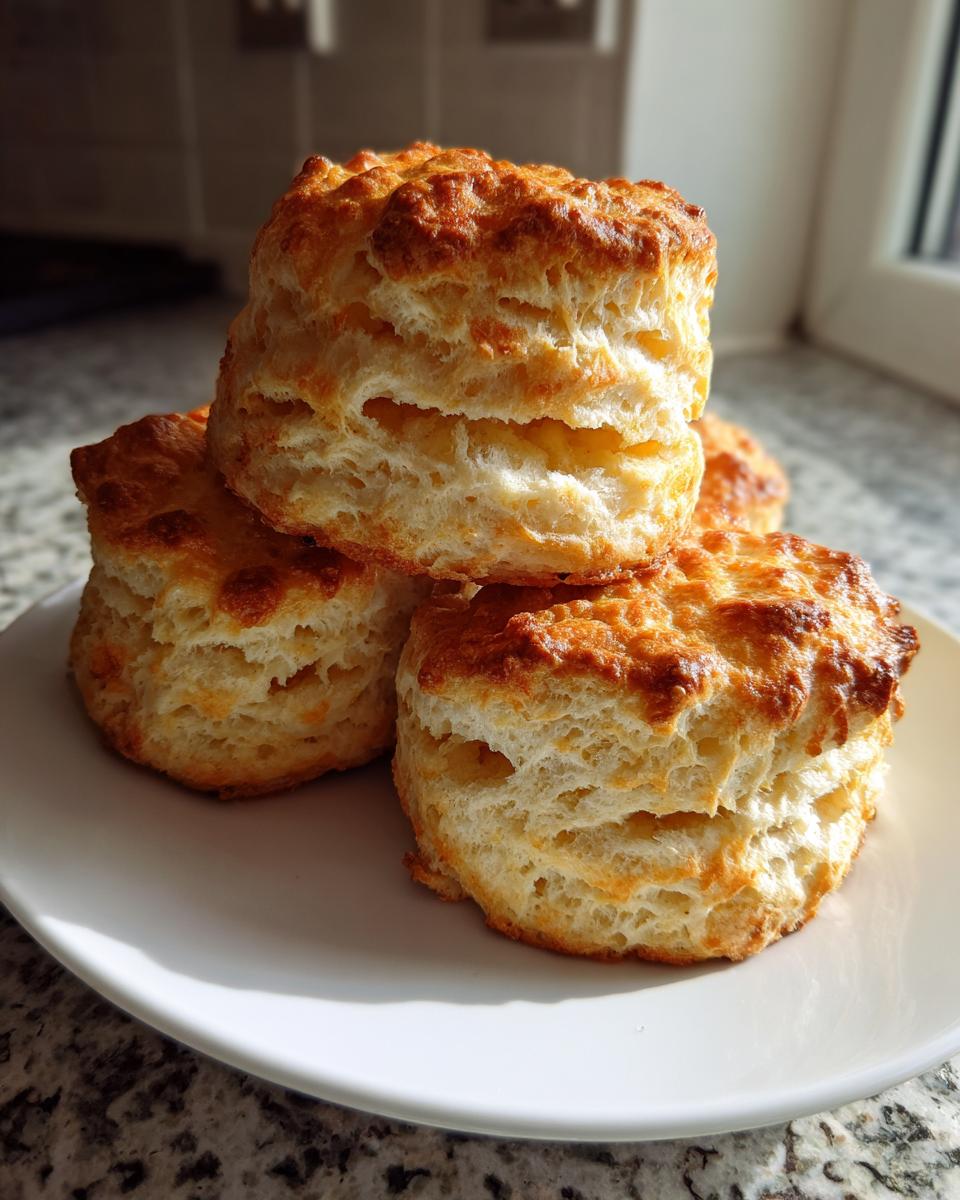
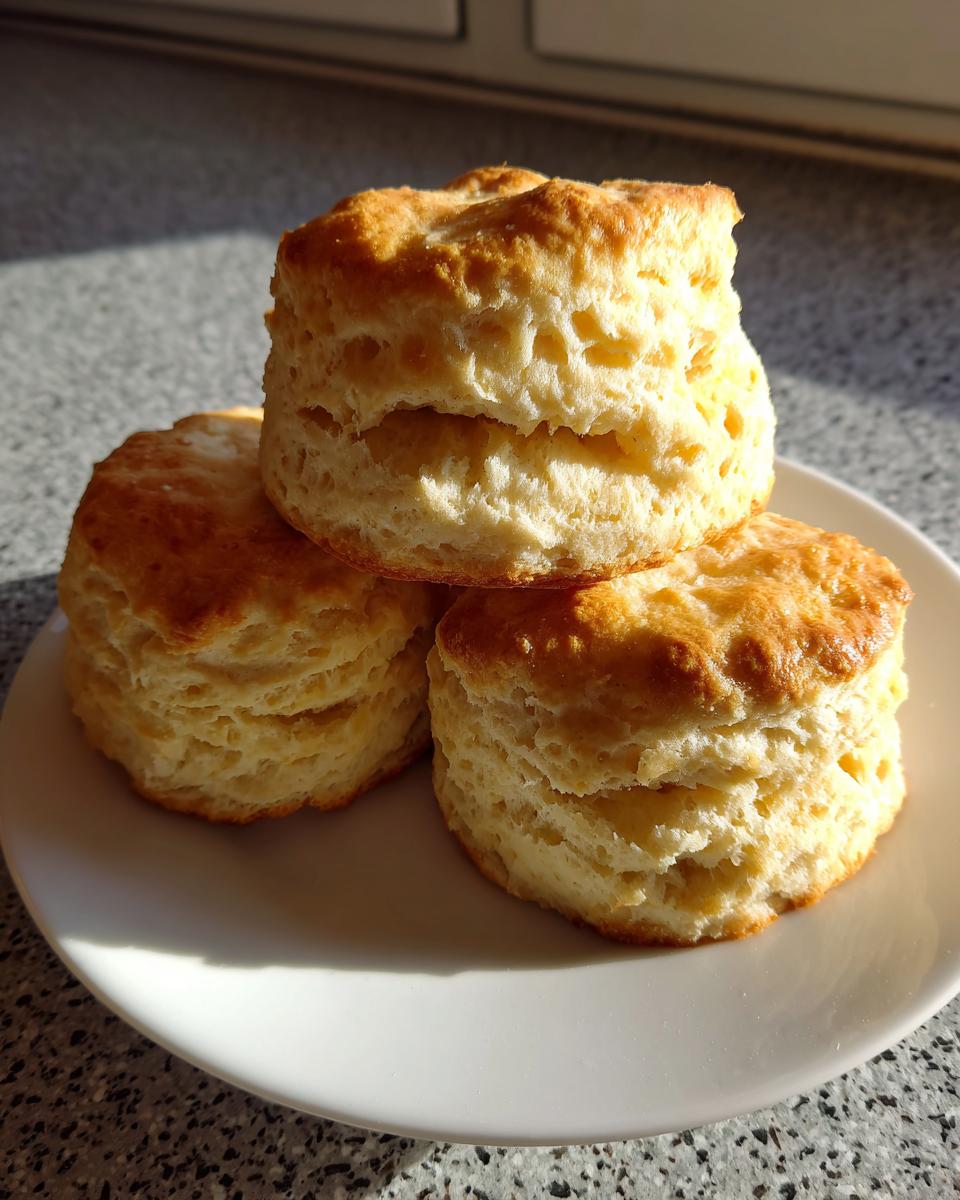
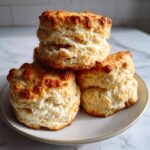
Happy National Buttermilk Biscuit Day, everyone! I truly believe that every great American spread needs a foundation of incredible bread, and nothing shouts ‘comfort’ louder than a tall, unbelievably flaky buttermilk biscuit. Forget those flat, shy circles you sometimes find! Today, we are unlocking the secret to those glorious, peel-apart layers that make you want to cheer. This isn’t about complicated baking; it’s about respecting tradition while applying just a touch of focused technique—specifically, how we handle that freezing cold butter. These layers are the heart of genuine southern baking, and I promise, once you master this, you’ll never look back. This recipe is foundational comfort, made reliable through technique.
- The Secret to Tall, Flaky Buttermilk Biscuits: Why Cold Fat Matters
- Gathering Your Ingredients for Homemade Buttermilk Biscuits
- Step-by-Step Instructions for Perfect Flaky Buttermilk Biscuits
- Tips for Success with Your Best Biscuits From Scratch
- Serving Suggestions for Flaky Buttermilk Biscuits
- Storage and Reheating Flaky Buttermilk Biscuits
- Common Questions About Making Flaky Buttermilk Biscuits
- Estimated Nutritional Data for Flaky Buttermilk Biscuits
- Share Your Success with This Flaky Biscuit Recipe
The Secret to Tall, Flaky Buttermilk Biscuits: Why Cold Fat Matters
When chasing that dream ‘peel-apart’ texture, the absolute non-negotiable is temperature. I’ve seen so many home cooks skip this simple rule, and sadly, their biscuits end up dense and tough. The difference between a good biscuit and a truly great flaky biscuit recipe lies in the physics of steam! We need solid, icy chunks of fat suspended in the dough. If you’re interested in other treats that rely on cold fat for incredible structure, you should check out my tips for making perfect flaky blueberry scones.
When that frozen butter hits the hot oven, it melts slowly, creating little pockets of steam. Since the dough around it is still holding its structure thanks to the cold, the steam has nowhere to go but UP. Bingo! That steam pushes the layers apart, giving you height and those gorgeous, defined flakes. Same goes for the buttermilk; if it’s even slightly warm, it will start melting the butter before it even hits the baking sheet. Keep everything frigid; that is my golden rule.

Essential Ingredients for Flaky Buttermilk Biscuits
To set up this success, pay attention to the details in the ingredients list. We need four dry staples, but the power duo here is the butter and the buttermilk. Remember, the butter must be unsalted because we are controlling all the sodium ourselves, and it needs to be frozen solid so we can grate it—trust me on the grating! The buttermilk also needs to be straight from the coldest part of your fridge. These specific temperatures are what separates a masterpiece from a mediocre morning bake.
Gathering Your Ingredients for Homemade Buttermilk Biscuits
Alright, let’s get our pantry prepped. You want to double-check that everything is ready to go before we even touch the mixer. Our main players are simple, but the preparation matters immensely. You need two cups of flour, the leavening agents, salt, and sugar for the foundation. But the critical check is the butter—it absolutely has to be rock hard frozen!
Here is exactly what you should have laid out on your counter:
- 2 cups all-purpose flour
- 1 tablespoon baking powder
- 1 teaspoon salt
- 1 teaspoon sugar
- 6 tablespoons unsalted butter, frozen and grated
- 3/4 cup cold buttermilk
Step-by-Step Instructions for Perfect Flaky Buttermilk Biscuits
Now that we have our cold components ready, the assembly moves fast, which is great because we never want that butter to warm up! We’re going to mix our dry stuff first, then quickly get that grated frozen butter incorporated. Remember, we are aiming for coarse crumbs, not flour dust. This whole process for making the best homemade buttermilk biscuits should feel quick and energetic.
When you add that icy buttermilk, just stir with your fork until it looks shaggy. Stop stirring right then! Overmixing is the death of flaky layers, it activates too much gluten. You’ll follow the official instructions closely here, especially when we get to the folding. If you want to see how I apply technique to other favorites, take a peek at my guide on making fluffy buttermilk pancakes—it’s all about gentle handling!
Mastering the Folding Technique for Maximum Layers
This is where the magic happens for those Instagram-worthy layers! After gently bringing the shaggy dough together into a rough rectangle, you have to fold it like a letter, right? You fold the dough in thirds. Then, this is key: you turn that dough 90 degrees before patting it back down to about an inch thick. You might think twisting the dough will make things easier, but twisting seals those potential layers shut! We need those walls of butter intact.
We repeat that fold and turn one more time. That simple sequence of folding and turning three times creates dozens of internal layers. When you press down with your biscuit cutter later, you must cut straight down—no wiggling! We want those layers stacked vertically, ready for lift-off.
Baking Your Flaky Biscuit Recipe to Golden Perfection
Get that oven set to 425°F. Before baking them, decide if you want softer sides or crisper ones. If you place your cut biscuits close together on an ungreased sheet, the sides will steam each other, keeping them soft and helping them rise higher. If you like a crunch, give them a little space.
Here’s a bonus trick I always use for my flaky biscuit recipe: if you have time, pop the whole tray into the freezer for ten minutes right before they go into the preheated oven. That final chill shock guarantees maximum steam eruption! Bake them for about 12 to 15 minutes. You’ll know they are done when the tops are beautifully golden brown.
Tips for Success with Your Best Biscuits From Scratch
Even with the perfect procedure, biscuits can sometimes give you attitude! Don’t sweat it; that’s why we talk through the common hurdles. My biggest secret for making sure your fats are evenly distributed into the flour powder when trying to achieve the best biscuits from scratch? Use the large holes on your box grater for the frozen butter. It shreds beautifully and mixes in much faster than chopping it, which keeps the surface temperature down.
Remember our golden rule from the instructions: Never twist that biscuit cutter! Press straight down and lift straight up. Twisting seals the edges, and that sealed edge prevents the dough from rising vertically. You want those glorious stacks!
Also, if you are having trouble with the dough sticking to your board, resist the urge to dump in tons of extra flour; that just makes dry biscuits. Instead, use a gentle flick of extra flour on your hands or a bench scraper. If you’re looking for other quick, reliable baked goods, you might want to look at how I make my English muffins from scratch—it’s a similar principle of gentle handling!
Serving Suggestions for Flaky Buttermilk Biscuits
Honestly, once you have these tall, layered beauties coming out of the oven, half the battle is won! Since these are the foundation of true southern baking, they demand classic companions. Of course, the ultimate pairing for me is a big pitcher of creamy sausage gravy poured right over the top. We’re talking Sunday morning heaven right there!
But they are also amazing in simpler settings. Try them split open with just a smear of salted butter and homemade strawberry jam—the delicate saltiness of the biscuit cuts the sweetness perfectly. They are also the perfect accompaniment to a bowl of hearty spring vegetable soup or chili on a cooler evening. If you’ve been looking at other comforting bread options, you absolutely must try my recipe for crispy fried cornbread next.
Storage and Reheating Flaky Buttermilk Biscuits
These flaky buttermilk biscuits are truly best eaten minutes after they come out of the oven, but let’s be real—sometimes we have leftovers! Store any extras in an airtight container at room temperature for up to two days. The microwave is your enemy here; it softens the crust and ruins the beautifully delicate layers we worked so hard to create.
When you crave that first-day texture, reheat them wrapped loosely in foil in a 350°F oven for about 5 to 7 minutes. This gentle dry heat crisps up the outside and warms the butter inside, bringing that lift right back. Trust me, you want that crackle when you pull them apart!
Common Questions About Making Flaky Buttermilk Biscuits
I know we covered a lot of technique here, but sometimes you just have the specific ingredient in your fridge, right? It’s natural to wonder about substitutions, especially when you’re trying to nail that perfect rise. If you’ve ever wondered what happens if you swap out that frozen butter for chilled but still soft butter—well, I’ll tell you: your layers will be significantly flatter. Soft butter melts into the flour instead of holding its structure for that big steam push.
Another common panic moment is when the dough looks too dry when mixing. If your dough seems like it won’t even come together, add your buttermilk one tablespoon at a time until it just starts to hold itself. This recipe is part of my collection of easy bread recipes, but it requires precision! If your biscuits still don’t rise well, it usually means the baking powder is old, or you twisted the cutter when you cut them out. Twisting seals the edges!
So for your homemade buttermilk biscuits, remember: frozen fat, straight cut, and never overmix. These three things solve about 90% of biscuit disasters!
Estimated Nutritional Data for Flaky Buttermilk Biscuits
I always tell folks that while this recipe is pure joy and comfort, it’s definitely not a light salad! When we talk about classic American comfort food, we know there’s going to be some delicious rich fat involved in getting those incredible layers. This data is based on standard ingredient calculations—so your final count might vary slightly depending on the exact brand of buttermilk or butter you grab.
For one of these tall, magnificent biscuits, here’s what you can generally expect the breakdown to look like in terms of serving size:
- Calories: Approximately 250
- Fat: Around 12 grams (Be generous with that butter, right?)
- Carbohydrates: About 30 grams
- Protein: Roughly 6 grams
We keep the sugar pretty low here, only about 2 grams, because the flavor comes naturally from the richness of the buttermilk and the salt contrast. Knowing these numbers helps, but truthfully, watching someone peel apart the first layer of a perfectly baked biscuit is truly priceless.
Share Your Success with This Flaky Biscuit Recipe
I truly hope you’re grabbing your box grater right now because it’s time to put this method to the test! I want to see those tall stacks! Since we celebrated National Buttermilk Biscuit Day today, there’s no better time to try making these homemade buttermilk biscuits for your family. Remember, cooking is a community effort here at Cookery Command—we learn best when we share what works!
After you pull those golden beauties out of the oven and enjoy the sheer delight of peeling apart the first layer, please come right back here and leave me a rating. Five stars lets me know that the frozen butter technique worked its magic for you! And if you’re looking for other quick wins for your next gathering, I have tons of ideas for easy appetizers and snacks, too.
Tell me what you served them with—did you go traditional gravy or maybe homemade jam? I get so excited reading your kitchen stories in the comments below, so don’t be shy. Happy baking, and enjoy commanding your kitchen!
PrintFlaky Buttermilk Biscuits: The Secret to Perfect Layers
Learn the technique for making tall, peel-apart flaky buttermilk biscuits from scratch using cold, frozen butter.
- Prep Time: 15 min
- Cook Time: 15 min
- Total Time: 30 min
- Yield: 8 biscuits 1x
- Category: Breakfast
- Method: Baking
- Cuisine: American
- Diet: Vegetarian
Ingredients
- 2 cups all-purpose flour
- 1 tablespoon baking powder
- 1 teaspoon salt
- 1 teaspoon sugar
- 6 tablespoons unsalted butter, frozen and grated
- 3/4 cup cold buttermilk
Instructions
- Combine the flour, baking powder, salt, and sugar in a large bowl. Whisk them together well.
- Grate the frozen butter directly into the dry ingredients using a box grater.
- Use your fingers or a pastry blender to quickly cut the butter into the flour mixture until it resembles coarse crumbs with some pea-sized pieces remaining.
- Pour the cold buttermilk into the mixture all at once. Stir gently with a fork until just combined. Do not overmix.
- Turn the shaggy dough out onto a lightly floured surface. Gently pat the dough into a rough rectangle about 1 inch thick.
- Fold the dough into thirds, like a business letter. Turn the dough 90 degrees and gently pat it down again to about 1 inch thick. This creates the layers.
- Repeat the folding and turning process one more time.
- Pat or roll the dough to a final thickness of 3/4 inch. Use a 2-inch biscuit cutter to cut straight down without twisting.
- Place the cut biscuits close together on an ungreased baking sheet for softer sides, or slightly apart for crispier sides.
- Bake in a preheated 425°F (220°C) oven for 12 to 15 minutes, or until the tops are golden brown.
Notes
- The key to flaky layers is keeping the butter very cold throughout the entire process.
- Do not twist the biscuit cutter; press straight down to keep the layers sealed.
- For extra height, place the cut biscuits on the baking sheet frozen for 10 minutes before baking.
Nutrition
- Serving Size: 1 biscuit
- Calories: 250
- Sugar: 2
- Sodium: 450
- Fat: 12
- Saturated Fat: 7
- Unsaturated Fat: 5
- Trans Fat: 0
- Carbohydrates: 30
- Fiber: 1
- Protein: 6
- Cholesterol: 25