
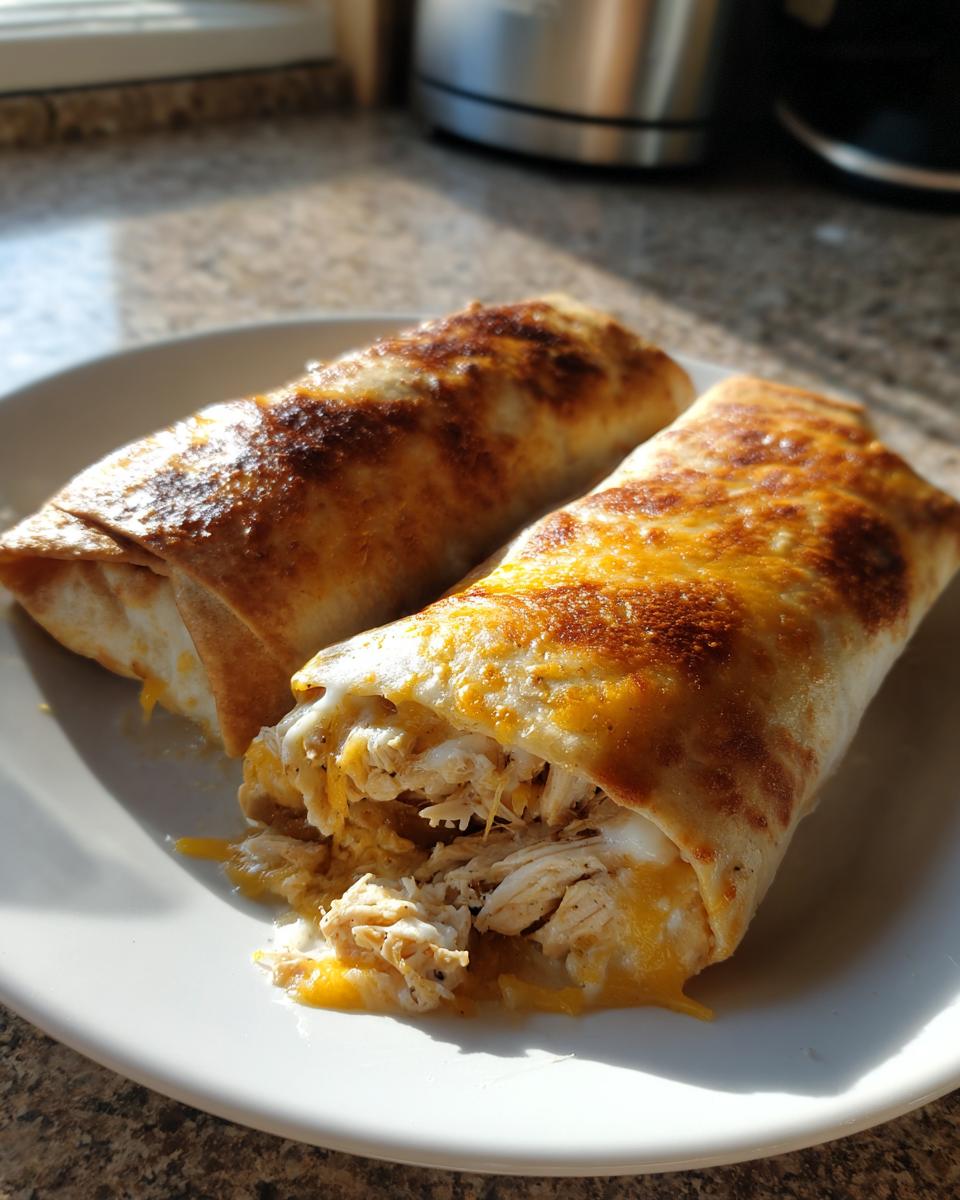
Oh, I totally get it. You’re craving that incredible crunch, that savory, cheesy filling, but the thought of dipping everything into a deep fryer on a Tuesday night just kills the vibe. We want comfort food, but we don’t always want the aftermath! That’s exactly why I developed these Crispy Baked Chicken and Cheese Chimichangas. They are my answer to getting that authentic, crispy satisfaction without the mess or the heavy guilt. This recipe is truly a quick weeknight dinner hero, coming together when you need it most.
Here at Cookery Command, my goal, inspired by Emily Harrison’s belief in merging old traditions with solid technique, is to make those classic Tex-Mex Recipes totally accessible. We respect the flavor, but we make the cooking process reliable. Trust me, these cheesy, savory Chimichangas deliver on texture and speed—you’ll be eating them in about 30 minutes total, and they taste like they took hours!
- Why This Crispy Baked Chicken and Cheese Chimichangas Recipe Works (Best Chimichanga Recipe)
- Ingredients for Your Homemade Chimichangas
- How to Make Crispy Chimichangas: Step-by-Step Instructions
- Tips for Success When Making Chimichangas
- Variations: Beef Chimichangas and Other Filling Ideas
- Serving Suggestions for Your Cheesy Chimichangas
- Storage and Freezer Friendly Meals with Chimichangas
- Frequently Asked Questions About Easy Chimichangas
- Estimated Nutritional Data for Baked Chimichangas
Why This Crispy Baked Chicken and Cheese Chimichangas Recipe Works (Best Chimichanga Recipe)
When folks look for the Best Chimichanga Recipe, they usually picture something deep-fried, right? And yes, that’s delicious, but I’m here to show you a better, faster way for your busy life. This method gives you that sought-after crunch without needing a pot of hot oil!
My goal when creating this recipe was to achieve Lightened Up Mexican Food that doesn’t taste like a compromise. We ditch the deep-fryer and use simple prep on a baking sheet—or even better, the air fryer—to make them golden and crispy. Because we use pre-cooked chicken, the entire process, from mixing to plating, clocks in right around 30 minutes. That screams Quick Weeknight Dinner to me, and you get all the cheesy, savory payoff. If you’ve been looking for a way to enjoy this classic Tex-Mex favorite without the fuss, you’ve found it! If you love baked appetizers that crunch, you might also want to check out my recipe for easy baked jalapeno poppers next.
Ingredients for Your Homemade Chimichangas
Okay, let’s talk about what goes into these glorious, crispy bites. Because this is an Easy Chimichanga recipe, we keep the filling simple but pack in the flavor with a dynamite cheese blend. You’ll need 12 nice, large flour tortillas—don’t use those tiny taco ones, because we need room to roll these tightly!
For the inside, the star is 2 cups of cooked, shredded chicken breast. That’s what makes it a great alternative to beef if you’re in a hurry. Then, we mix in the cheese magic: a cup each of Monterey Jack and cheddar. Don’t skimp here; that blend gives you that perfect, melty pull! To keep everything creamy and bind it together, grab 1/2 cup of softened cream cheese and 1/4 cup of sour cream. Finally, we season it up with 1 teaspoon of chili powder, plus a half teaspoon each of cumin, garlic powder, and onion powder for that deep Tex-Mex base. When you mix this, make sure that cream cheese is totally smooth—it acts like the glue!
How to Make Crispy Chimichangas: Step-by-Step Instructions
This is where the magic happens, and honestly, it’s shockingly fast! First things first, get your oven fired up to 400°F (200°C). I always give myself a little pep talk here—we are making something totally crispy without ever touching the deep fryer! Have your baking sheet ready and give it a good, even coating of cooking spray; that helps the bottoms get golden, too.
Next up is the filling. Grab that bowl where you measured out your chicken and cheeses. Your expert tip here is making sure that cream cheese is truly soft—I mean really soft. If it’s cold, you’ll end up with little lumps instead of a smooth binder. Mix that chicken, both cheeses, sour cream, and all those savory spices until everything looks totally incorporated. Stir it until you can’t see any plain white cream cheese peeking through!
Tortillas need flexibility to roll without cracking. This is super important for homemade chimichangas! Wrap your stack of 12 tortillas in a damp paper towel and microwave them for just 15 seconds. They become soft and stretchy. Now, line them up. Put about 1/3 cup of that cheesy chicken mixture right across the center line of each warmed tortilla. Don’t overstuff them, or they’ll explode on you!
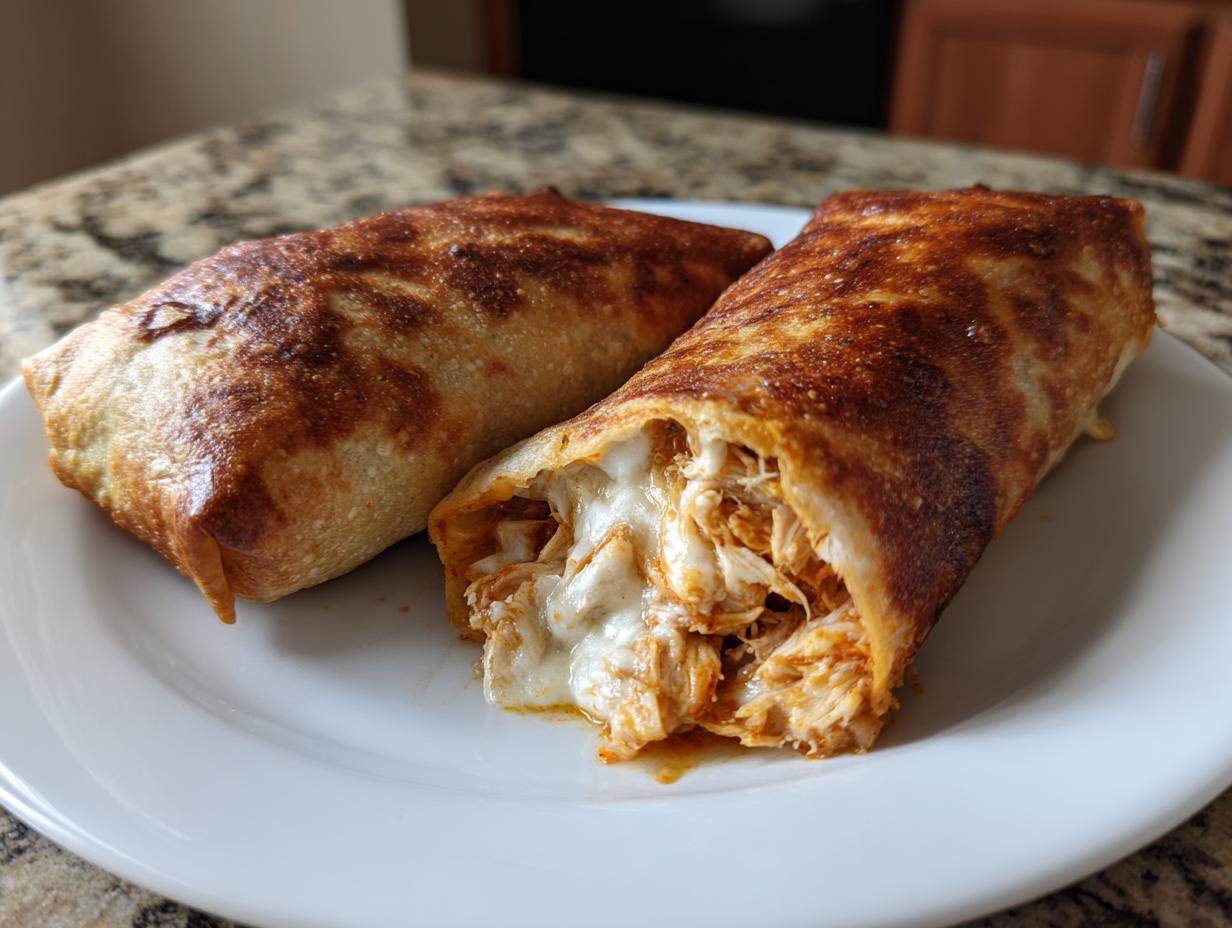
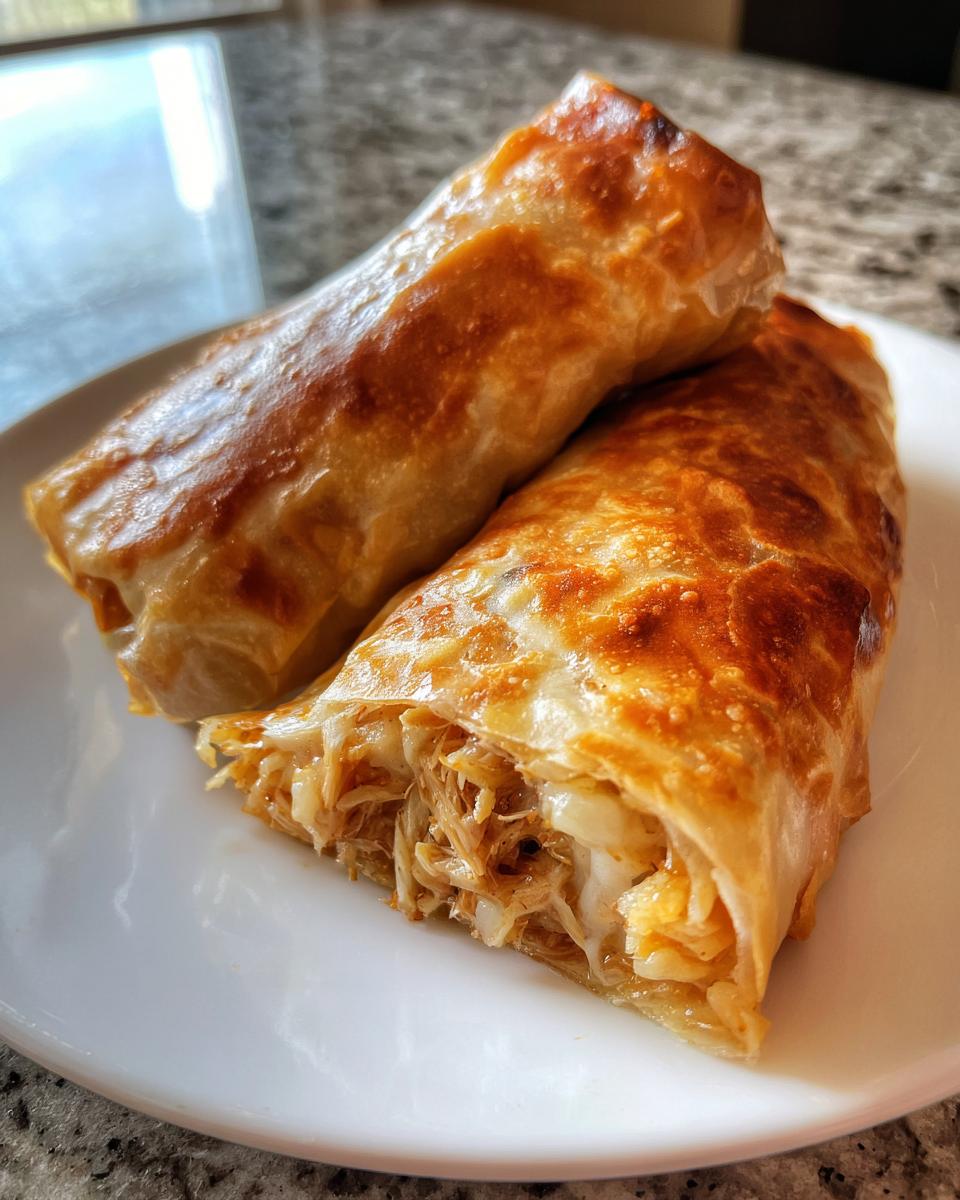
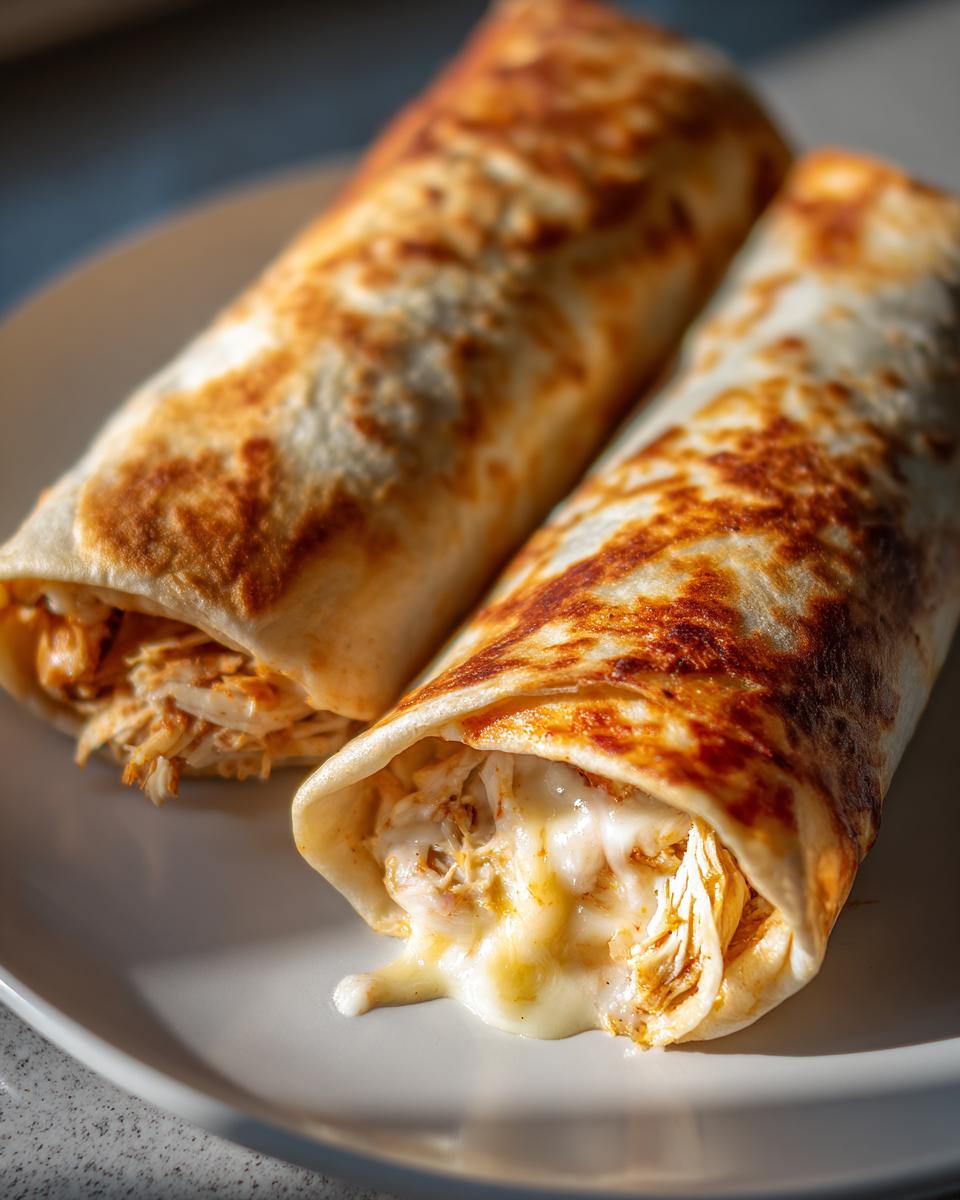
The rolling is key for structural integrity. Fold those sides in first—just a small tuck over the filling. Then, you need to roll them up tight, just like you would a tight little sleeping bag, starting from the bottom. Once rolled, place them seam-side down onto that prepared baking sheet. This neat placement keeps them sealed while they cook. We’re aiming for that beautiful golden color, so give the tops a light spray of cooking oil or brush them with olive oil. We want crispiness!
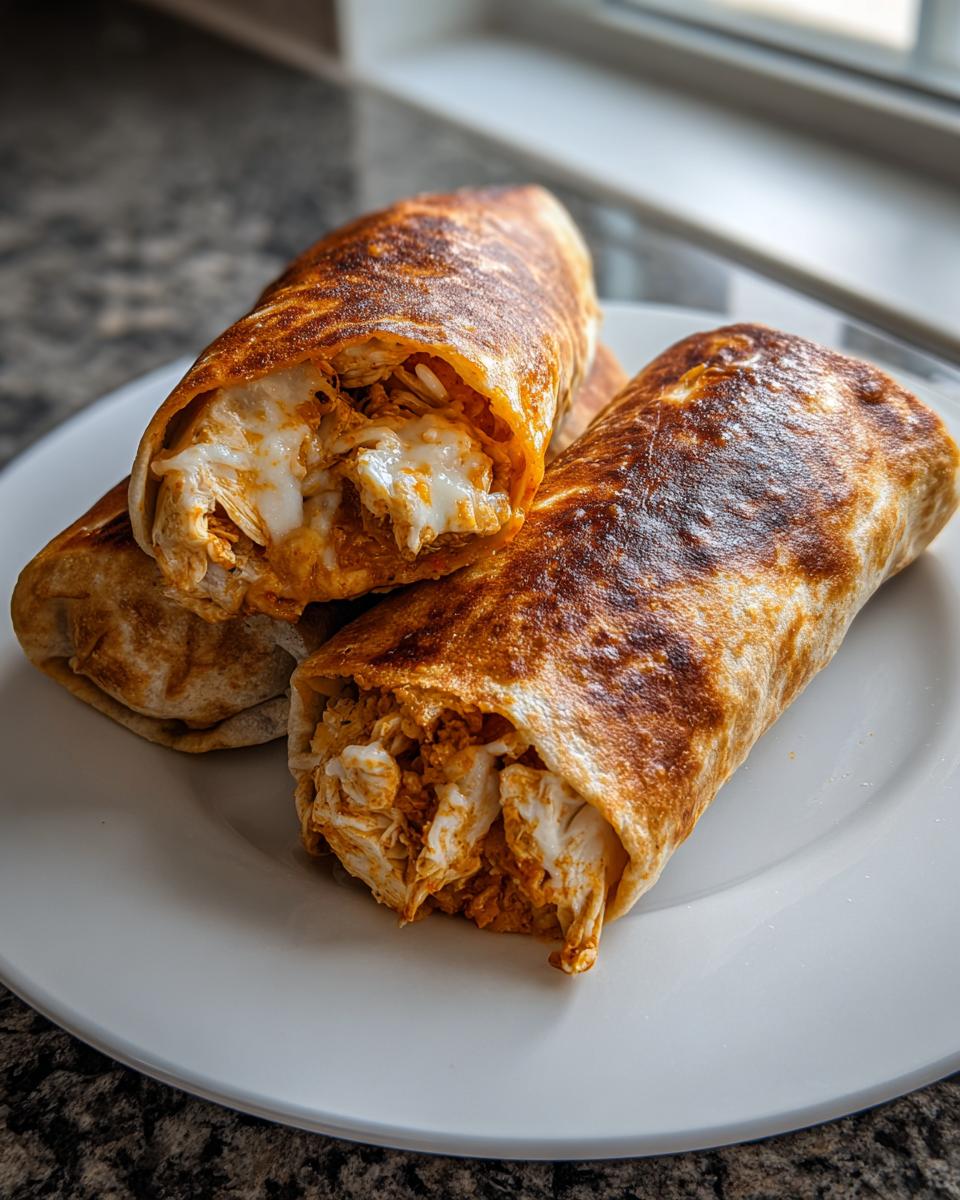
Bake time is just 12 to 15 minutes, but you have to flip them halfway through. This ensures both sides get that beautiful golden crunch. Now, if you’re using your air fryer because you’re dedicated to Air Fryer Chimichangas, go ahead and pop them into your basket—single layer only! Set your air fryer to 375°F (190°C) and cook them for 8 to 10 minutes, flipping around the halfway mark. If you are looking for other crispy baked snacks, take a peek at how I cook crispy baked chicken wings or even some fun air fryer frozen shrimp. It’s all about getting that texture! Check out this resource for more air fryer inspiration.
Tips for Success When Making Chimichangas
I want your chimichangas to be crispy perfection, not sad, floppy messes! So let me share the three little tricks that elevate this from good to amazing. First, that warming step for the tortillas is non-negotiable. If they are cold right out of the bag, they absolutely will crack when you start rolling them up tight. A quick 15 seconds in the microwave makes them pliable and forgiving.
Second, remember that you’re aiming for crispy, not oily. When you spray them before baking or air frying—and yes, you need to spray both sides—use a fine mist. Too much oil pools and the tortilla steams instead of crisps up. Think light coating! This is key for maximizing that crunch.
And finally, the ultimate secret for a Quick Weeknight Dinner: use leftover chicken! If you happened to make shredded chicken for a chicken cobbler last night, boom! You just cut your prep time in half. This recipe is designed around speed, so leaning into leftovers makes it lightning fast. Enjoy the crunch!
Variations: Beef Chimichangas and Other Filling Ideas
I love this chicken version because it’s so great with leftovers, but I know some people just need that classic, hearty flavor! If you’re craving the beef version, swapping ingredients is super easy. For these Chimichangas, just replace the 2 cups of shredded chicken with 2 cups of seasoned ground beef. Make sure your beef is fully cooked and drained well before adding it to the cheese mixture, or things will get soupy!
For the best results with ground beef, I often use a simple mixture of taco seasoning, a little garlic powder, and maybe a splash of broth to keep it moist. If you want to try a meatless option, you could swap the chicken out entirely for a mix of black beans and corn—just rinse those beans really well! And if you want more of a kick for your Beef Chimichangas, don’t be shy about mixing in a few spoonfuls of those drained green chiles mentioned in the notes. You can find a great approach to cheesy beef mixtures over at this resource, too. It’s all about customizing your dinner favorites, kind of like how I tweak my cheeseburger casserole!
Serving Suggestions for Your Cheesy Chimichangas
Once these babies come out of the oven golden brown and smelling like heaven, you need the right supporting cast! These Cheesy Chimichangas are fantastic all on their own, but the toppings really take them over the top. Since the chimichanga is hot, savory, and wonderfully crunchy, we need cool, fresh contrasts.
You absolutely must serve them with a dollop of cool sour cream—it’s the classic pairing. Then, if you have time, fresh salsa or pico de gallo adds that much-needed tang and acid. Guacamole is non-negotiable for me; the creamy texture balances the crunch perfectly. For a real Tex-Mex spread that feels special, consider making my easy Mexican street corn dip as a side, too. It’s the fiesta you need!
Storage and Freezer Friendly Meals with Chimichangas
Life happens, and sometimes you make too much, or maybe you were smart and doubled the batch for future you! That’s why discussing leftovers and storage is crucial for these Chimichangas. If you have any baked goodies left, just pop them into an airtight container and pop them in the fridge. They keep well for about three days, but honestly, they only last about one day in my house because they disappear!
Reheating is simple! If you want to recapture some of that original crispness, skip the microwave because that just makes them soft. Instead, pop those leftover chimichangas back into a 375°F oven for about 8 minutes, or run them in the air fryer at 360°F for 4-5 minutes until they are heated through and slightly crisp again. Quick cleanup, no waste!
Now, for the real winner: these are fantastic Freezer Friendly Meals. You must assemble them completely—fill them, roll them tight, and place them seam-side down on a baking sheet. Freeze them flat like this until they’re rock solid. Then, transfer them to a freezer bag. When it’s time to cook from frozen, add about 10 to 15 extra minutes to the oven time or cook them at 360°F in the air fryer for about 15 minutes. Always check that inner temperature, though! If you need a great make-ahead side dish for these, try my easy bean salad!
Frequently Asked Questions About Easy Chimichangas
Can I deep fry these Chimichangas instead?
Oh, absolutely you can! The oven method is a lighter choice, but if you want that true, traditional texture, frying is the way to go. For deep frying, heat about two inches of neutral oil (like canola or vegetable) to 350°F (175°C). Fry your assembled chimichangas for about 2 to 3 minutes per side until they are deeply golden brown and aggressively crispy. Just watch them carefully—they cook much faster than baking!
How do I prevent my tortillas from cracking?
This is maybe the most common issue when making Homemade Chimichangas, and it all comes down to moisture. You must soften the tortillas first! Don’t just pull them out of the package. I wrap my stack in a damp paper towel and microwave them until they are warm and very pliable—usually about 20 seconds for 10 tortillas. If your filling is too cold or too big, that can cause tearing too, so make sure your filling mixture isn’t ice cold.
What is the difference between a chimichanga and a burrito?
This is a classic Tex Mex question! The core difference is simple: A burrito is just a tightly wrapped tortilla filled with ingredients, usually eaten soft. A chimichanga is essentially a deep-fried (or baked/air-fried) burrito. That frying process crisps up the shell, giving it a totally different texture and making it a favorite among fans of Crispy Chimichangas everywhere. It’s all about that final cooking step!
Can I use ground beef instead of chicken for this recipe?
Yes, and it’s a fantastic way to make Beef Chimichangas! You’ll just need to swap the 2 cups of cooked, shredded chicken for 2 cups of seasoned, cooked ground beef. You still want to drain off any excess grease really well after cooking the beef so you don’t water down the cheese mixture. This swap keeps the cooking time nearly identical, making it a perfect alternative for a Quick Dinner.
My baked chimichangas aren’t very crispy, what did I miss?
Don’t worry, we’ve all been there! Usually, this means the tortillas didn’t get enough contact with dry heat. Make sure you are spraying *both* sides lightly with cooking spray or brushing them with oil before they go into the oven. Also, avoid crowding the pan; the steam gets trapped if they are touching. For the best chance at incredible crunch, I actually find the air fryer gives a more consistent crisp than the oven for these tortilla-based recipes.
Estimated Nutritional Data for Baked Chimichangas
Okay, now that you’ve got the steps down for making these amazing, lightened-up Chimichangas, I want to talk honestly about the numbers. Because we are focusing on home cooking and accessibility here, I don’t believe in getting bogged down with perfect tracking—the joy is in the making and sharing!
Keep in mind that the nutritional data provided below is just an estimate. This is based strictly on the exact ingredients listed in the recipe using standard portion sizes. If you swap out Monterey Jack for a lower-fat mozzarella, or if you decide to smother yours in a huge scoop of guacamole and sour cream (which I highly recommend, by the way!), those numbers are going to shift.
Think of this section as a guide, not a rulebook. These Baked Chimichangas are genuinely a smarter way to enjoy your Tex-Mex favorites, but you should always adjust ingredient amounts based on what you have on hand or what fits your personal needs. The important takeaway is that by baking instead of deep-frying, you’re already making a huge step toward lighter eating!
PrintCrispy Baked Chicken and Cheese Chimichangas
Make satisfying, crispy chicken chimichangas in your oven. This recipe offers a lighter alternative to deep-frying, delivering cheesy, savory flavor perfect for a quick weeknight dinner.
- Prep Time: 15 min
- Cook Time: 15 min
- Total Time: 30 min
- Yield: 12 servings 1x
- Category: Dinner
- Method: Baking
- Cuisine: Tex-Mex
- Diet: Vegetarian
Ingredients
- 12 large flour tortillas
- 2 cups cooked, shredded chicken breast
- 1 cup shredded Monterey Jack cheese
- 1 cup shredded cheddar cheese
- 1/2 cup cream cheese, softened
- 1/4 cup sour cream
- 1 teaspoon chili powder
- 1/2 teaspoon cumin
- 1/4 teaspoon garlic powder
- 1/4 teaspoon onion powder
- Cooking spray or light olive oil
Instructions
- Preheat your oven to 400°F (200°C). Lightly spray a baking sheet with cooking spray.
- In a medium bowl, combine the shredded chicken, Monterey Jack cheese, cheddar cheese, cream cheese, sour cream, chili powder, cumin, garlic powder, and onion powder. Mix until all ingredients are well combined into a filling.
- Warm the tortillas briefly in the microwave (about 15 seconds) to make them pliable and prevent tearing.
- Place about 1/3 cup of the filling mixture in a line across the center of each tortilla.
- Fold the sides of the tortilla inward over the filling, then tightly roll the bottom edge up and over the filling to create a sealed burrito shape. Place the chimichanga seam-side down on the prepared baking sheet. Repeat with the remaining tortillas and filling.
- Lightly spray the tops of the rolled chimichangas with cooking spray or brush with a small amount of olive oil for crisping.
- Bake for 12 to 15 minutes, flipping halfway through, until the tortillas are golden brown and crispy.
- For an Air Fryer option, place chimichangas in the air fryer basket in a single layer (work in batches if needed). Air fry at 375°F (190°C) for 8 to 10 minutes, flipping halfway, until golden and crisp.
- Serve immediately with your favorite toppings like salsa, guacamole, or extra sour cream.
Notes
- You can prepare the filling ahead of time and store it in the refrigerator for up to two days.
- For extra flavor, mix 1/4 cup of drained canned green chiles into the filling mixture.
- These chimichangas freeze well. Assemble completely, wrap tightly in foil, and freeze. To cook from frozen, bake at 375°F (190°C) for 25-30 minutes, or air fry at 360°F (180°C) for 15 minutes, checking for doneness.
Nutrition
- Serving Size: 1 chimichanga
- Calories: 320
- Sugar: 2
- Sodium: 450
- Fat: 14
- Saturated Fat: 7
- Unsaturated Fat: 7
- Trans Fat: 0
- Carbohydrates: 35
- Fiber: 2
- Protein: 16
- Cholesterol: 50