
If you’re looking for that perfect, warm hug of a dish for National Cherry Cobbler Day, stop scrolling right now! This Classic cherry cobbler delivers everything you want: a deeply jammy fruit base and that thick, golden, biscuit-like topping that just screams comfort. When I developed this recipe, I pulled directly from the techniques my mother taught me in our Ohio kitchen—it’s pure, simple heritage baking that just always turns out right. Forget fussy desserts; this is the reliable Sunday staple that everyone, from seasoned bakers to beginners, can master. It’s truly the best way to celebrate those wonderful, old-fashioned flavors we all love, especially when served warm with a scoop of melting vanilla ice cream.
- Why This Classic Cherry Cobbler is Your New Sunday Dessert Staple
- Gathering Ingredients for Your Classic Cherry Cobbler
- Step-by-Step Instructions for Easy Cherry Cobbler
- Tips for Perfect Spring Baking Recipes: Classic Cherry Cobbler Success
- Serving Suggestions for Homemade Fruit Desserts
- Storage and Reheating Instructions for Classic Cherry Cobbler
- Frequently Asked Questions About Classic Cherry Cobbler
- Estimated Nutritional Data for Classic Cherry Cobbler
- Share Your Heritage Baking Creations
Why This Classic Cherry Cobbler is Your New Sunday Dessert Staple
This recipe nails that comforting, “Granny revival” feeling we all crave. It’s about minimal fuss for maximum flavor, making it perfect for a relaxed Sunday dinner. You don’t need any fancy equipment, just a desire for truly home-style dessert.
- It’s fast! Total time is just about an hour, so you get that homemade fruit desserts satisfaction quickly.
- The filling cooks down into that perfect thick, sticky layer you dream about.
- It feels authentic—a true piece of American kitchen heritage.
If you need another simple comfort recipe to master, check out my thoughts on old-fashioned fruit cake!
Achieving the Best Cobbler Topping Texture
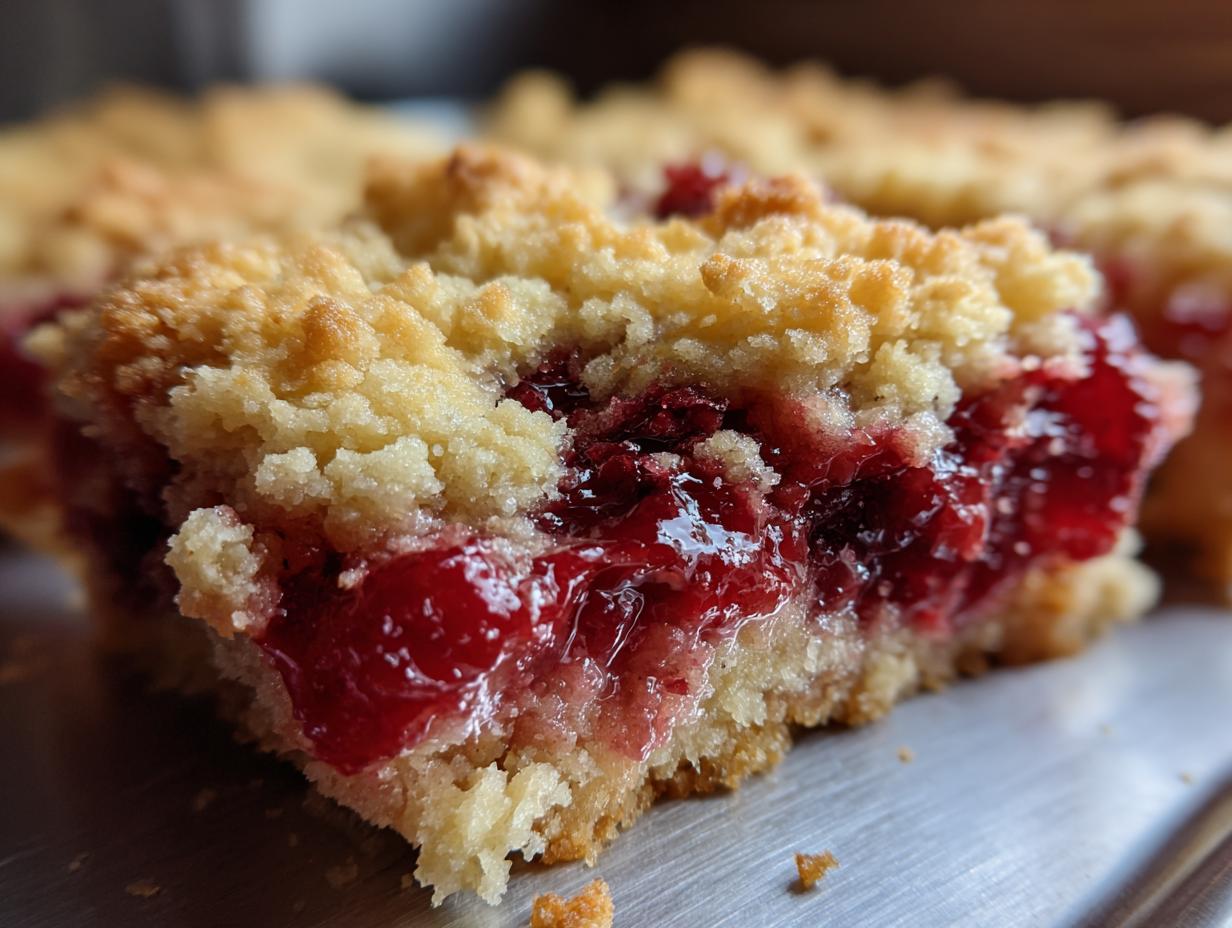
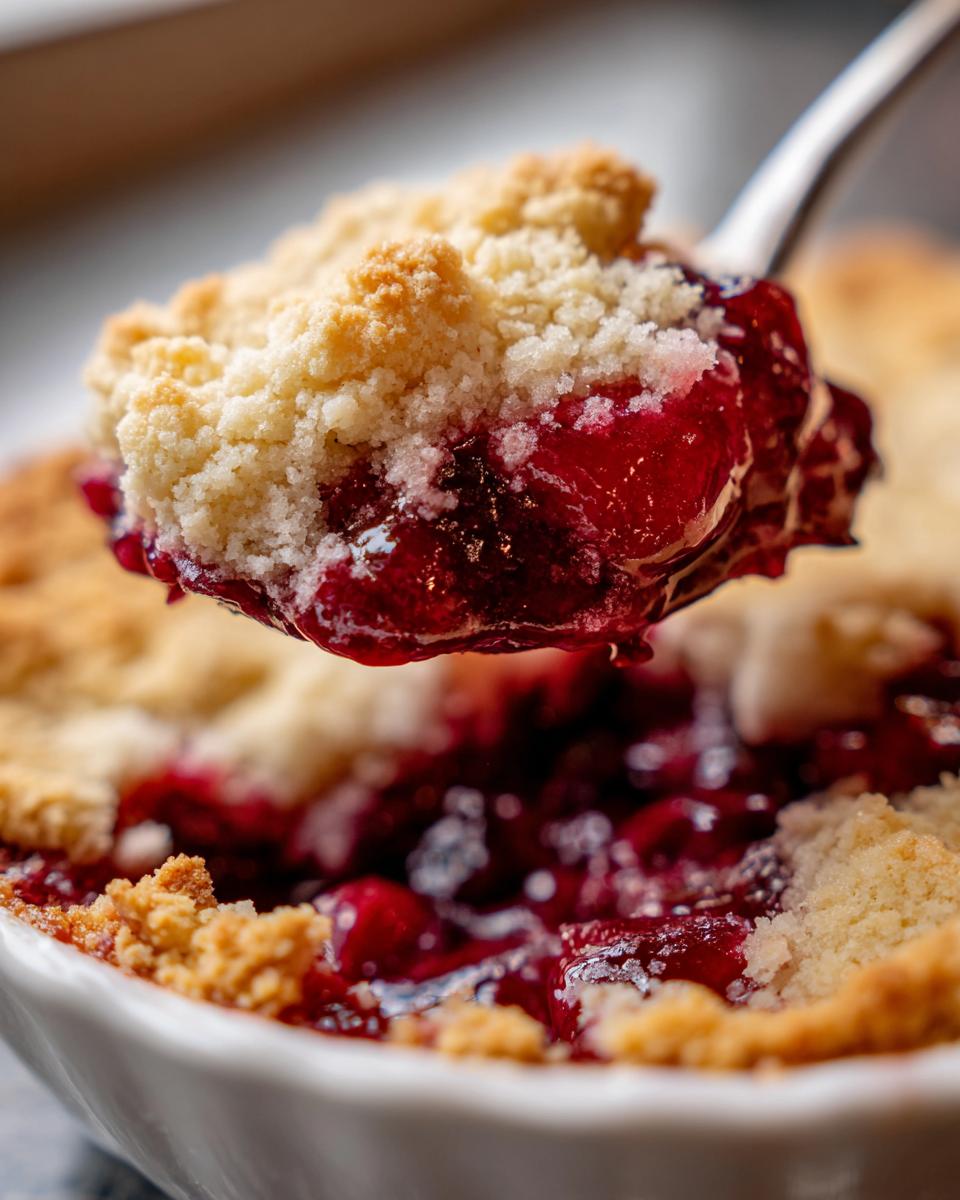
The topping is where we really earn that biscuit feel. The secret to the best cobbler topping, hands down, is maintaining temperature! You absolutely have to use butter straight from the fridge, cut into tiny cubes. If that butter warms up even a little before it hits the oven, you lose the pockets of steam that make that topping light and flaky instead of dense and heavy. Don’t rush this part, trust me on the cold!
Gathering Ingredients for Your Classic Cherry Cobbler
Alright, let’s talk supplies! Making this dish is why I love sharing my kitchen secrets; the ingredient list is straightforward, but the precision in measuring is key to that wonderful result. You’ll need about six cups of cherries—fresh or frozen—along with key texture aids like cornstarch and quality extracts. Remember, everything needs to be ready to go since we move fast once the stove gets hot!
If you’re curious about other easy treats, I happen to have a fantastic recipe for homemade marshmallows that uses a similar focus on precision!
Ingredient Notes and Substitutions for Classic Cherry Cobbler
I often get asked about cherries since they aren’t always in peak season. If you grab frozen ones, don’t even bother thawing them! Just toss those icy beauties right into the pot. That extra liquid will happily cook off as you thicken the filling. For anyone avoiding cherries, these traditional cherry recipes translate beautifully to blackberries or even a four-cup mix of firm plums and peaches. Just be ready to adjust the sugar slightly based on the fruit’s natural sweetness.
Step-by-Step Instructions for Easy Cherry Cobbler
This recipe moves quickly once you start, which is why I love it for a weeknight or a busy Sunday afternoon! First thing, get that oven preheated to 375°F and your 8×8 dish greased up. We’re going to tackle the filling first because it needs to cool slightly before we top it. Remember, we are aiming for that gorgeous, thick texture that makes an easy cherry cobbler so satisfying. After the magic happens in the oven, you absolutely must let it rest for at least 20 minutes. Patience here pays off; it lets the filling set up so it doesn’t run everywhere when you serve it. For more versatile recipes, you might want to check out my guide on easy beer cheese dips!
Cooking the Jammy Cherry Filling
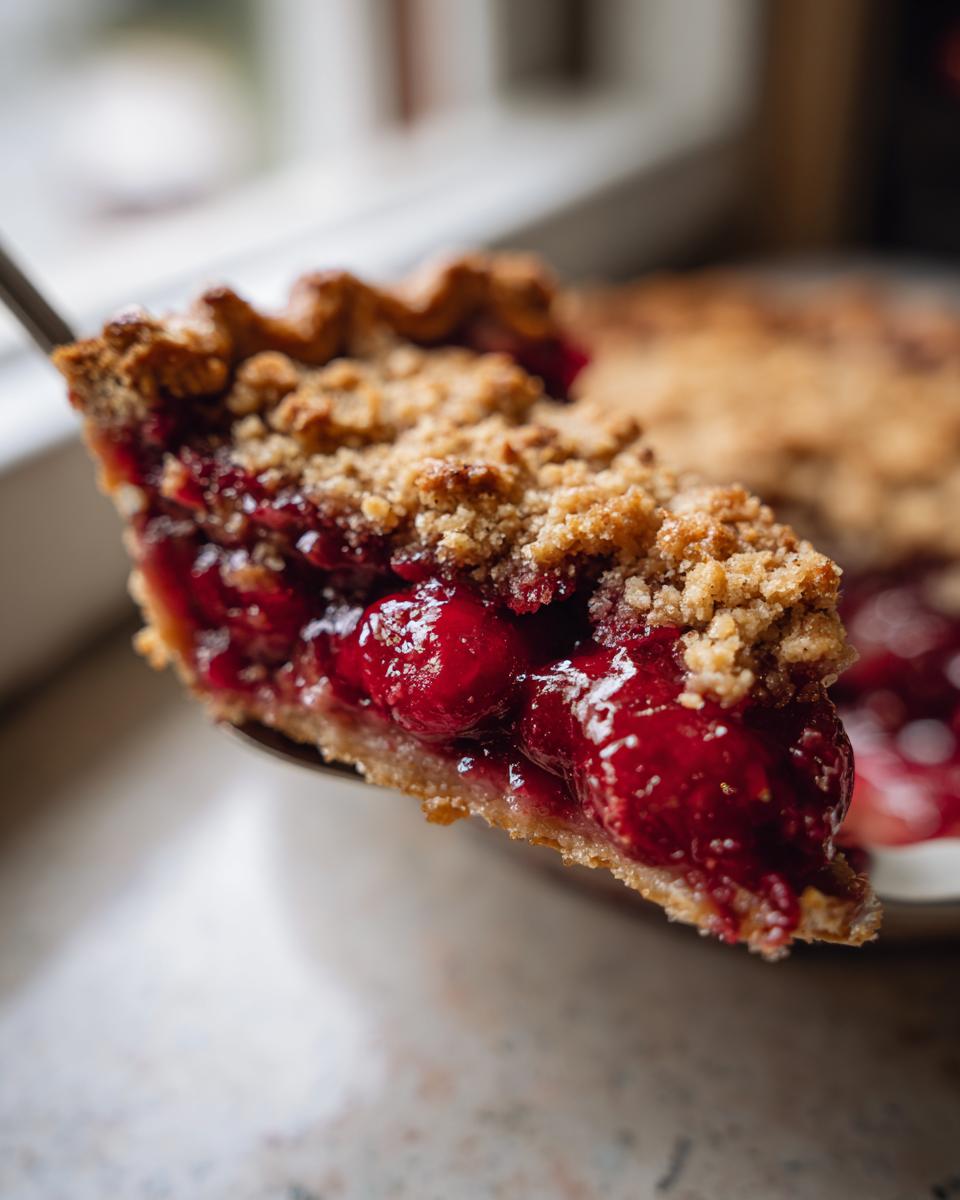
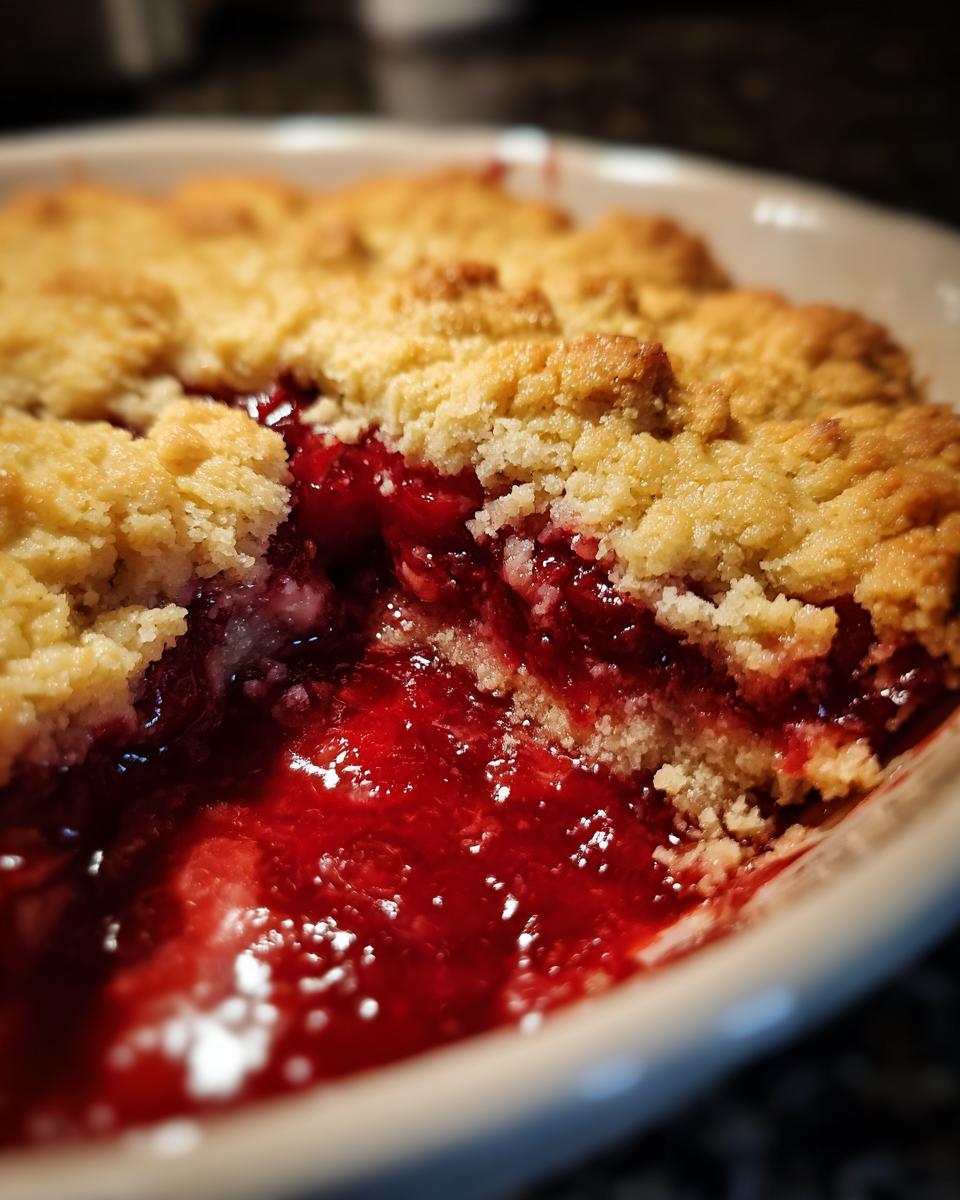
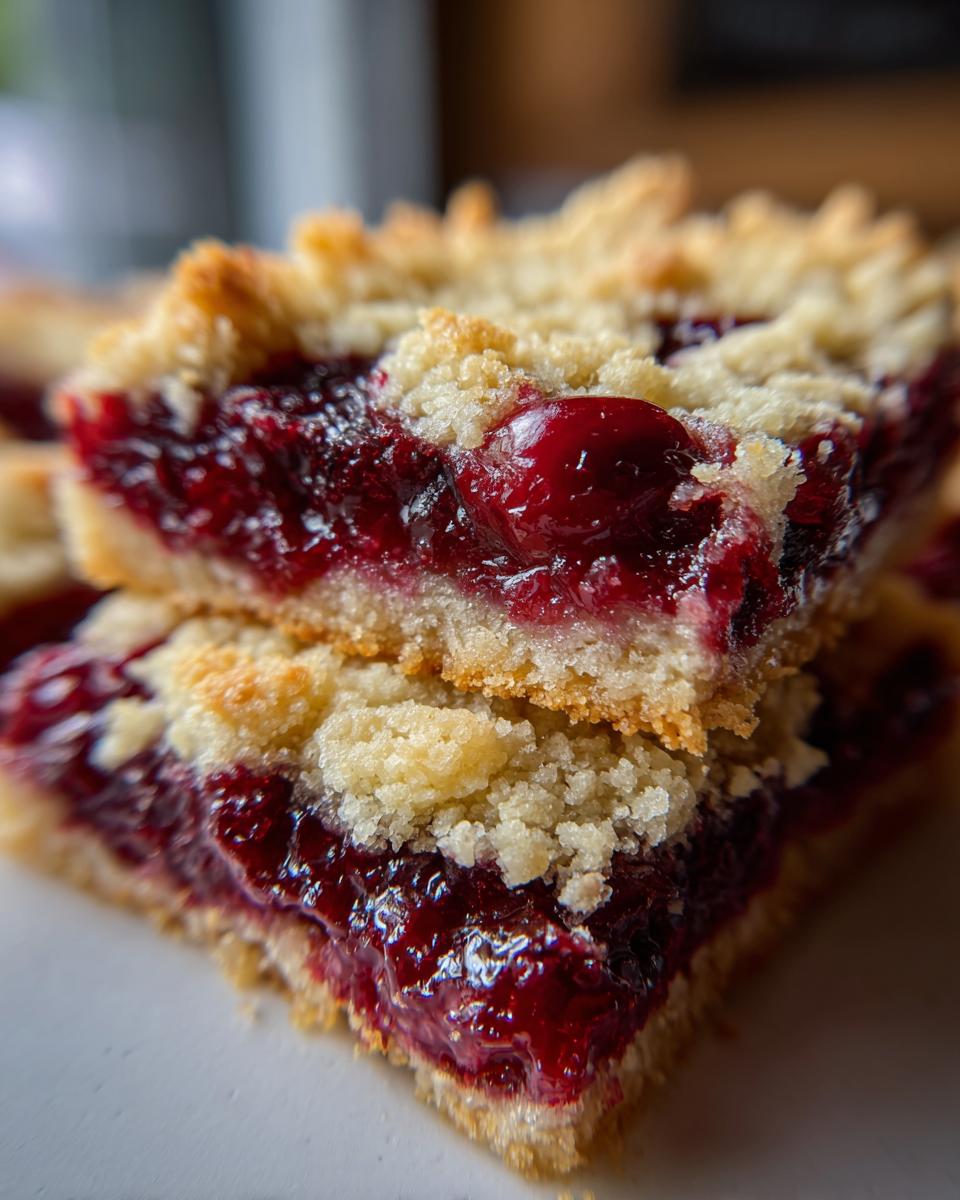
Grab a medium saucepan. Dump in your pitted cherries, that first cup of sugar, the cornstarch (that’s our secret to thickness!), lemon juice, and both extracts. Turn the heat to medium and just stir, stir, stir. You’re looking for it to bubble up lightly and start clinging to the spoon—that usually takes about 8 to 10 minutes. You want it jammy, not watery! Once it looks thick and gorgeous, pour it right into your prepared baking dish.
Assembling the Biscuit Topping for Classic Cherry Cobbler
Now for the best part—the topping! In a separate bowl, whisk together the flour, the smaller amount of sugar, baking powder, and salt. Here’s where we treat that cold butter exactly like biscuit dough: use your fingertips or a pastry blender and work that butter in until you have coarse crumbs. Seriously, don’t let your hands warm it up too much! Pour in the milk and just gently stir until you see a shaggy ball form. Stop mixing right there! Overmixing ruins this texture, so fight the urge to knead or smooth it out.
Tips for Perfect Spring Baking Recipes: Classic Cherry Cobbler Success
Oven management is just as crucial as mixing when it comes to nailing these spring baking recipes. We already preheated to 375°F, but watch what the cobbler is actually *doing* in there. You need to see those edges of the cherry filling starting to bubble up vigorously—that tells you the cornstarch has activated plenty. Also, don’t forget that egg wash! Brushing that beaten egg gently over the biscuit tops is what guarantees that incredible golden-brown color we want. It seals in the moisture and gives it that professional look without tasting eggy at all. If you’re looking for another great way to use your oven, you should definitely peep my recipe for Apple Dapple Cake; it needs a similar focused bake!
Serving Suggestions for Homemade Fruit Desserts
This beautiful, comforting cobbler really shines when it’s served warm—that’s the true Sunday dessert experience. You absolutely have to try it with a big scoop of good quality vanilla ice cream; the contrast between the hot, tart cherries and the cold cream is just heavenly. If ice cream isn’t your thing, another great pairing for these homemade fruit desserts is a dollop of freshly whipped cream sweetened lightly with vanilla. For the whipped cream recipe, I always follow my own guide for fluffy vanilla buttercream, using less powdered sugar, of course!
Storage and Reheating Instructions for Classic Cherry Cobbler
We all hope for leftovers, right? Once this cobbler cools down—and remember, let it rest for 20 minutes first!—cover the dish tightly with plastic wrap or aluminum foil. It keeps really nicely on the counter for a day, but for best texture, pop it in the fridge for up to four days. Never rush refrigeration!
When you want to bring it back to life, avoid the microwave if you can; it makes the biscuit topping soggy fast. Instead, reheat individual slices or the whole dish in a toaster oven or a regular oven set to about 325°F until it’s warmed through and the filling is bubbly again. That little burst of heat fixes the topping right up!
Frequently Asked Questions About Classic Cherry Cobbler
I get so many questions when people try this recipe for the first time, and that’s wonderful! It means you care about getting it perfect, just like I do. Here are the ones I hear most often about whipping up this tasty thing.
Can I make this Classic Cherry Cobbler ahead of time?
Yes, you absolutely can prep elements ahead of time, which helps with those hectic Sundays! You can cook the cherry filling completely, let it cool, and store it covered in the fridge for up to three days. When you’re ready to bake, just pour it into your dish—it might still be a little cool, which is fine—and proceed with making the topping fresh. Please, please, please don’t ever assemble the topping ahead of time; that biscuit dough needs that cold butter to do its job right when it hits the oven.
What makes this the best cobbler topping?
This is the difference between a cobbler and a crisp or a crumble! The best cobbler topping isn’t supposed to be uniform. It’s a biscuit dough; we are cutting cold butter into the dry mix and only adding enough milk until it’s shaggy. You drop spoonfuls of that rough dough over the cherries, not spread it out evenly. This technique creates little peaks and valleys that brown beautifully in the oven, giving you great nooks and crannies.
How do I stop the fruit from being too runny?
That’s usually all about the cornstarch and heat control. In step three, you must cook the filling until it’s truly jammy and clinging to the spoon—that means the cornstarch is activated. If you’re using frozen cherries, that extra water cooks off anyway! If you find your filling is running thin, just take it off the heat, stir in one extra teaspoon of cornstarch slurry (mix cornstarch with a tablespoon of cold water first!), and pop it back on the heat just until it thickens again. Consistency is key for great traditional cherry recipes!
Is this considered an easy cherry cobbler for beginners?
Totally! Since we aren’t making a full pie crust or a streusel topping, this falls right into the simple category. If you can whisk dry ingredients and cut butter into flour, you’ve basically mastered the whole thing! Keep an eye on the texture when cutting in the butter, and you’ll be making these easy cherry cobbler treats for years to come. If you need a refresher on basic mixing techniques, I have some general tips for easy appetizers and snacks that break down simple mixing well!
Estimated Nutritional Data for Classic Cherry Cobbler
Now, I know we bake for love, not for numbers, but sometimes it’s helpful to have a rough idea of what’s in that beautiful slice! Keep in mind, since we’re dealing with real fruit and butter, these figures change based on the sweetness of your cherries and how much you drizzle on top later.
- Calories: Approximately 380 per serving
- Total Fat: Around 15g
- Carbohydrates: Roughly 60g
- Protein: About 5g
- Sugar Content: Near 45g
These are just estimates based on the recipe as written for 6 servings. Enjoy every crumble!
Share Your Heritage Baking Creations
I truly hope this Classic cherry cobbler brings that kitchen joy we talk about here at Command Central! When you try this recipe, please take a minute to share a photo or rate your experience. Knowing you’re building your own confidence with these simple, heritage techniques is what keeps me testing recipes!
You can read more about the whole Cookery Command mission over on our About page anytime!
PrintClassic Cherry Cobbler: A Heritage Baking Recipe
Make this warm and comforting classic cherry cobbler with a jammy fruit base and a golden, biscuit-like topping. This simple heritage baking recipe is perfect for your Sunday dessert.
- Prep Time: 20 min
- Cook Time: 40 min
- Total Time: 60 min
- Yield: 6 servings 1x
- Category: Dessert
- Method: Baking
- Cuisine: American
- Diet: Vegetarian
Ingredients
- 6 cups fresh or frozen pitted sweet cherries
- 1 cup granulated sugar
- 1/4 cup cornstarch
- 1 tablespoon fresh lemon juice
- 1 teaspoon vanilla extract
- 1/4 teaspoon almond extract
- 1 1/2 cups all-purpose flour
- 1/4 cup granulated sugar
- 1 tablespoon baking powder
- 1/2 teaspoon salt
- 1/2 cup (1 stick) cold unsalted butter, cut into small pieces
- 1/2 cup milk
- 1 large egg, lightly beaten (for brushing)
Instructions
- Preheat your oven to 375 degrees Fahrenheit. Lightly grease an 8×8 inch baking dish.
- In a medium saucepan, combine the cherries, 1 cup sugar, cornstarch, lemon juice, vanilla extract, and almond extract.
- Cook the cherry mixture over medium heat, stirring often, until it thickens to a jammy consistency, about 8 to 10 minutes. Remove from heat and pour the filling evenly into the prepared baking dish.
- Prepare the topping: In a medium bowl, whisk together the flour, 1/4 cup sugar, baking powder, and salt.
- Cut in the cold butter using a pastry blender or your fingertips until the mixture resembles coarse crumbs.
- Pour in the milk and stir just until a shaggy dough forms. Do not overmix.
- Drop spoonfuls of the biscuit topping evenly over the hot cherry filling.
- Brush the tops of the dough with the lightly beaten egg for a golden finish.
- Bake for 35 to 40 minutes, or until the topping is golden brown and the fruit filling is bubbling around the edges.
- Let the cobbler cool on a wire rack for at least 20 minutes before serving warm with vanilla ice cream.
Notes
- If you use frozen cherries, do not thaw them before cooking the filling; the extra liquid will cook off.
- For the best biscuit topping texture, keep your butter very cold.
- This recipe makes a wonderful homemade fruit dessert that pairs well with coffee.
Nutrition
- Serving Size: 1 serving
- Calories: 380
- Sugar: 45
- Sodium: 210
- Fat: 15
- Saturated Fat: 9
- Unsaturated Fat: 6
- Trans Fat: 0
- Carbohydrates: 60
- Fiber: 3
- Protein: 5
- Cholesterol: 45