
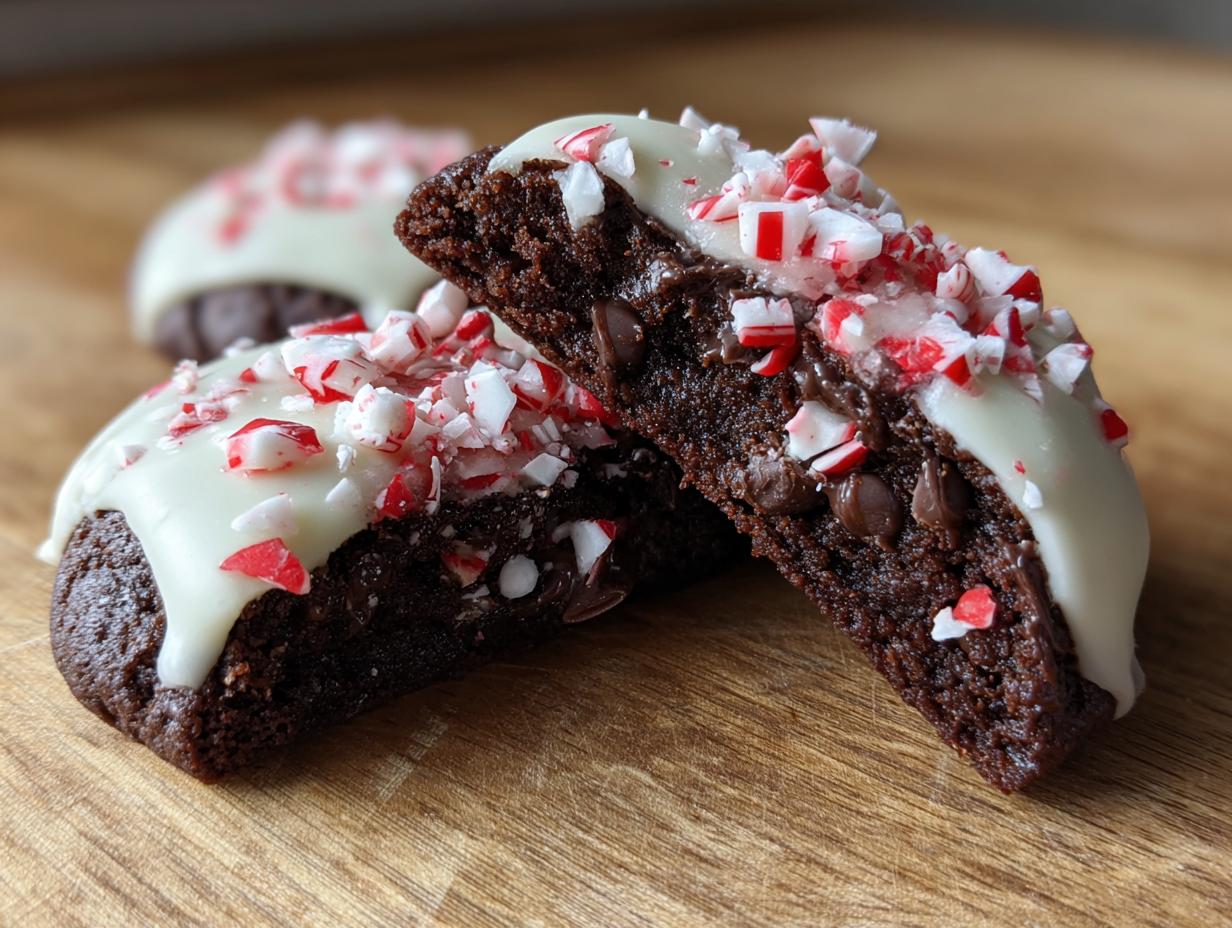
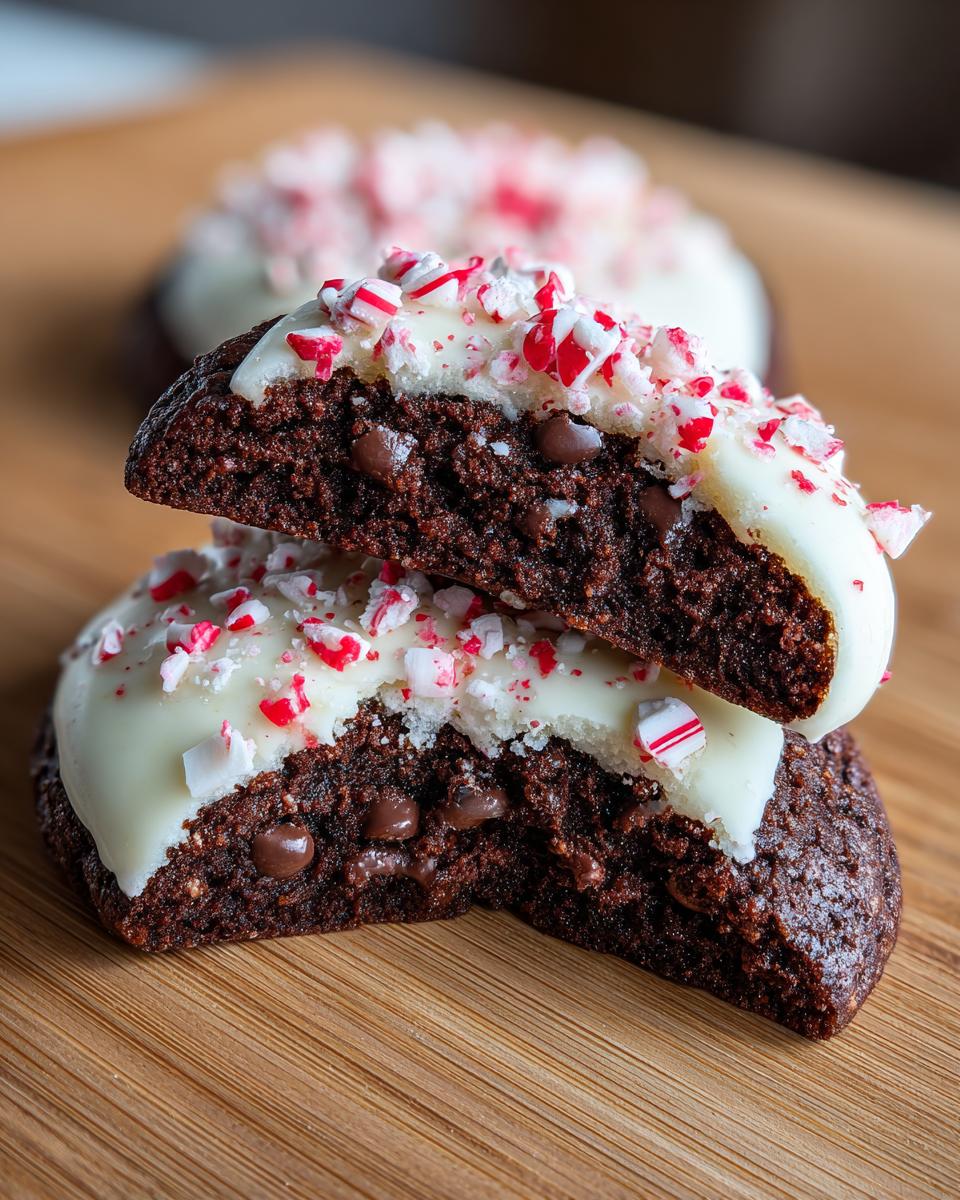
Oh my gosh, is it even the holidays until you smell that perfect, cool rush of mint mixed with deep, dark chocolate? I swear, the scent alone takes me right back to my childhood kitchen in Ohio, watching Mom try to keep up with everyone wanting seconds! Forget crumbly, dry baked goods. We’re making decadent, super soft, fudgy Double Chocolate Peppermint Cookies here, and the best part? They come together in about 20 minutes of active time. That quick turnaround is exactly what we look for here at Cookery Command—reliable American home cooking techniques that never fail, giving you maximum holiday joy with minimum stress. If you love rich holiday treats, you absolutely must check out my favorite Christmas Gooey Butter Cookies too!
- Why This Double Chocolate Peppermint Cookies Recipe is a Christmas Cookie Exchange Favorite
- Gathering Ingredients for Decadent Chocolate Mint Cookies
- Step-by-Step Instructions for Easy Peppermint Cookies
- Tips for Success When Making Your Best Chocolate Peppermint Recipe
- Storage and Make-Ahead Tips for Your chocolate peppermint cookies
- Serving Suggestions for Festive Winter Desserts
- Frequently Asked Questions About chocolate peppermint cookies
- Estimated Nutritional Data for One chocolate peppermint cookies Serving
- Share Your Homemade Holiday Cookies Experience
Why This Double Chocolate Peppermint Cookies Recipe is a Christmas Cookie Exchange Favorite
When you take these to a cookie exchange, they disappear first! We prioritize soft/chewy texture and huge flavor because nobody has time for cookies that taste flat or fall apart. They’re brilliant for any holiday setup, making them truly Easy Peppermint Cookies. If you want to see another take on this cookie—one that is really quick—check out the version from my friends over at I Heart Eating. For comparison on chewiness, you know I stand by my classic Best Chewy Chocolate Chip Cookies Recipe, and this version hits the same satisfying mark.
Achieving the Perfect Soft and Chewy chocolate peppermint cookies Texture
The secret to keeping these cookies soft is an old trick I picked up: the sugar ratio! We use both granulated sugar and brown sugar. The molasses in the brown sugar keeps things moist and chewy way longer than using all white sugar would. Plus, we pull these cookies out when they look *slightly* underdone. Trust me, they will set up perfectly on the hot baking sheet, netting you that fantastic, gooey center every single time. That’s how we nail that Chewy Fudgy Chocolate Cookies look without ever needing to chill the dough! If you skip the slight underbaking, you’ll end up with something closer to a Snickerdoodle, which isn’t what we want here. If you loved the no-chill promise of my Snickerdoodle Cookies, you’ll be thrilled these are just as speedy!
Gathering Ingredients for Decadent Chocolate Mint Cookies
Before we dive into the mixing, let’s make sure your countertop is ready! For any recipe, but especially with something as deeply flavorful as these chocolate peppermint cookies, the quality and precise measurement of what you put in matters a whole bunch. I’ve prepped this list based on achieving that perfect fudgy result. When you gather these items, just double-check that your butter is truly softened—not melted melt!
Ingredient List for Our Double Chocolate Peppermint Cookies
- 1 cup unsalted butter, softened
- 1 cup granulated sugar
- 1/2 cup packed brown sugar
- 2 large eggs
- 1 teaspoon vanilla extract
- 1 teaspoon peppermint extract
- 1 3/4 cups all-purpose flour
- 3/4 cup unsweetened cocoa powder
- 1 teaspoon baking soda
- 1/2 teaspoon salt
- 1 cup semi-sweet chocolate chips
- 1/2 cup white chocolate chips (optional, for dipping)
- 1 cup crushed candy canes or peppermint crunch
Ingredient Notes and Substitutions for Your chocolate peppermint cookies
I always urge home bakers to use Dutch-process cocoa powder if you have it; it just deepens that chocolate color and flavor so intensely! If you want a really intense mint hit, go ahead and bump that peppermint extract up to 1 1/2 teaspoons—that’s my little trick for making them truly pop. Also, crush those candy canes right before assembly, usually in a zip-top bag with a rolling pin, so you get that gorgeous, colourful dust when you dip them!
Step-by-Step Instructions for Easy Peppermint Cookies
Alright, let’s get baking! This recipe really moves along, which is why I love it for last-minute gifting or when a cookie craving hits hard. Remember, the key to keeping these treats fast and foolproof is organization—get everything measured out first. Before you even touch the mixer, you need to crank that oven up to 350°F (175°C) and get your baking sheets lined with parchment paper. You don’t want these gorgeous things sticking around, I promise you that! If you need a super speedy sauce for cleanup later, you should totally check out my recipe for an Easy 5-Minute Creamy Garlic Aioli—though I doubt you’ll have time to make anything else after these cookies!
Mixing the Dough for Chewy Fudgy Chocolate Cookies
First things first: we cream the butter and both sugars together until they’re genuinely light and fluffy. Like, pale yellow and airy, not just sort of mixed. This traps the air we need for that great texture. After that, drop in those two eggs, one at a time, making sure each one is mixed in before you add the next. Then, swirl in your vanilla and that lovely, sharp peppermint extract! Now, take a breath and switch bowls. Whisk your flour, super dark cocoa powder, baking soda, and salt together really well so everything is evenly distributed. This step is important so you don’t end up with pockets of baking soda!
Here is where people sometimes rush it, but you can’t! Slowly add the dry stuff to the wet stuff. I mean slowly—a third at a time—and mix on low speed or just use a spatula until it *just* comes together. I mean it! Stop mixing the second you don’t see flour streaks anymore. If you overmix that chocolate dough, you’ll lose all that air we just worked so hard to create, and boom—you’ve got hard cookies. Finish by folding in those semi-sweet chocolate chips. We aren’t chilling this dough, so let’s scoop!
Baking and Cooling Your chocolate peppermint cookies
Scoop rounded dollops of that rich dough onto the prepared sheets, leaving about two inches between them so they have room to hug each other just a little bit while baking. Pop them into that 350°F oven for 10 to 12 minutes. Now, this is crucial for that promised chewiness—do NOT bake them until they look totally done! Pull them when the edges look set but the very center still looks a tiny bit soft and underbaked. They’ll keep baking on the hot baking sheet once you take them out.
Let them sit right there on the pan for a solid five minutes. This lets them firm up enough so they don’t just crack when you try to move them. After those five minutes, carefully transfer them to a wire rack to cool completely. If you try to dip them while they’re even slightly warm, they will crumble, and that melted chocolate topping will just run everywhere. Patience for five minutes earns you cookie perfection!
Adding the Peppermint Crunch Topping to the chocolate peppermint cookies
If you skipped the optional white chocolate chips in the dough, this is when you get to the fun part! You need to melt those white chips—I use the microwave, doing 30-second bursts and stirring well between each one until it’s smooth and runny. You want it easy to move around. If it seems too thick, you can stir in just a *tiny* splash of neutral oil, but be careful not to add any water!
Once cooled, grab a cookie and dunk about half of it right into that melted pool of white chocolate. Try to get an even coat, but don’t stress if it’s messy—that brings out the homemade charm! Right after you pull the cookie out, immediately sprinkle the wet white chocolate side with your crushed candy canes. Seriously, work fast because that white chocolate sets up quickly! If you want to see how another great food blogger, Baker’s Slider, handles making similar treats, their recipe is a good look: chocolate peppermint cookies.
Tips for Success When Making Your Best Chocolate Peppermint Recipe
I’ve seen so many people bake these gorgeous chocolate peppermint cookies only to have the mint flavor taste artificial, and it breaks my heart! My biggest tip here is to respect the peppermint extract. It is seriously potent. I used way too much my first time trying to make a super festive version—I thought a full teaspoon and a half would be amazing—but nope, it tasted like toothpaste! Stick to the recipe’s amount unless you know your brand is milder. Also, if you’re taking these to a party, dip them the morning of or the night before, but don’t crush your candy canes until you are literally ready to dip!
For presentation, make sure those scoops of dough are uniform; that’s how they bake evenly, which is key for a great homemade lasagna recipe success story, too! If you want a little extra cocoa punch, I highly recommend using some Dutch-process cocoa powder here; it just makes the chocolate flavor richer, as Ava suggests on Recipes by Ava. These cookies are pretty straightforward, but those little expert touches really set them apart!
Storage and Make-Ahead Tips for Your chocolate peppermint cookies
These chocolate peppermint cookies are part of my annual lineup of Homemade Holiday Cookies because, thankfully, they are great make-aheads! You absolutely do not need to bake these the day of your event. Honestly, they taste even better the next day once the peppermint flavor really settles into the fudgy base.
You can store them airtight at room temperature for up to four days. Keep them in a container with minimal airspace, maybe layering them with parchment paper in between so the candy cane topping doesn’t smudge onto the cookie below it. My biggest warning here is humidity! If your kitchen is super warm or damp, that white chocolate dip might get a little sticky, so keep them tucked away somewhere cool.
And yes, they freeze beautifully! If you want to get ahead by a month, bake them completely—topping and all—and let them cool fully. Then, just stack them with wax paper squares between each layer and tuck them into a heavy-duty freezer bag. They last great for about two months, no flavor loss. When you want to serve them, just pull out however many you need and let them thaw on the counter for about 30 minutes. It’s like getting a fresh batch without turning the oven on! If you need more make-ahead ideas that store well, you have to try my Saltine Cracker Toffee Recipe; it’s a lifesaver during the busy season.
Serving Suggestions for Festive Winter Desserts
You’ve made these gorgeous chocolate peppermint cookies, so now you have to serve them right, right? These aren’t just any cookies; they are the star of any display of Festive Winter Desserts! Because they are so rich—double chocolate and then dipped in chocolate—they pair perfectly with something simple but cozy.
My absolute first thought is always a giant glass of cold milk that you can dunk them into. That contrast between the cold dairy and the fudgy, cool mint is just unbeatable. Seriously, don’t knock it until you try it. Kids go crazy for that dunking ritual!
If you’re serving these later in the evening, I love having a fresh pot of coffee ready. The slight bitterness of the coffee cuts through the richness of the chocolate beautifully. If you’re serving coffee, you might want to have a lighter, contrasting dessert on the table too, so everyone doesn’t get overwhelmed by dark chocolate flavors. I usually pair these cookies with my Easiest 3-Ingredient Frozen Hot Chocolate recipe for something different but equally festive!
For a really elegant touch at a holiday party, try serving them alongside just a bowl of fresh raspberries. The tartness of the berries is a wonderful palate cleanser after the powerful chocolate mint combination. It looks absolutely stunning on a platter, too—a little pop of red next to the dark cookies!
Frequently Asked Questions About chocolate peppermint cookies
Can I skip the white chocolate dip and still have great chocolate peppermint cookies?
Oh, you totally can! The white chocolate is mostly for looks and that extra little sweetness contrast, but if you aren’t a fan, skip it! To make sure your crushed candy canes stick without the dip, you have two good options for these Easy Peppermint Cookies. Option one: right out of the oven, while the cookies are still warm (but not piping hot!), just press a few candy cane pieces onto the top gently. Option two: dust the cookies with powdered sugar first, and then stick the peppermint crunch on. Either way, you still get that great peppermint flavor in your Festive Winter Desserts spread!
Help! How do I stop my double chocolate peppermint cookies from spreading too much?
I get asked this one all the time, especially when it’s warm in the kitchen! If your dough seems too soft when you’re scooping, that’s usually the culprit. Butter melts fast! Make sure your butter wasn’t overly softened when you started creaming it. If the dough still seems too loose before you scoop, pop the whole bowl into the fridge for just 15 minutes. Chilling the dough slightly firms up the fat, which means they won’t spread as much in the oven. This is a classic trick for keeping any Chewy Fudgy Chocolate Cookies thick and glorious!
Is it okay if I use mint extract instead of peppermint extract?
This is a great question, especially if you are scrambling to find ingredients during the rush of Simple Christmas Baking! Peppermint and mint are related, but they are not the same, flavor-wise. Peppermint is generally sharper, cooler, and more intense—think of a candy cane. Mint extract (like spearmint) is usually sweeter and milder. If you use mint extract, you might need a little more of it to get that signature ‘holiday’ punch. Some people prefer the milder spearmint, but if you want that bold, refreshing snap, stick to peppermint for the Best Chocolate Peppermint Recipe.
Can I make these ahead of time for my Christmas Cookie Exchange?
Absolutely! These are fantastic Christmas Cookie Exchange Favorites because they actually improve overnight. I usually bake them the day before the party. If you are dipping them in white chocolate, you should only wait about 24 hours before serving because the candy cane topping can start to weep or dissolve slightly after a couple of days. If you want to make them weeks ahead, bake them totally plain (no dipping), freeze them airtight, and then dip them right before you plan to serve them. Easy peasy for stress-free holiday prep!
If these cookies sound too involved and you want something seriously fast, you should look at my Easy Apple Cobbler Recipe; it’s less fussy and still a huge hit!
Estimated Nutritional Data for One chocolate peppermint cookies Serving
You know me, I try to keep things simple in the kitchen, and that includes the nutrition info! Since we’re talking about rich, Decadent Chocolate Mint Cookies here, these are certainly a holiday treat, not an everyday snack. The numbers below are an estimate based on how the recipe comes out when made exactly as written, including the optional white chocolate and candy cane topping. So, please take this list with a grain of salt—or maybe a grain of white chocolate!
I really just look at this list to make sure I’ve eaten enough protein today, ha! But seriously, this comparison can help you decide just how many cookies you *must* have during your cookie exchange.
- Serving Size: 1 cookie
- Calories: 210
- Sugar: 18g
- Sodium: 110mg
- Fat: 11g
- Saturated Fat: 7g
- Carbohydrates: 28g
- Protein: 3g
Just remember, this is an estimate based on 24 cookies. If you make smaller scoops that are only 20 cookies total, those numbers will definitely creep up a bit! Also, if you skip that delicious white chocolate dip—which is pure deliciousness, by the way—your fat and sugar content will drop down nicely. These chocolate peppermint cookies are worth every single calorie when they taste this good, though! I always say, enjoy the season!
Share Your Homemade Holiday Cookies Experience
Wow, you made it! You’ve successfully tackled some seriously decadent chocolate mint cookies, and I am so happy you tried this recipe for your holiday baking! Now that the kitchen smells amazing and those chocolate peppermint cookies are cooling, I need to know how they turned out for you.
Please, if you made these and loved them—or if you tweaked the peppermint extract like I mentioned and want to share your verdict—take a second and drop a comment below! I always read them, seriously! It helps me so much to hear what works in other kitchens, and the rating system is the best way to let other home cooks know these are worth their time. Did you go with the white chocolate dip or keep them plain? Were they the star of your Christmas Cookie Exchange Favorites?
And if you took a photo of your beautiful batch of holiday cookie recipes, please tag me on social media! Seeing your results is truly the best part of sharing recipes. It’s what Cookery Command is all about—connecting our home kitchens!
If you ever have questions about this recipe or any others, feel free to reach out via the contact page. Happy eating, and enjoy those amazing treats!
PrintDouble Chocolate Peppermint Crunch Cookies

Make soft, chewy double chocolate cookies flavored with peppermint and topped with crushed candy canes. This easy recipe is perfect for holiday baking and cookie exchanges.
- Prep Time: 20 min
- Cook Time: 12 min
- Total Time: 32 min
- Yield: 24 cookies 1x
- Category: Dessert
- Method: Baking
- Cuisine: American
- Diet: Vegetarian
Ingredients
- 1 cup unsalted butter, softened
- 1 cup granulated sugar
- 1/2 cup packed brown sugar
- 2 large eggs
- 1 teaspoon vanilla extract
- 1 teaspoon peppermint extract
- 1 3/4 cups all-purpose flour
- 3/4 cup unsweetened cocoa powder
- 1 teaspoon baking soda
- 1/2 teaspoon salt
- 1 cup semi-sweet chocolate chips
- 1/2 cup white chocolate chips (optional, for dipping)
- 1 cup crushed candy canes or peppermint crunch
Instructions
- Preheat your oven to 350°F (175°C). Line baking sheets with parchment paper.
- In a large bowl, cream together the softened butter, granulated sugar, and brown sugar until light and fluffy.
- Beat in the eggs one at a time, then mix in the vanilla and peppermint extracts.
- In a separate bowl, whisk together the flour, cocoa powder, baking soda, and salt.
- Gradually add the dry ingredients to the wet ingredients, mixing until just combined. Do not overmix.
- Stir in the semi-sweet chocolate chips.
- Drop rounded tablespoons of dough onto the prepared baking sheets, spacing them about 2 inches apart.
- Bake for 10 to 12 minutes for a chewy center. Do not overbake.
- Let the cookies cool on the baking sheets for 5 minutes before transferring them to a wire rack to cool completely.
- If desired, melt the white chocolate chips in a microwave-safe bowl in 30-second intervals, stirring until smooth.
- Dip the cooled cookies halfway into the melted white chocolate, then immediately sprinkle the wet chocolate with crushed candy canes.
- Let the chocolate set completely before serving or storing.
Notes
- For extra rich flavor, use Dutch-process cocoa powder in the dough.
- If you prefer a stronger mint flavor in the cookie itself, increase the peppermint extract to 1 1/2 teaspoons.
- You can substitute the white chocolate dipping with a simple peppermint glaze made from powdered sugar and a few drops of milk and peppermint extract.
- Crush your candy canes in a sealed plastic bag using a rolling pin for even pieces.
Nutrition
- Serving Size: 1 cookie
- Calories: 210
- Sugar: 18
- Sodium: 110
- Fat: 11
- Saturated Fat: 7
- Unsaturated Fat: 4
- Trans Fat: 0
- Carbohydrates: 28
- Fiber: 2
- Protein: 3
- Cholesterol: 30