
Let’s be honest, mornings can be a whirlwind. We all want that breakfast that’s genuinely satisfying, healthy, and doesn’t require us to stand over a stove when we’d rather be hitting snooze one more time. That’s exactly why I’m sharing my absolute favorite foundation recipe with you today: the **chia seed pudding** that changed my breakfast routine for good!
Here at Cookery Command, I truly believe that making incredible food shouldn’t be complicated. My goal, stemming from my time learning in my family’s kitchen, is to give you reliable techniques that create phenomenal results every time. This creamy vanilla **chia seed pudding** is the easiest base recipe you will ever find. It requires just four simple ingredients, and it sets up perfectly overnight, making it the quintessential **make ahead breakfast** for busy weeks. If you’ve been scared to try chia seeds because you think they clump or turn gooey, trust me—this method is foolproof. You can find more of my easy favorite morning meals over at my collection of breakfast and brunch recipes.
- Why This Vanilla Chia Seed Pudding Recipe Works for You
- Gathering Ingredients for Your Simple Chia Seed Pudding Recipe
- Step-by-Step Instructions to Make Chia Seed Pudding
- Ingredient Notes and Making High Protein Chia Seed Pudding
- Creative Variations on Your Chia Seed Pudding Recipe
- Serving Suggestions and Toppings for Healthy Breakfast Pudding
- Storage and Chia Seed Meal Prep Instructions
- Frequently Asked Questions About Chia Seed Pudding
- Estimated Nutritional Information for Chia Seed Pudding
Why This Vanilla Chia Seed Pudding Recipe Works for You
I know what you’re thinking: chia seeds are tricky! They either turn into a gelatinous brick or stay stubbornly thin. That’s why this vanilla base recipe is so important. It’s my go-to when I need an **easy chia pudding** that tastes like a real treat, not health food punishment. We’re talking about minimal effort for maximum reward!
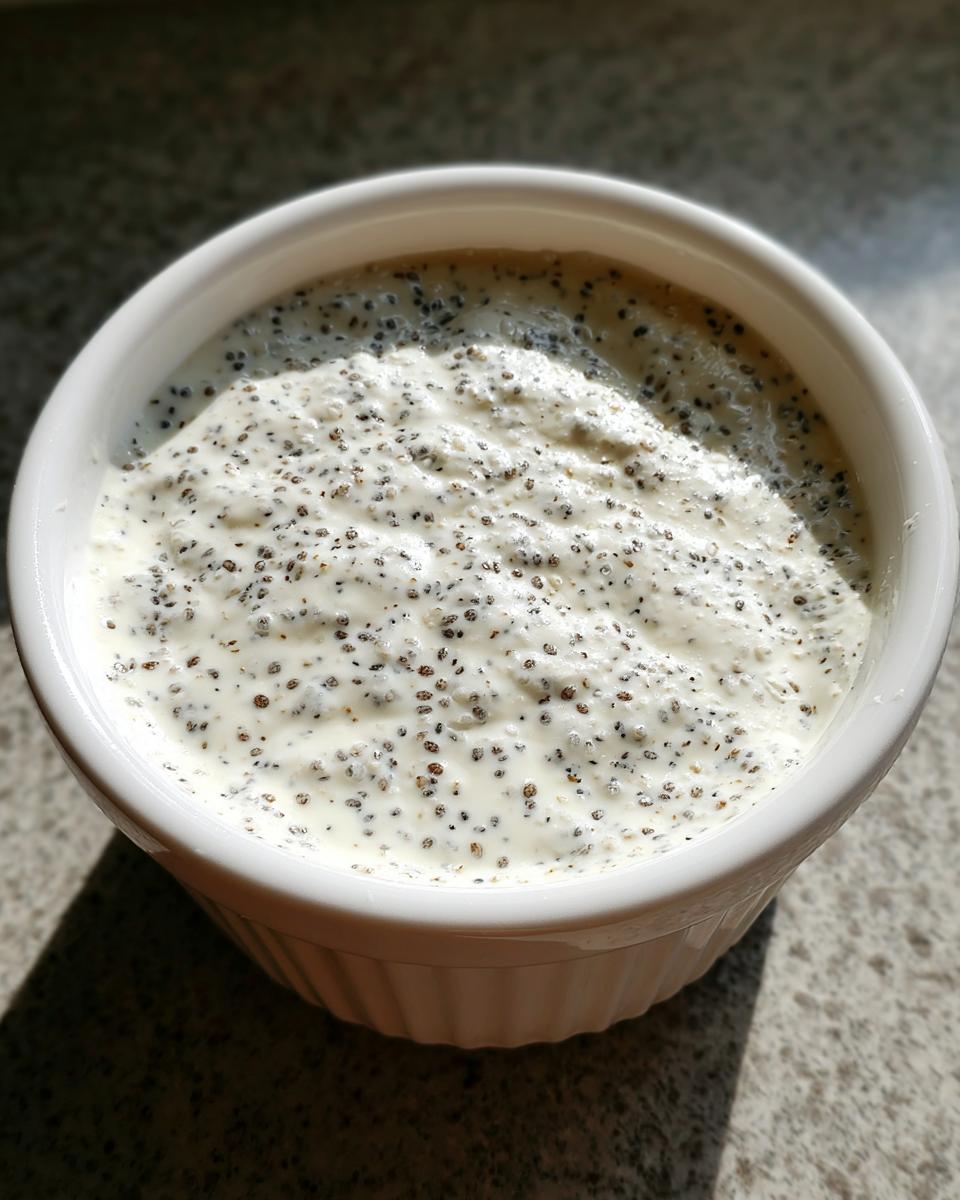
This method focuses entirely on delivering that luscious, **creamy texture pudding** you see in high-end cafes. It’s completely different from just dumping everything in a jar and hoping for the best. We use a little technique here, but it takes maybe two minutes extra of your time and guarantees you won’t end up with those dreaded chia seed clumps. This is what moves it from just edible to absolutely crave-worthy.
The Secret to a Perfect Creamy Texture Pudding
The secret weapon for beating the gooiness, which I discovered after practicing this technique while developing other make-ahead recipes, is the double-whisk. You must whisk vigorously for a full minute right when the seeds hit the liquid. This distributes them evenly before they start gelling up. Then, you let it sit for ten minutes—yes, set a timer!—and whisk it once more. That second whisk breaks up any setting seeds and incorporates air, which is what creates that unbelievably smooth foundation for your **creamy texture pudding**.
Mastering the Overnight Chia Seed Pudding
Honestly, if you can put a lid on a jar and walk away, you can master this. That’s the best part of this **chia seed pudding**: it requires zero active cooking time. Once you’ve done your quick double-whisking routine, the refrigerator does all the magic. We’re looking at about 5 minutes of actual work, and then 8 hours of passive setting time. This transforms it into the ultimate **make ahead breakfast** you just grab and go!
Gathering Ingredients for Your Simple Chia Seed Pudding Recipe
Since this **chia seed pudding recipe** is so simple—we’re sticking to just four core components—we need to make sure we’re precise with what we grab from the pantry. When a recipe has so few players, every single ingredient has to pull its weight, and getting the measurements right is key to that perfect set!
Ingredient Clarity and Measurement
Don’t sweat needing specialty items here; this is truly foundational cooking. For one perfect serving of this **easy chia pudding**, here is exactly what you need:
- 1/4 cup chia seeds (Trust me, don’t skimp here!)
- 1 cup milk (This can be regular cow’s milk or any non-dairy option that you love—almond, oat, soy—they all work great.)
- 1 tablespoon sweetener (I typically reach for pure maple syrup, but honey works just as beautifully.)
- 1/2 teaspoon vanilla extract (This is where we lock in that cozy flavor!)
That’s it! Four things. Keep these proportions right, and you’ve got a fail-safe **chia seed pudding recipe** ready for any variations you want to try later.
Step-by-Step Instructions to Make Chia Seed Pudding
Alright, time to get our hands a little sticky! While this is a **no bake pudding**, the success of the entire batch absolutely hinges on what you do in the first five minutes. If you skip the initial vigorous whisk, you’ll inevitably end up with a giant chia seed blob floating in the middle of your liquid. Nobody wants that sad scenario. Once you nail this step, the rest is just waiting game!
When I was first learning how to get this **chia seed pudding** just right, I kept rushing the mixing part. Once I started setting a timer for that initial minute, everything snapped into place. We are aiming for perfectly dispersed seeds so they can soak evenly. You can see my favorite gadgets for mixing these up when I make my no bake granola bars!
Combining and Initial Mixing for Chia Seed Pudding
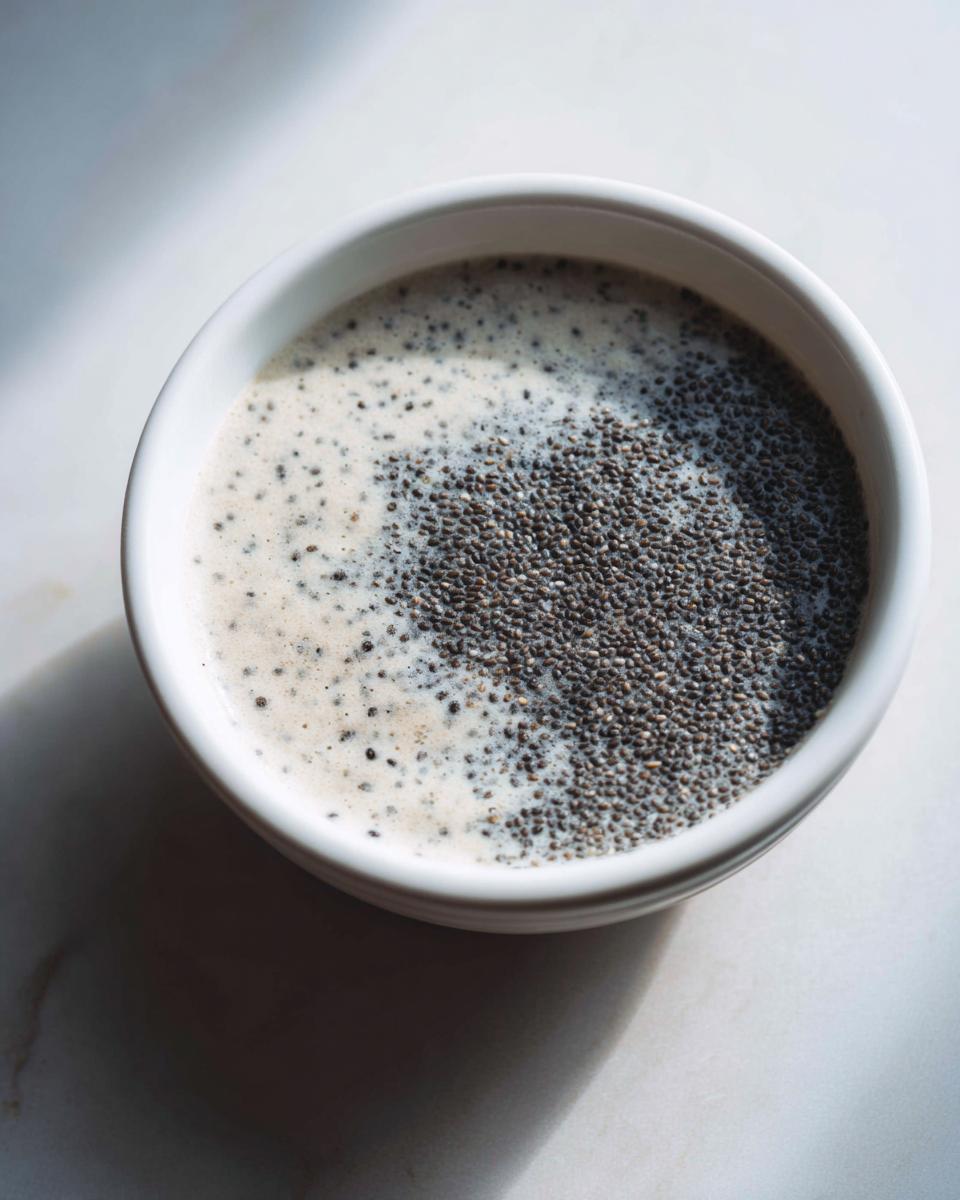
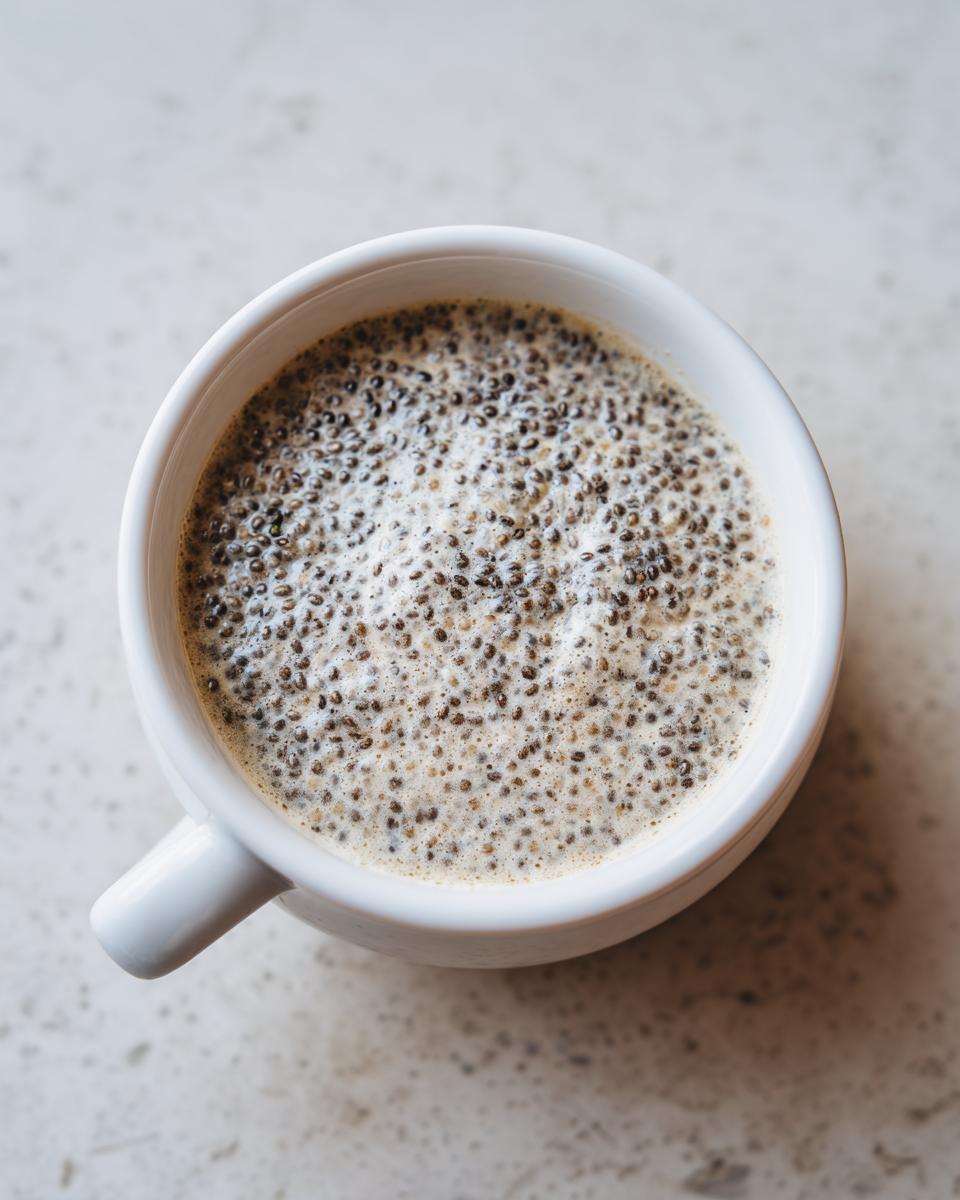
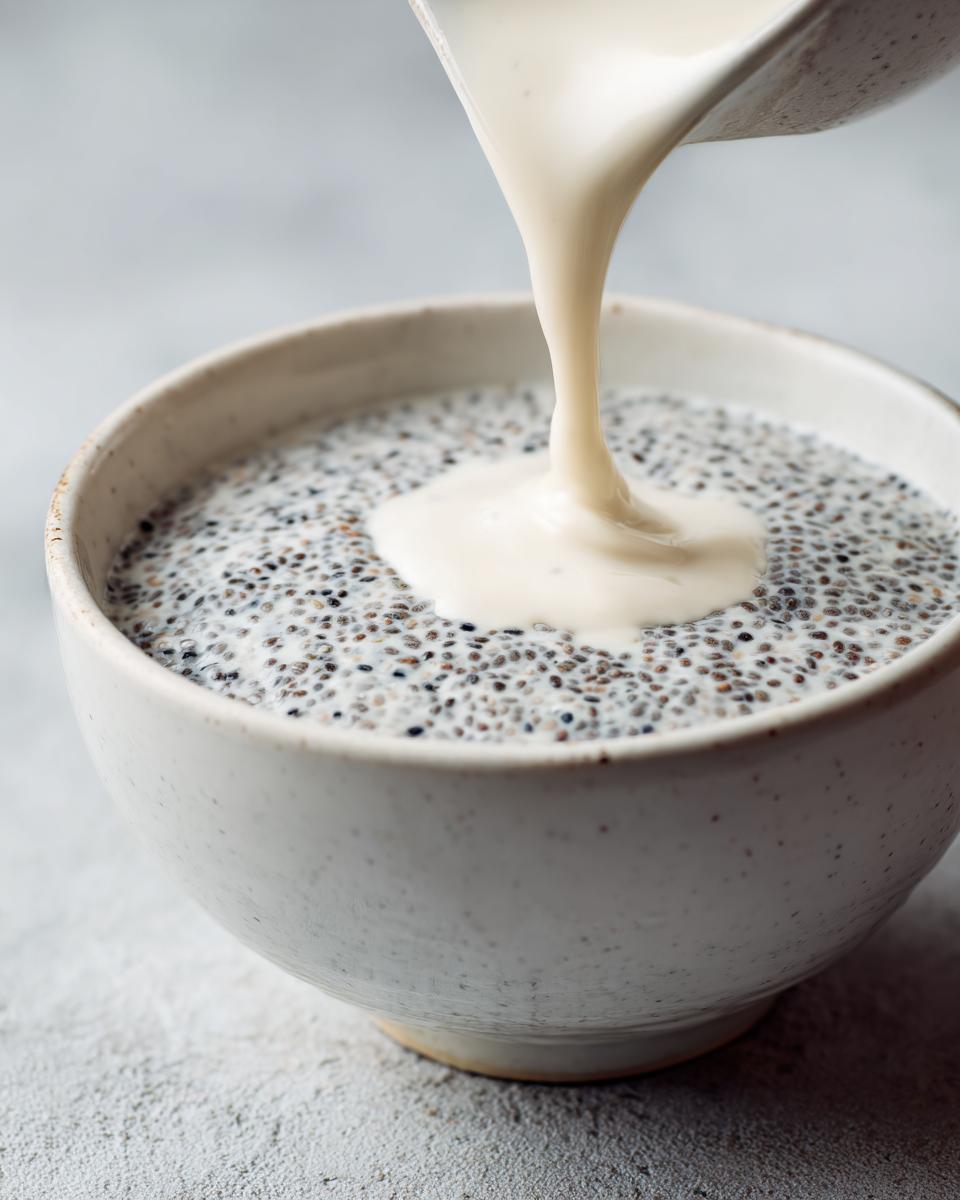
Grab your jar or container—I prefer using mason jars because they seal so nicely. Start by pouring in your 1/4 cup of chia seeds and 1 cup of your chosen milk. Now, grab a whisk, and I mean whisk it like you mean it for a solid minute. We are breaking up any immediate clump formation. Once that minute is up, add in your sweetener and the vanilla extract. Give it one more really good stir to marry all those flavors together.
The Overnight Chia Seed Pudding Setting Process
This is the easiest part! You need to secure the lid tightly on that container. Now, tuck it into the refrigerator. This needs time to transform. You *could*, in a true emergency, let it sit on the counter for maybe 30 minutes, and then put it in to chill for four hours total. But honestly? You want to aim for **overnight chia pudding**. That extra time ensures you get the thickest, most luscious result possible.
Final Check and Serving the Chia Seed Pudding
When you pull it out in the morning, it should be firm, not runny. Give it a quick stir. If it seems too thick—like cement, which happens if you use less liquid—just whisk in a tiny splash more milk until it loosens up. Too thin? Just let it sit on the counter for 30 more minutes. Once it’s set to your liking, you’re ready to serve it cold! Now go top it!
Ingredient Notes and Making High Protein Chia Seed Pudding
Since we established this base recipe is so flexible, I always get questions about substitutions, particularly when people are trying to boost the protein content for a more filling start to their day. I love that you’re looking to turn this into a powerhouse **high protein chia pudding**! That’s where the magic of Greek yogurt comes in.
To make this work for those needing extra staying power—or if you’re planning this for serious weekday **chia seed meal prep**—take half of your required milk (so, 1/2 cup) and swap it out for plain Greek yogurt. Make sure your yogurt is full-fat or 2% for the best texture; Greek yogurt thickens incredibly well. You’ll still whisk it exactly the same way, but combining that yogurt with the seeds gives you a phenomenal boost. If you are looking for other ways to pack in protein, I have some great tips in my guide on preparing high-protein make-ahead meals.
Dietary Adjustments for Vegan Chia Pudding or Dairy Free Pudding
This vanilla base recipe is fantastic because it handles dietary restrictions with zero fuss. If you use almond, soy, or oat milk instead of dairy milk, you automatically have a perfectly safe **dairy free pudding**! And because we aren’t baking or using any flour products, this **chia seed pudding** is naturally gluten free right out of the jar.
Creative Variations on Your Chia Seed Pudding Recipe
Now that you have mastered our foolproof vanilla base—the quintessential **chia seed pudding recipe**—it’s time to play! Honestly, the best part about this no-bake pudding is how easily it accommodates whatever flavor craving hits you that day. Having this vanilla version down means you can pivot to chocolate, fruit, or even something strictly **low carb snack** friendly in about five extra minutes.
I love showing people how versatile chia seeds really are. Once you trust the texture, you won’t feel limited at all! For example, if you are trying to keep the sugar low, simply swap out that maple syrup for a zero-calorie sweetener like stevia or monk fruit during the mixing stage. Boom—instant **low carb snack** that still tastes like a rich dessert.
Creating Chocolate Chia Pudding
If I am planning these for a week of healthy desserts, chocolate is usually my first stop. It’s so simple! When you are doing your initial whisk with the milk, just add in about two tablespoons of unsweetened cocoa powder. You need to mix it an extra second or two because the powder likes to try and clump up on itself, but once it’s incorporated, everything sets up just the same way. It tastes just like a rich, decadent chocolate mousse—but it’s actually healthy!
Making a Fruit-Based Chia Seed Pudding
For bright, summery flavors, like that popular blueberry version everyone loves, skip the vanilla extract and use fresh or frozen whole fruit instead. My favorite trick here is to take about a half-cup of whatever fruit you are using—like those gorgeous blueberries—and blend them with your milk until it’s totally smooth. That fruit-milk mixture then becomes your primary liquid poured over the seeds. When it sets, you get this beautiful color and a naturally sweet flavor throughout. Check out my recipe for homemade marshmallows if you want an extra fun, fluffy topping for your fruit pudding!
Serving Suggestions and Toppings for Healthy Breakfast Pudding
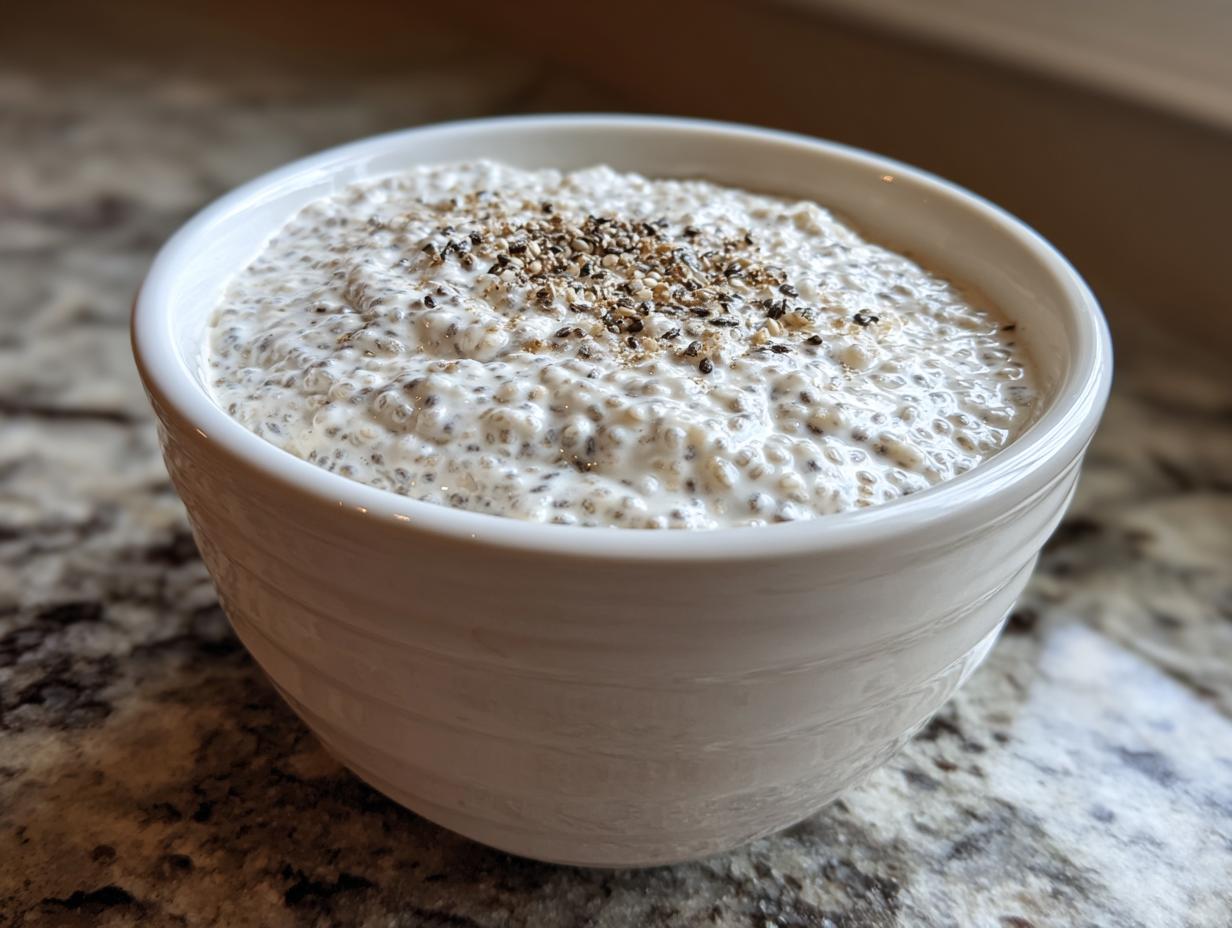
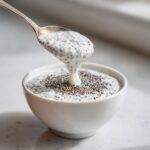
Okay, the base is set! It’s thick, it’s creamy, and it’s ready for its starring moment. Honestly, this **chia seed pudding** shines brightest when you customize it. This simple foundation begs to be dressed up, turning it into whatever you need: a quick snack, a proper sit-down **healthy breakfast pudding**, or even a light, satisfying dessert.
I always keep jars of the plain vanilla pudding ready in the fridge, and then I pull out whatever I have on hand. A few little additions can completely change the flavor profile, making it feel brand new every time. Don’t be shy about adding texture here—that’s what really elevates this from good to absolutely amazing. You can find some other easy, grab-and-go ideas over in my guide to simple sauces, like my easy homemade cocktail sauce recipe, but here are my go-to toppers:
- Fresh Sliced Banana and Peanut Butter: This combo is classic for a reason. The creaminess of the banana pairs perfectly with a swirl of your favorite nut butter across the top. It’s filling and stays good for an hour or two if you’re taking it on the go.
- Toasted Coconut Flakes: Oh, the crunch! Toasting the coconut flakes yourself fills your whole kitchen with the best smell. It adds a beautiful visual texture, too.
- Granola: Whether you make your own or buy your favorite kind, granola adds essential crunch. Just try not to soak it too early, or it loses its punch!
- Berries and a Drizzle of Honey: Blueberries, raspberries, or sliced strawberries bring color and a wonderful tartness to balance the sweetness of the pudding. A tiny drizzle of honey or a light maple syrup right before serving is perfection.
- A Spoonful of Cocoa Nibs: If you love that bittersweet kick, a sprinkle of unsweetened cocoa nibs provides a fantastic depth of flavor and an intense crunch without adding extra sugar.
Storage and Chia Seed Meal Prep Instructions
This is where this recipe truly earns its stripes as the ultimate **make ahead breakfast**. Because we aren’t dealing with any eggs or dairy that spoils quickly—unless you intentionally loaded it with yogurt, of course—this **chia seed pudding** is an absolute dream for meal prepping across the week. You can mix up a big batch on Sunday evening and skip scrambling for breakfast all the way through Friday!
The key to successful **chia seed meal prep** is using the right vessel. I always recommend an airtight container—mason jars are my favorite. They seal tightly, they stack well in the fridge door, and you can eat straight out of them, which means fewer dishes later. If you are prepping for a crowd, a large glass storage container also works perfectly fine.
Generally speaking, this **easy chia pudding** keeps beautifully in the refrigerator for up to five days. Because chia seeds continue to absorb liquid over time, they will naturally get a little thicker each day. If you find the pudding on Day 4 or 5 is getting a little too firm for your liking, don’t panic! Just stir in a splash—maybe a tablespoon—of extra milk right before you eat it. That little bit of liquid rehydrates it perfectly and brings it right back to that satisfying consistency. You can find some other great ideas for grab-and-go items in my guide to easy appetizers and snacks that are perfect for packing!
Frequently Asked Questions About Chia Seed Pudding
I get so many messages from folks who are trying out their first batch, and that’s fantastic! Settling those little cooking uncertainties right away makes all the difference between a one-time try and making this recipe your weekly standard. Here are the common hurdles I hear about when people are making their first **chia seed pudding**!
How long does it take for chia seed pudding to thicken?
It absolutely needs time to work its magic! If you are in a real pinch, you can cover it and pop it in the fridge after your second whisk, and it will set enough to eat in about four hours minimum. However, I strongly, strongly recommend letting it chill overnight. When you wake up to an **overnight chia pudding**, you get that gorgeous, smooth, **creamy texture pudding** that is just impossible to achieve in a few hours. Patience pays off here, trust me!
Can I use water instead of milk for this easy chia pudding?
Oh, please don’t! I know water is sitting right there, and it feels like an easy swap, but I really advise against it if you want a good result. Using just plain water means you lose all that flavor and creaminess we worked so hard to build with the double-whisk. If you don’t want to use dairy milk, that’s totally fine—grab almond, soy, or oat milk! But water alone will lead to a very bland, thin **chia seed pudding recipe** that just won’t satisfy you.
Is this recipe suitable for a low carb snack?
That’s a great question, especially for those watching their intake! As written, with maple syrup or honey, this is a moderately balanced snack, but it’s not specifically super low carb. The good news? It converts really easily! All the carbs are coming from the sweetener we add. If you swap that tablespoon of maple syrup for a zero-calorie option, like liquid stevia or monk fruit drops, your base recipe instantly becomes a fantastic **low carb snack** that still delivers all that fiber and protein. It’s an effortless switch!
If you need some other ideas for meals that stick to your nutrition goals, you can check out my guide to quick, healthy lunch recipes for inspiration!
Estimated Nutritional Information for Chia Seed Pudding
Now, because we are using various types of milk and sweeteners, these numbers are just a starting point—think of them as your baseline estimate for this recipe! This information is calculated based on using unsweetened almond milk and maple syrup as the sweetener. As always, the real nutrition facts will depend on what lovely things you decide to pump into your **chia seed pudding** base!
For one serving of the basic vanilla recipe, here is what you can generally expect:
- Calories: Around 250
- Protein: About 8 grams
- Total Fat: Roughly 12 grams
- Carbohydrates: Approximately 30 grams (with a fantastic 15 grams of that being filling fiber!)
I always remind folks that understanding the nutrition helps keep things balanced, especially if you’re using this for **chia seed meal prep**. For more about how we craft dependable recipes here at Cookery Command, you can always read more on our About Us page!
PrintCreamy Vanilla Chia Seed Pudding: The Simple Make-Ahead Breakfast
Make this easy, creamy vanilla chia seed pudding with only four ingredients. It is a perfect make-ahead breakfast or healthy snack that sets up perfectly overnight.
- Prep Time: 5 min
- Cook Time: 0 min
- Total Time: 8 hours
- Yield: 1 serving 1x
- Category: Breakfast
- Method: No Bake
- Cuisine: American
- Diet: Vegan
Ingredients
- 1/4 cup chia seeds
- 1 cup milk (dairy or non-dairy like almond milk)
- 1 tablespoon sweetener (maple syrup or honey)
- 1/2 teaspoon vanilla extract
Instructions
- In a jar or container, combine the chia seeds and your chosen milk. Whisk well for about one minute to prevent clumping.
- Add the sweetener and vanilla extract to the mixture. Whisk again until everything is fully incorporated.
- Cover the container and place it in the refrigerator for at least four hours, or preferably overnight, to allow the seeds to absorb the liquid and thicken.
- Before serving, check the consistency. If it is too thick, stir in a splash more milk. If it is too thin, let it sit for another 30 minutes.
- Serve cold with your favorite toppings.
Notes
- For a thicker, high protein chia seed pudding, substitute half of the milk with plain Greek yogurt.
- To achieve a creamy texture, whisk the mixture thoroughly right after combining the ingredients, and then whisk again after 10 minutes before refrigerating.
- This recipe is naturally gluten free and dairy free if you use a non-dairy milk.
- Store prepared pudding in an airtight container in the refrigerator for up to five days for easy meal prep.
Nutrition
- Serving Size: 1 serving
- Calories: 250
- Sugar: 8
- Sodium: 50
- Fat: 12
- Saturated Fat: 1
- Unsaturated Fat: 11
- Trans Fat: 0
- Carbohydrates: 30
- Fiber: 15
- Protein: 8
- Cholesterol: 0