

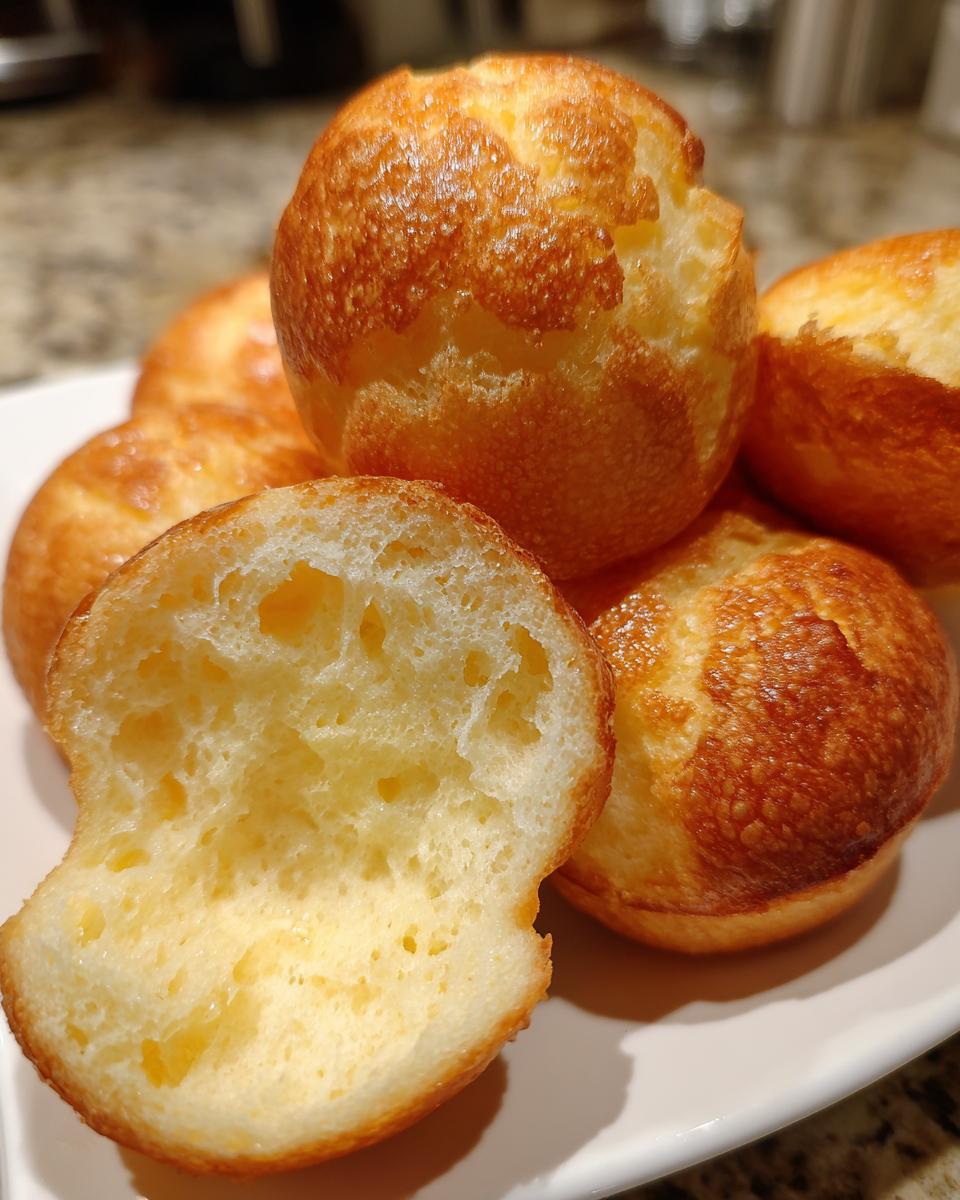
Have you ever bitten into something that was shockingly crisp on the edges yet yielded into the most wonderfully chewy, elastic center imaginable? That’s the magic of real Brazilian cheese bread, known globally as Pão de Queijo. Here at Cookery Command, we pride ourselves on taking beloved classics and making them absolutely foolproof. This is my definitive, authentic recipe that delivers that signature texture every single time, and you’ll be thrilled to know it’s naturally gluten-free! We blend the tradition passed down from generations with the precise technique I learned in the test kitchen, so you can trust these cheesy little bites to perform perfectly.
- Why This Authentic Brazilian Cheese Bread Recipe Works (EEAT Focus)
- Gathering Ingredients for Brazilian Cheese Bread
- How to Make Pão de Queijo Recipe: Step-by-Step Instructions
- Expert Tips for Perfect Homemade Pao de Queijo
- Serving Suggestions for Authentic Brazilian Appetizers
- Storage and Reheating Instructions for Gluten Free Cheese Bread
- Variations on Tapioca Flour Snacks
- Frequently Asked Questions About Brazilian Cheese Bread
- Share Your Homemade Brazilian Cheese Bread Success
Why This Authentic Brazilian Cheese Bread Recipe Works (EEAT Focus)
So many recipes for Brazilian cheese bread promise the world but deliver a tough, dense result. Why does mine nail that perfect puff every time? It all comes down to honoring the key elements, especially the naturally gluten-free aspect. We use 100% tapioca flour, which is the only way to get that signature elasticity once it bakes. Wheat flour simply won’t behave this way! When I first started testing this, I went through mountains of cheese trying to find the perfect savory-to-mild ratio for the flavor profile. Settling on Parmesan and Mozzarella gives us the necessary salty bite alongside that gentle melt. Always go for high-quality cheese for the best outcome!
The goal is always crispy outside, gooey inside, and this method locks in the moisture needed for that fantastic texture. Trust me, standing by the correct flour is the most important technical decision you’ll make. If you want to see another great cheesy option, check out my recipe for easy cheese bread recipe pull apart!
The Secret to Chewy Cheese Puffs: Tapioca Flour
You might see some recipes online suggesting you substitute with regular all-purpose flour, but please, don’t! If you want true chewy cheese puffs, you absolutely must use tapioca flour, also called tapioca starch. This starch comes from the cassava root and it hydrates differently than wheat flour. When we scald it with the hot oils and milk, we are setting up the structure that traps the steam created during baking.
If you want to get really authentic, try mixing equal parts sweet tapioca starch and sour tapioca starch—the sour version gives an amazing little tang that really brightens up the whole roll. But even using just standard tapioca flour, like the kind you use for thickening sauces, will give you great results. Don’t stray; this flour is non-negotiable for that amazing, slightly sticky, elastic interior we’re chasing!

Gathering Ingredients for Brazilian Cheese Bread
Alright, let’s talk about what you need to gather! Making Brazilian cheese bread is incredibly accessible because the ingredient list isn’t long, but precision here is key to achieving that bakery-quality chew. I’ve made this exact list dozens of times, and I promise, sticking to these amounts guarantees success. Get your saucepan ready, because we start by heating up the liquids—that’s half the magic!
Ingredient Clarity and Preparation
Make sure everything is measured precisely before you start the cook time, since the first steps go very quickly. You’ll need:
- 1 cup whole milk
- 1/2 cup vegetable oil
- 1 teaspoon salt
- 2 cups tapioca flour (or tapioca starch) – this is critical!
- 2 large eggs
- 1 cup shredded Parmesan cheese
- 1/2 cup shredded mozzarella cheese
See? Simple stuff! But remember what I said about the flour—no substitutions allowed if you want that signature gluten free cheese bread texture rolling out of your oven. Have the cheeses shredded and ready to go before that milk mixture even starts to simmer.
How to Make Pão de Queijo Recipe: Step-by-Step Instructions
Making phenomenal brazilian cheese bread is truly a process of building layers—we start hot and aggressive, then we cool down and incorporate gently. Don’t worry if the initial dough looks strange; that’s a sign you’re on the right track! Follow these steps meticulously, and you’ll be rewarded with those fantastic puffy rolls. If you want more guidance on the overall process, check out my full guide here: how to make brazilian cheese bread!
Scalding the Starch: The Crucial First Step
First things first: you need to get that milk, oil, and salt mixture boiling. We heat this until it’s bubbling wildly! Then, take it off the heat immediately—this is important, don’t let it keep boiling on the counter. Now, dump *all* two cups of your tapioca flour in there at once. Grab a sturdy wooden spoon, because you need to stir like crazy! This vigorous stirring is the scalding process. It gelatinizes the starch, which is exactly what sets up that stretchy, chewy interior later. It’s going to look thick and clumpy, almost like paste, but that’s perfect.
Incorporating Eggs and Cheese for Brazilian Cheese Bread Easy
Patience is key after the scalding! You must let that sticky dough cool down for about 10 minutes. If it’s too hot, you’ll scramble those eggs, and we absolutely do not want that. Once it’s just warm to the touch, start adding your eggs, one at a time. Mix really well after each egg goes in. I know, I know—it looks like it’s breaking apart and getting soupy, but hang in there! That’s just the dough getting ready to absorb everything properly. Once the eggs are incorporated, stir in the Parmesan and Mozzarella until everything is uniformly distributed. This is how you get that truly Brazilian cheese bread easy result.
Shaping and Baking for Crispy Cheesy Rolls
Now for the fun part! Preheat your oven to 375°F (190°C) while you work. Scoop out rounded tablespoons of the dough and roll them into little balls, about the size of a big walnut. You want to leave about two inches between each one on your baking sheet, as these guys need room to puff up and become those beautiful crispy cheesy rolls. Bake them for about 20 to 25 minutes. You’re looking for them to be gloriously golden brown on top—that color means the outside is shatteringly crisp and the inside is ready to deliver that famous chew!
Expert Tips for Perfect Homemade Pao de Queijo
Even with a reliable recipe, sometimes things don’t go exactly as planned, right? That’s why I always test and keep notes on what to do when your Homemade Pao de Queijo decides to be a little difficult. We want predictable perfection, and I’ve learned a few tricks over the years to rescue a batch or ensure next time is even better. Don’t let a flat roll or a dense bite discourage you; these are usually simple fixes based on temperature or timing.
Troubleshooting Common Brazilian Cheese Bread Issues
If your cheese bread comes out flat and dense instead of puffed up, nine times out of ten it’s because you over-mixed the batter after the eggs went in, which develops the starch too much, or maybe you didn’t get the liquid hot enough during that initial scalding stage. Remember, we want to trap steam in there, so don’t fear the boil!
If they are tough or bready, check those eggs—they might have been too cold when added, leading to poor incorporation. Also, don’t be tempted to let them sit around before baking; these need to go into the hot oven straight away to achieve that beautiful puff structure! Also, if you’re preparing ahead, make sure to roll your balls and freeze them solid before baking. Popping those frozen balls onto a hot sheet and adding just 5 to 10 extra minutes to your bake time yields consistently amazing results every time. For another simple savory bake, you might enjoy my easy homemade tomato sauce recipe to serve alongside!

Serving Suggestions for Authentic Brazilian Appetizers
Now that you have a beautiful batch of hot, fresh Brazilian cheese bread, the real question is: when do you eat them? Honestly, I think they’re perfect any time, but Brazilians often enjoy them as part of a wonderful Brazilian breakfast idea alongside a strong cup of coffee—it’s just heaven!
However, they shine equally bright as authentic Brazilian appetizers at any party. Serve them simply warm, straight off the baking sheet. They are intensely cheesy, so they don’t really need a sauce, but if you want to elevate things, I love pairing them with homemade guava paste or a small dish of herb butter.
They are also fantastic served alongside a hearty stew or soup, acting as your gluten-free roll substitute. For another great breakfast treat, you should definitely try my recipe for cinnamon sugar french toast muffins!
Storage and Reheating Instructions for Gluten Free Cheese Bread
One of the best things about these gluten free cheese bread rolls is that you don’t have to eat them all right away! If you have leftovers that have cooled down, just store them in an airtight container at room temperature for a day, maybe two. They will lose that initial crispness, but they should still be chewy inside.
To bring them back to life—and trust me, you *must* reheat them!—pop them on a baking sheet in an oven heated to 350°F (175°C) for about 5 to 7 minutes. That quick blast of dry heat re-crisps the exterior beautifully. For unbaked dough, which I highly recommend for making ahead, just freeze the raw balls solid! You bake them straight from frozen as detailed above. If you need a quick, no-fail sweet treat after these savory bites, you should try my easy fudge recipe no thermometer!
Variations on Tapioca Flour Snacks
While the classic Parmesan and Mozzarella combination is unbeatable, experimenting with different cheeses and flavorings is a fantastic way to customize your tapioca flour snacks! I encourage you to play around once you’ve mastered the basic technique. It’s still quick, and you’ll discover something new for your brunch spread or next gathering.
For instance, have you tried swapping out the mozzarella for something sharp? A cup of aged Gruyère or even sharp white cheddar melts beautifully and adds a deeper, nuttier flavor profile that is so sophisticated. Another easy addition is some fresh herbs. Finely chop about a teaspoon of fresh rosemary or chives—make sure they are super fine so they don’t interfere with the rising—and mix them right in with your cheeses.

These seasoned rolls are incredible dipped in a homemade sauce! If you’ve got some fresh herbs on hand, you should really try dipping these in my recipe for olive oil bread dip recipe; the pairing is stellar.
Frequently Asked Questions About Brazilian Cheese Bread
I know you might have a few lingering questions before you dive in—that’s totally normal when trying a new staple like Brazilian cheese bread! I’ve rounded up the biggest queries I get about ensuring these rolls come out perfectly chewy and cheesy every time. Don’t hesitate to reach out if you need more help; you can always contact me through my contact page!
Can I substitute tapioca flour in this recipe?
This is the most important question, and my answer has to be a firm no if you want authentic Pão de Queijo. Tapioca flour, or starch, is non-negotiable! If you try to swap it out for regular all-purpose wheat flour, you’ll end up with a sturdy, regular little cheese roll—not the signature airy, elastic, naturally gluten free treat that everyone loves. The starch is what reacts with the hot liquid to create that incredible chew when baked.
What is the best cheese for Pão de Queijo?
The blend in the recipe—Parmesan and Mozzarella—is fantastic because it gives you that salty kick from the Parmesan and the unbeatable stretch from the Mozzarella. If you want to go truly traditional, look for *Queijo Minas*, a Brazilian cheese, but frankly, finding a hard, aged cheese like Parmesan is essential for flavor depth. If you want extra flavor in your savory baked bites, try adding a little bit of sharp white cheddar alongside your Parmesan for a real flavor punch!
Why are my cheese puffs flat instead of puffy?
Flat rolls usually mean one of two things happened during the process. Often, it’s because the liquid (milk/oil) wasn’t hot enough when you added the tapioca flour—it needs to be boiling to properly gelatinize the starch structure. Alternatively, if you mixed the dough too much *after* the eggs were added, you can sometimes overwork the structure that’s supposed to puff up in the oven. They should be small, round balls going in; they do all the rising work themselves while baking!
Can I make these ahead of time? I want quick cheese bread recipe results later.
Yes! This is one of my favorite features, especially when hosting. You can absolutely assemble the raw dough balls, place them on a tray, and freeze them solid. Once frozen, move them to a big freezer bag. When you’re ready to bake, don’t thaw them! Just place the frozen balls directly onto a hot baking sheet and add about 5 to 10 minutes onto the regular baking time. It’s the secret to having instant, hot homemade Pão de Queijo whenever the craving hits!
Share Your Homemade Brazilian Cheese Bread Success
Well, that’s it! You’ve made it through the entire process for the most authentic, naturally gluten-free Brazilian cheese bread you’ll ever have. I really hope your kitchen smells wonderfully cheesy right now. Creating food memories is what Cookery Command is all about, and I’d be so thrilled if you shared your success!
When you pull those beautiful, puffy rolls out of the oven, snap a picture! I love seeing the results of my readers’ hard work. Please head down to the comments section, let me know what you thought, and give the recipe a heartfelt five-star rating if it earned it on your table. Your feedback helps other home cooks gain the confidence to try this recipe next.
If you ended up falling in love with the chewy texture and want more incredible, reliable recipes, you can always learn more about our mission over on our About Us page. And if you’re looking for another amazing take on this classic, make sure you check out the fantastic steps they laid out over at The Recipe Mingle for comparison!
PrintAuthentic Pão de Queijo (Brazilian Cheese Bread): Naturally Gluten-Free

Make this authentic Brazilian Cheese Bread, Pão de Queijo, using tapioca flour for a naturally gluten-free snack. This recipe delivers the signature crispy exterior and chewy, elastic center.
- Prep Time: 15 min
- Cook Time: 25 min
- Total Time: 40 min
- Yield: About 20 rolls 1x
- Category: Appetizer
- Method: Baking
- Cuisine: Brazilian
- Diet: Gluten Free
Ingredients
- 1 cup whole milk
- 1/2 cup vegetable oil
- 1 teaspoon salt
- 2 cups tapioca flour (tapioca starch)
- 2 large eggs
- 1 cup shredded Parmesan cheese
- 1/2 cup shredded mozzarella cheese
Instructions
- Preheat your oven to 375°F (190°C). Lightly grease a standard baking sheet.
- Combine the milk, oil, and salt in a medium saucepan. Bring this mixture to a boil over medium heat.
- Remove the saucepan from the heat immediately. Add the tapioca flour all at once and stir vigorously with a wooden spoon until a thick, sticky dough forms.
- Allow the dough to cool for about 10 minutes until it is warm, not hot.
- Add the eggs one at a time, mixing well after each addition until fully incorporated into the dough. The dough will look loose at first.
- Stir in the Parmesan cheese and mozzarella cheese until the dough is uniform and cheesy.
- Scoop rounded tablespoons of the dough and roll them into small balls, about 1 to 1.5 inches in diameter. Place them on the prepared baking sheet, leaving about 2 inches between each ball.
- Bake for 20 to 25 minutes, or until the cheese bread puffs up and the outside is golden brown.
- Serve warm for the best texture.
Notes
- For the most authentic result, use a mix of sour tapioca starch (polvilho azedo) and sweet tapioca starch (polvilho doce) if available, using 1 cup of each instead of 2 cups of just one type.
- These cheese puffs freeze well before baking. Place frozen balls on a baking sheet and add 5-10 minutes to the baking time.
- This recipe is naturally gluten free, making it a great option for gluten free appetizers for a party.
Nutrition
- Serving Size: 1 roll
- Calories: 110
- Sugar: 0.5
- Sodium: 150
- Fat: 7
- Saturated Fat: 4
- Unsaturated Fat: 3
- Trans Fat: 0
- Carbohydrates: 9
- Fiber: 0
- Protein: 4
- Cholesterol: 25