
Some of life’s most profound memories are born in the warmth of a kitchen. They’re found in the aroma of a familiar recipe, the shared laughter over a simmering pot, and the simple, powerful act of creating a meal with care. Here at Cookery Command, we honor those traditions. We take the retro desserts we grew up loving—the ones that make everyone gasp when you pull them out—and we nail the technique.
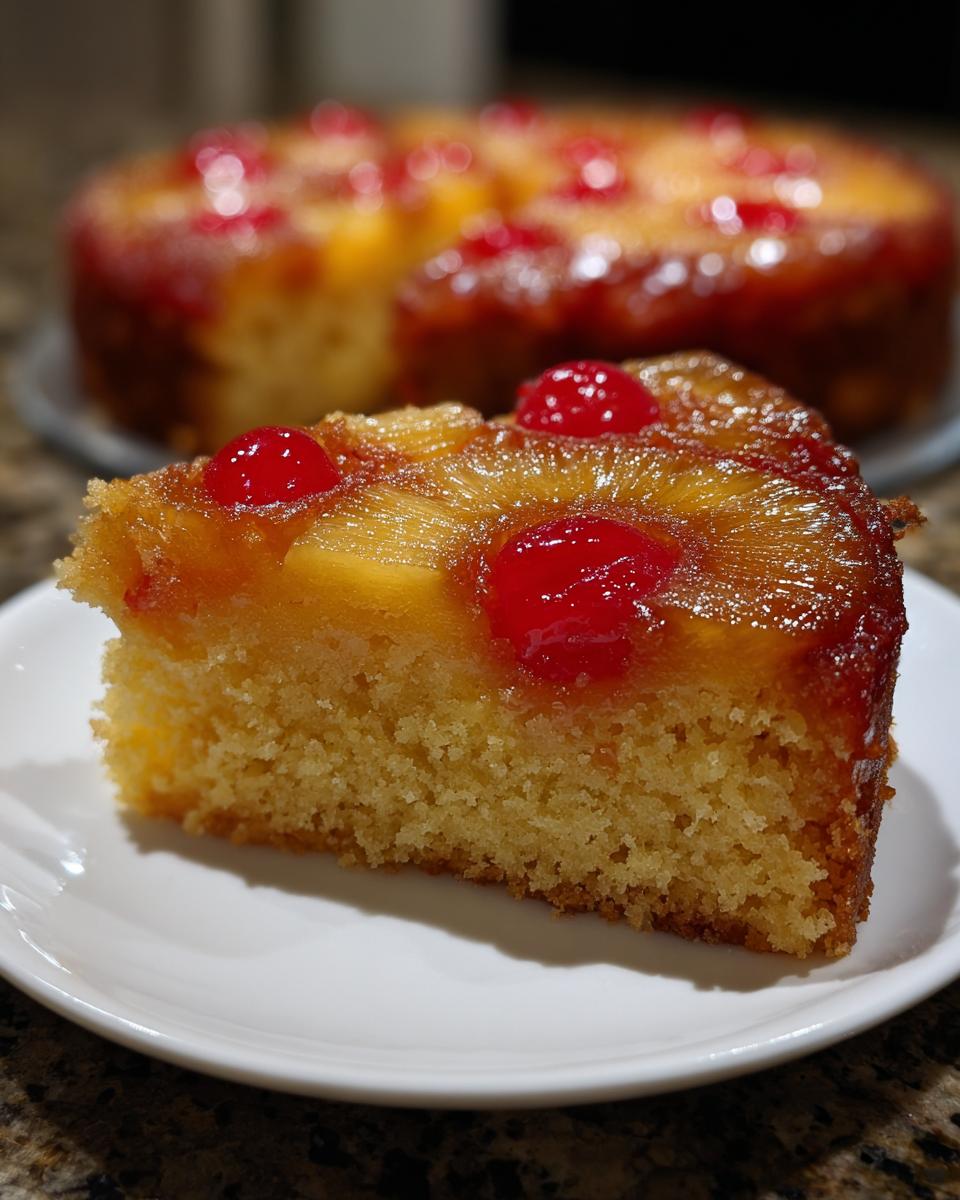
That’s why I’m so excited to share my approach to the Pineapple Upside Down Cake. This stunning centerpiece is our Family Favorite Pineapple Dessert for a reason! It’s a showstopper, hands down. When I was developing this recipe, I was determined to respect the classics while applying our rigorous testing standards. We wanted that perfect balance: a deeply flavorful, caramelized fruit topping and a wonderfully moist cake that never, ever sticks. Trust me, this version delivers on tradition and flawless presentation every single time. If you love a dessert that carries history, just wait until you try this; it’s right up there with my best rum cake!
- Why This Classic Pineapple Upside Down Cake Recipe Works (E-E-A-T)
- Ingredients for the Perfect Pineapple Upside Down Cake
- How to Make Caramelized Fruit Topping for Cake
- Mixing the Batter for a Sweet and Tender Cake Recipes
- Baking and Inverting the Pineapple Upside Down Cake
- Tips for Success with Your Pineapple Upside Down Cake
- Serving Suggestions for This Family Favorite Pineapple Dessert
- Storage & Reheating Instructions for Pineapple Upside Down Cake
- Frequently Asked Questions About Pineapple Upside Down Cake
Why This Classic Pineapple Upside Down Cake Recipe Works (E-E-A-T)
When you’re making something as nostalgic as this dessert, technique is everything. My goal here wasn’t just another recipe; it was to create the Best Pineapple Upside Down Cake that guarantees a moist cake and a topping that releases cleanly. That shiny, caramelized fruit layer has to stick to the plate, not the pan!
Having spent time testing in professional kitchens, I learned that the butter and sugar base is where the magic happens. We’re using a classic approach that locks in moisture while ensuring that gorgeous layer of fruit stays intact. It’s the kind of dependable result that makes you feel like a baking pro, just like when I nail a good chocolate cake.
Key Benefits of Our Pineapple Upside Down Cake
- Incredibly moist texture thanks to the pineapple juice in the batter.
- Guaranteed topping release—no more sticky messes!
- Visually a stunner; it’s your next Showstopping Fruit Cake Baking for sure.
- Easy enough for a weeknight but impressive for any gathering.
Ingredients for the Perfect Pineapple Upside Down Cake
Okay, gathering your ingredients is step one toward baking success, and you might be surprised how straightforward this list is for such a fancy-looking dessert! We keep everything super traditional here. Remember, we’re not using any boxed hacks for this Pineapple Upside Down Cake from Scratch; we want that tender crumb only good ingredients provide. Having all your mise en place ready, especially those precise measurements for the topping, makes the assembly process unbelievably fast. If you love a truly classic dessert, you’ll recognize these staples from my banana pudding work too!
For the Caramelized Fruit Topping
This is the jewel layer, so pay attention to the sugar! We need it ready before we even think about mixing the batter.
- 1/2 cup unsalted butter, softened
- 3/4 cup packed light brown sugar (make sure it’s packed down firmly!)
- 1 (20 ounce) can pineapple slices in juice, drained (Crucially, save that juice for the cake!)
- 10 maraschino cherries, drained
For the Moist Pineapple Cake Batter
The secret to a moist pineapple cake is using that reserved juice right here in the batter. It adds just a touch of tropical flavor and moisture.
- 1 1/2 cups all-purpose flour
- 1 1/2 teaspoons baking powder
- 1/2 teaspoon salt
- 1/2 cup unsalted butter, softened
- 3/4 cup granulated sugar
- 2 large eggs (room temperature is best, if you remember!)
- 1 teaspoon vanilla extract
- 1/2 cup milk
- 1/2 cup reserved pineapple juice
How to Make Caramelized Fruit Topping for Cake
This is the fun part! Seriously, watching the topping melt and bubble is half the joy of making this cake. We are building the bottom layer first, so picture this: when you flip this beauty over, this layer becomes the magnificent, glossy top. Because we want that perfect, showstopping look—a truly Perfectly Symmetrical Pineapple Cake—we need to be patient here and make sure everything is layered just right.
This base layer handles all the flavor and moisture for the bottom, so don’t rush it. It’s the secret to getting that rich, dark caramel color that makes this a memorable Homemade Pineapple Dessert Recipe. If you want a rich, deep caramel, make sure you use the dark brown sugar we talked about earlier!
Preparing the Pan Base for Your Pineapple Upside Down Cake
First things first: get your oven warming up to 350°F (175°C). You’ll need a 9-inch round cake pan for this classic build. Now, about that melted butter? I love doing this right on the stovetop over the lowest heat possible. You just need the butter to melt enough to coat the entire bottom surface of that pan evenly. Don’t let it brown—we want golden, not burnt!
Once it’s coated, gently sprinkle that packed brown sugar right over the melted butter. Spread it out so you have an even blanket of sugar. This sugar is what will turn into glorious caramel when it bakes with the butter. Make sure it goes right up to the edges!
Arranging the Fruit for a Showstopping Fruit Cake Baking
This is where you get creative, but remember symmetry helps! Take those drained pineapple rings and lay them neatly over the sugar base. You are trying to cover as much surface area as possible. If you have a few gaps, don’t sweat it; the cake batter will fill them in a little.
Now for the cherries! Take one drained maraschino cherry and gently nestle it right into the center hole of every single pineapple slice. After that, just toss the remaining cherries around the edges where the pineapple rings don’t quite meet. When you flip this later, it’s going to look absolutely incredible, ready for any party or potluck. For more amazing fruit baking tips, check out my guide on cranberry orange cake!
Mixing the Batter for a Sweet and Tender Cake Recipes
Now that our gorgeous fruit topping is waiting patiently in the pan, it’s time to whip up the batter for our Pineapple Upside Down Cake. We are aiming for that textbook texture here—that beautiful, sweet, and Tender Cake Recipes crumb that melts in your mouth. Remember, this batter is going to be poured right on top of dense fruit and sugar, so we need it airy enough to rise but sturdy enough to hold. That’s why creaming the butter and sugar is not optional; it’s the whole game plan for achieving that Moist Pineapple Cake Baking Guide result!
We need to build air into the fat so it has somewhere to go when it hits the heat. As always, don’t go mad mixing once the flour comes out. We want tender, not tough! If you love tender cake, you have to check out my recipe for coconut cake!
Combining Dry and Wet Ingredients for the Pineapple Upside Down Cake
Let’s get to work on the actual cake mixture. First, grab a medium bowl and whisk together your dry stuff: the flour, baking powder, and salt. Just give it a good swirl to make sure the leavening agents are evenly distributed—this is step five. Set that aside.
In a larger bowl (your mixer bowl is great here), cream together the other 1/2 cup of softened butter and the granulated sugar until it looks pale and fluffy. That usually takes a good minute or two with the electric mixer. Then, beat in your two large eggs, one at a time, mixing well after each addition. Don’t forget that teaspoon of vanilla extract!
For the moisture element, whisk together the milk and all that lovely reserved pineapple juice we saved earlier in a small bowl. Now comes the critical part for keeping this cake tender: you’re going to gradually add the dry ingredients to the wet mixture, alternating with that milk/juice blend. Always start and end with the dry ingredients. Mix carefully, just until everything comes together—seriously, stop as soon as you see no more white streaks. Overmixing that flour right now is the fastest way to ruin this beautiful cake!
Baking and Inverting the Pineapple Upside Down Cake
We’ve got the topping arranged perfectly, and the light, tender batter is ready to go. Now comes the moment of truth for our Pineapple Upside Down Cake! This is where following the timing exactly is essential for making sure we nail those No Stick Pineapple Upside Down Cake Tips we talked about. If you bake it too long, the topping can get crusty. If you pull it out too soon, well, nobody wants wet fruit sauce all over their serving platter!
You’ll be amazed how beautiful this looks once it’s flipped. It’s an absolute showstopper dessert, and my test runs for this recipe confirmed that the classic method still holds up against any fancy trick. Honestly, I look forward to the inversion almost as much as the tasting itself. For another reliably easy crowd-pleaser, you should really check out my apple cheesecake bars recipe!
Crucial Steps for a Successful Pineapple Upside Down Cake Release
First, carefully pour all that batter right over your fruit layer. Try your best not to disturb the pineapple and cherries! Spread it gently with a spatula—don’t push down; we want to keep all the air we worked so hard to create. Once it’s smooth, slide it into the preheated 350°F oven.
Bake it for about 35 to 40 minutes. You’ll know it’s done when a wooden pick inserted right into the center comes out clean. That’s the classic test! Now, here’s the step everyone messes up: you must let the cake cool in the pan on a wire rack for exactly 10 minutes. Not five, not twenty—ten! This brief cooling period allows the hot caramel sauce to firm up just enough so it doesn’t run everywhere when you flip it. Don’t forget your oven mitts for this next part!
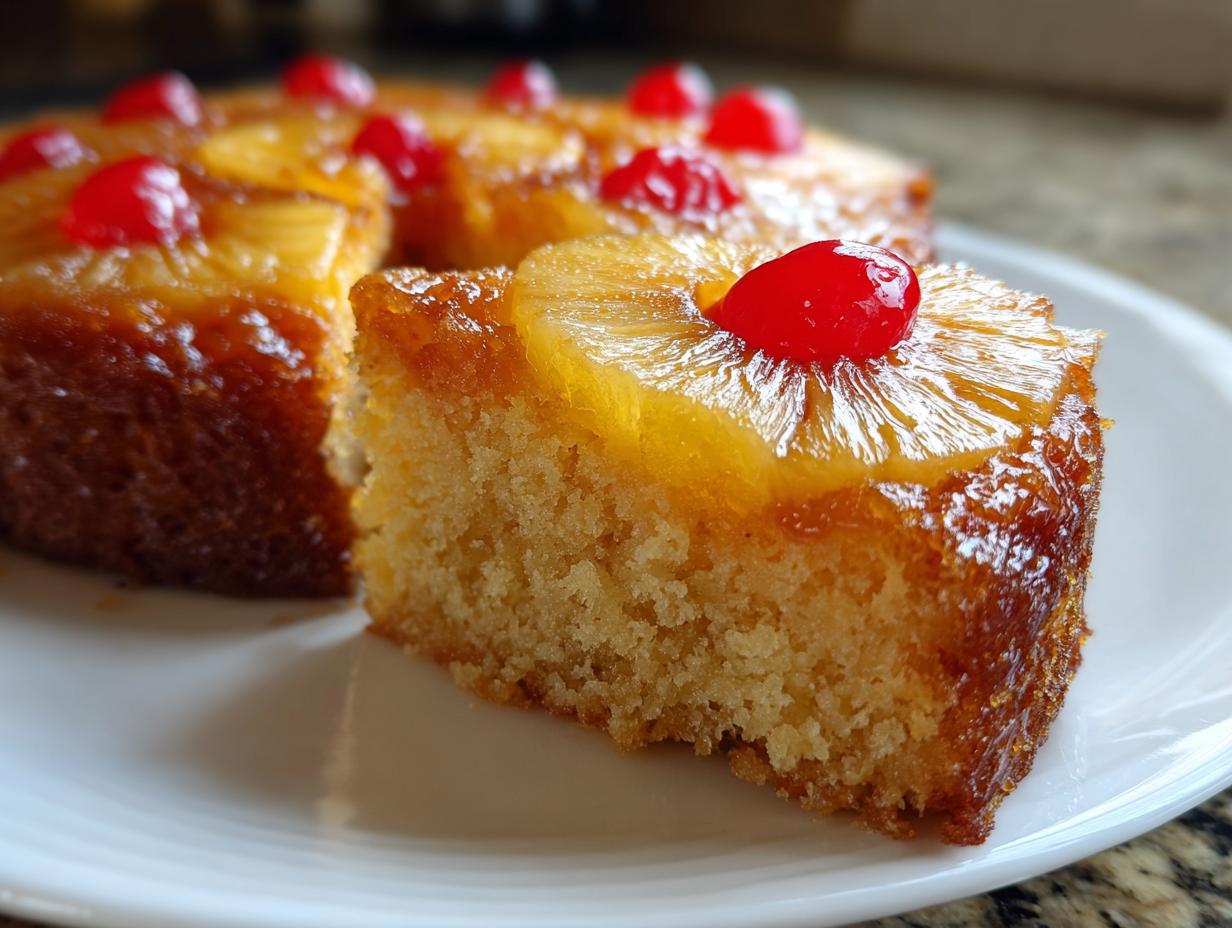
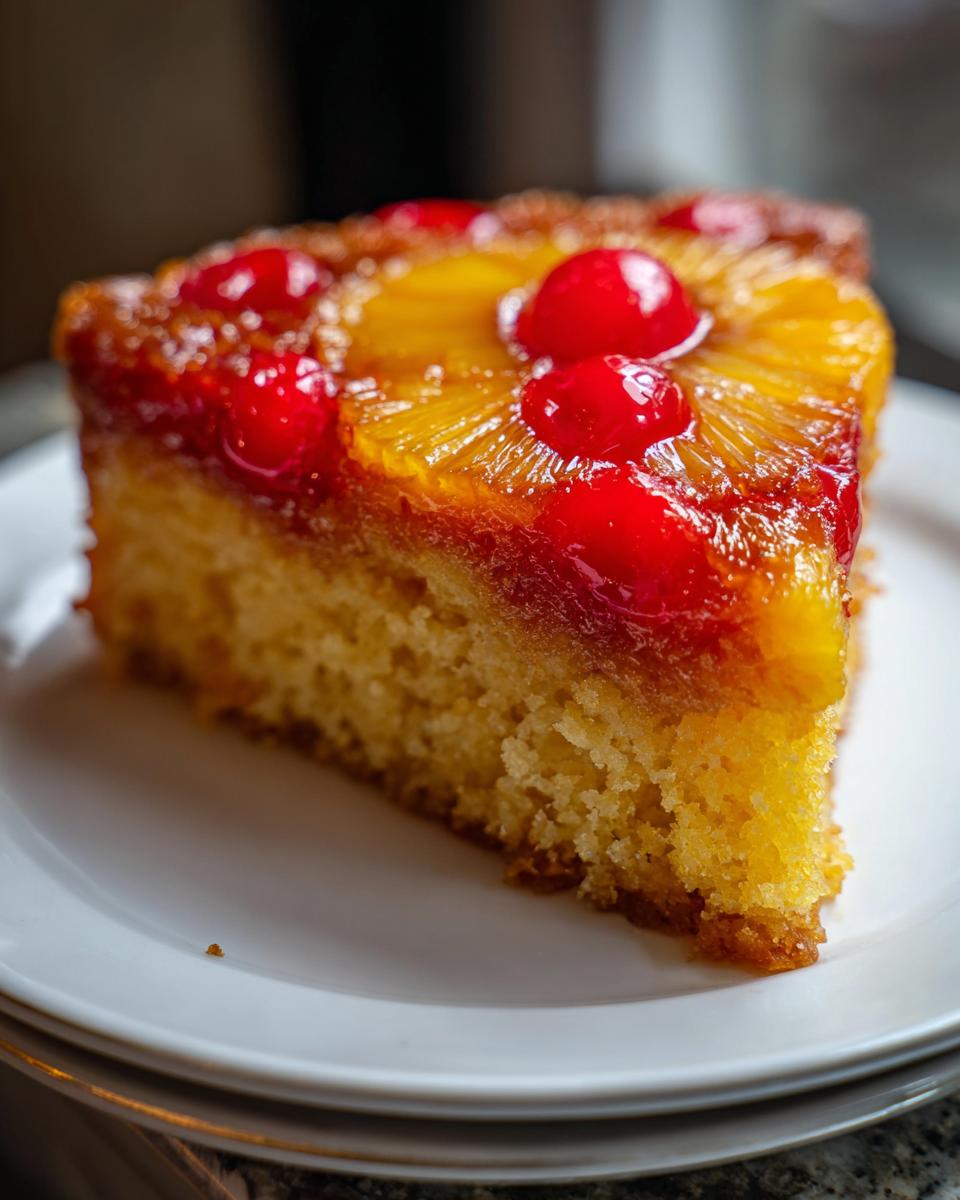
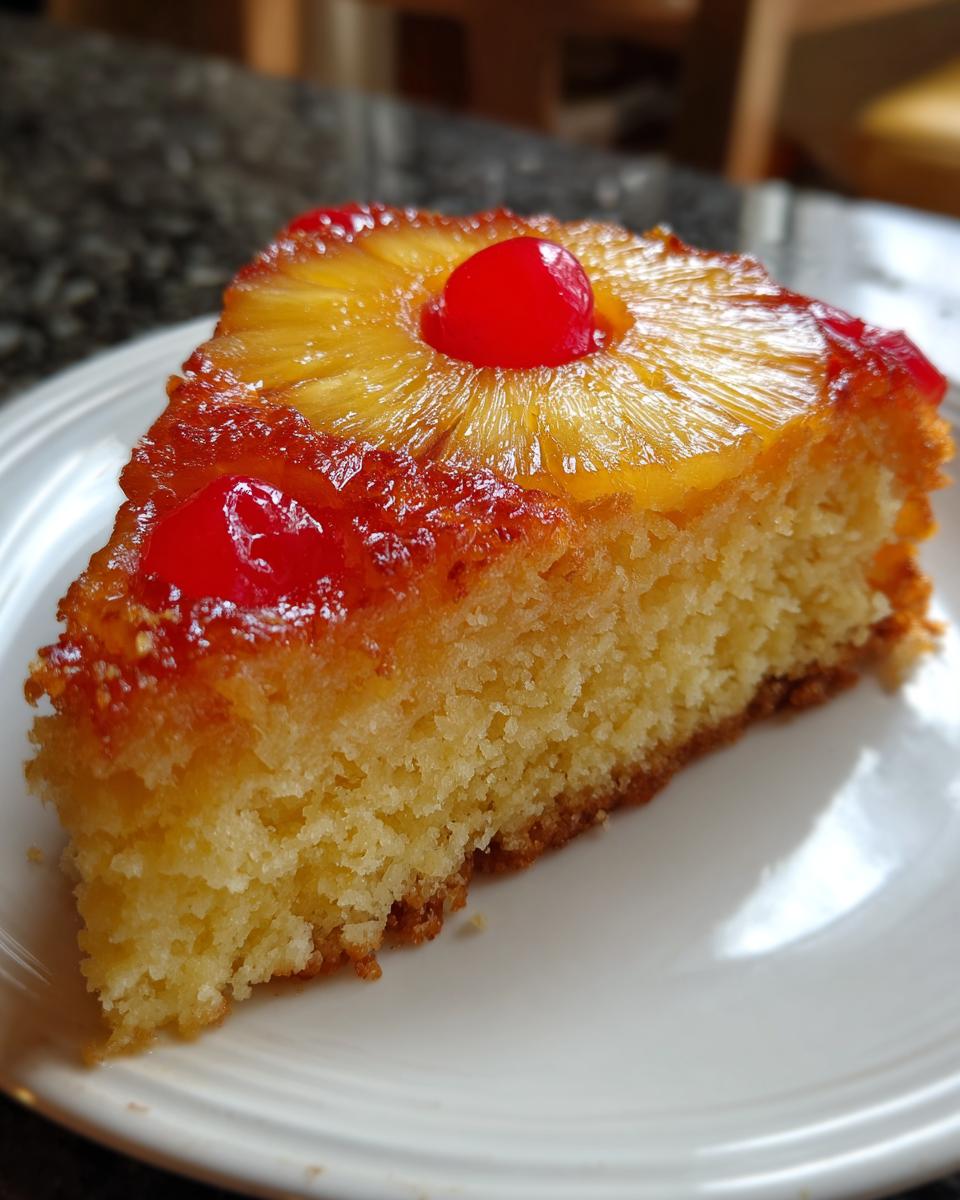
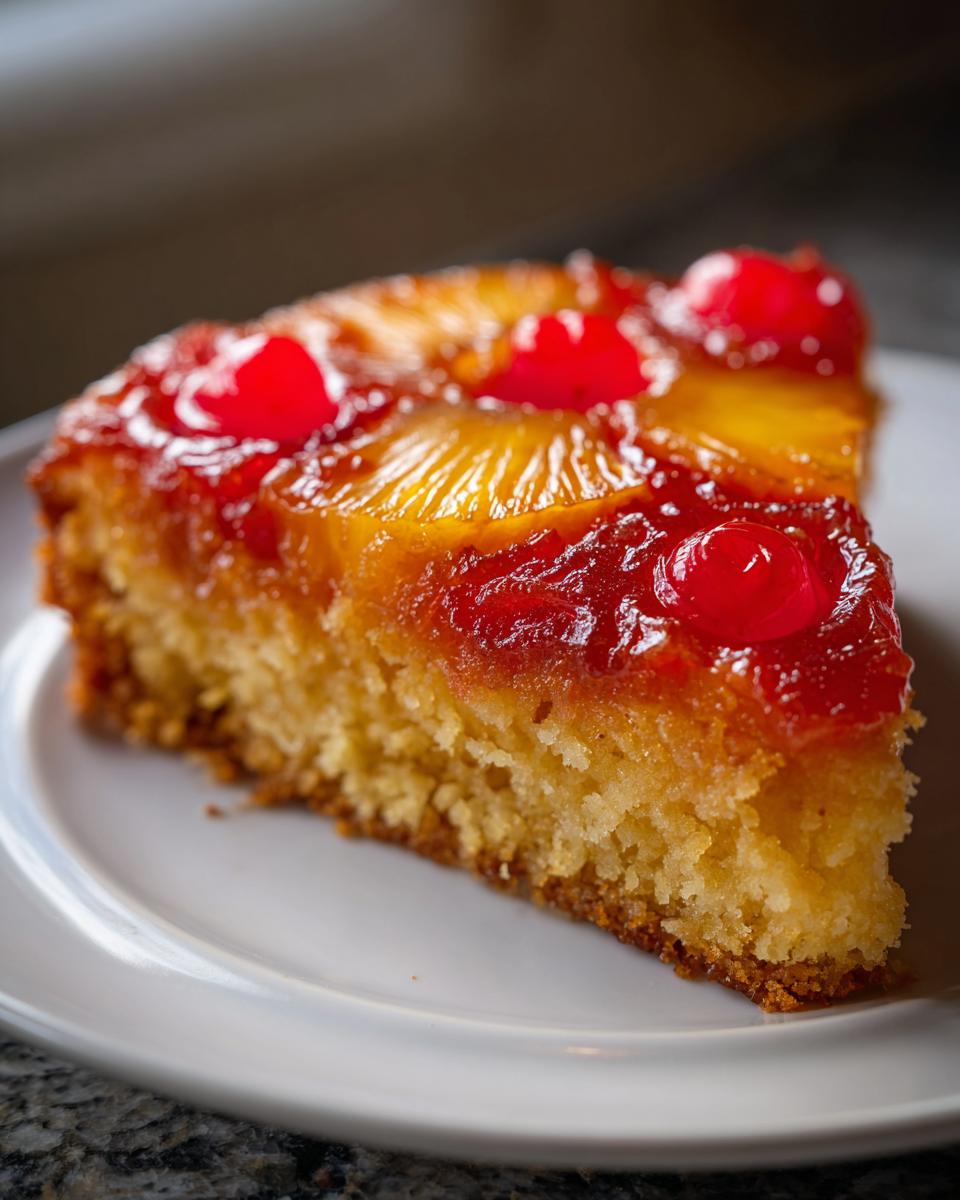
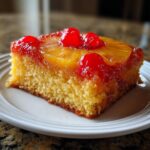
Place your serving plate upside down over the top of the cake pan. Using both hands and your mitts, carefully and confidently flip the whole assembly over in one fast motion. Tap the bottom of the pan lightly, wait a second, and gently lift the pan away. If, by some tiny chance, a cherry or piece of fruit decides to stay behind (it happens, even to me!), just use a fork to carefully place it back where it belongs. Just look at that beautiful, glossy, caramelized fruit topping—like that iconic version from Duke Manor Farm!
Tips for Success with Your Pineapple Upside Down Cake
Even after we’ve followed the steps perfectly, having a few expert pointers in your back pocket makes all the difference between a good cake and the absolute best cake. This recipe is designed to be super reliable, but these little details really push your Pineapple Upside Down Cake over the top. Since we are making this from scratch, the quality of the few topping ingredients really brings out that retro tropical flavor.
Listen, the beauty of this dessert absolutely depends on that caramel layer releasing smoothly. If you want that deep, almost molasses richness that elevates this dessert into a true showstopper, hold onto that dark brown sugar tip. Also, if you find that your cake is ever sticking, nine times out of ten it’s because the butter didn’t fully coat the bottom of the pan during the first step. Don’t let any dry spots hide down there!
Achieving the Best Caramelization and Texture
When it comes to the topping, I always recommend going for dark brown sugar over light brown sugar in the base layer. Dark brown sugar has a higher molasses content, and when it heats up with that butter, it creates a deep, almost smoky caramel flavor that white sugar just can’t touch. It intensifies the fruit flavor beautifully.
As for preventing sticking—our biggest fear! Make absolutely sure that 1/2 cup of butter you melt on the stove (or microwave) coats every single surface of the bottom of that 9-inch pan. I sometimes tilt the pan around a few times to ensure that liquid fat reaches the sides. Then, when you sprinkle the brown sugar, press it gently into the butter so they bond. This prevents the sugar from just dissolving into the batter too early. If you want more classic baking wisdom, check out how I treat my coffee cake cookies!
Serving Suggestions for This Family Favorite Pineapple Dessert
Pulling this beautiful Pineapple Upside Down Cake out of the pan is a moment worth celebrating! Since the topping is already warm, glossy, and perfectly set, it doesn’t need much dressing up, but I do have a couple of favorites.
This cake is absolutely divine served warm, maybe just after you’ve flipped it, with a generous scoop of good vanilla ice cream melting slowly down the side. The contrast between the warm, tart caramel and that cold cream is just heaven. If you’re looking for something slightly less chilly but still rich, a light drizzle of my vanilla buttercream over the plain sides of the cake works wonders, though it’s totally optional!
For a stunning presentation at a party, I like to serve it on a simple, bright white platter so that gorgeous fruit really pops. You can see how lovely it looks served with ice cream over at this serving idea. It’s officially time to eat!
Storage & Reheating Instructions for Pineapple Upside Down Cake
Because this cake has that wonderful caramelized fruit layer, storage is pretty simple, actually. You don’t want to cover it tightly right when it comes off the plate, though! Let your beautiful Pineapple Upside Down Cake cool completely to room temperature first.
Once cool, you can store leftovers covered on the counter for a day, but honestly, I prefer the fridge, especially if it’s warm in your house. If you keep it refrigerated, wrap slices tightly. To reheat, just microwave a slice for about 15 seconds—that little burst of heat softens the cake and brings back the gooey texture of the topping. It’s almost as good as fresh! If you’re looking for another great make-ahead dessert, you have to try my pumpkin fluff recipe!
Frequently Asked Questions About Pineapple Upside Down Cake
I know you’ve got questions! When something looks this good, people always wonder how to switch things up or if it’s really as easy as it looks. I’ve gathered the most common things folks ask me about after they’ve mastered this Classic Pineapple Upside Down Cake Recipe. Don’t worry, no question is silly when it comes to making a perfect dessert!
Can I make a Pineapple Bundt Cake Recipe instead of a round pan?
Oh, absolutely you can! A Pineapple Bundt Cake Recipe is a beautiful way to present this dessert, and the ridges hold onto that gooey caramel topping so well. The main thing you have to watch is baking time. Bundt pans are deeper than a standard 9-inch round, so you’ll likely need to increase the baking time by 10 to 15 minutes. And please, please, please—be extra meticulous when greasing and sugaring that Bundt pan. Seriously, coat every single nook and cranny with that butter and brown sugar; the deep crevices are notorious for sticking!
What if I want a Pineapple Cherry Upside Down Cake with more fruit?
I love that you want to maximize the fruit! For a richer look and taste, you can definitely amp up the fruit slightly, but you have to be cautious not to overload the top layer, or the batter won’t be able to seal it in properly. You could easily add 2 or 3 extra pineapple slices, perhaps fitting them in snugly around the edge after the main rings are set.
If you want to use fresh pineapple instead of canned, that’s wonderful; just drain it really well, perhaps even patting the slices dry first. If you add a lot of extra weight, though, you might need to add an extra tablespoon of flour to your dry mix just to help stabilize the batter so it doesn’t sink around the fruit. But for just a few extra cherries, you should be fine!
Is this the easiest Pineapple Upside Down Cake version?
Well, this is my Pineapple Upside Down Cake from Scratch version, and I promise you, it’s remarkably straightforward! However, if you are in a huge rush, yes, there are hacks out there that utilize a box cake. But here’s the thing, and I’m being honest with you: those shortcuts just don’t give you the same Moist Pineapple Cake Baking Guide result. The flavor depth that comes from creaming the proper butter and sugar amounts and using the reserved pineapple juice in the batter is irreplaceable.
This scratch recipe is really just about ten minutes of mixing before it goes into the oven, so it’s nearly as fast as a mix! If you want to see the gold standard for moist texture, though, you should check out my tried-and-true fruit cake recipe!
PrintClassic Pineapple Upside Down Cake Recipe
Bake this classic pineapple upside down cake for a moist, tender dessert with a beautiful caramelized fruit topping. This recipe guarantees a perfectly released cake for your next family gathering.
- Prep Time: 20 min
- Cook Time: 40 min
- Total Time: 60 min
- Yield: 8 servings 1x
- Category: Dessert
- Method: Baking
- Cuisine: American
- Diet: Vegetarian
Ingredients
- 1/2 cup unsalted butter, softened
- 3/4 cup packed light brown sugar
- 1 (20 ounce) can pineapple slices in juice, drained (reserve juice)
- 10 maraschino cherries, drained
- 1 1/2 cups all-purpose flour
- 1 1/2 teaspoons baking powder
- 1/2 teaspoon salt
- 1/2 cup unsalted butter, softened
- 3/4 cup granulated sugar
- 2 large eggs
- 1 teaspoon vanilla extract
- 1/2 cup milk
- 1/2 cup reserved pineapple juice
Instructions
- Preheat your oven to 350 degrees F (175 degrees C). You will need a 9-inch round cake pan.
- Melt 1/2 cup butter in the cake pan over low heat on the stovetop, or melt it in the microwave.
- Sprinkle the 3/4 cup brown sugar evenly over the melted butter in the pan.
- Arrange the pineapple slices on top of the brown sugar mixture. Place one maraschino cherry in the center of each pineapple ring, and place any remaining cherries around the edges.
- In a medium bowl, whisk together the flour, baking powder, and salt. Set this dry mixture aside.
- In a large bowl, cream together the 1/2 cup softened butter and 3/4 cup granulated sugar until light and fluffy.
- Beat in the eggs one at a time, mixing well after each addition. Stir in the vanilla extract.
- In a small bowl, whisk together the milk and the reserved pineapple juice.
- Gradually add the dry ingredients to the wet ingredients, alternating with the milk/juice mixture, beginning and ending with the dry ingredients. Mix until just combined; do not overmix.
- Carefully pour the cake batter over the fruit layer in the prepared pan, spreading it evenly.
- Bake for 35 to 40 minutes, or until a wooden pick inserted into the center comes out clean.
- Let the cake cool in the pan on a wire rack for 10 minutes.
- Place a serving plate upside down over the cake pan. Wearing oven mitts, carefully invert the pan and plate together. Lift the pan off the cake. If any fruit sticks, gently place it back onto the cake.
- Serve warm, perhaps with a scoop of vanilla ice cream.
Notes
- To prevent the cake from sticking, make sure the butter is fully melted and coats the bottom of the pan evenly before adding the brown sugar.
- For a richer caramel flavor, you can use dark brown sugar for the topping.
- If you want a showstopping look, use fresh pineapple rings cut to fit the pan perfectly.
Nutrition
- Serving Size: 1 slice
- Calories: 380
- Sugar: 35g
- Sodium: 250mg
- Fat: 18g
- Saturated Fat: 11g
- Unsaturated Fat: 7g
- Trans Fat: 0.5g
- Carbohydrates: 54g
- Fiber: 1g
- Protein: 4g
- Cholesterol: 85mg