
When the summer heat really starts to bite, nothing beats a bowl of truly spectacular homemade ice cream, right? Forget those store-bought tubs that taste mostly like sugar and air. I’m Emily, and having spent time both in my grandmother’s chaotic, wonderful Midwest kitchen and a very precise professional test kitchen, I know exactly what makes a frozen dessert sing. This recipe for the ultimate creamy homemade strawberry ice cream is the result of mastering that balance: using the absolute freshest fruit with techniques that guarantee that dreamy, scoopable texture we all crave. Get ready, because this is the best strawberry ice cream you’ll ever make.
- Why This Is The Best Homemade Strawberry Ice Cream Recipe
- Gathering Ingredients for Your Creamy Strawberry Ice Cream
- Step-by-Step Instructions for Perfect Strawberry Ice Cream
- Tips for Achieving Truly Creamy Strawberry Ice Cream
- Variations on Classic Summer Ice Cream Recipes
- Troubleshooting Your Homemade Strawberry Ice Cream
- Frequently Asked Questions About Strawberry Ice Cream
- Estimated Nutritional Data for Strawberry Ice Cream
- Share Your Creamy Strawberry Ice Cream Creations
Why This Is The Best Homemade Strawberry Ice Cream Recipe
I put this recipe through the wringer in my test kitchen, trust me. We weren’t just aiming for *good* strawberry ice cream; we wanted the benchmark for creamy strawberry ice cream. Most homemade versions end up rock-hard or tragically icy, but this one avoids all that drama. It’s all about the specific ratio of fat to sugar we use, which keeps everything wonderfully smooth.
Here’s why you need to skip every other recipe you’ve seen:
- It delivers a rich, unbelievably creamy strawberry ice cream texture that rivals any professional parlor.
- The maceration step ensures an intense, true-to-life fresh strawberry flavor that store-bought stuff can only dream about.
- We nailed the chilling time so those lovely strawberry pieces suspend perfectly, giving you that beautiful, scoopable strawberry ice cream consistency right out of the freezer.
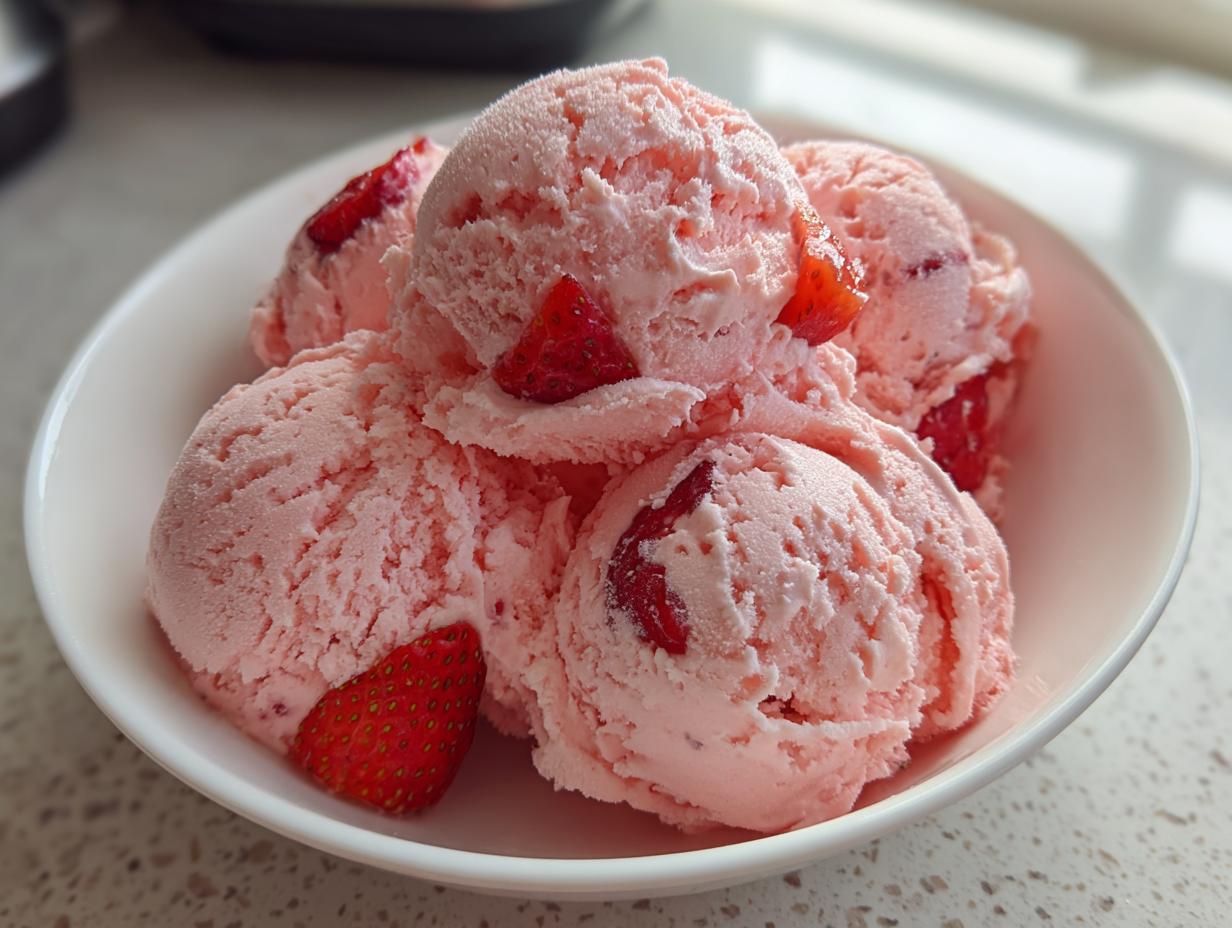
If you’re looking for the very best homemade strawberry ice cream, you’ve found it. It’s totally worth the small amount of extra effort to get a real summer treat. Check out this great piece on healthy ice cream treats for more ideas about keeping things light when you need to! Easy Creamy Strawberry Ice Cream Recipe
Gathering Ingredients for Your Creamy Strawberry Ice Cream
When we talk about making incredible strawberry ice cream, we have to start with supreme quality ingredients. Seriously, the flavor payoff comes directly from what you put in the bowl. I’ve listed everything you need below for that perfect sweet cream base combined with the fruit. Don’t skimp on the heavy cream; remember, we are aiming for creamy, baby! A little bit of science from my test kitchen days tells me that the ratio here is crucial for avoiding iciness.
Ingredient List: The Ultimate Strawberry Ice Cream Base
- 2 cups fresh strawberries, hulled and sliced
- 1/2 cup granulated sugar (for macerating)
- 1 tablespoon fresh lemon juice
- 2 cups heavy cream
- 1 cup whole milk
- 3/4 cup granulated sugar (for base)
- 1 teaspoon vanilla extract
- Pinch of salt
That lemon juice might seem strange, but trust me, it brightens up the strawberry flavor so much! It’s one of those little touches that distinguishes a good homemade batch from one that’s just okay.
Step-by-Step Instructions for Perfect Strawberry Ice Cream
Alright, now that we have our beautiful ingredients lined up, let’s get serious about technique. Making top-tier strawberry ice cream isn’t just throwing things in a machine; it’s about prepping those strawberries so they release ALL their flavor before they even hit the dairy. I learned this method watching my mom, and it’s non-negotiable if you want that intense taste. Pay attention to the chilling times—they seem long, but they are your ticket to ice cream magic!
Preparing the Fresh Strawberry Base
First things first: we need to wake up those strawberries! Toss your sliced berries with the half cup of sugar and that tiny splash of lemon juice. This process is called macerating, and it’s vital. Letting them sit for at least 30 minutes pulls the water out slightly while drawing out all that gorgeous, concentrated juice. After that waiting period, take a fork and roughly mash about half of your berries in the bowl. You want some chunkiness left—that’s what makes this fresh strawberry ice cream so much fun to eat! You can see a fantastic example of prepping fruit for freezing over at this great recipe.
Creating the Sweet Cream Ice Cream Base
While those berries are busy getting juicy, we whip up the liquid part. Grab a bigger bowl for this. Whisk together your heavy cream, milk, the remaining 3/4 cup white sugar, vanilla, and just that pinch of salt. You need to whisk this until you can feel that sugar grit disappear beneath your whisk. If you can still feel sugar crystals grinding away, the final product will be grainy—we don’t want that grainy texture!
Once the sugar is dissolved, gently stir in your macerated strawberries and all those glorious, red juices. Don’t overmix here; we just want everything incorporated nicely. If you’d like a peek at how others handle their bases, this recipe is a great reference: Homemade Strawberry Ice Cream.
Chilling and Churning Your Strawberry Ice Cream
This next part is where patience pays off tenfold for creamy strawberry ice cream. The base absolutely *must* be refrigerator-cold—at least two hours, but honestly, overnight is even better. If you try to churn warm cream, you’ll just end up with slightly flavored milk, not ice cream!
Once it’s screaming cold, pour it into your machine and churn according to its directions. Usually, this takes about 25 to 30 minutes. It will look like thick soft-serve when it’s done. For further insight into achieving that perfect churned texture, this article is very helpful: Homemade Strawberry Ice Cream.
Tips for Achieving Truly Creamy Strawberry Ice Cream
Okay, the churning is done, and what you have is glorious, soft-serve happiness. But how do we get from soft-serve to that perfect, scoopable slice of heaven that won’t shatter your teeth? This final stage—the hardening—is where people often mess up their beautiful strawberry ice cream batch. My job here, channeling my inner test kitchen guru, is to make sure you get that perfectly tempered texture every single time so your dessert is ready to go when the craving hits.
The biggest secret to creamy results is getting the air sealed out of that final container. If you skip this, you end up with freezer burn spots where ice crystals formed, which ruins that smooth mouthfeel we worked so hard for. Keep these final steps in mind!
The Importance of Proper Freezing and Storage
When the ice cream comes out of the churner, it’s soft—that’s expected! It has the right composition, now we just need to lock it in. Transfer the soft ice cream right into a shallow, airtight freezer-safe container. I prefer a loaf-style pan because it’s easier to cover thinly.
Now, here is the critical part: take a piece of plastic wrap, parchment paper, or wax paper, and press it *directly* onto the surface of the ice cream. I mean, press it down until it’s touching the mix. This prevents condensation from forming right on the top layer, which is what causes those dreaded ice crystals. Only after the plastic is touching the surface do you seal the lid on the container.
The final freeze needs time. I tell everyone to leave it alone for at least four hours, but ideally, you wait overnight. If you try to scoop it too soon, you’ll break the structure. When you’re ready to serve, let the tub sit on the counter for about 5 to 10 minutes. This short tempering time is what ensures you get perfect, creamy scoops of your homemade strawberry ice cream. For more ideas on perfecting your frozen treats, check out this lovely recipe guide!
Variations on Classic Summer Ice Cream Recipes
I know we are obsessed with pure, fresh berry flavor—and we should be! But sometimes, you want to mix things up a bit. This base recipe is so reliable that it just begs for variations. I love taking the trusty sweet cream foundation and turning it into something a little different for family gatherings.
One of the most requested things is a swirl, and creating a vanilla strawberry swirl ice cream is surprisingly simple. Once your churned berry ice cream is ready (it looks like soft-serve), layer it into your freezer tub alternating with thick dollops of high-quality vanilla bean ice cream or even some homemade vanilla custard base. Don’t stir it completely! Just use a knife or a chopstick to gently swirl them once or twice. You want distinct ribbons, not a blended pink mess.
If you’re feeling ambitious and want something richer—something that really feels like those old soda fountain treats—you can actually adapt this into an old fashioned strawberry ice cream recipe. Remember in the notes where I mentioned tempering egg yolks? If you cook those yolks gently into your milk and cream mixture until it thickens just slightly, you create a French-style custard base. That custard base adds incredible richness and stability, making that berry flavor deep and luxurious. It takes an extra step, but wow, the results are worth it if you want something truly decadent. You can find great inspiration for that classic taste over at this creamy vanilla variation!
Troubleshooting Your Homemade Strawberry Ice Cream
Even when we follow the rules perfectly, sometimes homemade strawberry ice cream throws us a curveball. Don’t panic! In my test kitchen, we learned that most freezing problems come down to one of two things: tiny ice crystals or liquid that wasn’t cold enough to begin with. It’s all fixable, though, and rarely means throwing the batch out entirely.
If your final product comes out too hard, almost like a frozen block instead of a soft scoop, it usually means two things happened: either the sugar content was slightly low, or you didn’t let it temper on the counter long enough. Sugar acts as an antifreeze in ice cream, keeping it soft. If you suspect your berries weren’t super sweet, next time consider adding just a tablespoon more of that base sugar, or perhaps using slightly less lemon juice.
If you’re getting a genuinely icy texture—those little shards instead of smooth creaminess—that almost always points back to the base not being chilled enough before it hit the churner. When the base isn’t perfectly cold, the chilling process takes too long, and the ice crystals get large and noticeable before the machine can break them down properly. Remember, we want that base ice-cold!
Now, if you want to make sure you never have a texture issue again, and you want something truly decadent, think about leaning into the old fashioned strawberry ice cream method I mentioned before. Adding those egg yolks creates a true custard base. That extra richness from the fat in the yolks is incredibly stabilizing, which naturally fights off ice formation and gives you the silkiest, most creamy strawberry ice cream possible. It’s worth the extra 15 minutes of gentle cooking, I promise! For a great example of a recipe that keeps complexity down while maximizing flavor, take a look at this simple recipe.
Frequently Asked Questions About Strawberry Ice Cream
I’m always happy to chat more about making things perfect in the freezer! People ask me the same things all the time when they are new to making their own frozen treats. Getting the texture right can sometimes feel like chemistry homework, but I promise, if you follow the base rules on the chilling and macerating, you’re golden. These are the questions I hear most often about getting this amazing berry ice cream just right.
Can I make this easy strawberry ice cream recipe without a machine?
Absolutely! We all don’t have fancy equipment lying around, and that’s okay. If you don’t have an ice cream maker, you can definitely use the no churn strawberry ice cream method I mentioned in the notes. You basically whip the heavy cream until stiff peaks form, fold everything else in gently, and then you must freeze it while stirring vigorously every 45 minutes for the first three hours. This manual agitation replaces the churning action and keeps the ice crystals small. It requires a little more focus from you, but it works! You can find a great guide on that method right here: No-Churn Strawberry Ice Cream.
How do I get the richest flavor for my berry ice cream?
Hands down: use the absolute ripest strawberries you can find. Seriously, if they look pale or firm, set them aside. For the absolute richest flavor that screams summer, you want berries that are practically collapsing when you touch them. Also, if you want that deep, caramelized, luxurious taste that makes it feel like an old fashioned strawberry ice cream, you must use the egg yolk variation mentioned in the notes. Tempering those yolks into the base creates a custard. That fat content stabilizes everything and deepens the entire flavor profile beautifully.
If you are looking for that perfect texture that makes it easy to serve, remember that final 5-minute rest on the counter after it comes out of the deep freeze. That little bit of warming makes all the difference for getting that gorgeous, scoopable strawberry ice cream straight from the container!
Estimated Nutritional Data for Strawberry Ice Cream
I always try to keep the focus on enjoyment, not counting calories, when it comes to classic summer desserts like this! But for those of you who like to know what you’re eating, here is the typical breakdown based on the standard measurements for this specific strawberry ice cream recipe. Remember, if you add more sugar for a sweeter base, or swap out cream for a lighter milk, these numbers will shift a bit. These figures are just estimates based on the recipe formulation.
- Serving Size: 1/2 cup
- Calories: 310
- Fat: 19g
- Sugar: 28g
- Protein: 3g
Since we are dealing with fresh fruit and heavy cream, the fat content is what gives us that amazingly rich mouthfeel. Enjoy it guilt-free—it’s homemade, and that counts for something!
Share Your Creamy Strawberry Ice Cream Creations
Honestly, the best part of cooking is knowing you’re making something wonderful for your family and friends. I hope you loved making this strawberry ice cream as much as I love perfecting it here at Cookery Command! Did you manage that creamy texture?
Please take a moment to rate the recipe below and leave a quick comment telling me about your experience. Did you manage that perfect scoopable consistency? I’d also absolutely adore it if you shared a photo of your fruity frozen treats over on social media and tagged us! I always check in to see your beautiful results. I hope this becomes a staple in your summer desserts, just like it is in mine! You can find more great inspiration here: Creamy Strawberry Ice Cream Recipe
PrintThe Ultimate Creamy Homemade Strawberry Ice Cream

Make rich, creamy homemade strawberry ice cream packed with fresh strawberry flavor. This recipe delivers a classic, scoopable dessert perfect for summer.
- Prep Time: 20 min
- Cook Time: 0 min
- Total Time: 2 hours 50 min
- Yield: About 1 quart 1x
- Category: Dessert
- Method: Churning
- Cuisine: American
- Diet: Vegetarian
Ingredients
- 2 cups fresh strawberries, hulled and sliced
- 1/2 cup granulated sugar (for macerating)
- 1 tablespoon fresh lemon juice
- 2 cups heavy cream
- 1 cup whole milk
- 3/4 cup granulated sugar (for base)
- 1 teaspoon vanilla extract
- Pinch of salt
Instructions
- Combine the sliced strawberries, 1/2 cup sugar, and lemon juice in a bowl. Gently stir. Let the mixture sit at room temperature for at least 30 minutes to macerate the berries and release their juices.
- Lightly mash about half of the strawberries with a fork to create a thicker puree while leaving some pieces whole for texture.
- In a separate large bowl, whisk together the heavy cream, whole milk, 3/4 cup sugar, vanilla extract, and salt until the sugar is mostly dissolved.
- Stir the macerated strawberries and their juices into the cream mixture. Mix until just combined.
- Chill the entire mixture in the refrigerator for at least 2 hours, or until very cold. This step is important for the best texture.
- Pour the chilled base into your ice cream maker and churn according to the manufacturer’s directions, usually 20 to 30 minutes, until the ice cream reaches a soft-serve consistency.
- Transfer the soft ice cream to an airtight freezer-safe container. Press plastic wrap directly onto the surface to prevent ice crystals.
- Freeze for at least 4 hours, or until firm enough to scoop. Allow it to sit on the counter for 5 to 10 minutes before serving for the best scoopable texture.
Notes
- For a richer, old-fashioned style, you can temper 3 egg yolks into the milk/cream mixture before chilling, cooking it gently until it coats the back of a spoon, then chilling completely before churning.
- If you do not have an ice cream maker, you can use the no-churn method: Whip the heavy cream to stiff peaks, gently fold in the chilled strawberry mixture and milk, then freeze, stirring every 45 minutes for the first 3 hours.
- Use ripe, sweet strawberries for the strongest natural flavor.
Nutrition
- Serving Size: 1/2 cup
- Calories: 310
- Sugar: 28g
- Sodium: 35mg
- Fat: 19g
- Saturated Fat: 11g
- Unsaturated Fat: 8g
- Trans Fat: 0.5g
- Carbohydrates: 31g
- Fiber: 1g
- Protein: 3g
- Cholesterol: 70mg