
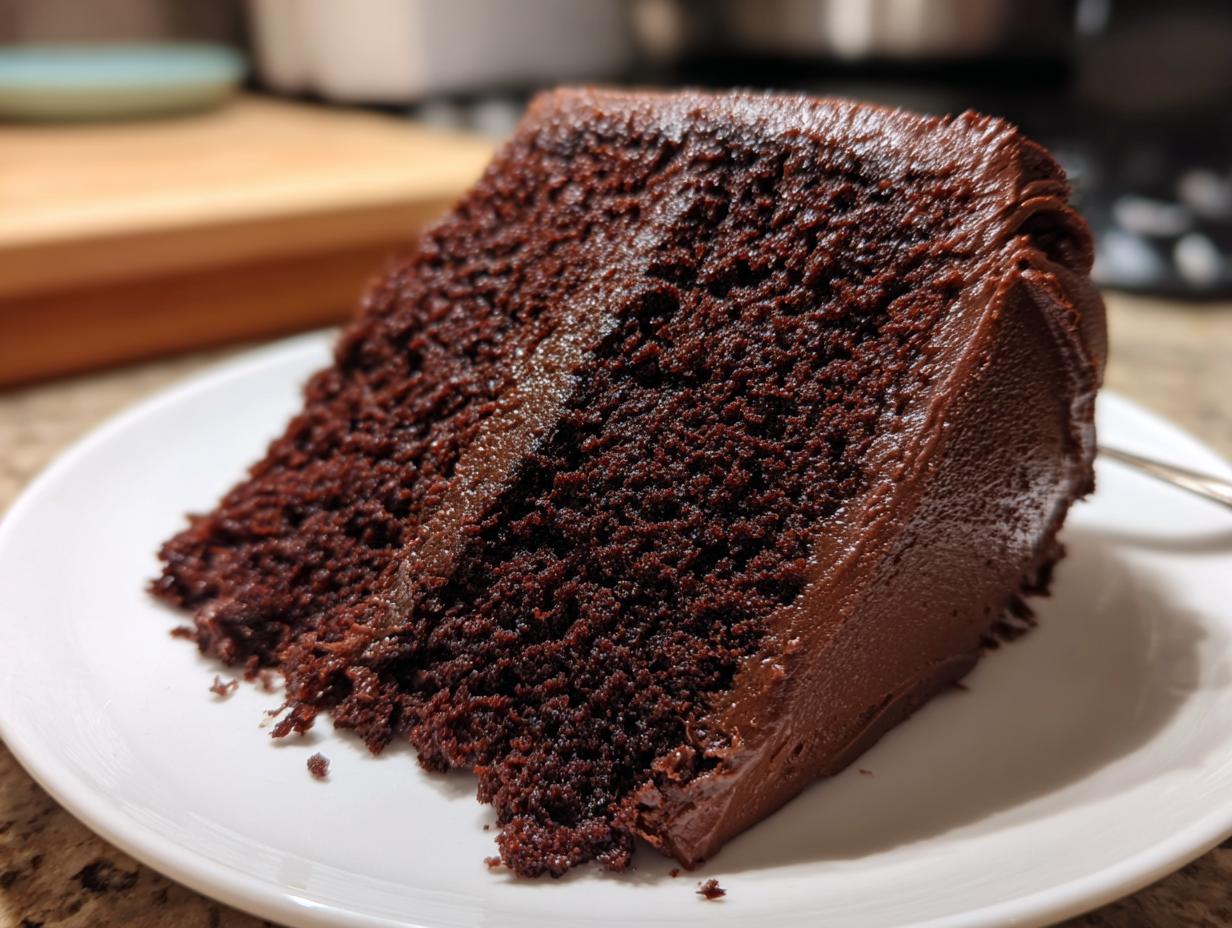
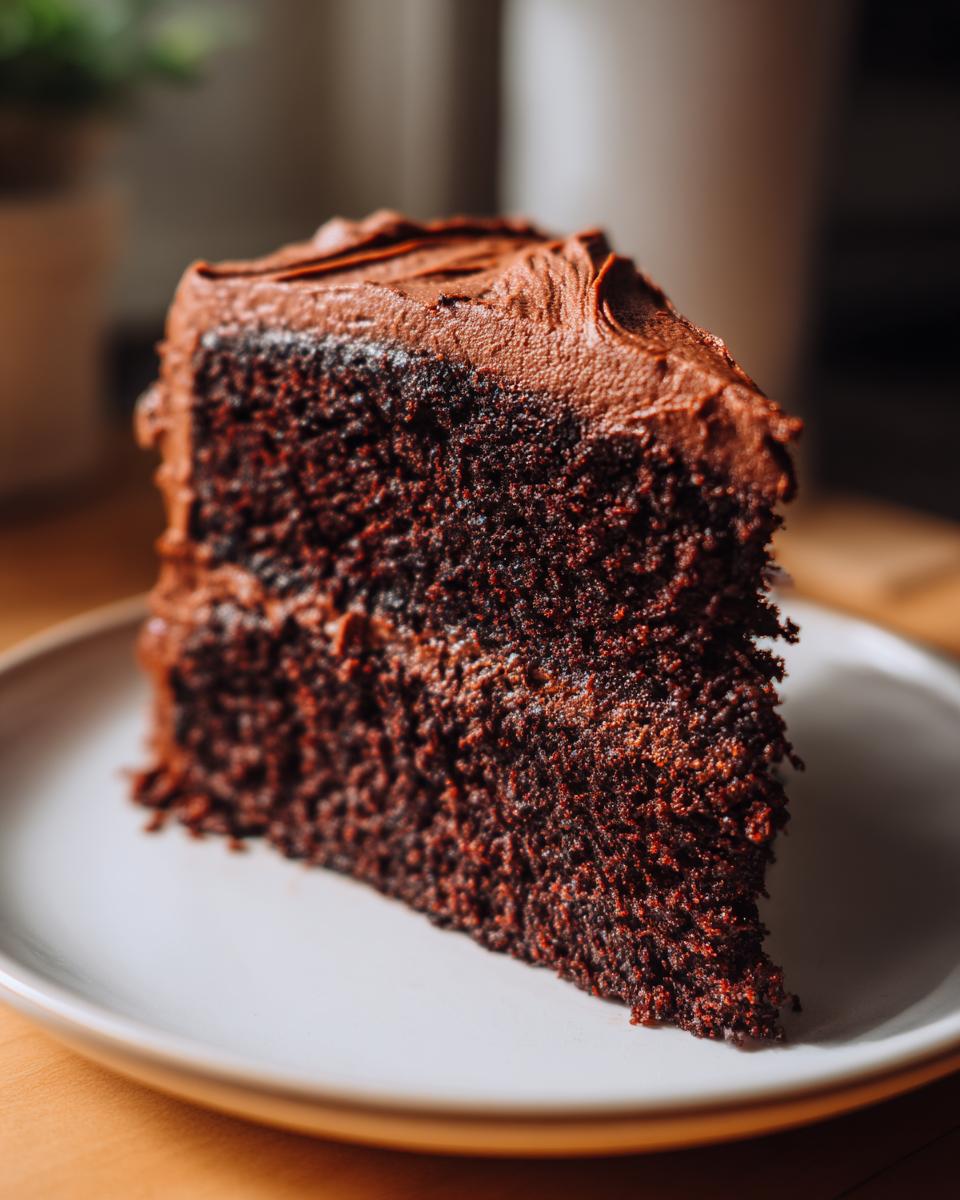
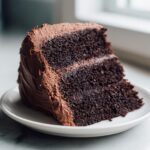
There is nothing quite like pulling a perfectly baked, deeply fragrant layer cake out of the oven. For me, the true measure of comfort food always involves chocolate, and getting that texture just right can feel like cracking a secret code. Well, stop searching! I promise you, this homemade chocolate cake recipe is the one that brings me back to my family’s kitchen every single time. It’s straightforward enough for a Tuesday night craving but decadent enough for a special celebration. We worked hard to nail the precise balance of wet ingredients and dry elements here, and what you get is a consistently moist, unbelievably rich cake with a tender crumb. Seriously, you’re going to feel like you’ve leveled up as a baker!
- Why This is The Ultimate Moist Homemade Chocolate Cake Recipe
- Gathering Ingredients for Your Homemade Chocolate Cake From Scratch
- Step-by-Step Guide to Baking the Homemade Chocolate Cake
- Crafting the Easy Chocolate Buttercream Frosting
- Assembling Your Best Chocolate Layer Cake Recipe
- Tips for Success with Your Rich Chocolate Cake Baking Guide
- Storage and Reheating Instructions for Homemade Chocolate Cake
- Frequently Asked Questions About This Decadent Chocolate Cake with Frosting
- Estimated Nutritional Data for This Homemade Chocolate Cake
Why This is The Ultimate Moist Homemade Chocolate Cake Recipe
I’ve tested so many variations trying to find the perfect balance, and this version just wins every time. It’s wildly flavorful and super simple, which is exactly what a good homemade chocolate cake should be. You don’t need fancy equipment, just a standard mixer and a good whisk!
- The flavor depth is unmatched—it’s rich without being overly heavy.
- It stays perfectly moist for days (if it lasts that long!).
- The entire cake comes together remarkably fast; cleanup isn’t terrible either!
If you’re looking for a recipe that delivers results you can rely on, check out the approach used in this ultimate guide here, though I think my coffee trick really takes it over the top! For another stunning layered option, you should definitely peek at Annette’s amazing recipe too: Natasha’s Chocolate Layer Cake is always a showstopper.
Achieving the Perfect Chocolate Cake Texture
The secret weapon for that incredibly soft and fluffy texture is a two-part liquid system. We use room temperature buttermilk, which helps tenderize the flour, but the real magic comes from adding that cup of hot water—or better yet, hot coffee—right at the end. Pouring in hot liquid blooms the cocoa powder, releasing deep chocolate notes you just can’t get otherwise. It makes the batter look thin, and I know that worries some people, but trust me, that thin batter transforms into the softest crumb imaginable while baking.
Gathering Ingredients for Your Homemade Chocolate Cake From Scratch
When you’re making a truly classic homemade chocolate cake, the ingredients you use matter so much. I always tell folks that if you lay everything out before you start mixing, the whole process feels so much more relaxed and professional! We need two distinct sets of tools here: what goes into the beautiful, moist cake layers, and what we use to create that cloud-like frosting to cover them up. Let’s make sure we have exactly what the recipe calls for right here on the counter.
When you find a recipe that works this well, you don’t want to mess with the specific amounts! For those of you looking to check out another incredible foundational recipe, Shannon has a truly fantastic one over at Eats Delightful that shares some structural similarities.
Cake Batter Components
For the actual cake, we are reaching for standard pantry staples to build that depth of flavor. Remember that buttermilk and eggs need to be at room temperature; it really helps everything emulsify beautifully! Don’t skimp on the cocoa powder either—we are using unsweetened cocoa powder here for that pure, rich chocolate hit.
- 2 cups all-purpose flour
- 2 cups granulated sugar
- 3/4 cup unsweetened cocoa powder
- 2 teaspoons baking soda
- 1 teaspoon baking powder
- 1 teaspoon salt
- 1 cup buttermilk, room temperature
- 1/2 cup vegetable oil
- 2 large eggs, room temperature
- 1 teaspoon vanilla extract
- 1 cup hot water or hot brewed coffee (use coffee, trust me!)
Decadent Chocolate Buttercream Frosting Ingredients
Now for the crowning glory! This buttercream is light but intensely chocolatey. Make sure your butter is nice and softened so it creams up without chunks, and use heavy cream if you happen to have it for the richest possible outcome.
- 1 cup unsalted butter, softened
- 3 1/2 cups powdered sugar
- 1/2 cup unsweetened cocoa powder
- 1/2 cup milk or heavy cream
- 1 teaspoon vanilla extract (for the frosting!)
Step-by-Step Guide to Baking the Homemade Chocolate Cake
Okay, we have all our lovely ingredients waiting patiently, so it’s time to build this gorgeous homemade chocolate cake! Remember, success here is all about method. Don’t rush the mixing steps, especially when adding that final hot liquid. If you take your time during this building phase, you’ll be rewarded with a truly superior, moist chocolate cake recipe at home.
I always feel so much more organized when I start by getting the oven ready. Go ahead and preheat your oven to 350°F (175°C) right now! While that’s warming up, make sure you grease and flour your two 9-inch cake pans. I use baking spray and then dust with cocoa powder instead of flour—it keeps the edges from getting that white dusty look!
If you haven’t decided yet, I highly recommend heating up some strong coffee for the liquid step; it makes this cake so much richer. For another easy-to-follow guide on getting this recipe done fast, check out the instructions here, and for a great step-by-step resource, Recipe Change has some solid tips here!
Mixing the Batter for a Moist Chocolate Cake Recipe At Home
First up is your dry mix. In your biggest bowl, whisk together the flour, sugar, cocoa powder, baking soda, baking powder, and salt. Whisk it really well—we want everything evenly distributed before we introduce any wet ingredients. Next, add in the buttermilk, oil, eggs, and vanilla extract. Now, use your electric mixer on medium speed and beat this for a solid two minutes. It’s going to look thick and a little strange, but hang in there!
This is the critical part: Carefully pour in that hot water or hot coffee while mixing on the lowest speed. Mix only until it’s just combined—I mean it! If you mix too long now, you’ll beat the air out and end up with a dense cake instead of that perfect, soft crumb we’re aiming for. The batter will be quite thin, almost like soup. That’s perfect timing!
Baking and Cooling Your Layers
Divide that thin batter evenly between your two prepared pans. Slide them into that preheated 350°F oven. You’re looking for about 30 to 35 minutes. How do you know they’re done? Insert a wooden pick right into the center—it needs to come out clean or with just a few moist crumbs clinging to it. No wet batter allowed!
Once they’re baked, let them sit in their pans on a cooling rack for just 10 minutes. Don’t wait longer, or they might stick! After those ten minutes, carefully invert them onto the racks to cool completely. Please, please, please make sure they are stone cold before you even think about touching them with frosting, or you’ll have expensive chocolate soup on your counter.
Crafting the Easy Chocolate Buttercream Frosting
Now that our cake layers are cooling—and I mean completely cooling—we can move onto the final, crucial step: that dreamy chocolate buttercream! This is where we create that smooth, decadent topping that makes this recipe feel so special, yet it truly is so easy to master from scratch. We aren’t going for heavy or stiff here; we want fluffy, spreadable, and utterly delicious.
If you want another highly rated recipe that focuses on simple, decadent frosting, Kara has a wonderful one you might want to try out as a comparison at her site. It’s always good to see how other bakers approach the finishing touches!
Tips for Creamy Frosting Consistency
The secret to perfectly light and fluffy chocolate buttercream is starting with the butter. You must beat your softened, room-temperature unsalted butter until it looks pale and airy on its own—this can take three or four minutes with a stand mixer, maybe longer by hand! This step incorporates the air that will keep the final frosting from tasting dense.
Once the butter is fluffy, add your dry ingredients—the powdered sugar and the cocoa powder—in stages. I mean it, stages! If you dump it all in at once, you are going to create a massive, brown sugar cloud that will cover your whole kitchen. Add about a third, mix on low until it’s just incorporated, then turn the speed up slightly. Do the same thing with your milk or cream and vanilla. Keep mixing until you reach that perfect, beautifully light and ready-to-spread consistency!
Assembling Your Best Chocolate Layer Cake Recipe
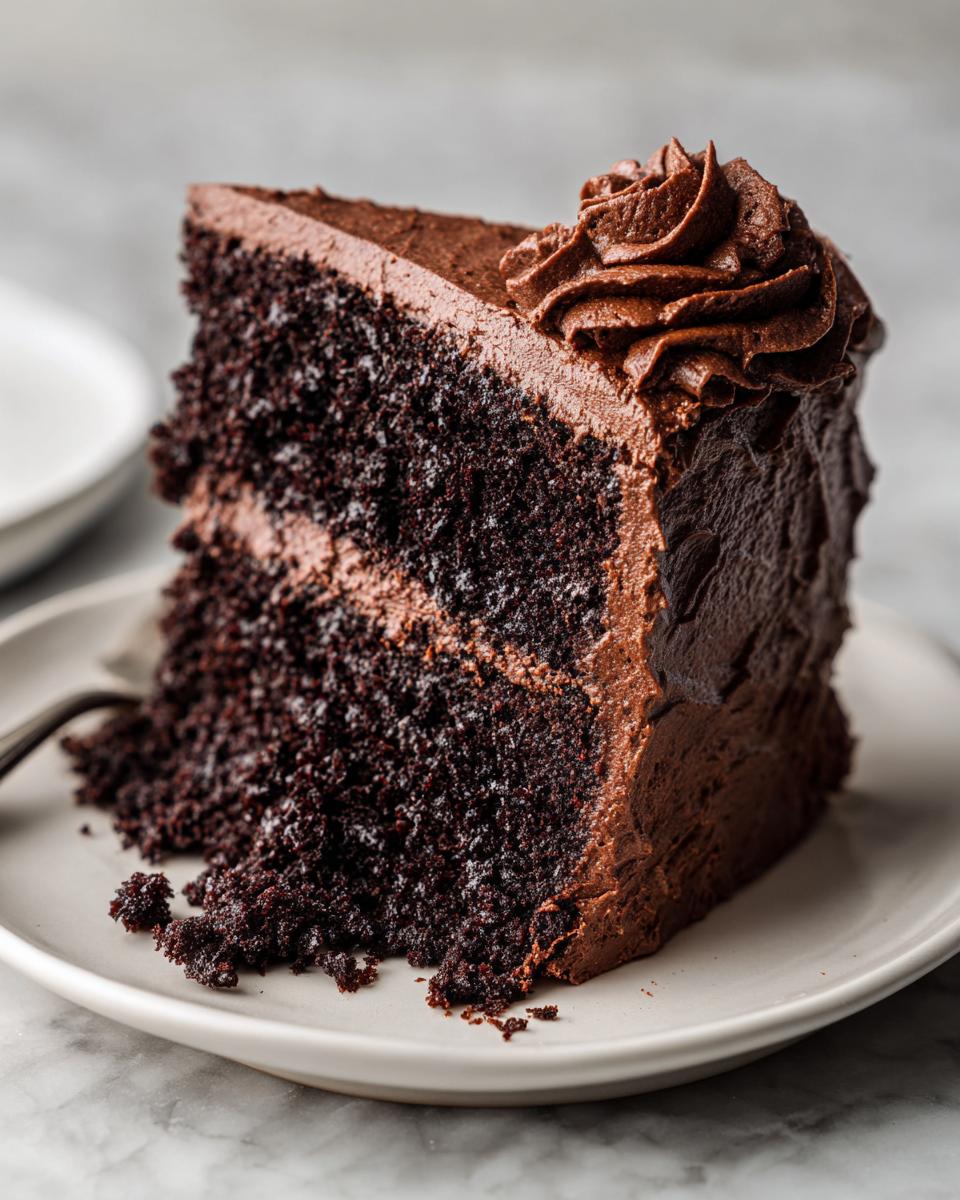
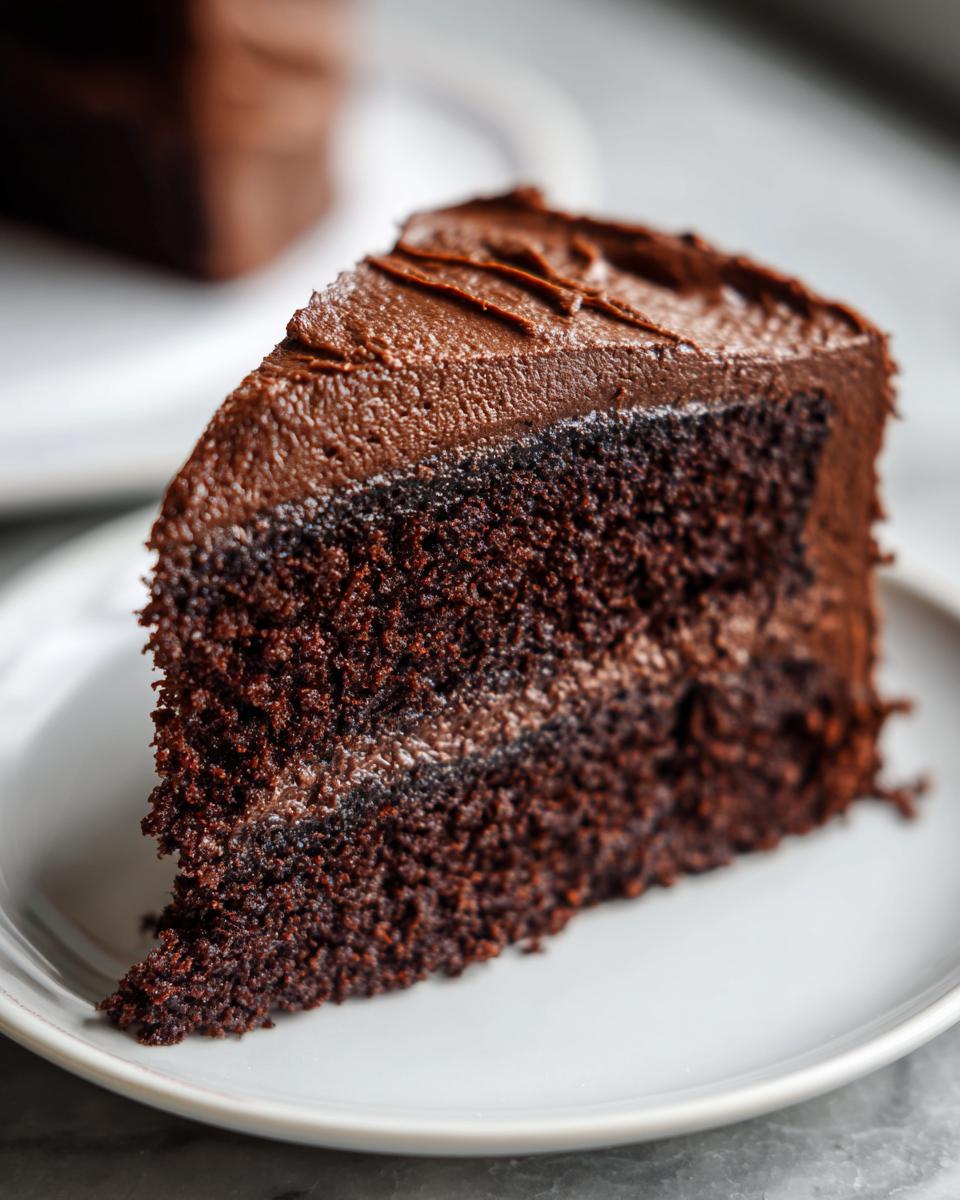
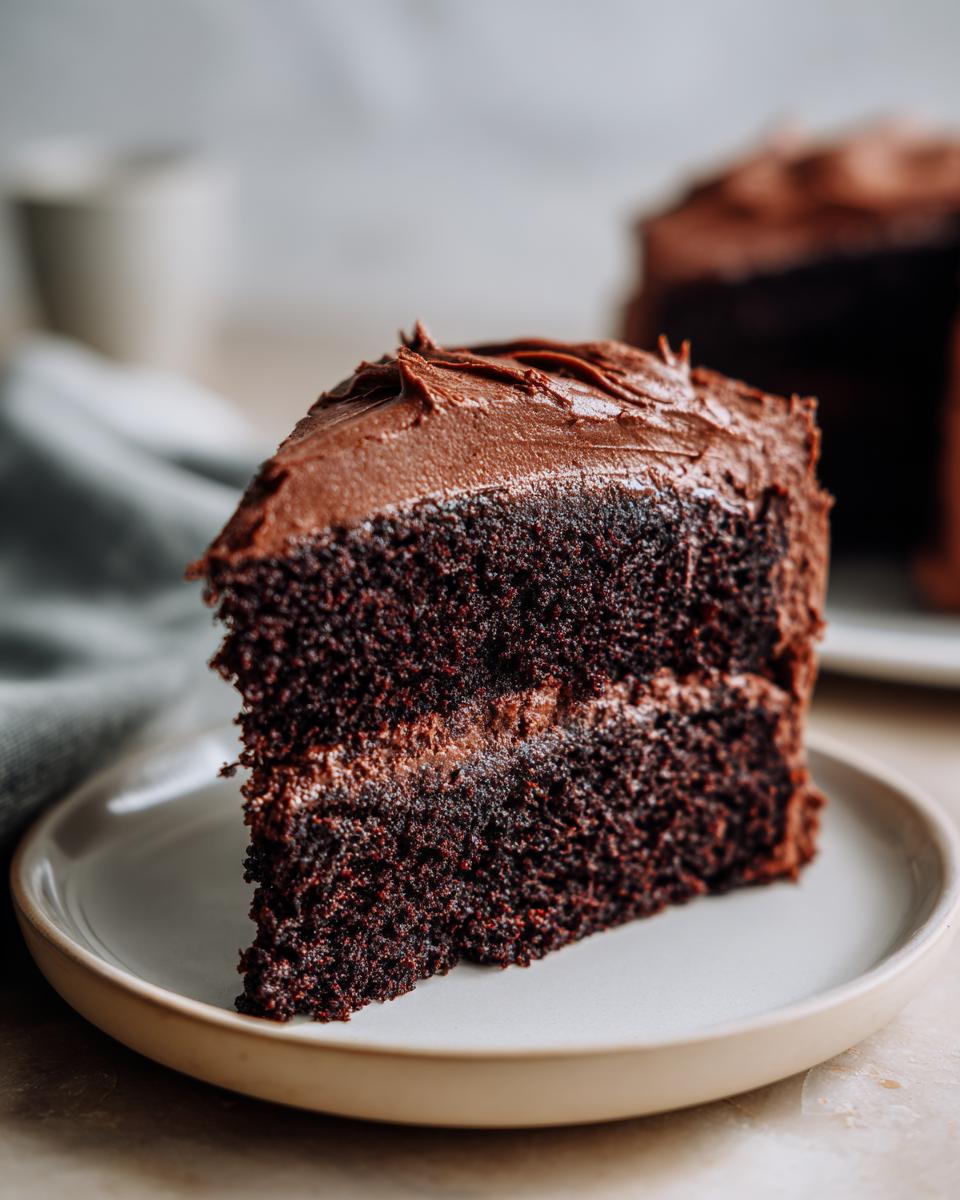
This is my favorite part! We’ve baked, cooled, and whipped up that gorgeous frosting—now it’s time to bring this beautiful homemade chocolate cake together. Seeing these two layers come together signals that you’re about to have the best chocolate layer cake recipe you’ve ever made sitting right there on your counter, ready for any celebration or just a casual Thursday night dessert.
First, take a look at your cake layers. If one top seems noticeably domed or slightly uneven, you might want to give the very top a fast, gentle trim with a long, serrated knife. This just ensures your final layer cake stands up straight and proud. If your cakes look pretty flat already, skip this step entirely! We don’t want to waste any of that moist crumb.
Place your first layer—let’s say the bottom one, if they are slightly different sizes—onto your serving plate or cake stand. Scoop about one-third of that luxurious chocolate buttercream right onto the top center. Use an offset spatula, working gently from the center out, to spread it evenly right to the edges. Don’t press too hard; we are setting a creamy, delicious foundation.
Now, carefully place that second layer right on top. Try your best to center it perfectly! Once it’s seated, take the rest of your frosting. I like to do a thin “crumb coat” first—a very thin layer spread over the whole cake, sides and top. Pop that in the fridge for about 15 minutes. This traps any loose crumbs so your final coat is perfectly smooth. Once chilled, grab the rest of the frosting and start applying it generously around the sides and over the top. Since this is our classic chocolate birthday cake, feel free to swirl it a bit or smooth it out for a clean look. See? I told you this was so easy to decorate!
If you’re looking for a recipe that prioritizes ease and quick assembly on top of flavor, make sure you bookmark this gorgeous creation here. It’s the perfect template for a fuss-free, decadent dessert!
Tips for Success with Your Rich Chocolate Cake Baking Guide
We’ve covered the how-to, but sometimes you just want those little extra nuggets of wisdom that separate a good cake from a *truly* great one. Since this is a rich chocolate cake recipe that relies on some specific chemistry, I want to make absolutely sure you get those rich flavors and that signature soft texture every single time you bake it. My goal is always reliability in your kitchen!
Remember earlier when I mentioned swapping hot water for coffee? That’s one tip I won’t budge on. Using hot brewed coffee instead of plain hot water is non-negotiable for me. It doesn’t make the cake taste like a mocha, I promise! Instead, the acidity and deep roast of the coffee really enhance the bitter notes in the cocoa powder, making the chocolate taste intensely richer and more decadent. It’s a simple swap that dramatically elevates the final result.
Another critical element for that soft, fluffy texture we’re aiming for is ingredient temperature. Please, please, remember to take your buttermilk and eggs out of the fridge ahead of time so they reach room temperature. When cold ingredients hit the batter, they don’t mix as smoothly. Room temperature eggs and buttermilk emulsify beautifully with the oil and butter, creating a smooth, uniform emulsion that traps air better. This guarantees that lovely, tender crumb.
One final thought: if you’re dreaming of a fudgier texture, you have a tiny bit of control over the liquid. If you slightly reduce the amount of hot liquid added in Step 4—say, by just two tablespoons—you’re locking in a bit more flour and cocoa solids relative to the liquid. This minor adjustment yields a slightly denser, more fudgy chocolate cake experience, which is fantastic if you prefer that ultra-rich mouthfeel!
If you’re interested in exploring another tried-and-true classic baking method, Mary’s Hershey’s cake recipe is famous for a reason. You can see how she manages that intensity here. It’s always neat to compare techniques!
Storage and Reheating Instructions for Homemade Chocolate Cake
You’ve made the absolute best homemade chocolate cake, and now you have leftovers—which is a happy problem to have! How we store this masterpiece significantly impacts that perfect moist chocolate cake texture we worked so hard for. Honestly, I prefer keeping this cake on the counter versus the fridge whenever possible, especially because of that wonderful whipped chocolate buttercream on top.
When the cake is fully assembled with the frosting, it does best covered tightly at cool room temperature for up to two days. Think of it like this: cold temperatures make the butter in the frosting firm up and can actually draw moisture out of the cake layers themselves, leading to a slightly drier bite. If your kitchen is very warm (say, over 72°F), you might need to risk the fridge, but you must bring it out well ahead of time.
If you ended up chilling your homemade chocolate cake, you absolutely need a “waking up” period before serving it. Take the cake out of the refrigerator at least two to three hours before you plan to slice into it. This resting time allows the cocoa fats in the cake and the butter in the frosting to soften back to that perfect, creamy room temperature. When it’s properly tempered, you get the best flavor and the softest texture possible.
If you happen to have leftover slices that you’ve wrapped individually, don’t panic if you’ve stored them overnight. You can gently bring just the slice to temperature on the counter, or if you’re in a real hurry, try microwaving a single slice for just five to seven seconds on low power—this just warms the chocolate a tiny bit and makes it ultra-fudgy for an immediate treat. Never reheat the whole cake though; we want to preserve that gorgeous frosting design!
Frequently Asked Questions About This Decadent Chocolate Cake with Frosting
I get so many great questions once people start trying out this recipe—it’s proof that everyone craves that perfect, rich chocolate cake! Here are a few things I hear most often when folks are baking their decadent chocolate cake with frosting for the first time.
Can I use regular milk instead of buttermilk?
You totally can, but you’ll need to activate it! If you don’t have plain buttermilk on hand for this moist chocolate cake recipe at home, here’s my quick fix: Take one cup of regular whole milk and stir in one tablespoon of white vinegar or lemon juice. Let it sit on the counter for about 10 minutes until it curdles slightly. It won’t have the exact same tang as commercial buttermilk, but it will provide the necessary acidity to react with the baking soda and keep your cake tender!
Why is my batter so thin? Did I mess up?
Oh, I’m glad you asked this! If you’re panicking because the batter seems more like runny soup than thick brownie mix after you add that hot coffee, take a deep breath—you’ve done it exactly right! The addition of hot liquid (coffee or water) thins the batter significantly. This is an intentional step in this easy homemade chocolate cake from scratch method. It ensures the cocoa is fully bloomed and guarantees that wonderfully soft and fluffy cake result.
Can I bake these layers in a 9×13 pan instead of two rounds?
Yes, absolutely! If you prefer a sheet cake, you can definitely use a 9×13 inch baking dish. Just make sure you grease and flour it well, perhaps using my cake goop trick if you have one handy! Because the heat distribution is flatter, you will need to reduce the baking time slightly, usually cutting it down to about 30 to 35 minutes, but always check with that wooden pick first. It makes for an incredibly easy serving presentation, too!
Can this recipe be used for cupcakes?
It makes fantastic cupcakes! For cupcakes, I slightly adjust the baking time down—usually around 18 to 22 minutes, depending on how full you fill your liners. This recipe yields about 24 standard-sized cupcakes. They are perfect for school events or bake sales because they stay wonderfully moist, which is exactly what you want in a baked-from-scratch goodie. If you’re looking for a smaller, fuss-free version of a wonderful baked treat, check out this super simple recipe here!
Estimated Nutritional Data for This Homemade Chocolate Cake
I always find it helpful to look at the big picture, especially when we’re indulging in something as wonderful as this decadent chocolate cake. Knowing the general details helps you plan those birthday parties or special occasions! Here is the estimated breakdown for one generous slice of this cake, topped with the whipped chocolate buttercream. Keep in mind, these numbers are very much educated ballpark figures.
I always have to mention that since we are using specific brand names—like how one brand of cocoa powder might have slightly different fat content than another, or what type of milk I used in the frosting—these numbers can vary! This is just a guideline to give you a general idea of what you’re enjoying. It’s a treat, pure and simple, meant to be savored!
- Serving Size: 1 slice
- Calories: 450
- Sugar: 55g (Yes, it’s a treat!)
- Fat: 25g
- Saturated Fat: 14g
- Carbohydrates: 58g
- Protein: 5g
- Sodium: 320mg
- Fiber: 2g
- Cholesterol: 65mg
We prioritize flavor and texture over everything else in this kitchen, and that means sugar and butter are our friends when it comes to achieving that perfect crumb! I hope this helps you plan, but honestly, my best advice regarding nutrition is to just focus on how much joy that first bite brings you. That measurement is the most important one!
PrintUltimate Moist Homemade Chocolate Cake with Whipped Chocolate Buttercream
This recipe delivers a deeply satisfying, traditional homemade chocolate cake that is consistently moist with a soft, tender crumb. It is straightforward to make and yields a rich, decadent chocolate flavor, topped with a homemade chocolate buttercream frosting.
- Prep Time: 20 min
- Cook Time: 35 min
- Total Time: 55 min
- Yield: 12 servings 1x
- Category: Dessert
- Method: Baking
- Cuisine: American
- Diet: Vegetarian
Ingredients
- 2 cups all-purpose flour
- 2 cups granulated sugar
- 3/4 cup unsweetened cocoa powder
- 2 teaspoons baking soda
- 1 teaspoon baking powder
- 1 teaspoon salt
- 1 cup buttermilk, room temperature
- 1/2 cup vegetable oil
- 2 large eggs, room temperature
- 1 teaspoon vanilla extract
- 1 cup hot water or hot brewed coffee
- 1 cup unsalted butter, softened (for frosting)
- 3 1/2 cups powdered sugar (for frosting)
- 1/2 cup unsweetened cocoa powder (for frosting)
- 1/2 cup milk or heavy cream (for frosting)
- 1 teaspoon vanilla extract (for frosting)
Instructions
- Preheat your oven to 350°F (175°C). Grease and flour two 9-inch round cake pans.
- In a large bowl, whisk together the flour, sugar, cocoa powder, baking soda, baking powder, and salt. This is the dry mix.
- Add the buttermilk, oil, eggs, and vanilla extract to the dry ingredients. Beat with an electric mixer on medium speed for two minutes. The batter will be thick.
- Carefully pour the hot water or hot coffee into the batter and mix on low speed until just combined. The batter will be thin; this is correct for a moist cake.
- Divide the batter evenly between the prepared cake pans.
- Bake for 30 to 35 minutes, or until a wooden pick inserted into the center comes out clean.
- Let the cakes cool in the pans for 10 minutes before inverting them onto a wire rack to cool completely.
- Prepare the frosting: In a large bowl, beat the softened butter until creamy. Gradually add the powdered sugar and cocoa powder, alternating with the milk or cream, beating until smooth. Add the vanilla extract and beat until light and fluffy.
- Once the cakes are completely cool, place one layer on a serving plate. Spread about one-third of the frosting evenly over the top. Place the second layer on top.
- Frost the top and sides of the entire cake with the remaining chocolate buttercream frosting. Slice and serve this classic chocolate birthday cake.
Notes
- Using hot coffee instead of hot water deepens the chocolate flavor without making the cake taste like coffee.
- Ensure your buttermilk and eggs are at room temperature for the best cake texture.
- For an extra fudgy texture, slightly reduce the amount of hot liquid added in step 4.
Nutrition
- Serving Size: 1 slice
- Calories: 450
- Sugar: 55g
- Sodium: 320mg
- Fat: 25g
- Saturated Fat: 14g
- Unsaturated Fat: 11g
- Trans Fat: 0.5g
- Carbohydrates: 58g
- Fiber: 2g
- Protein: 5g
- Cholesterol: 65mg