
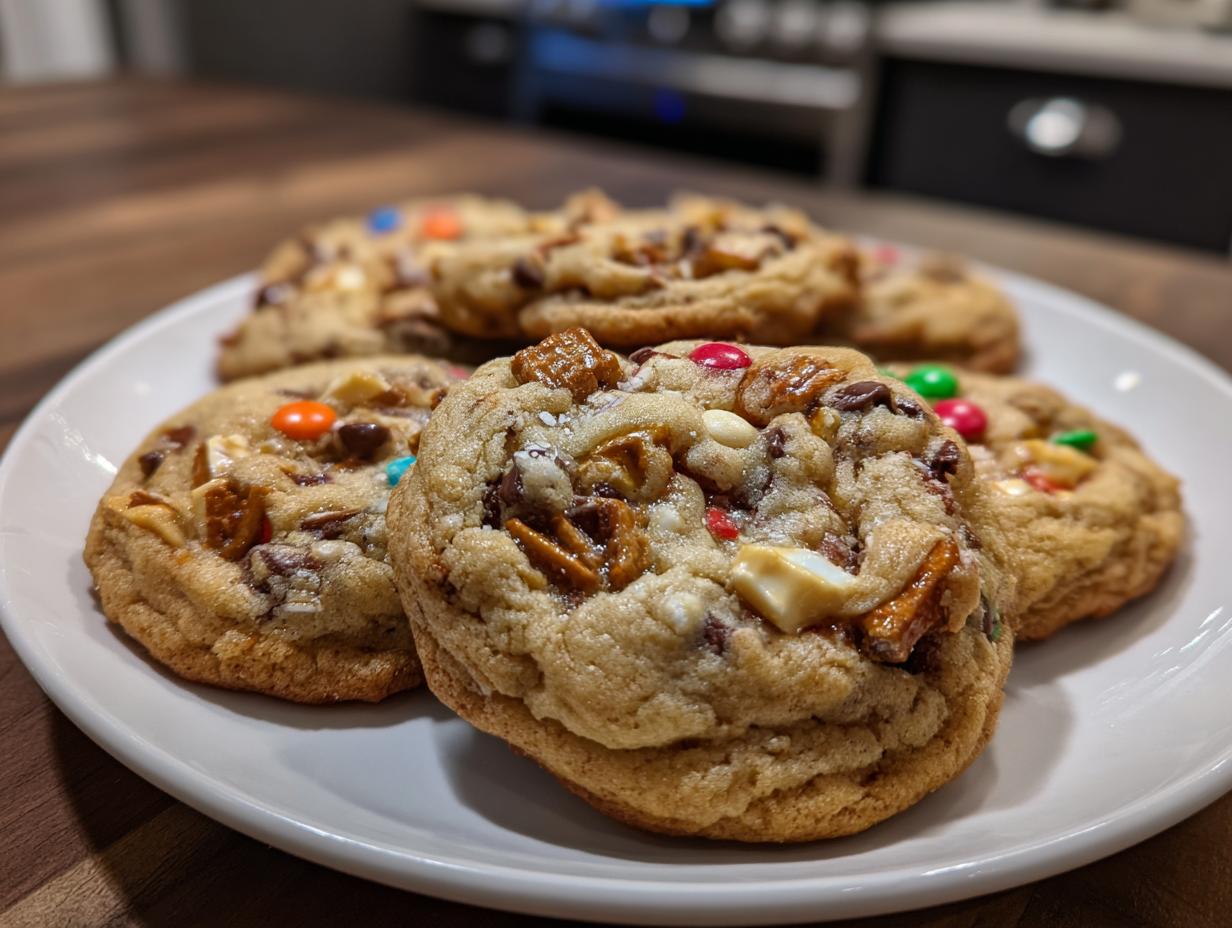
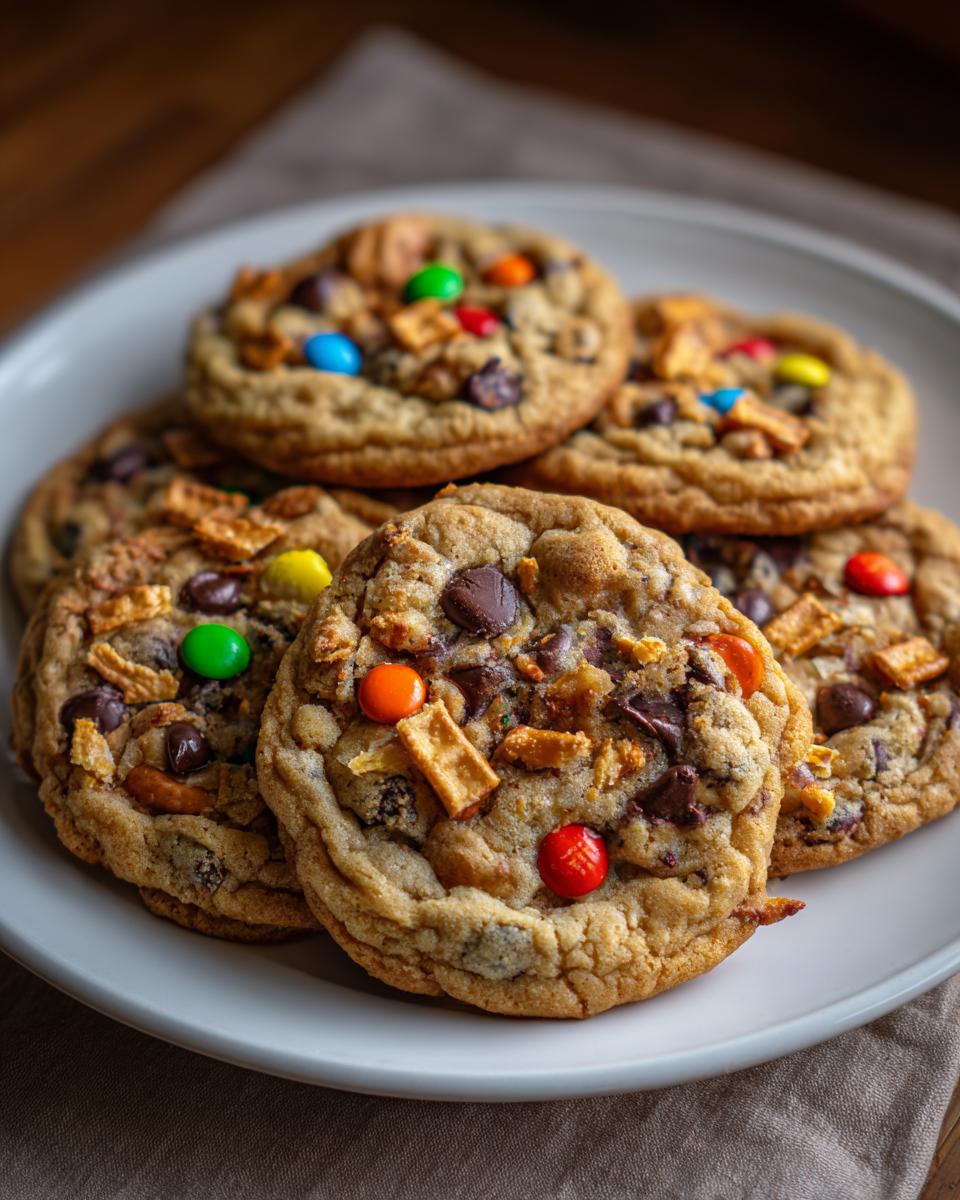
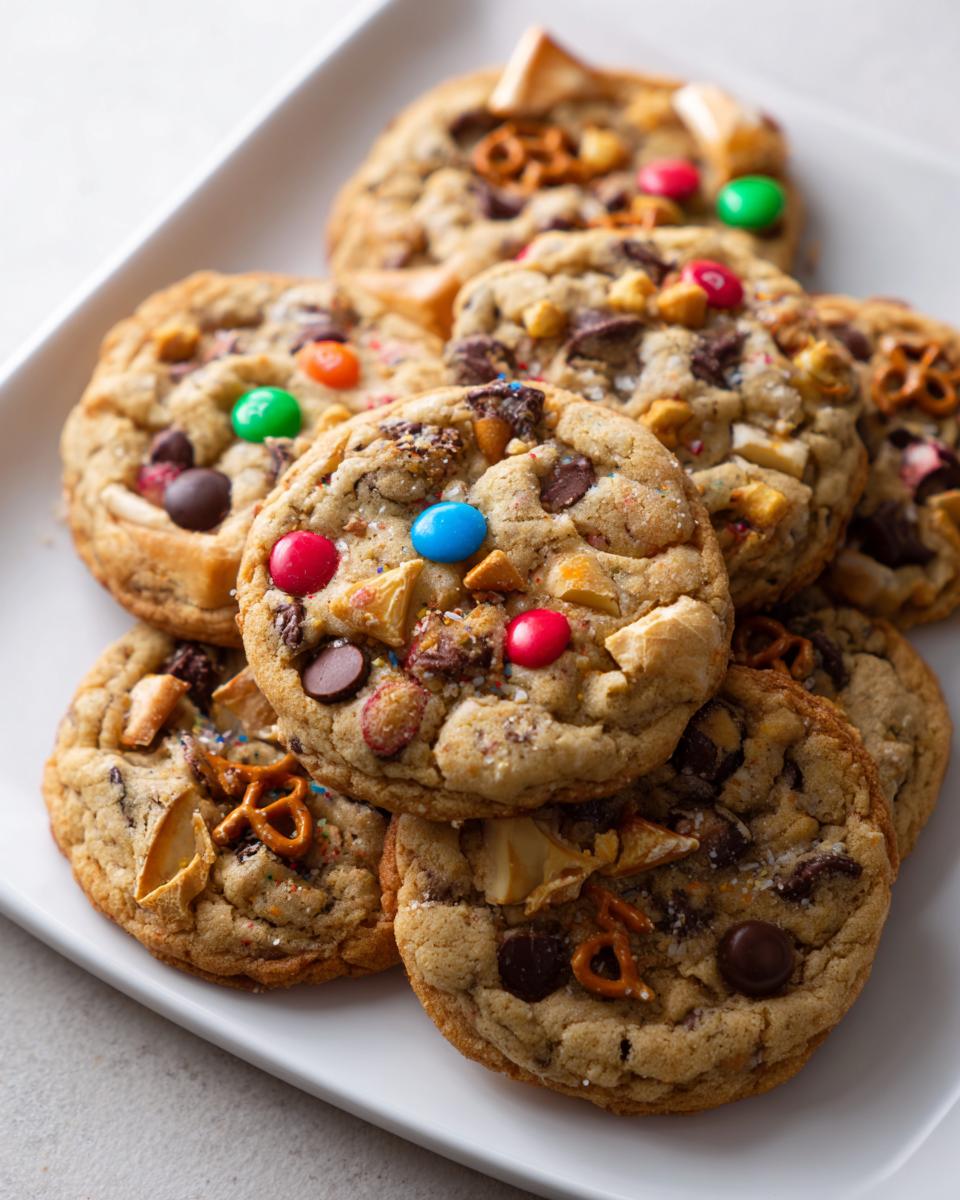
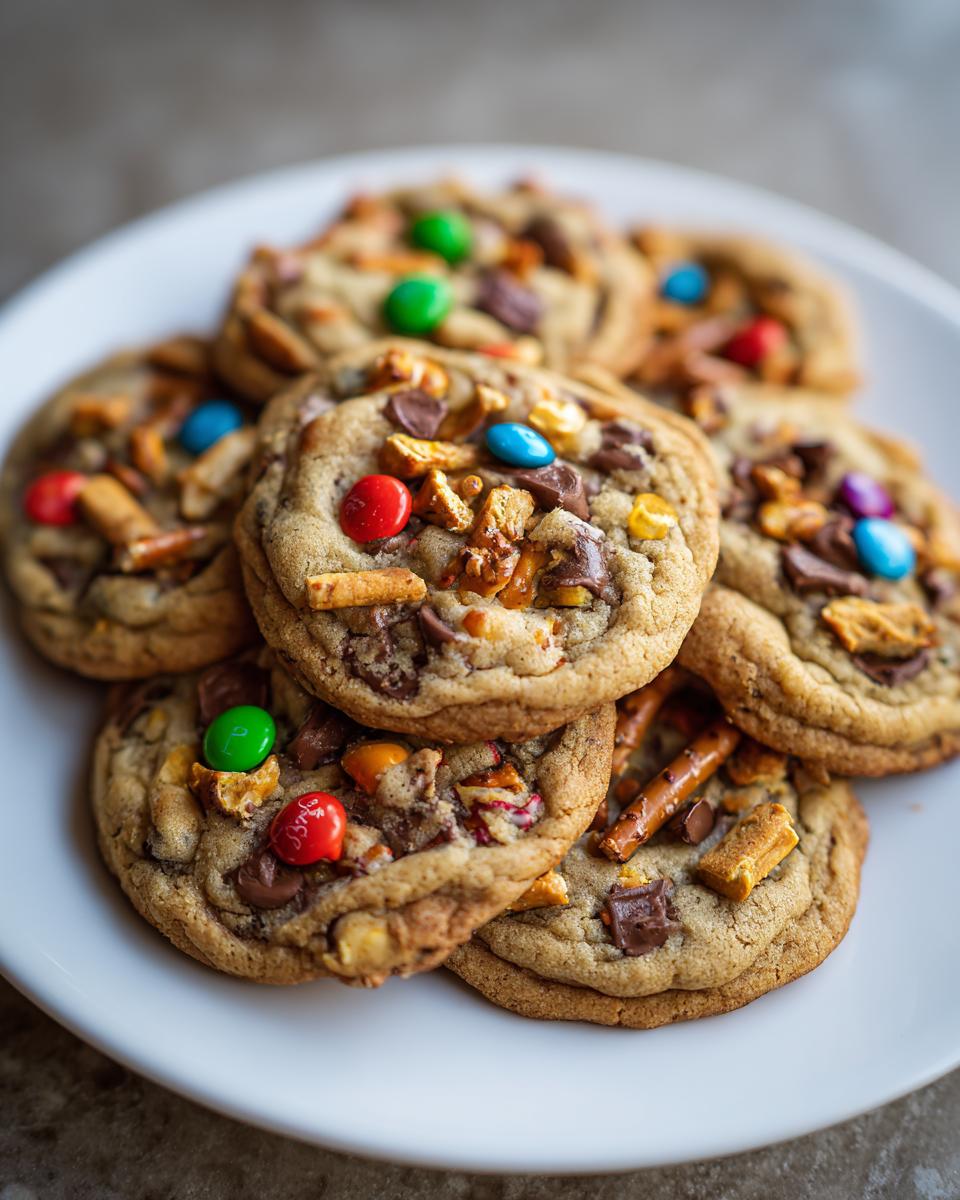
If you’ve ever looked in your pantry, seen twelve different types of chocolate, a bag of pretzels, some leftover Halloween candy, and thought, “I must bake something massive,” then you know the spirit behind kitchen sink cookies! This isn’t about careful portion control; this is maximalist baking at its absolute best. My goal here at Cookery Command is always reliability, and these cookies deliver pure indulgence. They are the ultimate sweet and salty treat, and trust me, they shine especially bright when jazzed up for holiday baking, but the base recipe is fantastic any time of year. It’s easy to adapt these festive treats further by checking out how I handle glittery toppings in my Christmas sprinkle sugar cookies post. This framework balances all those wild additions so the cookie stays chewy and doesn’t just crumble into a salty mess. It’s where my background in tested technique meets my grandmother’s love for generosity in American home cooking.
- Why This is the Best Kitchen Sink Cookie Recipe (Ultimate Mix-In Cookies)
- Gathering Ingredients for Your Kitchen Sink Cookies
- How to Prepare Epic Cookie Recipes: Step-by-Step Kitchen Sink Cookies
- Baking Your Holiday Kitchen Sink Cookies to Perfection
- Tips for Achieving Chewy Cookies Recipe Texture
- Storing and Reheating Your Kitchen Sink Cookies
- Frequently Asked Questions About These Customizable Cookies
- Serving Suggestions for Dessert Overload Treats
- Final Thoughts on Your Kitchen Command Over the Kitchen Sink Cookies
Why This is the Best Kitchen Sink Cookie Recipe (Ultimate Mix-In Cookies)
The secret to the Best Kitchen Sink Cookie Recipe isn’t just throwing things in; it’s making sure the base dough can handle the weight and flavor of all those bits and bobs! We are aiming for that perfect marriage: centers that pull apart soft and chewy, while the edges have a satisfying snap. That balance between the sweet chips and the salty pretzels and potato chips is what makes these Sweet and Salty Cookies so addictive. I spent ages testing the wet-to-dry ingredient ratio here. If you don’t have enough structure, all that extra weight makes the cookies spread too thin or turn crumbly. If you are looking for baseline cookie perfection to build upon, make sure you check out my guide on the best chewy chocolate chip cookies recipe first!
Customizable Cookies: Making Your Own Ultimate Loaded Cookies
This is truly a case of No Rules Baking! While I love the holiday version with peppermint and festive M&Ms, this base framework handles anything you throw at it. If you aren’t baking for Christmas, swap those seasonal candies for chopped peanut butter cups or maybe some toasted pecans. That’s the beauty of these Customizable Cookies. You can dial back the salt entirely if you prefer super sweet treats, or you can lean heavily into the savory by adding extra crunch. It’s your kitchen command center, so go wild with your own unique combinations!
Gathering Ingredients for Your Kitchen Sink Cookies
Okay, I know these are supposed to be wild, but hear me out: even for Everything But The Kitchen Sink Cookies, we need precision in our foundation layers. You wouldn’t believe how much the small details count, especially when we’re about to dump pounds of mix-ins into the dough! We need to be super clear on our base ingredients so the final result stays wonderfully chewy and doesn’t just collapse under its own delicious weight.
Ingredient Breakdown and Preparation Notes
Before you even think about turning on the mixer, get your ingredients ready exactly as the list states. Pay extra close attention to the sugars—we need one full cup of *light brown sugar packed* firmly into the measuring cup for that moisture, and exactly two large eggs. The crunch elements demand pre-work, too! You’ll need to crush your pretzels and potato chips before measuring them out. Don’t just measure them whole; crush them down to a roughly pebble-sized texture. That way, they distribute evenly and give you that amazing sweet and salty hit in every single bite!
How to Prepare Epic Cookie Recipes: Step-by-Step Kitchen Sink Cookies
Now we get to the fun part: mixing! We are going to build these Epic Cookie Recipes layer by layer to make sure they hold up. First things first, get that oven set to 350 degrees Fahrenheit and line those baking sheets with parchment paper—don’t skip that, especially with so many wonderful things melting in there! Once the oven is warming up, we move to the mixing bowl. If you’re looking to streamline this whole process someday and make it even faster, I talk about how to turn this into a one-bowl cookie method in another post, but for this heavy batch, the separation is worth it!
Mixing Wet Ingredients and Dry Ingredients Separately
Start by creaming your softened butter with both sugars until it gets really pale and fluffy; this traps tons of air and is key for the texture. Then, beat in your eggs one by one, making sure each one is fully incorporated before you add the next. Don’t forget the vanilla! While that’s going, grab a separate bowl and whisk together your flour, baking soda, and salt. With these super loaded cookies, separating the dry ingredients ensures that the leavening agents are perfectly distributed, which helps lift all the heavy mix-ins evenly. Add the dry mixture to the wet mixture gradually, mixing only until *just* combined. You’re looking to keep that gluten development low and slow here.
Folding in the Mix-Ins for Cookie Recipe with Chips and Pretzels
This is where the chaos begins, but we need discipline! Grab all your amazing additions—the chips, the salty crunch, the M&Ms—and gently fold them into the dough with a sturdy spatula. I mean *gently*. You only want to mix these until you see the last streak of flour disappear and the mix-ins are just distributed. If you mix too long, you’ll overwork the dough, and suddenly your goal of a Chewy Cookies Recipe turns into a tough, hard cookie. Stop mixing when it seems *almost* fully combined; the residual mixing while scooping will finish the job. For the best visual proof that these are worthy of the name Cookie Recipe with Chips and Pretzels, press a few extra chocolate chips or a pretzel piece right on top of the dough balls before they hit the heat!
Baking Your Holiday Kitchen Sink Cookies to Perfection
Alright, the dough is ready, and it looks absolutely chaotic in the best possible way! Now we move to the actual baking, which requires focusing back in, even though the cookie itself is all about letting go. We preheated the oven earlier, right? We need a steady 350 degrees Fahrenheit for these monsters to set properly without flattening entirely. Remember those tips from the other recipes? If you want to see how the temperature affects texture, check out my guide on making soft gingerbread cookies recipe.
Drop your dough balls onto those parchment-lined sheets—and here’s where we make them look like a million bucks! Take a few of your best-looking mix-ins—maybe a whole pretzel curl or a pretty M&M—and gently press them right onto the top surface of each mound. This ensures that when they bake, you get that awesome visual punch that screams “loaded!”

Bake time is usually between 10 and 12 minutes. You want the edges of these Holiday Kitchen Sink Cookies to look set and just slightly golden, but the center should still look a little soft and puffy. Don’t overbake! They firm up once they come off the heat. If you want to see an example of how different mix-ins affect the look, check out this external inspiration here. Trust me, pulling them out when they look slightly underdone is the key to that amazing chewy texture we’re after.
Tips for Achieving Chewy Cookies Recipe Texture
Listen closely, because this is the make-or-break moment for any truly great drop cookie. We are striving for that magical Chewy Cookies Recipe profile—a crisp edge that gives way to a center that’s almost gooey. The biggest trick I use to control texture, especially in these overloaded kitchen sink cookies, is chill time. Seriously, don’t rush this! I know we want to eat them immediately, but covering that bowl and sticking it in the fridge for at least 30 minutes gives the flour time to hydrate and the fats to solidify.
When the dough is colder, it spreads less quickly in the oven. This means the cookies bake up thicker, which naturally leaves the middle wonderfully soft while the outside hits that perfect crisp point. Also, check your sugar ratio! We use more brown sugar than white sugar for a reason. That molasses in the brown sugar keeps the cookie softer longer. If you need a reminder on how I balance things perfectly for a classic soft base, check out my best chewy chocolate chip cookies recipe post. That methodology totally holds up here!
Storing and Reheating Your Kitchen Sink Cookies
These cookies are so packed with goodness that they hold up really well, which is great news for us! Once they are completely cool—and I mean totally cooled down so the residual heat isn’t creating steam—stow them away in an airtight container. I just keep mine right on the counter at room temperature. If you stack them with parchment or wax paper in between layers, they won’t stick together, which is a small cheat to keep them nice.
Now, if you happen to have leftovers after a couple of days and they’ve lost that fresh-baked spring, don’t panic! To bring those amazing sweet and salty flavors right back to life, just grab one or two and give them 10 seconds in the microwave. That bursts the chocolate and softens the center right up. If you want that crisp edge back, a quick 3-minute trip in a warm 300-degree oven works wonders before they cool slightly again.
Frequently Asked Questions About These Customizable Cookies
It’s normal to have questions when you’re experimenting this much with one recipe! These kitchen sink cookies are wonderful because they adapt, but sometimes you need a little clarification on the rules versus the fun suggestions. Here are the things I get asked most often about balancing the chaos in these Customizable Cookies. If you have other brilliant ideas for how to make these treats even better, I’d love for you to save your favorites and maybe try a batch of easy maple fudge while you’re at it!
Can I make these Kitchen Sink Cookies without pretzels or chips?
Absolutely, you can! If you’re not looking for the full Sweet and Salty Cookies experience, just leave those out. But here’s the crucial thing: when you remove salted elements, you need to balance the flavor profile elsewhere so the cookie doesn’t taste flat. I usually replace the volume of the missing chips and pretzels with extra chocolate chips—maybe a mix of milk and dark—or double up on your favorite candies. That way, you keep the flavor intensity high without the sodium hit.
How do I make these Christmas Loaded Cookies look more festive?
This is where we really lean into the holiday fun! If you’re making these Christmas Loaded Cookies, presentation counts. You can mix festive sprinkles, like sanding sugars or specific colored jimmies, right into the dough. But for the biggest impact, take a few of your prettiest red, green, or white candies, or perhaps a chunk of crushed peppermint bark, and gently press them onto the very top of the dough balls right before they go into the oven. When they bake, those pops of color really shine through!
Can I freeze the dough for these Ultimate Mix-In Cookies?
Yes, and I highly recommend it! Making dough ahead is key for easy weeknight baking. For these Ultimate Mix-In Cookies, roll the dough into balls and lay them out single file on a baking sheet. Pop that sheet into the freezer until the balls are completely firm—this keeps them from squishing together. Once they are frozen solid, transfer them to a freezer-safe bag. When you decide you need cookies, just bake them straight from frozen, but add about 2 to 4 extra minutes to the baking time until they look set on the edges.
Serving Suggestions for Dessert Overload Treats
Because these Dessert Overload Treats are so intensely flavorful and packed with everything but the kitchen sink, you don’t need much on the side! When they are fresh out of the oven—still warm with that beautiful melt happening inside—they are practically a meal on their own. Honestly, a tall glass of ice-cold milk is my number one suggestion. If you want to skip the store-bought stuff, I have a fantastic quick homemade chocolate milk recipe that makes the dunking experience even better.
If you are serving these after a big holiday meal, skip the extra complicated desserts. These cookies satisfy that craving all by themselves! A small scoop of high-quality vanilla bean ice cream on the side is amazing for contrast, or just set them out on a platter alongside some fresh coffee. For more holiday presentation ideas, you can look at inspiration from others here: In Bloom Bakery has some cute ideas, too!
Final Thoughts on Your Kitchen Command Over the Kitchen Sink Cookies
Well, you did it! You took command of the pantry and created something truly epic with these kitchen sink cookies. Before you go, I absolutely need to know what wild combination you settled on! Drop your favorite mix-ins—the weirder the better—in the comments below so we can all get inspired. And hey, if these cookies brought you joy, please hit that five-star rating right above this section. Happy baking until we meet again at our contact page!
PrintThe Ultimate Customizable Kitchen Sink Cookies (Holiday Edition)

Make these epic, everything-but-the-kitchen-sink cookies packed with sweet, salty, and crunchy mix-ins. This recipe is fully customizable for any occasion, but shines as a festive Christmas loaded cookie treat.
- Prep Time: 20 min
- Cook Time: 12 min
- Total Time: 32 min
- Yield: 24 cookies 1x
- Category: Dessert
- Method: Baking
- Cuisine: American
- Diet: Vegetarian
Ingredients
- 1 cup (2 sticks) unsalted butter, softened
- 1 cup packed light brown sugar
- 1/2 cup granulated sugar
- 2 large eggs
- 1 tablespoon vanilla extract
- 2 1/4 cups all-purpose flour
- 1 teaspoon baking soda
- 1/2 teaspoon salt
- 1 cup semi-sweet chocolate chips
- 1 cup white chocolate chips
- 1 cup crushed pretzels
- 1 cup crushed potato chips
- 1 cup holiday M&M’s or seasonal candies
- 1/2 cup chopped peppermint bark (optional, for holiday version)
Instructions
- Preheat your oven to 350 degrees Fahrenheit. Line baking sheets with parchment paper.
- In a large bowl, cream together the softened butter, brown sugar, and granulated sugar until the mixture is light and fluffy.
- Beat in the eggs one at a time, mixing well after each addition. Stir in the vanilla extract.
- In a separate bowl, whisk together the flour, baking soda, and salt. Gradually add the dry ingredients to the wet ingredients, mixing on low speed until just combined. Do not overmix.
- Fold in all your mix-ins: chocolate chips, white chocolate chips, crushed pretzels, crushed potato chips, M&M’s, and peppermint bark if using. Mix until they are evenly distributed throughout the dough.
- Drop rounded tablespoons of dough onto the prepared baking sheets, spacing them about 2 inches apart. For best results, press a few extra mix-ins onto the tops of the dough balls.
- Bake for 10 to 12 minutes, or until the edges are set and lightly golden brown. The centers should still look slightly soft for a chewy cookie.
- Let the cookies cool on the baking sheet for 5 minutes before transferring them to a wire rack to cool completely.
Notes
- For the chewiest centers and crispiest edges, chill the dough for at least 30 minutes before baking.
- This recipe is highly customizable. Feel free to substitute any mix-in for your favorite candy, nuts, or cereal to create your own ultimate loaded cookies.
- To make this a one-bowl cookie recipe, combine the dry ingredients directly into the wet ingredients after creaming the butter and sugars, mixing carefully to avoid overdeveloping the gluten.
- If you prefer a sweeter cookie, omit the pretzels and chips and add more chocolate or candy.
Nutrition
- Serving Size: 1 cookie
- Calories: 220
- Sugar: 18g
- Sodium: 150mg
- Fat: 13g
- Saturated Fat: 8g
- Unsaturated Fat: 5g
- Trans Fat: 0g
- Carbohydrates: 25g
- Fiber: 1g
- Protein: 3g
- Cholesterol: 35mg