
Some of life’s absolute best moments are tied to that feeling of biting into something perfectly crunchy that melts into gooey comfort on the inside, right? When I think about true comfort food finger food, my mind immediately goes to the king of satisfying snacks: the Italian rice balls, or Arancini. Now, I know the term ‘rice balls’ covers everything from Japanese onigiri to Korean shapes, but today, we are focusing on making the Ultimate Crispy Arancini Rice Balls with Mozzarella Center. This recipe channels that spirit of creating memorable food that my family always cherished. Trust me when I say, mastering these golden spheres is easier than you think at Cookery Command.
- Why You Will Make These Ultimate Crispy Rice Balls Again and Again
- Essential Ingredients for Perfect Italian Stuffed Rice Balls
- Step-by-Step Instructions for Homemade Rice Balls
- Tips for Success Making the Best Arancini Recipe
- Variations: From Italian Stuffed Rice Balls to Savory Asian Rice Shapes
- Storage and Make Ahead Appetizers with Rice Balls
- Serving Suggestions for Your Comfort Food Finger Food
- Frequently Asked Questions About Making Rice Balls
- Estimated Nutritional Data for Cheesy Rice Balls
- Share Your Ultimate Crispy Rice Balls Experience
Why You Will Make These Ultimate Crispy Rice Balls Again and Again
I promise, these aren’t just *another* recipe cluttering your bookmarks. These cheesy rice balls hit such a perfect internal/external balance that they become your default party snack. You’ll see why they earn their keep!
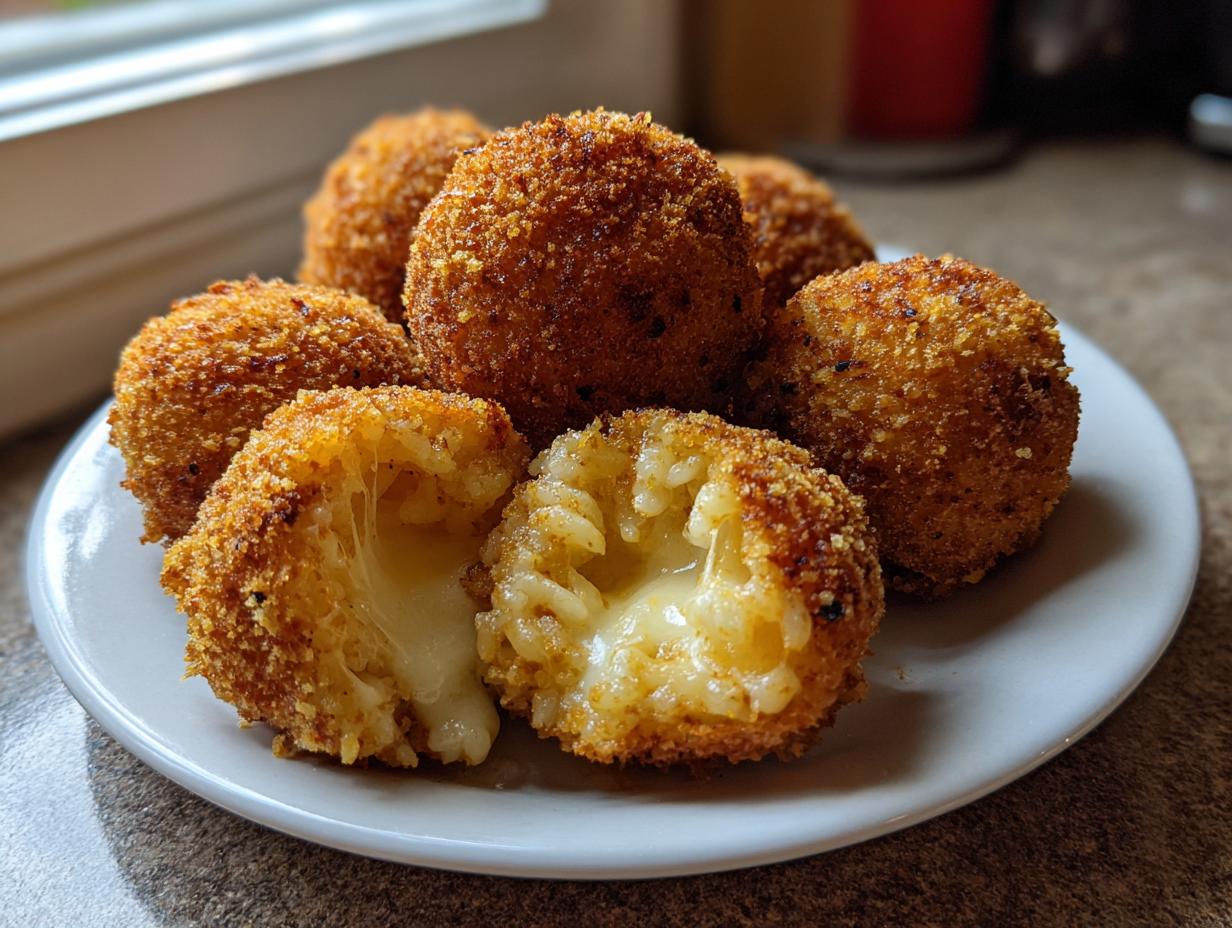
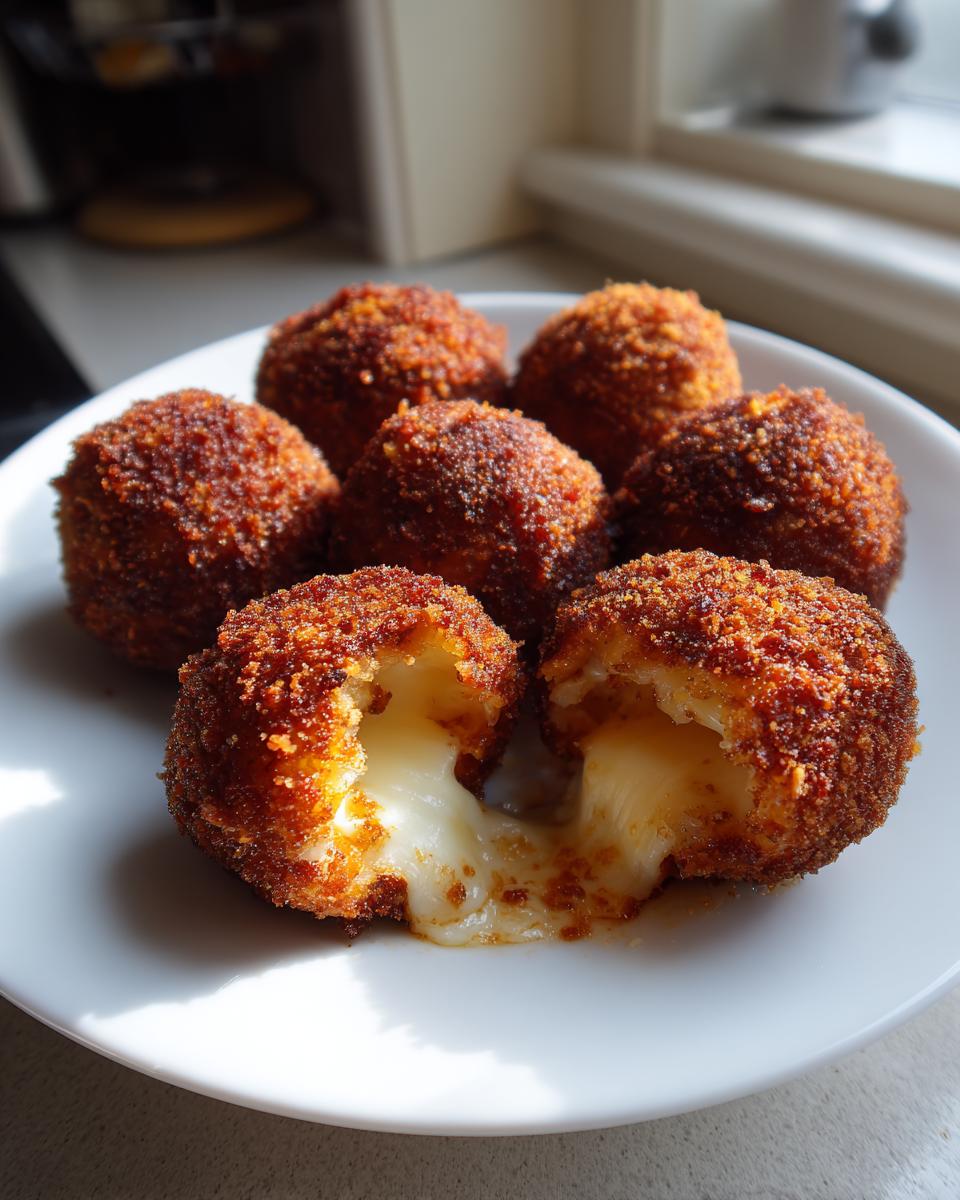
- That Texture Contrast: You get the crunchiest exterior you’ve ever had, completely giving way to that gorgeous, molten mozzarella center. It’s pure satisfaction.
- Leftover Magic: This is honestly an easy rice ball recipe because it relies on day-old, chilled risotto—a great way to give last night’s dinner new life.
- Crowd-Pleaser Guaranteed: They are designed to be comfort food finger food. Seriously, load them up on a platter, and watch them disappear. Find more easy party snacks here: easy appetizers and snacks.

Essential Ingredients for Perfect Italian Stuffed Rice Balls
Getting the right texture hinges entirely on what you bring to the table, ingredient-wise, before we even look at the pot for frying. For these ultimate crispy rice balls, you need quality components ready to go. Most importantly, you absolutely must have your risotto chilled solid. I mean it—cold rice holds its shape beautifully when you try to mold it around that mozzarella core. Don’t even think about using fresh, warm risotto here; it will turn into a sad, cheesy mess.
For the Cheesy Rice Balls
These are the foundational items that create the soft, savory interior of your homemade rice balls.
- 2 cups leftover cooked risotto (your leftover Parmesan or even saffron risotto works like a dream!)
- 4 ounces fresh mozzarella, cut into 1/2-inch cubes (make sure they are roughly the same size!)
- Salt and black pepper to taste—you want the rice nicely seasoned before frying.
For the Crispy Breading Station
This setup is what gives you that signature golden brown rice spheres exterior. It’s a classic three-step process that locks everything in tight.
- 1/2 cup all-purpose flour
- 2 large eggs, beaten well (these are your ‘glue’)
- 1 1/2 cups fine dry breadcrumbs (I use Panko sometimes, but fine crumbs make a denser crust)
- 1/4 cup grated Parmesan cheese (we mix this right into the breadcrumbs for extra flavor!)
And finally, you’ll need plenty of vegetable oil set aside for frying. Don’t skimp, or you’ll end up with sad, flattened snacks instead of true, beautiful rice balls.
Step-by-Step Instructions for Homemade Rice Balls
Okay, deep breath! This is where the magic happens, turning that cold, stubborn risotto into gorgeous, stuffed Arancini. Remember, technique is everything here, especially when dealing with that gooey center snack we all crave. If you’re nervous about frying, don’t worry—I have baked alternatives we’ll touch on later, but frying is truly what gives you that classic crispy fried appetizer shell. We must work efficiently, but patience in the shaping is vital!
Chilling and Forming the Gooey Center Snack
First things first: that risotto needs to be firm. I cannot stress enough how important that cold temperature is for structure! Take about two spoonfuls of that chilled rice and gently flatten it right in the palm of your clean, slightly damp hand. Now, nestle one of those creamy mozzarella cubes right in the middle. You need to gently coax the rice up and around the cheese, pinching the seams closed really well. Roll it carefully between your palms until you have a perfect, tight ball, about an inch and a half wide. If you don’t seal it well, you’ll have leaky messes instead of beautiful golden brown rice spheres later!
Achieving the Perfect Golden Brown Rice Spheres Coating
Now we move to the breading station. Set up your three bowls: flour, beaten eggs, and the breadcrumb/Parmesan mix. Take your nicely formed rice ball and dredge it completely in the flour first—just a light dusting, shake off the extra! Next, dip it straight into the egg mixture so it’s totally coated. The last, and maybe most important step, is rolling it firmly in the seasoned breadcrumbs. Don’t just roll it; I press lightly with my thumbs to make sure that crumb coating sticks everywhere. A firm coating means maximum crisp!
Frying Your Crispy Fried Appetizer
Time to heat the oil! You need about two inches of vegetable oil in a sturdy pot, heated precisely to 350°F (175°C). Please use a thermometer; if the oil is too cool, your rice balls will just soak it up and get greasy. Carefully drop just three or four balls in at a time—don’t overcrowd the pot, or the temperature will drop instantly! Let them fry for about 3 to 4 minutes. You’re looking for that deep, even golden brown color. Scoop them out right away with a slotted spoon and place them on a paper-towel-lined wire rack. Since you’re here learning technique, check out how we handle crispy potato cakes for another great idea: mashed potato cakes recipe easy.

Tips for Success Making the Best Arancini Recipe
Even though this is an easy recipe to follow, a few little expert secrets lift these homemade rice balls from good to absolutely unforgettable. First, let’s talk about that risotto. It *really* needs to be cold and still slightly stiff from being made the day before. The starch sets up perfectly, giving you the structure needed to handle the filling process.
Next, while 350°F is our magic frying temperature, I always recommend chilling those breaded rice balls for an extra 30 minutes before they even see the oil. It sounds redundant, I know, but trust me! That quick freeze helps glue that breadcrumb coating on so firmly that your mozzarella center has almost zero chance of escaping while frying. A tight seal means perfect, uninterrupted golden brown rice spheres!

For dipping later, you can’t go wrong with something tangy. If you’re feeling ambitious, whip up some Cowboy Butter dipping sauce—the rich spice pairs wonderfully with the creamy interior.
Variations: From Italian Stuffed Rice Balls to Savory Asian Rice Shapes
While my heart belongs firmly to these golden, fried Italian stuffed rice balls, I know the search term ‘rice balls’ brings up a whole world of incredible variations. It’s my job here at Command Central to make sure you feel confident exploring them all! So, let’s talk about how you can twist this Arancini recipe, or look at completely different styles, like those wonderful savory Asian rice shapes.
If you want to stick with the Italian theme but change the filling? Go for it! You can stir cooked, seasoned ground sausage or beef right into your leftover risotto batch before you chill it. Or, for a veggie punch, fold in some sautéed spinach or sweet peas for color and texture contrast against that gooey mozzarella. These swaps still keep you firmly in the Arancini family.
But we need to acknowledge the other giant in the room when people search for rice balls. Sometimes folks are craving the soft, portable shapes perfect for a packed lunch rather than a deep-fried appetizer.
Making Japanese Onigiri Tutorial Alternatives
Japanese onigiri is a totally different beast, flavor-wise and texture-wise, but they are just as comforting! Think less crispy fried appetizer and more soft, grilled snack. Instead of starting with rich, fatty risotto, onigiri traditionally uses plain, slightly sticky short-grain rice, often seasoned with just a little salt. They are shaped into triangles or simple smooth rice balls and sometimes brushed with soy sauce or miso butter and grilled—that’s called Yaki Onigiri preparation.
The fillings are completely different too. Instead of mozzarella, you might see savory Asian rice shapes filled with classic things like tuna mayo or even Spam rice balls. It’s a fantastic, fast lunch idea, but it relies on a much milder rice base. If you’re ever looking to dive into that world next, I have some great resources on Asian wraps and rolls, like this easy tuna kimbap recipe, which uses similar sticky rice concepts.
For our purposes today, though, we are sticking to the rich, comforting, crispy Italian version. But hey, now you know where to look when you need a quick lunch idea rice alternative tomorrow!
Storage and Make Ahead Appetizers with Rice Balls
One of the greatest things about preparing our ultimate crispy rice balls is that they are fantastic for making ahead! As a home cook running Command Central, I’m always looking for ways to prep for busy evenings or unexpected guests. Luckily, these cheesy rice balls can be handled in a couple of stages.
You have two main make ahead options here. Option one is storing the rice balls *after* you’ve shaped them but *before* you bread them. Place those formed risotto spheres onto a baking sheet lined with parchment paper. Cover them tightly with plastic wrap and pop them in the fridge for up to 24 hours, or freeze them solid for up to a month. If freezing, you don’t even have to thaw them; just move them straight into the breading station when you’re ready.
Option two is storing the fully cooked, golden brown rice balls. Once they are totally cool, you can store them in an airtight container in the fridge for about three days. Just remember, the microwave is the enemy of crispiness here! If you microwave them, you’ll end up with soft, steamed rice balls, and that defeats the entire purpose of all that hard work getting them golden brown.
To reheat and bring back that amazing crunch you love, use the oven or, ideally, an air fryer. Preheat your oven to 375°F (190°C) and spread the leftovers on a wire rack set over a baking sheet. Bake for about 10 to 12 minutes, or until they are piping hot all the way through and that crust is singing again. If you are using the air fryer, 350°F for about 6 to 8 minutes works like a charm! This strategy keeps them perfect for snacking later, just like our easy baked jalapeno poppers recipe does for its crisp factor.
Serving Suggestions for Your Comfort Food Finger Food
These Italian stuffed rice balls are incredible right out of the fryer, but honestly, they need something bright and tangy to cut through all that wonderful richness. A classic Arancini is just begging for a dipping situation! I always set out at least two different choices because everyone seems to have a personal favorite way to enjoy these crispy fried appetizers.
The absolute traditional choice, and the one I fall for every time, is a simple, good San Marzano marinara sauce. But not the watery kind! You want a rich, slow-simmered sauce that coats the rice ball beautifully. Warm that up, put it in a little ramekin, and you are good to go. It’s savory, it’s bright, and it warms up that mozzarella center even more.
Now, if you want to jazz things up for a party—and I almost always do—you have to try a homemade aioli. A simple garlic aioli or a spicy ranch is unbelievably good. It gives you that creamy texture on top of the already creamy risotto. My go-to is an easy garlic version since it takes five minutes flat to whip up and pairs so well with cheese dishes. You can find my recipe for an easy 5-minute creamy garlic aioli here.
Remember, since these are such substantial powerhouses of flavor, you don’t need a huge spread. Just stack those golden spheres high on a platter, set out your marinara and aioli, and watch them disappear. They are the perfect comfort food finger food!
Frequently Asked Questions About Making Rice Balls
When you’re working hard to get those perfect, crispy fried appetizers right, sometimes little questions sneak up on you. Don’t worry; these are super common concerns when making homemade rice balls, especially the Italian stuffed rice balls kind! I gathered the most frequent questions I get about this recipe.
Can I use freshly made risotto instead of leftover rice balls?
Oh, I see this one all the time! While you technically *can* use freshly made risotto, please, please try to resist! The structural integrity of the chilled, day-old risotto is what saves you from disaster here. When risotto cools down completely, say, overnight in the fridge, the starches firm up and bind together. This gives you a rice mixture that is stiff enough to flatten, mold around that mozzarella cube, and hold its nearly perfect spherical shape through the breading process and into the hot oil. Fresh risotto is too loose—it’s just too much moisture, and you risk having your balls fall apart right when they hit the 350°F oil. Seriously, make the risotto one day and fry them the next!
What is the best oil temperature for frying these rice balls?
Temperature control is the difference between a delicious outcome and a greasy mess, my friends! For these ultimate crispy rice balls, we are aiming for exactly 350°F (175°C). If your oil is too cold—say, under 325°F—the breading soaks up fat like a sponge before the heat sets the crust, leaving you with heavy, soggy rice balls instead of that satisfying crunch. On the flip side, if your oil is smoking hot, maybe over 375°F, the exterior will instantly burn to a dark brown before the mozzarella center even gets a chance to warm up and melt. Keep that thermometer handy; it’s the key to truly golden brown rice spheres.
How do I ensure the mozzarella center stays gooey and doesn’t leak?
This is all about the seal! When you flatten that portion of rice in your hand, make sure the edges are thin enough to meet nicely over the cheese cube, but thick enough that you can press them together securely. You want to create a seamless skin completely covering the cheese. After you seal the ball, gently roll it once or twice between your palms to smooth out any major creases or weak spots. My best extra trick for preventing leaks with this gooey center snack is to take those sealed balls and put them into the freezer for about 30 minutes before you start the breading process. That brief chill really locks the shape down and prevents any ‘sweating’ cheese from interfering with your breadcrumb coating!
Estimated Nutritional Data for Cheesy Rice Balls
When we put in the effort to create something truly delicious like these homemade rice balls, it’s only fair to have an idea of what we’re dealing with nutritionally! I always map out these figures because food should be enjoyed mindfully, even when it’s the best arancini recipe ever. Remember, since these are fried comfort food finger food, the numbers reflect that golden, crispy goodness.
Keep in mind that these values are strictly estimates based on the ingredients listed and assumes you are frying them (Method: Frying, Option A). If you opt for a baked alternative, your fat and calorie count will certainly shift down a bit!
- Serving Size: 2 rice balls
- Calories: 280
- Fat: 15g
- Saturated Fat: 6g
- Carbohydrates: 28g
- Protein: 10g
- Cholesterol: 75mg
- Sodium: 350mg
- Fiber: 1g
Enjoying these occasionally as part of a balanced diet is totally fine by me! The joy they bring to a party completely outweighs worrying too much about the stats. Just make sure to pair them with something light next time!
Share Your Ultimate Crispy Rice Balls Experience
Now that you’ve mastered the technique for making these incredible, cheesy rice balls, I truly want to hear how they turned out! Did you achieve that perfect golden brown rice spheres crust? Did the mozzarella center goo exactly as planned? Don’t keep that success story to yourself!
Please take a moment to leave a rating right below the recipe card—it helps other home cooks know they can trust this recipe, just like I trust all of yours. And if you snapped a picture of your perfect batch, I would absolutely love to see it! Tag us online so I can properly admire your command in the kitchen.
Creating a community where we can all share our favorite comfort food finger food and troubleshoot challenges is why Cookery Command exists. We’re all about building confidence around your home cooking, one fantastic appetizer at a time. If you have questions about swapping fillings or want to share your take on the best arancini recipe, drop it in the comments.
Don’t forget, if you need any specific help or just want to say hello, you can always reach out directly via the Contact Page. And if you want to see what another wonderful fellow cook made with their ultimate cheesy Italian rice balls, check out this delicious version here!
PrintUltimate Crispy Arancini Rice Balls with Mozzarella Center

Make perfect Italian rice balls that are crispy outside and have a gooey, cheesy center. This recipe guides you through creating this classic comfort food finger food.
- Prep Time: 25 min
- Cook Time: 15 min
- Total Time: 40 min
- Yield: About 12 servings 1x
- Category: Appetizer
- Method: Frying
- Cuisine: Italian
- Diet: Vegetarian
Ingredients
- 2 cups leftover cooked risotto (preferably Parmesan or saffron flavor)
- 4 ounces fresh mozzarella, cut into 1/2-inch cubes
- 1/2 cup all-purpose flour
- 2 large eggs, beaten
- 1 1/2 cups fine dry breadcrumbs
- 1/4 cup grated Parmesan cheese (for breading)
- Vegetable oil, for frying
- Salt and black pepper to taste
Instructions
- Chill the cooked risotto thoroughly, at least 2 hours or until firm.
- Take about 2 tablespoons of chilled risotto and flatten it in your palm. Place one mozzarella cube in the center. Gently form the rice around the cheese, rolling it into a tight, uniform ball about 1 1/2 inches in diameter. Repeat with the remaining risotto and cheese.
- Set up a standard breading station: place flour in one shallow dish, beaten eggs in a second, and a mix of breadcrumbs and Parmesan cheese in a third.
- Dredge each rice ball first in the flour, shaking off excess. Dip it completely into the egg mixture. Finally, roll it firmly in the breadcrumb mixture, pressing lightly to ensure full coverage.
- Heat about 2 inches of vegetable oil in a deep pot or Dutch oven to 350°F (175°C). Use a thermometer to maintain the temperature.
- Carefully lower 3 or 4 rice balls into the hot oil, ensuring you do not overcrowd the pot. Fry for 3 to 4 minutes, turning occasionally, until they are deep golden brown and crispy.
- Remove the fried rice balls with a slotted spoon and place them on a wire rack lined with paper towels to drain excess oil. Season lightly with salt immediately.
- Serve the homemade rice balls hot so the mozzarella center is melted and gooey.
Notes
- For a less messy process, chill the formed rice balls for an additional 30 minutes before breading and frying.
- If you prefer a baked alternative to frying, place the breaded balls on a baking sheet, spray lightly with cooking oil, and bake at 400°F (200°C) for 15 to 20 minutes, turning halfway, until golden brown.
- Use leftover risotto from a previous meal; the rice must be cold and slightly stiff to hold its shape.
Nutrition
- Serving Size: 2 balls
- Calories: 280
- Sugar: 1
- Sodium: 350
- Fat: 15
- Saturated Fat: 6
- Unsaturated Fat: 9
- Trans Fat: 0
- Carbohydrates: 28
- Fiber: 1
- Protein: 10
- Cholesterol: 75