
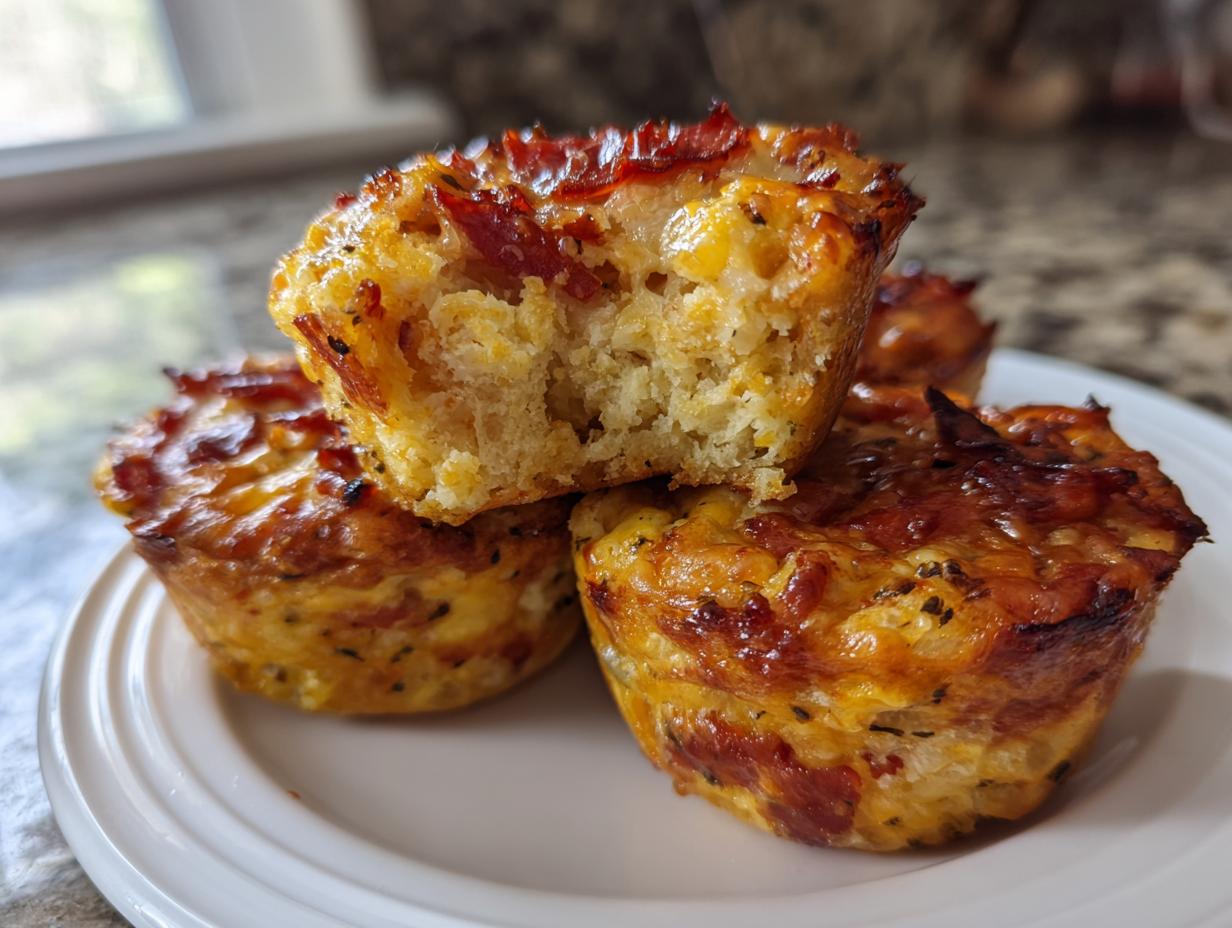
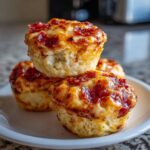
If you feel like you spend half your life packing lunches that come back half-eaten, trust me, I get it. We need food that travels well, freezes like a dream, and actually tastes amazing when reheated or even eaten cold. That’s why I spent weeks perfecting my recipe for pizza muffins. These aren’t just glorified slices of pizza baked in a liner; they are perfectly balanced, savory muffins bursting with mozzarella and pepperoni goodness.
As someone who values quick, reliable snacks for family lunches, I perfected this pizza muffins recipe to deliver that huge pizza flavor in a convenient, bite-sized format. They come together faster than ordering takeout, and the cleanup is honestly ridiculously minimal. Get ready to solve your snack dilemma!

- Why You Will Love These Easy Pizza Muffins
- Essential Ingredients for Perfect Pizza Muffins
- Step-by-Step Guide to Making Pizza Muffins
- Expert Tips for Perfect Pizza Muffins Every Time
- Variations for Your Kid Friendly Pizza Snack
- Storing and Reheating Lunchbox Pizza Bites
- Frequently Asked Questions About Pizza Muffins
- Nutritional Estimates for Your Pizza Muffins
- Share Your Experience Making These Pizza Muffins
Why You Will Love These Easy Pizza Muffins
Honestly, these little morsels solve so many dinner or lunchtime problems. I keep a batch stashed in the freezer constantly because they are just that useful. If you’re tired of sad sandwiches, you need these in your rotation immediately.
- Kid Approved, Parent Approved: They taste like pizza! That’s the magic combo right there. They disappear fast whether they are hot out of the oven or packed later in the day.
- Perfect Portability: These are sturdy little bites, meaning they don’t get squished in a lunchbox like a regular slice. They are ideal for school, picnics, or road trips.
- Speedy Prep Time: Seriously, we are talking 15 minutes of hands-on prep. You can mix these up right after school lets out and still have them baked before dinner time.
- Fantastic for Freezing: They freeze beautifully, which is a lifesaver when you need a quick grab-and-go breakfast or lunch option. Cool them completely first, though!
- Portion Control is Built-In: Since they are mini pizza muffins, you don’t have to cut anything. Everyone gets exactly one, which is great for portion checking.
- Simple Ingredient List: Nothing fancy or hard to find here—just pantry staples getting a major flavor upgrade.
Essential Ingredients for Perfect Pizza Muffins
When making these savory snacks, using the right measurements is critical. We aren’t aiming for a bread texture here; we want that perfect, slightly cakey lift that holds all the cheesy, meaty goodness without falling apart. Trust me, every ingredient plays a role in making these the best mini pizza muffins you’ll ever whip up. Don’t substitute the baking powder, or they won’t rise right!
- 1 3/4 cups all-purpose flour
- 1 tablespoon baking powder
- 1/2 teaspoon salt
- 1/2 teaspoon dried oregano
- 1/4 teaspoon garlic powder
- 1 large egg
- 1 cup milk (whole milk is my personal favorite for richness!)
- 1/4 cup vegetable oil
- 1 cup shredded mozzarella cheese
- 1/2 cup pizza sauce for topping
- 1/2 cup mini pepperoni, chopped
Step-by-Step Guide to Making Pizza Muffins
This process is so straightforward, which is why these are perfect for weeknights. The secret to making sure these taste like actual pizza and not just savory bread lies in how you mix things, especially avoiding that over-mixing trap. I learned that lesson the hard way; nobody likes a tough muffin! If you want guaranteed fluffy results every time, follow these steps from the Cookery Command kitchen.
Preparing Dry and Wet Bases for Your Pizza Muffins
First things first, get that oven heating up to 400 degrees Fahrenheit and line that muffin tin—don’t skip this step or you’ll be scraping things later! Grab your big bowl and whisk together everything dry: the flour, baking powder, salt, oregano, and garlic powder. Now, in a separate, slightly smaller bowl, whisk your egg, milk, and oil until they look happy together. Pour those wet ingredients right into the dry bowl.
Here’s the crucial part for amazing pizza muffins: Mix until *just* combined. You should still see a few streaks of flour—that’s okay! Stop mixing right there. If you keep stirring to eliminate every lump, you’ll activate too much gluten, and your muffins will be tough instead of tender.
Folding in Toppings and Filling the Pans for Cheesy Pizza Cupcakes
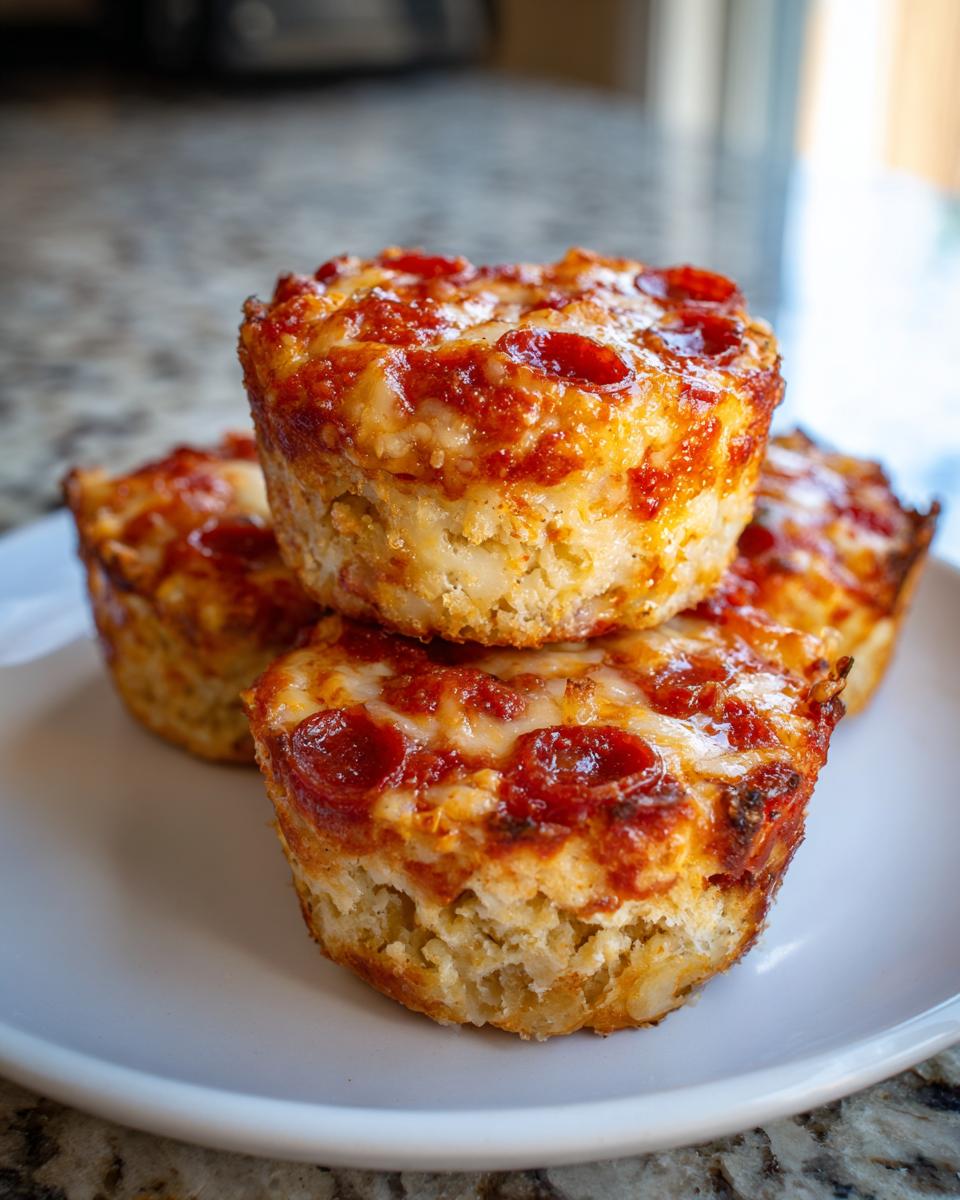
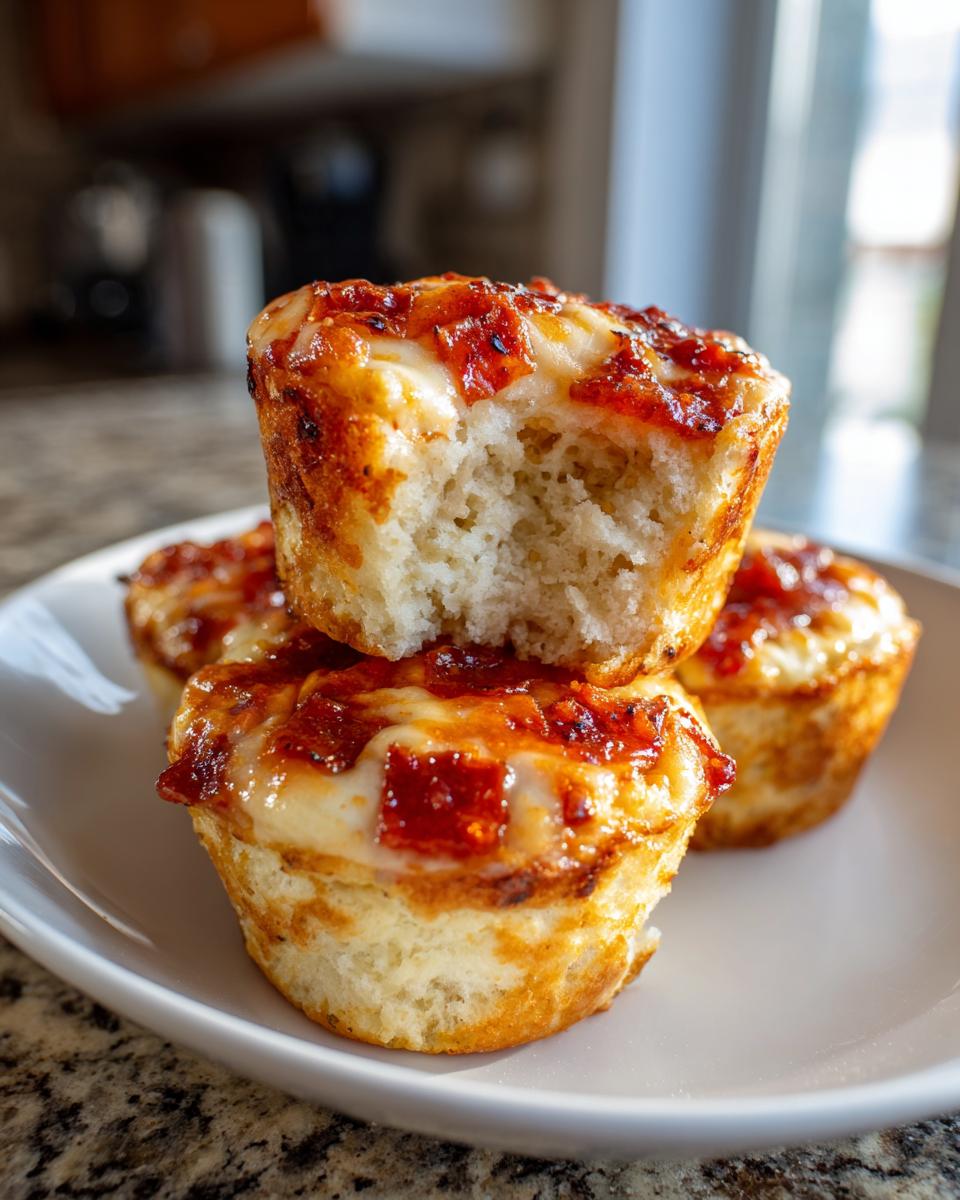
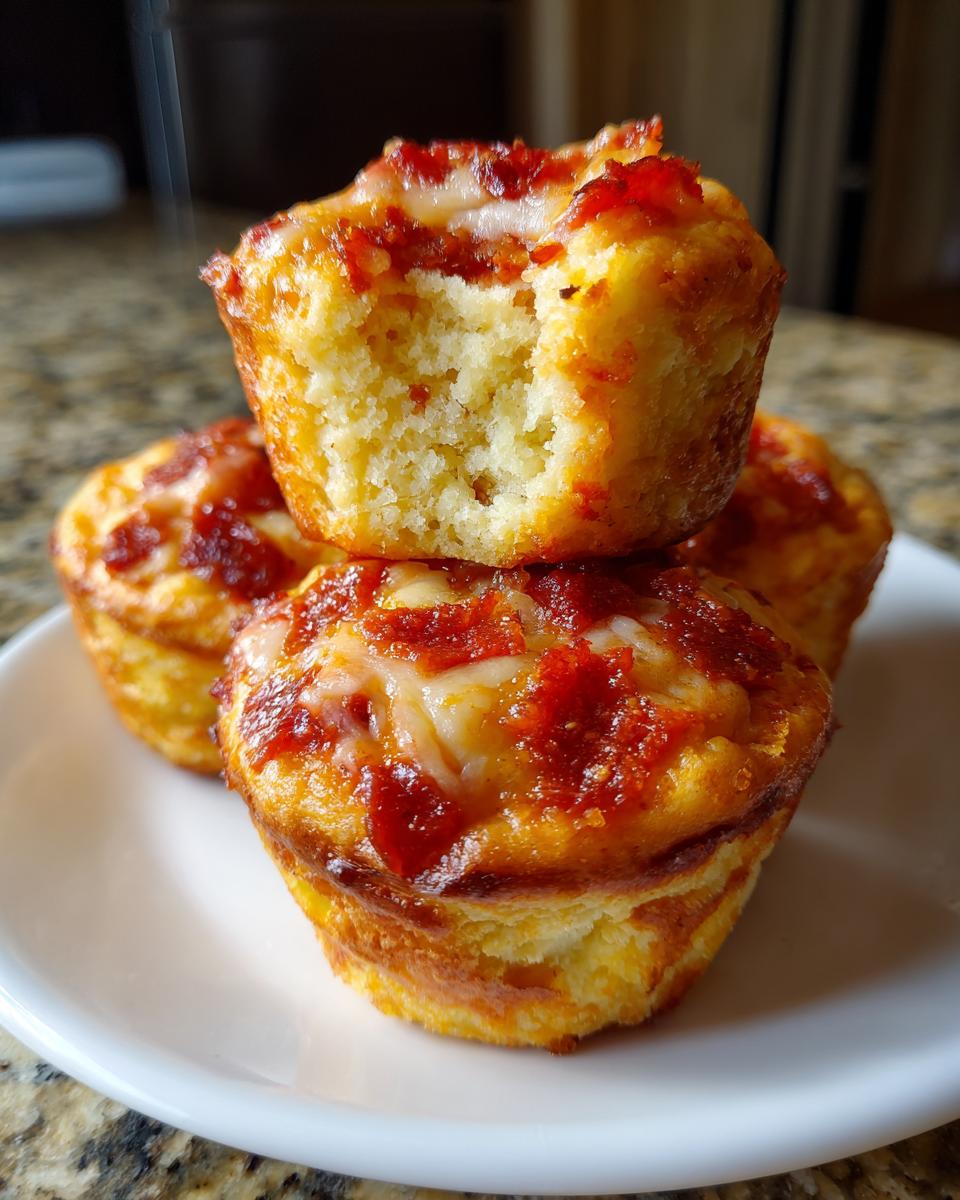
Now we bring in the good stuff! Using a rubber spatula, gently fold in your shredded mozzarella cheese and that chopped pepperoni. You want to incorporate these without knocking out all the air you just tried to trap in the batter. Once it’s mixed in, spoon your vibrant batter evenly into those prepared cups, filling them about two-thirds of the way up.
For the final touch that makes them look like little pizza tops, plop just about one teaspoon of your pizza sauce right on top of each batter mound. This gives you that picture-perfect look once the cheesy pizza cupcakes bake up.
Baking and Cooling Your Mini Pizza Muffins
Time for the oven! Slide those tins in and bake them at 400 degrees for about 15 to 18 minutes. To check if your mini pizza muffins are done, insert a toothpick right into the center of one—if it comes out clean, they are ready to go. Don’t rush them out of the tin immediately; let them sit there for about five minutes to firm up a bit. Then, carefully move them over to a wire rack to cool completely. If you try to rush the cooling, they can sometimes steam themselves soggy.
Expert Tips for Perfect Pizza Muffins Every Time
Now that you know the basic steps for these pizza muffins, let me give you the insider knowledge that takes them from good to absolutely legendary. These are the little details I picked up watching my mom bake hundreds of these for school fundraisers over the years. They really do make a difference in texture and flavor.
First, let’s talk milk. The recipe calls for regular milk, but if you want the absolute richest flavor and a slightly tighter crumb structure, please, please swap it for whole milk if you have it. That extra fat content really contributes to a luxurious mouthfeel. It’s one of those simple swaps that pays off huge!
Another common issue with veggie-heavy muffins is that they get soggy on the bottom, so here’s my trick for preventing that. Make sure those paper liners are firmly settled in the tin—a loose liner lets moisture steam underneath. Also, when you are cooling them, don’t let them rest in the hot pan for more than five minutes. Heat trapped in the metal pan will continue to cook the bottoms and can make them gummy. Getting them straight onto a good wire rack ensures air circulates all around.
If you are worried about the pepperoni sinking to the bottom (which happens!), try this trick: Toss your chopped pepperoni pieces with about a tablespoon of the dry flour mixture before you fold them into the batter. That light coating acts like a little non-stick barrier, helping the meat stay suspended evenly throughout your mini pizza muffins as they bake up. It’s a game-changer!
Also, when you drop the batter into the cups, try to get the sauce right on top, just as we did in the instructions. If you try to stir the sauce *into* the batter, you risk overmixing again, and you’ll lose that lovely visual cue of little pizza dots on top that kids love.
Variations for Your Kid Friendly Pizza Snack
While the classic pepperoni version is certainly my go-to for speed and universal appeal, you should absolutely feel free to customize these savory bites! That’s the beauty of a great base recipe—it’s ready for whatever you have in the fridge. Think of these pizza muffins as an edible blank canvas waiting for your family’s favorite pizza combinations.
Don’t just stick to pepperoni! If you have picky eaters, this is a fantastic stealth-veggie opportunity. You can finely dice things like bell peppers, mushrooms, or even cooked, very finely chopped spinach and fold them right in with the cheese and meat. If you add something very watery, like sautéed onions, make sure you squeeze out every drop of liquid first, or you risk throwing off the moisture balance.
For the cheese, while mozzarella is king for that perfect melt, mixing in a little sharp cheddar or even some shredded Parmesan will add a fantastic salty depth. I love mixing half mozzarella and half shredded smoked provolone when I’m making them for myself because the smokiness is just amazing with the oregano!
If you have vegetarians at the table, swapping out the pepperoni is easy. You can use browned, crumbled Italian sausage if you want meat, but for a vegetarian option, try using finely chopped sun-dried tomatoes for a tangy chew, or perhaps some black olives. Just remember to chop everything small so it integrates nicely into the batter.
You can even change the sauce! Try using a pesto base instead of tomato sauce for the topping if that’s something your family enjoys. Just use the same tiny amount so they don’t turn soggy. Having these kinds of options means you can make a batch of kid friendly pizza snack variations all at once!
Storing and Reheating Lunchbox Pizza Bites
One of the absolute best things about these lunchbox pizza bites is how well they keep. If you’re like me, you immediately want to make a double batch because you know morning packing time is way less stressful when you have ready-made snacks waiting.
The most important thing, and I cannot stress this enough, is that they must be completely cool before they go anywhere near a container. If you wrap them while they are even slightly warm, that residual heat turns the moisture into steam inside the container, and boom—soggy bottoms, and nobody wants that!
For refrigeration, just pop them into a standard airtight container. They stay perfectly delicious in the fridge for about four or five days. They are perfectly fine cold, which is great for rushed mornings, but I know most kids prefer them warm, so we’ll cover reheating in the FAQ.
Now, let’s talk about the freezer, where these things really shine for busy parents. These mini pizza muffins freeze like little pockets of sunshine waiting for a busy day. Allow them to cool down fully on the rack—I usually let them sit for at least an hour after baking. Once they are completely room temperature, arrange them in a single layer on a baking sheet to flash freeze for about an hour. This stops them from sticking together.
After that, transfer those beautiful, frozen orbs into a heavy-duty zip-top freezer bag or a sturdy airtight container. If you use a bag, make sure to squeeze out as much air as possible before sealing. When stored correctly, they are fantastic for up to three months. Having these ready means your next few weeks of quick snacks are totally taken care of!
Frequently Asked Questions About Pizza Muffins
When I first started making these, I had a million questions too! It’s only natural when you’re trying to fit something new into the crazy schedule of packing freezer lunches. I’ve pulled together the most common things readers ask me about these savory little bites.
Can I make these pepperoni pizza muffins ahead of time?
Oh, absolutely! That is half the point of them, honestly. You can make a huge batch on Sunday, let them cool completely, and store them in an airtight container on your counter for 2-3 days, or pop them straight into the freezer for future use. I find that making them ahead radically reduces my morning stress. Just remember my tip from the storage section: make sure they are room temperature before packaging them tightly!
What is the best way to reheat these easy pizza muffins?
This is important for texture! If you zap them in the microwave, they get super soft, almost spongy, which some kids don’t mind, but I find it loses that nice, slightly crispy edge. For the best results, I always recommend reheating your easy pizza muffins in a toaster oven or a conventional oven set to about 350 degrees Fahrenheit for about 5 to 7 minutes. That little bit of dry heat warms them through and crisps up the bottom crust perfectly.
Are these suitable for school lunchboxes if they contain meat?
Generally, yes, they are absolutely suitable for school lunches as they are self-contained and don’t require heating up at school. Because they are baked goods rather than a hot entrée, they hold up really well, even at room temperature for several hours. Since you are using chopped pepperoni, they are very sturdy on the go. Of course, always check your specific school district’s guidelines regarding packed meat items, especially around food safety temperatures, but these are extremely portable which is what matters for lunchboxes!
If you have any other burning questions about the process or if you tried out a new cheese blend, drop a comment below. We love hearing from you, and don’t forget to check out our other policies, like our Privacy Policy, if you have any concerns about site usage!
Nutritional Estimates for Your Pizza Muffins
I know lots of parents worry about what exactly is going into those little lunchboxes, and while these are way tastier than any packaged snack, it’s good to know the rough numbers. I ran these through the calculator, and these figures are a pretty solid estimate for one of these delicious pizza muffins.
Remember, these are just ballpark figures! If you use low-fat milk instead of whole milk, or maybe swap out the pepperoni for something lighter, those numbers are going to shift a little bit. These estimates are based on using standard, name-brand ingredients.
- Serving Size: 1 muffin
- Calories: 180
- Fat: 9g (with 3g saturated fat)
- Carbohydrates: 19g
- Protein: 6g
- Sodium: 350 mg
- Sugar: 2g
It’s a really good balance for a snack, giving the kids some necessary protein and carbs to get through the afternoon without loading them up with sugar like a lot of processed treats do. Pretty reasonable for something that tastes this much like Friday night pizza, right?
Share Your Experience Making These Pizza Muffins
Now that you have a perfect batch cooling on the rack, I genuinely want to know how they turned out for you! Did your kids devour them before you could even get them packed for the next day? These pizza muffins are one of those recipes that just feel like a win, so please don’t keep your success a secret!
If you followed the steps and found some extra little tricks that worked wonders in your own kitchen, drop a comment down below! I love reading about how you adapt things, whether you swap in smoked cheese or try grilling sausage instead of pepperoni. We’re all about sharing that kitchen command here at Cookery Command.
And hey, if you snap a picture of your beautiful, golden-brown lunchbox pizza bites ready for action, please share it on social media and tag us! Seeing your family enjoy these homemade snacks truly is the best reward. If you had any trouble at all or have a burning question that didn’t make the FAQ list, you can always reach out to us directly via the Contact page. Happy baking!
PrintEasy Pizza Muffins for Lunchboxes
Bite-size muffins packed with classic pizza flavor, perfect for snacks, parties, or packed lunches.
- Prep Time: 15 min
- Cook Time: 18 min
- Total Time: 33 min
- Yield: 12 muffins 1x
- Category: Snack
- Method: Baking
- Cuisine: American
- Diet: Vegetarian
Ingredients
- 1 3/4 cups all-purpose flour
- 1 tablespoon baking powder
- 1/2 teaspoon salt
- 1/2 teaspoon dried oregano
- 1/4 teaspoon garlic powder
- 1 large egg
- 1 cup milk
- 1/4 cup vegetable oil
- 1 cup shredded mozzarella cheese
- 1/2 cup pizza sauce
- 1/2 cup mini pepperoni, chopped
Instructions
- Preheat your oven to 400 degrees Fahrenheit. Line a 12-cup muffin tin with paper liners or grease well.
- In a large bowl, whisk together the flour, baking powder, salt, oregano, and garlic powder.
- In a separate medium bowl, whisk the egg, milk, and vegetable oil until combined.
- Pour the wet ingredients into the dry ingredients. Mix until just combined; do not overmix.
- Gently fold in the mozzarella cheese and chopped pepperoni.
- Spoon the batter evenly into the prepared muffin cups, filling each about two-thirds full.
- Top each muffin with about 1 teaspoon of pizza sauce.
- Bake for 15 to 18 minutes, or until a toothpick inserted into the center comes out clean.
- Let the muffins cool in the tin for a few minutes before transferring them to a wire rack to cool completely.
Notes
- These pizza muffins freeze well for quick lunch additions. Cool completely before freezing in an airtight container.
- You can substitute other pizza toppings like cooked sausage or diced bell peppers for the pepperoni.
- For a richer flavor, use whole milk instead of regular milk.
Nutrition
- Serving Size: 1 muffin
- Calories: 180
- Sugar: 2
- Sodium: 350
- Fat: 9
- Saturated Fat: 3
- Unsaturated Fat: 6
- Trans Fat: 0
- Carbohydrates: 19
- Fiber: 1
- Protein: 6
- Cholesterol: 30