

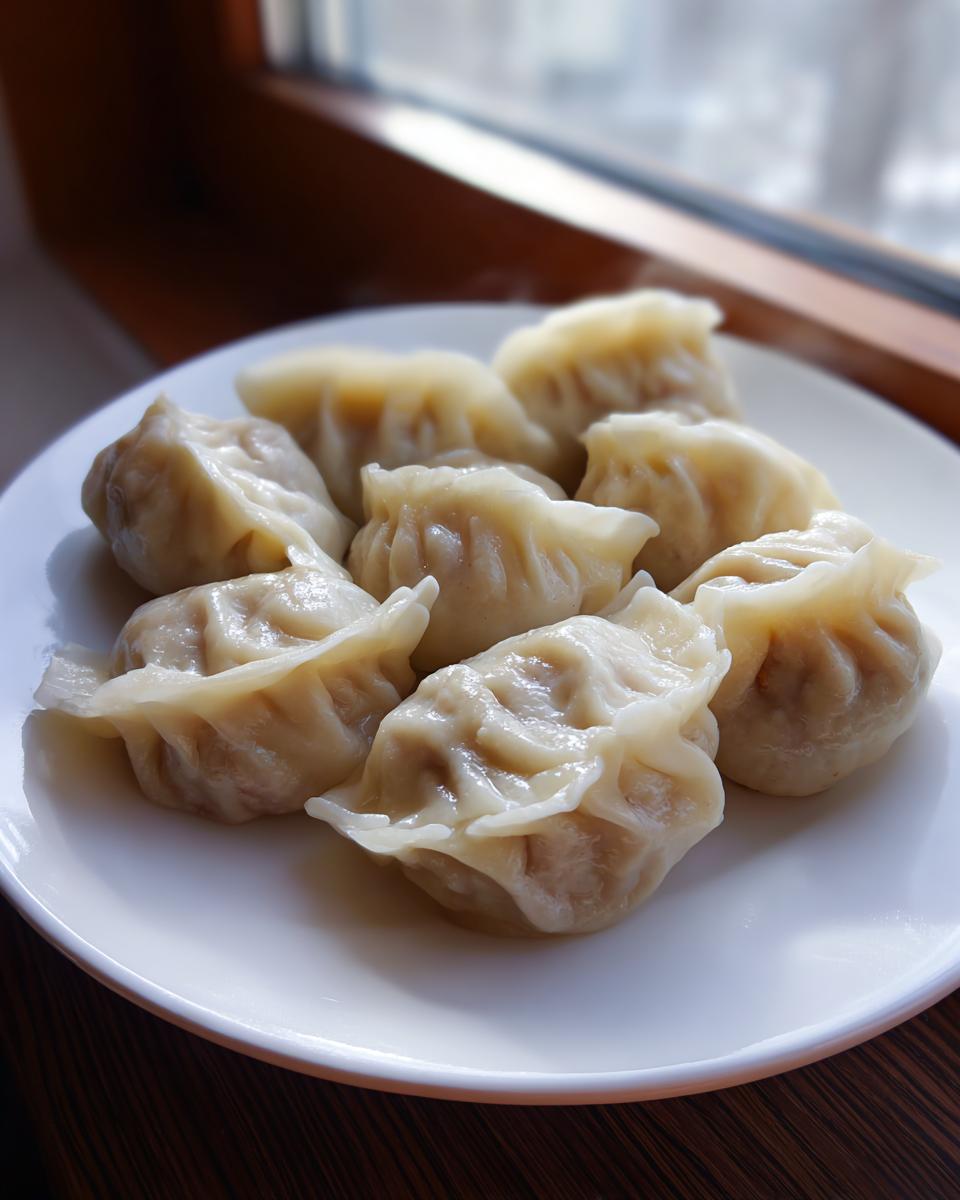
Oh, nothing—and I mean *nothing*—beats the satisfaction of pulling a plate of perfect, freshly boiled dumplings out of the pot. It just feels like a triumph, doesn’t it? When I first set out to conquer **Traditional Chinese Dumplings**, I thought the filling was the hard part. Nope! The real secret to that authentic, chewy texture everyone raves about is rolling the wrappers from scratch.
Trust me on this: if you conquer the simple dough, you unlock 90% of the magic. I spent so many years trying to get the dough just right. I ended up covered in flour most of the time, but once I figured out the water temperature and the resting time, it clicked. This recipe is my tried-and-true method for making incredible, restaurant-quality jiaozi right here in my kitchen. Let’s get rolling!
- Why You'll Love These Traditional Chinese Dumplings
- Gathering Ingredients for Authentic Jiaozi
- Mastering Homemade Dumpling Wrappers for Traditional Chinese Dumplings
- Preparing the Flavorful Pork Cabbage Dumplings Filling
- Assembling and Pleating Your Traditional Chinese Dumplings
- Cooking Method: Perfect Boiled Chinese Dumplings
- Storage and Making Freezer Friendly Dumplings
- Frequently Asked Questions About Traditional Chinese Dumplings
- Storage and Making Freezer Friendly Dumplings
- Frequently Asked Questions About Traditional Chinese Dumplings
- Estimated Nutritional Information for Traditional Chinese Dumplings
- Estimated Nutritional Information for Traditional Chinese Dumplings
Why You’ll Love These Traditional Chinese Dumplings
I know you can buy wrappers, but honestly, once you try these, you’ll never go back. They are tender yet sturdy enough to hold all that yummy pork and cabbage without tearing mid-boil. Here’s why this recipe is about to become your new favorite project:
- Authentic Jiaozi Right Here: We’re doing it the traditional way, wrapper and all, giving you that true, satisfying chewiness you crave.
- Surprisingly Easy Dough: Seriously, the dough only needs flour and water! Once you get the kneading down, it’s mindless and meditative.
- The Flavor Punch: That filling—pork, ginger, sesame oil—it’s perfectly balanced; savory, a little salty, and super fresh tasting.
- Perfect for Big Batches: These are the ultimate comfort food for family dinners, especially when we make them for Lunar New Year celebrations.
- Freezer Friendly Dumplings Gold: You can assemble dozens and freeze them flat. Having homemade dumplings ready on a weeknight? Total game changer!
- They Boil Beautifully: We talk about boiling them, and these wrappers handle the water like champs—they float up proud and plump when they’re done cooking.
Gathering Ingredients for Authentic Jiaozi
Okay, before we dive into the rolling and folding marathon, we need to talk supplies. For true **Traditional Chinese Dumplings**, you can’t skimp here because the few ingredients we use really let their quality shine through. Everything needs to be prepped right, especially that cabbage, or your filling will be soupy and sad. Don’t let that happen!
When you’re prepping, think about flavor layers. That little bit of sesame oil and fresh ginger is what really separates our **pork cabbage dumplings** from the bland stuff. Grab your mixing bowls and let’s measure out exactly what we need for the dough and the filling before we start that dough resting process.
For the Homemade Dumpling Wrappers
Keep this super simple! You just need 2 cups of all-purpose flour, and about 2/3 cup of warm water—maybe a tiny bit more if the flour is extra thirsty. That’s honestly it for the dough itself!
For the Pork Cabbage Dumplings Filling
For the flavor hub, grab 1 pound of ground pork—I like using a little bit of pork belly for extra richness, but standard ground works too. You need 3 cups of Napa cabbage, chopped super finely! Then, grab 2 tablespoons of soy sauce, 1 tablespoon sesame oil, grated fresh ginger, salt, and white pepper. Mix it all up!
Mastering Homemade Dumpling Wrappers for Traditional Chinese Dumplings
This is where the real magic happens for our **Traditional Chinese Dumplings**, but don’t panic! Rolling your own **homemade dumpling wrappers** takes zero specialty tools, just a little elbow grease. We start with Step 1: making the dough. In a big bowl, combine your flour and that warm water. I’m talking warm, not hot—think of the temperature you’d use for a comfy bath, not hot tea. If the water’s too hot, it starts to cook the flour, and we end up with gummy wrappers, which is a tragedy.
Mix it until it looks like a shaggy mess, and then turn it out onto your counter. Now, get ready to knead! You need to work this dough for a solid 8 to 10 minutes. Push, fold, turn, push! You’re developing the gluten so the wrapper stretches paper-thin without tearing later. When it feels smooth as silk, wrap that baby up tight and let it rest for at least 30 minutes. That break is essential! It lets the gluten relax, meaning rolling it out later will feel like a dream. I read up on this over at Cookery Command, and they confirmed that resting time is non-negotiable for that beautiful, tender texture you want in your authentic jiaozi.
Preparing the Flavorful Pork Cabbage Dumplings Filling
While that dough is taking its well-deserved nap, we tackle Step 2: the filling! This is where you inject so much life into your **pork cabbage dumplings**. The absolute most important thing here is dealing with the cabbage. You must squeeze out every ounce of extra water after you chop it finely. If you skip this tiny step, I promise you, your dumpling insides will be watery right when you boil them, leading to mushy bottoms.
Once the cabbage is dry, toss it into a big bowl with your ground pork, soy sauce, sesame oil, ginger, salt, and pepper. Now for the crucial technique: you have to mix it all together super vigorously, but here’s the trick—mix it all in **one direction only**. Keep churning it until the mixture starts looking sticky and almost paste-like. That stickiness creates the protein bonds, which is why your authentic jiaozi stay juicy and hold together when cooked. Don’t mix it halfway; you want that good, binding texture. Trust me, this is how you ensure a solid, flavorful batch!
Assembling and Pleating Your Traditional Chinese Dumplings
Alright, the dough is rested and the filling is sticky and fragrant—it’s assembly time! This is where we move from preparation to pure creation. We’re combining Steps 3 and 4 here. First, chop your rested dough into four equal parts, roll each into a rope, and slice those ropes into little 1-inch pieces. Think of them as little dough buttons.
Now, take one button and gently roll it out with a small rolling pin until it’s a thin little circle, about 3 inches wide. Don’t stress if the edges are slightly thicker than the middle. That thicker edge is actually what gives you something to grip when you seal them up!
Place about a teaspoon of that delicious pork filling right in the middle. Don’t overfill, or they will explode! Moisten the entire edge with a tiny bit of water—this is your glue. Fold the wrapper in half over the filling to make that classic half-moon shape. See how it looks like a little taco? Now for the secret to boiled Chinese dumplings not leaking: crimp and pleat those edges tightly! If you aren’t a pro at traditional pleating, don’t sweat it. Just pinch the edges together firmly, adding little folds as you go if you can. My first tries looked like little mashed potatoes, but as long as the seam is sealed shut, your Traditional Chinese Dumplings won’t pop open when they hit the boiling water. That’s the key!
Cooking Method: Perfect Boiled Chinese Dumplings
Now that we have our perfectly pleated little packages, it’s time for Step 5: the actual cooking! We are aiming for classic **boiled Chinese dumplings**, and the secret here is a full, rolling boil. Fill a large pot with plenty of water and get it going until you see big, happy bubbles breaking the surface everywhere. Don’t put the dumplings in until it’s truly boiling!
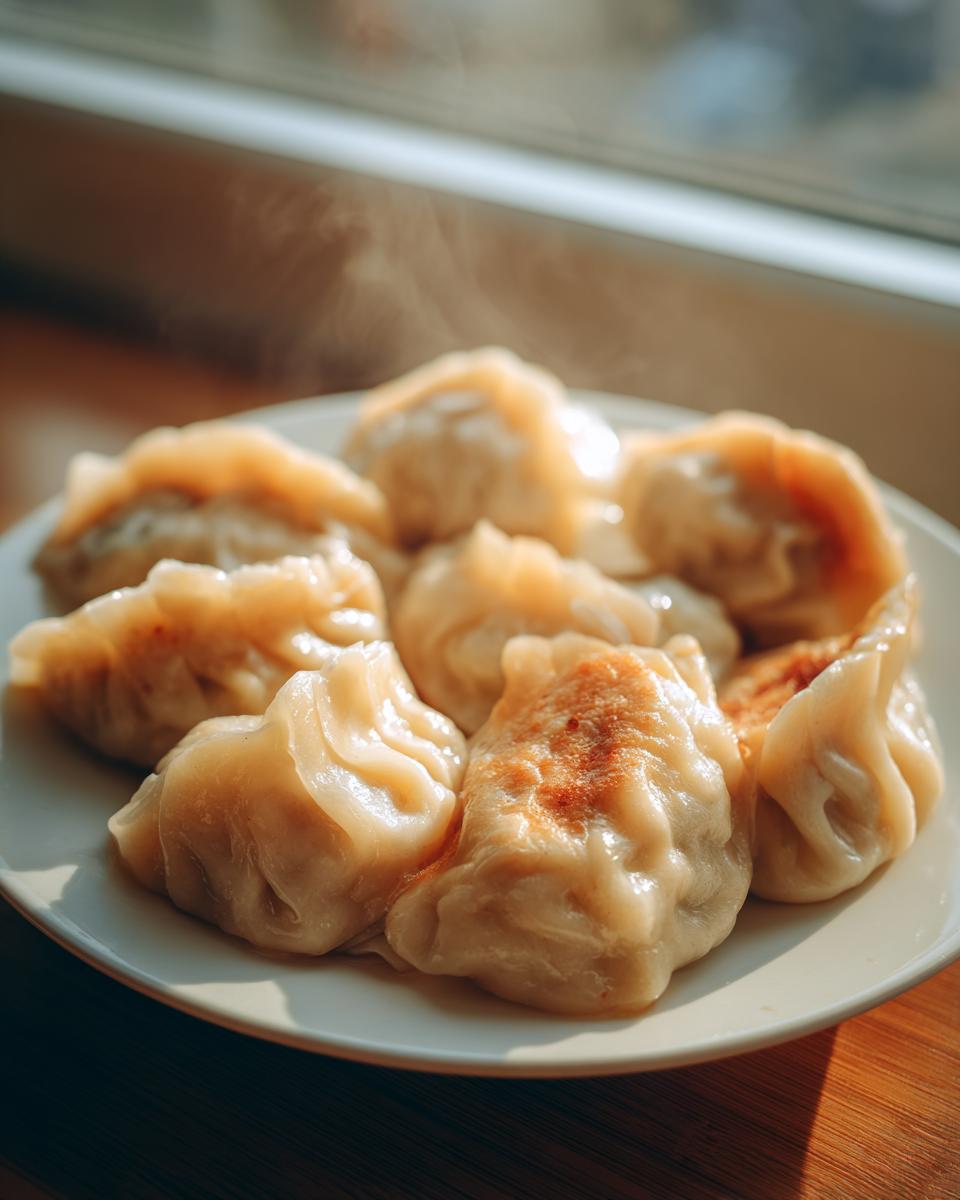
Gently drop the dumplings in—and I mean *gently*. Be careful not to overcrowd the pot, or the water temperature will drop too fast, and they’ll all stick together in a big, doughy blob. Give them a quick, slow stir right away so they don’t grab the bottom. They’ll cook for about 5 to 7 minutes. You’ll know they are done when they float right up to the surface and look plump and a little translucent. Pull them out with a slotted spoon right away, and serve them up immediately while they’re hot!

Storage and Making Freezer Friendly Dumplings
You absolutely cannot eat 40 dumplings in one sitting—well, maybe you *could*, but saving some is the smart move! Making big batches of these **Traditional Chinese Dumplings** is my favorite way to prep for the holidays, especially for **Lunar New Year dumplings**. The best part? They freeze like a dream, making them amazing **freezer friendly dumplings** for quick dinners later.
Here’s the trick, which comes straight from my notes: Make sure your dumplings are cooked or completely uncooked before freezing; don’t freeze any that are partially cooked! If you’re freezing them raw, you need a parchment-lined baking sheet. Lay them out in a single layer so none of them touch. Pop that sheet right into the freezer until they are rock solid—this usually takes a couple of hours. Once they are frozen stiff, you can just toss them all into a heavy-duty freezer bag. When you’re ready to cook them later, just drop them right into boiling water and add about 2 or 3 extra minutes to the cooking time since they are coming right from frozen solid!
Frequently Asked Questions About Traditional Chinese Dumplings
I know it seems like a lot of steps when you read it all through, but trust me—once you get into the rhythm of making these **Traditional Chinese Dumplings**, it flows so easily! People always send me questions after they try making a big batch, so I wanted to address a few sticky points right here.
Can I use store-bought wrappers instead of homemade dumpling wrappers?
Oh, you totally *can*, and sometimes we all need life to be easy, right? If you’re short on time, using good quality, thin, round wrappers from the store will get you close. But I have to be honest: if you want that true, slightly chewy texture that makes **authentic jiaozi** so satisfying, nothing beats the **homemade dumpling wrappers**. The ones you make yourself have a little more body and flavor that just complements that rich pork and cabbage filling perfectly. It’s worth the extra thirty minutes, I promise!
What is the best way to reheat leftover boiled Chinese dumplings?
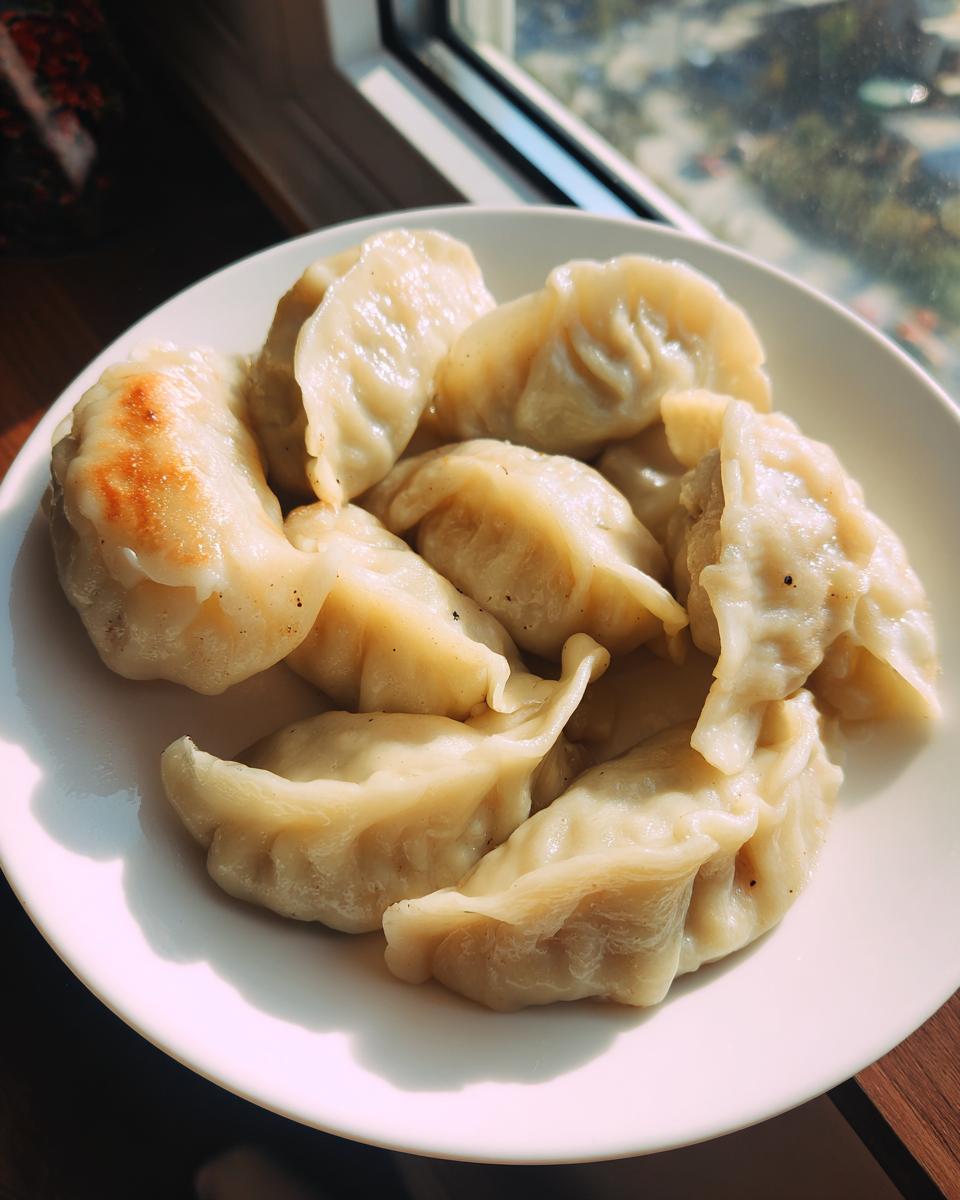
Reheating **boiled Chinese dumplings** can be tricky because they can get soggy if you just microwave them! If you only have a few, the best way to bring them back to life is to gently pan-fry them. After they’re cooled, you just add a tablespoon of oil to your skillet, lay the dumplings flat-side down, and brown them slightly until the bottoms are crisp. Then, add just a splash of water (maybe two tablespoons) to the pan and immediately cover it. Let them steam for about 3 minutes. This gives you a crispy base like pot stickers, and a hot, tender top. Way better than the microwave!
What dipping sauce pairs best with these pork cabbage dumplings?
You need something bright and acidic to cut through the richness of the pork! While you can get fancy, the simplest sauce lets those flavors shine. My go-to combination for these **pork cabbage dumplings** is mixing equal parts light soy sauce and Chinese black vinegar—I prefer Chinkiang vinegar if you have it. Then, just stir in a tiny drizzle of sesame oil for aroma, and if you like heat, a teaspoon of chili oil or some chili crisp. That’s it! It takes two seconds, and it’s the perfect accompaniment for your perfectly **boiled Chinese dumplings**. You can find more sauce ideas over on our policy page, just kidding! But seriously, start simple!
Storage and Making Freezer Friendly Dumplings
You absolutely cannot eat 40 dumplings in one sitting—well, maybe you *could*, but saving some is the smart move! Making big batches of these **Traditional Chinese Dumplings** is my favorite way to prep for the holidays, especially for **Lunar New Year dumplings**. The best part? They freeze like a dream, making them amazing **freezer friendly dumplings** for quick dinners later.
Here’s the trick, which comes straight from my notes: Make sure your dumplings are cooked or completely uncooked before freezing; don’t freeze any that are partially cooked! If you’re freezing them raw, you need a parchment-lined baking sheet. Lay them out in a single layer so none of them touch. Pop that sheet right into the freezer until they are rock solid—this usually takes a couple of hours. Once they are frozen stiff, you can just toss them all into a heavy-duty freezer bag. When you’re ready to cook them later, just drop them right into boiling water and add about 2 or 3 extra minutes to the cooking time since they are coming right from frozen solid!
Frequently Asked Questions About Traditional Chinese Dumplings
Can I use store-bought wrappers instead of homemade dumpling wrappers?
Oh, you totally *can*, and sometimes we all need life to be easy, right? If you’re short on time, using good quality, thin, round wrappers from the store will get you close. But I have to be honest: if you want that true, slightly chewy texture that makes **authentic jiaozi** so satisfying, nothing beats the **homemade dumpling wrappers**. The ones you make yourself have a little more body and flavor that just complements that rich pork and cabbage filling perfectly. It’s worth the extra thirty minutes, I promise!
What is the best way to reheat leftover boiled Chinese dumplings?
Reheating **boiled Chinese dumplings** can be tricky because they can get soggy if you just microwave them! If you only have a few, the best way to bring them back to life is to gently pan-fry them. After they’re cooled, you just add a tablespoon of oil to your skillet, lay the dumplings flat-side down, and brown them slightly until the bottoms are crisp. Then, add just a splash of water (maybe two tablespoons) to the pan and immediately cover it. Let them steam for about 3 minutes. This gives you a crispy base like pot stickers, and a hot, tender top. Way better than the microwave!
What dipping sauce pairs best with these pork cabbage dumplings?
You need something bright and acidic to cut through the richness of the pork! While you can get fancy, the simplest sauce lets those flavors shine. My go-to combination for these **pork cabbage dumplings** is mixing equal parts light soy sauce and Chinese black vinegar—I prefer Chinkiang vinegar if you have it. Then, just stir in a tiny drizzle of sesame oil for aroma, and if you like heat, a teaspoon of chili oil or some chili crisp. That’s it! It takes two seconds, and it’s the perfect accompaniment for your perfectly **boiled Chinese dumplings**. You can find more sauce ideas over on our policy page, just kidding! But seriously, start simple!
Estimated Nutritional Information for Traditional Chinese Dumplings
Now, I’m not a nutritionist by any means, but I did break down the general numbers based on the standard batch size. Keep in mind that this is just my best guess for the entire recipe, spread out over 40 dumplings, so the real numbers depend on the exact fat content of your pork. This information is just a guideline so you know what you’re working with when you make a big plate of these delicious **Traditional Chinese Dumplings**!
- Serving Size: About 5 dumplings
- Calories: Roughly 250 per serving
- Fat: Around 12g total fat, with 4g being saturated
- Protein: Excellent source at about 15g
- Carbohydrates: About 22g, mostly from that wonderful homemade wrapper.
It’s pretty good for a main course, considering how filling they are! We’re keeping the sugar super low in this **Chinese dumplings recipe**, which is great when you’re loading up on that dipping sauce.
Estimated Nutritional Information for Traditional Chinese Dumplings
Now, I’m not a nutritionist by any means, but I did break down the general numbers based on the standard batch size. Keep in mind that this is just my best guess for the entire recipe, spread out over 40 dumplings, so the real numbers depend on the exact fat content of your pork. This information is just a guideline so you know what you’re working with when you make a big plate of these delicious **Traditional Chinese Dumplings**!
- Serving Size: About 5 dumplings
- Calories: Roughly 250 per serving
- Fat: Around 12g total fat, with 4g being saturated
- Protein: Excellent source at about 15g
- Carbohydrates: About 22g, mostly from that wonderful homemade wrapper.
It’s pretty good for a main course, considering how filling they are! We’re keeping the sugar super low in this **Chinese dumplings recipe**, which is great when you’re loading up on that dipping sauce. If you want to talk more specifics or have questions about substitutions, feel free to reach out—you can always shoot me a message through the Contact page. Happy dumpling making!
PrintTraditional Pork and Cabbage Chinese Dumplings (Jiaozi)
Make authentic Chinese dumplings with homemade wrappers filled with seasoned pork and cabbage. This recipe includes instructions for boiling and freezing.
- Prep Time: 45 min
- Cook Time: 10 min
- Total Time: 55 min
- Yield: About 40 dumplings 1x
- Category: Main Course
- Method: Boiling
- Cuisine: Chinese
- Diet: Low Fat
Ingredients
- 2 cups all-purpose flour
- 2/3 cup warm water (plus extra for sealing)
- 1 pound ground pork
- 3 cups finely chopped Napa cabbage
- 2 tablespoons soy sauce
- 1 tablespoon sesame oil
- 1 teaspoon grated fresh ginger
- 1 teaspoon salt
- 1/2 teaspoon white pepper
Instructions
- Make the dough: Combine flour and warm water in a bowl. Mix until shaggy, then knead on a lightly floured surface for 8-10 minutes until smooth. Cover the dough and let it rest for 30 minutes.
- Prepare the filling: Squeeze excess water from the chopped cabbage. In a large bowl, combine the ground pork, cabbage, soy sauce, sesame oil, ginger, salt, and white pepper. Mix thoroughly in one direction until the mixture becomes sticky.
- Roll the wrappers: Divide the dough into four equal pieces. Roll each piece into a long rope and cut into 1-inch pieces. Roll each piece into a thin circle, about 3 inches in diameter.
- Assemble the dumplings: Place about 1 teaspoon of filling in the center of a wrapper. Moisten the edges with water. Fold the wrapper in half over the filling to form a half-moon shape. Crimp and pleat the edges to seal them tightly.
- Cook the dumplings: Bring a large pot of water to a rolling boil. Gently drop the dumplings into the water, ensuring they do not stick together. Cook for 5-7 minutes, or until they float and the filling is cooked through.
- Serve immediately, or cool completely before freezing.
Notes
- To freeze: Place uncooked dumplings in a single layer on a parchment-lined baking sheet. Freeze until solid, then transfer to a freezer bag. Cook directly from frozen, adding 2-3 minutes to the cooking time.
- For a richer flavor, substitute half the ground pork with ground pork belly.
- You can substitute Napa cabbage with finely chopped bok choy.
Nutrition
- Serving Size: 5 dumplings
- Calories: 250
- Sugar: 1
- Sodium: 350
- Fat: 12
- Saturated Fat: 4
- Unsaturated Fat: 8
- Trans Fat: 0
- Carbohydrates: 22
- Fiber: 1
- Protein: 15
- Cholesterol: 50