
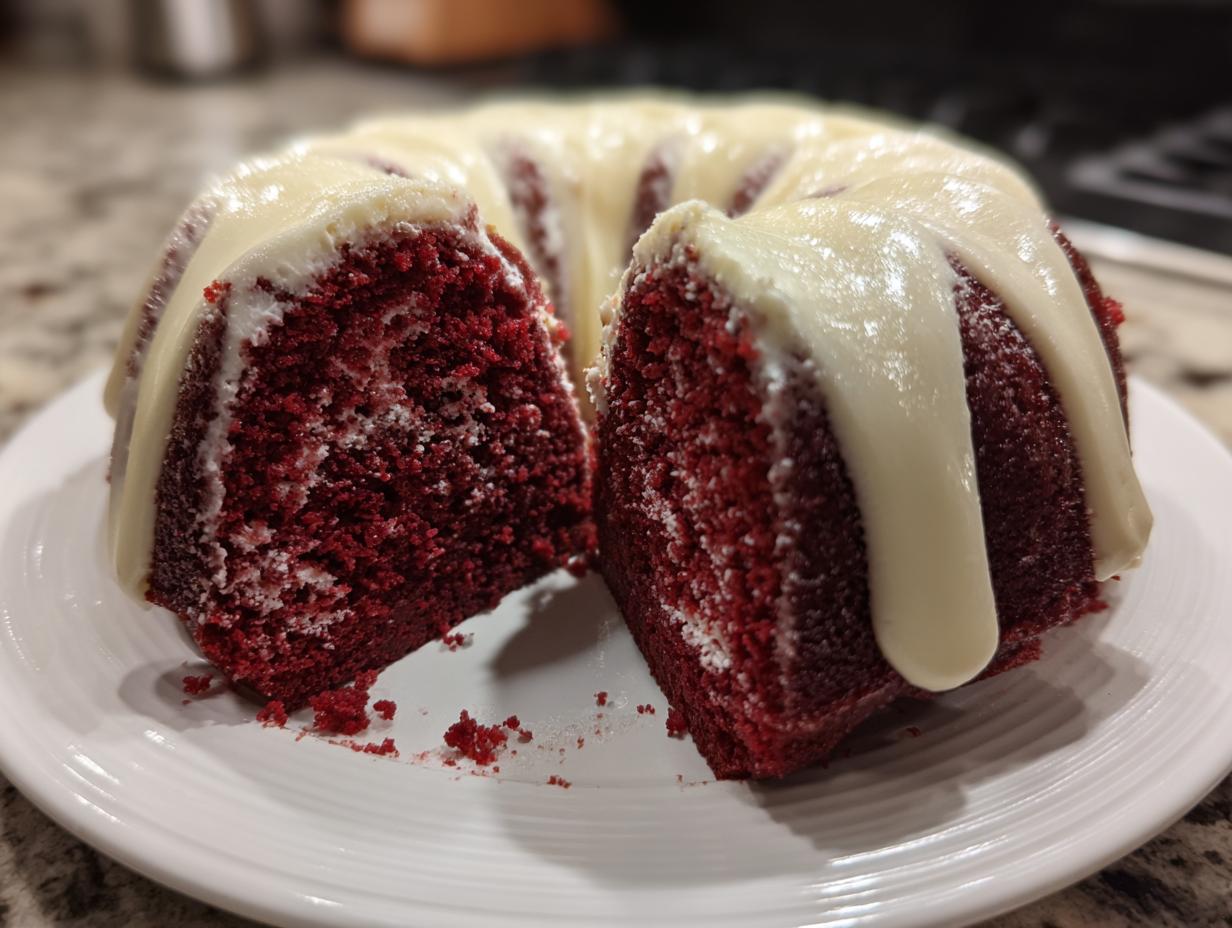
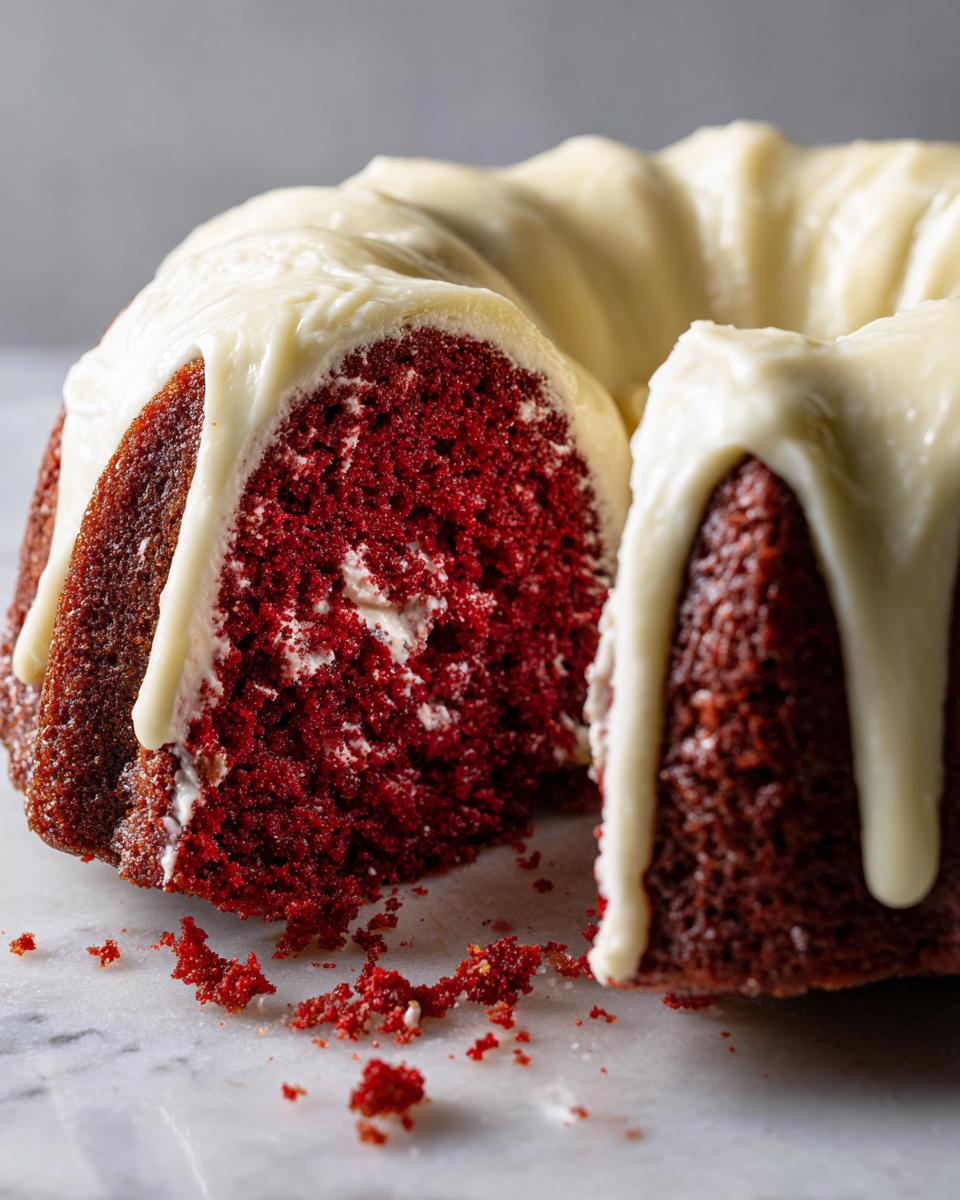
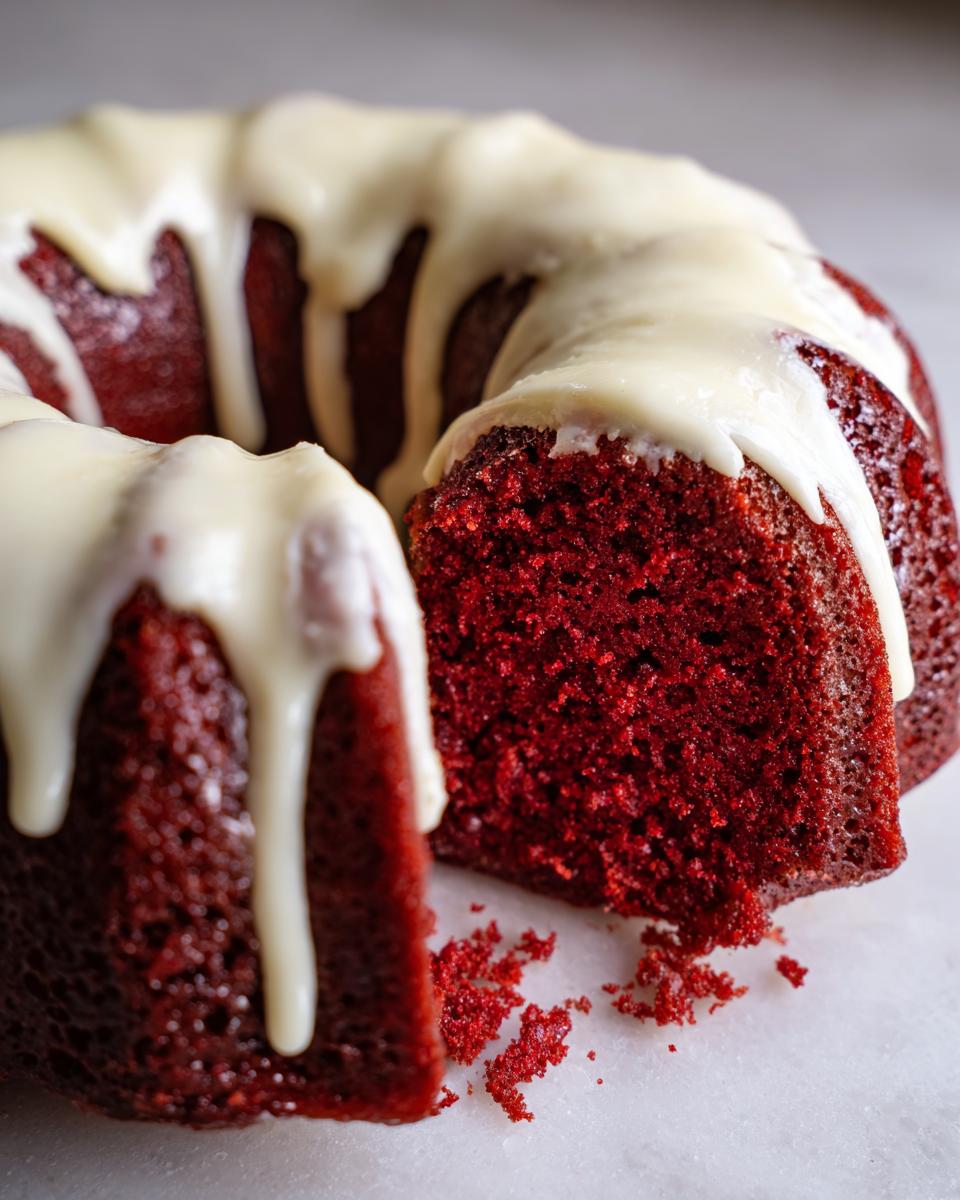
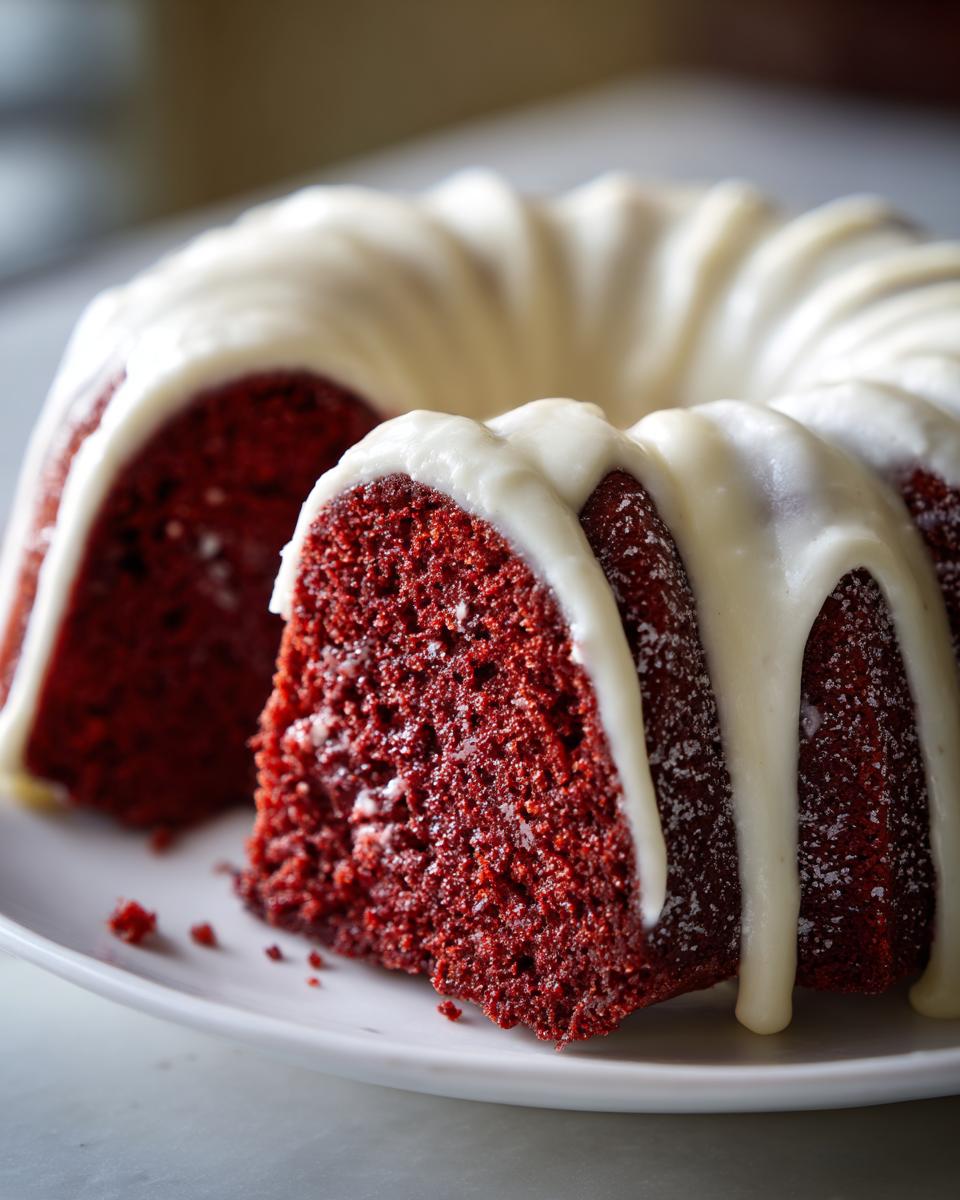
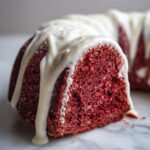
There’s nothing quite like watching a perfectly deep-red cake emerge from the oven, the intricate swirls of the Bundt pan promising a decadent experience. That’s exactly what we’re aiming for with this recipe: the ultimate, moist, scratch-baked red velvet bundt cake that’s guaranteed to be a showstopper. Too often, red velvet turns out dry or, worse, vaguely reddish-brown instead of that stunning, velvety hue. I learned early in my test kitchen days that you can’t just throw ingredients together; you need intention. That’s where my culinary background comes in—blending those cherished family traditions with solid technique to conquer every baking challenge. If you’re chasing that legendary moisture, you might also want to grab my secrets for the best ultra-moist red velvet cake recipe while you’re here! Trust me, this homemade recipe conquers dryness for good!
- Why This Is The Best Red Velvet Bundt Cake Recipe
- Ingredients for the Ultimate Moist Red Velvet Bundt Cake
- How to Prepare Your Showstopper Red Velvet Bundt Cake
- Tips for Baking Beautiful Bundt Cakes
- Ingredient Notes and Substitutions for Red Velvet Bundt Cake
- Serving Suggestions for Your Classic Red Velvet Dessert
- Storage & Reheating Instructions for Red Velvet Bundt Cake
- Frequently Asked Questions About This Red Velvet Bundt Cake Recipe
- Share Your Showstopper Red Velvet Bundt Cake Creations
Why This Is The Best Red Velvet Bundt Cake Recipe
I know, everyone claims their recipe is the best, but I promise you, this red velvet bundt cake recipe is different. We aren’t aiming for ‘good enough’; we’re hitting maximum flavor and moisture every single time. That’s the standard I hold myself to here in the kitchen.
When you’re baking a classic red velvet dessert from scratch, you need guarantees! Here’s what sets this recipe apart:
- It guarantees a truly moist red velvet cake that stays tender for days.
- It delivers that deep, satisfying rich cocoa cake underpinning beneath the vanilla notes.
- The cream cheese glaze recipe you’ll find below is perfectly tangy, cutting through the richness just right. You can grab my favorite frosting guide here: best cream cheese frosting recipe.
Achieving the Perfect Velvety Crumb for Your Red Velvet Bundt Cake
Moisture is everything, right? For our scratch baked bundt cakes, we rely heavily on oil instead of just butter. Oil stays liquid at room temperature, meaning a softer crumb when you bite into it. Plus, the buttermilk interacts perfectly with the baking soda to create incredible lift and tenderness. We just mix until combined—no aggressive beating!
Signature Deep Red Color and Rich Cocoa Flavor
We aren’t messing around with weak colors here! You absolutely need gel food coloring for that intense, vibrant hue. Liquid drops just won’t cut it for a true, stunningly deep red velvet cake. The small amount of cocoa powder we use provides that classic, subtle chocolate whisper without letting it taste like a chocolate cake that accidentally turned pink.
Ingredients for the Ultimate Moist Red Velvet Bundt Cake
Okay, we’ve talked up the moisture and the color, now it’s time to talk about what actually goes into making this stunning dessert happen. Remember what I said earlier? Precision counts, especially for the elements that keep this cake tender. For the best results, make sure your eggs and buttermilk are at room temperature—it helps everything emulsify beautifully! You’ll want to get your mise en place ready, separating the cake items from the glaze items. This organization is the first step to turning out a perfect red velvet bundt cake.
Cake Ingredients for Your Red Velvet Bundt Cake
Here’s the list for the cake itself. Please, please, please measure your flour correctly—spoon it into the cup and level it off, don’t scoop! That little bit of care ensures the moist red velvet cake success we’re aiming for.
- 2 1/2 cups all-purpose flour
- 1 1/2 cups granulated sugar
- 1 teaspoon baking soda
- 1 teaspoon salt
- 1 tablespoon unsweetened cocoa powder
- 1 cup buttermilk, room temperature
- 1 cup vegetable oil
- 2 large eggs, room temperature
- 1 teaspoon white vinegar
- 1 teaspoon vanilla extract
- 1 to 2 tablespoons red food coloring (gel preferred for deep color)
Ingredients for the Tangy Cream Cheese Glaze for Bundt Cake
This glaze is the perfect finish, giving you that signature zing to balance the cake! Make sure your cream cheese and butter here are genuinely softened, not melted—that’s key for smoothness. And don’t skip sifting the powdered sugar, or you’ll end up with little white lumps.
- 1 cup cream cheese, softened (for glaze)
- 1/2 cup unsalted butter, softened (for glaze)
- 3 cups powdered sugar, sifted (for glaze)
- 1 teaspoon vanilla extract (for glaze)
- 1 tablespoon milk or cream (for glaze, if needed)
How to Prepare Your Showstopper Red Velvet Bundt Cake
Now for the fun part! Turning those gorgeous ingredients into the actual showstopper cake recipe you’ve been dreaming of. Because we are using a Bundt pan—which can be notoriously tricky—we have to be meticulous about preparation. If your cake sticks, that beautiful shape is ruined, and honestly, I’ve learned that lesson the hard way! Follow these steps closely, especially around the cooling process, and you’ll have that stunning, clean release every time. Let’s get this red velvet bundt cake into the oven!
Preparing the Pan and Dry Ingredients
First things first: get that oven preheated to 350°F (175°C). Next, treat your Bundt pan like it is solid gold. Don’t cheat here! I use a dedicated Bundt pan goop—a mix of equal parts shortening, vegetable oil, and flour—slathered into every nook and cranny with a pastry brush. Seriously, go deep into those grooves. Once the pan is prepped, whisk your dry ingredients (flour, sugar, leaveners, and cocoa) together in a large bowl. This makes sure the baking soda is evenly distributed, which is vital for a uniform rise.
Mixing the Batter for a Moist Red Velvet Cake
This is where we lock in that moisture! In a separate bowl, whisk your wet ingredients—the room temp buttermilk, oil, eggs, vinegar, vanilla, and that crucial red coloring—until it’s just one beautiful, smooth shade of red. Now, pour the entire wet mixture into the dry ingredients. Mix it on low speed, or gently by hand, just until you see the last powdery streaks disappear. Stop mixing! Seriously, stop. If you overmix, you’ll develop gluten, and that leads straight to a tough, dry cake instead of the soft, moist red velvet cake we want.
Baking and Cooling the Red Velvet Bundt Cake
Pour the batter evenly into that lovingly greased pan and slide it into the preheated oven. It usually takes between 45 and 55 minutes. Get in the habit of using a wooden skewer inserted right near the center to check for doneness—you want it to come out clean, maybe with a few moist crumbs clinging to it. Do NOT pull it out dry. Once it passes the test, let it cool right in that pan on a wire rack for about 15 minutes. This short rest lets the cake firm up just enough to handle. After 15 minutes, gently invert it onto the rack to cool completely later. If you want more background on getting that perfect shape, check out my guide on baking beautiful bundt cakes!
Making and Applying the Cream Cheese Glaze
A word of warning: do not attempt to glaze a warm cake unless you secretly want melted, runny icing instead of a drizzle! Once the cake is completely cool (give it a good hour or two), whip up that cream cheese and butter until they are happy and smooth. Gradually add your sifted powdered sugar and vanilla. If it’s too stiff to pour gracefully over your beautiful cake, add milk or cream just one teaspoon at a time until you hit that perfect, thick-but-pourable consistency. Drizzle it on and get ready for compliments!
Tips for Baking Beautiful Bundt Cakes
Look, I’m going to be honest with you. My very first attempt at a red velvet bundt cake—I won’t name the year, but it involved questionable frosting—stuck to the pan like glue. It looked like modern abstract art when I tried to pull it out! That taught me that gorgeous intricate pans require serious respect. Achieving those clean lines—the hallmark of baking beautiful bundt cakes—is all about procedure, not luck.
Once you’ve nailed the batter texture, these few extra steps are what separate a good cake from the kind of dessert you proudly call a showstopper.
Temperature Control for the Red Velvet Bundt Cake
This tip is non-negotiable, especially for a cake that relies on buttermilk and oil for its texture. You must use room temperature eggs and buttermilk. Why? Cold ingredients don’t mix well with the creamed fat and sugar base of the cake batter. When cold items go in, they cause the batter to curdle or look separated—this ruins the smooth emulsion we need for that tender crumb. Also, take five minutes to check your oven temperature with a thermometer! Ovens lie, and an oven that runs hot by 25 degrees can easily dry out your cake halfway through the bake time. If you want to explore other recipes where temperature control is key, check out my foolproof guide for fruit cake recipe never fail moist!
Ingredient Notes and Substitutions for Red Velvet Bundt Cake
We covered the ingredients list, but I want to talk about two specific items in this red velvet bundt cake recipe that are crucial for getting the signature results. When I started baking, I often substituted ingredients without understanding the consequences, and that’s how I ended up with pale, crumbly cakes! For this recipe, we need to stick to the science a little bit so we can focus on the joy later.
The buttermilk isn’t just for moisture; it’s a necessary acid to react with the baking soda. If you absolutely don’t have any, you can make a quick substitute by taking one cup of regular milk and stirring in one teaspoon of white vinegar. Let it sit for five minutes until it looks slightly curdled—that’s your homemade buttermilk!
Also, about that color: don’t be shy, but use the right stuff! I highly recommend gel food coloring, like the professional bakers use. It concentrates the dye without adding excess liquid to the batter, which keeps our cake from getting weirdly thin. It’s the secret weapon for a truly intense, rich color in your red velvet bundt cake.
Serving Suggestions for Your Classic Red Velvet Dessert
This glorious red velvet bundt cake is truly a showpiece, which means it deserves a perfect pairing! Since this classic red velvet dessert is rich and just the right amount of tangy thanks to that glaze, it loves simple, bright accompaniments. Don’t feel like you need complicated sides; the cake does most of the heavy lifting when you’re baking for parties.
On a warm evening, nothing beats a tall glass of my homemade pink lemonade recipe from scratch—the tartness cuts right through the richness beautifully. For a holiday gathering, serve slices slightly warmed alongside a simple cup of black coffee or a chilled glass of crisp sparkling cider. That’s all you need to make this dessert unforgettable!

Storage & Reheating Instructions for Red Velvet Bundt Cake
Because we used that gorgeous cream cheese glaze, how you store your red velvet bundt cake matters a whole lot! I usually leave a slice or two out on a covered cake stand at room temperature for about a day, and it’s perfectly fine for a quick treat. But for anything longer than that, or if your kitchen is super warm, you absolutely must refrigerate it.
Wrap any remaining cake tightly in plastic wrap, and then foil. It keeps well in the fridge for up to five days. If you’re taking it out of the fridge to serve, let it sit on the counter for about 30 minutes first. That lets the cake soften up again so you get that amazingly moist texture we worked so hard to achieve!
Frequently Asked Questions About This Red Velvet Bundt Cake Recipe
I know you might have a few lingering thoughts after looking over this recipe for the red velvet bundt cake. Baking from scratch always brings up questions, but that’s okay! We want you to feel totally confident before you even grease that pan. I’ve pulled together the questions I get asked most often about achieving that perfect, show-stopping cake.
Can I use a standard tube pan instead of a Bundt pan for this red velvet bundt cake?
Yes, you absolutely can! This batter volume is perfect for a standard 10-cup Bundt pan, but if you use a simple tube pan, the baking time might need a little TLC. Because deep, straight sides can sometimes bake slower than the fluted edges of a Bundt, you might need an extra 5 to 10 minutes in the oven. Always rely on that wooden skewer test; if it comes out clean, you’re done!
How do I get the vibrant red color without affecting the flavor of my red velvet bundt cake?
This is crucial for making a beautiful holiday baking ideas centerpiece! The secret is twofold: use a high-quality gel food coloring, not the liquid drops you find near the baking powder. The gel is super-concentrated, so you use less product—which means less added liquid to the batter. We only use a small amount of cocoa powder, which adds that signature flavor complexity without staining the batter brown!
What makes this recipe a better ‘homemade red velvet cake’ than using a mix?
Honestly, it’s all down to quality control and that deep, rich cocoa cake flavor! Box mixes are designed to be neutral, but here, you’re in command. We control the dairy (buttermilk!), we use vibrant coloring, and we use oil for guaranteed moisture. When you make this homemade red velvet cake, you get that authentic, tangy flavor profile that you just can’t fake!
If you’re looking for some extra help with toppings, I’ve compiled a few of my very favorite easy cake frosting ideas that pair wonderfully with this dessert!
Share Your Showstopper Red Velvet Bundt Cake Creations
Wow, I hope you loved making this red velvet bundt cake as much as I loved sharing it with you! Truly, seeing your creations is the best part of my day. This recipe is designed to be one of those special holiday bundt cakes that everyone asks about year after year, and I’m so excited for you to take the praise!
When you serve up that beautiful slice, please come back here and let me know how it went! Did you try the glaze or a swirl? Did your family devour it? Telling me what worked—or maybe what surprised you—helps me refine things even more for the next cook. Drop a comment below with your thoughts and rating!
And if you snap a picture of your finished cake, tag me on social media! I keep an eye out for those stunning, deep-red swirls hitting my feed. I’ve got tons more dazzling dessert recipes waiting for you, too, when you’re ready for another baking adventure over at my dessert recipes hub!
PrintThe Ultimate Moist Red Velvet Bundt Cake with Tangy Cream Cheese Glaze
Create a show-stopping, scratch-baked Red Velvet Bundt Cake that delivers deep cocoa flavor and a reliably moist, velvety crumb. This recipe includes instructions for a simple, tangy cream cheese glaze perfect for holidays or special occasions.
- Prep Time: 20 min
- Cook Time: 50 min
- Total Time: 1 hour 35 min
- Yield: 12 servings 1x
- Category: Dessert
- Method: Baking
- Cuisine: American
- Diet: Vegetarian
Ingredients
- 2 1/2 cups all-purpose flour
- 1 1/2 cups granulated sugar
- 1 teaspoon baking soda
- 1 teaspoon salt
- 1 tablespoon unsweetened cocoa powder
- 1 cup buttermilk, room temperature
- 1 cup vegetable oil
- 2 large eggs, room temperature
- 1 teaspoon white vinegar
- 1 teaspoon vanilla extract
- 1 to 2 tablespoons red food coloring (gel preferred for deep color)
- 1 cup cream cheese, softened (for glaze)
- 1/2 cup unsalted butter, softened (for glaze)
- 3 cups powdered sugar, sifted (for glaze)
- 1 teaspoon vanilla extract (for glaze)
- 1 tablespoon milk or cream (for glaze, if needed)
Instructions
- Preheat your oven to 350°F (175°C). Grease and flour a 10-cup Bundt pan thoroughly.
- In a large bowl, whisk together the flour, sugar, baking soda, salt, and cocoa powder. Set aside.
- In a separate medium bowl, whisk together the buttermilk, vegetable oil, eggs, vinegar, vanilla extract, and red food coloring until the mixture is uniformly red.
- Pour the wet ingredients into the dry ingredients. Mix on low speed until just combined. Do not overmix; stop when no streaks of flour remain.
- Pour the batter evenly into the prepared Bundt pan.
- Bake for 45 to 55 minutes, or until a wooden skewer inserted into the center comes out clean.
- Let the cake cool in the pan on a wire rack for 15 minutes.
- Invert the cake onto the wire rack and allow it to cool completely before glazing.
- To make the cream cheese glaze, beat the softened cream cheese and butter together in a medium bowl until smooth and creamy.
- Gradually beat in the sifted powdered sugar until combined. Add the vanilla extract.
- If the glaze is too thick, add milk or cream one teaspoon at a time until you reach a thick, pourable consistency.
- Drizzle the cream cheese glaze generously over the cooled Red Velvet Bundt Cake. Allow the glaze to set before slicing and serving.
Notes
- For the deepest red velvet color, use a high-quality gel food coloring instead of liquid drops.
- Buttermilk is key for moisture and activating the baking soda; do not substitute with regular milk unless you add 1 teaspoon of white vinegar or lemon juice to regular milk and let it sit for 5 minutes first.
- To ensure a tender crumb, measure your flour by spooning it into the measuring cup and leveling it off, rather than scooping directly from the bag.
Nutrition
- Serving Size: 1 slice
- Calories: 450
- Sugar: 55g
- Sodium: 350mg
- Fat: 24g
- Saturated Fat: 10g
- Unsaturated Fat: 14g
- Trans Fat: 0g
- Carbohydrates: 58g
- Fiber: 1g
- Protein: 4g
- Cholesterol: 55mg