
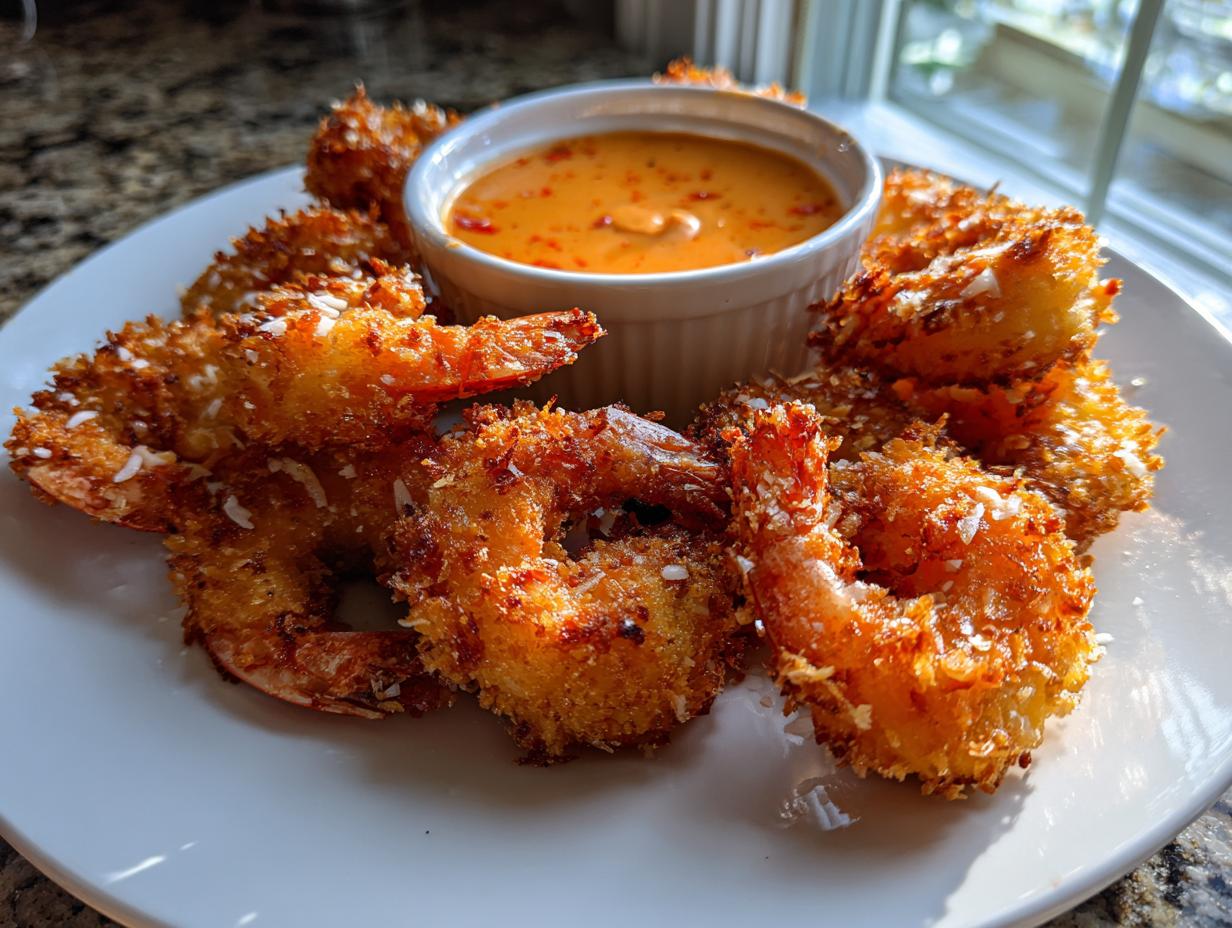
Are you ever sitting there, staring at the appetizer menu, and all you can really handle is that amazing, sweet, crunchy mouthful of coconut shrimp? I totally get it! That restaurant-style stuff is just addictive, but trust me, paying those appetizer prices adds up fast. That’s why I spent forever developing this recipe. We aren’t messing around with flimsy coatings here; our goal is pure crunch, thanks to a little trick involving panko, and absolutely mandatory balancing act with the dipping sauce. Everything we do here at Command Central aims for reliable, homemade quality, just like our founder Emily insists upon. You can check out her commitment to proven techniques over on the About page. Get ready, because this is the best homemade coconut shrimp you’ll ever dip!
- Why This Copycat Crispy Coconut Shrimp Recipe Works
- Gathering Ingredients for Perfect Homemade Coconut Shrimp
- Step-by-Step Instructions for Restaurant Style Coconut Shrimp
- Tips for the Best Crispy Coconut Shrimp Success
- Cooking Alternatives: Air Fryer Coconut Shrimp and Baked Coconut Shrimp Recipe
- Serving Suggestions for Your Tropical Shrimp Appetizer
- Storing and Reheating Crispy Coconut Shrimp
- Frequently Asked Questions About Coconut Shrimp
- Share Your Homemade Coconut Shrimp Experience
Why This Copycat Crispy Coconut Shrimp Recipe Works
I know there are a million coconut shrimp recipes out there, but if you’re chasing that perfect crunch you get at a really good seafood spot, you need to pay attention to two main things. We’ve cracked the code, not by going overboard, but by sticking to smart techniques. We bake reliability right into this recipe, so you don’t end up with soggy shrimp!
Achieving the Ultimate Crunchy Texture with Panko Coconut Shrimp
The secret sauce to the crust isn’t just the coconut—it’s the breadcrumb backbone! We absolutely have to use panko breadcrumbs. They are larger and flakier than regular breadcrumbs, which lets them absorb just the right amount of oil during frying and creates those spiky, golden areas of pure crunch. This blend of sweet coconut and sharp panko is what guarantees your coconut shrimp crust stays shatteringly crisp.

The Essential Sweet Chili Mayo Coconut Shrimp Dipping Sauce
Honestly, serving coconut shrimp without the right sauce is a crime. Plain sweet chili sauce is fine, but we kick it up several notches with our Sweet Chili Mayo. It’s creamy, it’s tangy from that little bit of lime juice, and it cuts right through the richness of the fried shrimp. This isn’t optional; it’s what takes this appetizer from good to absolutely can’t-stop-eating-it material.
Gathering Ingredients for Perfect Homemade Coconut Shrimp
Okay, getting ready to cook is almost as fun as eating, right? Especially when you know exactly what you need! This recipe uses simple, trustworthy ingredients, but you have to make sure you grab the right versions of things—like that sweetened coconut. We broke this down into two easy groups, so grab your cutting board and let’s make sure we have everything because once you start breading, things move fast!
Ingredients for the Crispy Coconut Shrimp
- 1 pound large shrimp, peeled and deveined (Make sure they are nice and large—jumbo shrimp really show off the coating!)
- 1 cup all-purpose flour (Our first dredge station!)
- 2 large eggs, beaten (Give these a good whisk until they are frothy.)
- 1 cup sweetened shredded coconut (This is key—we want that little bit of sugar for browning.)
- 1 cup panko breadcrumbs (Our non-negotiable crunch provider!)
- 1 teaspoon salt and 1/2 teaspoon black pepper (Mix these right into your flour.)
- Vegetable oil, for frying (You’ll need about 2 inches deep in your pot.)
Ingredients for the Sweet Chili Mayo Coconut Shrimp Dipping Sauce
Don’t skip the sauce shopping! It really makes the homemade coconut shrimp feel restaurant-style. These three ingredients come together in seconds.
- 1/2 cup mayonnaise (Use the creamy kind you like best!)
- 1/4 cup sweet chili sauce (This brings most of that tropical sweetness and spice.)
- 1 tablespoon lime juice (Please use fresh! That little bit of acid is magic against the fat from frying.)
Step-by-Step Instructions for Restaurant Style Coconut Shrimp
Alright, now for the fun part! Making restaurant-style coconut shrimp is all about the assembly line. Once you get the station set up, it’s so quick you’ll wish you didn’t wait so long to try making it homemade. This frying method gives you that incredible, sealed-in crackle you’re looking for.
Preparing the Shrimp and Setting Up the Breading Station
First thing’s first—and this is a huge make-or-break tip: use paper towels to pat those raw shrimp absolutely bone dry. Seriously, if they have any moisture left lurking, the coating is going to slide right off. Once they’re dry, set up three shallow dishes lined up in order. Dish one gets your seasoned flour (salt and pepper in there!). Dish two is just for your beaten eggs. Dish three is where the magic happens—mix up those panko breadcrumbs and the sweetened shredded coconut together completely.
Coating and Preparing the Coconut Shrimp for Frying
Now, we repeat this sequence for every single piece of shrimp: flour first, shake off the excess gently. Then dip it right into the egg bath, letting any extra drip away. Finally, press that shrimp firmly into the coconut-panko mix. You want to really push that coating on so it adheres beautifully! Lay the finished, coated beauties on a clean baking sheet while you prepare the oil; this prevents them from sticking together.
Making the Quick Coconut Shrimp Dipping Sauce
While that oil is heating up, put together your dipping sauce! It takes maybe 60 seconds. Just grab a little bowl and whisk together that mayonnaise, the sweet chili sauce, and squeeze in your fresh lime juice. Taste it! If you want it a little punchier, maybe add a tiny bit more lime. Once it’s mixed, set it aside—it’s ready when the shrimp are!
Frying the Coconut Shrimp to Golden Perfection
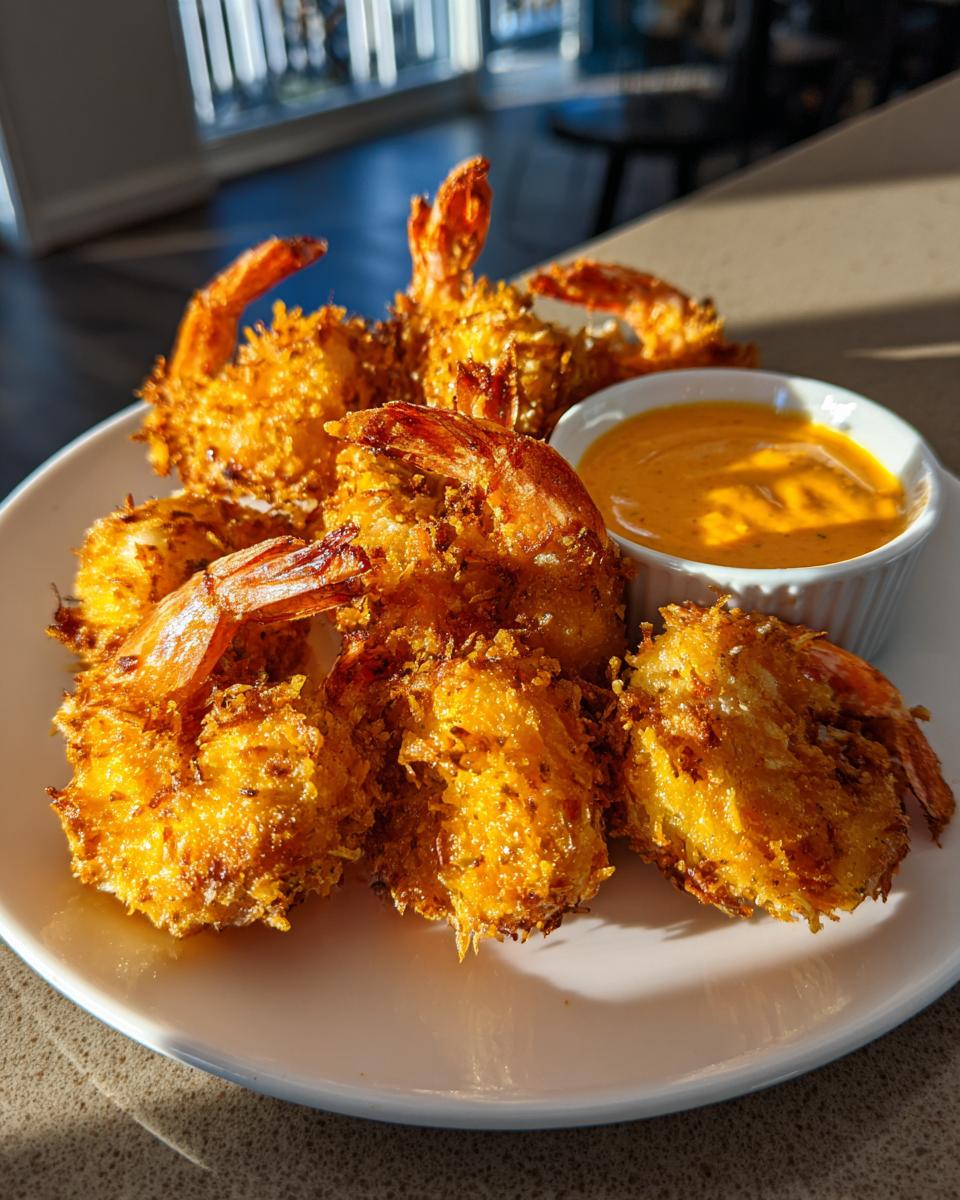
Time for the heat! You need about two inches of vegetable oil going in a heavy pot, and you must bring that temperature up to exactly 350°F (175°C). I keep a thermometer handy because if it’s too cold, the shrimp get greasy, and if it’s too hot, the coconut burns before the shrimp cooks. Work in small batches—about 4 to 6 shrimp at a time—so you don’t drop the oil temp too low. Fry for only 2 to 3 minutes, turning once, until they are gorgeously golden brown. Pull them out quickly and set them on a wire rack so the excess oil can drip away!
Tips for the Best Crispy Coconut Shrimp Success
Look, I’ve made this coconut shrimp recipe more times than I can count, and I’ve learned a few things along the way that stop those pesky problems like soggy crusts or coatings sliding off. You want that restaurant-quality snap, right? A few tweaks to your ingredients and knowing what to do when things go slightly wrong will make all the difference. Trust me, avoiding sogginess is all about prep work!
Ingredient Notes and Substitutions for Coconut Shrimp
First off, the size of your shrimp matters! I really mean it when I say use large or jumbo shrimp here. It gives you more surface area to hold onto that beautiful, crunchy coating. If you happen to only have unsweetened coconut flakes, that’s okay! Just add about a teaspoon of granulated sugar directly into your coconut and panko mix. It helps everything brown nicely and keeps that sweetness balance we are aiming for in great coconut shrimp.
Troubleshooting Common Coconut Shrimp Issues
If you pull a piece out and the coating is suddenly naked and floppy, that’s usually a temperature issue or, more likely, the shrimp weren’t dry enough! Always, always blot them dry first. If your oil temperature dropped too low while frying, the starch and flour drink up the oil instead of crisping up, leading to grease bombs. If you notice the oil bubbling sluggishly, let it come back up to a steady 350°F before dropping in the next batch. It’s worth the wait!
Cooking Alternatives: Air Fryer Coconut Shrimp and Baked Coconut Shrimp Recipe
I know deep frying is how we get that absolute best, golden crunch, but sometimes my waistline—or the sheer thought of deep cleaning that fryer oil—says, “Absolutely not!” And you guys are always asking about healthier routes, so let’s talk about making fantastic coconut shrimp without drowning it in oil. Both the air fryer and the standard oven are your friends here, provided you treat the coating right.
Air Fryer Coconut Shrimp Timing and Prep
If you’re pulling out the air fryer, you’re in for a treat because clean-up is a breeze! Don’t just toss them in there, though. Remember how we patted them dry earlier? That’s still Step One! Once your shrimp are fully coated in the coconut-panko mix, you need to lightly spray them on all sides with cooking spray. This helps wake up the coconut and gives you that desirable golden color. Set your air fryer basket up so the shrimp aren’t touching—we need air circulation for true crispiness. Cook these buddies at 380°F (195°C) for about 8 to 10 minutes total. Make sure you flip them halfway through so both sides get that lovely, crunchy texture. It works like a charm for quick weeknight meals!
Baked Coconut Shrimp Recipe Tips
For the baked version, you want maximum heat to try and mimic that fry, so preheating is vital. Set your oven to 400°F (200°C). Instead of an air fryer basket, you’ll need a light layer of oil sprayed right onto your baking sheet, or even better, use one of those wire racks placed on top of the sheet.
Placing the shrimp on a rack lifts them up, letting that hot air circulate underneath, which seriously prevents a common issue: soggy bottoms! After you lightly spray the tops of your coated shrimp, pop them in. They usually take a little longer than the air fryer—think 12 to 15 minutes. You must flip them once halfway through baking so that beautiful crust gets perfectly toasted on both sides. These methods are fantastic when you want a lighter take on your favorite coconut shrimp appetizer!
Serving Suggestions for Your Tropical Shrimp Appetizer
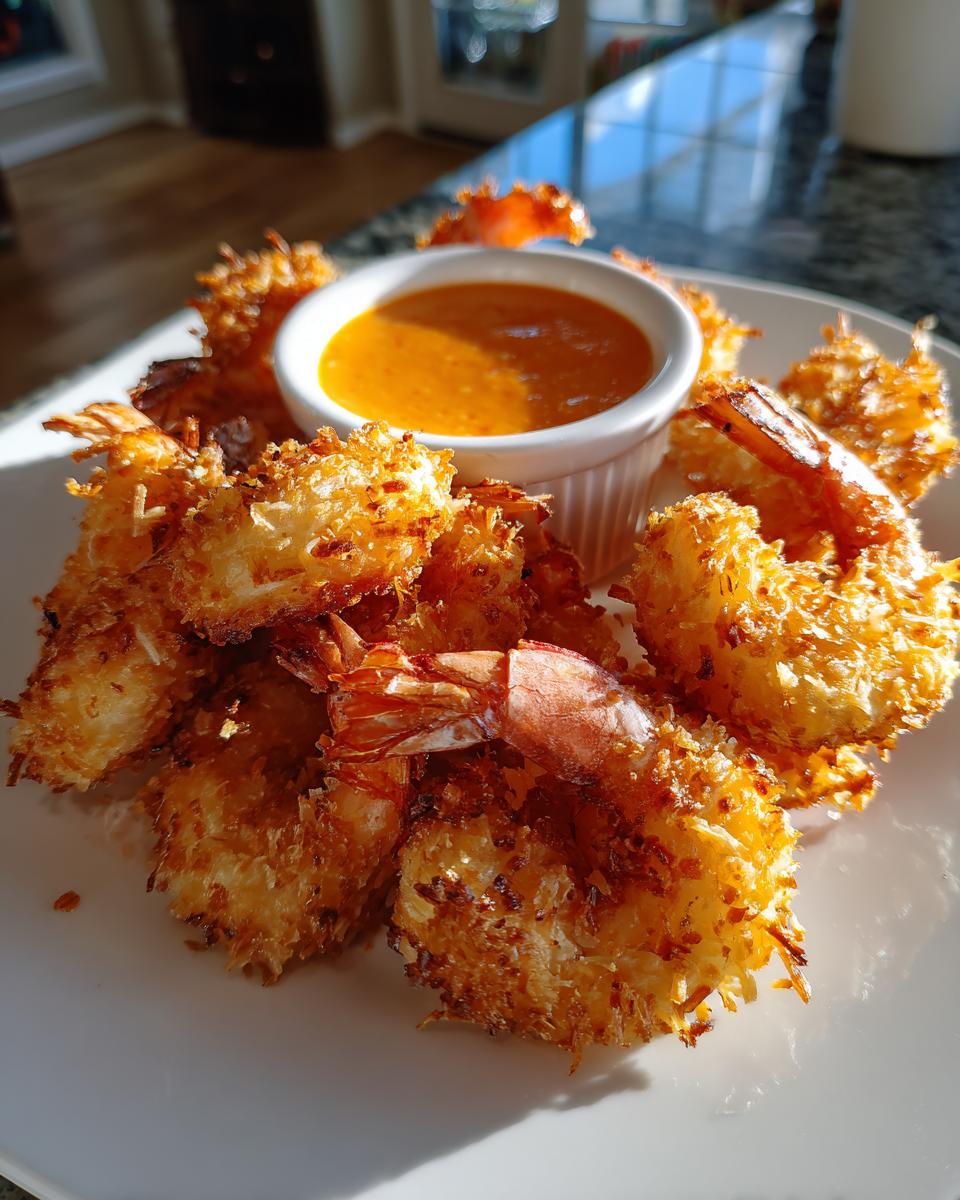
So you’ve got this amazing batch of golden, crunchy coconut shrimp cooling on the rack and that vibrant sweet chili mayo looking irresistible. What now? We can’t just stare at them forever! While these make the absolute best party snack—the kind where people gather around the platter like magnets—they can easily anchor a light, fun meal too. Presentation is everything, even when you’re just feeding the family on a Tuesday night!
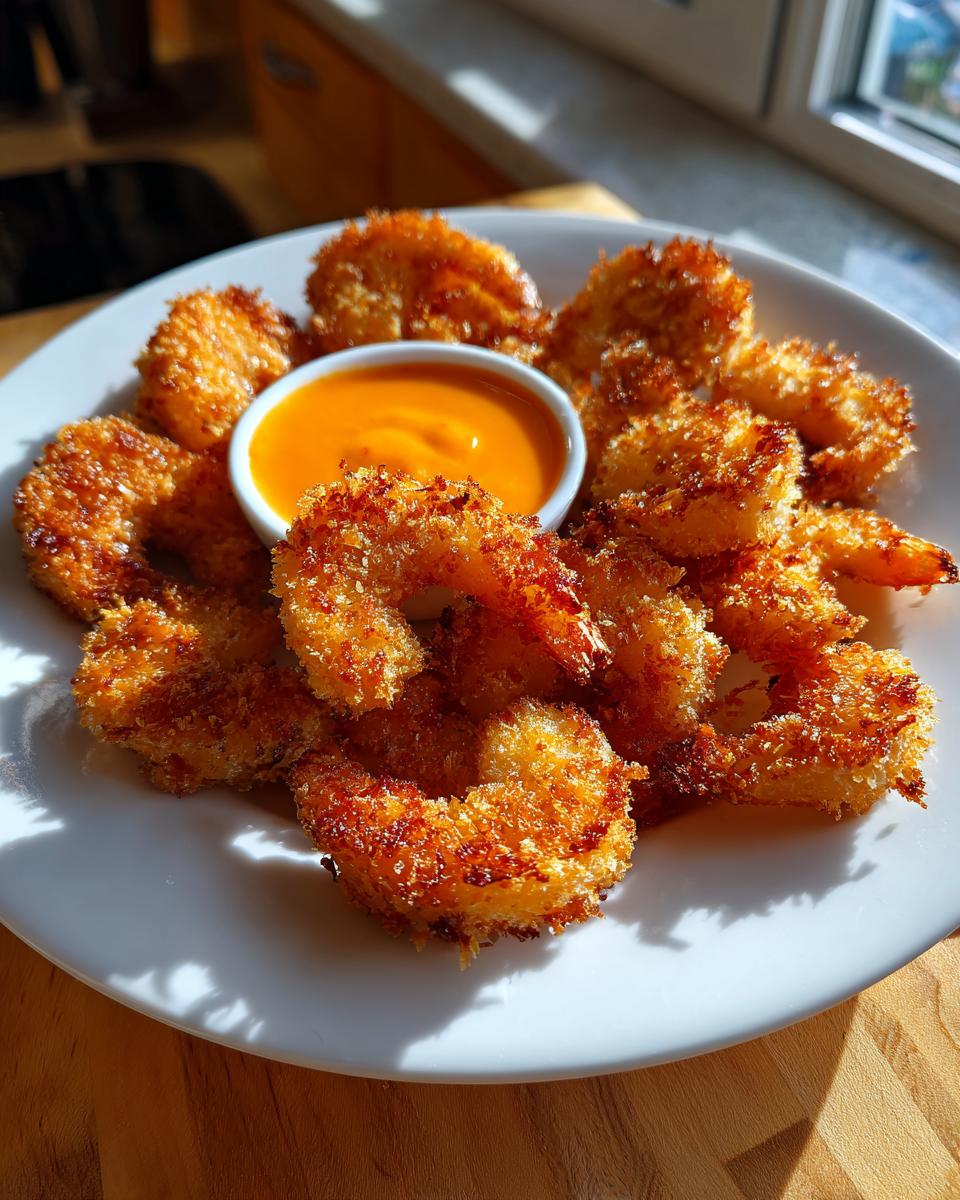
For a straightforward Seafood Appetizer Ideas platter, keep it colorful. Arrange the shrimp in a crescent shape around a small bowl of that incredible dipping sauce. I love scattering some fresh, thinly sliced jalapeños and maybe a wedge or two of fresh lime right on the platter. The vibrant green and red just make those golden curls pop! A sprinkle of fresh cilantro over the top gives it that final tropical flourish.
But if you want to turn this into a real dinner, think fresh and bright to complement the richness. Try serving your Panko Coconut Shrimp over a bed of crisp, Asian-inspired slaw. Mix shredded cabbage, carrots, maybe some mandarin slices if you’re feeling extra tropical, and toss it with a light sesame-ginger vinaigrette. The cool, crisp slaw gives you the perfect temperature and texture contrast to the warm, crunchy shrimp.
Another excellent main dish application is shrimp tacos! Skip the tortillas and serve the shrimp right on top of large butter lettuce cups. Add a spoonful of the sauce, maybe some diced mango salsa, and you have a light, healthy, and absolutely delicious weeknight shrimp dinner that everyone will devour. It still hits that tropical note but feels miles away from heavy fried food!
Storing and Reheating Crispy Coconut Shrimp
Okay, this is the hard part: having leftovers! Because these are fried, we have to be super careful about how we store them so they don’t turn into sad, soggy little shrimp puddles the next day. Remember, we worked really hard to get that crunch, and we don’t want to lose it to humidity overnight!
For storage, the absolute best thing you can do is let them cool completely on the wire rack after frying, ideally for about 30 minutes. Once totally cooled, store the coconut shrimp in an airtight container. You can definitely leave them in the fridge for a day or two, no problem. If you try to keep them longer than that, the coating starts to get compromised, and honestly, day-old fried food just isn’t the same.
Now, for reheating—and this is a major command from the kitchen chief: Do NOT use the microwave! I repeat, do not microwave your leftover coconut shrimp! The steam generated inside will turn that beautiful panko crust into damp cardboard instantly. We need dry heat to bring that crunch back to life!
The Best Way to Reheat for Maximum Crispness
If you have an air fryer, this is where it truly earns its keep. Spread your cooled leftovers in a single layer in the basket—don’t overlap them! Pop them in at 380°F (195°C) for just about 4 to 6 minutes. They come out piping hot and almost as crispy as when they were first made. It’s honestly shocking how well this works!
Reheating Coconut Shrimp in the Oven
If the air fryer is tied up or you don’t have one, the standard oven is your next best bet. Preheat your oven to a nice, hot 400°F (200°C). Place the shrimp directly on a wire rack set over a baking sheet—just like we talked about for the original baking alternative. That rack keeps the bottoms from getting steamy. Bake them for about 8 to 10 minutes. Keep an eye on them after the 7-minute mark, because that coconut toasts fast once it gets going again!
As for the dipping sauce? Just keep that sealed up tight in the fridge, too. It will thicken up a bit since it’s mayo-based, but you can stir in an extra tiny squeeze of lime juice before serving, and it’ll be good as new!
Frequently Asked Questions About Coconut Shrimp
I know you’ve got questions! Getting homemade coconut shrimp perfect can sometimes feel tricky, especially when you are aiming for that restaurant-quality crunch. Don’t worry, these are the exact things I needed to figure out when first testing this recipe, and I’m happy to share the solutions so you get an amazing result every time you make this fantastic Seafood Appetizer Idea!
Can I use unsweetened coconut in this coconut shrimp recipe?
That’s an excellent question, and yes, you totally can! If your usual grocery run only nets you the unsweetened shredded coconut, don’t panic and ditch the recipe. The primary reason we ask for sweetened coconut is that the sugar helps the coating brown quickly and evenly during frying—that gorgeous golden color. If you only have unsweetened, just toss about one teaspoon of regular granulated sugar right in with your coconut and panko mix. That little bit of sugar will mimic the effect and keep your Easy Coconut Shrimp looking and tasting beautiful!
What is the best oil to use for frying coconut shrimp?
When you are deep-frying anything, the oil choice is critical because you need high heat without the oil breaking down or smoking everywhere. For frying your crispy coconut shrimp, you want a neutral oil with a high smoke point. My go-to recommendation is simple vegetable oil or canola oil. They are flavor-neutral, which lets the sweet coconut flavor shine through, and they handle the 350°F we need like champions. Stay away from oils like extra virgin olive oil; they have smoke points that are just too low for this kind of cooking!
Can I prepare the coconut shrimp ahead of time?
Yes, you absolutely can save yourself time, especially if you are hosting a big group! The best way to do this is all about the coating step, not the frying step. Go ahead and prep your shrimp entirely—flour, egg, and press that beautiful coconut-panko mix onto them. Lay these raw, coated shrimp on a baking sheet and pop them into the freezer until they are totally frozen solid. Once frozen, you can transfer them to a freezer bag. When you’re ready to eat, just take them straight from the freezer, add about 2 minutes to the frying time, or cook them in the air fryer/oven slightly longer. This keeps that coating locked on tight!
Share Your Homemade Coconut Shrimp Experience
Whew! We did it! You now have the blueprint for making the crispiest, most flavor-packed coconut shrimp right here in your own kitchen. I am so excited for you to try this recipe and finally stop ordering this appetizer out at restaurants!
Now comes the fun part for me: hearing from you! Did you try the Sweet Chili Mayo? Maybe you went rogue and added a pinch of cayenne to the coating mix? Don’t keep those kitchen wins a secret! Please drop a rating below—let me know how many stars you landed on—and definitely leave a comment telling everyone how your homemade coconut shrimp turned out.
If you ran into a snag or have a brilliant modification I haven’t thought of yet, please share that too! We are all learning together here, and I love seeing your creative spins on these classic comfort foods. If you need me directly for questions, you can always use the Contact page, but usually, the comments section is where the real fun happens!
Happy cooking, and enjoy every crunchy, tropical bite!
PrintCrispy Fried Coconut Shrimp with Best Sweet Chili Mayo Dipping Sauce

Make restaurant-style coconut shrimp at home. This recipe yields perfectly crispy, sweet, and crunchy shrimp, served with a simple, flavorful sweet chili mayonnaise dipping sauce.
- Prep Time: 20 min
- Cook Time: 10 min
- Total Time: 30 min
- Yield: 4 servings 1x
- Category: Appetizer
- Method: Frying
- Cuisine: American Tropical
- Diet: Vegetarian
Ingredients
- 1 lb large shrimp, peeled and deveined
- 1 cup all-purpose flour
- 2 large eggs, beaten
- 1 cup sweetened shredded coconut
- 1 cup panko breadcrumbs
- 1 teaspoon salt
- 1/2 teaspoon black pepper
- Vegetable oil, for frying
- For the Dipping Sauce:
- 1/2 cup mayonnaise
- 1/4 cup sweet chili sauce
- 1 tablespoon lime juice
Instructions
- Prepare the shrimp by patting them completely dry with paper towels.
- Set up a standard breading station with three shallow dishes. Place the flour seasoned with salt and pepper in the first dish. Whisk the eggs in the second dish. Combine the shredded coconut and panko breadcrumbs in the third dish.
- Working with one shrimp at a time, dredge it first in the flour mixture, shaking off any excess.
- Dip the floured shrimp into the beaten egg, allowing excess to drip off.
- Press the shrimp firmly into the coconut-panko mixture to coat evenly on all sides. Place the coated shrimp on a baking sheet.
- In a small bowl, whisk together the mayonnaise, sweet chili sauce, and lime juice to create the dipping sauce. Set aside.
- Heat about 2 inches of vegetable oil in a heavy-bottomed pot or deep skillet to 350°F (175°C). Use a thermometer to monitor the temperature.
- Carefully place 4 to 6 shrimp into the hot oil, ensuring you do not overcrowd the pan. Fry for 2 to 3 minutes, turning once, until the crust is golden brown and crispy.
- Remove the cooked shrimp with a slotted spoon and place them on a wire rack set over a paper towel-lined plate to drain excess oil.
- Repeat the frying process with the remaining shrimp.
- Serve the hot, crispy coconut shrimp immediately with the sweet chili mayo dipping sauce.
Notes
- For an air fryer version, spray the coated shrimp lightly with cooking spray and cook at 380°F (195°C) for 8 to 10 minutes, flipping halfway, until golden.
- To make a baked version, place coated shrimp on a lightly oiled baking sheet and bake at 400°F (200°C) for 12 to 15 minutes, flipping once.
- If you prefer a less sweet sauce, reduce the sweet chili sauce amount by one tablespoon and add a dash of sriracha for heat.
Nutrition
- Serving Size: 5 shrimp
- Calories: 380
- Sugar: 14
- Sodium: 450
- Fat: 22
- Saturated Fat: 10
- Unsaturated Fat: 12
- Trans Fat: 0.5
- Carbohydrates: 28
- Fiber: 2
- Protein: 18
- Cholesterol: 150