
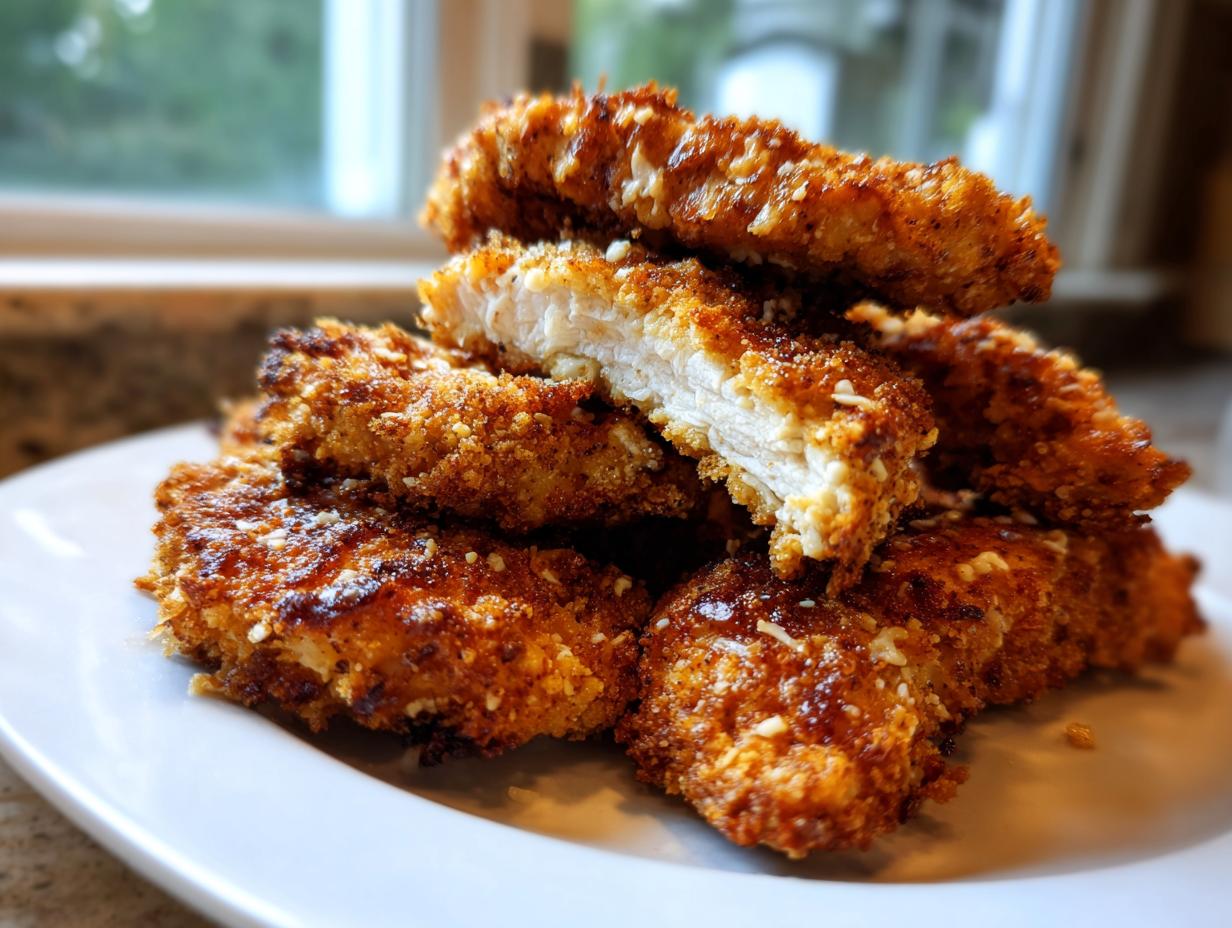
You know those nights, right? The clock is ticking down, the kids are asking what’s for dinner already, and the thought of hauling out the deep fryer feels like a massive chore. I get it. When I was first building Cookery Command, I wanted to smash the myth that comfort food has to be complicated or unhealthy. That’s why this recipe for chicken tenders is my absolute favorite weeknight secret weapon. We are achieving that ‘better than takeout chicken’ crunch everyone screams about, but we are doing it in the oven! This method guarantees that satisfying, shatteringly crisp coating while keeping the inside juicy. It’s dependable, easy, and exactly the kind of reliable home cooking technique I promise my readers we will always deliver. If you need more ideas for those tight schedules, check out my list of weeknight dinner recipes!
- Why This Ultimate Crispy Baked Chicken Tenders Recipe Wins
- Essential Ingredients for Perfect Chicken Tenders
- Step-by-Step Instructions for Crispy Baked Chicken Tenders
- Pro Tips for Perfect Chicken Tenders Every Time
- Make‑Ahead & Freezer Meal Chicken Tenders Strategy
- Serving Suggestions for Your Homemade Chicken Tenders
- Storage and Reheating Instructions for Leftover Chicken Tenders
- Frequently Asked Questions About Making Chicken Tenders
- Estimated Nutritional Data for These Chicken Tenders
Why This Ultimate Crispy Baked Chicken Tenders Recipe Wins
Look, I know you want crispy chicken tenders, but dredging them in oil isn’t always practical. That’s the beauty of this method! We’ve engineered this recipe to hit all the high notes people look for: maximum crunch, healthier prep, and speed. I wouldn’t share it unless it was absolutely solid. These aren’t going to taste like watery, sad oven chicken, trust me.
Here’s why our technique stands out for providing that perfect texture:
Achieving Maximum Crispiness Without Frying
The magic starts with two things: we use Panko breadcrumbs—they are lighter and flakier than standard breadcrumbs, which is huge for texture. Then, we blast the oven at 425°F! That high heat, combined with a generous spray of cooking oil right before baking, mimics the crisping action of frying without submerging the chicken. It turns out golden brown way faster than you think.
A Quick Chicken Dinner Solution
Because we bake these, cleanup is a breeze, and the prep combined with cook time keeps us under 40 minutes total! Seriously, that makes these an incredible quick chicken dinner option. You get that takeout satisfaction in time for an early bedtime, or maybe just time for an extra sauce dip!
Essential Ingredients for Perfect Chicken Tenders
Okay, let’s talk gear! Getting the best result for these chicken tenders absolutely relies on using the right ingredients—and using them correctly, too. I laid out exactly what you need below, but honestly, the quality of your coating really makes or breaks the “crispy” promise. Don’t go substituting things here unless you absolutely have to. My goal is always to give you the blueprint for that amazing texture, and these specific items get us there faster.
The Chicken and Buttermilk Marinade
We start with about 2 pounds of boneless, skinless chicken tenderloins. Tenderloins are perfect because they cook evenly, but if you only have breasts, just slice those into strips that are about the same size, okay? Then comes the soak. You need one full cup of buttermilk—it’s crucial! Buttermilk is slightly acidic, which tenderizes the meat beautifully, ensuring they stay juicy even at that high oven temperature. To that buttermilk, we add simple seasonings: a teaspoon each of salt, black pepper, garlic powder, and onion powder, plus a half teaspoon of paprika for a little color. Let this mingle for at least 15 minutes. Trust me, that quick soak time makes a huge difference in how tender your baked chicken tenders turn out!
Creating the Crispy Coating Recipe
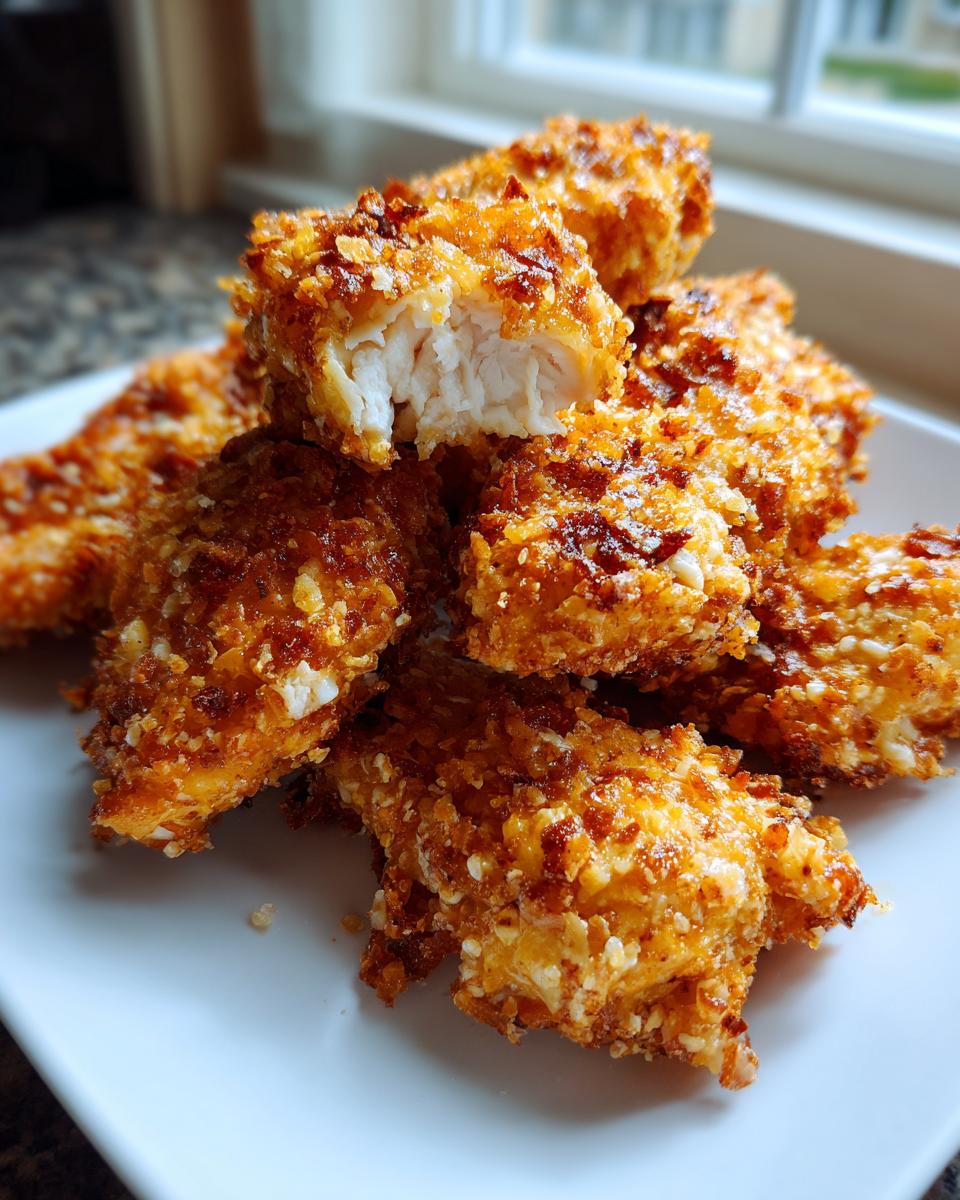
This is where our oven-baked magic really takes shape. We are ditching soggy breading for something much crunchier. You’ll need two cups of Panko breadcrumbs. Panko is key; they stay crispier than regular crumbs. We mix those crumbs with a half cup of grated Parmesan cheese—yes, the real stuff makes a difference in flavor—and two tablespoons of all-purpose flour. The flour, along with the single large egg that’s lightly beaten for the wash, helps everything stick perfectly. This combination is what gives us that golden, deeply crunchy exterior we are looking for in our homemade chicken tenders.
Step-by-Step Instructions for Crispy Baked Chicken Tenders
Okay, here is where the fun begins! We want these crispy chicken tenders to be perfect from start to finish. Don’t rush through the setup, because good prep means crunchy results later. Remember, we are aiming for tender meat encased in that golden, crunchy shell. It’s all about managing the heat and the coating assembly line! Learning how to get perfect oven-fried results is vital, similar to my guide on crispy baked chicken wings.
Preparation: Preheat and Marinate Your Chicken Tenders
First things first: get that oven hot! We preheat to a roaring 425°F (220°C). While it’s heating up, grab your baking sheet—I like to line mine with parchment paper for cleanup, then hit it generously with cooking spray. Now, dive back to your chicken soaking in that buttermilk bath. Make sure those tenderloins sit in there for at least 15 minutes. Seriously, don’t skip that soak time; it’s what makes them so juicy!
The Breading Process for Oven Baked Chicken Tenders
Set up your little dredging station. You have your buttermilk mixture, your egg wash, and your Panko/Parmesan/flour mix. Pull one tenderloin out of the buttermilk, let the extra drip back in—we don’t want it soupy! Dip it completely into the beaten egg, making sure it’s slicked all over. Then, and this is important, press that soggy tender firmly into the Panko mixture. *Press* it, don’t just roll it. We need that coating to stick right before we bake these!
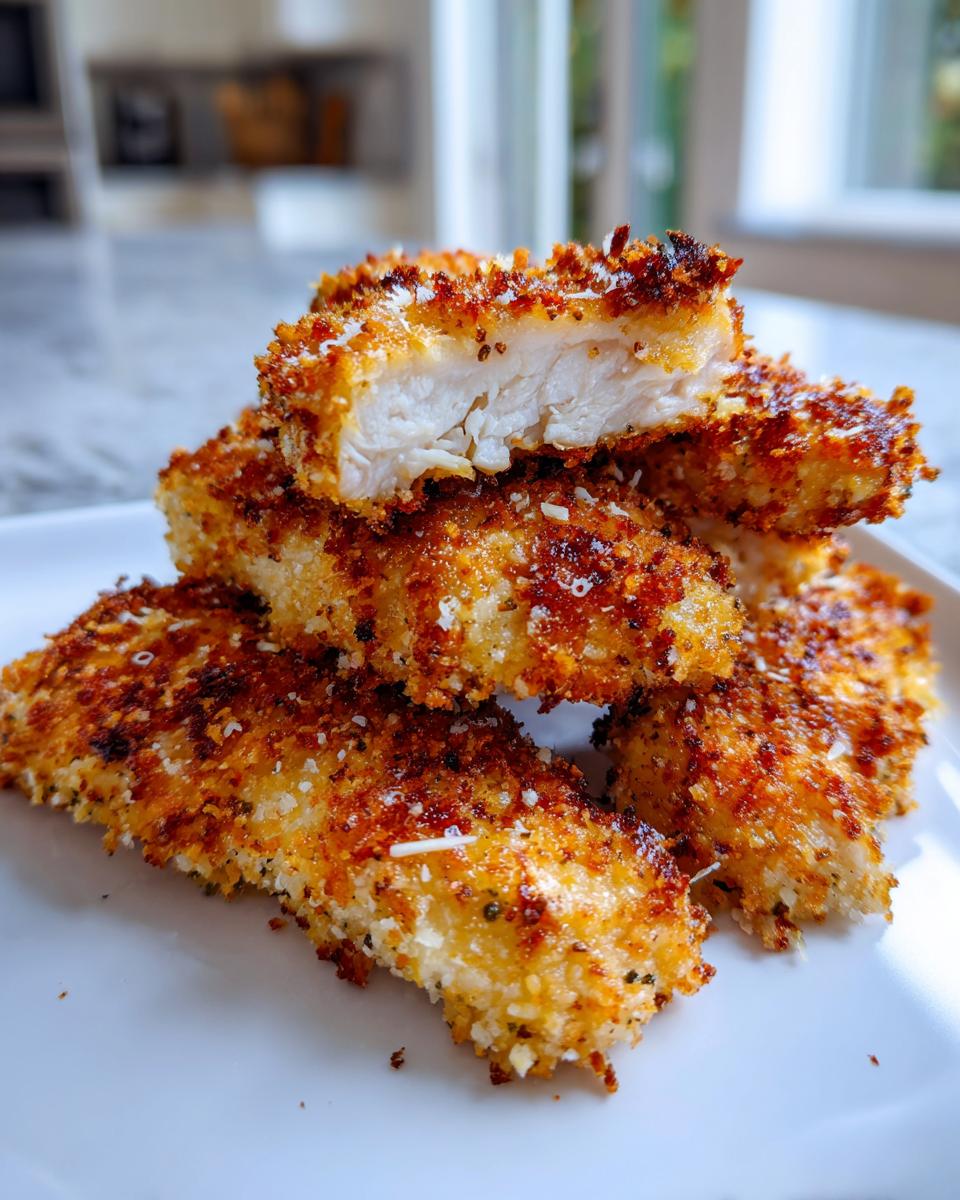
Baking for Ultimate Golden Crunch
Line those perfectly coated beauties on your prepared sheet pan in a single layer. Do not let them touch! Now, grab your cooking spray—yes, more oil is needed! Spray the tops liberally so they brown nicely. Bake them for exactly 10 minutes. Pull them out, flip every single one over, and spray the second side again with cooking spray. Back they go for another 8 to 12 minutes until they hit 165°F internally. Perfect homemade chicken tenders!
Pro Tips for Perfect Chicken Tenders Every Time
Getting these baked chicken tenders as crispy as possible involves a tiny bit of staging, but it’s worth the effort! If you’re worried about the bottoms getting steamed while they bake, I have the trick you need. These aren’t just recipes; they are methods I’ve tested to perfection in my test kitchen, just like my guide for baked ranch chicken.
Technique Adjustments for Extra Crispy Chicken Tenders
If you really want to lock in that shatteringly crisp bottomcoat, avoid putting the tenders directly on the sprayed baking sheet. Instead, line your sheet pan with a wire cooling rack. Yes, you need to spray the rack too! This lifts the chicken just slightly, allowing the hot air to circulate underneath. That means all sides get gorgeously golden and crunchy, not just the tops.
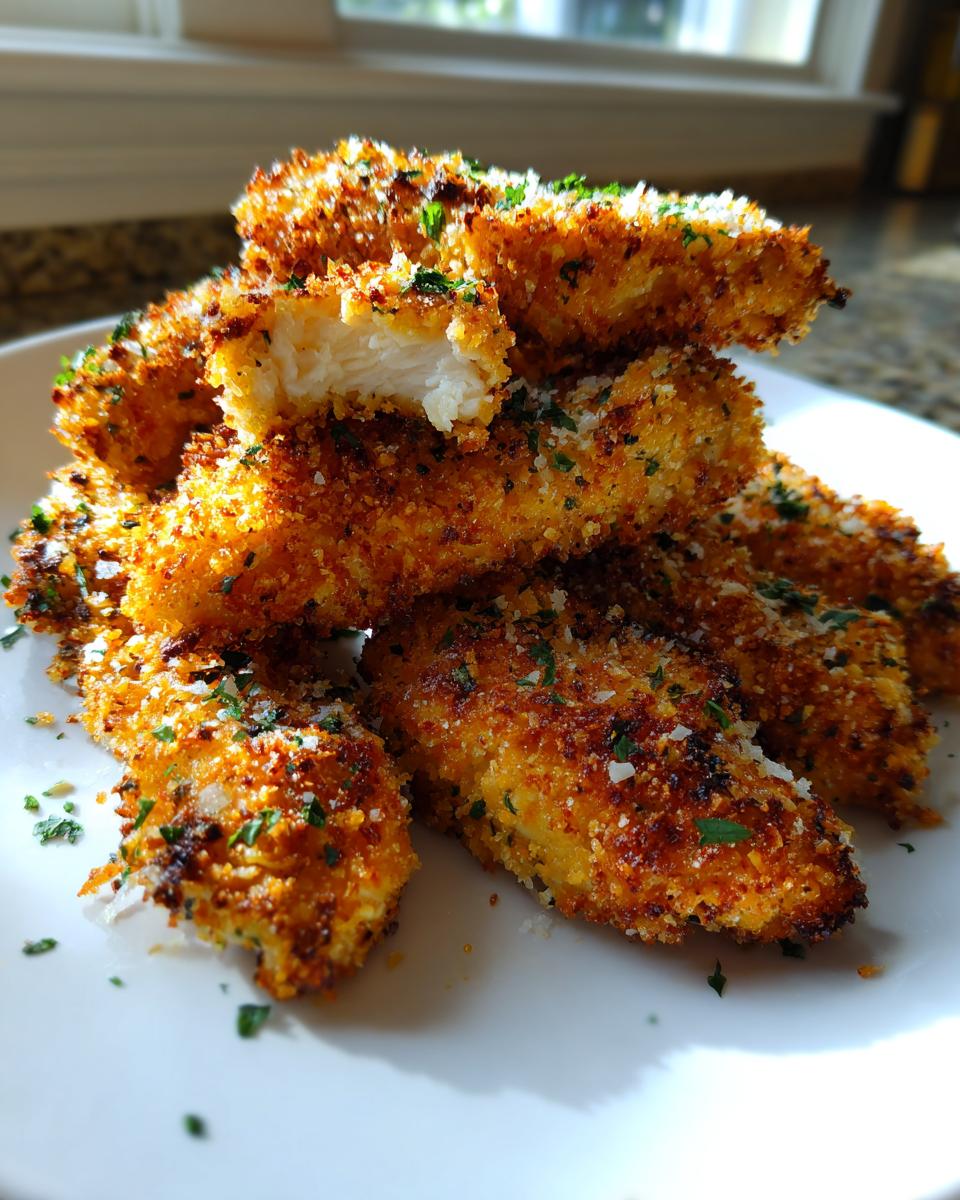
Flavor Variations: Try Ranch Chicken Tenders
I know so many of you are looking for those ‘Crack Chicken’ vibes, and yes, we can sneak that flavor in here easily! If you want to transform these into ranch chicken tenders, just add about one tablespoon of dry ranch seasoning mix right into your Panko breadcrumb and Parmesan mixture. It blends right in with the salty Parmesan, giving you that savory, herby punch everyone loves. It’s an excellent, fast flavor upgrade for an already stellar easy chicken tenders recipe.
Make‑Ahead & Freezer Meal Chicken Tenders Strategy
Listen, getting dinner on the table fast during the week is a war, and we need supplies ready to go! That’s why I always make a double batch of these chicken tenders when I have the time. Turning this into a freezer meal chicken tenders situation is so simple, and thank goodness for that because nothing beats pulling out perfectly seasoned, ready-to-bake chicken when you are exhausted!
You have two options here, depending on how much effort you want to put in later:
If you want to freeze them uncooked, you need to take extra care with your breading station. After you coat every tenderloin in the Panko mix, lay them out on a baking sheet *without* spraying them with cooking spray yet. Freeze them completely solid like this—this is called flash freezing, and it stops the breading from clumping later. Once they are like little frozen sticks of deliciousness, carefully transfer them to a heavy-duty freezer bag. When you go to cook them later, you skip the marinade time, give them a good spritz of cooking spray right on the pan, and add about 5 to 7 minutes to the total bake time.
If you prefer to freeze them cooked (which is honestly my favorite for throwing into a quick lunch), make sure they are completely cool after baking. Then, package them in an airtight container or freezer bag. When reheating, skip the microwave entirely if you can! Microwaving kills the crunch we worked so hard to achieve. Instead, reheat them on a wire rack on a baking sheet at 350°F for about 8 to 10 minutes. This brings back that oven-crispiness and keeps them tender. Seriously, having these ready to go means you’re only 10 minutes away from a fantastic meal, even when the evening feels chaotic. If you need more ideas for planned meals, you might want to check out my recipe for easy chicken cobbler casserole!
Serving Suggestions for Your Homemade Chicken Tenders
Okay, now that you have transformed your simple chicken tenderloins into these unbelievably crispy chicken tenders, the only question left is: what do we eat them with? Since our coating is mild, savory, and built around Parmesan, they are total sponges for flavor, meaning they pair well with nearly everything! Whether you’re serving these for a true weeknight dinner or prepping them for game day appetizers, we need the right supporting cast on the plate.
For a fantastic kid friendly dinner idea, keeping things simple on the side is always a winner. My kids love these with a side of sweet potato fries or some crunchy carrot sticks—you know, keeping it casual. If you are serving these as an appetizer spread, set up a sauce bar! Variety is the spice of life, right?
Here are my must-have pairings:
- Classic Dippers: Honey mustard is non-negotiable, in my book. But you absolutely need a good comeback sauce! If you’re feeling ambitious, try making my easy homemade tartar sauce recipe—it’s unexpectedly amazing with the crispy Panko crust, giving it that diner feel.
- Making it a Meal: To turn these into a full, balanced dinner, toss the tenders alongside some quick roasted broccoli or serve them atop a really fresh, simple green salad. A light vinaigrette cuts through the richness of that coating perfectly.
- Flavor Boost: If you used the Ranch seasoning trick in the breading, lean into that comfort factor with some baked potato wedges or crispy oven fries. It’s pure, delicious American eats!
These tenders are versatile enough that they go from being the star of the show for a family favorite chicken night to being the perfect, easy finger food for a crowd. Just make sure you make extra, because they vanish fast!
Storage and Reheating Instructions for Leftover Chicken Tenders
Listen, if you have leftover crispy chicken tenders, you’ve won the weeknight lottery! But the real challenge comes the next day: how do you get that beautiful, golden Panko coating crunchy again? The microwave is your enemy here. I learned that the hard way trying to reheat leftovers; you end up with perfectly cooked chicken that feels like sad, wet cardboard on the outside. We worked too hard for that crispiness to let the microwave destroy it!
The goal with leftovers is restoring that high heat crunch we achieved in the oven the first time. If you need help figuring out how to crisp up other frozen items, you might want to check out my guide on air fryer frozen shrimp—the concept is similar!
Here is the exact protocol I follow for leftovers:
Reheating for Maximum Crispiness
You have two excellent options, depending on how much time you have. The very best way to reheat these oven baked chicken tenders is definitely back in the oven. Set your oven temperature to 375°F (190°C). Place the leftover tenders on a clean, lightly sprayed wire rack set over a baking sheet—don’t skip the rack! This allows the air to circulate underneath, reviving the bottom crust. Heat them for about 8 to 10 minutes, or until they are piping hot throughout. They come out tasting almost exactly like they just came out of the oven the first time.
If you happen to own an air fryer, that’s my close second favorite method! A quick blast in the air fryer at 370°F for about 4 minutes is genius for reviving a few pieces quickly. Just make sure the basket isn’t crowded!
How Long Do These Homemade Chicken Tenders Last?
Once cooled completely after the initial bake, store your leftover homemade chicken tenders in an airtight container or a zip-top bag. They keep beautifully in the refrigerator for about three to four days. If you think it might be longer than that, definitely freeze them using the method I described above in the freezer meal section! Always cool them down completely before sealing them up; putting warm food into a sealed container traps moisture, which guarantees sogginess later, and we absolutely cannot have soggy tenders around here.
Frequently Asked Questions About Making Chicken Tenders
I get so many questions about this recipe once people start loving how crispy these baked chicken tenders turn out! It’s fun seeing all the ways you tweak them for your own family’s taste. Since getting that crunch without deep-frying is slightly different than traditional methods, people always have specific questions about substitutions and cooking methods. Don’t worry if you need to make little swaps; we can usually handle it! If you’re looking for a side dish to go with these, make sure you check out my recipe for air fryer french fries—they cook up perfectly crispy right alongside your tenders!
Can I use chicken breast instead of tenderloins for these chicken tenders?
Absolutely, you can! Chicken tenderloins are just the small strip naturally attached to the bottom of the chicken breast, but since they are smaller, they are foolproof. If you are using full chicken breasts, just make sure you pound them slightly if they are super thick and then slice them into uniform strips. I aim for about one inch thick strips every time. This uniformity is key because if one piece is thick and the next is skinny, the skinny one will dry out while you wait for the thick one to finish cooking. Keep the marinade time the same, and you’ll still have wonderfully healthy chicken tenders!
What is the best way to make these air fryer chicken tenders?
People absolutely love turning this into an air fryer chicken tenders situation, and honestly, it works great because the air fryer is basically a powerful little convection oven! For adapting, first, make sure your marinated tenders are nicely patted dry because that helps the coating stick better in the basket. Skip the parchment paper obviously. Arrange them in a single layer in your air fryer basket—you might need to work in batches so you don’t overcrowd it! Cook them at 380°F (about 195°C). They usually only take about 14 to 18 minutes total, but you’ll need to flip them halfway through and give them a little spritz of cooking spray then, just like we do in the oven. They come out perfectly crunchy!
How do I make these healthy chicken tenders spicier?
If you like a little kick in your homemade chicken tenders, you have a couple of great options! The buttermilk marinade is the perfect spot to sneak in the heat. You can add about a teaspoon of cayenne pepper, or even a dash or two of your favorite hot sauce, directly into the buttermilk mixture when you add the garlic and onion powder. That acidic marinade will penetrate the chicken meat, giving you heat deep inside the tender. If you want the spice primarily on the outside crust for an immediate punch, mix a little cayenne directly into your Panko breading, too. It’s a double hit of heat, and I love it!
Estimated Nutritional Data for These Chicken Tenders
Now, I always want to be super transparent here at Command Central. When we talk about making things from scratch, especially for our ultimate crispy oven-baked easy healthy homemade salad dressing recipes, the numbers can shift based on exactly how much oil you spray or the specific brand of Parmesan cheese you grab. This information is calculated based on the exact measurements in the recipe I shared above, estimating serving size as four tenders per person.
Please know these values are estimates, but they give you a great baseline for what you’re enjoying! This is part of my promise to apply clear technique to home cooking.
- Serving Size: 4 tenders
- Calories: 380
- Fat: 14g (with 4g saturated fat)
- Carbohydrates: 20g (Fiber: 1g, Sugar: 2g)
- Protein: 45g
- Cholesterol: 110mg
- Sodium: 450mg
It’s a fantastic profile for such a satisfying meal! You’re getting tons of protein and keeping the fat content reasonable since we skipped the deep fryer. Pretty excellent for an easy weeknight dinner, right?
PrintUltimate Crispy Oven Baked Chicken Tenders

Make these incredibly crispy chicken tenders in your oven. This recipe delivers a golden, crunchy coating and juicy interior, making it a healthier, easy weeknight dinner that rivals takeout.
- Prep Time: 15 min
- Cook Time: 22 min
- Total Time: 37 min
- Yield: 4 servings 1x
- Category: Dinner
- Method: Baking
- Cuisine: American
- Diet: Vegetarian
Ingredients
- 2 lbs boneless, skinless chicken tenderloins
- 1 cup buttermilk
- 1 teaspoon salt
- 1 teaspoon black pepper
- 1 teaspoon garlic powder
- 1 teaspoon onion powder
- 1/2 teaspoon paprika
- 2 cups panko breadcrumbs
- 1/2 cup grated Parmesan cheese
- 2 tablespoons all-purpose flour
- 1 large egg, lightly beaten
- Cooking spray
Instructions
- Preheat your oven to 425°F (220°C). Lightly grease a baking sheet or line it with parchment paper, then coat generously with cooking spray.
- In a medium bowl, combine the buttermilk, salt, pepper, garlic powder, onion powder, and paprika. Add the chicken tenderloins, ensuring they are fully coated. Let the chicken marinate for at least 15 minutes, or up to 4 hours in the refrigerator.
- In a separate shallow dish, whisk together the panko breadcrumbs, Parmesan cheese, and flour.
- In a third dish, lightly beat the egg.
- Remove one tenderloin at a time from the buttermilk mixture, allowing excess to drip off. Dip the tenderloin into the egg wash, then press firmly into the panko mixture until completely coated.
- Place the coated tenders in a single layer on the prepared baking sheet. Do not overcrowd the pan.
- Spray the tops of the coated tenders liberally with cooking spray to help them brown and crisp.
- Bake for 10 minutes, flip the tenders, and spray the other side with cooking spray.
- Bake for another 8 to 12 minutes, or until the internal temperature reaches 165°F (74°C) and the coating is golden brown and crispy.
- Serve immediately with your favorite dipping sauces for a family favorite meal.
Notes
- For extra crispiness, place a wire rack on top of your baking sheet before arranging the tenders.
- If you prefer a ‘Crack Chicken’ flavor, add 1 tablespoon of dry ranch seasoning mix to the panko breadcrumb mixture.
- This recipe works well for freezer meal preparation; freeze cooked or uncooked tenders on a sheet pan before transferring them to a freezer bag.
Nutrition
- Serving Size: 4 tenders
- Calories: 380
- Sugar: 2
- Sodium: 450
- Fat: 14
- Saturated Fat: 4
- Unsaturated Fat: 10
- Trans Fat: 0
- Carbohydrates: 20
- Fiber: 1
- Protein: 45
- Cholesterol: 110