
Oh, the heartbreak of the perfect autumn day ruined by a runny mess! You know what I’m talking about—you spend all that time making beautiful *caramel apple* treats, and then the caramel slides right off onto the platter. It’s the worst! At Cookery Command, we believe in results you can trust, which is why I’ve put my years of kitchen technique into this truly foolproof recipe. We are going to get you that wonderfully chewy caramel that adheres perfectly, every single time. It’s all about blending that sweet Midwestern tradition with a little bit of precise science, and trust me, the results are worth the attention to detail. You can read more about our approach to technique over on our About Page!
- Why This Is the BEST Caramel Apple Recipe: The Secret to Caramel Apples That Stick
- Ingredients for Foolproof Homemade Caramel Apples
- How to Prepare Homemade Caramel Apples: The No-Fail Technique
- Tips for Success with Your Caramel Apple Recipe
- Variations: Spiced Caramel Apples and Other Gourmet Caramel Apples
- Serving Suggestions for Your Caramel Apple Creation
- Storage and Reheating Instructions for Homemade Caramel Apples
- Frequently Asked Questions About Making Caramel Apples
- Estimated Nutritional Data for One Caramel Apple
Why This Is the BEST Caramel Apple Recipe: The Secret to Caramel Apples That Stick
Okay, let’s talk science for a minute, because this is where most people run into trouble with their homemade caramel apples. The reason this is the best caramel apple recipe? It tackles the two biggest failure points head-on: wax and temperature. If your apples are waxy, the caramel just slides off, no matter how perfectly you cook your sauce. That’s why our first step is crucial! And frankly, if you skip the candy thermometer, you are guessing, and guessing leads to runny caramel that won’t hold.
We nail the “firm ball stage” at exactly 245 degrees Fahrenheit. That exact temperature forces the caramel into a chewy set that keeps it locked onto the apple, giving you those amazing caramel apples that stick like they should. No more sad, sliding fruit on your holiday platters!
Choosing the Right Apples for Your Caramel Apple
The apple choice matters just as much as the caramel, truly! You need something that can stand up to both the heat of the dip *and* the heavy coating once it sets. I absolutely insist on Granny Smith or Honeycrisp. Granny Smiths bring that wonderful tart punch that perfectly cuts through the richness of the caramel—it’s that classic sweet and sour balance we crave in a fall treat.
Whichever you choose, make sure they are crisp but firm. Mushy apples will just deflate under the weight. We need a sturdy base for our beautiful caramel apple coating!
Ingredients for Foolproof Homemade Caramel Apples
Getting your supplies lined up is half the battle when making candies at home. Don’t try to substitute here—the chemistry is specific to get that perfect chewy texture we’re after in these homemade caramel apples. I always lay everything out next to the stove before I even turn an element on. It just makes the whole process so much smoother!
Essential Caramel Ingredients
- 12 medium crisp apples (I always use Granny Smith or Honeycrisp, they hold up so well!)
- 12 wooden or parchment-lined sticks
- 1 cup (2 sticks) unsalted butter
- 2 cups light brown sugar, packed tight
- 1 cup light corn syrup (please don’t try to skip this, it’s necessary for stability!)
- 1 (14 ounce) can sweetened condensed milk
- 1 teaspoon pure vanilla extract
- 1/2 teaspoon sea salt
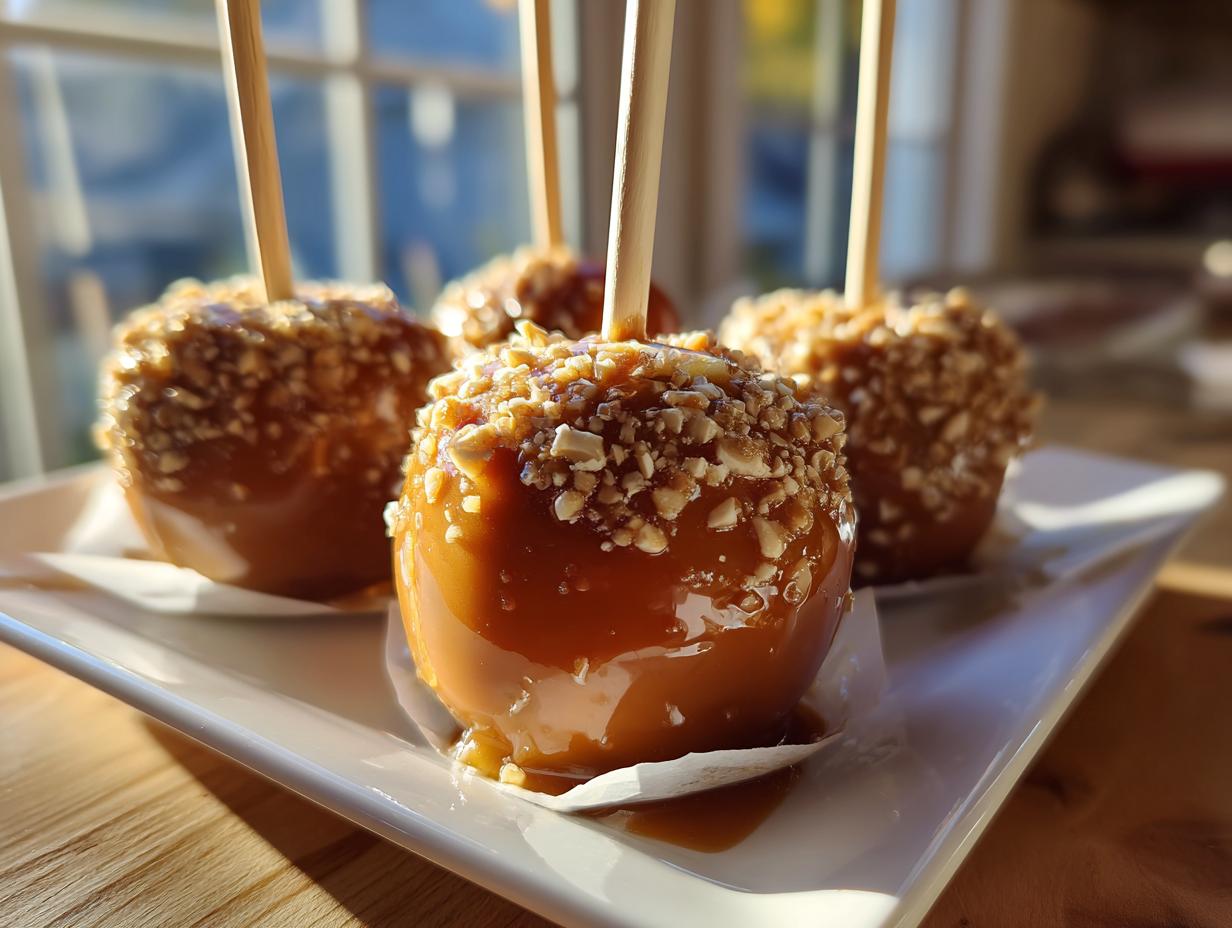
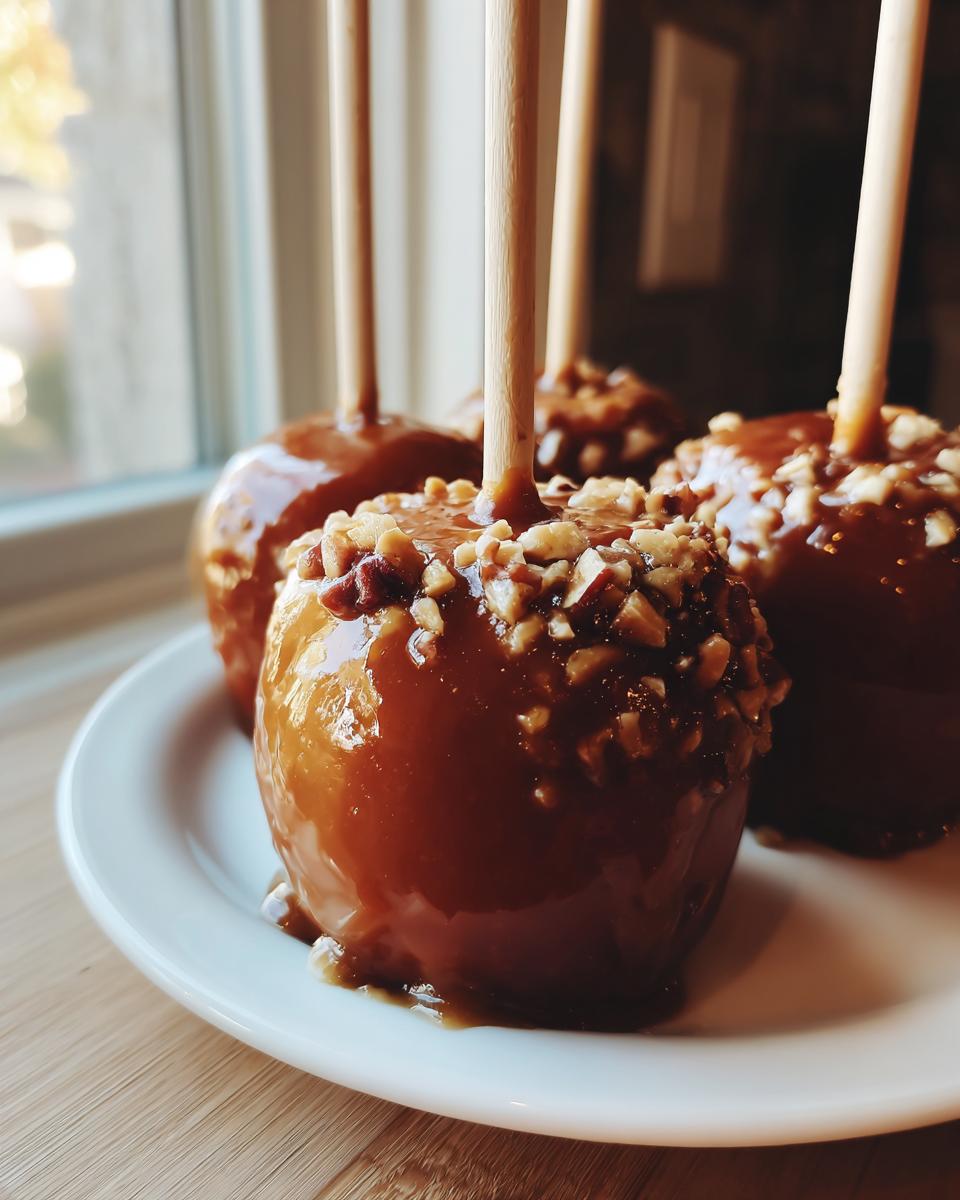
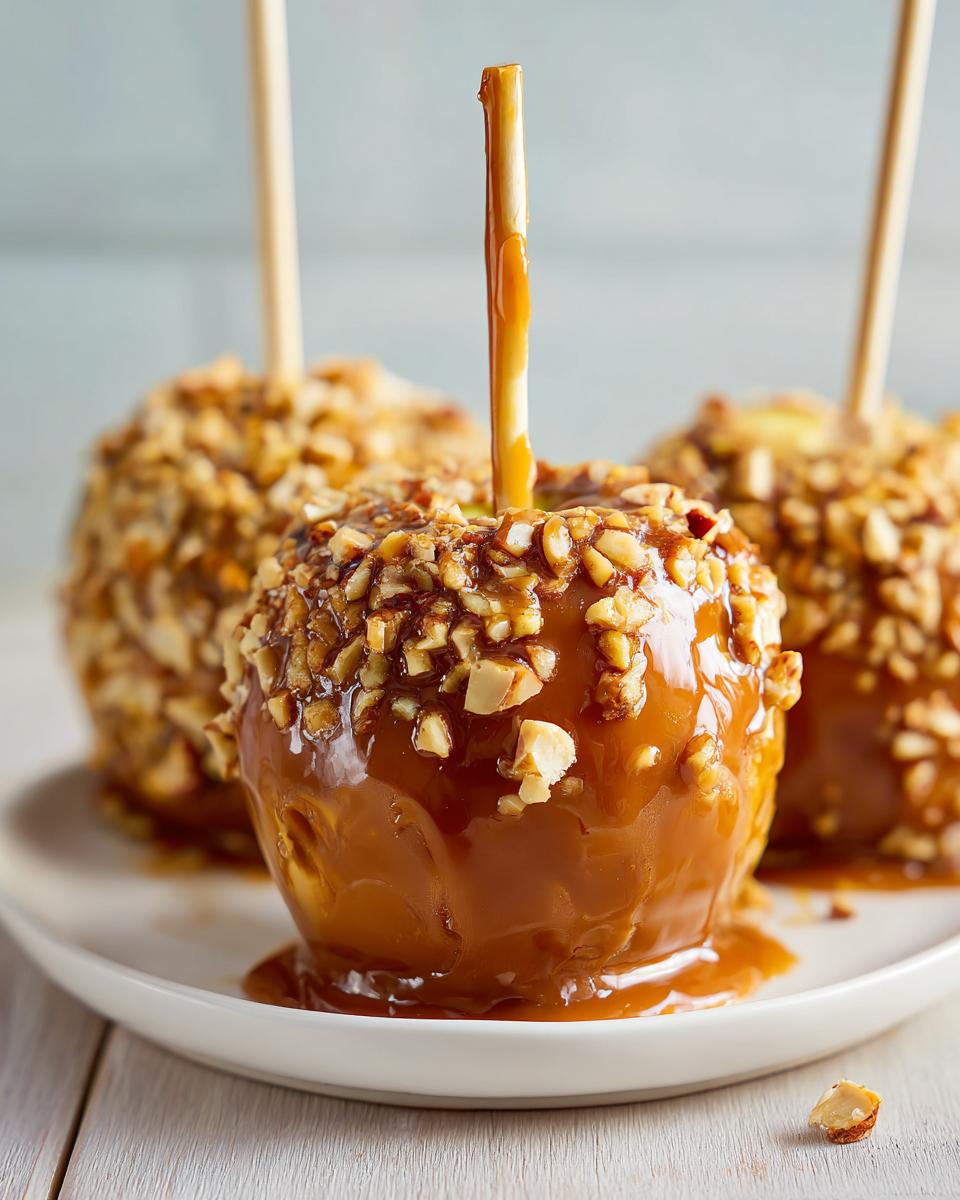
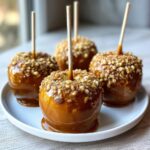
Caramel Apple Topping Ideas for Gourmet Caramel Apples
This is where you can really personalize these! Having these options ready to go helps you move fast once the apples are dipped. We’re going for that upscale, gourmet caramel apples look.
- Optional Toppings:
- Chopped nuts (pecans or walnuts are my favorite)
- Miniature chocolate chips
- Crushed pretzels (the ultimate sweet and salty combo!)
- Rainbow or autumn-mix sprinkles
How to Prepare Homemade Caramel Apples: The No-Fail Technique
This is it—the moment of truth where we turn simple ingredients into those gorgeous, glossy treats. Follow these steps exactly, and I promise you’ll have no fail caramel apples. Rushing through the prep or cooking is what leads to disaster, and we just won’t have that here! We need precision for that perfect texture, just like my friends writing about making the best homemade caramel apples stress.
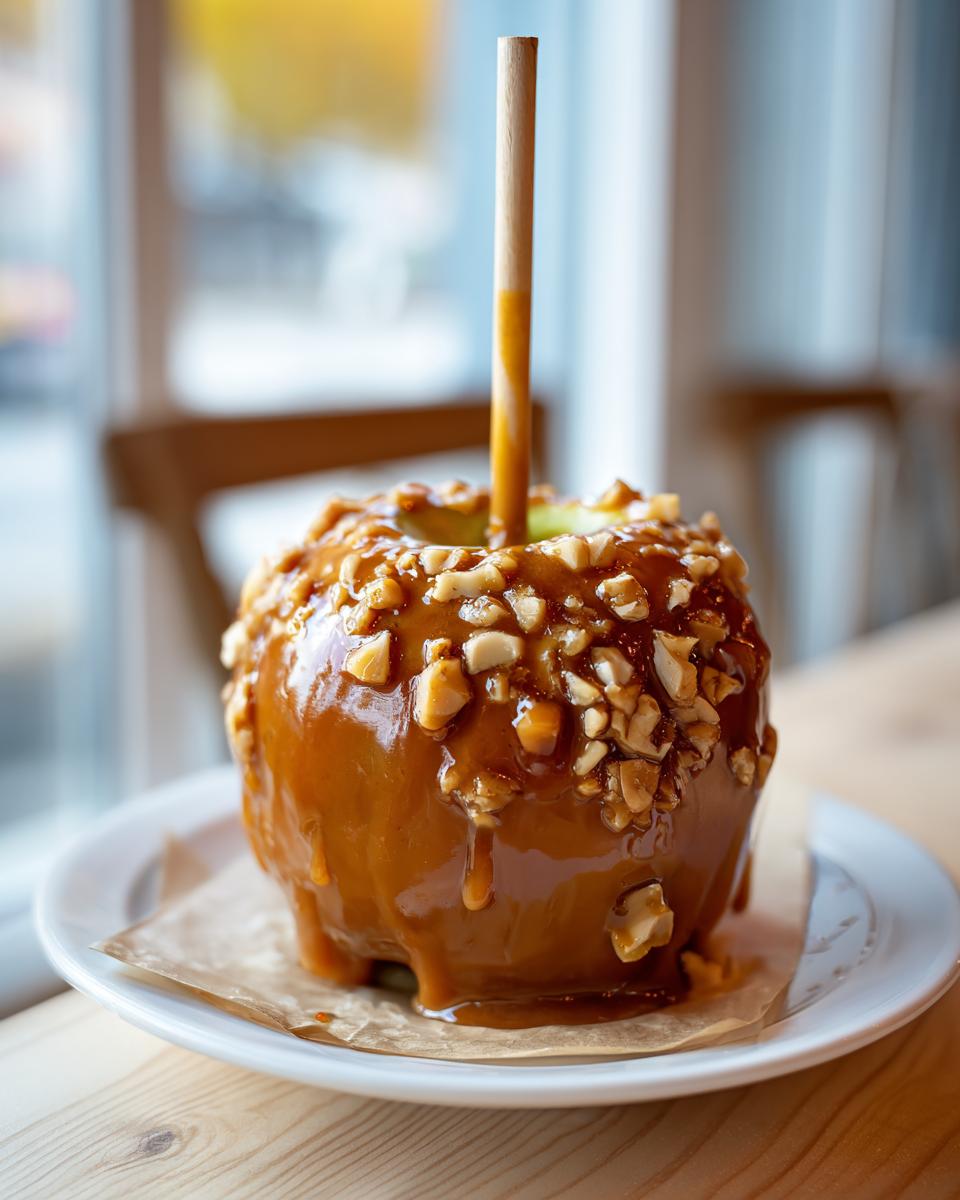
Step 1: Preparing the Apples to Ensure the Caramel Sticks
This is the non-negotiable step if you want your caramel to stay put! First, wash those apples really well, but that only removes dirt. To get rid of the waxy coating that manufacturers put on them—that’s what makes the caramel slide away—you need to dip them briefly in boiling water. Just 10 seconds or so, then take them out. The most important part? Dry them completely. I mean *bone dry*. Any trace of water will ruin the caramel’s adherence. Once dry, push those sticks in firmly through the stem end. We are ready for dipping!
Step 2: Cooking the Caramel to Achieve Chewy Caramel Apples
In a nice, heavy saucepan, combine your butter, brown sugar, and corn syrup. Heat it gently until everything dissolves, like in Step 3 of the overview. Now, this is critical: bring it to a boil and **do not stir** it while it’s boiling! You must use your candy thermometer here. We are aiming for 245 degrees Fahrenheit—that’s a firm ball stage. Trust me, hitting that exact temperature is what guarantees you get those fantastic, **chewy caramel apples** that don’t weep or run down the side. It’s how we build flavor and texture authority!
Step 3: Dipping, Coating, and Setting the Caramel Apple
Once you hit 245°F, take the pot off the heat. Whisk that condensed milk in carefully—it’s going to bubble up! Whisk until smooth, return it to low heat for just two minutes, then pull it off and stir in the vanilla and salt. Now, here’s a little secret: let that caramel cool for about 5 to 10 minutes until it thickens up a hair but is still gloriously pourable. If it’s too hot, it will slide off! Tilt the pan and dip your dried apples smoothly. Immediately roll them in your prepared toppings if you’re using any. Then, place them gently on parchment paper to set up completely at room temperature. It usually takes about an hour for them to firm up nicely. You can even use this technique later if you try making those gorgeous Christmas Caramel Apples!

Tips for Success with Your Caramel Apple Recipe
I can’t stress enough how much patience this specific caramel apple recipe demands. The biggest lesson I learned early on was when I rushed the cooling process after removing the caramel from the heat in Step 5. I was eager to get them dipped before the football game started, and what happened? Disaster! The caramel was too thin because I dove in too soon, and the apples came out looking patchy, with huge drips running all the way down the sticks.
So, remember that crucial 5-to-10-minute rest time? That’s your window to let the caramel reach the perfect viscosity. It needs to be thick enough to coat heavily but thin enough to flow smoothly when you tilt the pan. If you notice your caramel starts getting stiff while you’re still dipping, don’t panic! Just set the pan over the lowest flame possible for about 30 seconds, stirring gently until it’s pourable again. It’s all about respecting the timing, and you’ll get results that look just like the professional topping ideas you see out there—I love looking at all the fun topping ideas!
Variations: Spiced Caramel Apples and Other Gourmet Caramel Apples
While the classic sweet caramel apple is heavenly all on its own, once you’ve mastered the sticking technique, you have to experiment! Fall flavors practically beg you to jazz things up a bit. Once you’re feeling confident with that magical 245 degrees F, you can start creating your own incredible gourmet caramel apples right in your kitchen.
The easiest way to elevate these for holiday apple candy is adding aromatic spice. You can follow the suggestion on the recipe card right in Step 3. When you are combining your butter, sugar, and corn syrup, take that extra 1/2 teaspoon of ground cinnamon and a tiny pinch of nutmeg and whisk them right in from the start. When that heats up, the whole house smells like an apple orchard!
Creating Spiced Caramel Apples
Adding those warm spices transforms the experience! It creates beautiful spiced caramel apples that feel instantly special. Just make sure they are fully incorporated before you bring the mixture to that necessary boil. You don’t want clumps! I made these last year for a neighbor’s party, and everyone asked what my “secret ingredient” was. It’s just cinnamon working its magic!
The Double Dip: Chocolate and Caramel Apple Perfection
If you really want to lean into the gourmet side, wait until your spiced caramel apple has fully set—and I mean completely firm! Then, you can melt some dark or milk chocolate wafers separately. Dip about a third of the hardened caramel coating into the melted chocolate and let that set on fresh parchment paper. It gives you that incredible textural contrast: crisp apple, chewy caramel, snappy chocolate.
If you want more fantastic ideas on making these upscale, you should definitely check out what my friend Alba is doing with her Gourmet Spiced Caramel Apples; she has some amazing citrus zest ideas that pair beautifully with spice!
Serving Suggestions for Your Caramel Apple Creation
Once you have these gorgeous, perfectly set caramel apples cooling on the counter, half the battle is won! Now, how do you present this amazing Halloween treat or holiday apple candy? For parties, forget just setting them upright; I like to use a big glass jar or vase filled with coarse salt or even dried beans so they stand up tall like a candy bouquet. It looks stunning on a dessert table!
For an easy fall dessert vibe, cutting them into slices after they are fully set is a game-changer. We call these Caramel Apple Slices, and they are fantastic served with a small dollop of cream cheese frosting on the side for dipping. Honestly, if you want to turn this into a full-blown feast, check out this amazing Caramel Apple Dip recipe—it’s perfect for dipping graham crackers while the main event is cooling down!
Storage and Reheating Instructions for Homemade Caramel Apples
One of the best things about mastering the chewy texture in our **caramel apple recipe** is that these keep so well! You actually don’t want to refrigerate them, weirdly enough. Keep them wrapped individually in plastic wrap—this prevents them from getting sticky when they touch each other—and store them at cool room temperature for up to a full week. Seriously, they last! Because the caramel is cooked to that perfect firm ball stage, reheating isn’t usually needed unless you completely forgot them in a warm spot.
Frequently Asked Questions About Making Caramel Apples
I know you just followed the steps, but I always get questions after people try making their first batch of these classic **holiday apple candy** treats! It’s totally normal. Candy making can feel a little intimidating, but once you nail that temperature, these become one of the easiest easy fall desserts you can whip up!
Can I make caramel apples ahead of time for a party?
Yes, and you absolutely should, as they need time to set completely! The key is making sure they are wrapped tightly in plastic wrap so they don’t sweat or stick to each other. I store mine on the counter, not the fridge, because the cold tends to make the caramel a little too hard. If your kitchen is very warm, just look for a cool corner. They are best eaten within 3 to 5 days, but they hold up well for a full week if they were perfectly set, just like when preparing Christmas Caramel Apples.
What if I don’t have a candy thermometer for my caramel apple recipe?
Oh, honey, please don’t skip the thermometer! I truly beg you not to risk it. If you try the old ‘drop it in ice water’ test, you risk pulling the caramel off the heat way too early or way too late. If it’s too cool, you end up with that sad, drippy mess that looks amateur. If it’s too hot, it will be rock hard and shatter when you bite it—not chewy at all! For those perfect caramel apples that stick and remain pleasantly chewy, that 245°F mark is your best friend. It’s the entire secret weapon for this caramel apple recipe!
Estimated Nutritional Data for One Caramel Apple
I always like to share what we are working with here. Knowledge builds confidence in the kitchen, right? Now, remember that these homemade caramel apples are a genuine indulgence—they’re packed with that wonderful brown sugar and rich butter we talked about! I always tell people to just enjoy the moment because these are treats, not an everyday snack.
This data is based on using one of the 12 apples with the standard caramel recipe and no extra toppings mixed in. Since we are using real, whole ingredients, these are estimates, but they give you a good idea of what’s in that delicious treat!
- Serving Size: 1 apple
- Calories: 450
- Sugar: 65g (Yep, that’s the fun part!)
- Sodium: 150mg
- Fat: 18g
- Saturated Fat: 11g
- Carbohydrates: 75g
- Protein: 3g
Just looking at those numbers confirms it—this isn’t light fare; this is holiday magic! Be proud of what you made, and enjoy every satisfyingly chewy bite! That’s the whole point of mastering the caramel apple recipe!
PrintThe BEST Foolproof Homemade Caramel Apples That Actually Stick
Make perfect, chewy homemade caramel apples every time. This no-fail technique guarantees the caramel adheres flawlessly to crisp apples, making it ideal for Halloween or holiday gifting.
- Prep Time: 20 min
- Cook Time: 25 min
- Total Time: 45 min
- Yield: 12 servings 1x
- Category: Dessert
- Method: Stovetop Cooking
- Cuisine: American
- Diet: Vegetarian
Ingredients
- 12 medium crisp apples (like Granny Smith or Honeycrisp)
- 12 wooden or parchment-lined sticks
- 1 cup (2 sticks) unsalted butter
- 2 cups light brown sugar, packed
- 1 cup light corn syrup
- 1 (14 ounce) can sweetened condensed milk
- 1 teaspoon pure vanilla extract
- 1/2 teaspoon sea salt
- Optional Toppings: Chopped nuts, mini chocolate chips, crushed pretzels, sprinkles
Instructions
- Prepare the apples: Wash the apples thoroughly. Remove the wax coating by dipping them briefly (about 10 seconds) in boiling water, then dry them completely. Insert the sticks firmly into the stem end of each apple.
- Prepare your dipping station: Line a baking sheet with parchment paper or a silicone mat. Set out your chosen toppings in shallow bowls nearby.
- Make the caramel: In a heavy-bottomed saucepan, combine the butter, brown sugar, and corn syrup. Heat over medium heat, stirring until the butter melts and the sugar dissolves.
- Cook the caramel: Bring the mixture to a boil without stirring. Insert a candy thermometer and cook until the mixture reaches 245 degrees Fahrenheit (firm ball stage). This step is crucial for chewy caramel that sticks.
- Finish the caramel: Remove the pan from the heat. Carefully whisk in the sweetened condensed milk. Return the pan to low heat and stir constantly for about 2 minutes until smooth. Remove from heat and stir in the vanilla extract and salt. Let the caramel cool for 5 to 10 minutes until it thickens slightly but is still pourable.
- Dip and coat: Tilt the pan slightly and dip each apple into the caramel, turning to coat evenly. Lift the apple and allow excess caramel to drip off. Immediately roll the coated apple in your desired toppings, or place it on the prepared baking sheet to set.
- Set the apples: Let the caramel apples cool completely at room temperature (about 1 hour) until the caramel is firm. Store them wrapped individually in plastic wrap at room temperature for up to one week.
Notes
- For the caramel to stick, the apples must be completely dry and free of wax. The boiling water dip removes the wax layer.
- Do not skip the candy thermometer; achieving the 245°F temperature ensures the caramel sets chewy, not runny.
- If the caramel becomes too thick while dipping, gently reheat it over very low heat for a minute.
- For a spiced caramel apple variation, add 1/2 teaspoon of ground cinnamon and a pinch of nutmeg to the caramel mixture in Step 3.
Nutrition
- Serving Size: 1 apple
- Calories: 450
- Sugar: 65
- Sodium: 150
- Fat: 18
- Saturated Fat: 11
- Unsaturated Fat: 7
- Trans Fat: 0
- Carbohydrates: 75
- Fiber: 2
- Protein: 3
- Cholesterol: 55