
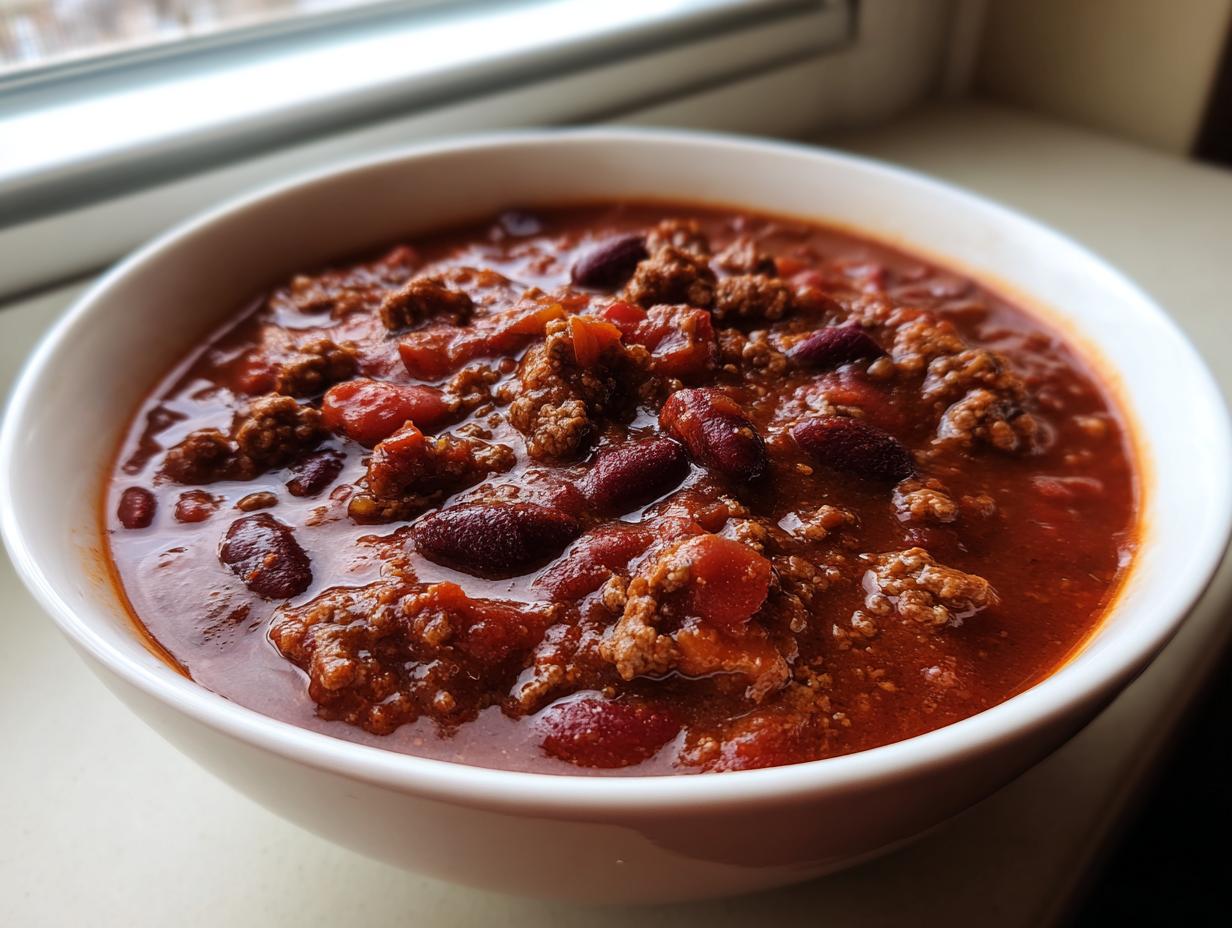
There is nothing quite like coming in from the cold to the deep, savory aroma signaling that a big, comforting bowl of chili is waiting for you. Forget those dry, lackluster versions you’ve had before; we’re making the real deal here—The Ultimate Award-Winning Stovetop Chili. This recipe is my answer to the chili cookoff blues, engineered for maximum flavor without needing to stand over a slow cooker all day. Trust me when I say we’ve rigorously tested the spice blend and thickening methods so you get that perfectly thick, hearty profile that always secures the blue ribbon for families across the country.
- Why This Award Winning Chili Recipe is Your New Family Favorite Chili
- Ingredients for the Ultimate Stovetop Chili
- How to Prepare This Easy Homemade Chili
- Tips for the Best Classic Chili Cookoff Recipe
- Serving Suggestions for Your Flavorful Chili
- Storage and Reheating Instructions for This Chili
- Frequently Asked Questions About Making Chili
- Nutritional Estimate for This Hearty Chili Recipe
- Share Your Award Winning Chili Experience
Why This Award Winning Chili Recipe is Your New Family Favorite Chili
I know what you’re thinking: another chili recipe? But hear me out! This isn’t that same old thin stuff. This is truly my go-to Hearty Chili Recipe because it gives you all the depth of flavor you’d expect from a slow-simmered classic, but it gets done on the stovetop in right around an hour. That means you have a fantastic, Quick Chili Dinner ready on a busy Tuesday night!
The magic really happens in how we layer those spices—we bloom them right in the meat fat—which locks in incredible savory notes. Plus, I have one little trick, a teaspoon of sugar, that acts like a secret ingredient to balance the acidity of the tomatoes. It rounds everything out beautifully, making this the ultimate Comfort Food Chili that kids and grown-ups absolutely devour. It’s rich, satisfying, and you won’t need hours waiting for it to finish. If you’ve ever wanted to try making something ridiculously fluffy like my homemade marshmallows, you know how important that methodical layering of ingredients is—and that’s what we do here to build flavor!
If you’re looking for the best flavor without turning on the slow cooker for eight hours, this is it. You can even make a double batch and freeze half for those emergencies when you need a perfect, simple dinner fast. I’m so excited for you to try this version!
Ingredients for the Ultimate Stovetop Chili
If you want this chili to taste like it simmered all day, using the best ingredients and measuring them correctly is non-negotiable! When I developed this recipe, I wanted it to be completely approachable, meaning you probably have 90% of this list in your pantry already. My big focus here was getting a really rich, savory base without needing hours on the heat. Remember, this is the foundation for everything that follows, so chopping your veggies evenly and using quality canned goods makes a huge difference. It’s all about setting ourselves up for success before we even turn the stove on! I think you’ll absolutely love how clearly everything comes together when you follow this list. For alternative weeknight magic, you can check out my cheeseburger casserole, but for now, let’s get this chili ready!
- 2 pounds ground beef (80/20 recommended)
- 1 large yellow onion, chopped
- 1 green bell pepper, chopped
- 3 cloves garlic, minced
- 1 (28 ounce) can crushed tomatoes
- 1 (15 ounce) can kidney beans, rinsed and drained
- 1 (15 ounce) can pinto beans, rinsed and drained
- 1 (15 ounce) can black beans, rinsed and drained
- 1 (8 ounce) can tomato sauce
- 1 cup beef broth
- 3 tablespoons chili powder
- 1 tablespoon ground cumin
- 1 teaspoon dried oregano
- 1 teaspoon smoked paprika
- 1/2 teaspoon salt
- 1/4 teaspoon black pepper
- 1/4 teaspoon cayenne pepper (optional, for heat)
- 1 teaspoon sugar (secret ingredient for depth)
Ingredient Notes and Substitutions for Your Chili
Okay, let’s talk specifics, because that’s what separates a decent chili from an award-winner. I always instruct you to use 80/20 ground beef. Why? Because that little bit of fat renders out while you brown it, and that fat carries all the flavor right into your spices later on. If you drain it well, you won’t even notice it!
Now, about that teaspoon of sugar—if you really prefer not to use it, you can swap it out cup-for-cup with maple syrup, though I’d start with just three-quarters of a teaspoon if you go that route. If you’re looking to make this a purely vegetarian meal, you can absolutely skip the beef and use two cans of rinsed, drained lentils along with one cup of cooked mushrooms; just make sure you add an extra half cup of beef broth or vegetable broth to compensate for the moisture loss.
How I Make This Easy Homemade Chili
This is where we build that beautiful base layer of flavor, folks. Don’t rush this first stage! In a really large pot—I use my heavy Dutch oven for the best heat distribution—brown your ground beef over medium-high heat until it’s all nicely browned. Once it looks done, stand over the pot and drain off as much of that excess fat as humanly possible. I mean it; a clean fat drain means a cleaner, deeper chili flavor, not a greasy one!
Next, toss in your chopped onion and green pepper right into that meaty pot. Let them cook down until they start getting soft and see-through, about five to seven minutes. Then, add the garlic—just one minute here until you can really smell it kicking up. That’s your signal!
Now for the spices! Add all your chili powder, cumin, oregano, smoked paprika, salt, pepper, cayenne (if you like the zing!), and that secret teaspoon of sugar. Stir this dry mix right into the meat and veggies. Let it toast there for about 60 seconds. This is blooming the spices, and it makes them smell ten times better, I promise!
Once they are fragrant, pour in your crushed tomatoes, tomato sauce, and beef broth. Give it a really good stir, scraping up any browned bits from the bottom of the pot—that’s pure flavor gold. Bring the whole mixture up to a steady, low bubble, then reduce that heat way down, let it simmer, and cover it just slightly so the top doesn’t dry out completely. You want this to go for at least 45 minutes, but honestly, if you can let it hang out for an hour, you’ll notice the quality jump up immediately.
Finally, once that fragrant base has thickened up nicely, stir in your three types of beans, all rinsed and drained, please! Let that simmer for another 15 minutes or so. This gives the beans time to warm up and soak up all that savory sauce. Taste it right at the end, adjust your salt—and that’s it! You’ve made an incredible stovetop chili.
Achieving the Perfect Thick and Hearty Chili Texture
A soggy, soupy chili is a sad chili, and we don’t do sad around here! If you follow the steps above, you should be pretty close to that perfect consistency, but sometimes, depending on your crushed tomatoes, it might be a hair looser than I’d like. If that happens, just pull that lid off completely for the last 20 minutes of simmering. Letting the steam escape helps concentrate the sauce naturally, turning it into that wonderful Thick and Hearty Chili texture you dream about. Don’t fall into the trap of adding cornstarch or flour; let the natural reduction method do the work for you!
How to Prepare This Easy Homemade Chili
This is where we build that beautiful base layer of flavor, folks. Don’t rush this first stage! In a really large pot—I use my heavy Dutch oven for the best heat distribution—brown your ground beef over medium-high heat until it’s all nicely browned. Once it looks done, stand over the pot and drain off as much of that excess fat as humanly possible. I mean it; a clean fat drain means a cleaner, deeper chili flavor, not a greasy one! That’s one of my biggest tips for keeping this Comfort Food Chili tasting savory and not heavy.
Next, toss in your chopped onion and green pepper right into that meaty pot. Let them cook down until they start getting soft and see-through, about five to seven minutes. Then, add the garlic—just one minute here until you can really smell it kicking up. That’s your signal!
Now for the spices! Add all your chili powder, cumin, oregano, smoked paprika, salt, pepper, cayenne pepper (if you like the zing!), and that secret teaspoon of sugar. Stir this dry mix right into the meat and veggies. Let it toast there for about 60 seconds. This is blooming the spices, and it makes them smell ten times better, I promise! You can even boost the flavor here by stirring in a quarter cup of dry red wine before the tomatoes if you have some lying around, kind of like I do when I make my beer cheese dip.
Once they are fragrant, pour in your crushed tomatoes, tomato sauce, and beef broth. Give it a really good stir, scraping up any browned bits from the bottom of the pot—that’s pure flavor gold. Bring the whole mixture up to a steady, low bubble, then reduce that heat way down, let it simmer, and cover it just slightly so the top doesn’t dry out completely. You want this to go for at least 45 minutes! Seriously, don’t cheat here; that minimum 45-minute simmer is absolutely crucial for letting those spices really marry the meat and create that robust, Flavorful Chili depth.
Finally, once that fragrant base has thickened up nicely, stir in your three types of beans, all rinsed and drained, please! Let that simmer for another 15 minutes or so. This gives the beans time to warm up and soak up all that savory sauce. Taste it right at the end, adjust your salt—and that’s it! You’ve made an incredible Easy Homemade Chili.
Achieving the Perfect Thick and Hearty Chili Texture
A soggy, soupy chili is a sad chili, and we don’t do sad around here! If you follow the steps above, you should be pretty close to that perfect consistency, but sometimes, depending on your crushed tomatoes, it might be a hair looser than I’d like. If that happens, just pull that lid off completely for the last 20 minutes of simmering. Letting the steam escape helps concentrate the sauce naturally, turning it into that wonderful Thick and Hearty Chili texture you dream about. Don’t fall into the trap of adding cornstarch or flour; let the natural reduction method do the work for you! This simple stovetop trick is why this recipe beats many competitors.
Tips for the Best Classic Chili Cookoff Recipe
So, you want to take this recipe beyond just a weeknight dinner and into the realm of the truly memorable? I get it! Winning a neighborhood cookoff isn’t about luck; it’s about maximizing every single flavor opportunity. We already talked about blooming the spices, but let’s lean into layering those flavors even more, because that is the secret to any Best Classic Chili that keeps people coming back for a second bowl.
If you have zero patience (which, honestly, I sometimes lack too!), the 45-minute simmer time is where you’ll get a great result. But if you’re planning ahead for a real event, like a proper Chili Cookoff Recipe challenge, you absolutely must let this simmer overnight. Seriously. Once it cools down completely, refrigerate it, and then reheat it the next day before serving. All those spices mingle and deepen overnight, transforming the whole profile from good to absolutely stellar. It’s like magic, but it’s just flavor chemistry!
Next up: heat control. That little bit of cayenne pepper I listed? That’s the starting point! If you want a little edge, try adding a small dash of high-quality smoked chipotle powder along with the regular chili powder. It brings smoke *and* heat without overwhelming the savory notes.
A couple of other things that elevate the flavor profile significantly: if you have 15 extra minutes while the chili is simmering, stir in about a tablespoon of Worcestershire sauce. It adds a deep, almost ‘aged’ background note that people can’t quite place but they know they love. Also, if you’re serious about winning, try replacing just half a cup of that beef broth with strong, black coffee. Don’t panic! It doesn’t make it taste like coffee; it just adds an incredibly dark, earthy ballast that supports the spice blend beautifully. It’s a trick I picked up years ago, kind of like how I use a touch of smoked paprika when making my Chex Party Mix to give it that slightly outdoorsy flavor.
Remember, for a cookoff, presentation matters too! Keep your chili warm but don’t let it boil hard while waiting for judging. A slow, steady warmth is what keeps that texture perfect until it’s time to serve.
Serving Suggestions for Your Flavorful Chili
Okay, your incredible Flavorful Chili is ready! It’s thick, it’s savory, and it’s radiating heat and aroma across your kitchen. But honestly, a bowl of perfect chili isn’t complete until you dress it up a bit, right? The toppings are where you get to really personalize this experience—I love that everyone in my family can make their bowl totally unique!
You absolutely can’t go wrong with the essentials. For me, that means a generous handful of sharp, freshly shredded cheddar cheese—none of that pre-shredded stuff that has anti-caking agents that mess with the melt! A big dollop of cool, full-fat sour cream cuts through the spice beautifully, and some thinly sliced green onions or chives give you a nice, fresh bite.
We usually offer up a bowl of finely chopped raw white onion, but be warned, that adds a real punch! My husband loves jalapeños, but I keep those on the side so the kids can enjoy their bowls without the fire.
Now, let’s talk about pairings that take this dinner to the next level. If you are serving this up for a cold Sunday supper, you need a side to soak up every last drop. My absolute favorite thing to serve alongside this Hearty Chili Recipe is a slab of my easy cheese bread. It’s cheesy, slightly sweet, and perfect for dipping!
But here is the unexpected pairing that just works: oyster crackers. Seriously! While most people go for crushed tortilla chips (which are great too!), there’s something nostalgic about sprinkling those tiny, salty crackers right on top of piping hot chili. They soften just enough as you stir them in to give you a wonderful textural contrast without dissolving completely. Try it just once, and you might find yourself reaching for the oyster crackers every Dinner for Chili Night after that!
Storage and Reheating Instructions for This Chili
One of the biggest blessings of making a big pot of chili is knowing you have leftovers for days! This recipe truly becomes a Simple Dinner Chili powerhouse you can pull out when you’re too tired to cook later in the week. It holds up incredibly well, but you want to treat it right so those layers of spice don’t get muddy.
For refrigeration, let your chili cool down honestly—don’t put a scorching hot pot straight into the fridge, as that overheats everything else in there. Once it’s room temperature or slightly warm, transfer it to airtight containers. You can keep this reliably in the fridge for four to five days. I’m telling you, the flavor deepens beautifully; the second day is almost always better than the first because those spices keep melding together. We use our homemade tomato sauce less often now because this chili is just easier!
If you really want to stock up your freezers for those truly hectic times, this recipe freezes like a dream. I usually use heavy-duty freezer bags, lay them flat on a baking sheet in the freezer until solid, and then stack them vertically. That saves so much space! It keeps perfectly well for up to three months in the freezer. When you’re ready to eat it, just let it thaw overnight in the fridge, and then reheat slowly on the stovetop, adding a splash of water or broth if it looks a little too thick after thawing. If you’re using my homemade tomato sauce recipe for any future canning, remember that chili should be handled slightly differently for long-term preservation, but for standard refrigeration or freezing, this is golden!
Frequently Asked Questions About Making Chili
It’s totally normal to have questions when you’re trying a new favorite recipe, especially when it comes to perfecting something as personal as chili! I’ve gathered some of the most common things folks ask me about getting this One Pot Chili just right. If you don’t see your question here, please drop it in the comments below—I love chatting about cooking!
Can I make this chili recipe without beans for a Texas style chili?
Oh yes, you absolutely can! If you are craving that classic, meaty Texas-style chili, you should feel free to leave out the kidney, pinto, and black beans. Just remember that beans do add a lot of body and help thicken the sauce naturally. If you skip them entirely, you might want to watch your cook time a bit closer during that final simmer, or use just slightly less beef broth to start. Beans actually help prevent scorching on the bottom, so keep that heat low and stir really well if you go bean-free!
How can I adapt this stovetop chili for a slow cooker chili?
That’s a great question for busy days! The beauty of this flavor base is that it transfers perfectly to the slow cooker, which means you can switch this stovetop chili over to a reliable set-it-and-forget-it meal. The technique is nearly the same for the beginning: brown your beef and sauté your onions/peppers the way I described, because you *always* want to brown the meat first, no matter the method. Transfer all that browned goodness, the tomatoes, spices, broth, and garlic into the slow cooker basin. Cook on low for about 6 to 8 hours, or high for 3 to 4 hours. Crucially, wait until about the last hour of cooking to stir in those rinsed beans so they don’t turn into complete mush.
Is this chili recipe toddler friendly?
I always love making big batches of something that works for the whole family! The key here is really dialing back the heat. For my little ones, I leave the cayenne pepper out entirely when making their portion. I’ll often scoop out their bowl amount before I add the cayenne to the rest of the pot. Also, make sure your meat is ground finely, or give it a good once-over with a potato masher while it’s simmering to break up any large chunks. This ensures easier chewing for little mouths. It’s a fantastic way to get some protein and fiber into them!
If you want to check out how I handle other crowd-pleasing comfort foods that are easy for families, take a peek at my recipe for Instant Pot Lasagna Soup—it’s another winner for quick weeknights!
Nutritional Estimate for This Hearty Chili Recipe
Now, I always try to keep things delicious here at Cookery Command, but I know so many of you are tracking your macros or just trying to make sure your favorite Hearty Chili Recipe fits your lifestyle. That’s why, after plugging all the components of this robust batch into our calculation system, I pulled together this estimate for you. When I was studying nutrition, I learned how crucial it is to understand what you’re eating, even when it’s pure comfort food!
Keep in mind, because we are using 80/20 beef and three different types of beans, these numbers are pretty solid for meeting protein and fiber goals, but they are estimates, of course. What you use—the brand of canned tomatoes, whether you drain the fat perfectly, or exactly how much you pile on your toppings—will change the final count. If you happen to be whipping up my light-as-air homemade salad dressing to go on the side salad, that will affect the overall meal profile!
Here is the breakdown per serving (based on 6 servings):
- Calories: 450
- Fat: 22g (with 9g Saturated Fat)
- Protein: 32g
- Carbohydrates: 35g
- Fiber: 10g
- Sodium: 650mg
See that fiber count? That’s our three kinds of beans working hard for you! It’s proof that this isn’t just delicious comfort food chili; it’s genuinely satisfying and packs a nutritional punch. When you make a big batch of this Classic American Chili, you know you have a wonderfully balanced meal ready to go!
Share Your Award Winning Chili Experience
Now that you’ve tasted the richness and seen how straightforward it is to achieve that deep, comforting flavor, I just have one request: I want to hear all about it! This is called The Ultimate Award-Winning Stovetop Chili for a reason, and I love knowing that it’s making its way onto your tables and perhaps even winning your family cookoffs now, too!
Did you stick to the simmering time, or did you try letting it rest overnight? Did the secret teaspoon of sugar make a difference for you? Don’t be shy! Head down to the comments section below and give this one a star rating—I’m really hoping you give it five! Your feedback helps me know which family favorites to perfect next.
And please—if you make a batch and top it with all the fixings, snap a picture! I adore seeing your creations on social media. Tag us so I can see how you dressed up your bowl of this amazing Award Winning Chili. Seriously, show me your toppings game!
If you served this up as part of a bigger meal, maybe alongside a side of my creamy peppercorn sauce steak or something similar, I want to know the whole menu!
Thank you so much for cooking with me today. I hope this rich, hearty chili becomes a staple in your home just like it has in mine. Happy cooking!
PrintThe Ultimate Award-Winning Stovetop Chili: Hearty Three-Bean Beef Chili

Create a thick, hearty, and flavorful classic American chili on your stovetop. This easy, one-pot recipe uses ground beef and three types of beans, delivering award-winning taste perfect for a simple weeknight dinner or game day.
- Prep Time: 15 min
- Cook Time: 60 min
- Total Time: 75 min
- Yield: 6 servings 1x
- Category: Dinner
- Method: Stovetop
- Cuisine: American
- Diet: Vegetarian
Ingredients
- 2 pounds ground beef (80/20 recommended)
- 1 large yellow onion, chopped
- 1 green bell pepper, chopped
- 3 cloves garlic, minced
- 1 (28 ounce) can crushed tomatoes
- 1 (15 ounce) can kidney beans, rinsed and drained
- 1 (15 ounce) can pinto beans, rinsed and drained
- 1 (15 ounce) can black beans, rinsed and drained
- 1 (8 ounce) can tomato sauce
- 1 cup beef broth
- 3 tablespoons chili powder
- 1 tablespoon ground cumin
- 1 teaspoon dried oregano
- 1 teaspoon smoked paprika
- 1/2 teaspoon salt
- 1/4 teaspoon black pepper
- 1/4 teaspoon cayenne pepper (optional, for heat)
- 1 teaspoon sugar (secret ingredient for depth)
Instructions
- Brown the ground beef in a large pot or Dutch oven over medium-high heat. Drain off excess fat.
- Add the chopped onion and green bell pepper to the pot with the beef. Cook until the vegetables soften, about 5 to 7 minutes.
- Stir in the minced garlic and cook for 1 minute until fragrant.
- Add the crushed tomatoes, tomato sauce, and beef broth to the pot. Stir to combine.
- Add the chili powder, cumin, oregano, smoked paprika, salt, pepper, cayenne pepper (if using), and sugar. Stir well to incorporate the spices.
- Bring the mixture to a simmer. Reduce the heat to low, cover the pot partially, and let it simmer for at least 45 minutes, stirring occasionally. Longer simmering deepens the flavor.
- Stir in the rinsed and drained kidney beans, pinto beans, and black beans. Cook for an additional 15 minutes, allowing the beans to heat through and absorb the flavors.
- Taste the chili and adjust salt or spice levels as needed before serving hot.
Notes
- For an even thicker chili, remove the lid during the last 20 minutes of simmering.
- Serve this hearty chili with your favorite toppings like shredded cheddar cheese, sour cream, chopped green onions, or crushed tortilla chips.
- This chili tastes better the next day; plan to make it ahead for the best flavor.
Nutrition
- Serving Size: 1.5 cups
- Calories: 450
- Sugar: 10
- Sodium: 650
- Fat: 22
- Saturated Fat: 9
- Unsaturated Fat: 13
- Trans Fat: 0
- Carbohydrates: 35
- Fiber: 10
- Protein: 32
- Cholesterol: 75